Tag: White
PROJECT SPOTLIGHT: A BATHROOM REMODEL WITH KILZ® PRIMERS – PART 2
January 3, 2024Welcome back to part 2 of the bathroom remodel project from Jamie and Morgan Molitor of c2s. We’re excited to share the reveal and complete transformation of this primary bathroom project. As you may recall from the first blog post, this project was one of the c2s team’s latest ventures for whom we have the privilege to call a mentor and friend, the wonderful Chris Freytag. A prominent health and fitness influencer, blogger, author, and esteemed figure in the Twin Cities and nationally.
A bathroom remodel transcends the mere act of updating a space; it’s about curating a sanctuary that exceeds ordinary functionality. Your primary bathroom space is a place where your day both begins and ends. You set your intentions for the day in the space and reflect in the evening. Let’s dive into the details of this breathtaking makeover!
This bathroom remodel entailed a complete overhaul, minus the existing cabinetry. Beyond that, it was a gut-and-remodel project that blended transitional tradition with contemporary elegance. Far beyond mere aesthetics, this transformation dove deep into the realm of luxurious tranquility, converting an outdated bathroom into a serene oasis of relaxation.
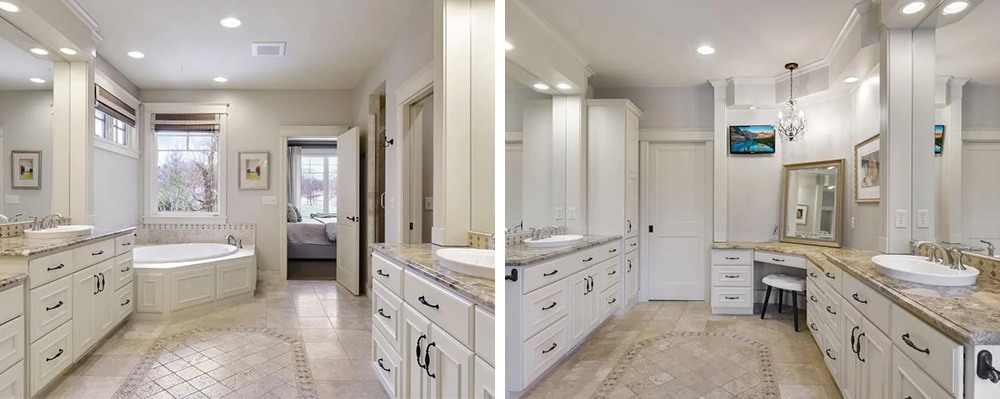
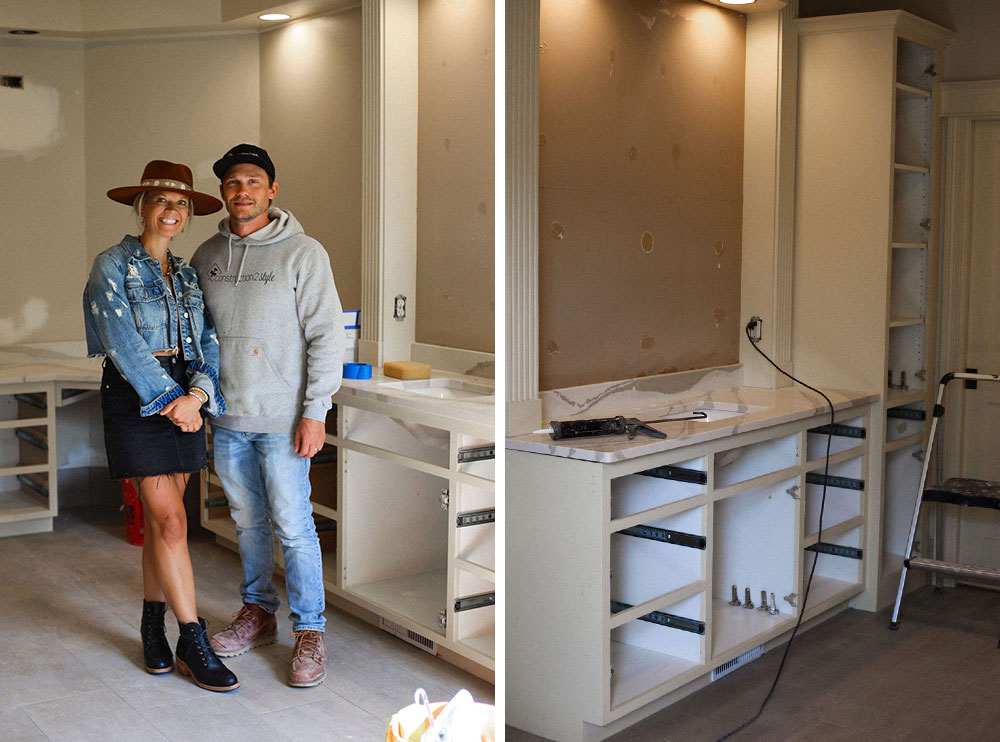
BEFORE
Chris and her husband were intent on crafting a bathroom that exuded a light and airy ambiance. Their vision revolved around a palette dominated by bright whites, seeking to replace the subdued beige hues. They aimed for a space that felt refreshed, spacious, and radiant. This desire for a luminous atmosphere prompted a comprehensive renovation, encompassing various elements such as paint, countertops, tiles, and fixtures. Their strategic choice to embrace these lighter tones played a pivotal role in transforming the bathroom into an inviting and open environment.
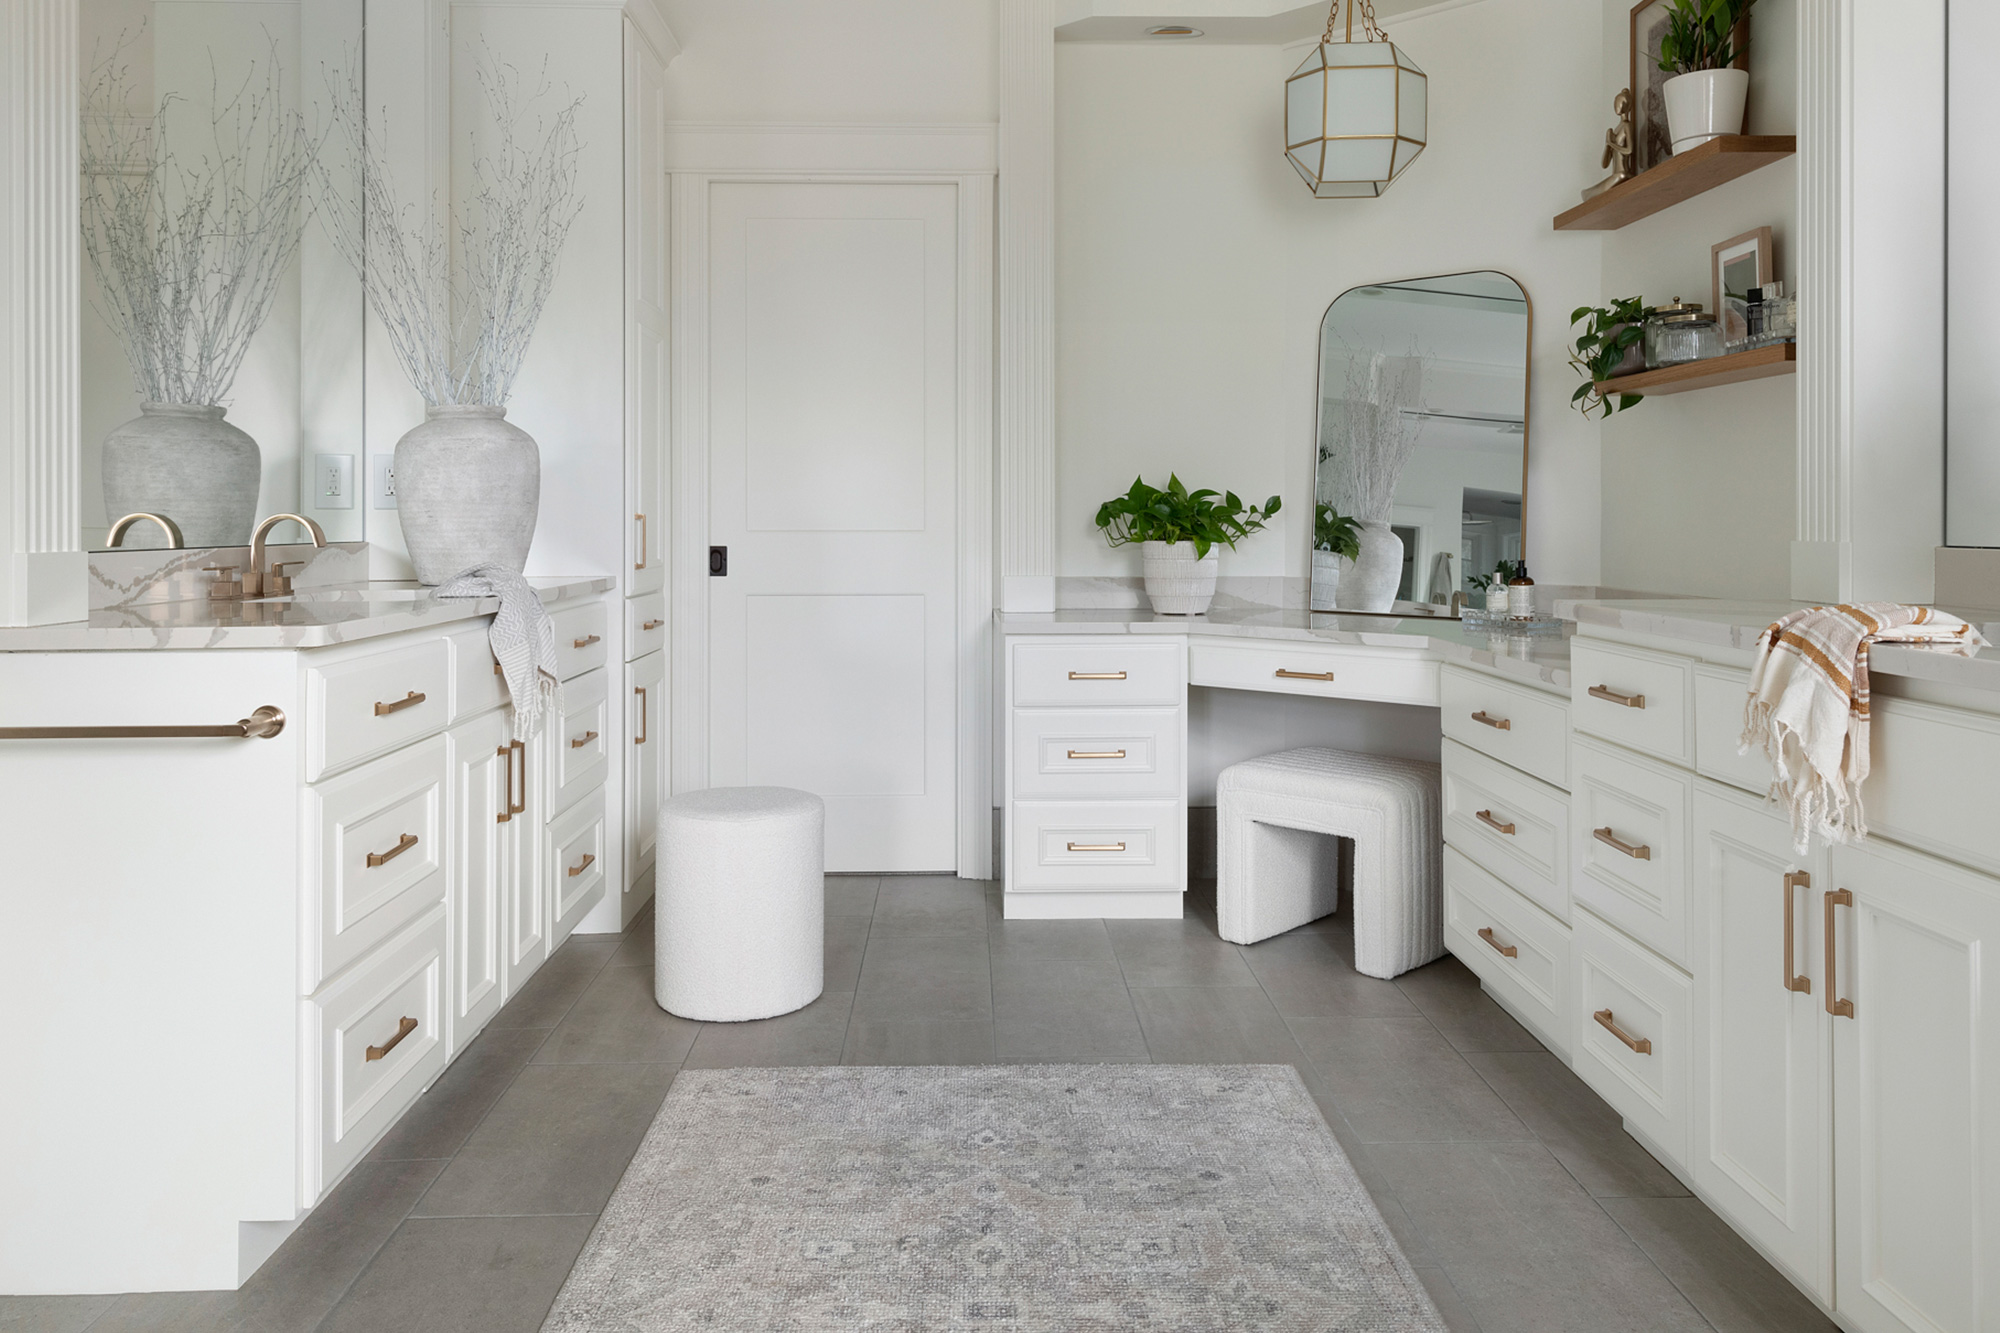
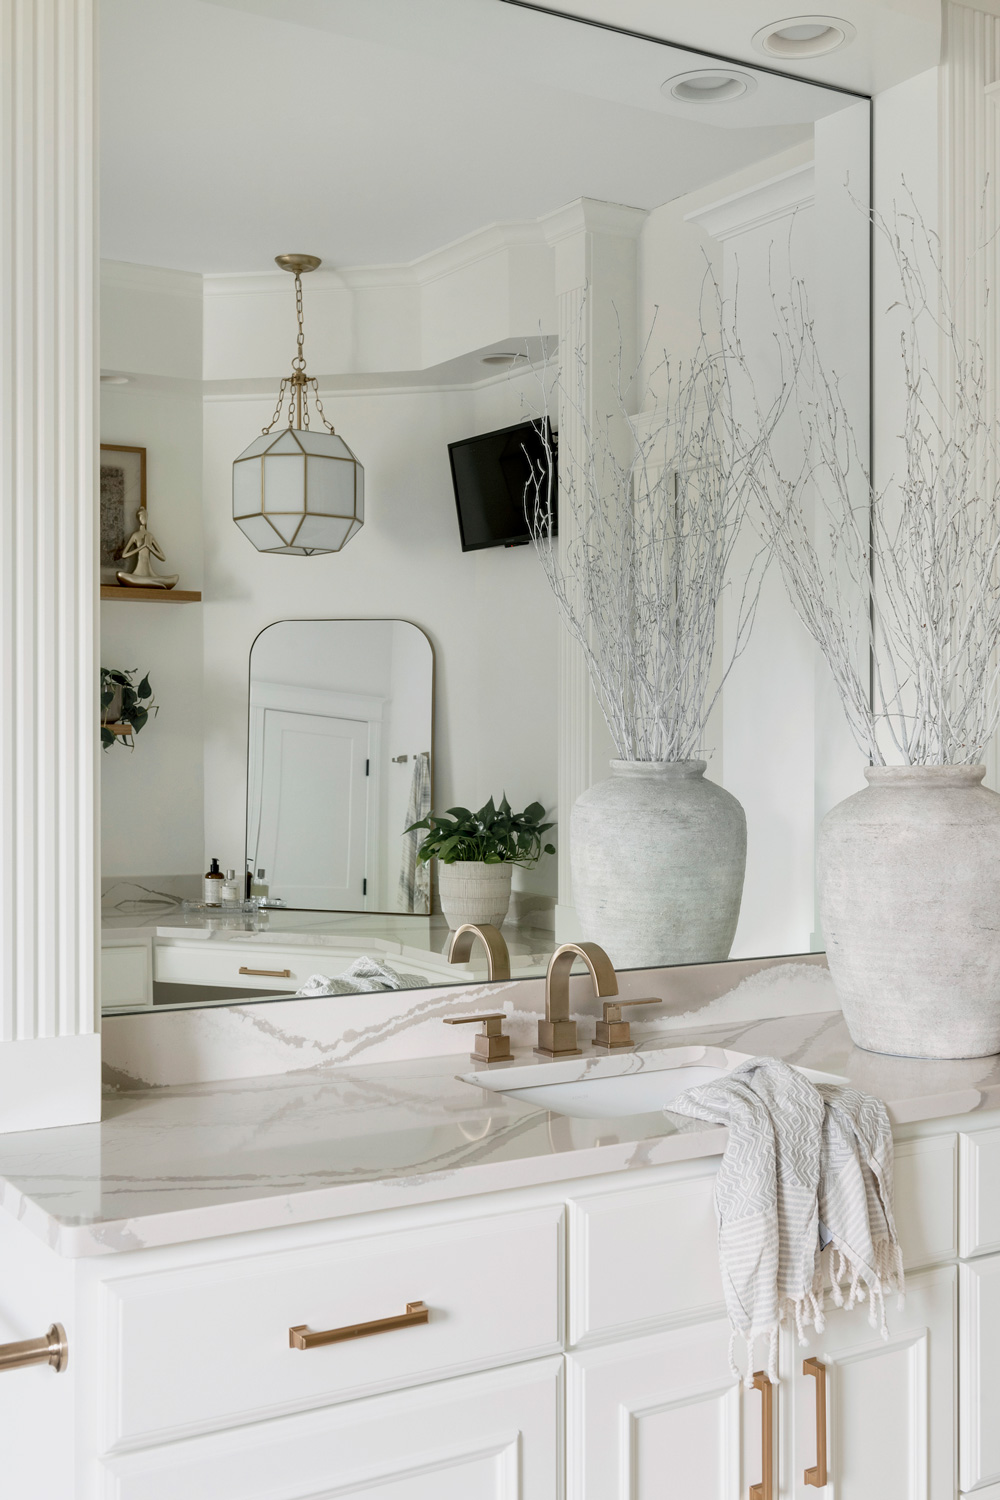
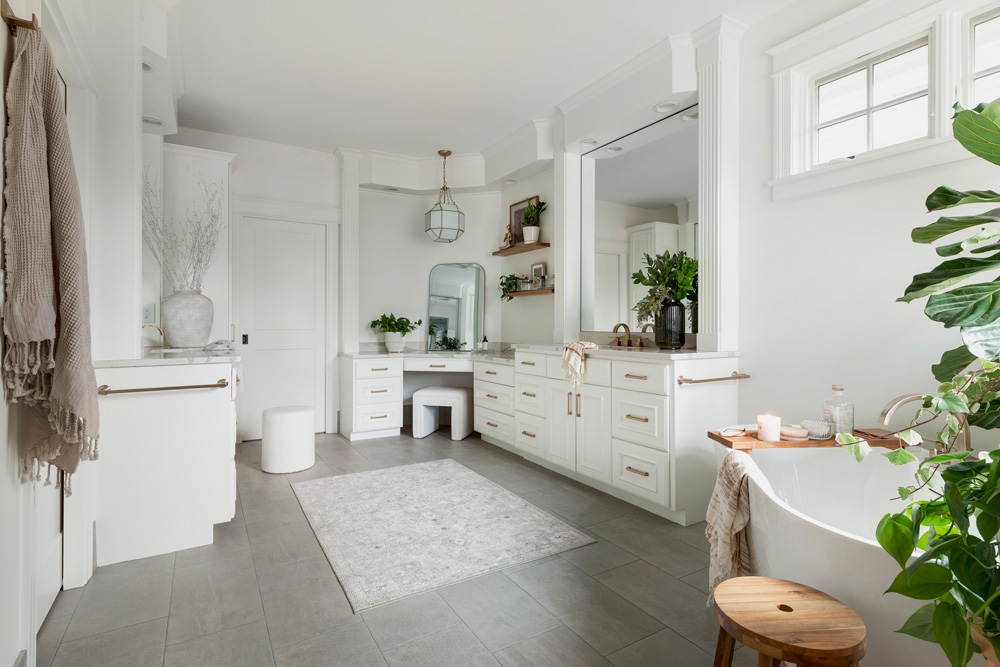
AFTER
Out with the old and in with the new – the freestanding tub isn’t just an aesthetic choice; it’s a practical one. The liberation of space not only visually opens up the bathroom but also offers a tangible sense of freedom. A spa-like experience is rooted in space and serenity, and the freestanding tub became the embodiment of both. And with our client’s visible love for plants – we knew that this space called for many plant friends to surround it.
A spa-like bathroom isn’t complete without an indulgent shower experience. We enlarged the shower door opening, not just for practicality, but to help create an oasis of relaxation. The white subway tiles and quartz bench are not just design choices; they are elements that enhance the spa-like ambiance, inviting you to linger and rejuvenate.

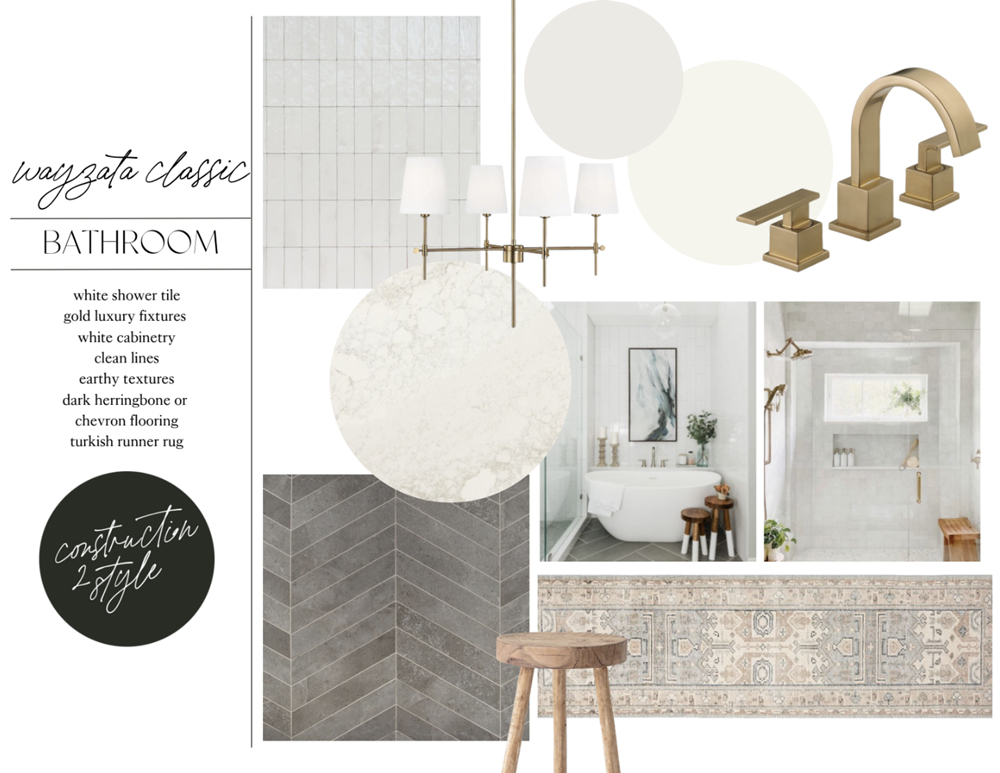
DESIGN DETAILS
 Our client expressed a desire for a retreat-like feel after long, hectic days. At c2s, we recognize that a spa-inspired bathroom transcends a passing trend; it’s an investment in personal well-being. The remodel’s embodiment of modern elegance fosters an atmosphere of serenity. Through the addition of a freestanding tub boasting clean lines, the space invites you to decompress, becoming a focal point that reshapes the bathroom into a private sanctuary. The integration of contemporary elements with the existing cabinetry achieves a harmonious fusion, ensuring relaxation without sacrificing style.
Enhancing the serene, light, and airy ambiance of a spa-like bathroom involves thoughtful choices that marry elegance with functionality. For instance, the selection of Cambria quartz countertops was more than just a design decision; it was a tactile experience that elevated the space’s luxuriousness. The warm veining not only unified the bathroom’s aesthetic but also offered a touch of opulence to the daily routine. This investment in quality materials brought forth an everyday sense of luxury, emphasizing both comfort and visual appeal.
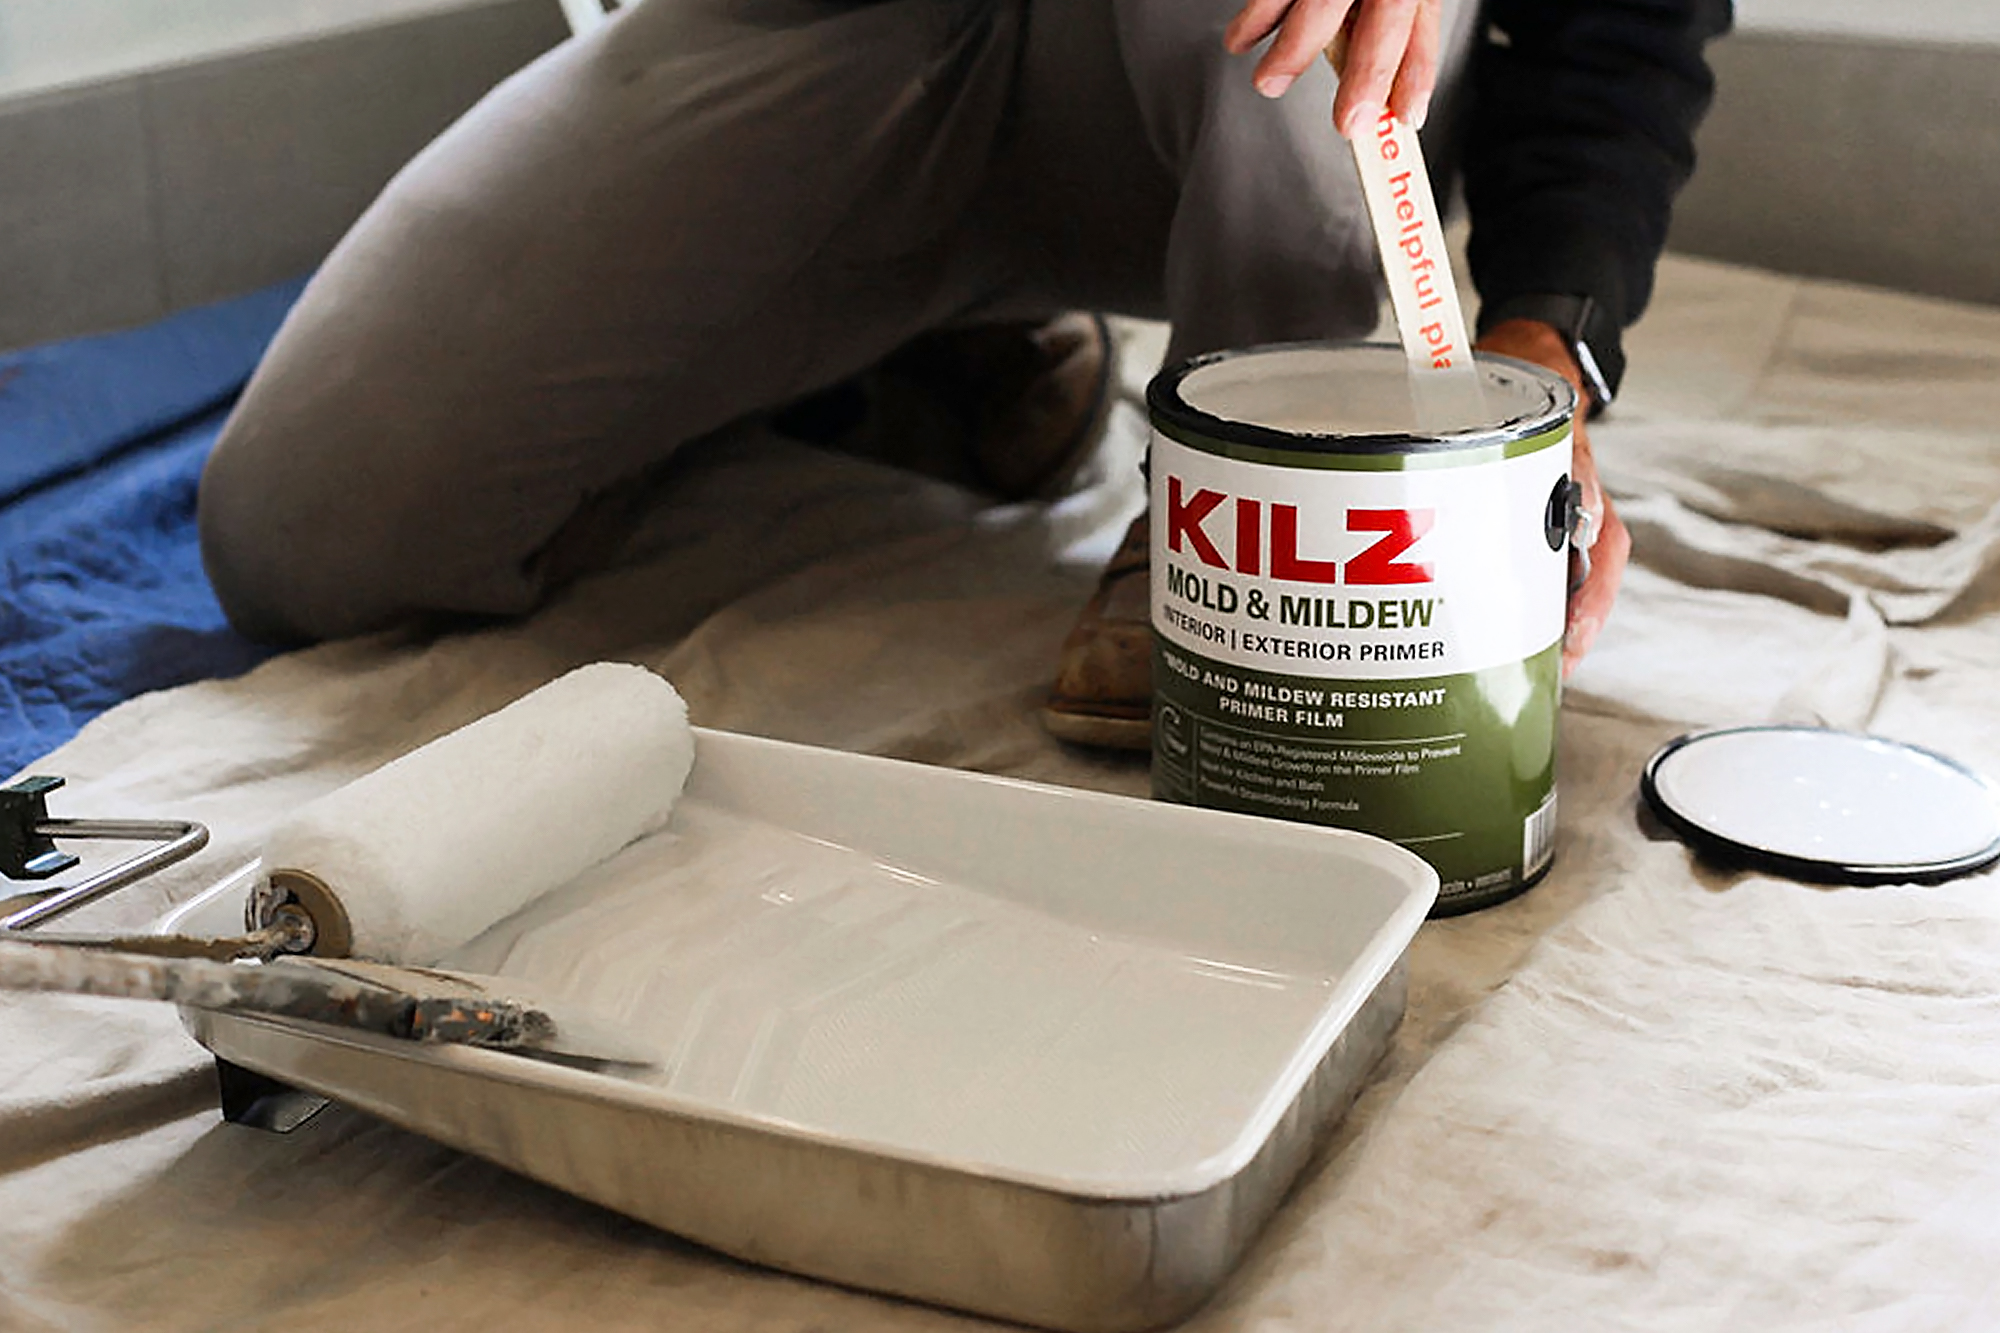
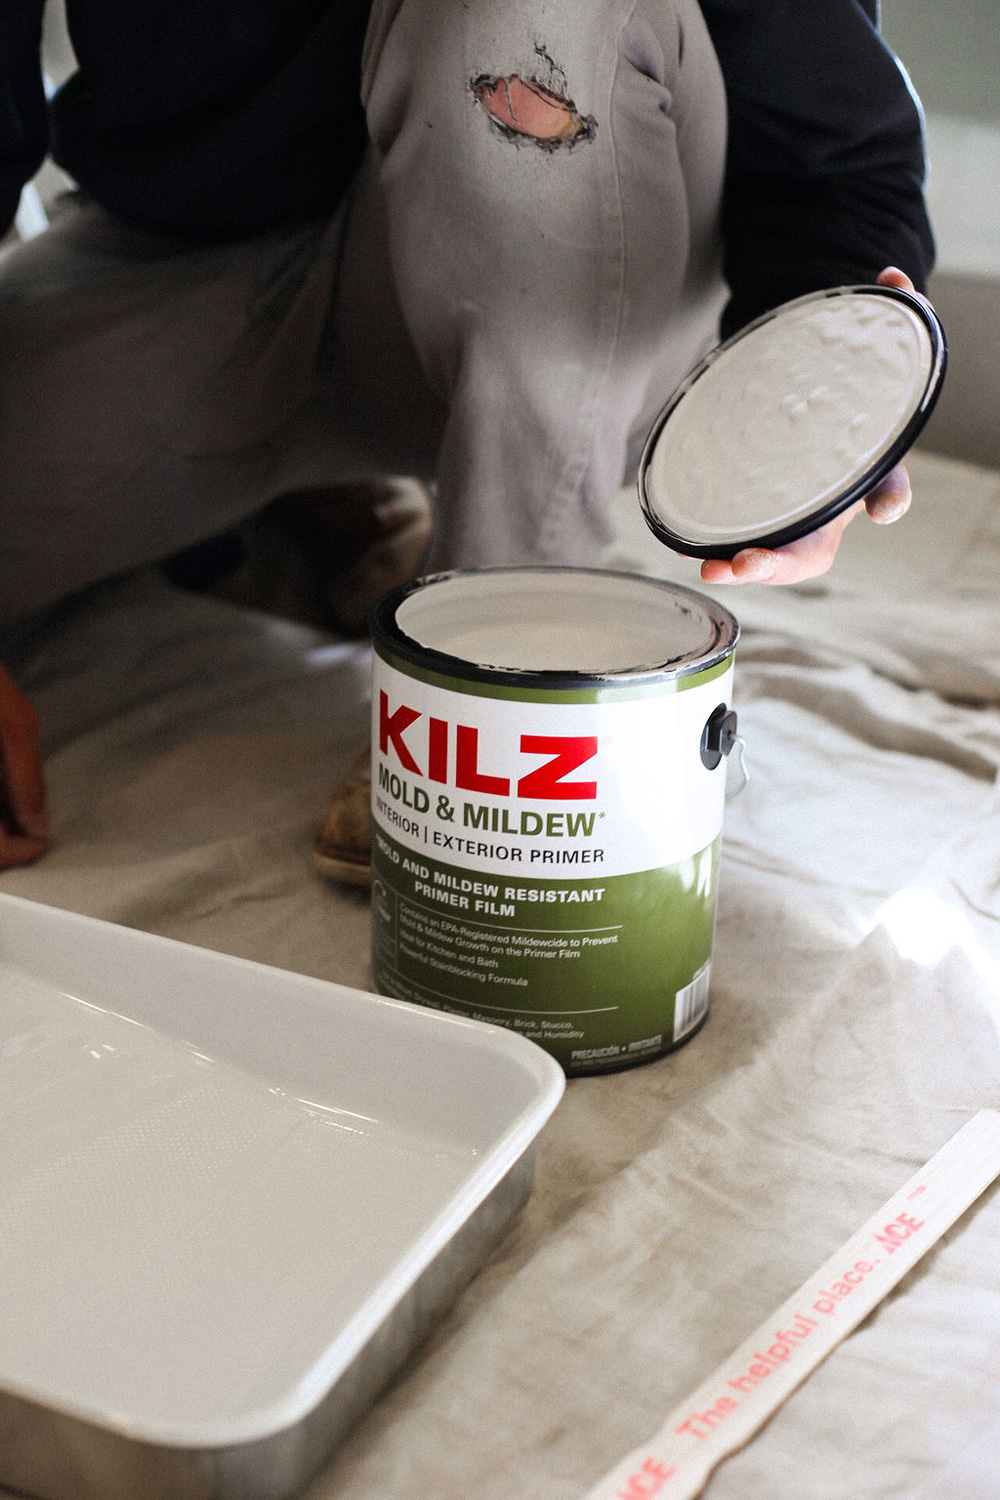
PRIMER
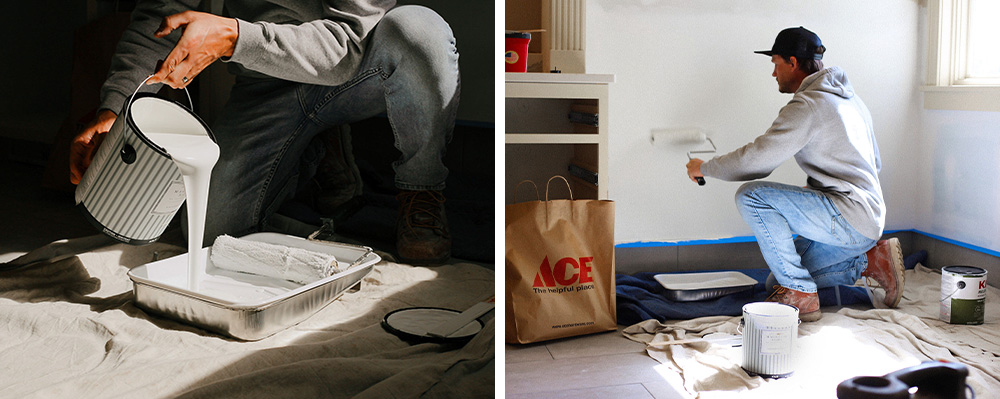
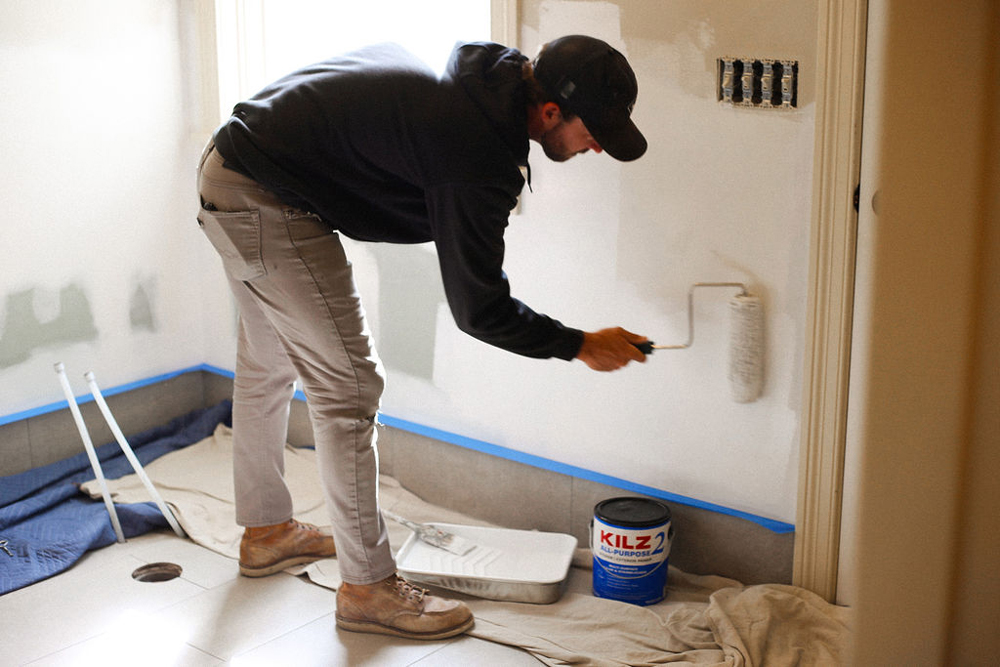
Investing in primer isn’t merely about enhancing the final look; it’s about creating a blank canvas so that a space can transform into a tranquil oasis. KILZ® Primers were the unsung hero of the project that provided consistent, enduring results for the space to truly shine.
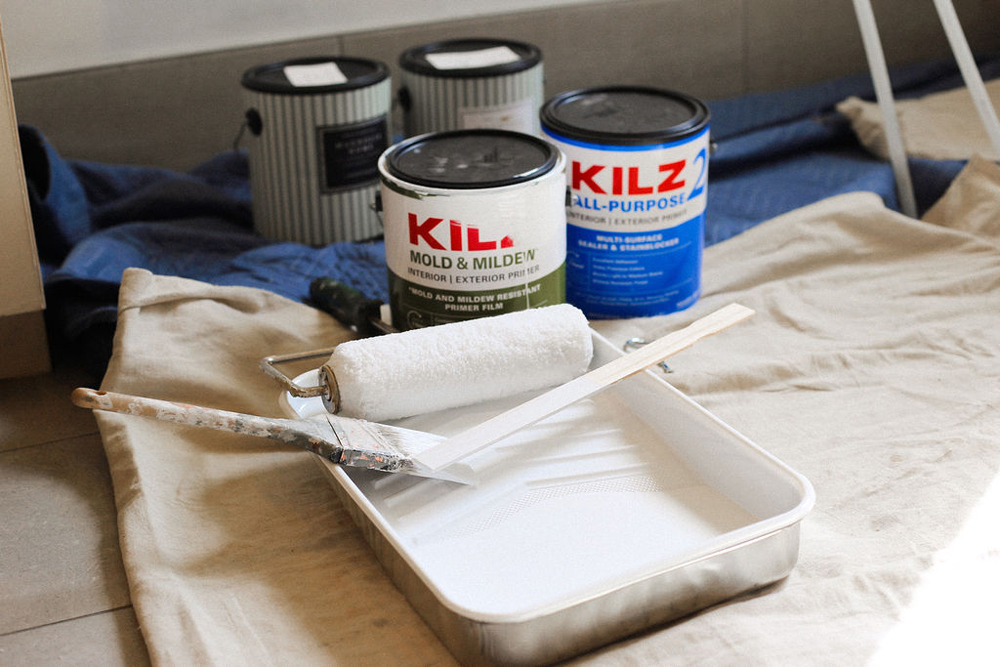
We have multiple, reliable KILZ® Primers we frequently turn to for our projects. Let’s dive into the distinctions among them, why they’ve secured our trust, and which we used within this bathroom makeover.
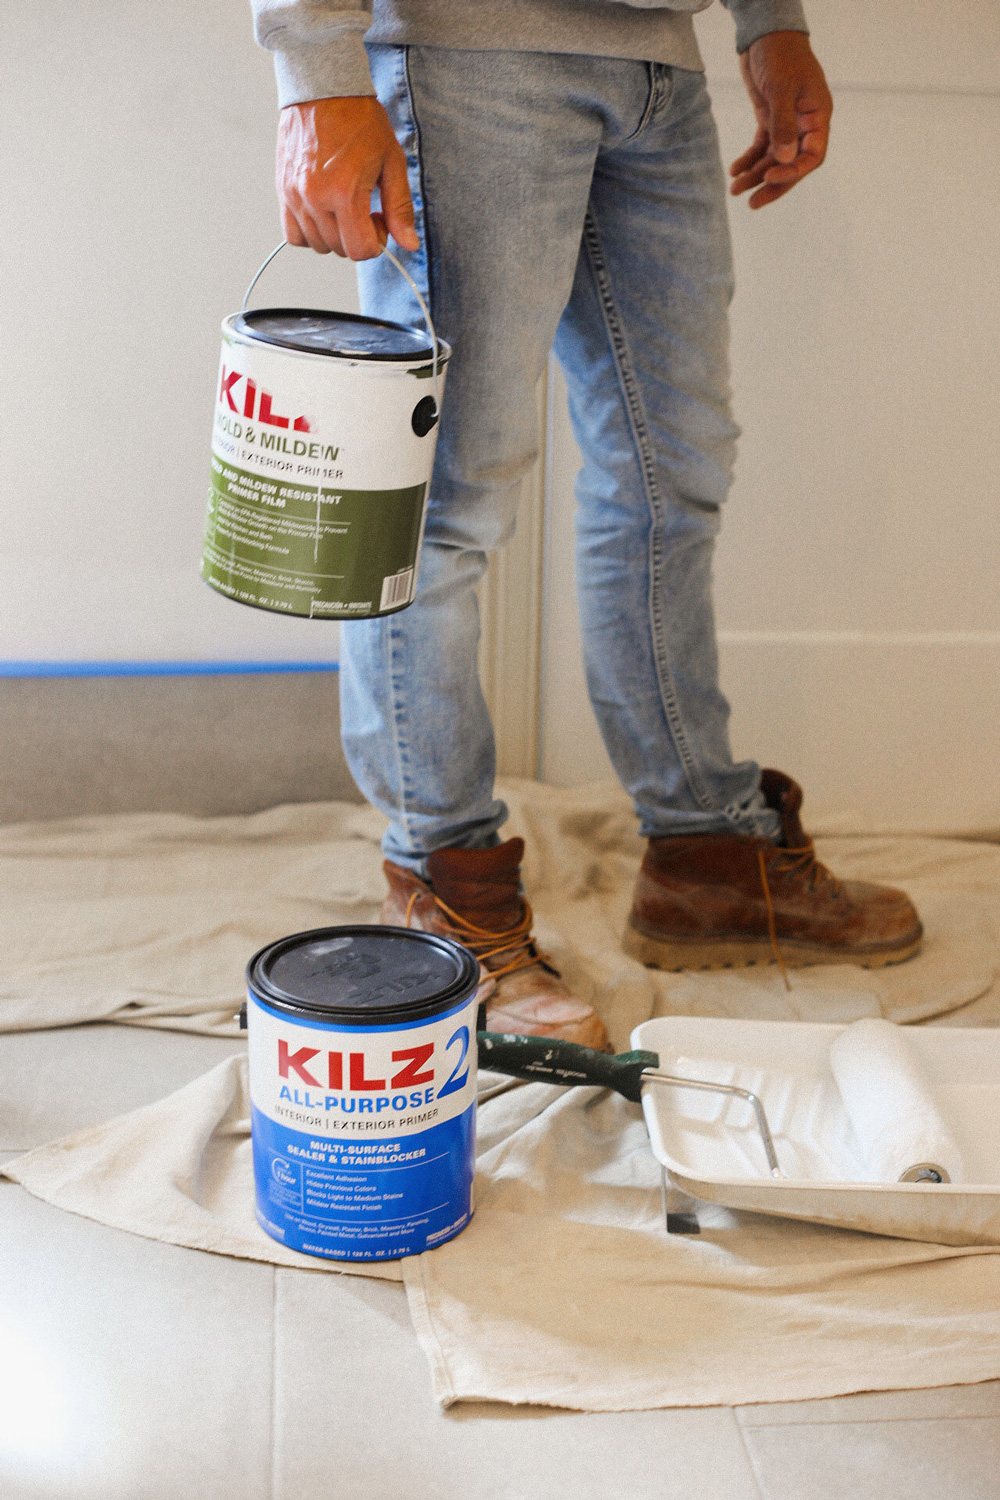
• KILZ® MOLD & MILDEW Primer (walls)
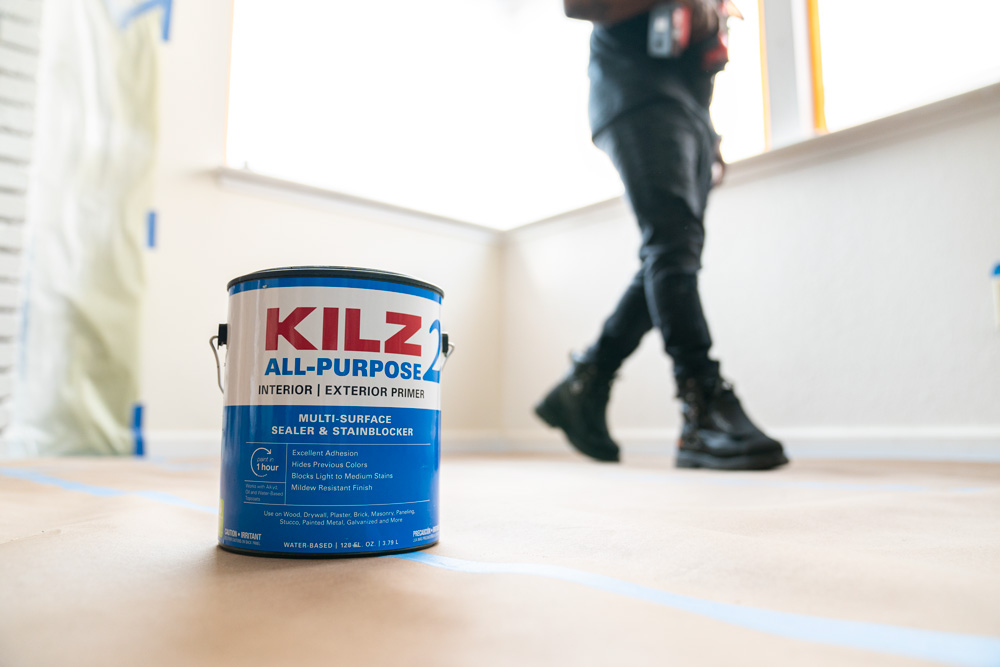
• KILZ 2® ALL-PURPOSE Primer (cabinets)
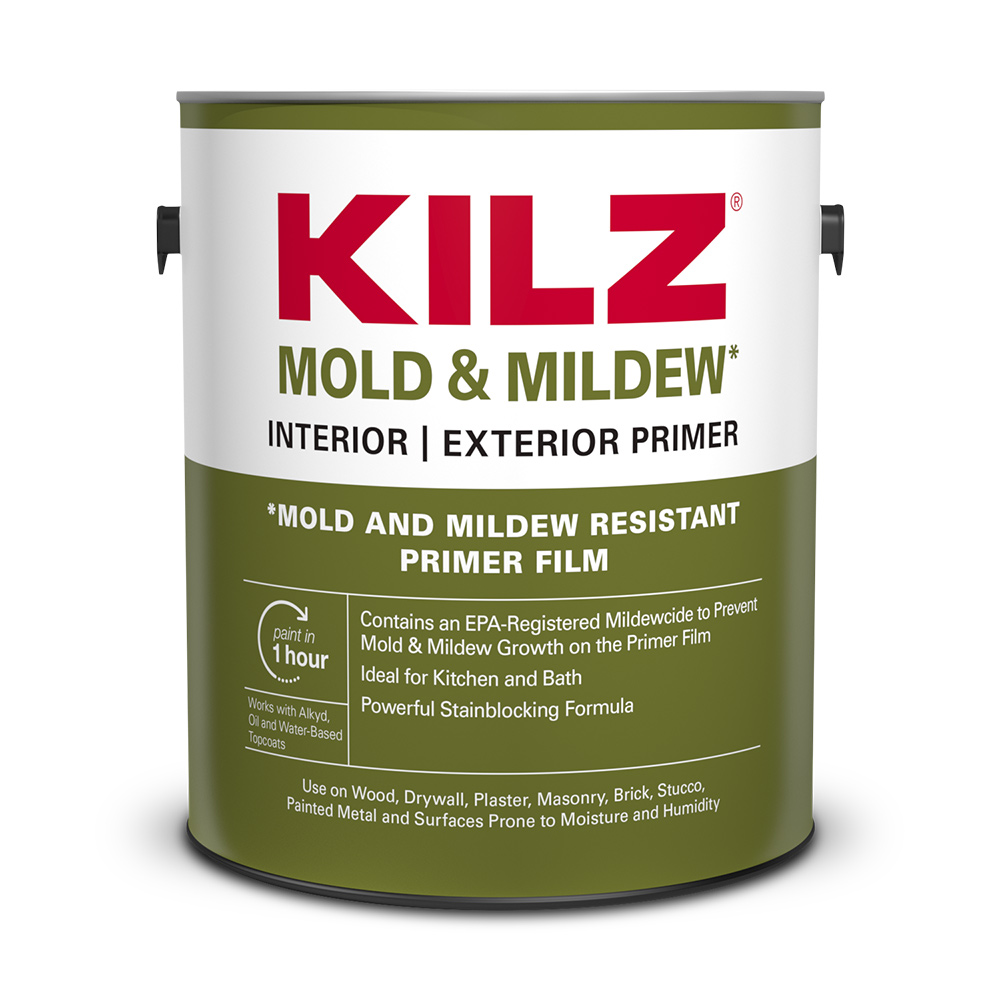
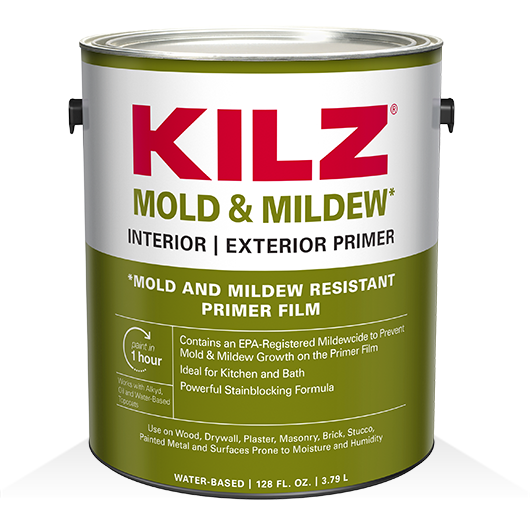
One of our go-to choices is the KILZ® MOLD & MILDEW Primer, a remarkable solution for moisture-prone spaces like a bathroom. We selected this primer for the walls and shower ceiling because of its mildew-resistant properties, in addition to its stain blocking abilities. This primer serves as an effective barrier against mildew growth while offering a solid foundation for the paint to adhere to, ensuring the paint’s longevity on these surfaces.
We opted for the KILZ 2® ALL-PURPOSE Primer when tackling the cabinets in our project due to its versatile nature and impressive adhesion. It also became our preferred option for the cabinets due to its ability to adhere effectively to different materials, ensuring a smooth and durable base for the paint application. Its quick-drying feature allowed for efficient progress in our project timeline. We appreciated its ability to block minor stains and provide a consistent surface, contributing to a flawless finish for the cabinets.
WALL PAINT
The KILZ® primer and Magnolia Home by Joanna Gaines® by KILZ paint created the perfect primer and paint combination for this bathroom. Both their durability and quality ensure that the tranquil spa ambiance we created becomes an enduring part of the everyday routine.
Our clients were looking for a light, bright aesthetic infused with a serene spa-like vibe for this makeover. The chosen white paint hues, coupled with creamy and natural elements, were the perfect combination to achieve this serene ambiance.
Silos White from Magnolia Home by Joanna Gaines® by KILZ Premium Interior Paint has become a go-to choice for our primary bath projects because it delivers a timeless look. This specific shade offers a beautiful blend of warmth and crispness, creating an airy and refreshing feel within the space while also making it feel larger.
We chose Silos White for the walls in this primary bath due to its ability to effortlessly pair with different textures and materials, such as tiles, countertops, and fixtures. It’s a neutral white with warm undertones that harmonize with a wide range of design styles, allowing for flexibility in decor choices while maintaining a cohesive look.
CABINETRY AND MILLWORK
We intentionally chose Magnolia Home by Joanna Gaines® by KILZ Cabinet Paint in True White for the cabinetry and millwork to achieve a refined and cohesive aesthetic. True White emerged as the perfect selection due to its truly pure white hue and timeless allure.
True White has the ability to bring a sense of freshness and sophistication to the space. It boasts a pristine quality that not only brightens but also seamlessly pairs with various design elements, contributing to a clean and polished appearance. Silos White, with its calming and serene nature, served as an excellent backdrop for the cabinetry finished in True White. The synergy between True White and Silos White was intentional, aiming to create a cohesive and inviting space as these paint colors complemented each other seamlessly.
By incorporating True White for the cabinetry and millwork alongside Silos White on the walls and leveraging KILZ® MOLD & MILDEW Primer and KILZ 2® Primer as preparatory steps, we achieved a harmonious and elevated design. This intentional selection of paints and primers played a crucial role in establishing a timeless and lasting finish within the Wayzata Classic Bath.
*This is a sponsored blog post with c2s.
RELATED ARTICLES

get inspired:
FOLLOw us:
@kilzbrand
SHOP
PRODUCTS
Project Spotlight: A Bathroom Remodel With KILZ® Primers – Part 1
November 20, 2023We are Jamie and Morgan Molitor, a dynamic duo in both life and business, and the driving force behind our journey in home remodeling, interior styling, and the world of small media. Since 2012, we’ve been all about keeping it real.
What started as a lifestyle blog has since blossomed into c2s, a thriving design and build business combined with a small media enterprise. With over a decade of experience, we’ve mastered the art of transforming houses and crafting spaces filled with joy, not only for our clients but for ourselves as well. We’re here to take you on a journey through every step, from design and construction processes to the intricacies of digital marketing.
Our most recent bathroom design and remodel project is in Wayzata, MN for the fabulous Chris Freytag, a local health and fitness expert, blogger, author, and popular keynote speaker here in the Twin Cities.
At our core, we have a genuine passion for remodeling primary bathrooms, and there’s a unique excitement when we embark on a total transformation while preserving the existing layout. It’s like unlocking the hidden potential within the familiar confines. Each year, we take on approximately 10 bathroom projects that follow this transformative approach, where we breathe new life into the space without altering its fundamental structure. There’s an art to retaining the essence of the layout while infusing it with modern elegance and functionality. It’s about enhancing the existing beauty, ensuring that every corner reflects the homeowner’s vision, and delivering a space that feels both rejuvenating and utterly luxurious. These projects allow us to showcase our expertise and creativity, creating bathrooms that are not just functional but also awe-inspiring havens within the home.
 And one of the best ways to do this is through paint! The KILZ® brand is one of c2s’ go-to brands, especially for bathroom remodels. In high-humidity areas, such as bathrooms, finding the right primer that can withstand moisture is crucial. That’s where KILZ® MOLD & MILDEW Primer truly shines. Specially designed for these challenging environments, it forms a protective barrier that not only prevents mildew growth but also supports the paint, ensuring it thrives in its best condition. With KILZ® MOLD & MILDEW Primer, you can confidently transform your spaces, knowing that your paint will stand strong against the challenges of high humidity, allowing your home to look its best for years to come. Say goodbye to worries and hello to enduring, vibrant walls!
THE PROJECT
At first, Chris and her husband aimed for a cosmetic refresh since the space’s layout was already well-designed. Removing the jetted tub was a priority, and the only structural change involved expanding the shower entrance. Everything, except the cabinetry, underwent a transformation — from paint and countertops to tiles and fixtures. A complete makeover to match their vision! The whole goal of this project was to say goodbye to the beige and hello to white, white, white. A light and bright bathroom makeover!
A classic bathroom remodel is like a timeless makeover that keeps things stylish and comfy. It’s all about simple lines, cool fixtures, and a calming color scheme that makes your bathroom a chill space to be in. Think subway tiles, vintage tubs, and those shiny chrome fixtures you love. Classic bathrooms never go out of style and give you a space that’s not just pretty but also super practical. Whether it’s the retro vibes of black and white or the cozy feel of wood accents, classic bathroom makeovers keep things cool and comfy for years to come.
This project has been smooth sailing. Painting is underway, plumbing up next – and this project will be a wrap! Can’t wait to share the final reveal with you all soon. But today – we wanted to chat about priming and painting! Especially the importance of primer, something that is so often overlooked. We see so often those buying the cheapest primer or even worse, not priming at all. Once you get done reading this blog post – we hope you will never be that person.
Importance of Primer
Priming is like the secret sauce for a successful paint job. It’s the difference between just getting it done and getting it done perfectly, ready for Instagram-worthy photos. Taking the time to prime is a smart move that can save you time and money down the road. With KILZ® Primers, you can achieve long-lasting results that you can show off with confidence. These go-to products always deliver the dependable and consistent performance you need.
Our Go-To KILZ Products
These are c2s’ four go-to primers when it comes to any project beyond this bathroom renovation. And we’re here to tell you the differences between them and why we love and use them.
KILZ® MOLD & MILDEW Primer is your go-to solution for residential spaces that deal with high humidity, moisture, and temperature fluctuations, like kitchens, bathrooms, powder rooms, and laundry rooms. This water-based primer-sealer-stain blocker offers excellent adhesion on both indoor and outdoor surfaces, providing a solid base for paints to adhere to. What sets it apart is its EPA-registered ingredient, which forms a protective, mold and mildew-resistant layer on the primer surface, keeping these unwelcome guests at bay. It’s also a champ at blocking medium to heavy stains like markers, grease, ink, and more. Plus, it dries quickly, has a mild odor, has low VOCs, and can be easily cleaned up with soap and water.
KILZ RESTORATION® Primer is like a modern superhero for your home surfaces. It’s a water-based primer, sealer, and stain blocker that rivals the performance of traditional oil and shellac-based primers. This powerhouse takes on the toughest stains, from water damage and rust to smoke, nicotine, ink, and even pesky pet stains. But it doesn’t stop there—KILZ RESTORATION® Primer is also your go-to solution for sealing in persistent odors like those from pets, food, and smoke. You can use it on a variety of indoor surfaces, from drywall and woodwork to plaster, masonry, and even glossy surfaces. It’s the perfect base for water-based or oil-based paint, and it’s a game-changer when you’re replacing carpet or wood flooring and need to block subfloor odors. Say hello to your home’s new best friend!
KILZ 2® ALL-PURPOSE Primer is your speedy, go-to solution for priming, sealing, and blocking stains on a variety of surfaces. This water-based wonder is known for its quick-drying, excellent adhesion, and mildew-resistant properties, all while emitting a very faint odor. It’s your trusty partner in blocking medium stains, such as minor water stains, rust, ink, and more, and it’s especially handy when you’re changing colors, reducing the need for multiple paint coats. Suitable for both indoor and outdoor surfaces like woodwork, drywall, masonry, and even glossy surfaces with proper preparation. You can confidently use it under or over water-based or oil-based paints.
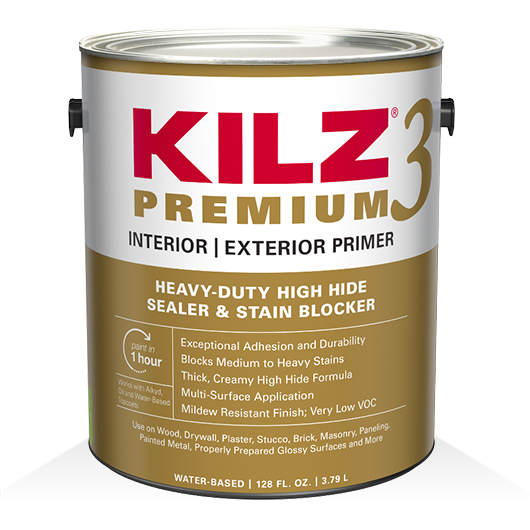
KILZ 3® PREMIUM Primer is a top-notch, quick-drying, and low-odor water-based primer-sealer-stain blocker. It’s got a very low VOC, making it environmentally friendly, and it excels in adhesion while providing a protective, mildew-resistant coating—perfect for areas prone to moisture. This powerhouse can tackle medium to heavy stains caused by water, tannin, ink, grease, and more. With its thicker, high-hiding formula, it’s a champ at concealing surface imperfections and prepping your surfaces for a fresh coat of paint. From indoor to outdoor projects, it’s versatile and suitable for woodwork, drywall, masonry, and even glossy surfaces with proper prep. Plus, it plays well with both oil and water-based paints.
We hope you enjoyed learning about our progress, and more is to come! We are waiting on a final light and the shower glass door and then this project will be a wrap. Stay tuned for the big reveal – before and after coming to KILZ’s The Perfect Finish blog soon!
*This is a sponsored blog post with c2s.
RELATED ARTICLES
get inspired:
FOLLOw us:
@kilzbrand
SHOP
PRODUCTS
Project Spotlight: A Step-by-Step Guide to Painting Your Kitchen Cabinets
November 1, 2023Hi! My name is Abby from Making It With Abby. I am a self-taught DIYer who loves to learn new things and take on all sorts of different projects. I find so much joy in creating with my own two hands and teaching others how they can do it too! As a new homeowner, I started building furniture, but it wasn’t until 7 years later that I started taking on other types of home projects, which is when Making It With Abby was born!
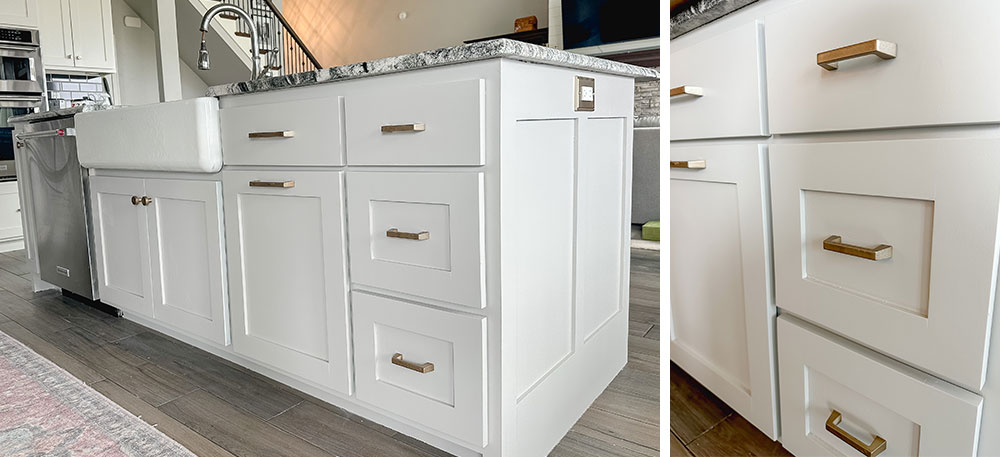
When we built our second home 7 years ago, I didn’t have a strong design sense or style, so when my builder suggested a dark gray/brown stain for our kitchen island, I agreed. I never really liked it and especially disliked how much dirt it showed. I recently renovated our dining area, and it left our island looking out of place. I started thinking about painting it to better fit the space and be a color I actually love.
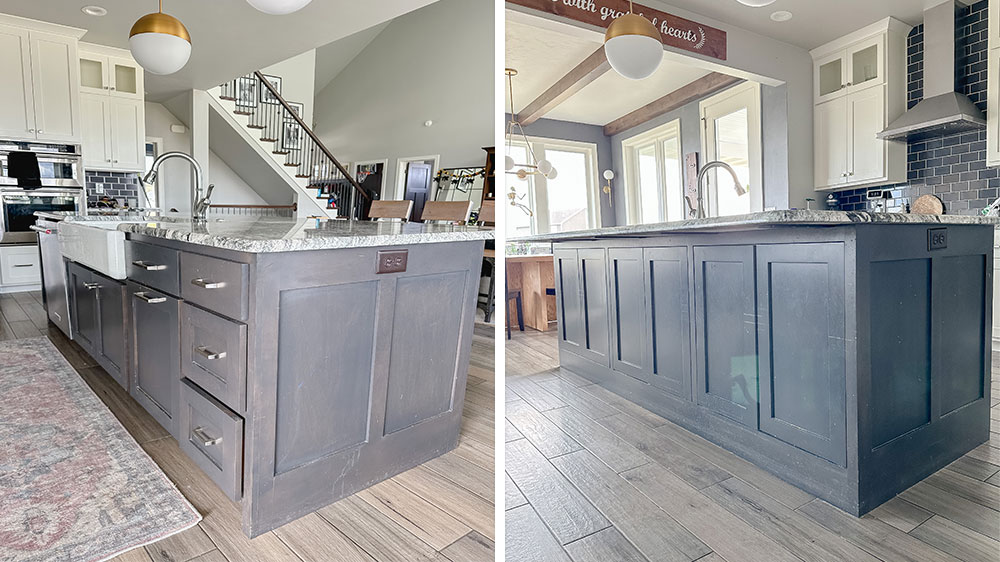
I think a lot of people are in the same boat and don’t like the color of their cabinets, or their cabinets just need a fresh coat of paint. It may seem daunting to think about painting your kitchen cabinets or an island, but it is actually very simple. Best of all, painting your cabinets can breathe new life into your kitchen, giving it a fresh and updated look. In this tutorial, I’ll take you through the entire process using KILZ 3® PREMIUM Primer, ensuring a durable and beautiful finish that will stand up to the demands of a high-traffic kitchen. Let’s get started!
Step 1: Prepare Your Cabinets
The first step in this cabinet transformation journey is preparation. To do this, you’ll need to:
• Remove Decorative Hardware: Begin by taking off all the hardware from your cabinets. Place screws, hinges, and other small parts in a secure place to ensure you don’t lose any.
• Remove Cabinet Doors: Carefully remove the cabinet doors so you have easy access to the cabinet frames for painting. I also removed the hinges where it was blocking areas that needed to be painted, but the other hinges just needed to be covered with painter’s tape.
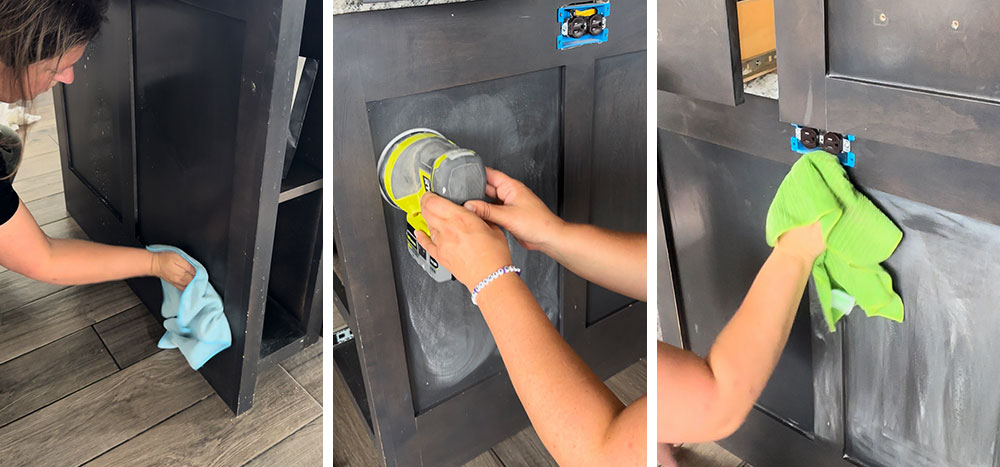
Step 2: Clean and Degrease
Before applying any primer or paint, it’s important to clean your cabinets thoroughly to remove dirt and grease buildup. Use a degreaser to cut through kitchen grime, ensuring a clean surface for the products.
Step 3: Scuff Sand the Cabinets
To improve paint adhesion, lightly scuff sand the cabinet surfaces. This step removes any sheen and provides a better grip for the primer. I recommend using 150 or 180 grit sandpaper.
Step 4: Wipe Down the Cabinets
After sanding, wipe down the cabinets with a damp cloth to remove any dust and residue from sanding. A clean surface is essential for a smooth finish.
Step 5: Primer Application
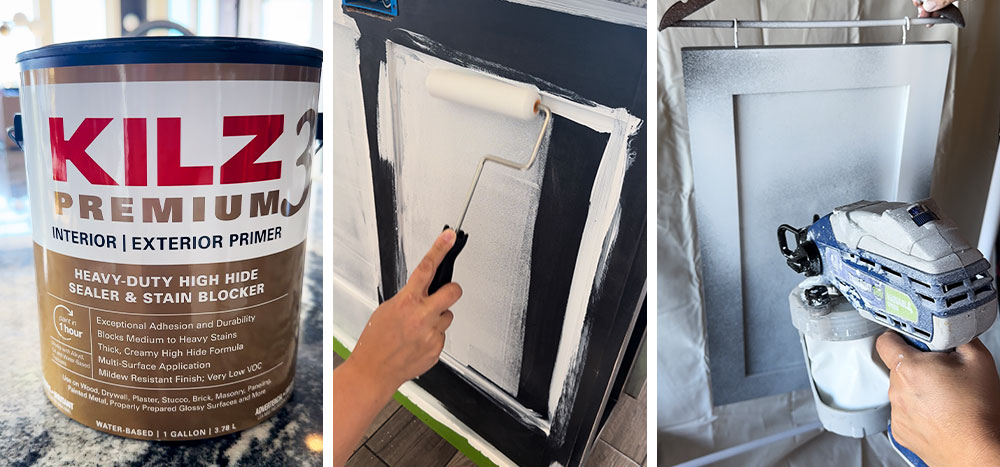
Priming is a crucial step in cabinet painting, especially in a high-traffic area like a kitchen. It makes all the difference between a job done and a job done correctly. I selected KILZ 3® PREMIUM Primer because it provides excellent adhesion to prevent any paint chipping or peeling in the future, and the mildew-resistant coating prevents any mildew growth in moisture-prone areas like a kitchen. There is nothing worse than fixing your old mistake; using a primer helps ensure that this job is done right the first time. KILZ 3® PREMIUM Primer was also the best choice for my project because it provides coverage for medium-to-heavy stains, which will ensure that the current dark color of my island doesn’t bleed through the paint.
Apply a uniform coat of KILZ 3® PREMIUM Primer to your cabinet frames and doors. The thicker formula fills in imperfections in the wood grain of your cabinets, creating a smooth surface for paint application.
I used a brush to get into corners and crevices and a mini foam roller on the rest of the surface and to cover any visible brush strokes. I find a mini foam roller gives the best and smoothest finish when painting cabinets or furniture without the use of a paint sprayer. I decided to use my paint sprayer on the cabinet doors, but you can definitely use a brush and roller for the doors as well.
Using a paint sprayer may seem intimidating, but it’s really quite easy to use. I like to use an airless sprayer, and it really is as simple as pulling the trigger and moving in a slow, even motion. I have used a few different kinds of sprayers at all different price points, and all have been easy to use and have given an impeccable finish.
Step 6: Sand and Wipe Down Again
KILZ 3® PREMIUM Primer is ready for paint in just one hour. After the primer has dried, lightly sand the surfaces once more to ensure a smooth finish. Be sure to remove any dust with a tack cloth or damp cloth.
Step 7: Paint Your Cabinets
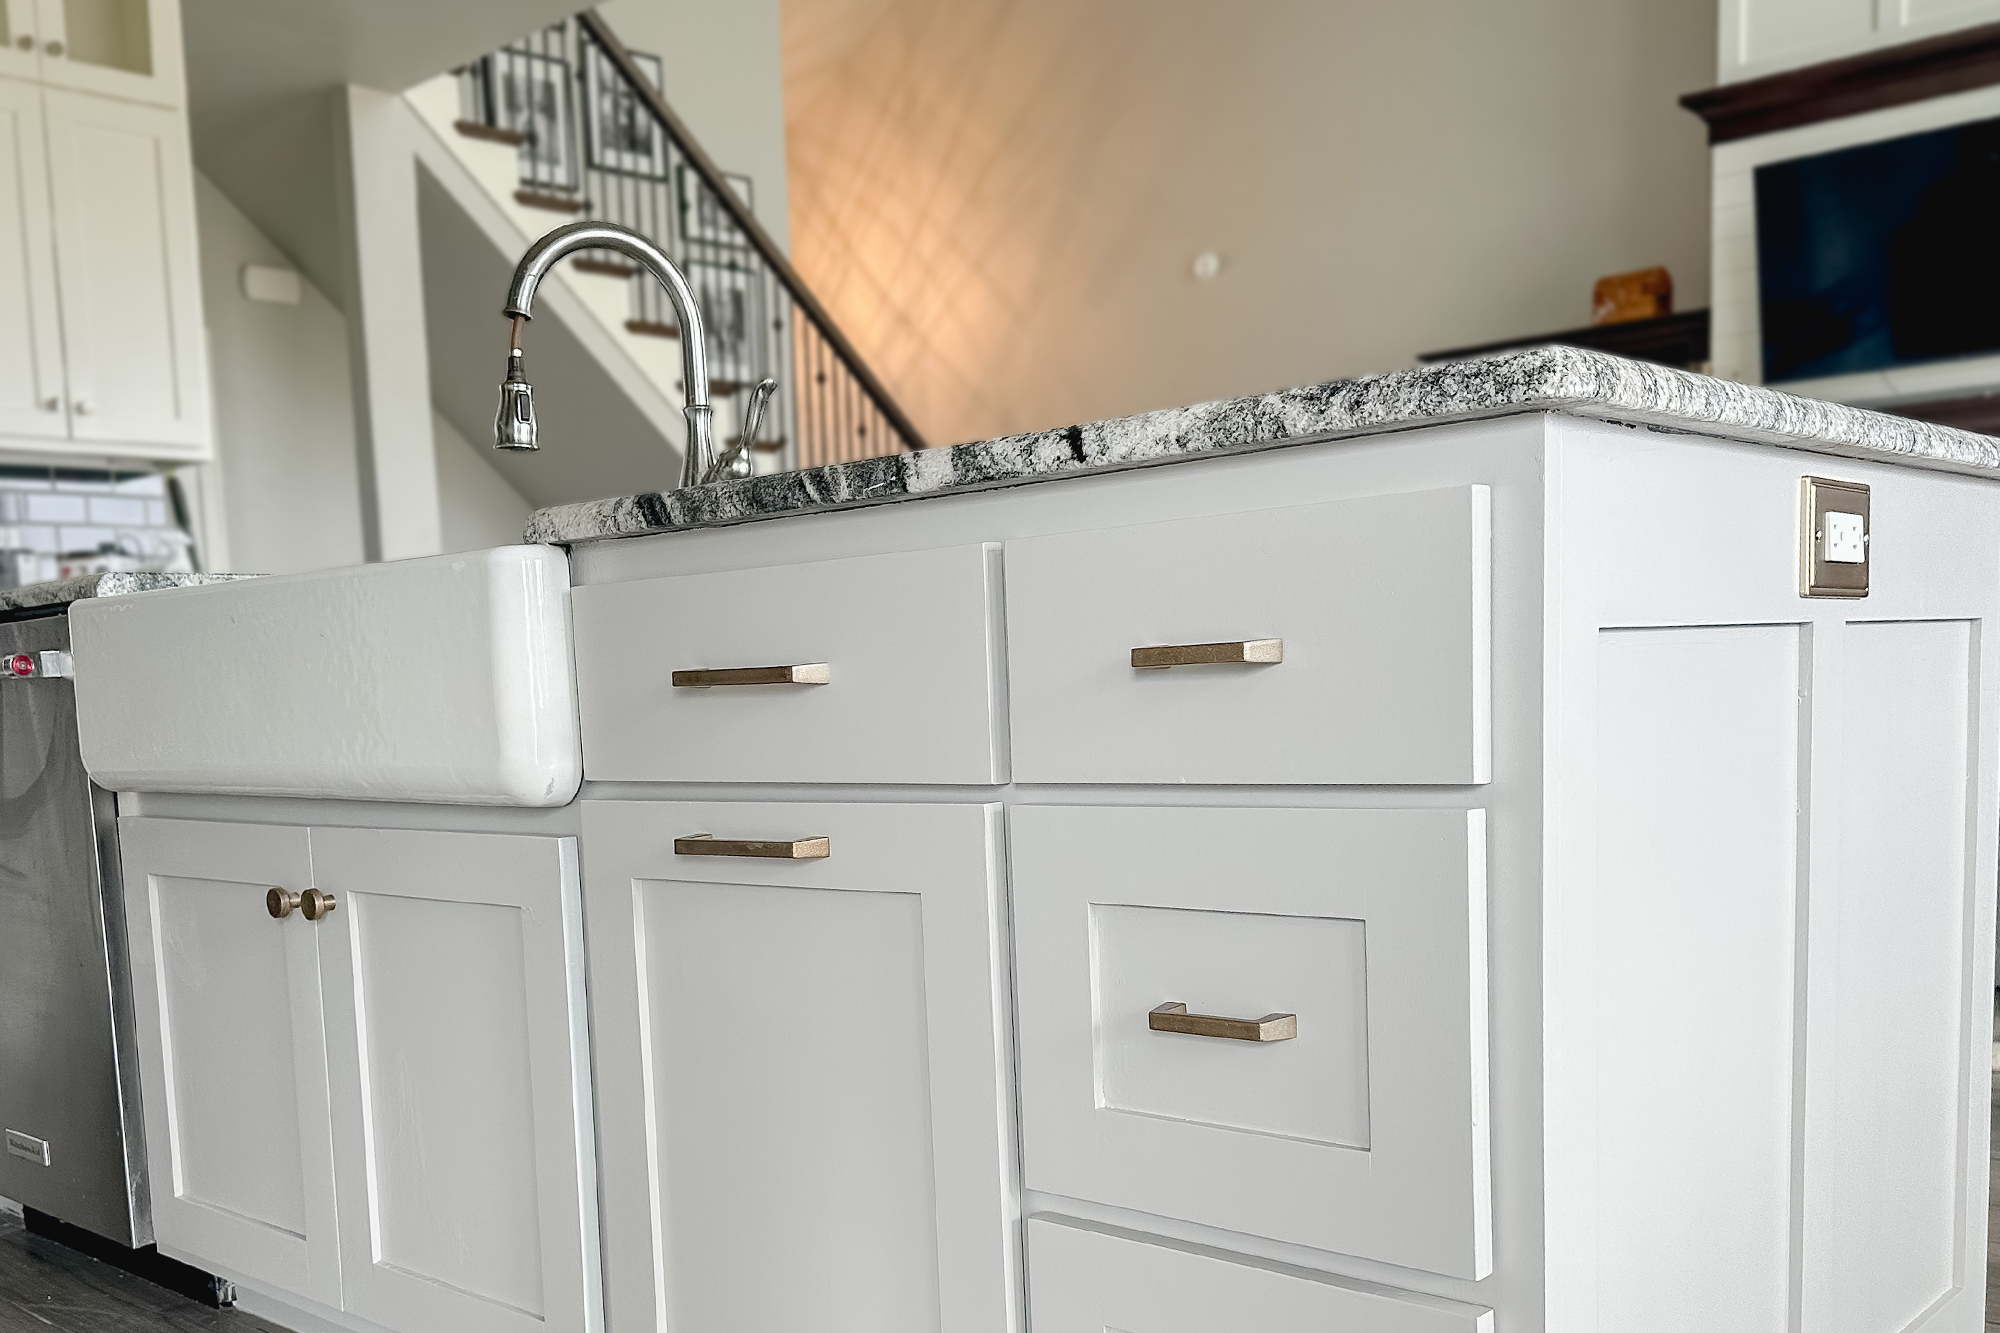
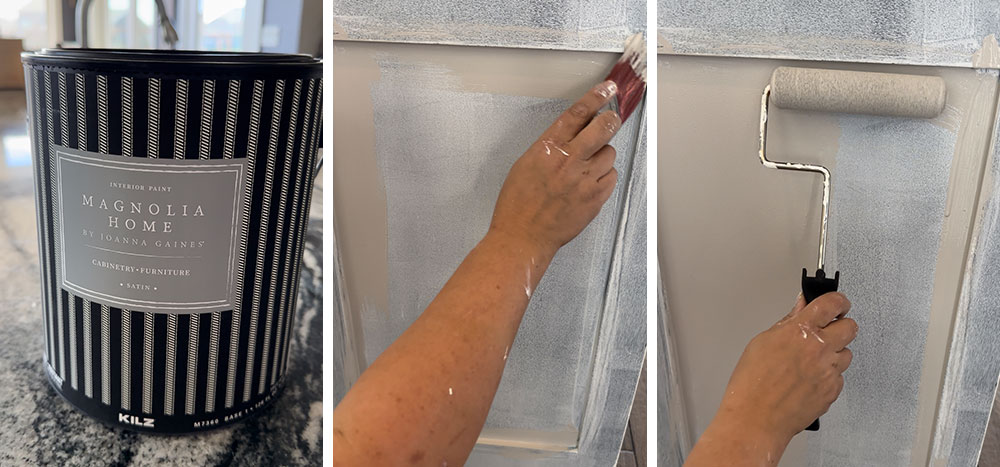
For the paint, I used Magnolia Home by Joanna Gaines® Cabinetry and Furniture Paint. Choose a color that suits your kitchen’s style. There are so many gorgeous colors to choose from in the Magnolia Home by Joanna Gaines® Paint line, but I decided on the color Anatolian, a perfect warm tan with gray undertones. I love this line of paint because of the perfectly curated color options and the superior durability and stain resistance. Their cabinetry and furniture paint offers superior flow and self-leveling which is crucial when painting cabinets to get a smooth and sleek finish.
Apply the paint in even, thin coats to achieve a sleek and professional finish. Be sure to allow each coat to dry thoroughly before applying the next. Once again, I used a brush for corners and crevices and then went over the surfaces with a mini foam roller.
Step 8: Sand and Wipe Down Between Coats
Between coats of paint, lightly sand the surfaces again and remove any dust with a tack cloth or damp rag. This step ensures a flawless finish.
Step 9: Hardware Upgrade
After painting the cabinets, you might want to also update the hardware for a complete transformation. I used KILZ® ORIGINAL Aerosol to prime the metal hardware and then BEHR PREMIUM™ Metallic Spray Paint to give it a fresh, new look. This small change can make a significant impact on the overall look of your kitchen.

Step 10: Reinstall Hardware and Cabinet Doors
Once everything is dry, reinstall the hardware onto your newly painted cabinet doors, and then reinstall the doors to the cabinet frames. Painting your kitchen cabinets can be a rewarding DIY project that transforms your kitchen’s appearance. By following these steps and using KILZ 3® PREMIUM Primer and Magnolia Home by Joanna Gaines® Cabinetry and Furniture Paint, you’ll achieve a beautiful, durable finish that will make your kitchen feel like new. Enjoy your freshly updated space!
*This post is a paid partnership with Making It With Abby.
Always remember to refer to our website kilz.com or product back labels for additional information on which primer is right for your project and detailed instructions on how to apply our products. Check out our Coverage Calculator to understand your estimated paint needs for your upcoming project.
RELATED ARTICLES
get inspired:
FOLLOw us:
@kilzbrand
SHOP
PRODUCTS
MINI RENI – A TIMELESS RENOVATION
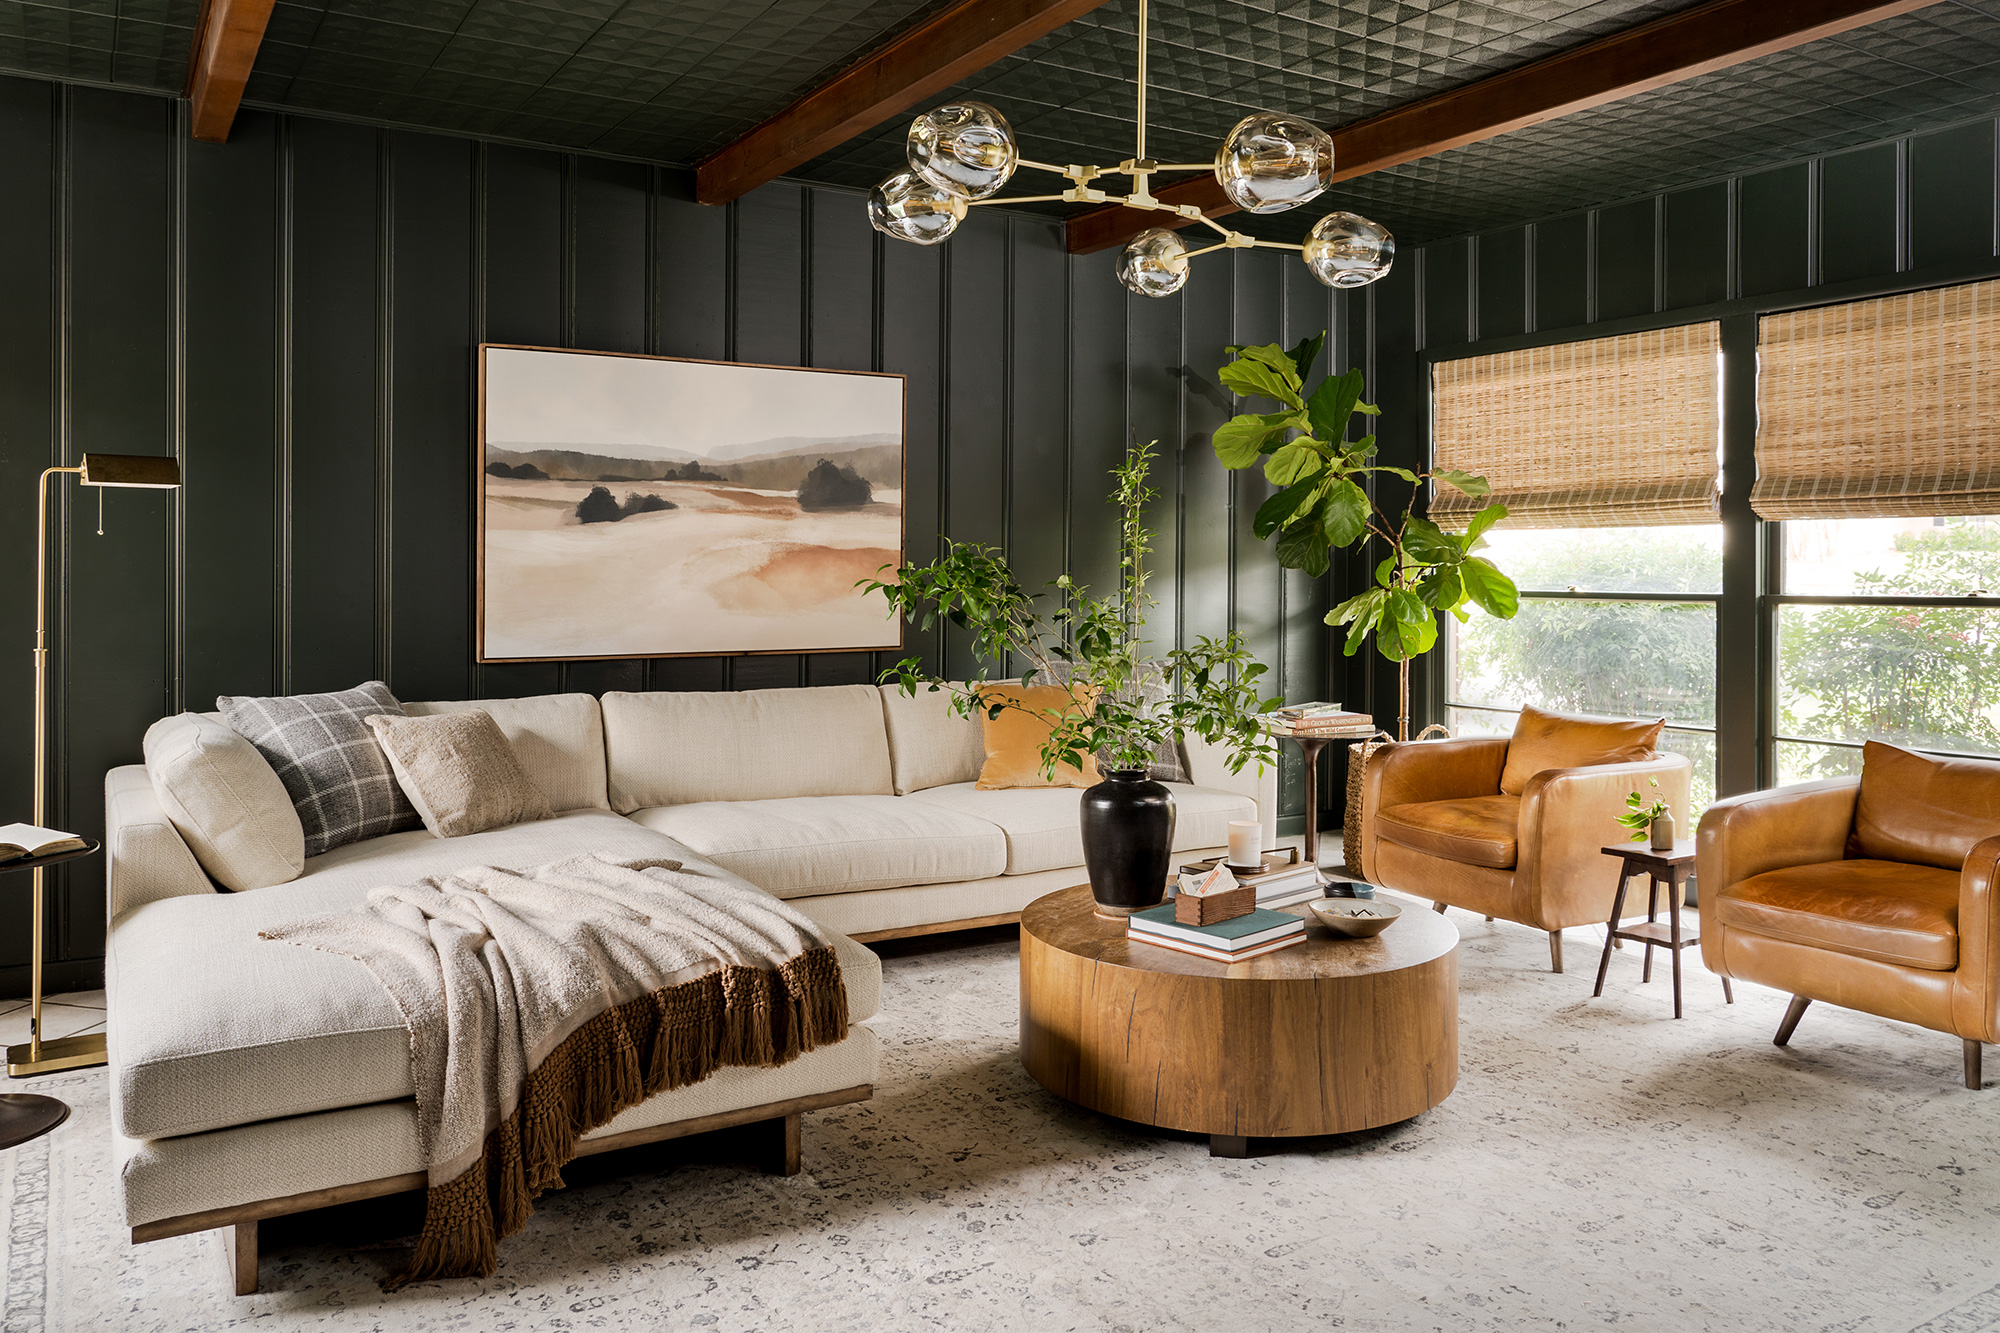
August 21, 2023Welcome back to the KILZ® Perfect Finish blog. Today we are going to talk about Joanna Gaines’s first Mini Reni project, where she renovated a house without undergoing a major demo day. The home featured in this mini reni belongs to a couple who just welcomed a baby into their family and were looking to refresh their space under a budget. Watch as Joanna is able to transform this family’s living and dining room by using some primer, paint, and new décor.
With less than $5,000 to spend in the living room, Joanna chose to embrace the space and make it modern with some fresh paint and key design elements.
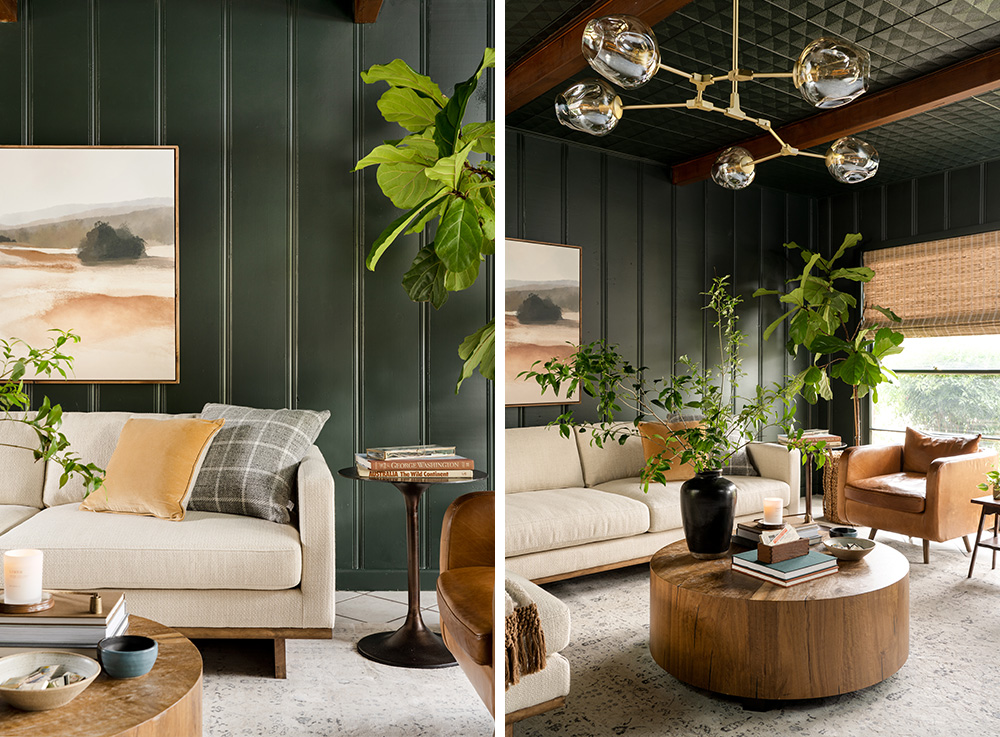
The home’s original living room had shiny wood paneled walls and a white tiled ceiling with wooden beams, which really dated the area. To update the room, the wall panels were sanded and primed using KILZ® Original Oil Primer, which covered up the knots in the wood grain, creating a flat surface that was ready for paint. Once the wood was prepped, the walls and ceiling were painted in one of Joanna’s favorite interior paint colors, Cottage Grove (in eggshell finish) from the Magnolia Home by Joanna Gaines® Castle Collection.
 |
“A rich blend of navy and green, this color can take on either tone in different light, which makes it both dramatic and cozy all at once.” |
By bringing the paint up to the ceiling and decorating the living room with a large area rug, plants, and tonal furniture, Joanna was able to transform the entire space into an elevated yet cozy room ready for entertaining guests or fun family nights.
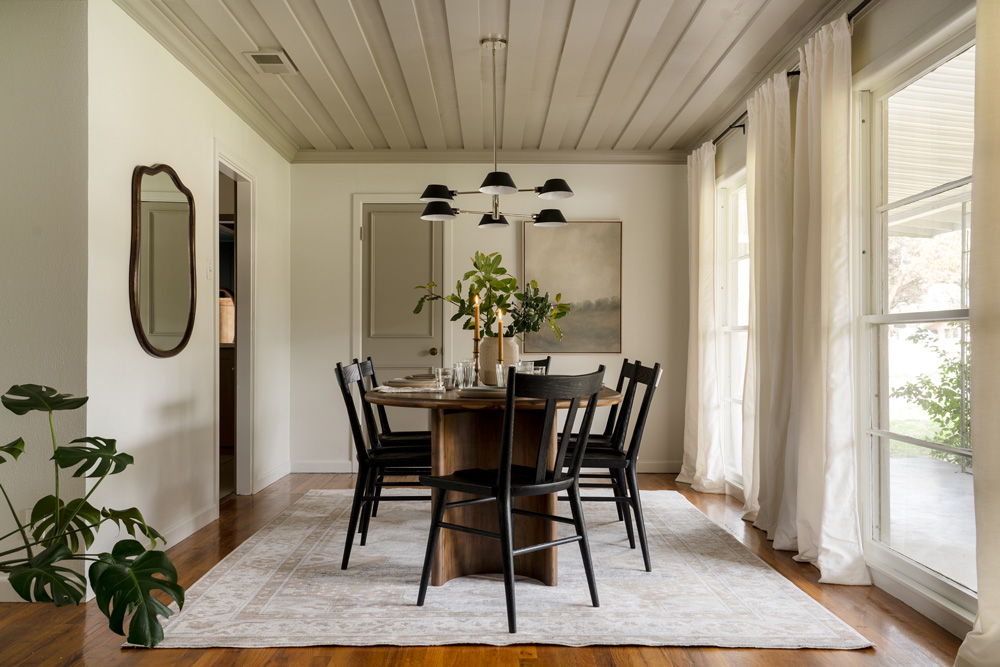
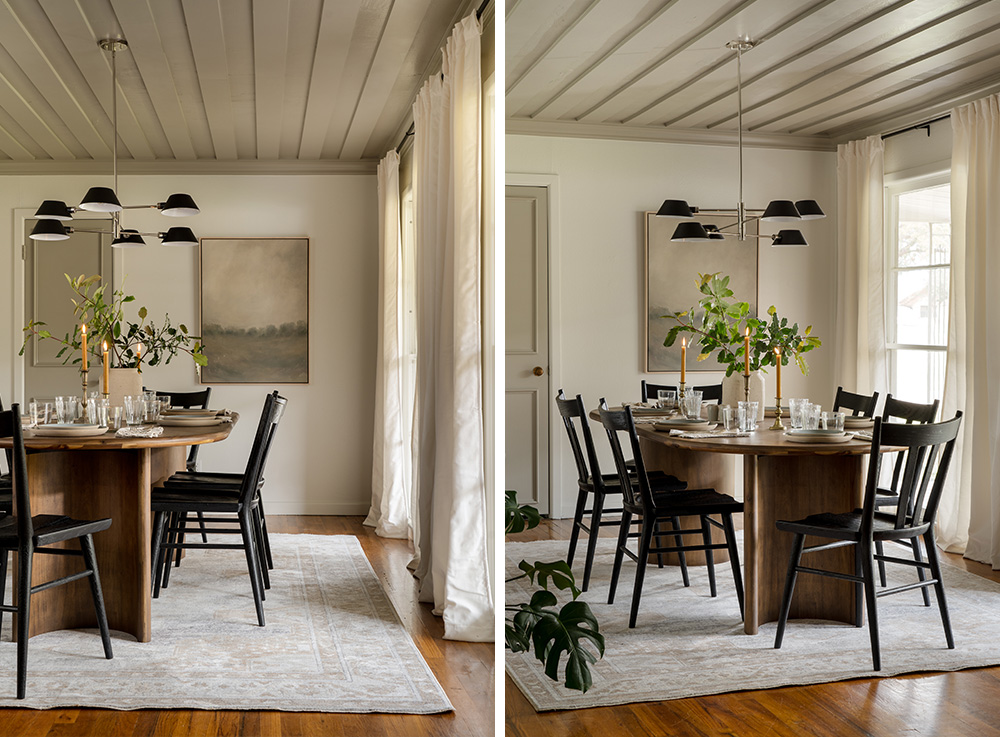
The home’s original dining room started out as a plain white box, which allowed for lots of opportunity, but with a small budget in place, Joanna had to get creative. By bringing in fresh colors and textures, she was able to completely update the room.
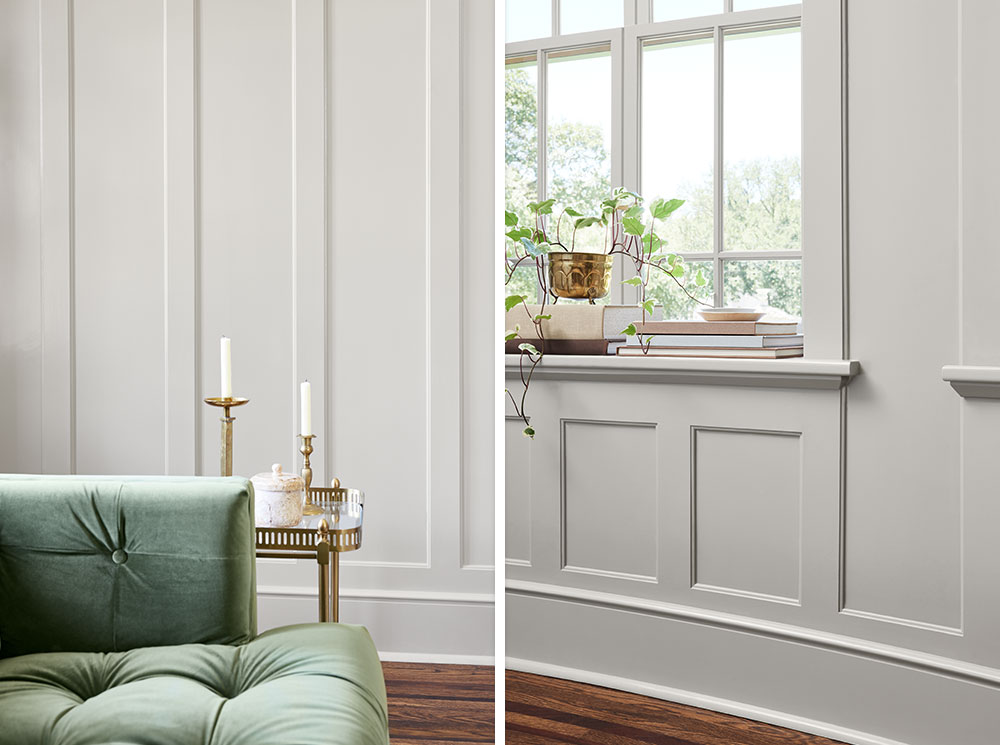
To create some visual interest, crown molding and wood panels were installed on the ceiling and painted in the interior paint color Drawing Room, a soft gray from the Magnolia Home by Joanna Gaines® Castle Collection. The plain wood door also was renovated, turning it into one of the focal points of the room, by adding some trim and painting it in the same Drawing Room color.
 |
A soft French gray. |
The walls were painted with a coat of One Horn White, making the room feel fresh and new again. In order to create contrast with the soft paint colors, the lighting was updated from an old fan to a new modern light fixture with black accents. Final decorative touches included dark dining table and chairs, along with long velvet curtains and an ivory rug to ground the area.
 |
One Horn White is a warm white with a light beige tint. |
This home was brought back to life and elevated by a few simple changes, adding KILZ® Primer, Magnolia Home by Joanna Gaines® Paint, and new decor. You don’t always need a large renovation to make your home look and feel new!
Encouraged to tackle a project using one of the Magnolia Home by Joanna Gaines® paint colors? Check out the link below to explore more.
Complementary Palette

Castle Cream

Plaster

Estate

Step Stool Green

Vintage Crown
“Where can I buy Magnolia Home by Joanna Gaines Paint?”
These paint colors are now available at Ace Hardware, Lowe’s, and Magnolia.com/shop.
Always remember to refer to our website kilz.com or product back labels for additional information on which primer is right for your project and detailed instructions on how to apply our products. Check out our Coverage Calculator to understand your estimated paint needs for your upcoming project.
RELATED ARTICLES
get inspired:
FOLLOw us:
@kilzbrand
SHOP
PRODUCTS

THE CASTLE COLLECTION: DRAWING ROOM
June 1, 2023Today, we are back highlighting another Castle Collection color from the Magnolia Home by Joanna Gaines® paint line!
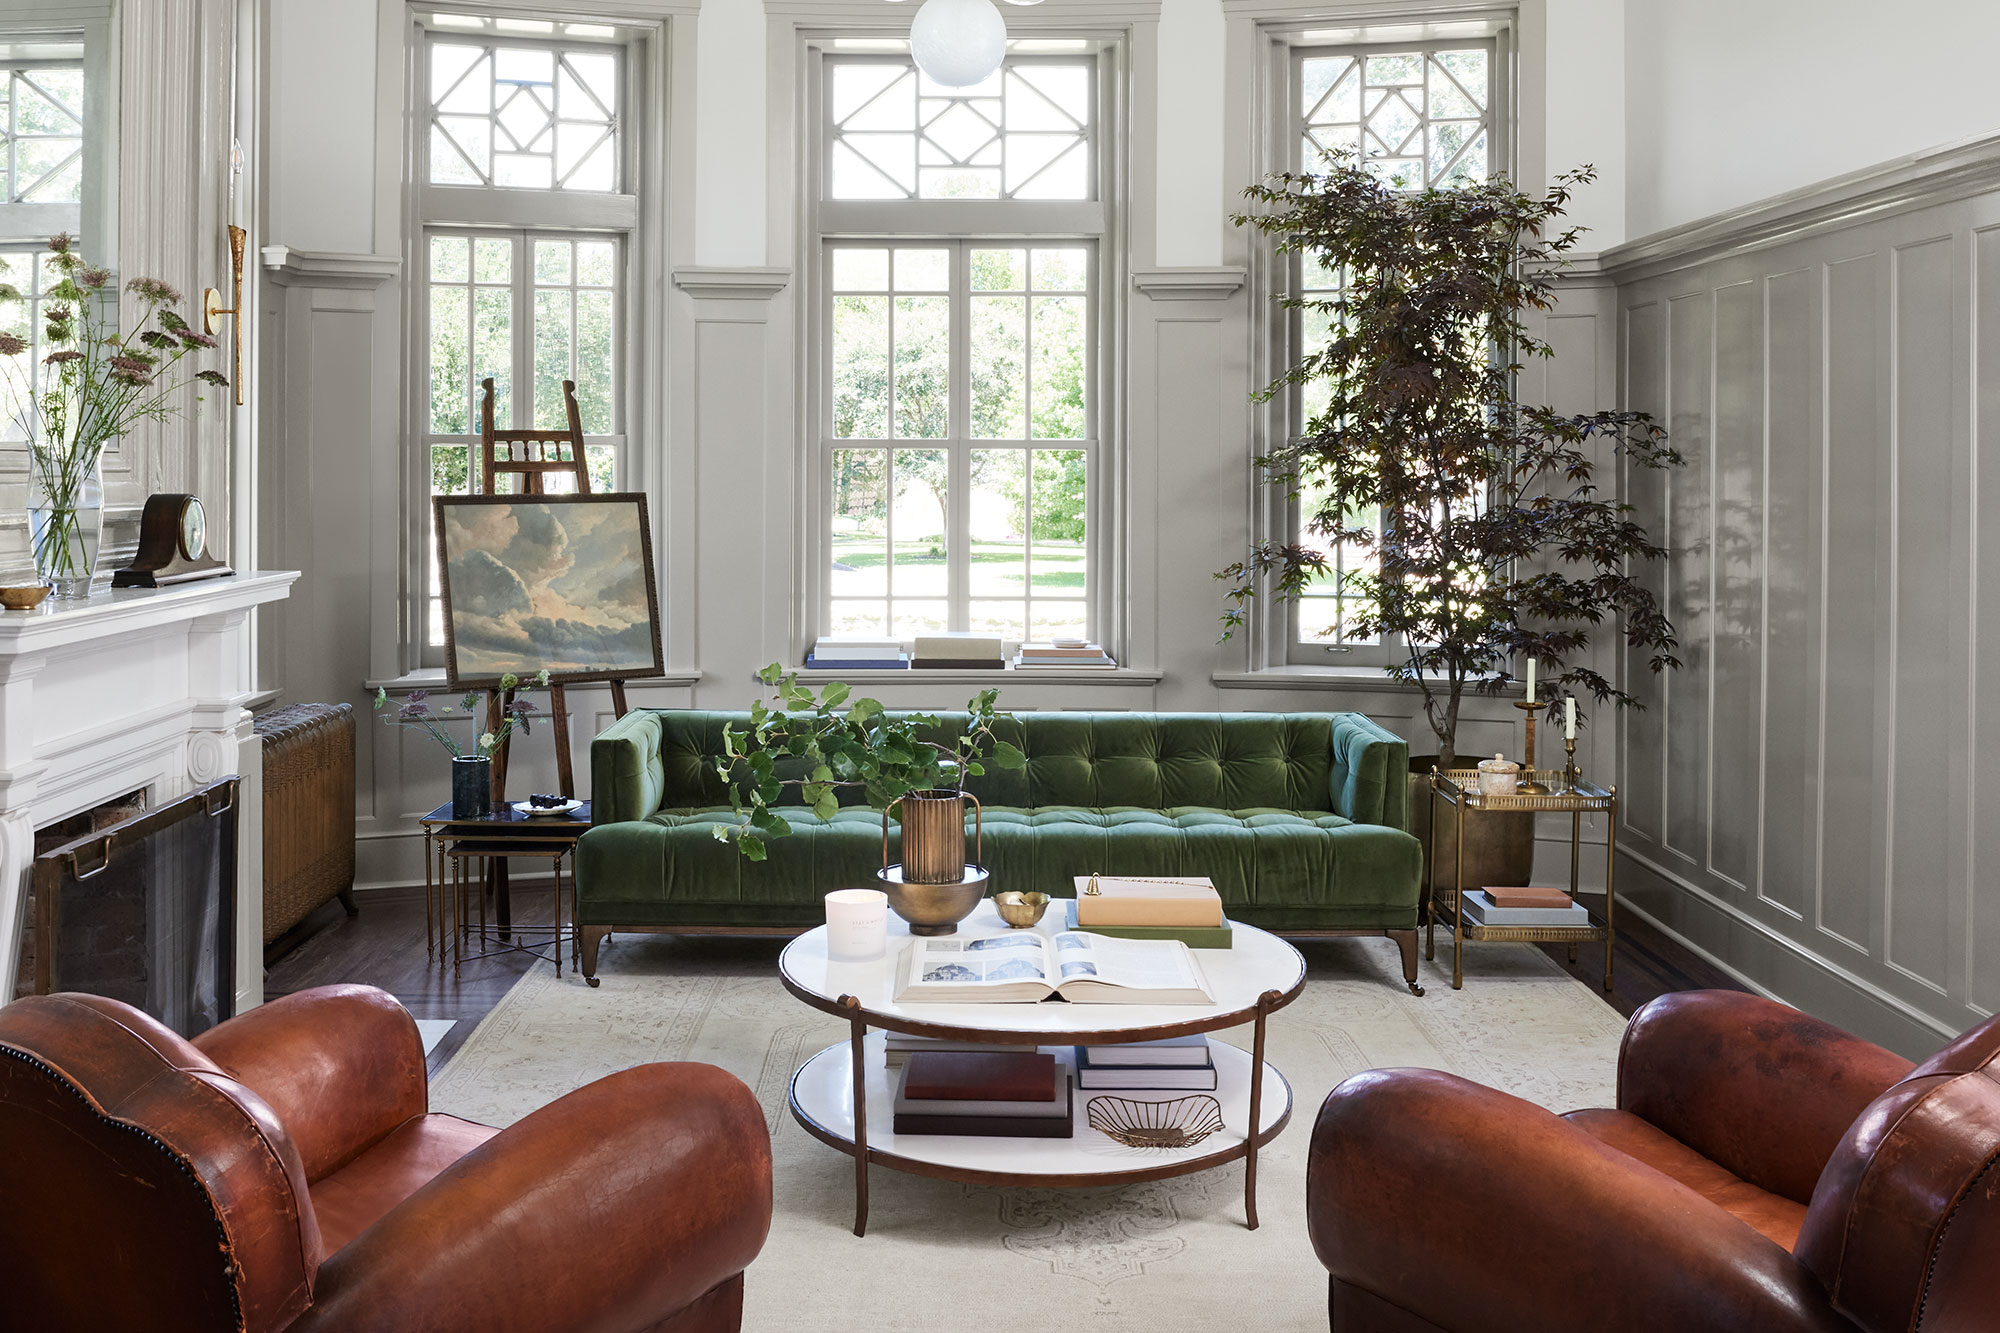
In this edition, we will be talking about the Drawing Room. The beauty of this room is its ability to create a balance between aesthetic appeal without losing comfort, it invites you to step into a world of modern times while preserving its charm.

The Magnolia Home by Joanna Gaines Castle Collection paint color, Drawing Room, by Magnolia Home by Joanna Gaines was inspired by the room’s elegance and timeless style. The color is a soft French gray, that refreshes and uplifts this room while keeping the sophistication from the Castle’s original era.

“Named after one of my favorite rooms in the castle, I love the subtle character and charm this gray shade brings to a space.” – Joanna Gaines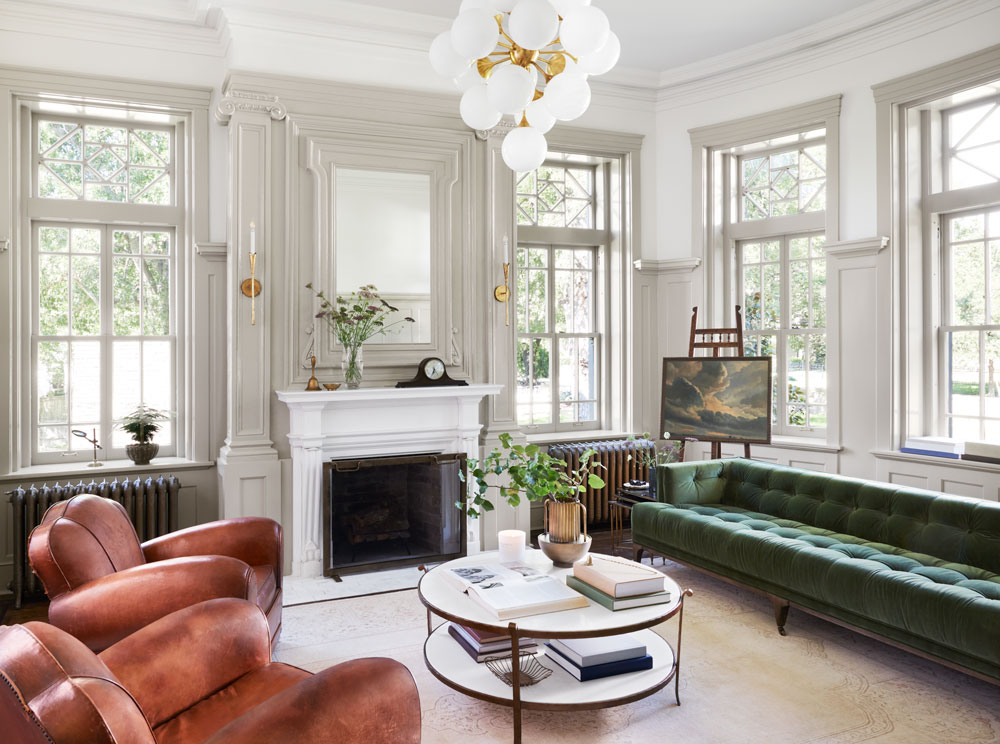
Using the Magnolia Home by Joanna Gaines interior paint to highlight certain features of the room like the window trim and wall molding gives the room contrast against its white walls. It makes the fireplace (one of the seven in the castle) a focal point, serving as a timeless centerpiece and adding to the calm and cozy feeling of this area.
This drawing room has embraced a modern design while preserving its traditional charm. Contemporary furniture like the coffee table and the green velvet couch coexists with antique pieces like leather chairs and some of the décor creating the perfect blend between old and new. With big windows brightening this space, the color Drawing Room brings character, charm, and coziness to this space.
In case you missed it, the full Castle Collection color palette was created by Joanna Gaines for the Magnolia Home by Joanna Gaines paint line. Made of ten new colors, from moody accents and warm neutrals, this palette was inspired by the historic castle restoration project in Waco, Texas and it is featured in the Fixer Upper: The Castle season.
Check back here at the Perfect Finish to learn more about the rooms in the castle and their specific colors and descriptions. Read about the Butler’s Pantry here.
Encouraged to tackle a project using one of the Magnolia Home by Joanna Gaines paint colors? Check out the palette below that complements the Drawing Room and coordinates with its soft gray color.

Pond Stone

Bright Days

True White

Locally Sown

Dutch Tulip
“Where can I buy Magnolia Home by Joanna Gaines Paint?”
These paint colors are now available at Ace Hardware, Lowe’s, and Magnolia.com/shop.
Always remember to refer to our website kilz.com or product back labels for additional information on which primer is right for your project and detailed instructions on how to apply our products. Check out our Coverage Calculator to understand your estimated paint needs for your upcoming project.
RELATED ARTICLES
get inspired:
FOLLOw us:
@kilzbrand
SHOP
PRODUCTS
An Outdated Living Room Gets a Facelift
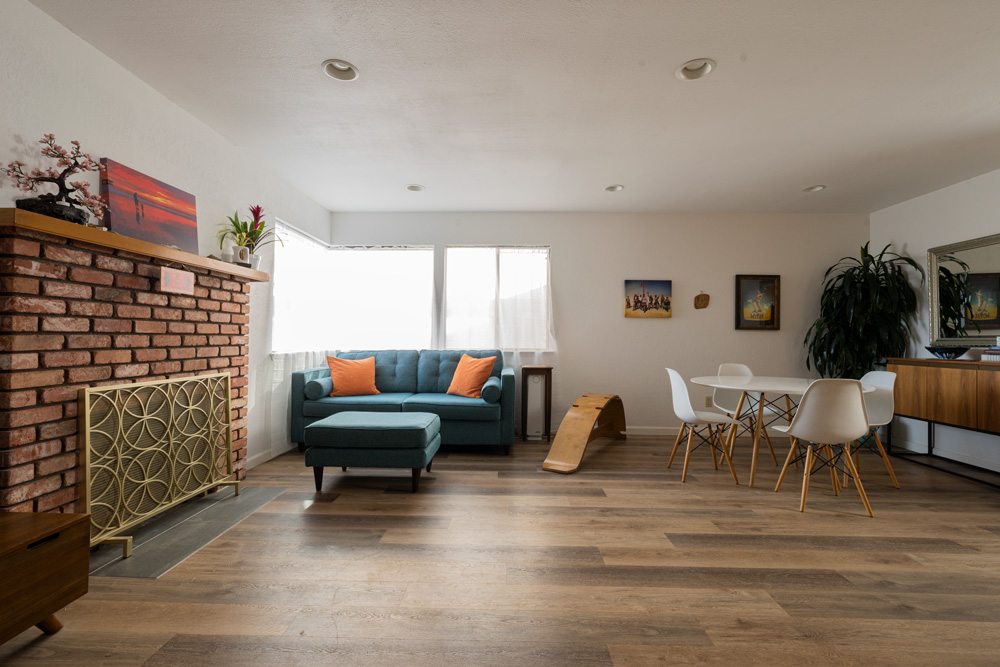
April 17, 2023On this episode of Destination Restoration, we upgraded an open concept family living/dining room, while demonstrating the power of primer in a striking fireplace restoration. Rather than putting this 4th generation home through a full gut rehab, our pros, Jason Lai (interior designer) and Jared Foster (contractor/pro painter) worked to reimagine the space and rejuvenate it for another generation. This series demonstrates how you can breathe new life into an older home while keeping its structural integrity intact.
Jason and Jared worked together to take this space from ordinary to inviting, contemporary, and cheerful with a few tweaks. Keeping in mind aesthetics and functionality, the goal was to avoid tearing things out and starting from scratch, and instead, add value to the existing room. They updated the décor, primed, and painted the fireplace, added new lighting, built a convenient storage unit in the dining area, and overall, made the space look chic and feel cozy.
We’ve broken down each area below so you can get a more detailed look into the upgrades we made. If you’re not sure where to start, we’ve included a step-by-step guide of how to paint brick fireplaces like the one here.
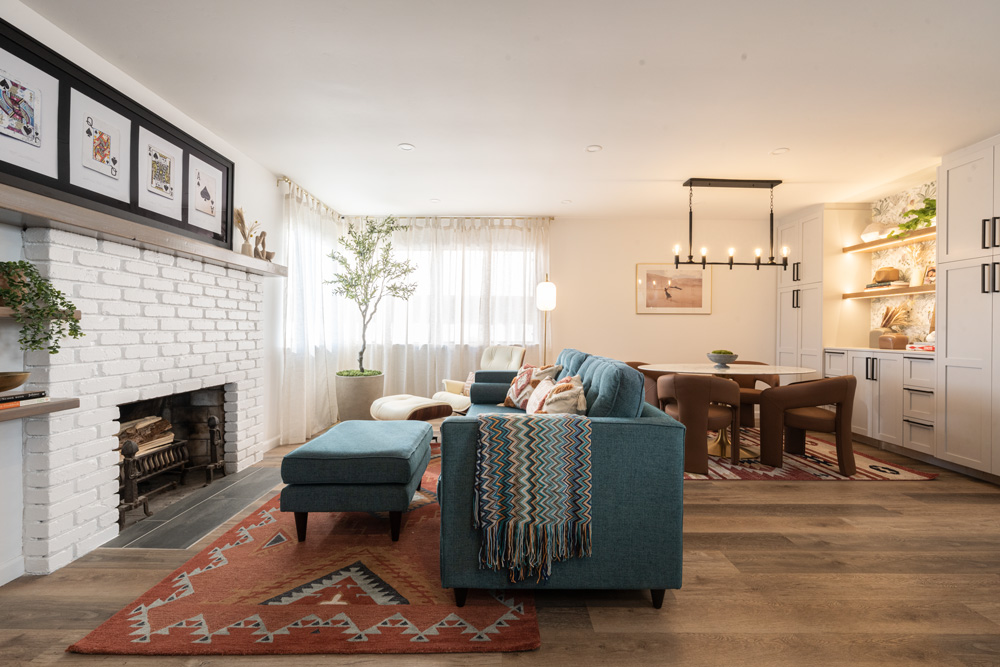
Living Area
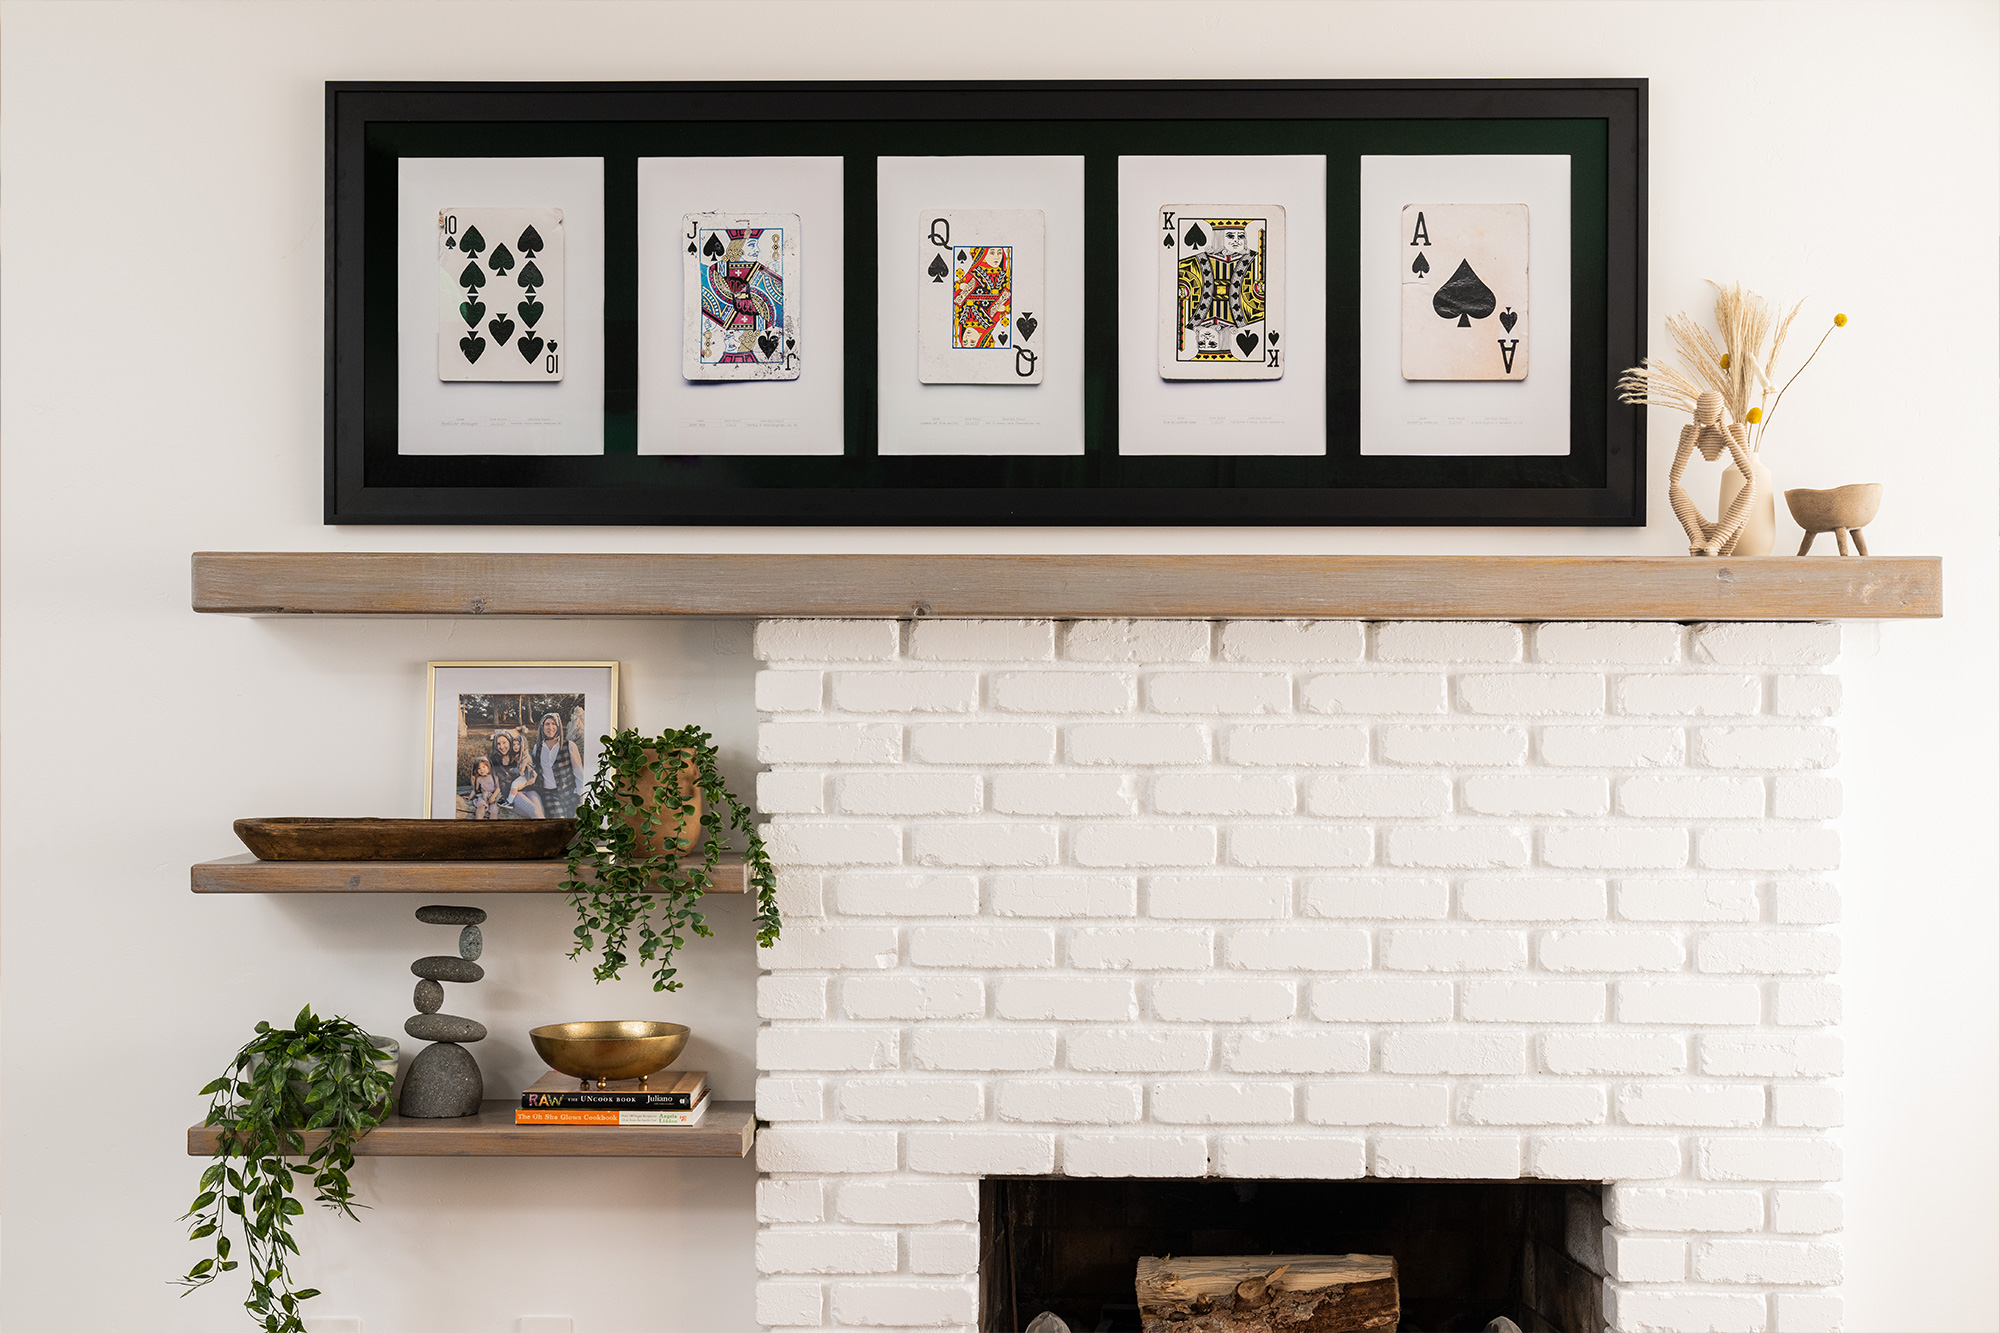
First, we primed the fireplace and front door using KILZ 2® All-Purpose Primer. For living room paint colors, the front door was painted Chic Grey and the fireplace Whipped Cream, both colors by Behr Paint. We also replaced the front door hardware for a more modern look. Using the beam we removed from the kitchen ceiling, we stained and repurposed it to extend the mantle out to the left of the fireplace. Finally, we added floating shelves just underneath. These shelves were the result of leftover pieces from the kitchen beam, which were also stained to match.

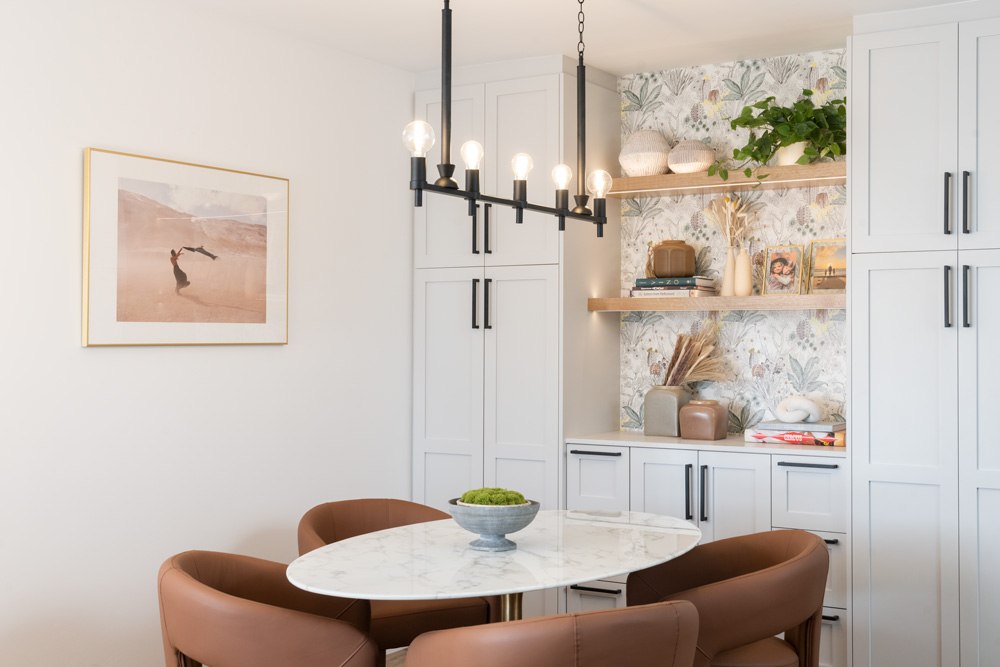
Dining Area
To spruce up the old dining area, we replaced the buffet cabinet with a larger, built-in storage unit, and brightened it up with under cabinet lighting and a linear chandelier (by Kichler Lighting) over the dining table.
Other Changes
Our interior designer, Jason, added touches of new furniture and décor throughout this space to bring it into the modern day. He chose to keep the existing couch and update the throw pillows and blanket, as well as rearrange the furniture to create a distinct living and dining area within the space.
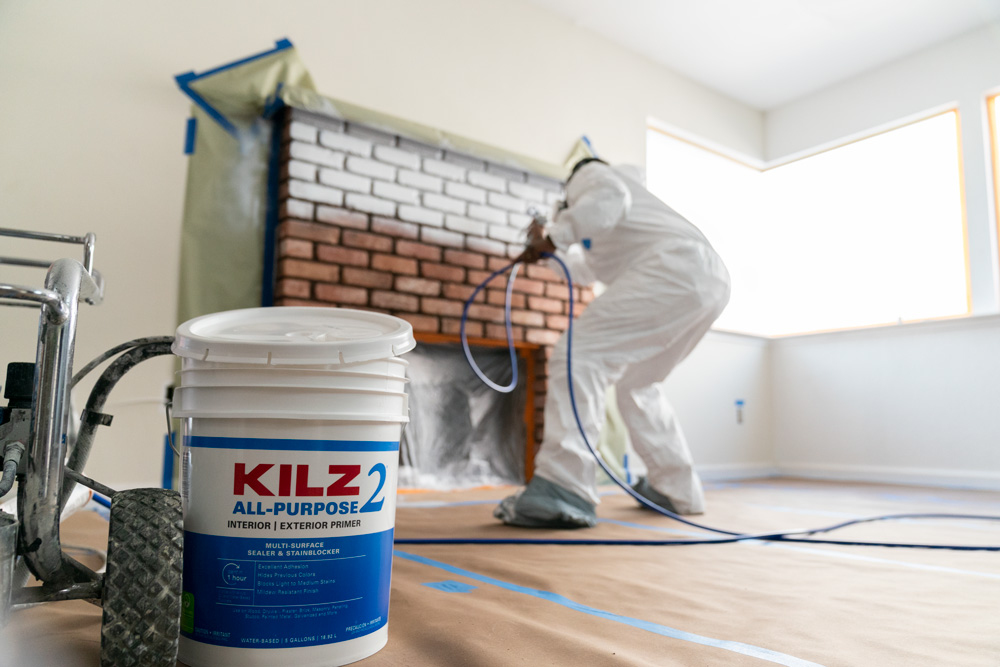
Why Do You Need to Prime?
Priming is essential for proper surface preparation for any paint project. It’s the difference between a job done and a job done right. Priming helps solve a wide range of problems, including highly porous surfaces, stains, odors, uneven surfaces, texture differences, and adhesion problems.
For the purposes of this project we used, KILZ 2® All-Purpose Primer because it dries fast and can be used on many surfaces, including brick. It’s also a great stain blocker with excellent adhesion, mildew resistance, sealing properties and a very mild odor. Its enhanced hiding formula makes it ideal for changing colors, like in the case of our fireplace, and helps lessen the number of coats of paint required, saving you time and money.
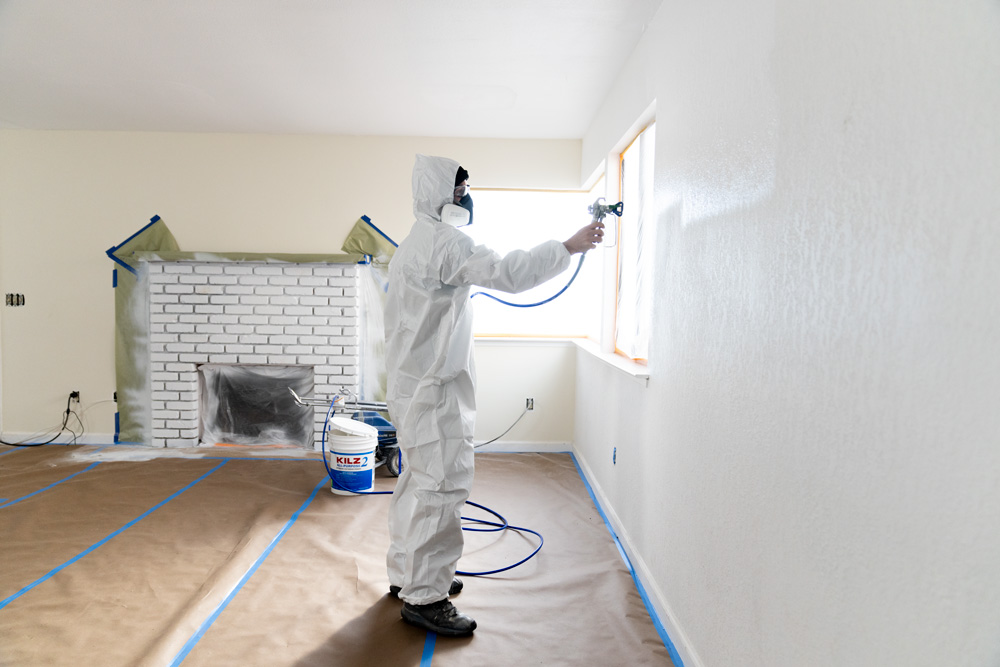
Step-By-Step Guide for a Brick Fireplace Makeover:
A primed and painted fireplace requires a few basic steps from start to finish. Here’s an easy guide to follow for your next project:
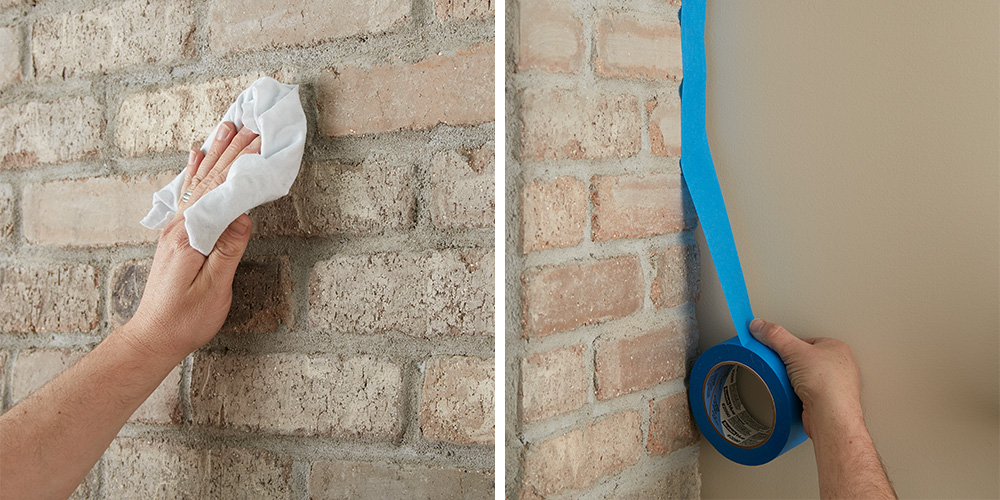
1. Clean the bricks. If it’s extra dirty, start with a vacuum and use the crevice tool attachment to clean between the bricks. Next, wipe down the fireplace with a damp cloth to ensure all surfaces are clean and free of any lingering dust. Allow to dry.
2. Tape around the fireplace to protect the walls and floor. Also tape around the mantel and where the brick meets the firebox (the inside where the wood goes!) to keep that area protected from paint and primer.
3. Protect your floors from paint and primer by covering it with a drop cloth.
4. Now it’s time to prime! Using KILZ 2® All-Purpose Primer, start with an angled brush to cut in around the mantle and edges of the fireplace.
5. Next, use a roller to cover the brick faces with primer.
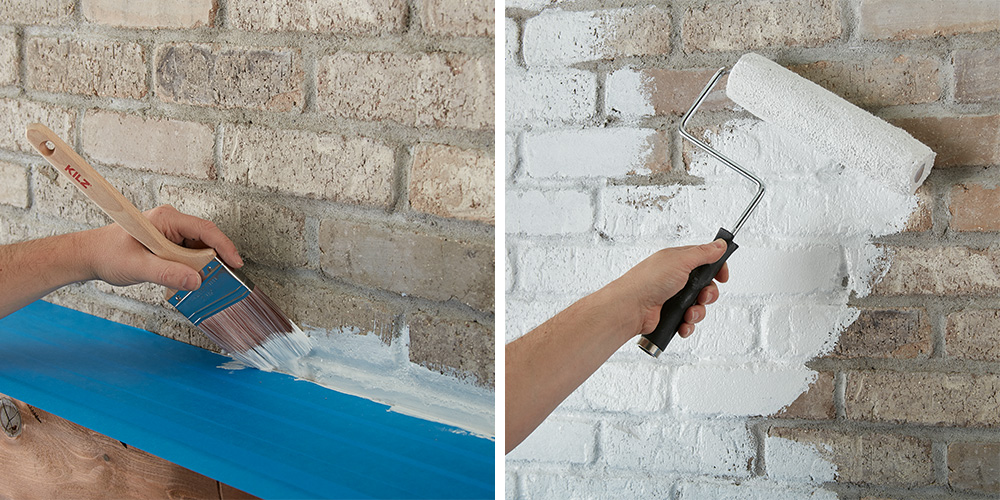
6. Go back with a small, angled brush to fill in any remaining grout areas and crevices in the bricks.
7. Allow to dry for 1 hour.
8. Once the primer is dry, apply paint of your choice using the same application process at the primer.
9. Remove the painter’s tape before your paint is fully dry.
You Will Need:
• Vacuum and rags to wipe dirty and dusty surfaces
• Painter’s tape
• Drop cloths, canvas, or other reusable material
• Paint roller, angled brush, and paint tray
• Paint of choice
We hope this episode of Destination Restoration inspires you to tackle your own living room remodel this year. Be sure to keep KILZ® products in mind for your next project, and come back for more ideas, tips, and project inspiration.
If you loved this restoration, be sure to check out the other episodes of Destination Restoration. Jason and Jared took on the Kitchen, Primary Bedroom and Primary Bathroom.
Always remember to refer to our website kilz.com or product back labels for additional information on which primer is right for your project and detailed instructions on how to apply our products. Check out our Coverage Calculator to understand your estimated paint needs for your upcoming project.
RELATED ARTICLES
get inspired:
FOLLOw us:
@kilzbrand
SHOP
PRODUCTS
Pro Spotlight: Kenny and Kate Transform Historic Tin Bedroom Ceiling
August 31, 2022Hi there! We are Kenny and Kate-Home Renovation/DIY husband and wife duo based in northern Alabama. Although most of the time you will find us renovating a space or DIYing a project, on the weekends we can often be found on a hike at our nearby state park with our daughter Remi. Whether playing fetch with one of our three dogs, Kessa, Scout, and Lola or snuggling our guinea pigs, Kipper and Gus, we are also huge animal lovers. Our DIY journey began when we purchased our little 1972 fixer-upper home in 2019. We began renovating the home room by room and ultimately fell in love with the process of transforming each space. When most of the world was shut down in 2020, we found comfort in making our home a place of peace and restoration. We loved it so much that in January of 2021 we started our own local home remodeling business, Kaleidoscope Home Co. LLC, to help others embrace and improve the spaces that make up their homes. As the business grew, so did we. By the end of 2021, we had decided to sell our 1972 fixer-upper home and purchase an 1800s downtown brick mercantile building to live in/operate our business out of. That building is currently where we reside. Our business is located on the ground level and our living space is located on the second floor.
Because the decision to purchase and move into the building was made rather quickly, we did not have the time or resources to renovate any of the spaces before moving in. Our daughter, Remi, has been sleeping in a makeshift closet area for the last seven months. It is finally time to give her the room she deserves!
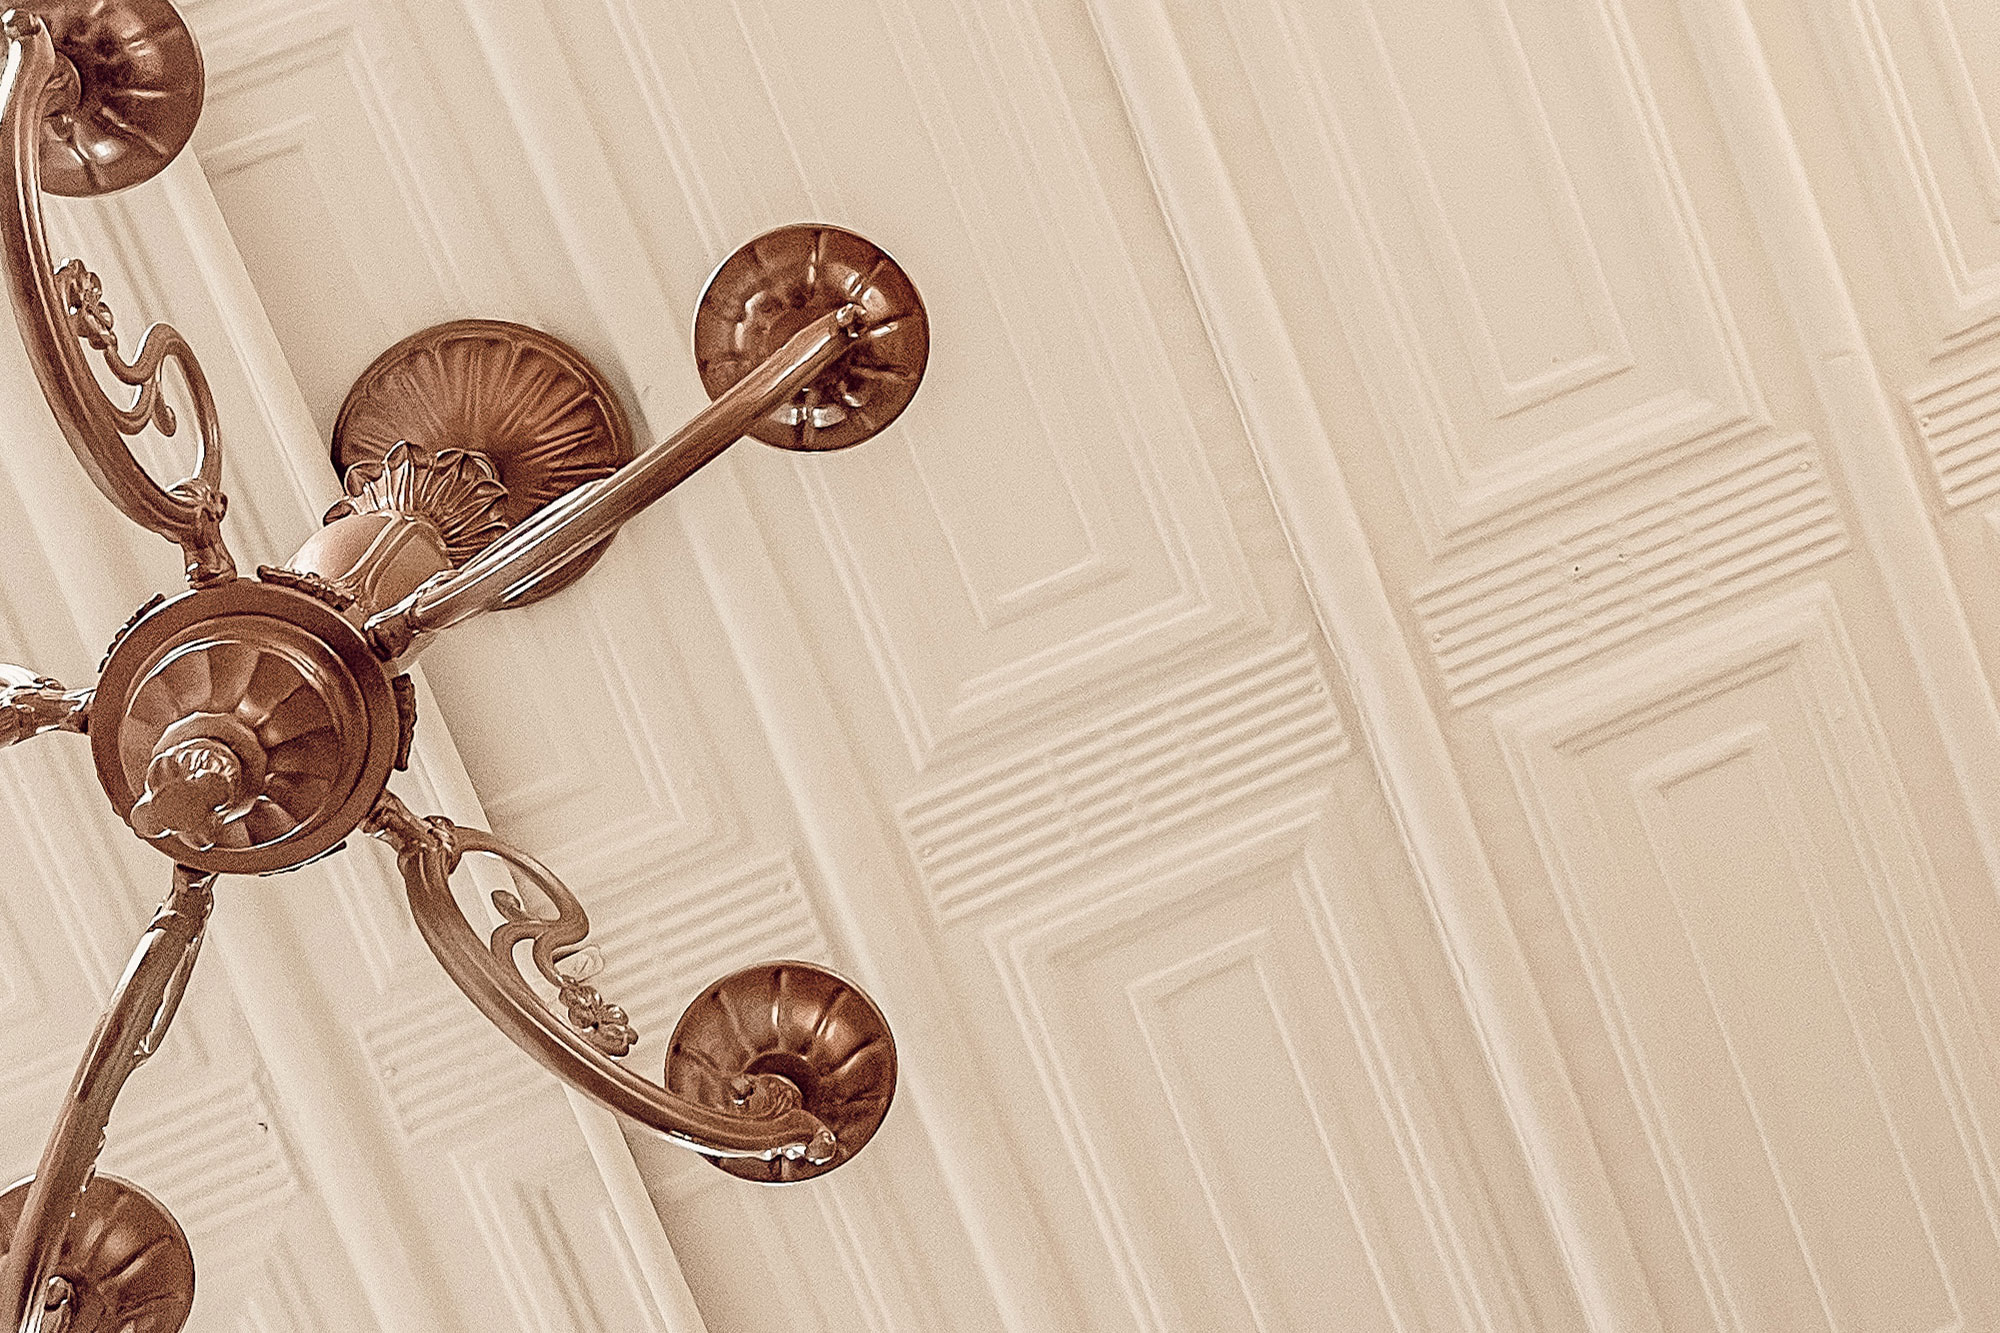
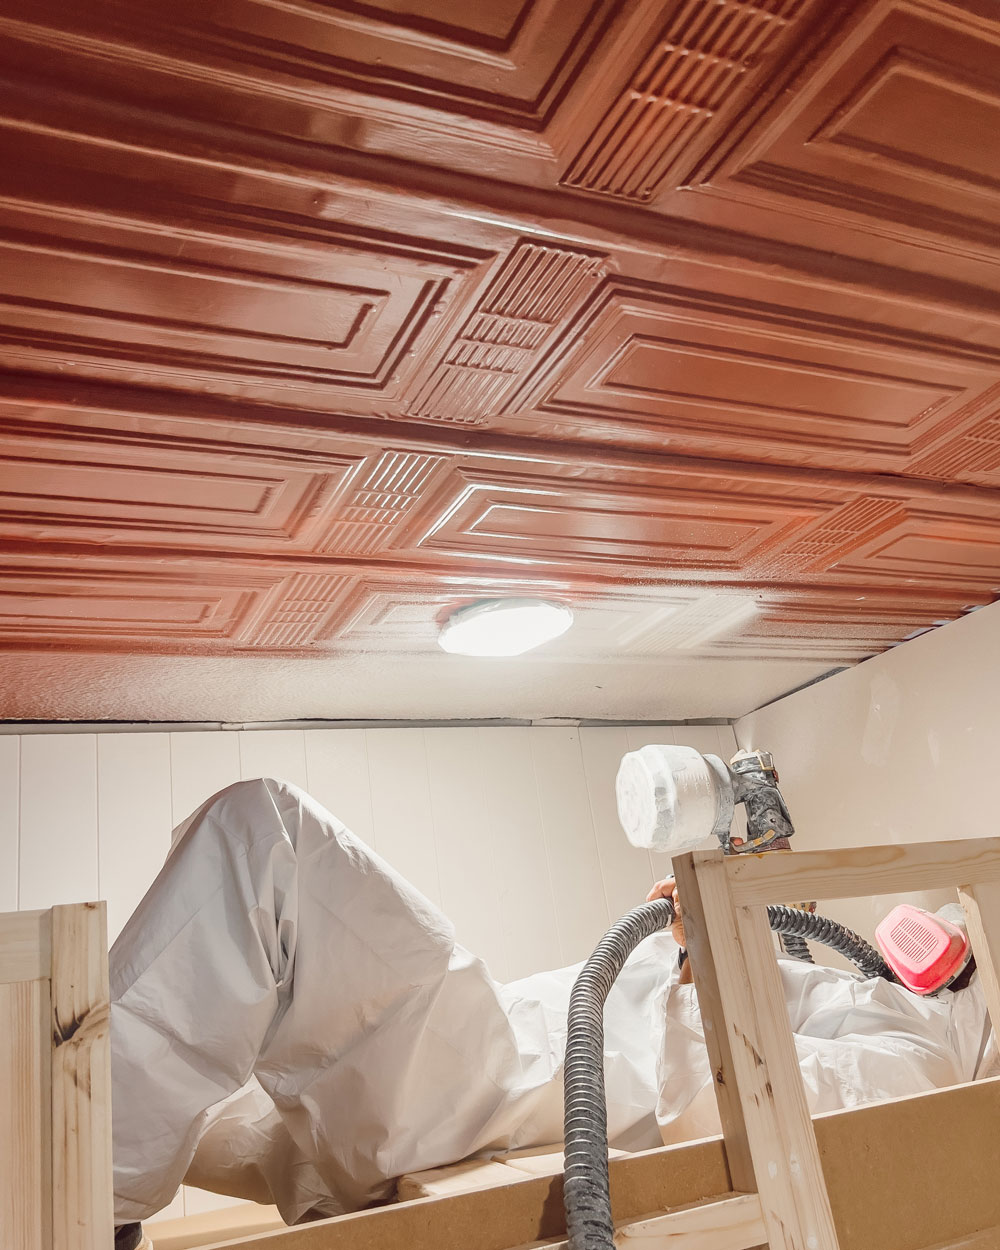
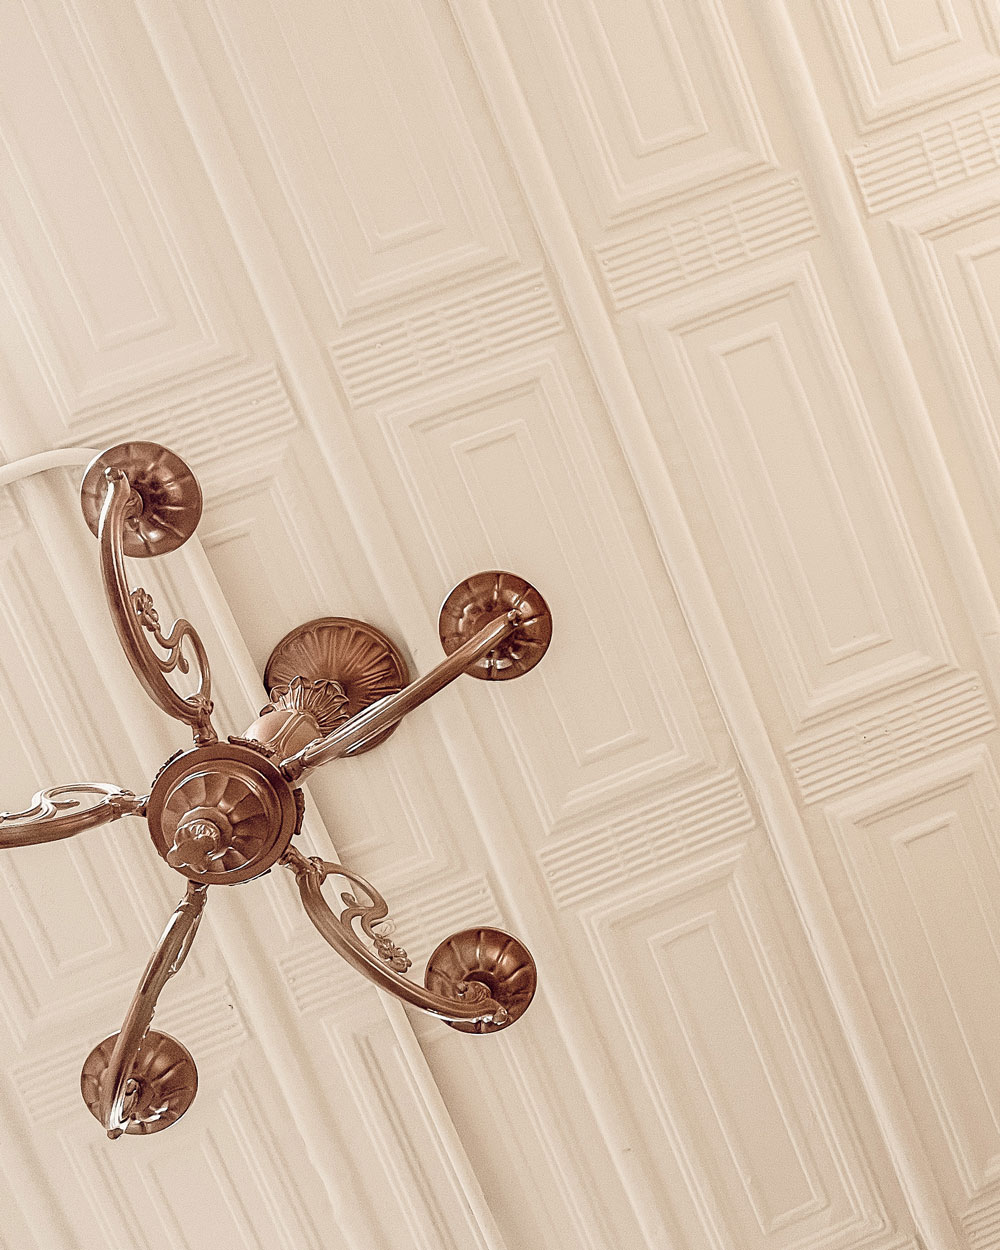
As mentioned above, this is a commercial property (now zoned for mixed-use). This means it does not have designated bedrooms. We have quite literally built Remi’s “big girl bedroom” from the ground up in a portion of the upstairs loft. Now that the walls are up, the closet and bed are built, and the hardwood floors are sanded, it is time to paint the ceiling. The beautiful, crimson red ceiling color works wonderfully in the rest of the building, however, it is just not the vibe in this room. We are painting the walls green and we’re afraid it would look like the holiday season threw up in here. So, as you might have guessed, we’ve decided to paint the ceiling a creamy white color. The historical tin ceilings in this building are worth preserving, and we believe a creamy white color will help accentuate all of the intricate details.

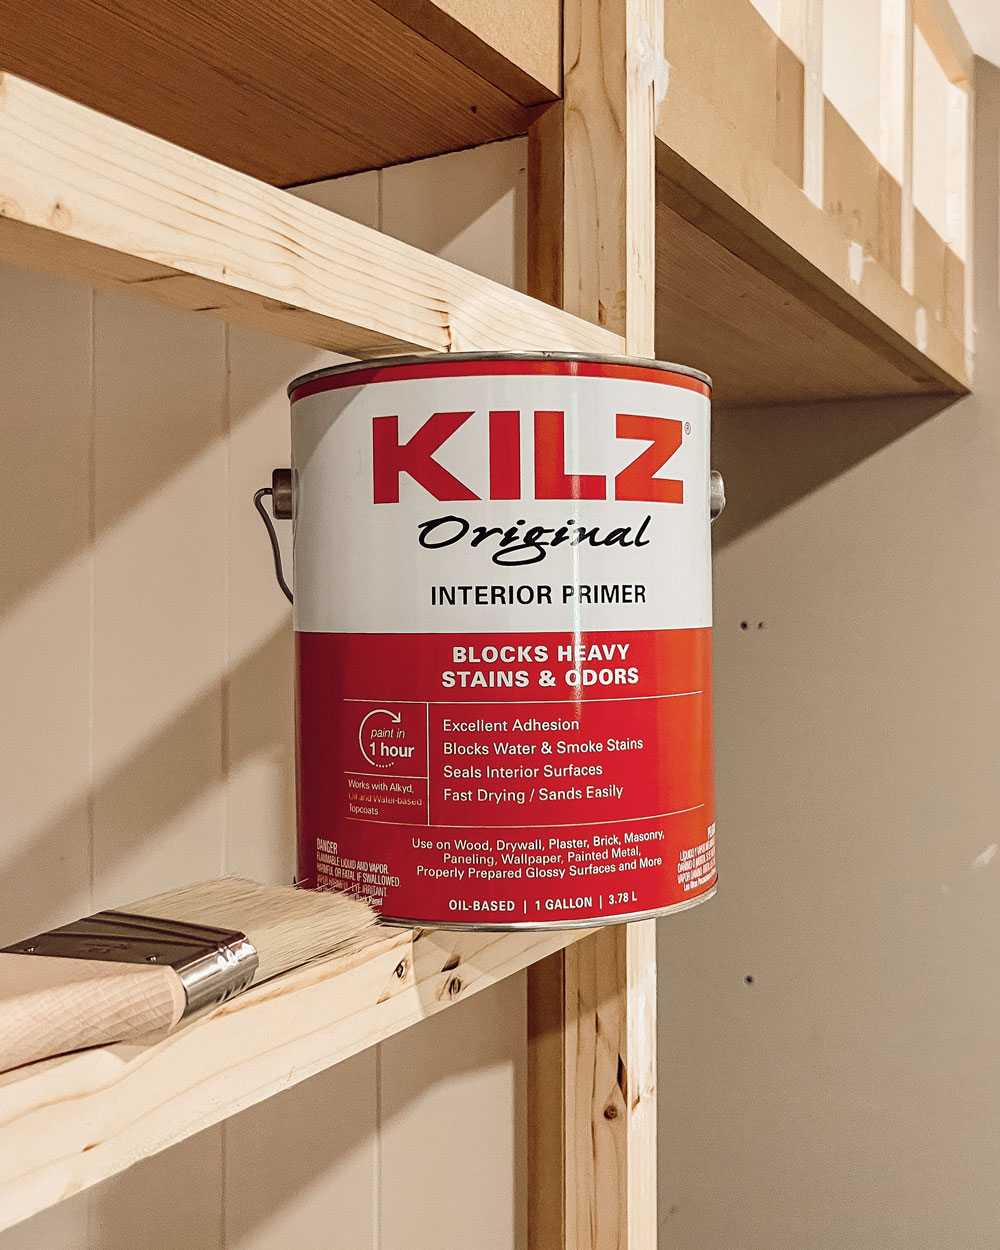
Although the ceilings were previously painted, there are spots where the paint has been chipped or scuffed. Because of this, we need to prime the ceiling with an oil-based primer to prevent the tin from rusting when painted. Priming is fundamental for completing any paint project. It is the difference between a job done and a job done right. Quite simply, primers create an ideal surface coat for the topcoat paint to perform and look its best: paint delivers color and makes that color and beautiful finish last as long as possible, while primers do the “dirty work” underneath. Of course, we would use no other primer on this project than our favorite KILZ Original Interior Primer.
When painting over an existing color, thick, high-hide primer formulas like KILZ Original Interior Primer are important for preparing surfaces, blocking color bleed-through, and covering surface imperfections. And believe us, these 100+-year-old tin ceilings have some imperfections!
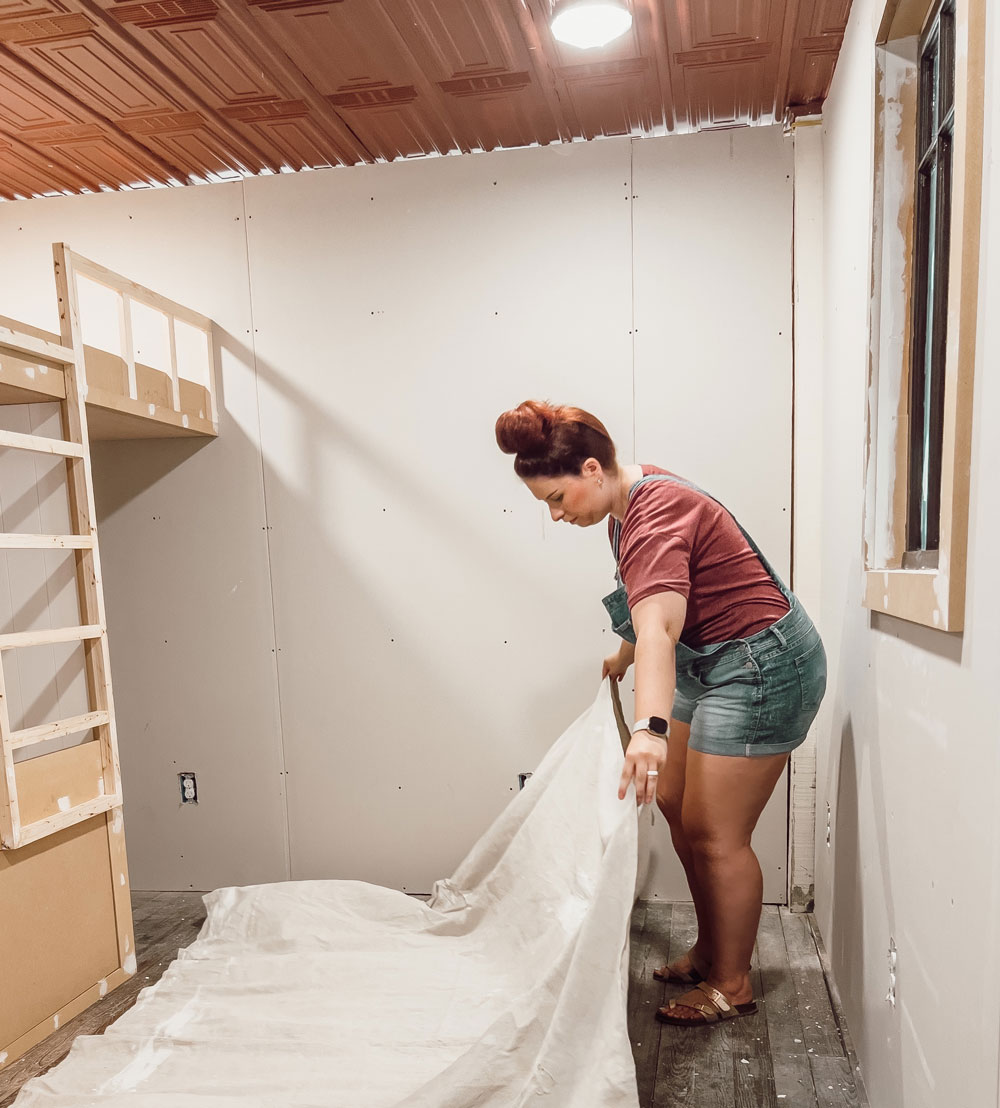
First things first, we need to cover the recessed lighting with plastic bags and lay drop cloths over the hardwood flooring. We will be spraying the primer over some areas that also need to be primed (like the walls and bed), so there is no worry of overspray on these areas.
We always, always make sure to stir KILZ Original Interior Primer before painting because it is very common for the ingredients to separate while sitting in the can.
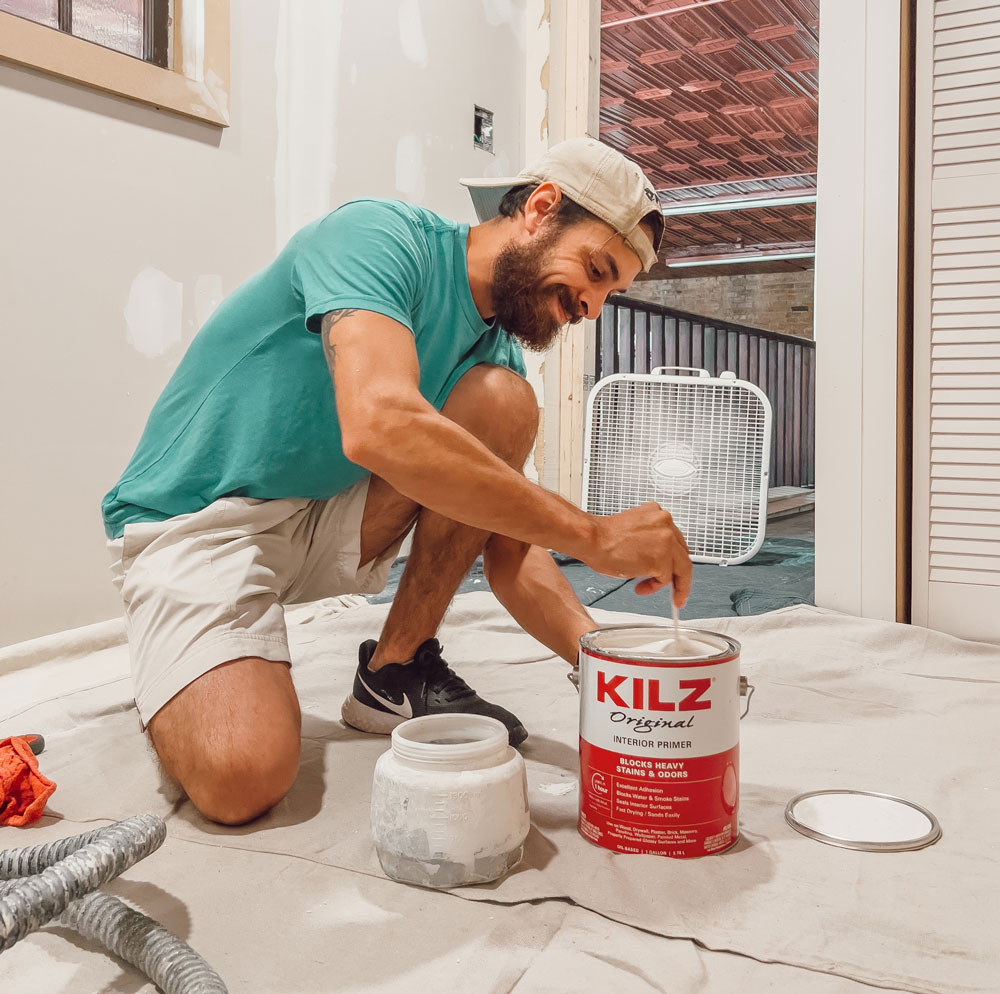
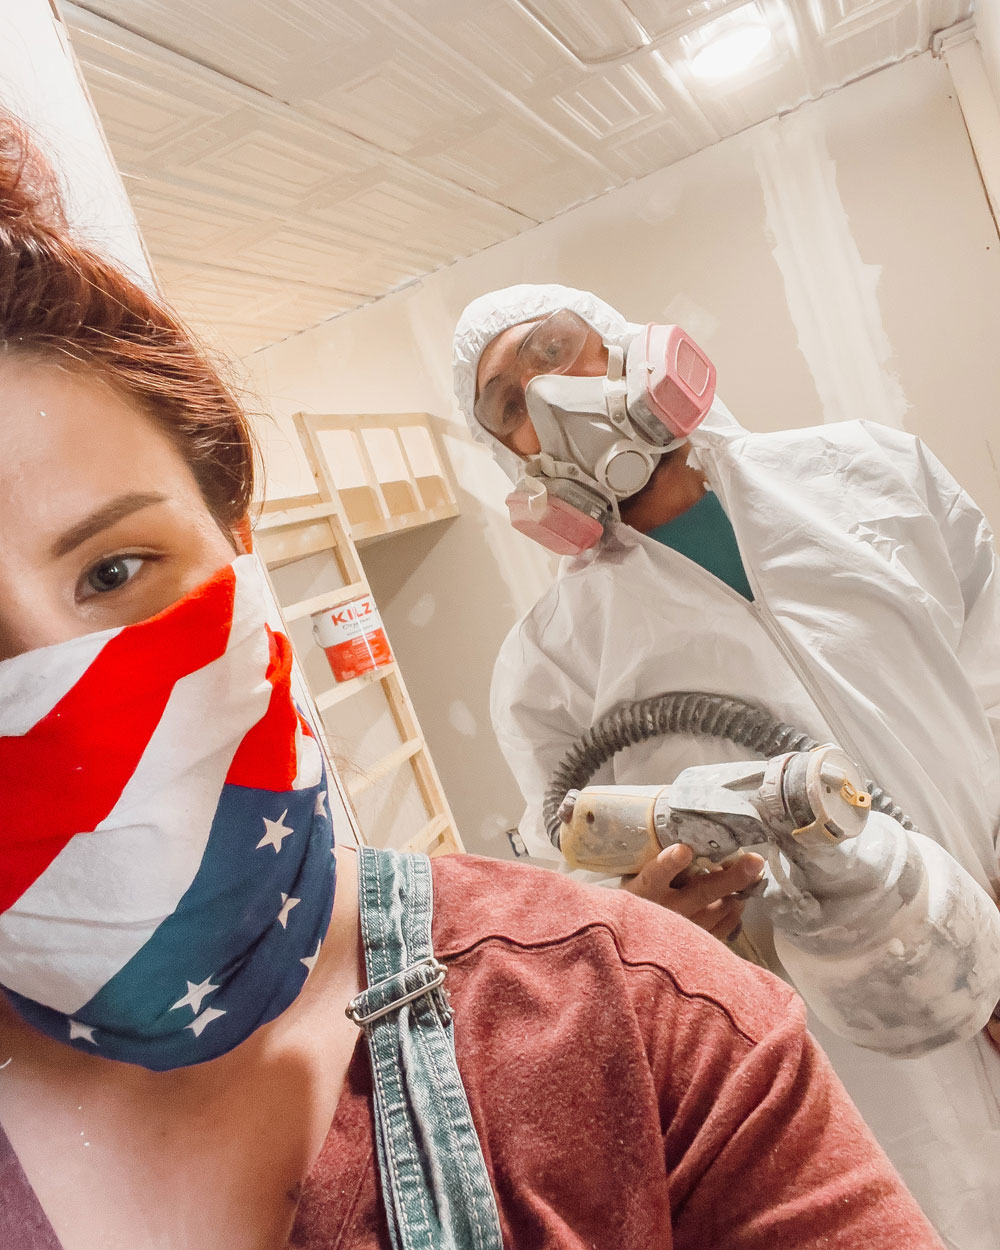
Now that our primer is stirred and the bedroom is fully prepped and ready, it is time to start painting. Always be sure to use proper PPE when painting with oil-based paint. We like to gear up with a face respirator mask, a hooded paint suit, and protective eyewear.
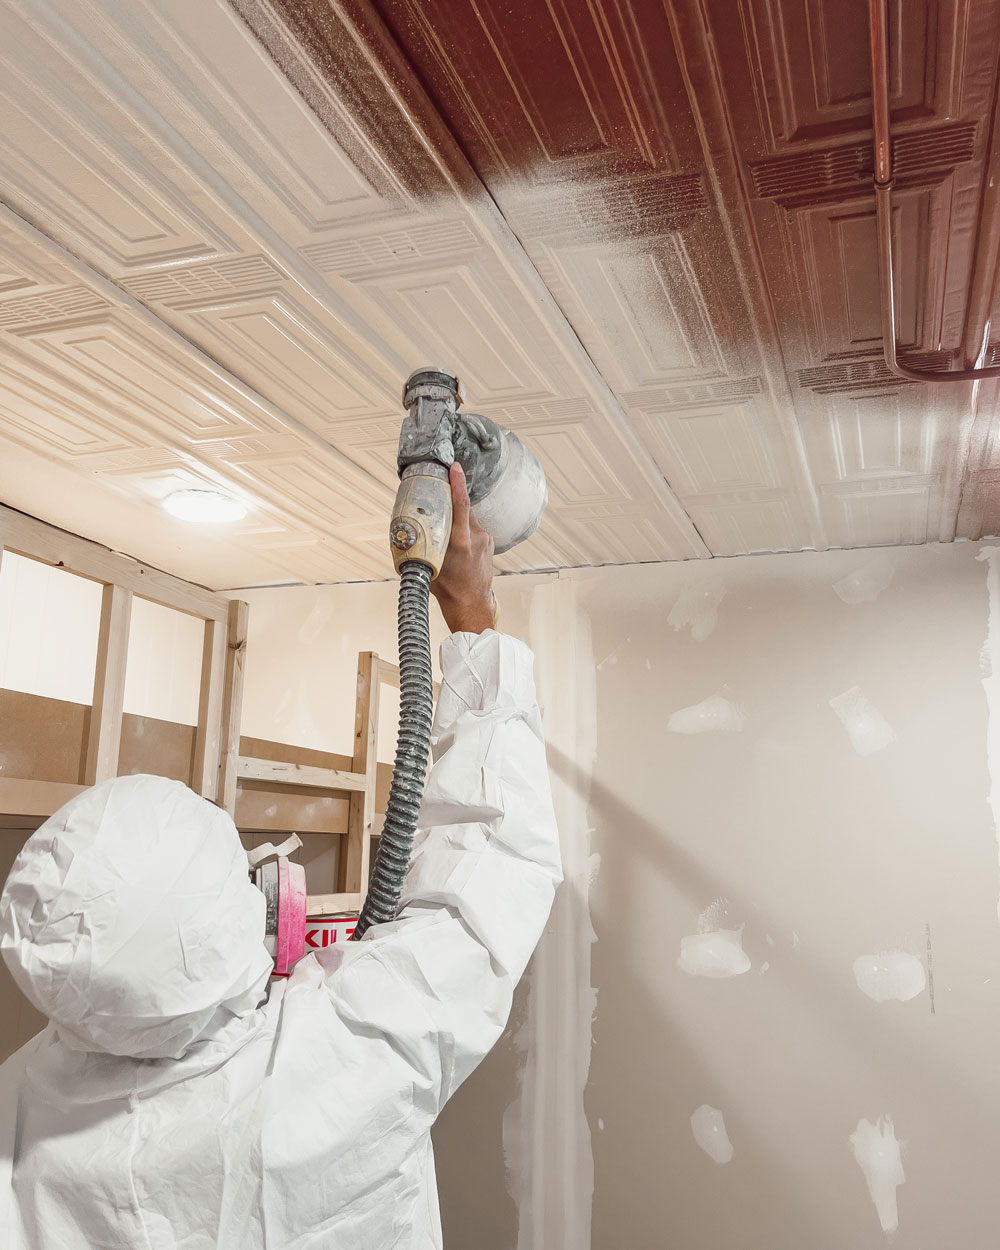
We have found that slow and steady is the best method for even coverage with KILZ Original Interior Primer. It dries quickly, but not so quickly that the process needs to be rushed. Back and forth motions are the easiest way to get in all the grooves of this super detailed tin ceiling.
And without further ado…drumroll, please… it is time for the final reveal of the painted tin ceiling!
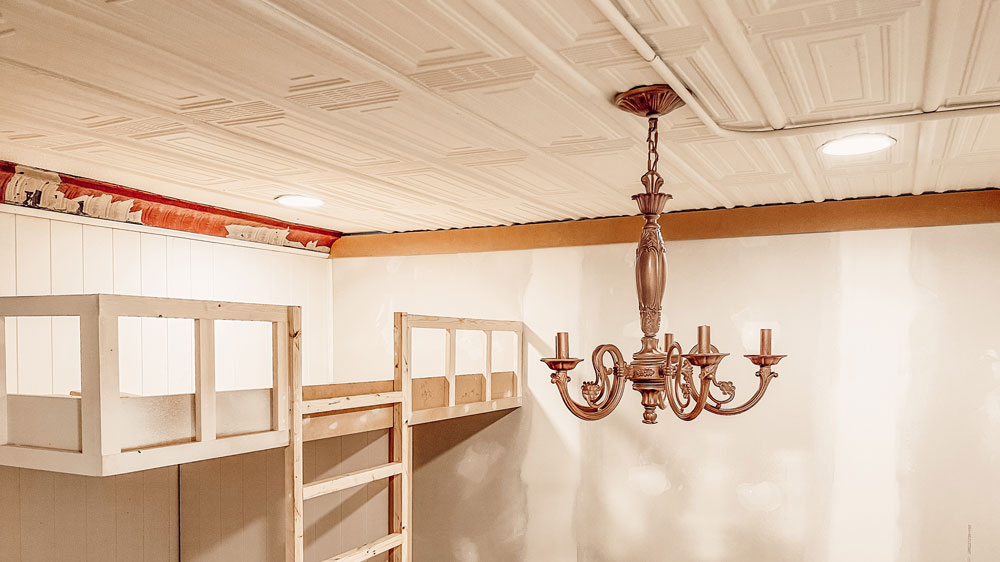
We finished this project by coating the primer with Behr Premium Plus Interior Ceiling Flat paint in the shade Warm Marshmallow. The ceiling now has a soft, warm glow to it, and all of the scuffs, scratches, and imperfections are covered. We could not be happier with this finish. If you have ever wanted to paint a tin ceiling of your own, KILZ Original Interior Primer. is the way to go. It can be used on wood, drywall, plaster, paneling, wallpaper, masonry, brick, painted metal, and properly prepared glossy surfaces. It is, however, not recommended for mold or mildew-prone surfaces or flooring. You can learn more about preparation, application, and product specifications HERE.
Thank you for following along on this project!
Kenny & Kate
*This is a paid partnership with Kenny and Kate
Always remember to refer to our website kilz.com or product back labels for additional information on which primer is right for your project and detailed instructions on how to apply our products. Check out our Coverage Calculator to understand your estimated paint needs for your upcoming project.
RELATED ARTICLES
get inspired:
FOLLOw us:
@kilzbrand
SHOP
PRODUCTS
Kids Room Refresh with Oak Hill Millworks
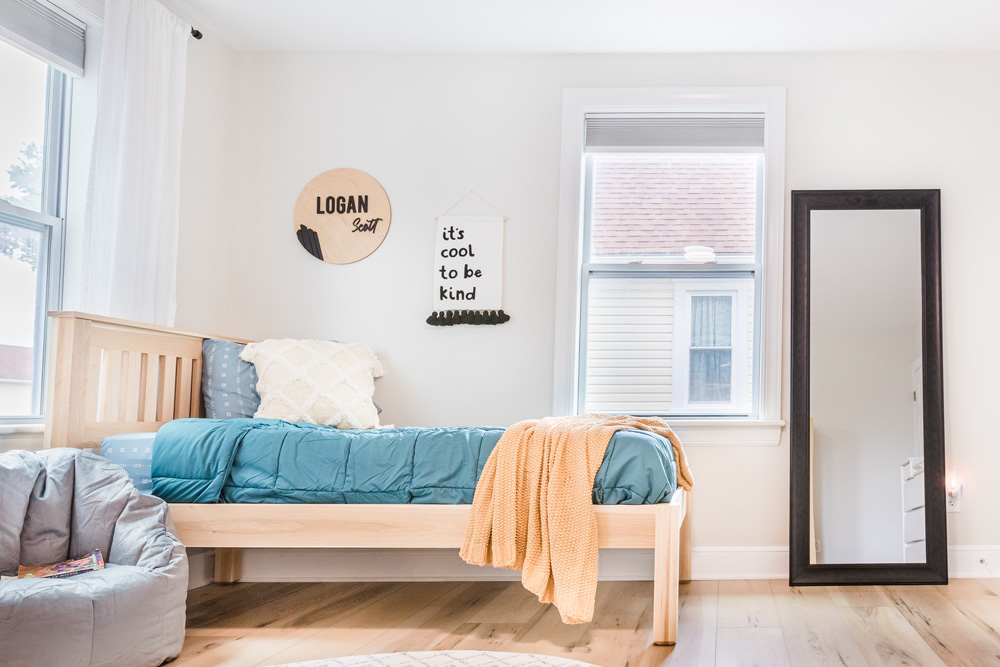
August 10, 2022 What’s up, guys? Christy here with Oak Hill Millworks and today I am recapping a home renovation project that I just wrapped up for my kids! Before we dive into the details, let me introduce myself. I am a small business owner in New Brighton, PA and my family is relocating to Kokomo, Indiana.
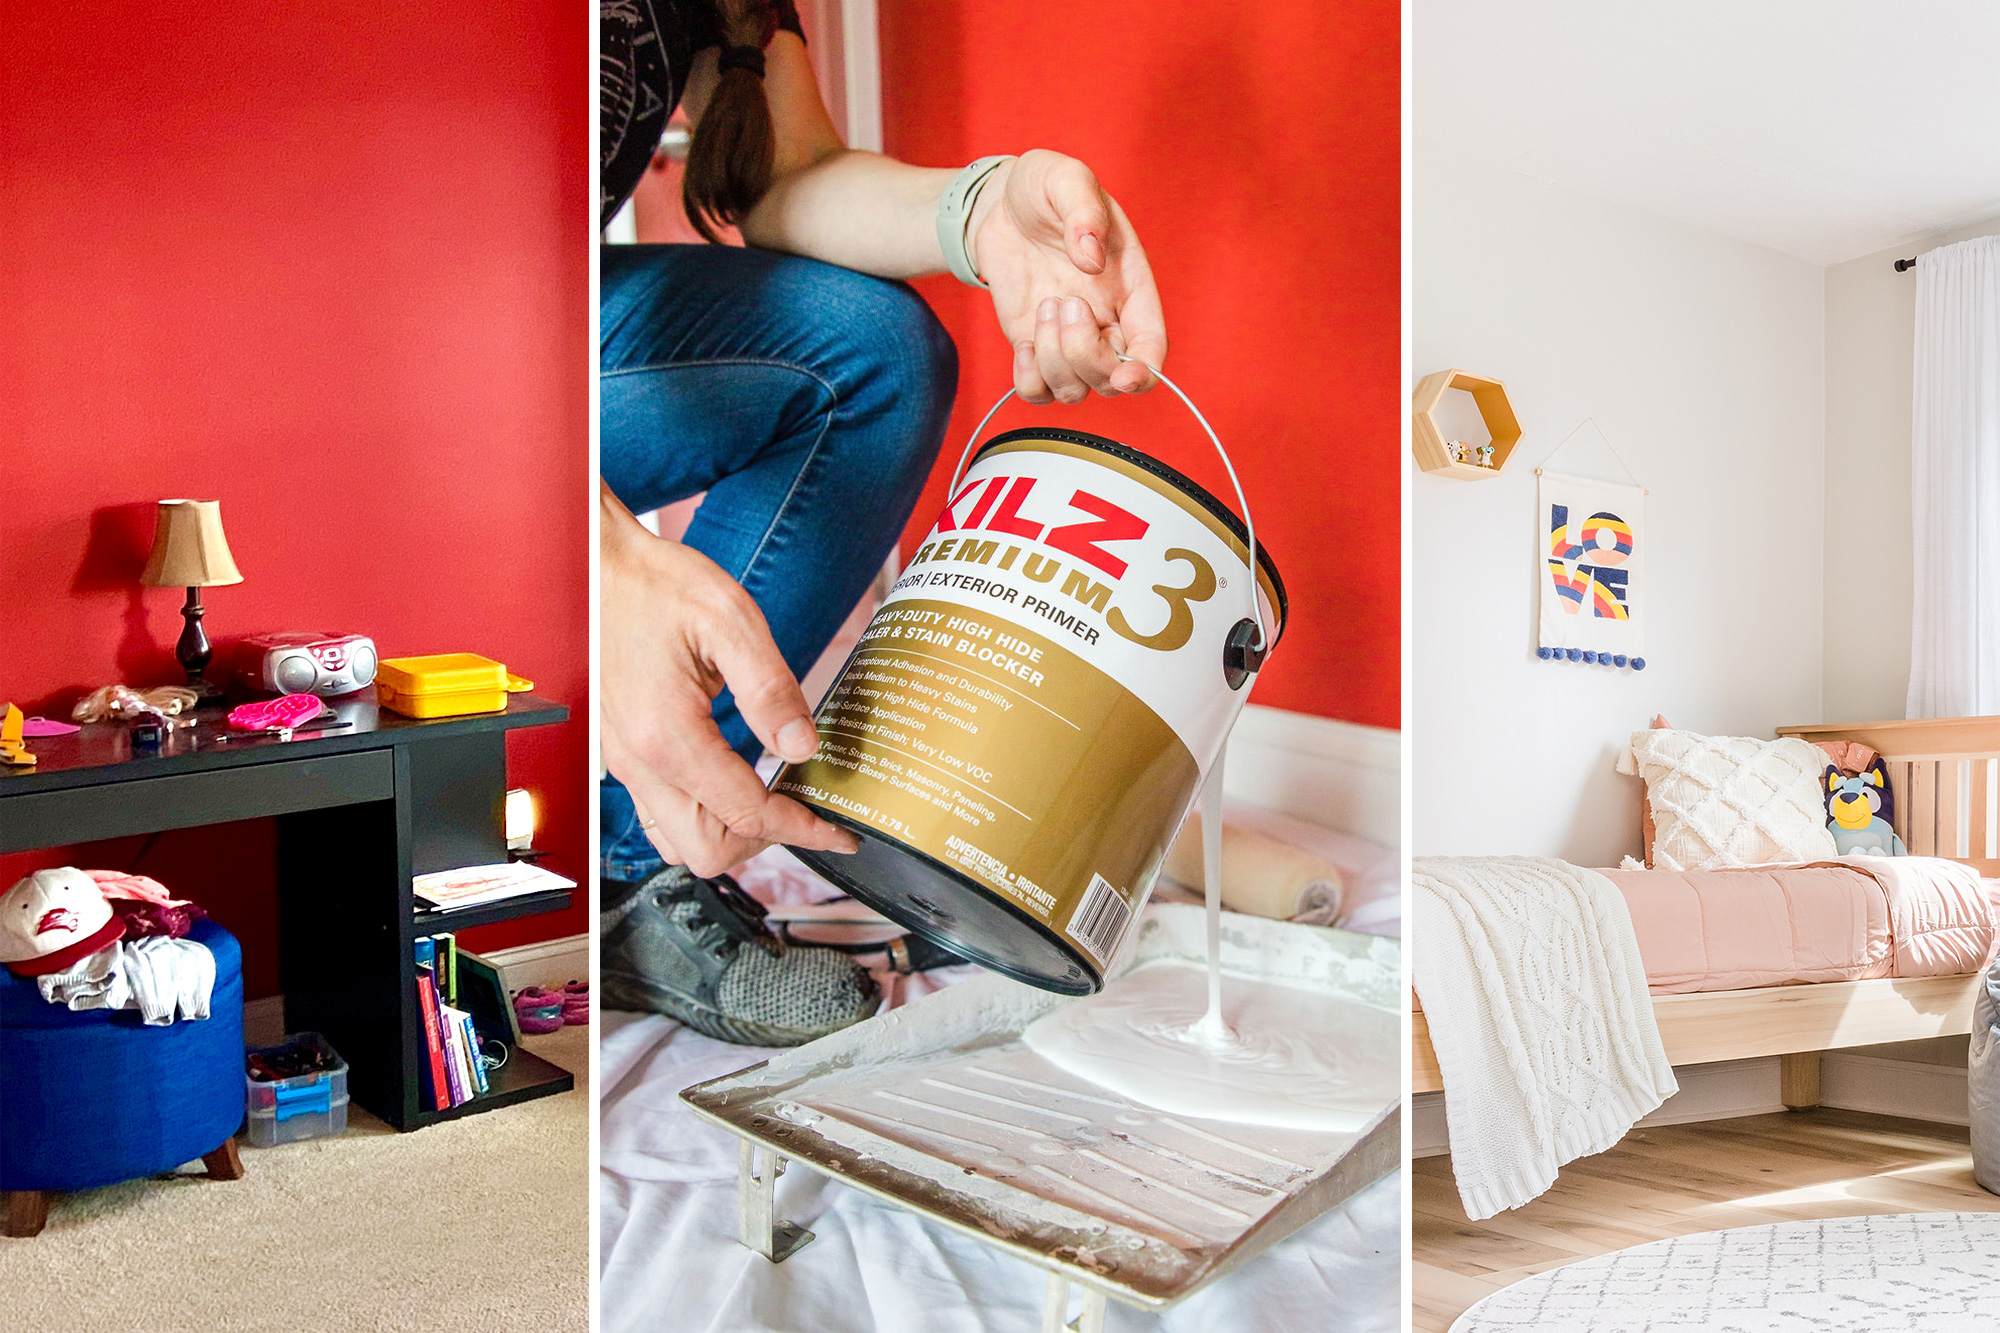
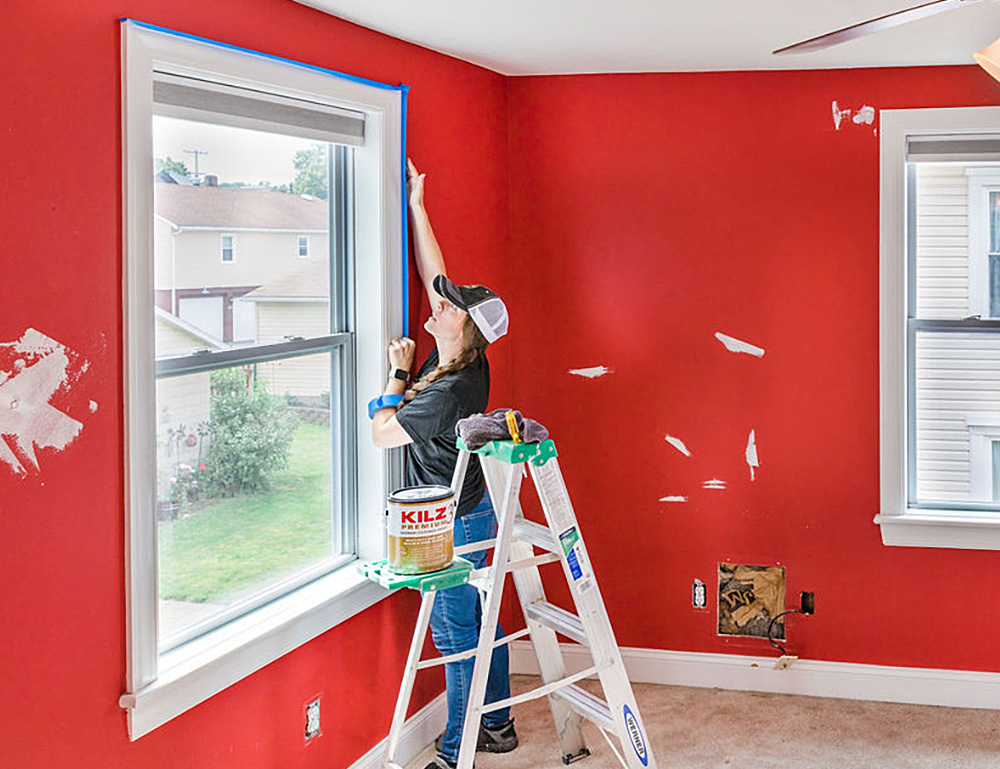
So, I recently found myself wanting to brighten my kids’ room up and expand it a bit. Are any fans of demolition reading this? Our house had a 2′ x 3′ foot bump out in the corner of the kids’ room, and we knew there was a chimney behind it. We assumed it was leveling off in the attic, considering there wasn’t a chimney coming out of the roof. I went against my better judgment and started what should have been a simple refresh with primer and paint with demolition instead.ͭ
ͭ Behr Paint Company strongly recommends the use of highly skilled professionals when undertaking a project that requires demolition.
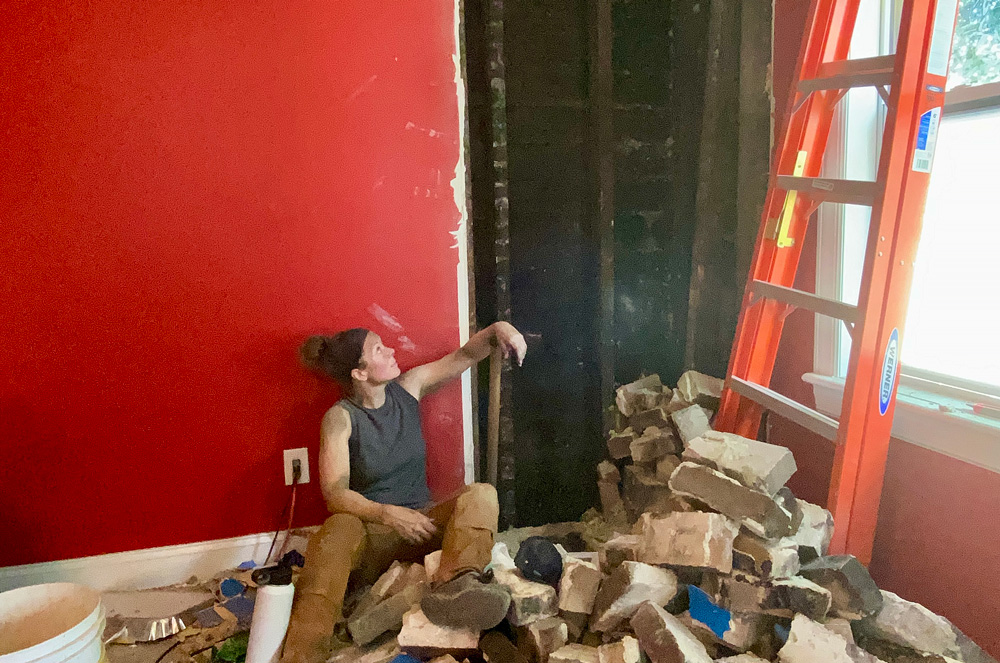
Was it worth it to go through all that manual labor to gain an extra 6 square feet of floor space in their room? I vote yes! I love to challenge myself and taking a chimney out on your own, reframing a wall, hanging new drywall, and finally doing the FUN DIY work of painting was a great challenge for me to say the least. Once I finally got the room cleaned up and the walls wiped down, it was time to prep for primer!
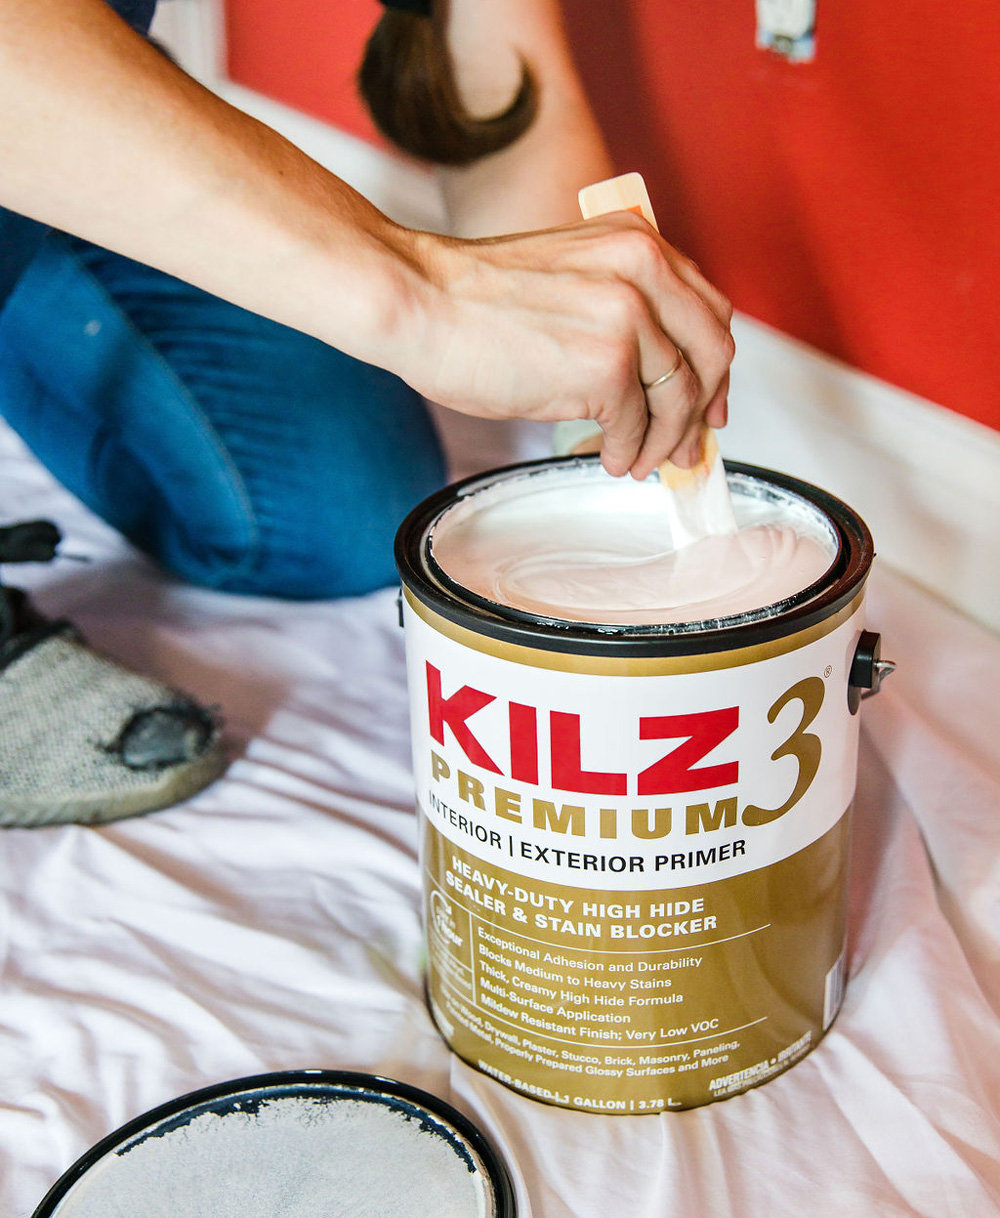
The dark red walls needed a high-hide primer formula to prevent color bleed-through and, because of its thicker formula, help fill in any small dimples or imperfections in the wall. For the majority of the room, I chose KILZ 3® Premium Primer to get the job done well, rather than just getting the job done well enough.
Priming is foundational for any painting project for good adhesion and just in case you missed things like pencil marks or greasy fingerprints when you were cleaning your walls at the beginning, KILZ 3 Premium Primer will act as a stain-blocker to prevent those marks from showing up.
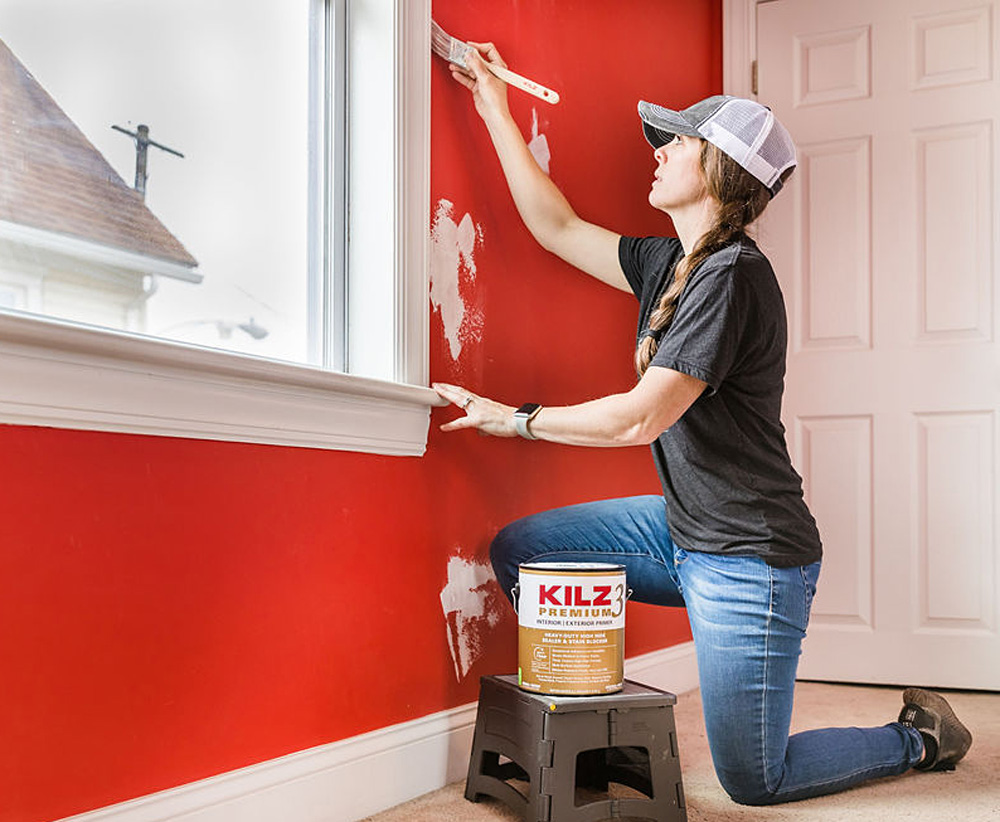
My room prep this time around was minimal, I taped around windows since I tend to go rogue with my rollers! I did not use drop cloths because I knew I was also going to rip out the carpet and install new flooring, otherwise I would 100% recommend drop cloths. I almost ALWAYS spill paint one way or another!
After rolling on 2 coats of KILZ 3 Premium Primer, it was time to see the room take shape by painting with BEHR® Premium Plus Interior paint in Silver Drop. I have always felt that painting a room is truly the best and most cost-effective way to really allow a space to become something new. A great tip, if you are rolling paint on, is to wrap your roller in inters’ tape and then unwind it and watch some fuzzies come loose — this prevents those fuzzies from getting in your topcoat! Beyond that, though, don’t skimp on the roller. Spend a couple of extra bucks and get a nicer one; you won’t regret it. It truly does make a difference in the finish.
Drumroll please… here it is!
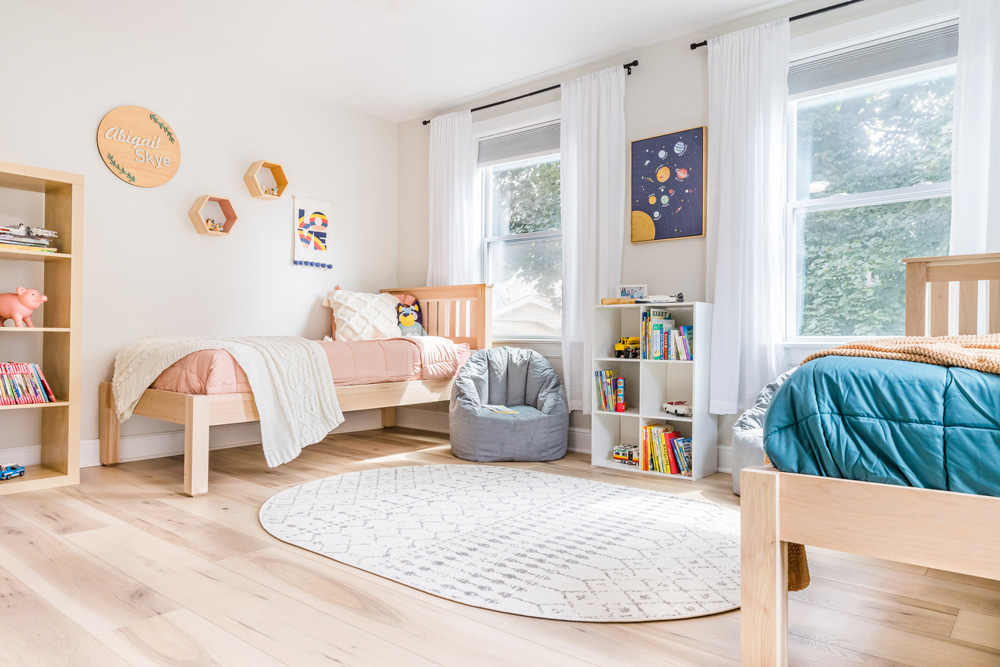
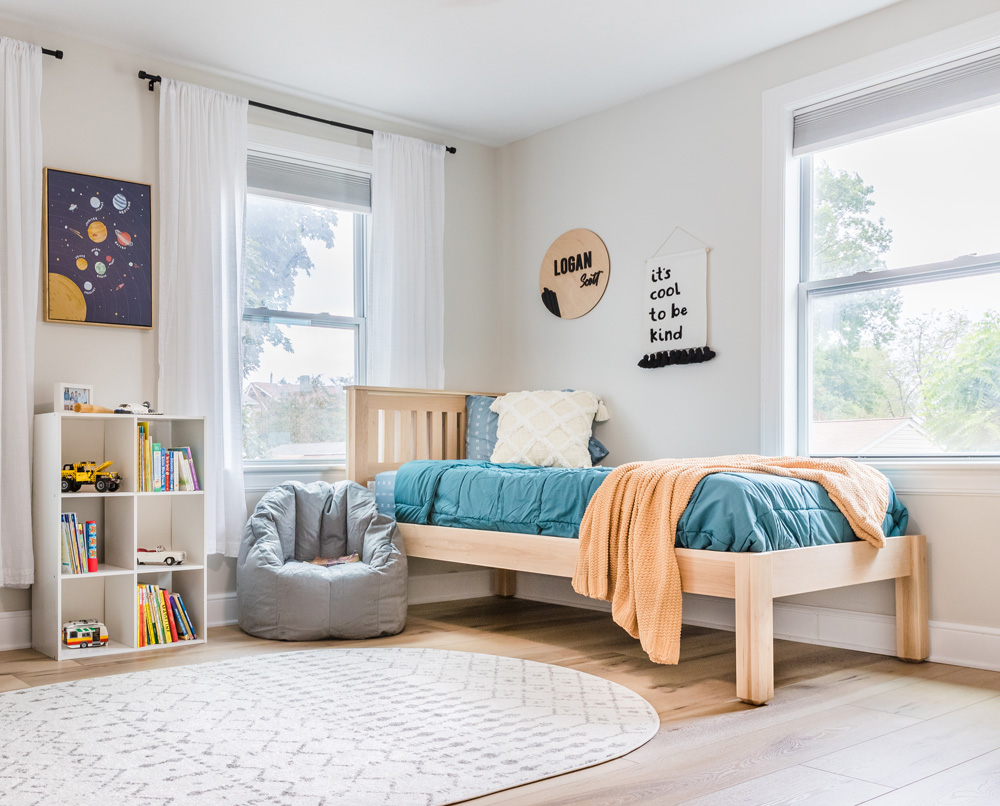
Priming was a necessary step to block that deep red color from breaking through since we went so light on the topcoat color. Not priming could cost you time and money in the long run, so don’t skip that step. I am so happy with how this room remodel turned out. Although I did some major renovations to add to the overall transformation, priming & painting were ESSENTIAL in making it look like a brand new, light & bright space.
Doesn’t it look so much bigger too? Hard to deny that primer is key for Instagram-worthy photo finishes. Time to chalk this one up as a win and get started planning my next DIY project! Cheers!

*This is a paid partnership with Oak Hill Millworks
Always remember to refer to our website kilz.com or product back labels for additional information on which primer is right for your project and detailed instructions on how to apply our products. Check out our Coverage Calculator to understand your estimated paint needs for your upcoming project.
RELATED ARTICLES
get inspired:
FOLLOw us:
@kilzbrand
SHOP
PRODUCTS
Restore a Timeless Home with KILZ® and Leanne Ford
August 1, 2022Here on the Perfect Finish, we sat down with top designer Leanne Ford to chat about her restoration to the exterior of her 120-year-old home in Pittsburgh. Using KILZ 3® Premium Primer and exterior paint from the BEHR® MARQUEE® Designer Collection palette, Leanne’s goal is to restore all the exterior spaces of her home to their natural original beauty.

“My husband and I bought an old historical home from 1900 and I loved it had been set empty for almost five years before we moved in, and it was totally magical. It was waiting for us. And it’s this beautiful old historical home that I really felt drawn to save and fix up and take it back to its glory.” – Leanne Ford
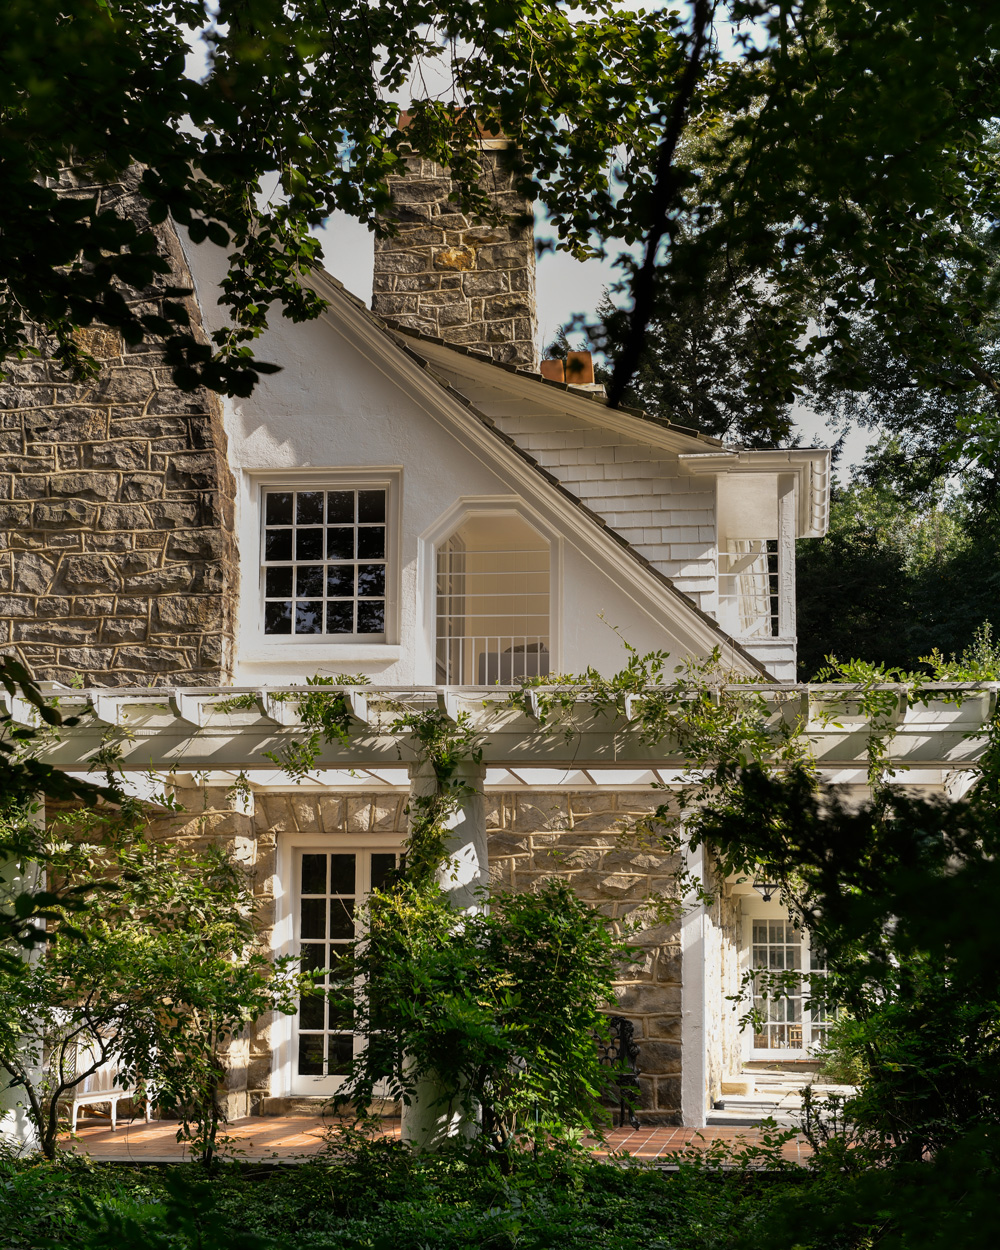
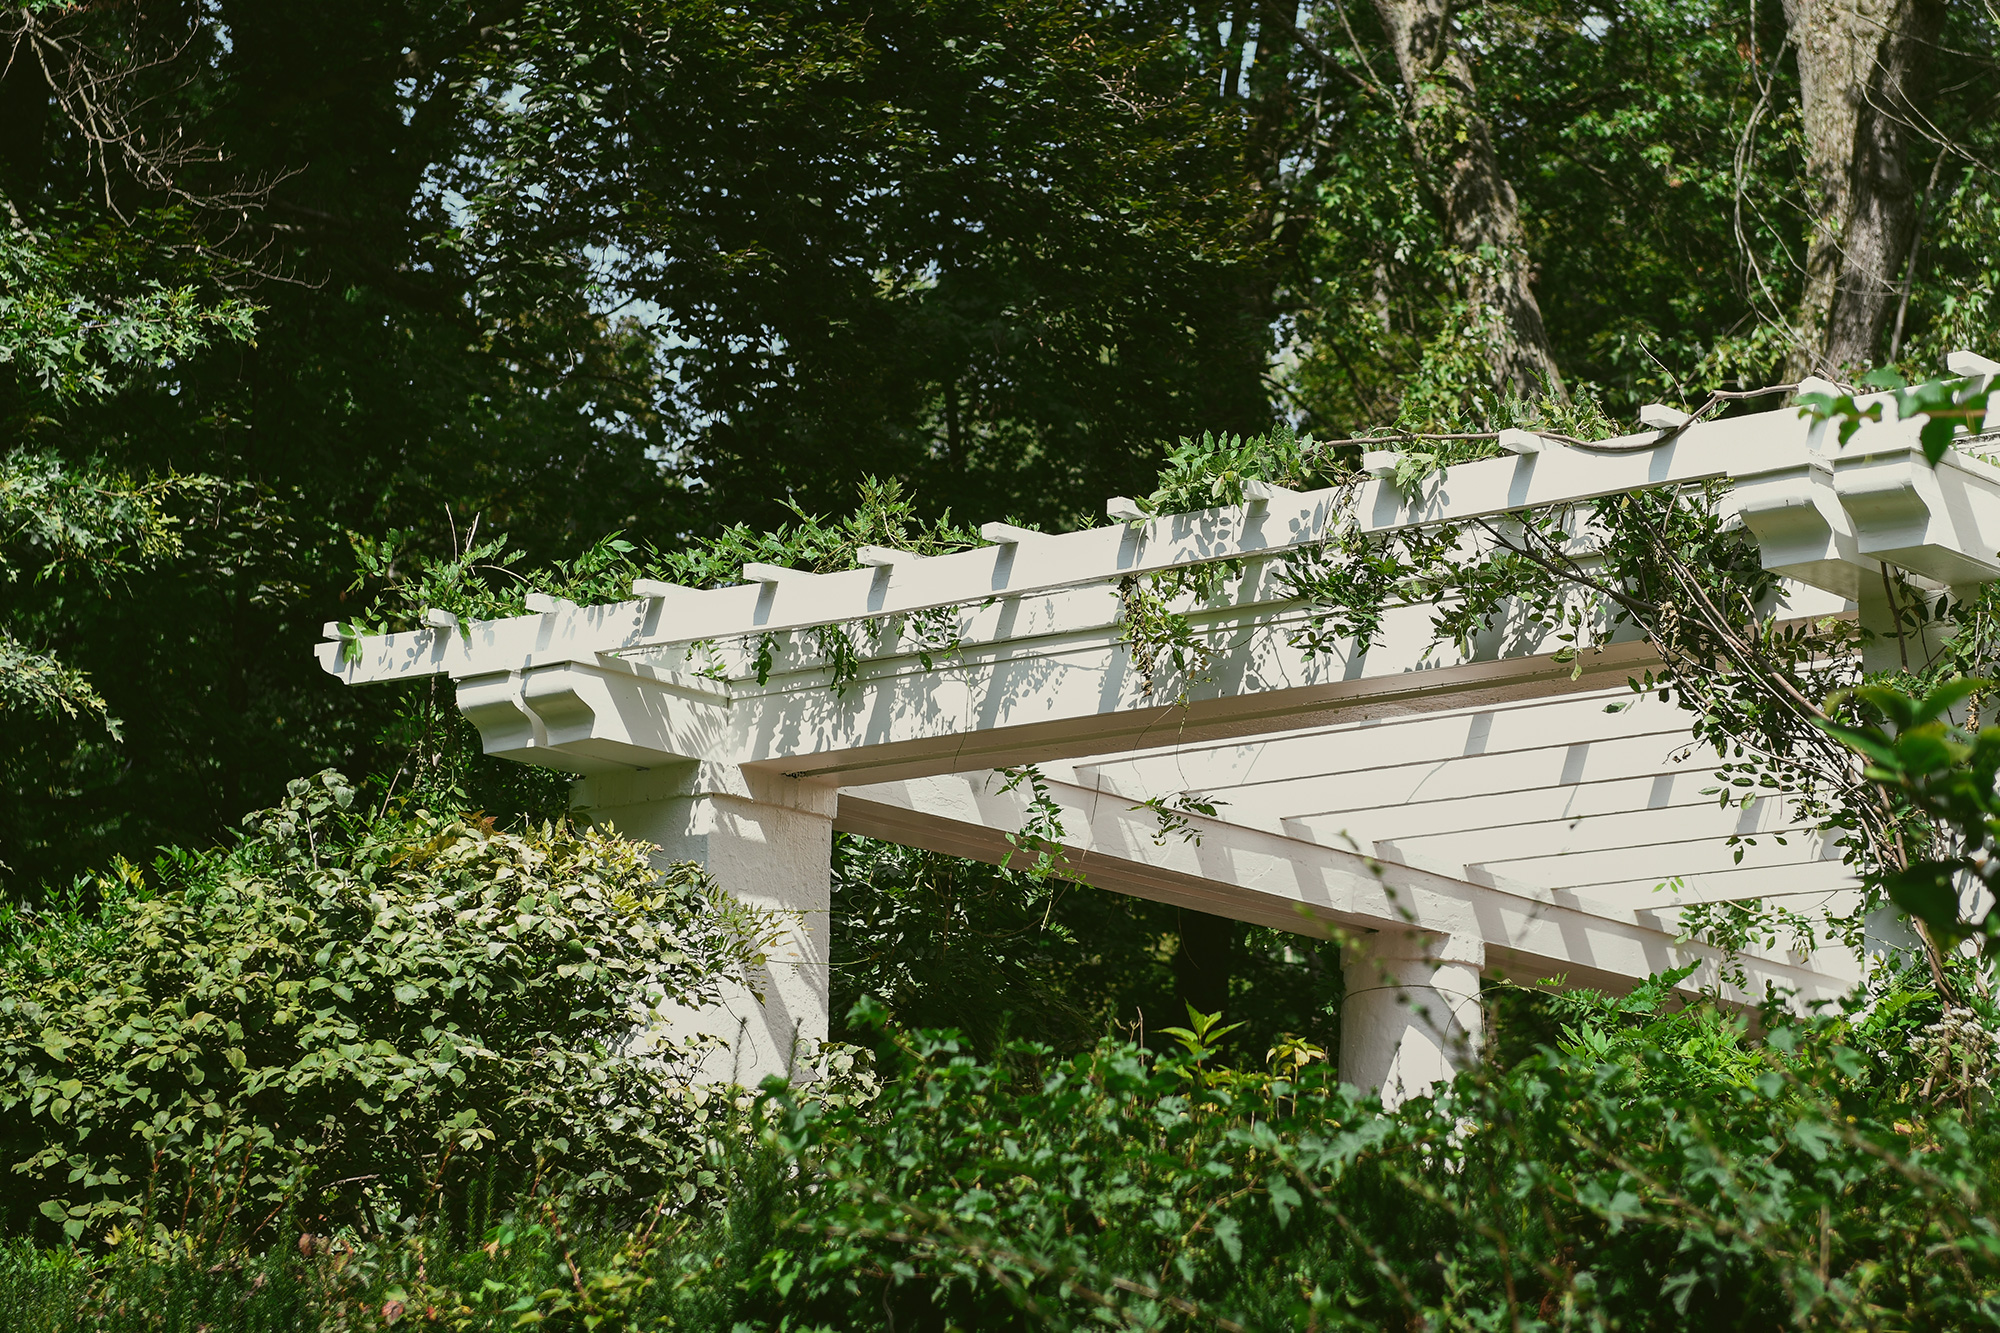
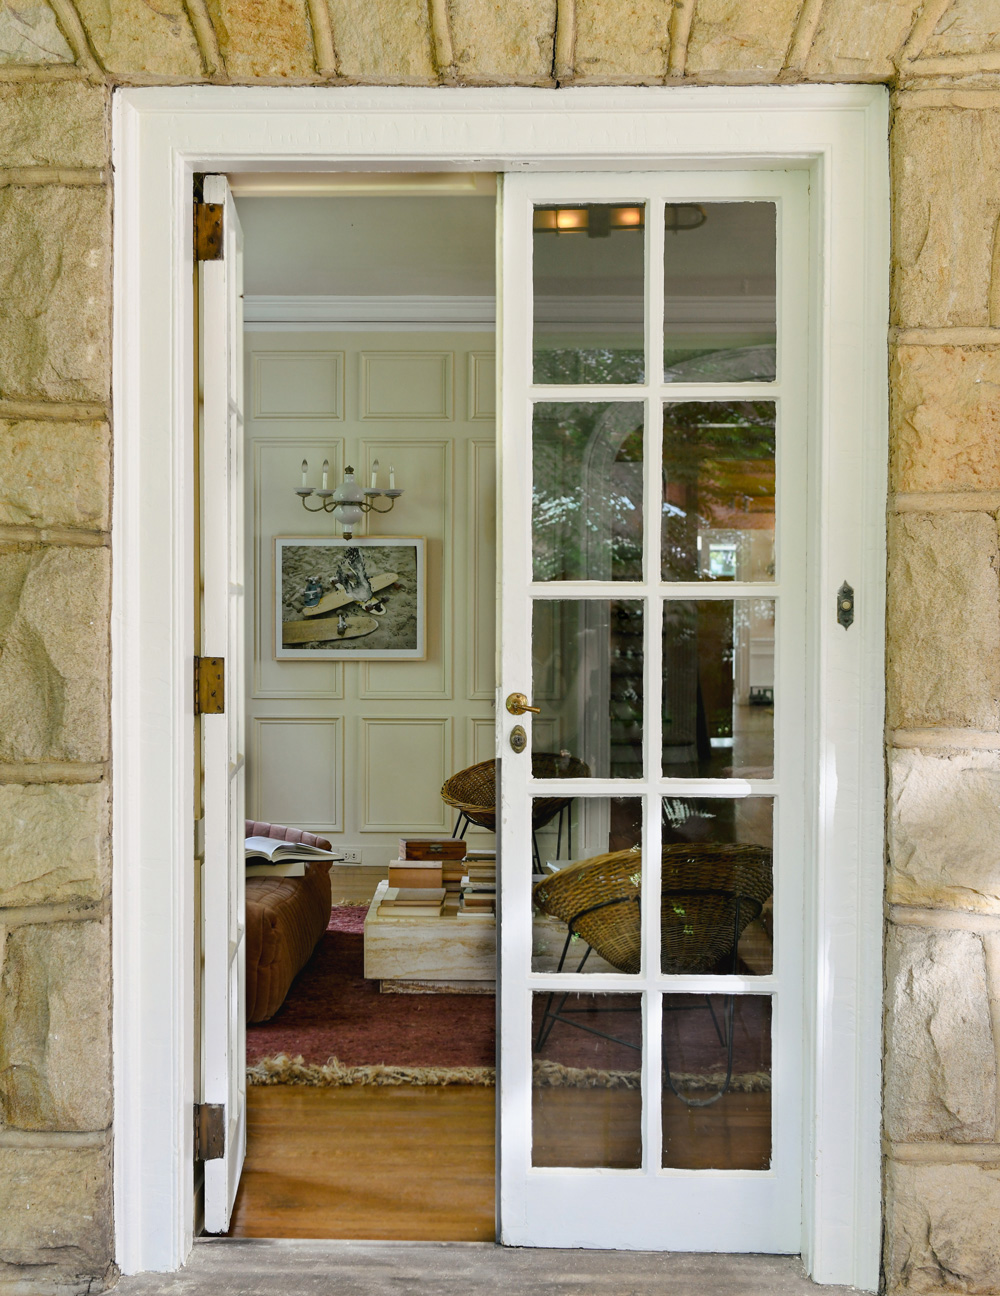
Built in 1900 by celebrated architectural icon, Charles Barton Keen, this home is punctuated with gorgeous exterior elements, wooden windows, pergolas, archways, and columns, all waiting to be brought back to life.
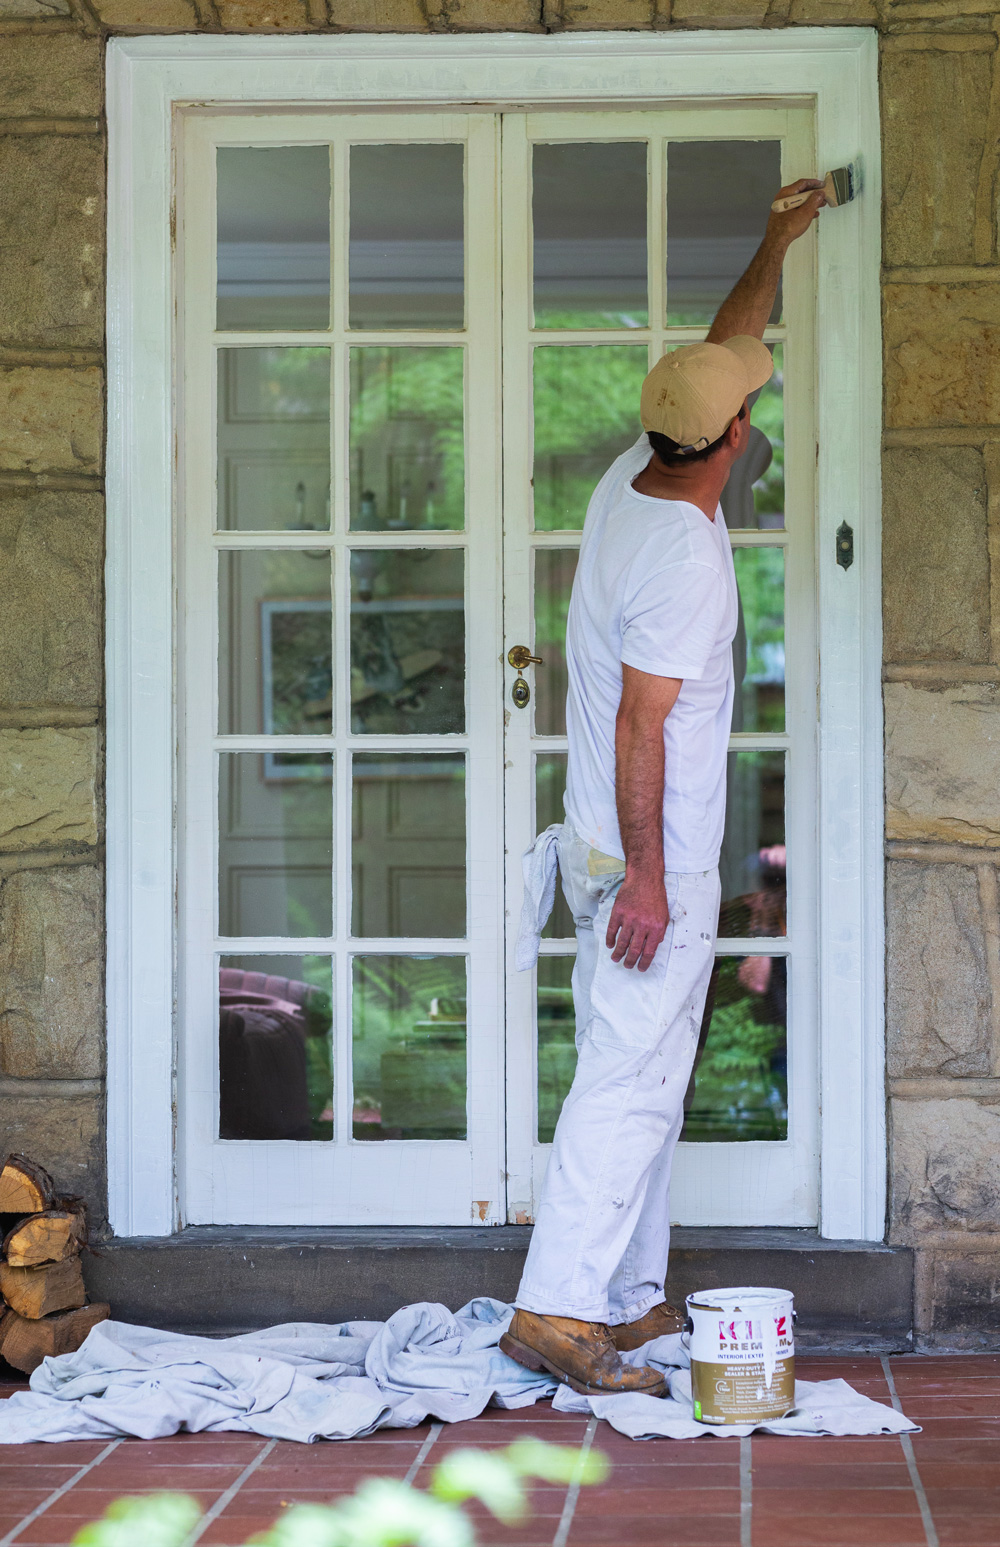 “I’m trying to hone in on what the architect’s plan was for this home, what the people that built it, what their plan was for the home. So, we’re really just doing primer and paint on the window and all the woodwork on all the doors, which is exciting. This home is 120 years old and we’re only the third owner. So, I do feel a duty to keep it beautiful.”
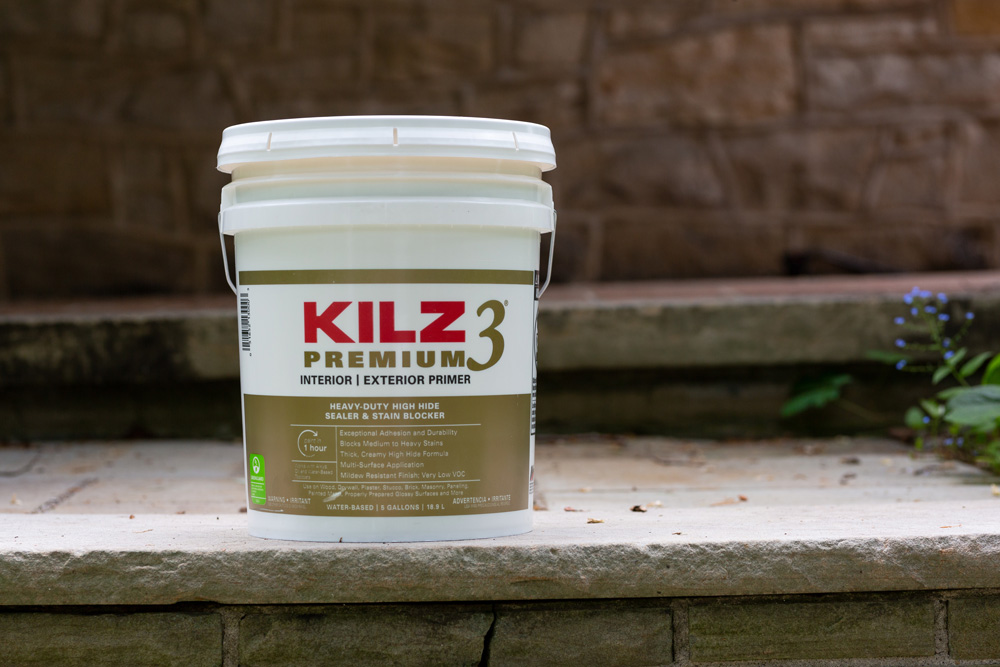
To save as much as possible of the exterior, there are structural elements that need some love. To start, Leanne chose KILZ 3® Premium Primer, a versatile and heavy-duty interior and exterior primer, that will create a clean canvas for new color. She emphasizes the importance of tackling a restoration like this right from the start, which includes choosing the right products for long-lasting results.
“The outside of your house is a big job, and I’m trying to do this and not do it again for a long time. So, I’m getting the best primer. I’m getting the best paint. I want to do it right. And I want it to last. First, we’re going to do KILZ 3 Premium Primer and we’re going to put it on all the surfaces and really, it’s going to make it a beautiful clean canvas for the paint.” – Leanne Ford
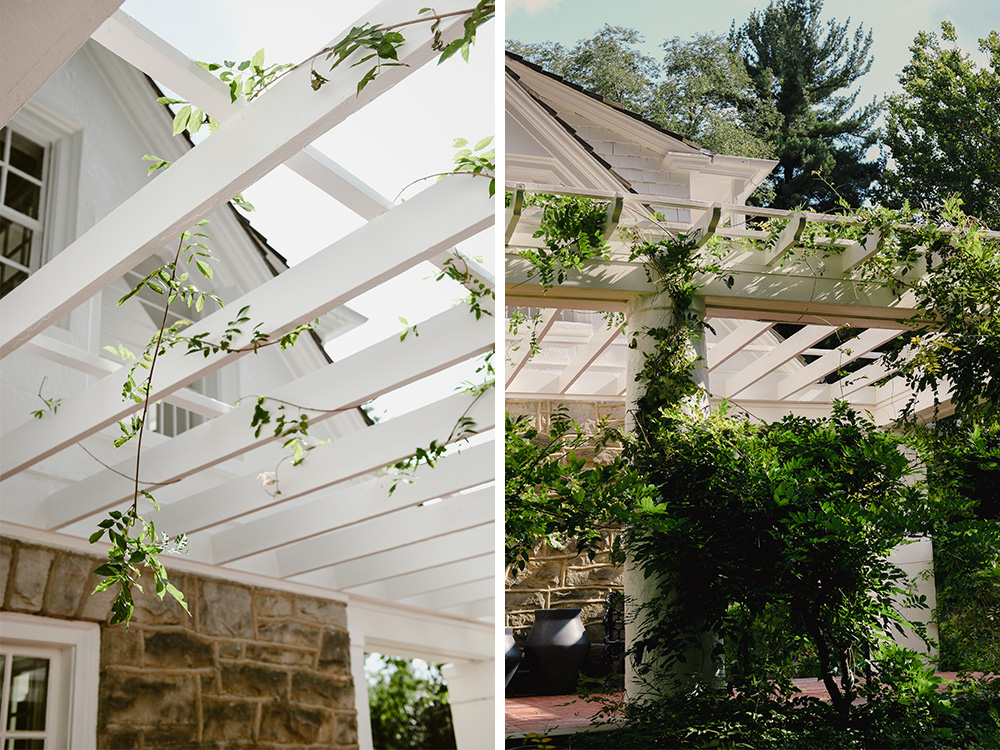
The Pergola

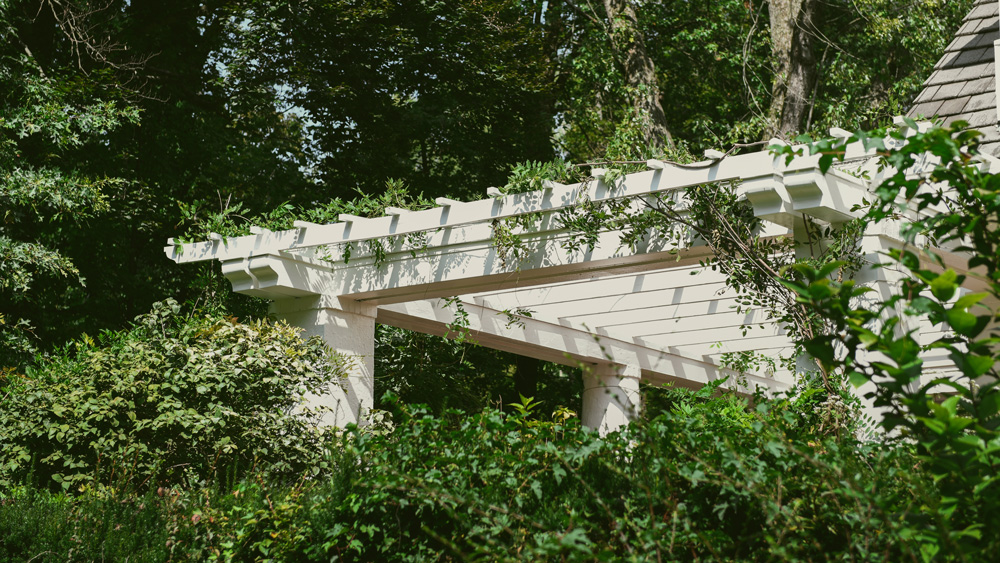
“This house is all about the outside. It’s all about the garden, and it’s all about the pergola, and it’s all about the sunroom. This house is made for sitting outside and looking at this beautiful building.”
The current state of the exterior proves the home has withstood many decades of weathering. To refresh this historic structure, KILZ 3 Premium Primer ensures that porous surfaces are evenly sealed; scuffs and blemishes are hidden, stains that could otherwise show through or bleed through the paint are blocked and sealed-in and odors are neutralized. Reminder, it’s always important to clean and prep any surface appropriately, including exteriors, prior to applying a fresh coating.
The Windows
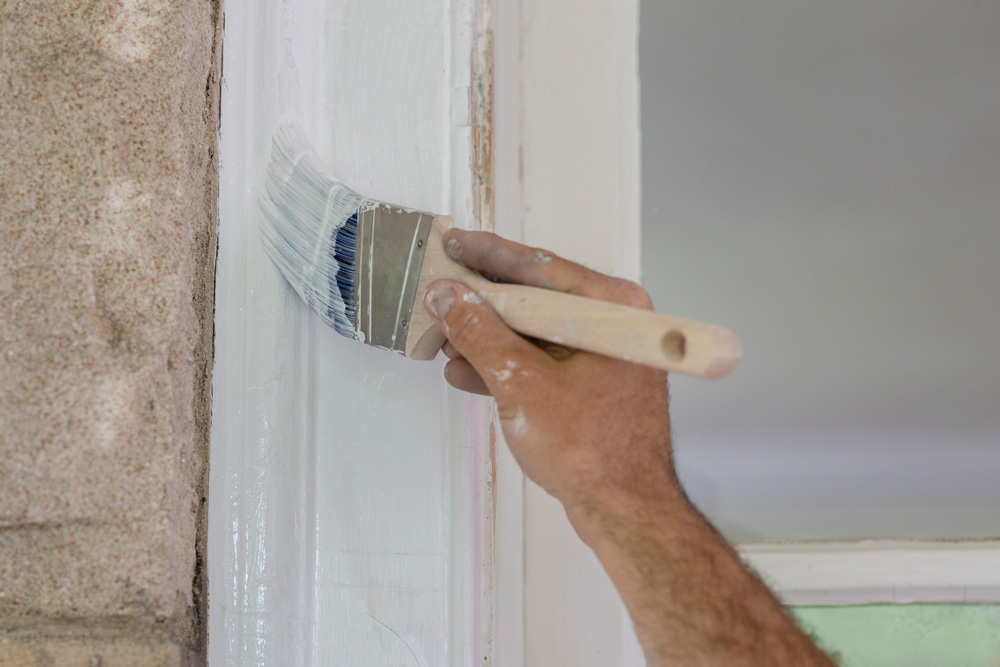
“My big thing is the windows and the doors and the wood. I don’t want these windows to look brand new. I wanted them to look clean and give them a fresh life.”
KILZ 3 Premium Primer creates a clean slate for the new color to show as intended. These windows pay homage to the age of the home and restoring them with KILZ 3 Premium Primer allows for the new topcoat to have a long life.
The Stucco
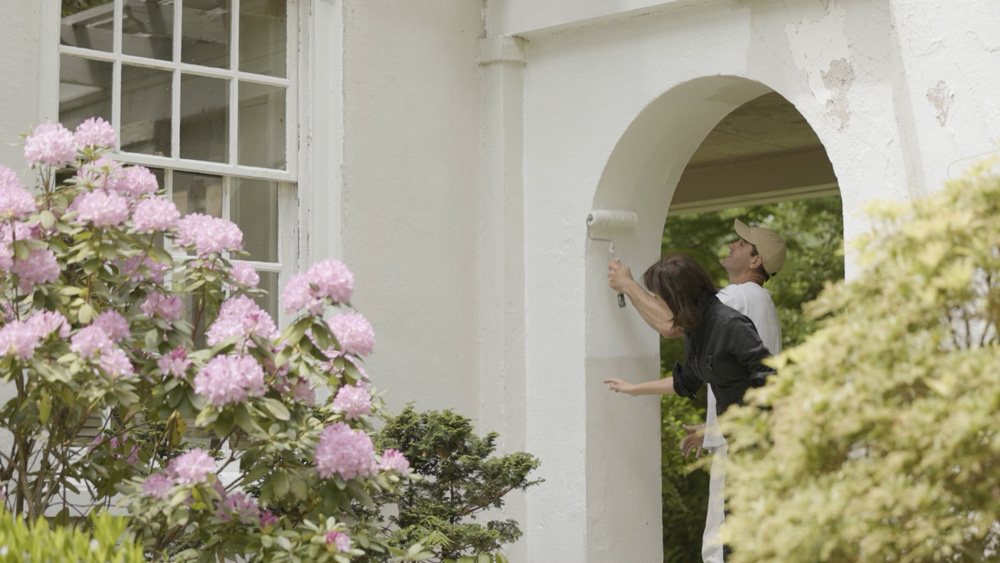
Much of the home is engulfed in stucco and it’s just as important to refresh and restore. After a thorough power wash, the adhesion from KILZ 3 Premium Primer will act as an anchor for the topcoat of paint to ensure it stays on the surface and prevents peeling while remaining flexible enough to handle the weather.
Once primed, and ready to go, the topcoat color can be applied. Leanne chose BEHR MARQUEE in Natural White from the new Designer Collection palette. This is a soft and timeless shade, a perfect fit for this home restoration. The BEHR Designer Collection is a palette full of tried-and-true designer-approved white, neutral, and accent colors.
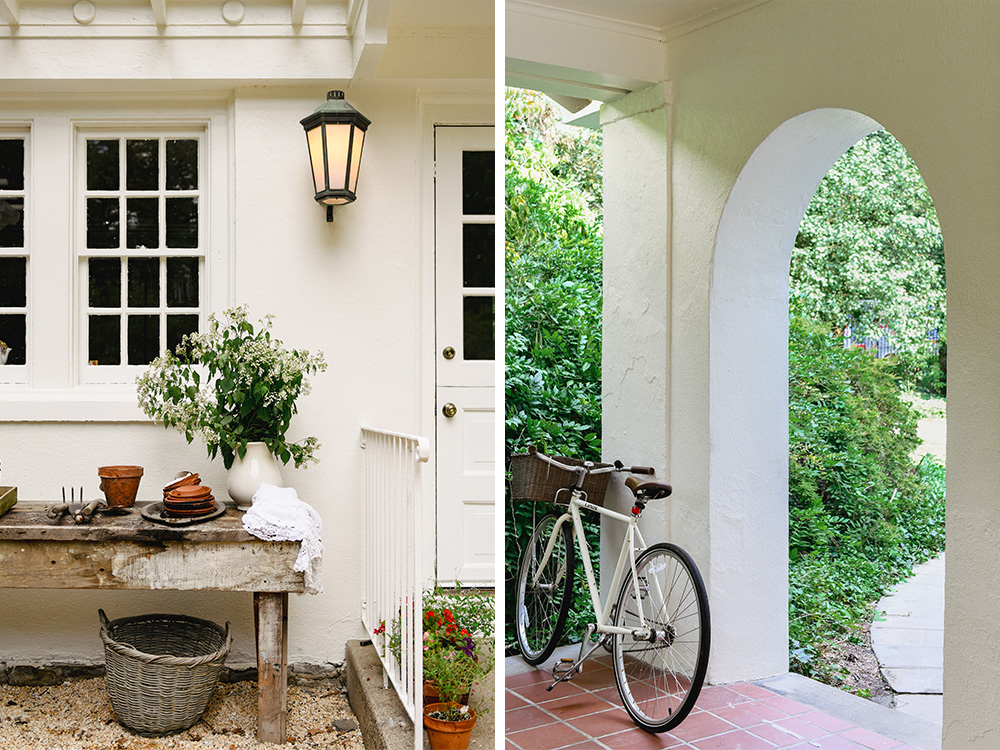
“This home will be perfect for many dinner parties and family celebrations outside in the garden, admiring this historic home’s natural beauty. Walking to the backyard with a refreshed stucco archway and the new ivy growing on the pergola make the garden feel like a secret oasis for family and guests to enjoy. I envision having a very long life here. This is my last house.” – Leanne Ford
This is a paid partnership with Leanne Ford.
Always refer to our website kilz.com or product back labels for additional information on which primer is suitable for your project and detailed instructions on how to apply our products. Check out our Coverage Calculator to understand your estimated paint needs for your upcoming project.
RELATED ARTICLES
get inspired:
FOLLOw us:
@kilzbrand
join the conversation:
SHARE this post: