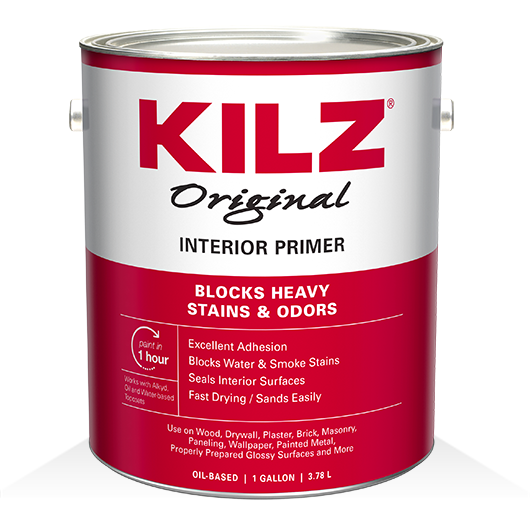
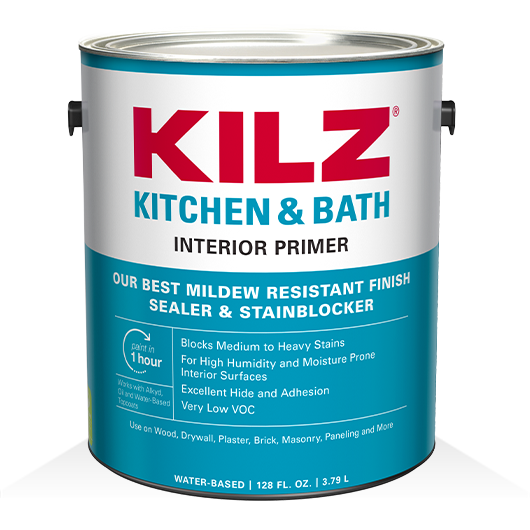
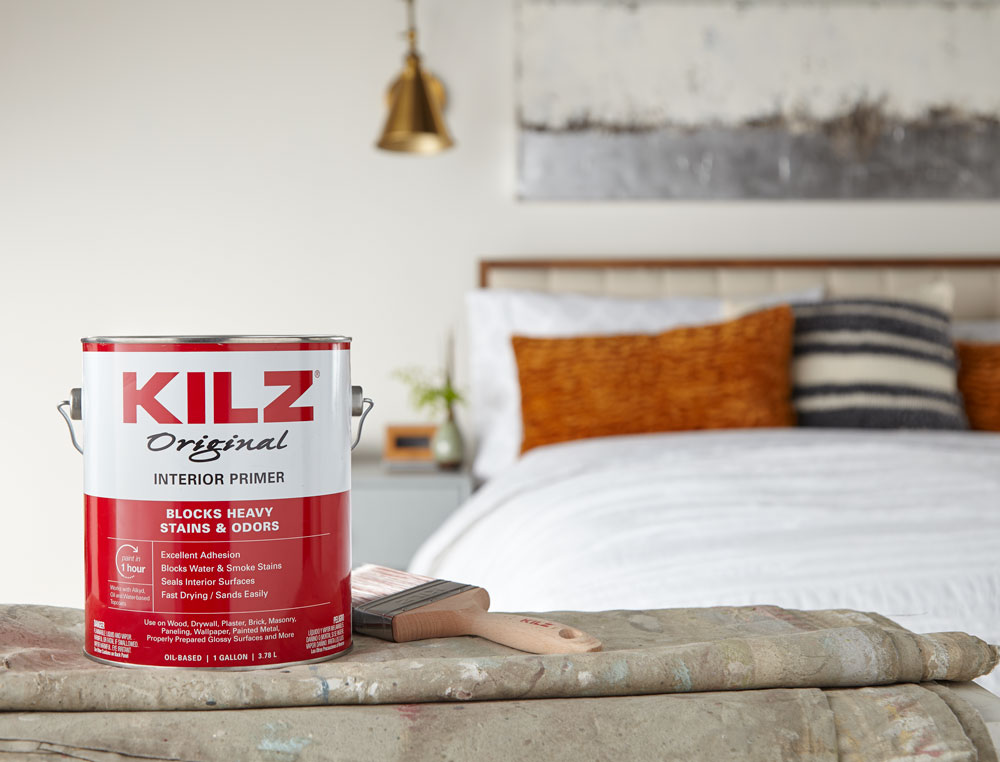
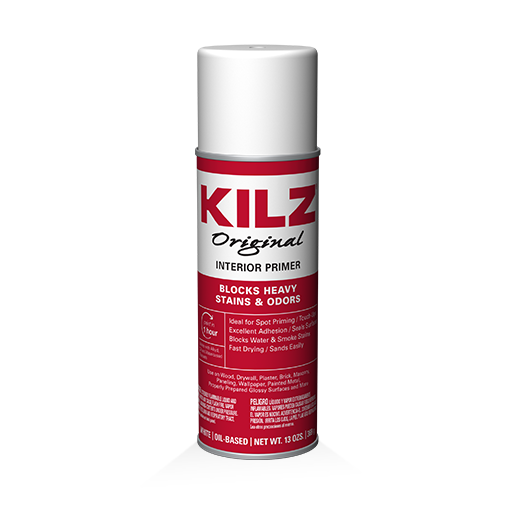
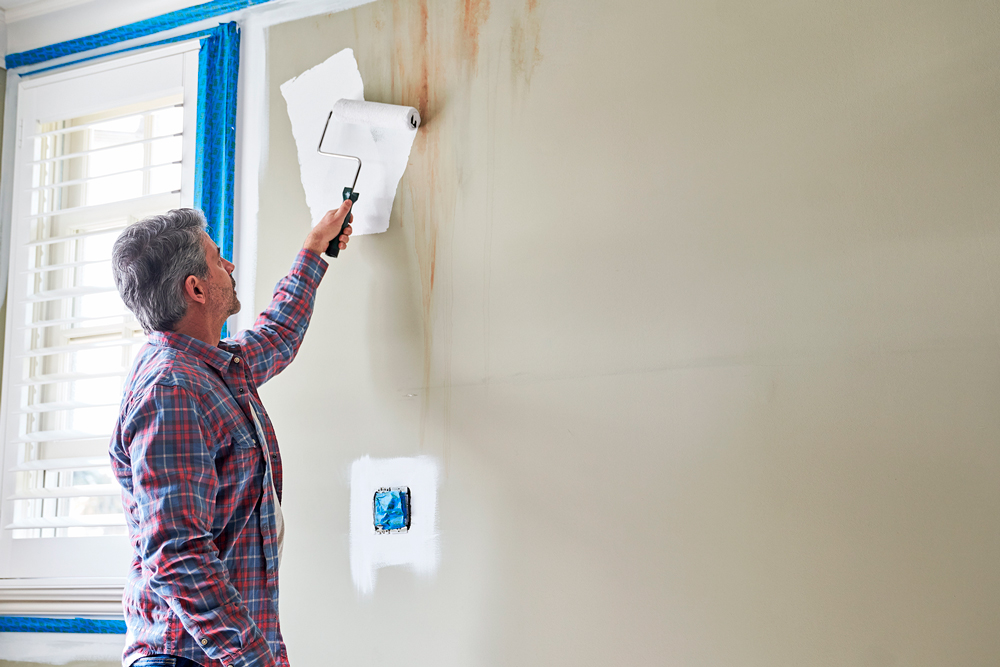
Tag: KILZ Original Interior Primer
Our Favorite Projects of 2022
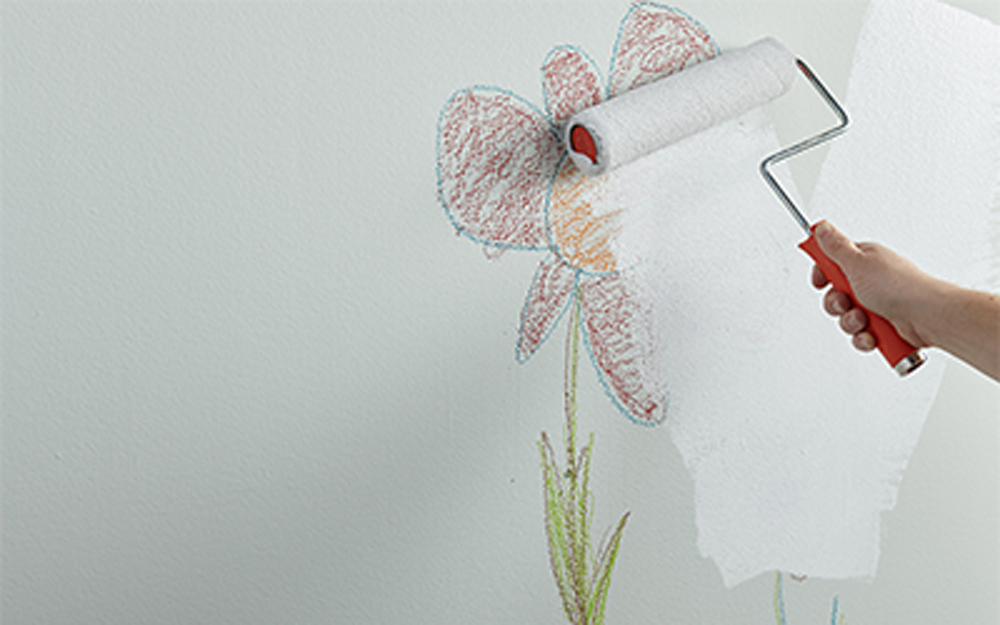
November 17, 2022The end of the year is right around the corner, which means it’s time to look back on some of our biggest accomplishments of 2022. What better way to recap the last 12 months than to revisit some of your favorite projects? From kitchens to bathrooms to living spaces, 2022 did not disappoint. When it came to updating, revamping, and overhauling, the year was full of inspiring home makeovers, so let’s recap some of our biggest standouts, and get excited to tackle another year of home improvement.
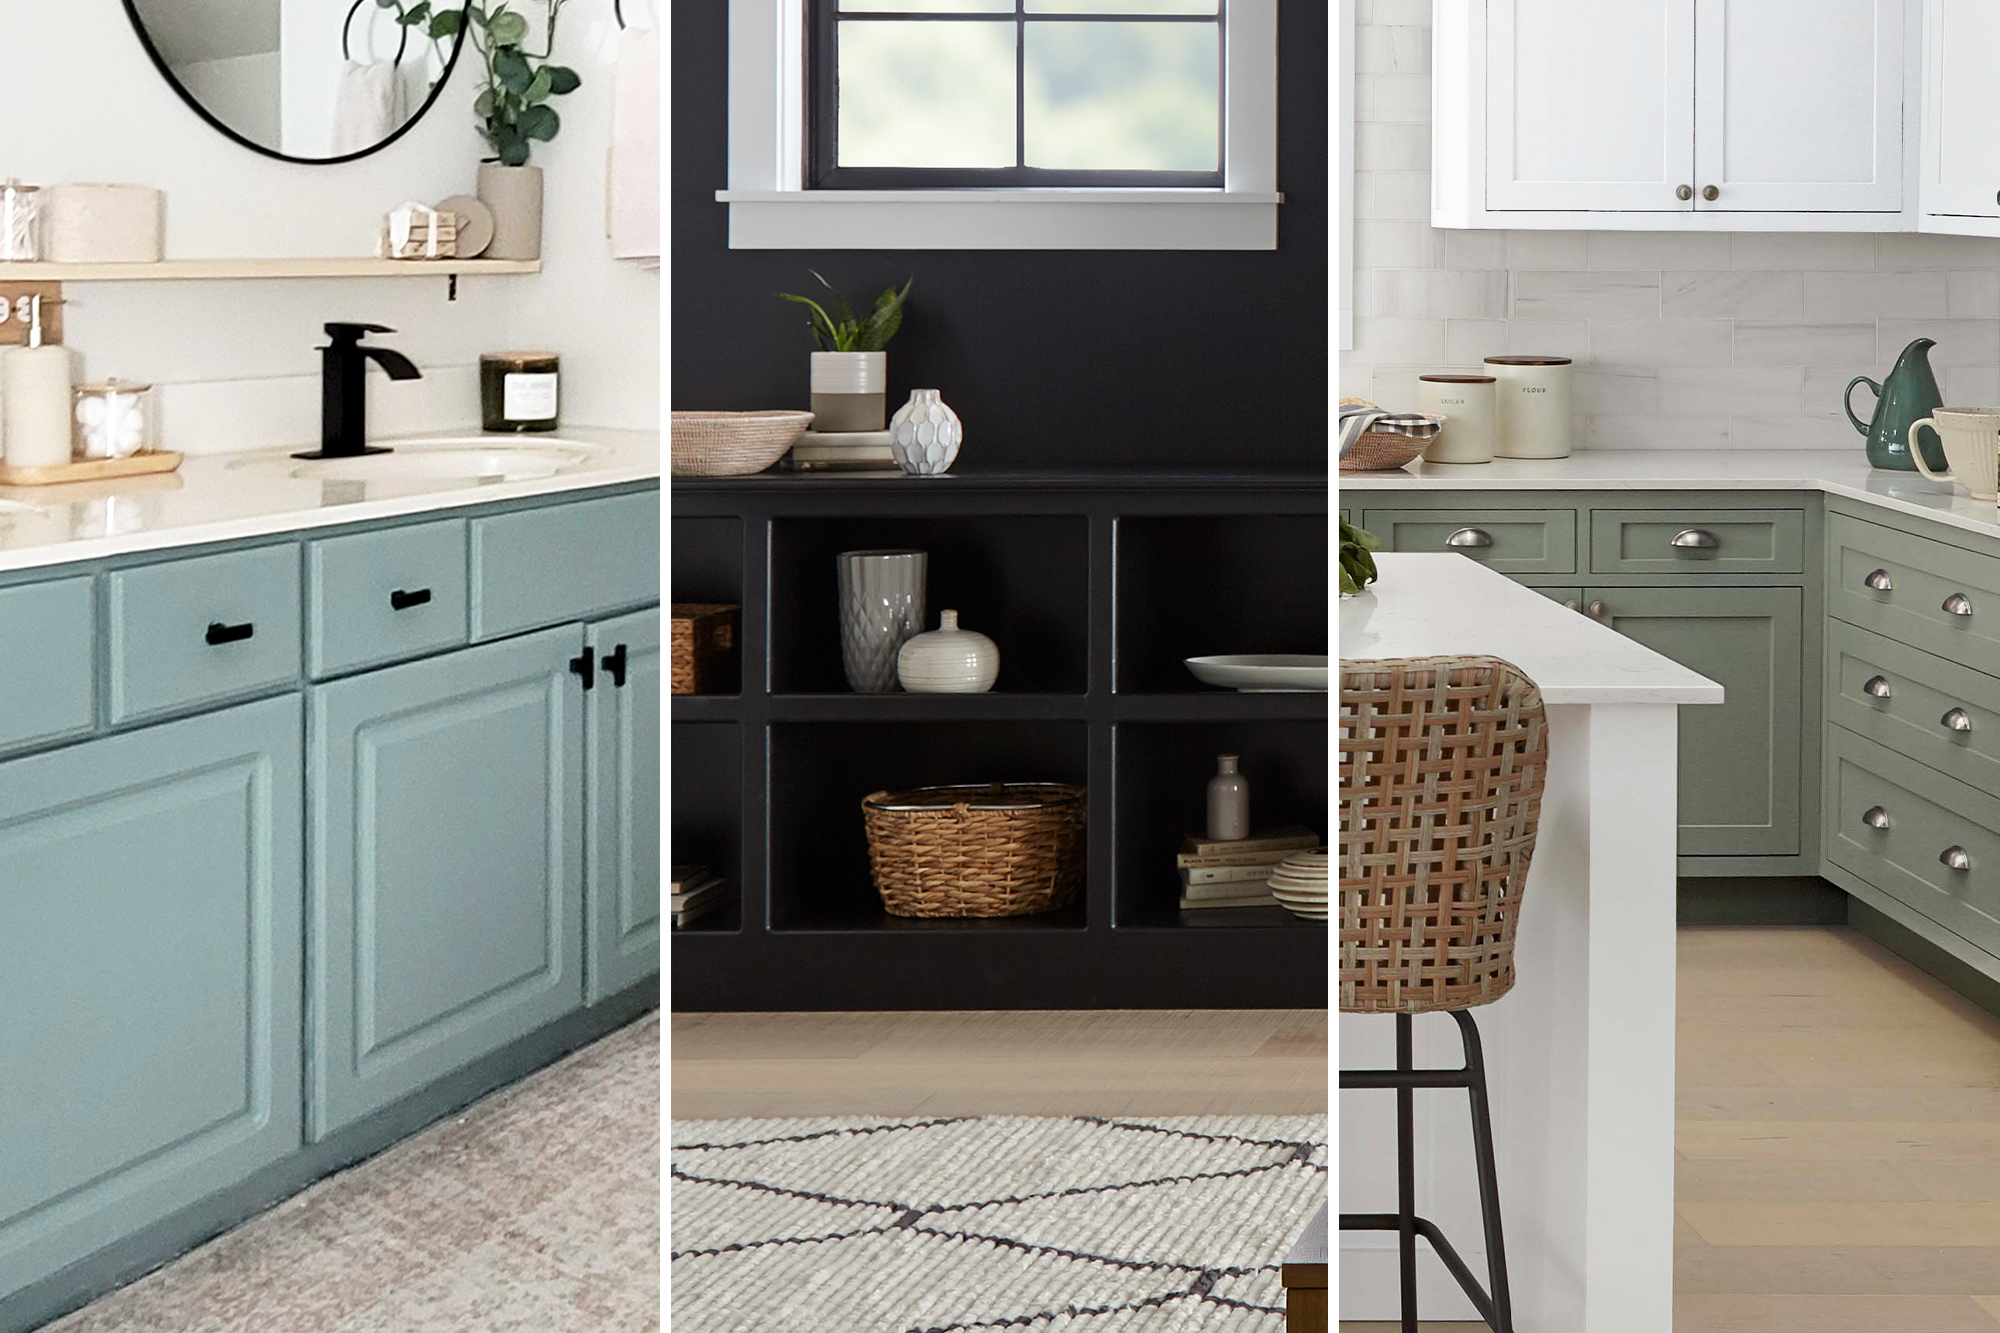
1. How to Prime Kitchen Cabinets for Color That Pops
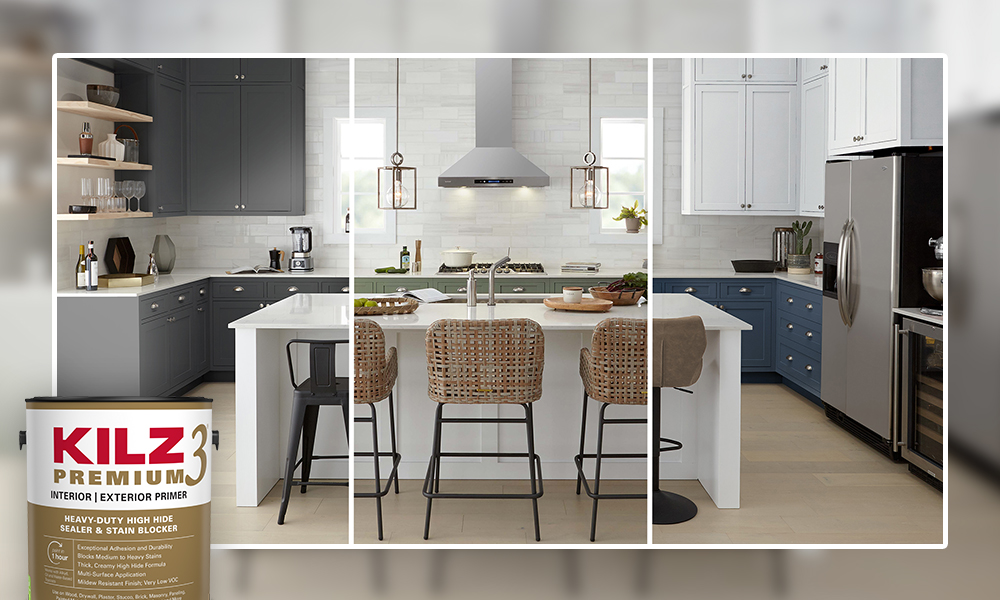
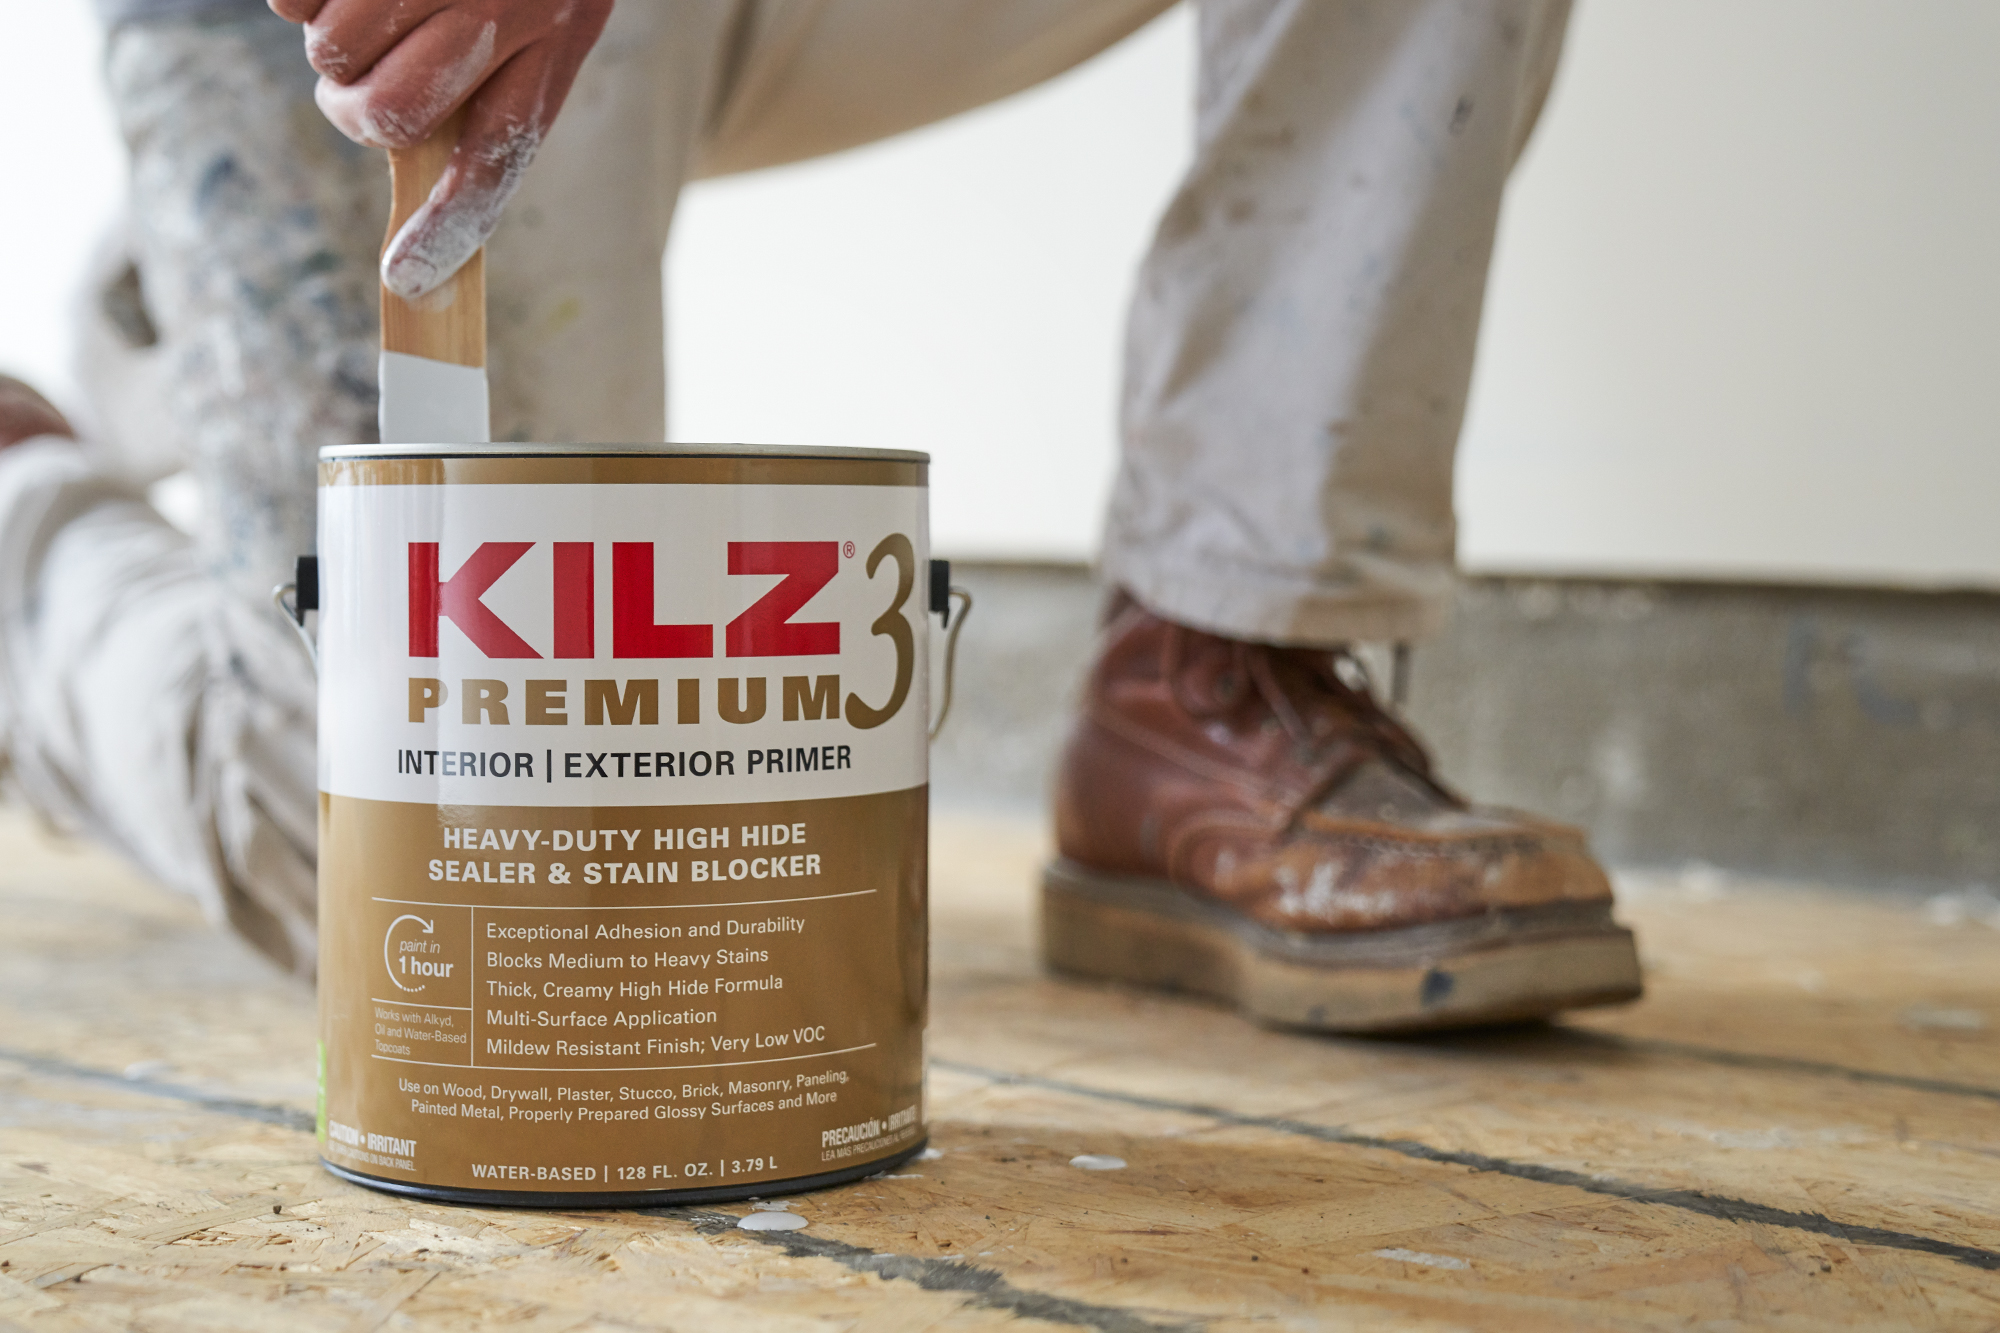
You may remember this gorgeous kitchen update from earlier in the year. This project featured three different kitchen inspirations, all using KILZ 3®PREMIUM Interior and Exterior Primer, which came to life thanks to varied design concepts and paint combos that gave the original space some much needed personality. Two toned kitchen cabinets were a theme for this project, and using subtle, yet distinct colors that played off one another, we achieved a polished effect that would make any pro proud. See the full project.
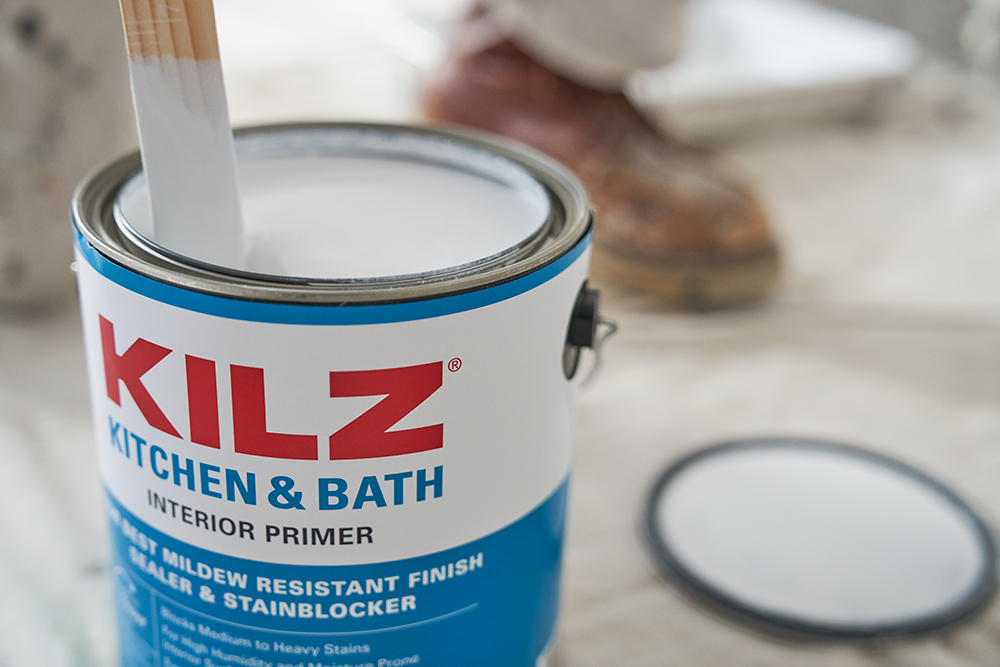
2. Pro Spotlight: Angela Cacace Creates a Spacious and Fresh Feeling Bathroom
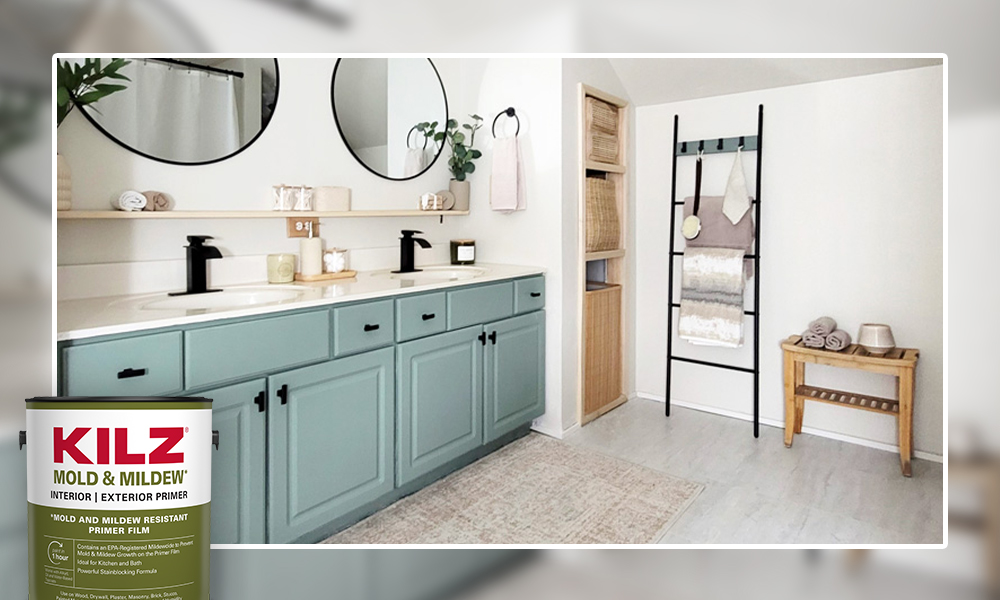
This outdated bathroom was in desperate need of a makeover, and pro designer and contractor, Angela Cacace, took everything from budget to aesthetic to difficulty into consideration. She used KILZ® Mold and Mildew Resistant Primer to start, and then finished the room using light and airy paint selections from the Magnolia Home by Joanna Gaines® collection to make the bathroom feel fresh, bright, and spacious. Achieving the creamy and neutral result was no small feat considering the hot pink “before” color of the walls and the heavy black cabinets. Primer was an absolute must for this project, and the true star of the show. See the full project.
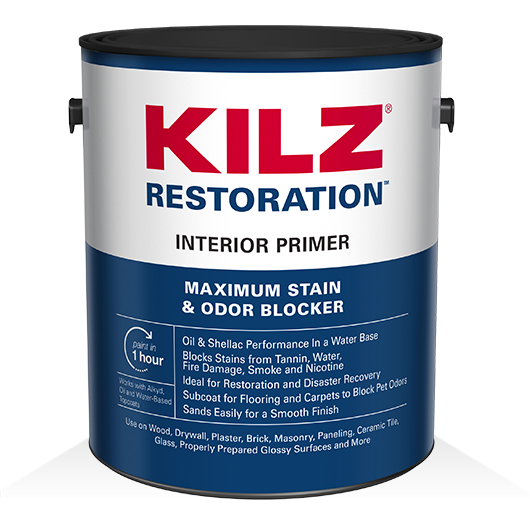
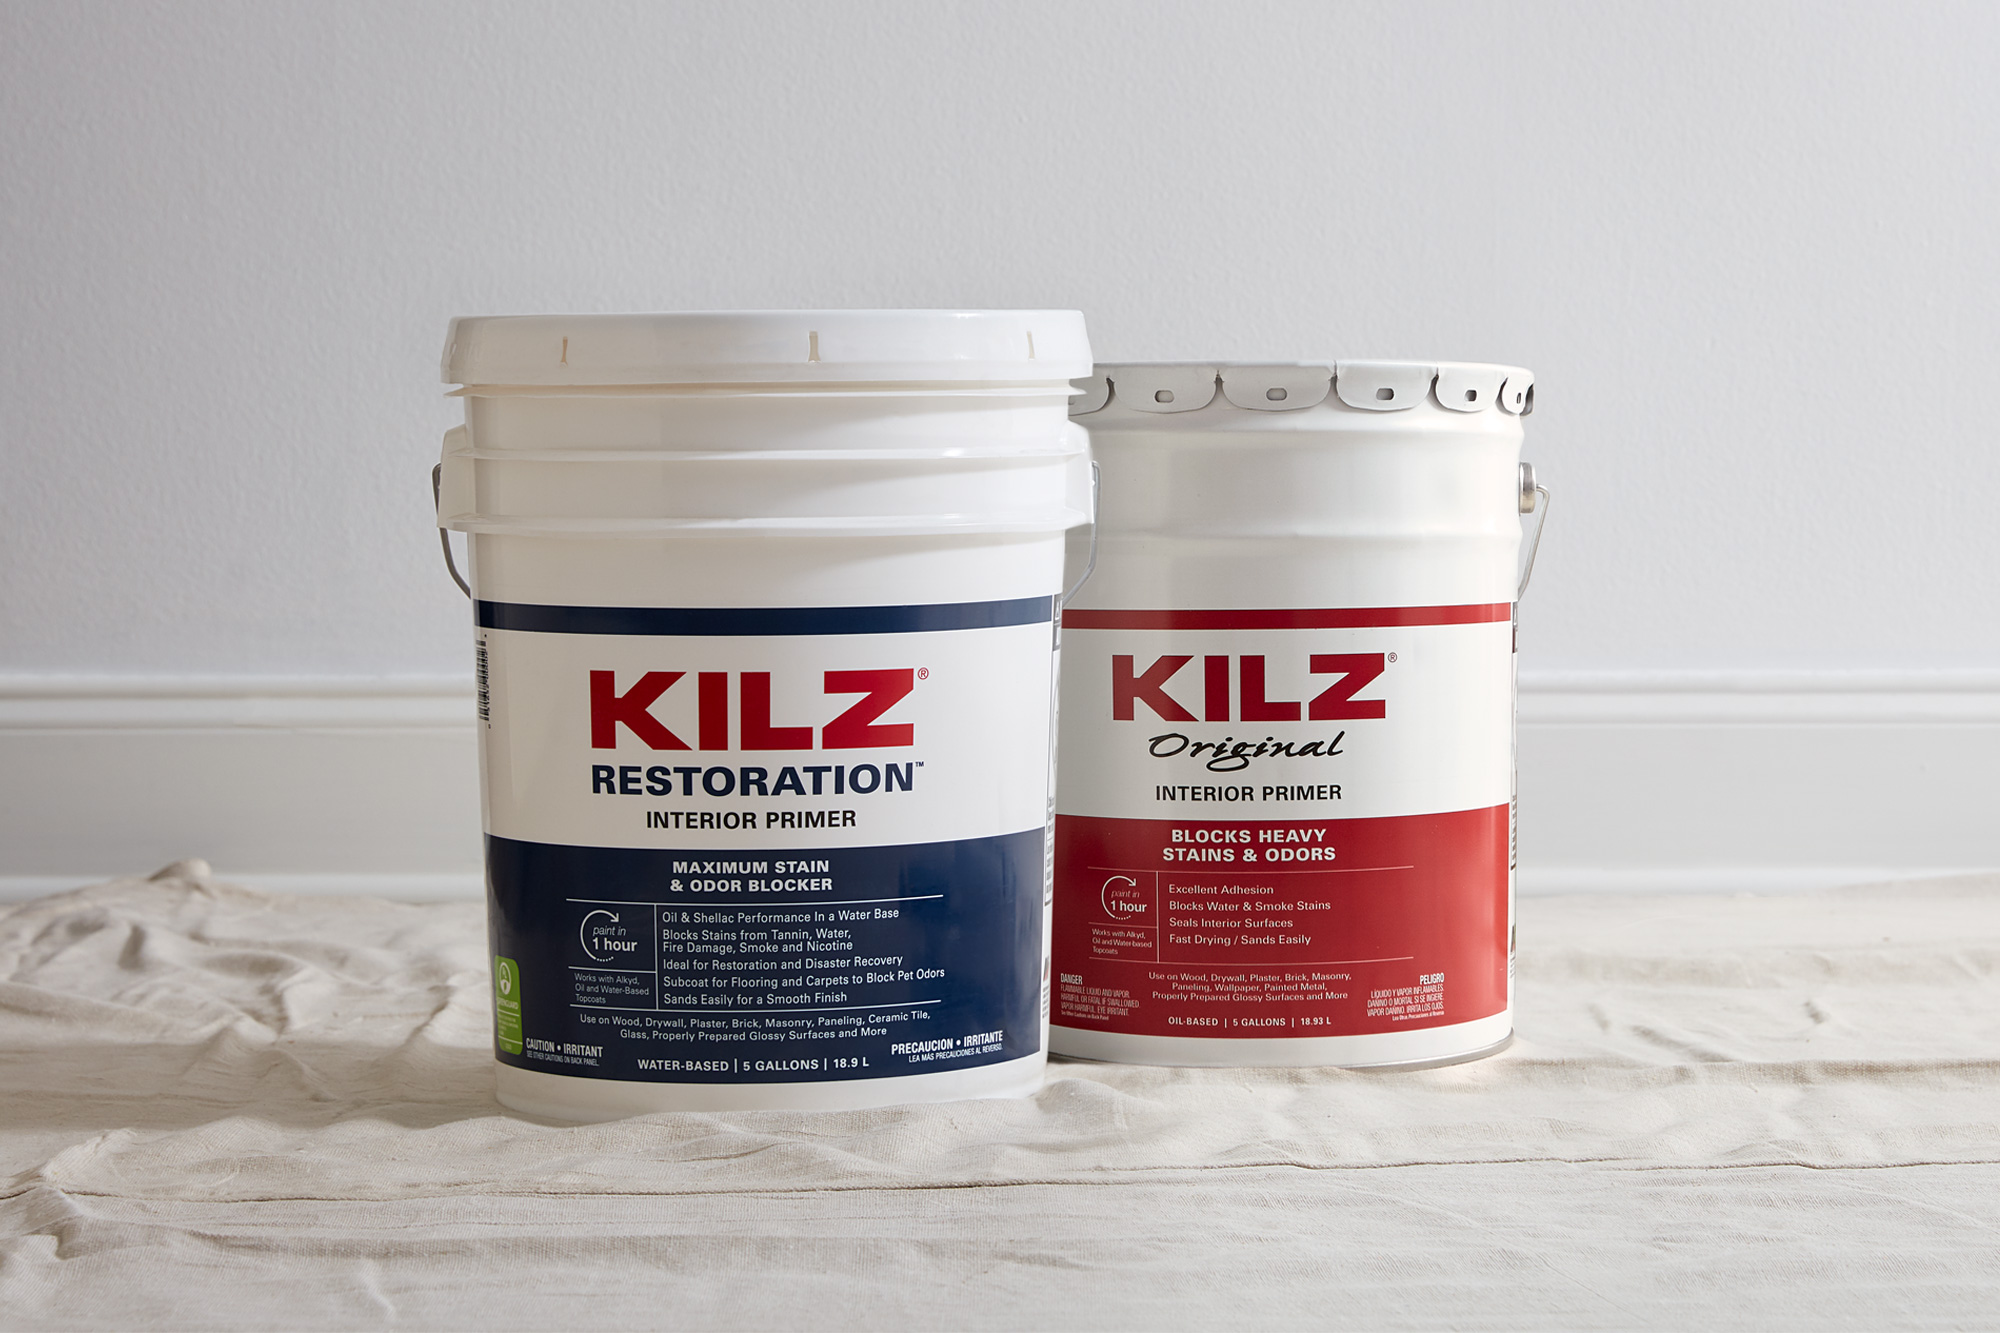
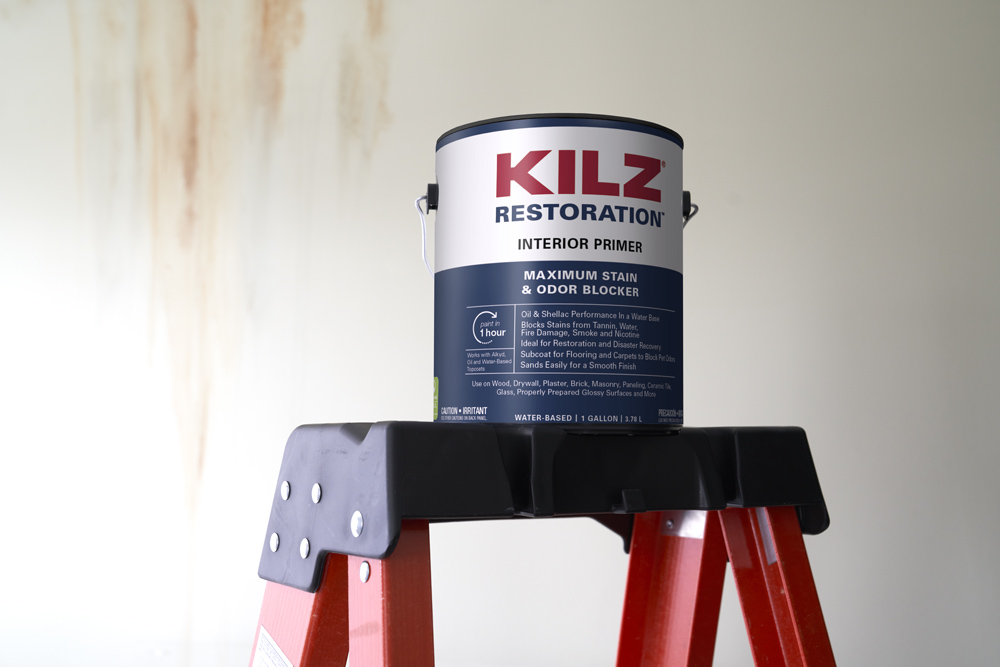
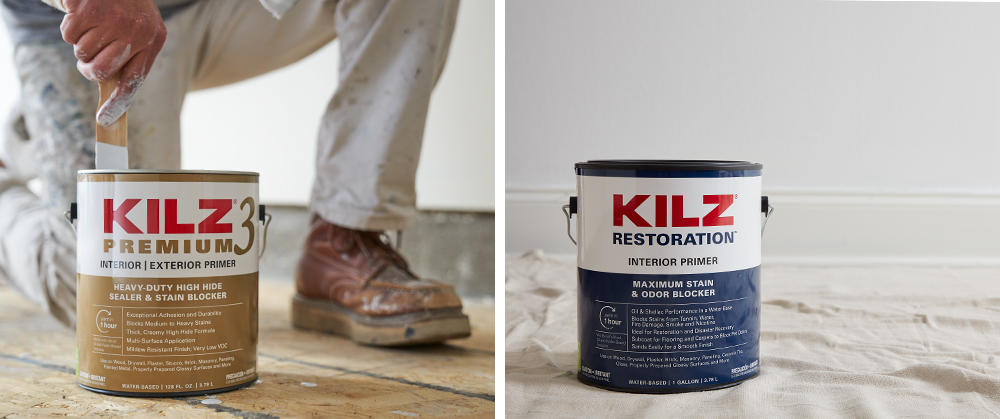
3. Restoration vs. Original – What’s the Difference?
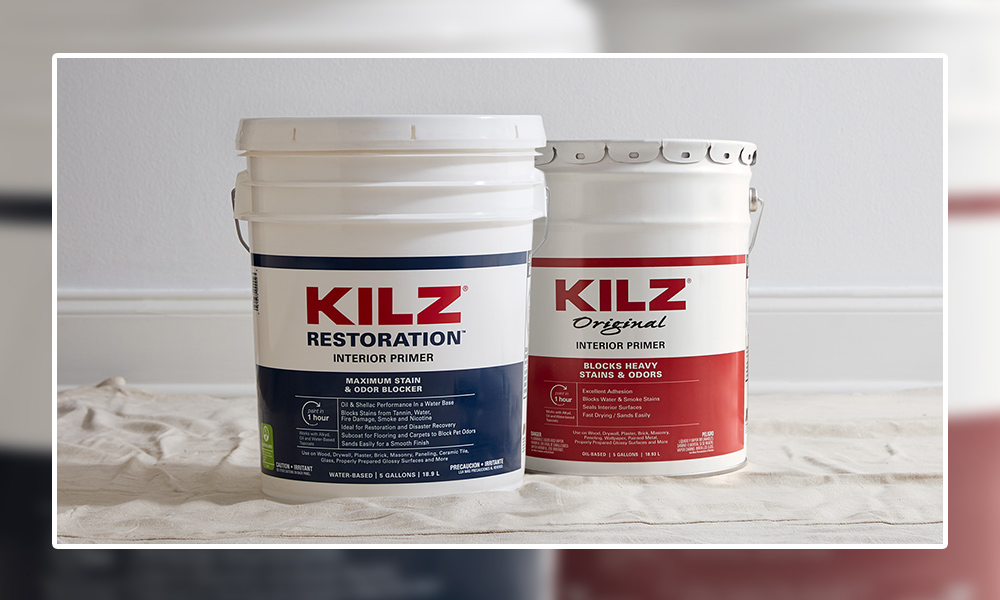
For this article, we talked to John Golamco, Project Manager and Primer Category lead with the KILZ® brand. His 25 years of experience gave him critical insight into this category. He explained the fundamental differences between the primers and compared them in more detail. According to John, KILZ® Original is an oil-based primer that works great for blocking severe stains and odors. It also has a more pungent solvent odor and requires mineral spirits or paint thinner to clean up. KILZ Restoration® on the other hand is a water-based primer that also blocks severe stains and odors but has lower VOCs and meets all national regulations. It’s a low-odor primer and can be cleaned up easily using soap and water. See the full article.
4. PRO SPOTLIGHT: Make A Front Door Pop with Jared Foster
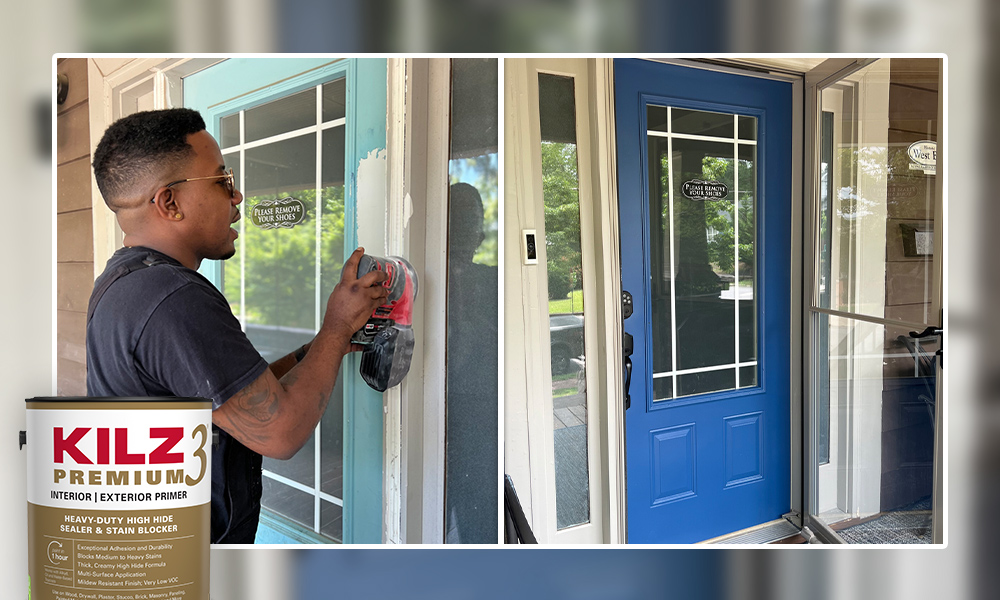
We know a thing or two about details, which is exactly what we wanted to highlight with this front door refresh. Carpenter, Jared Foster, sought to complement the already calm vibe of his front porch with an equally relaxed color scheme, and he walked us through his process in bringing it to life. “Once I laid on the primer and allowed it to dry, I was able to spray the door and trim using BEHR® paint, remove all the paper and tape and enjoy the new look. All and all, this project was completed in 48 hours. Having used KILZ 3® PREMIUM Interior and Exterior Primer,I knew this door color would pop,” said Jared. See the full project.
5. Creating a Family Room that Brings People Together
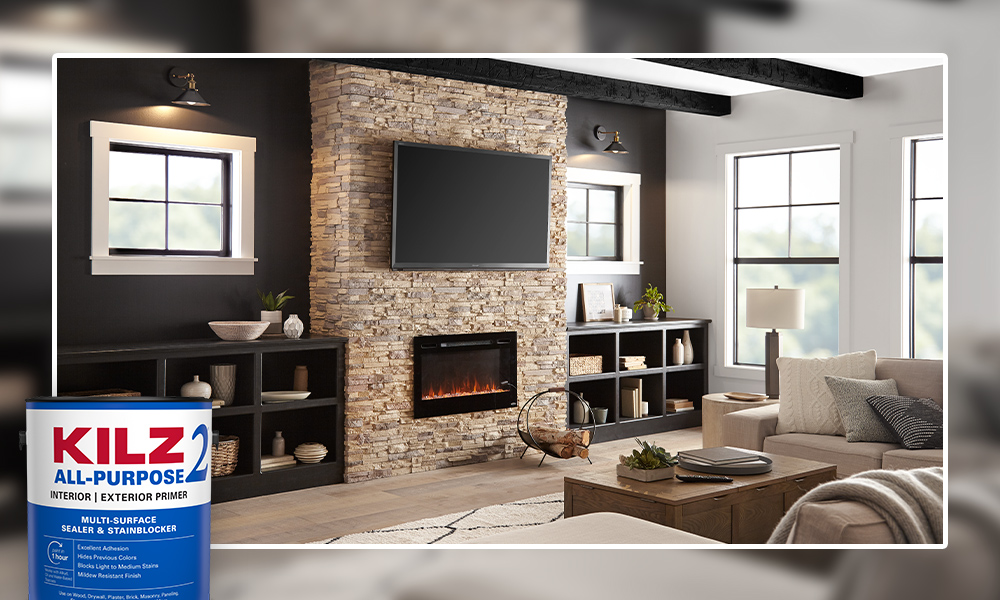
This chic, yet cozy family room makeover was all about encouraging togetherness. Using a modern farmhouse look as inspiration, we crafted a similar feel with soft white paint, dark accents, and intentional décor. Taking the room from light to dark meant priming the walls for the best possible paint application, so we used KILZ 2® All-Purpose Primer, which made the job a breeze thanks to its great adhesion and fast-drying formula. The finished room breathed new life into a familiar space and created a relaxed, yet sophisticated atmosphere, perfect for spending time with loved ones. See the full project.
This was a great year for DIY home makeovers, and even though the year is ending, we’re not slowing down. Whether you’re taking a little break or busy planning next year’s projects, we hope this inspirational list gives you the motivation you need to make your vision come to life. Thanks for spending the year with us. We can’t wait to see what new ideas you’ll bring to life in 2023.
Always remember to refer to our website kilz.com or product back labels for additional information on which primer is right for your project and detailed instructions on how to apply our products. Check out our Coverage Calculator to understand your estimated paint needs for your upcoming project.
RELATED ARTICLES

get inspired:
FOLLOw us:
@kilzbrand
Pro Spotlight: Kenny and Kate Transform Historic Tin Bedroom Ceiling
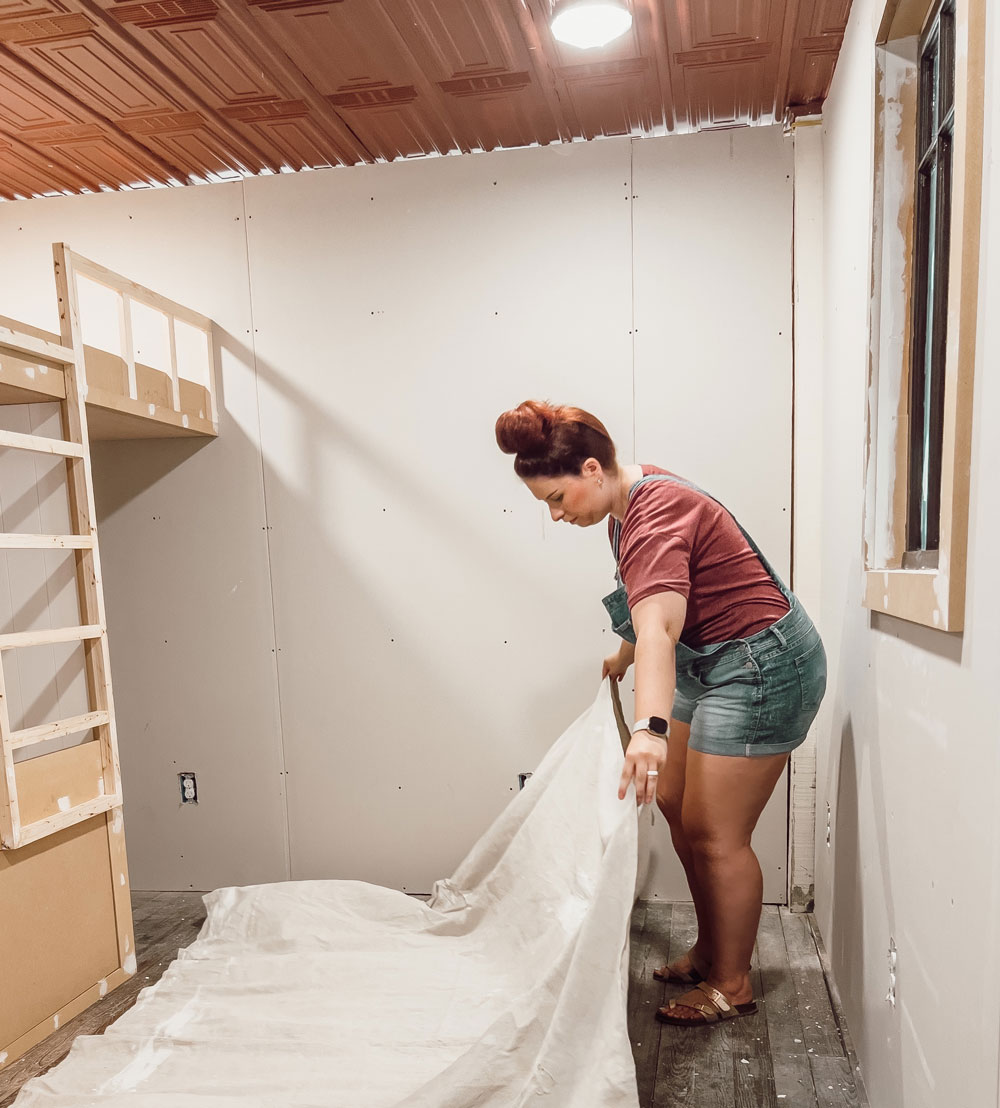
August 31, 2022Hi there! We are Kenny and Kate-Home Renovation/DIY husband and wife duo based in northern Alabama. Although most of the time you will find us renovating a space or DIYing a project, on the weekends we can often be found on a hike at our nearby state park with our daughter Remi. Whether playing fetch with one of our three dogs, Kessa, Scout, and Lola or snuggling our guinea pigs, Kipper and Gus, we are also huge animal lovers. Our DIY journey began when we purchased our little 1972 fixer-upper home in 2019. We began renovating the home room by room and ultimately fell in love with the process of transforming each space. When most of the world was shut down in 2020, we found comfort in making our home a place of peace and restoration. We loved it so much that in January of 2021 we started our own local home remodeling business, Kaleidoscope Home Co. LLC, to help others embrace and improve the spaces that make up their homes. As the business grew, so did we. By the end of 2021, we had decided to sell our 1972 fixer-upper home and purchase an 1800s downtown brick mercantile building to live in/operate our business out of. That building is currently where we reside. Our business is located on the ground level and our living space is located on the second floor.
Because the decision to purchase and move into the building was made rather quickly, we did not have the time or resources to renovate any of the spaces before moving in. Our daughter, Remi, has been sleeping in a makeshift closet area for the last seven months. It is finally time to give her the room she deserves!
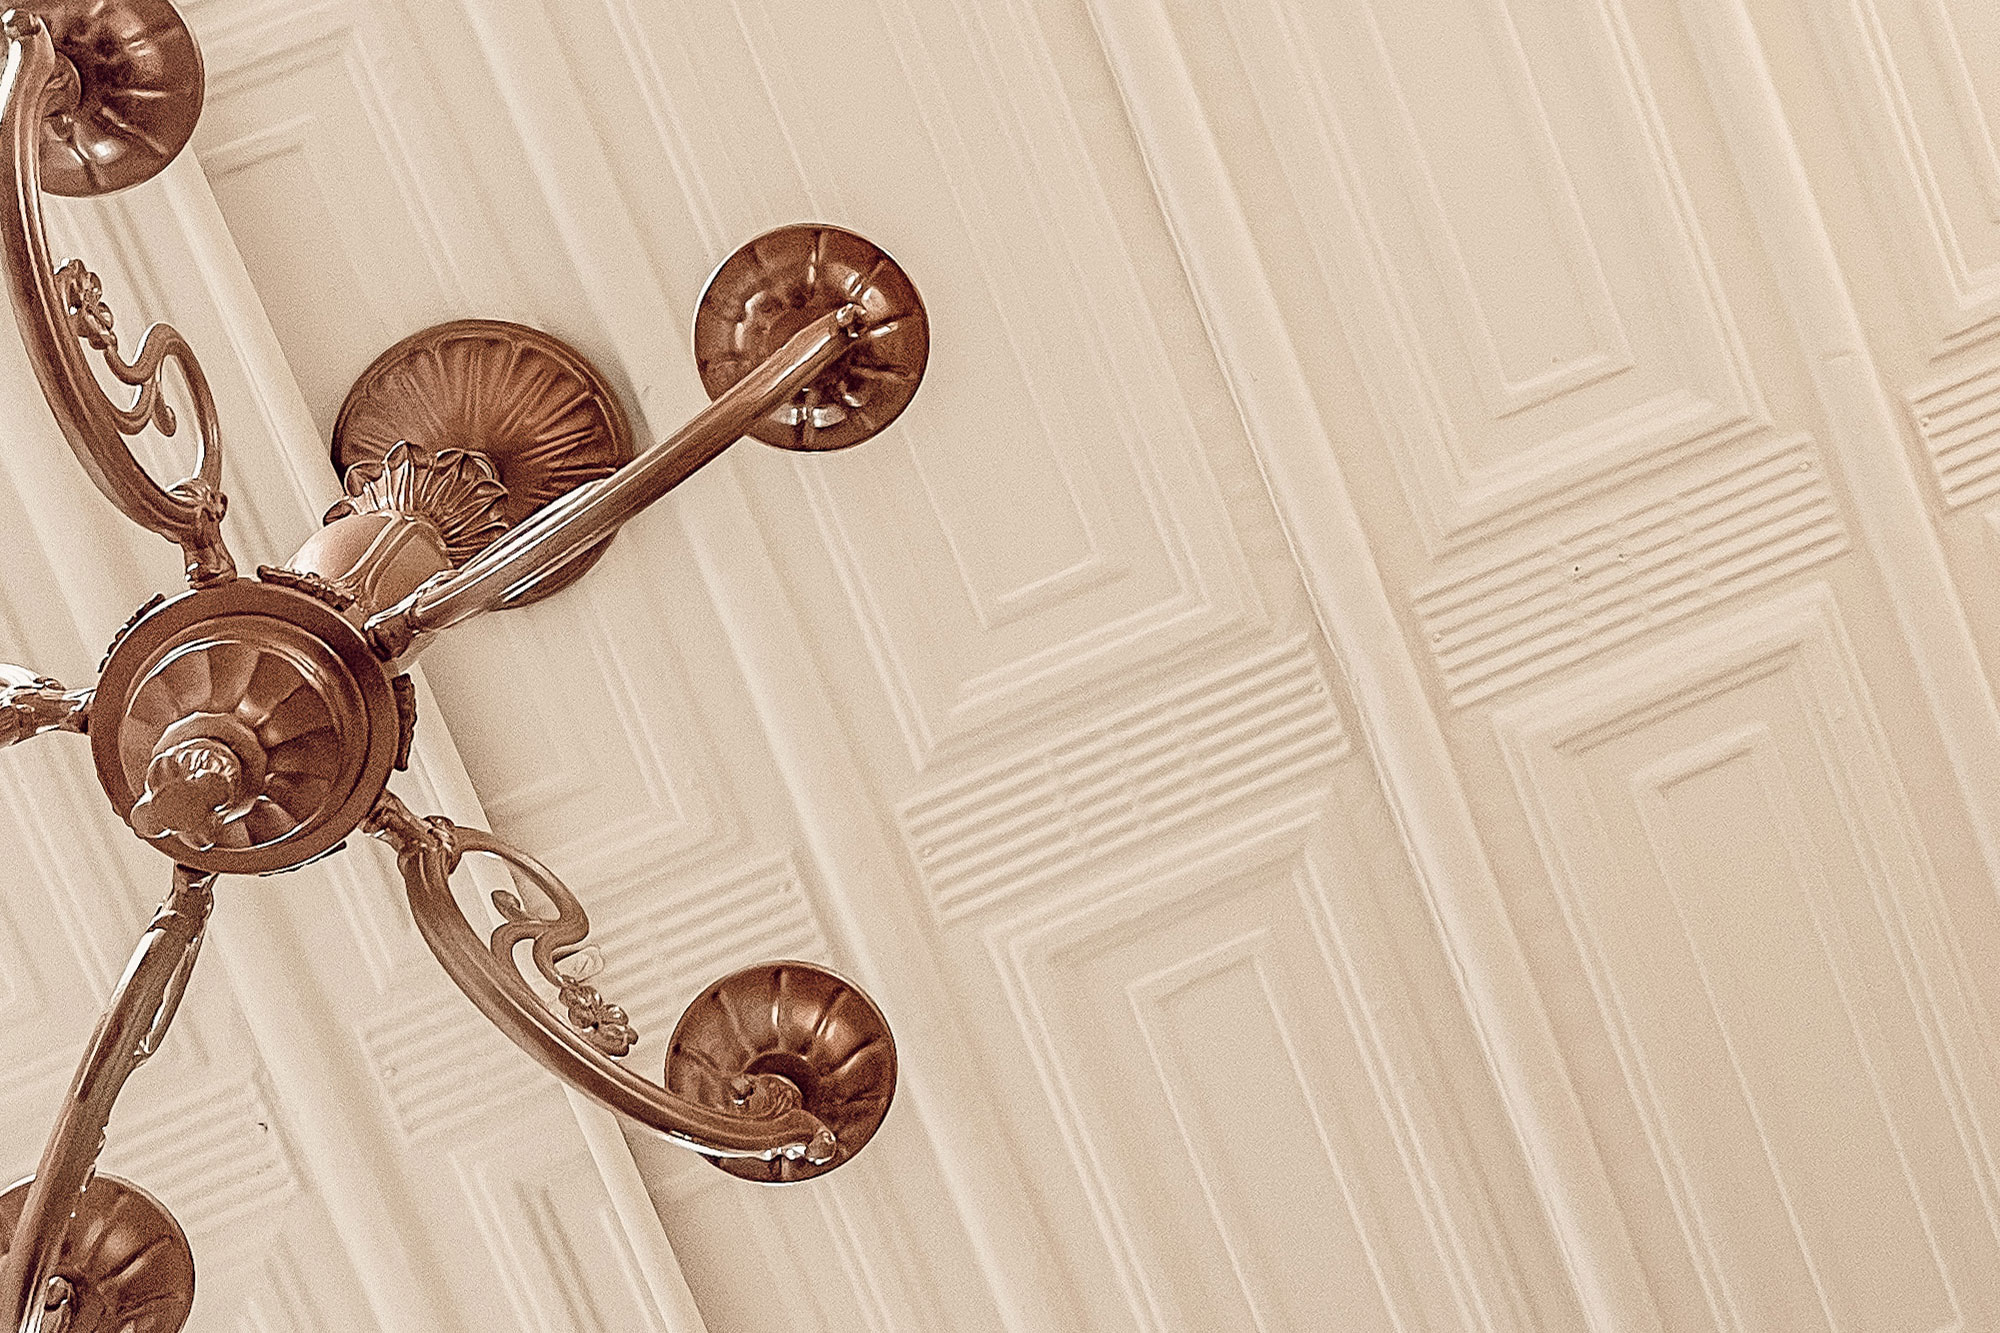
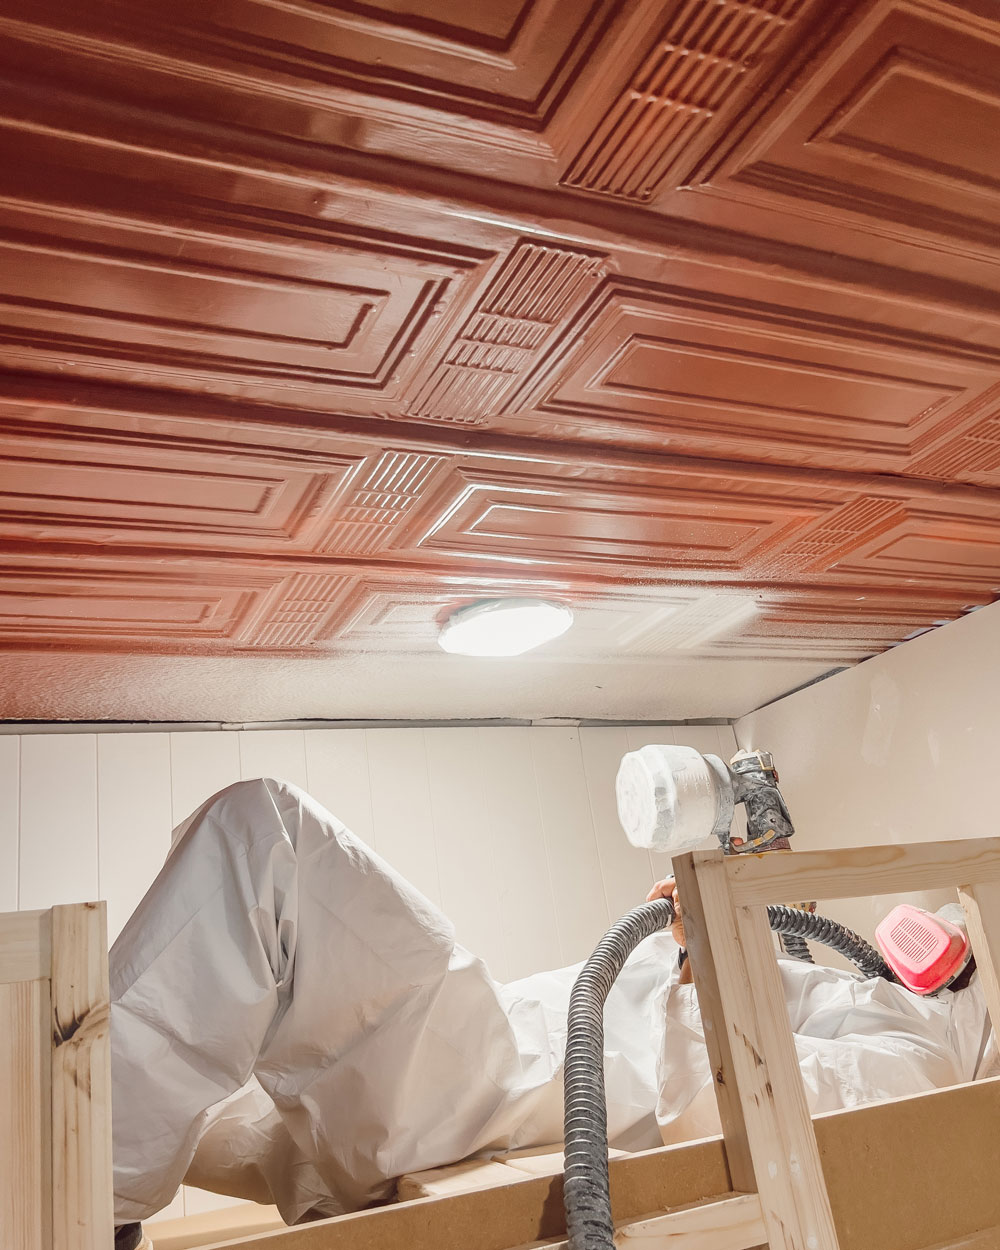
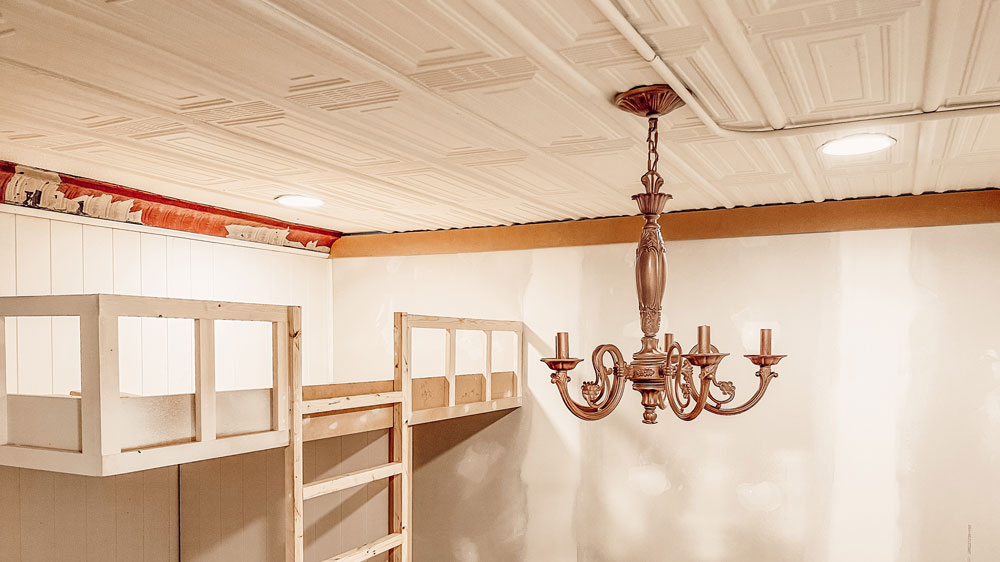
As mentioned above, this is a commercial property (now zoned for mixed-use). This means it does not have designated bedrooms. We have quite literally built Remi’s “big girl bedroom” from the ground up in a portion of the upstairs loft. Now that the walls are up, the closet and bed are built, and the hardwood floors are sanded, it is time to paint the ceiling. The beautiful, crimson red ceiling color works wonderfully in the rest of the building, however, it is just not the vibe in this room. We are painting the walls green and we’re afraid it would look like the holiday season threw up in here. So, as you might have guessed, we’ve decided to paint the ceiling a creamy white color. The historical tin ceilings in this building are worth preserving, and we believe a creamy white color will help accentuate all of the intricate details.

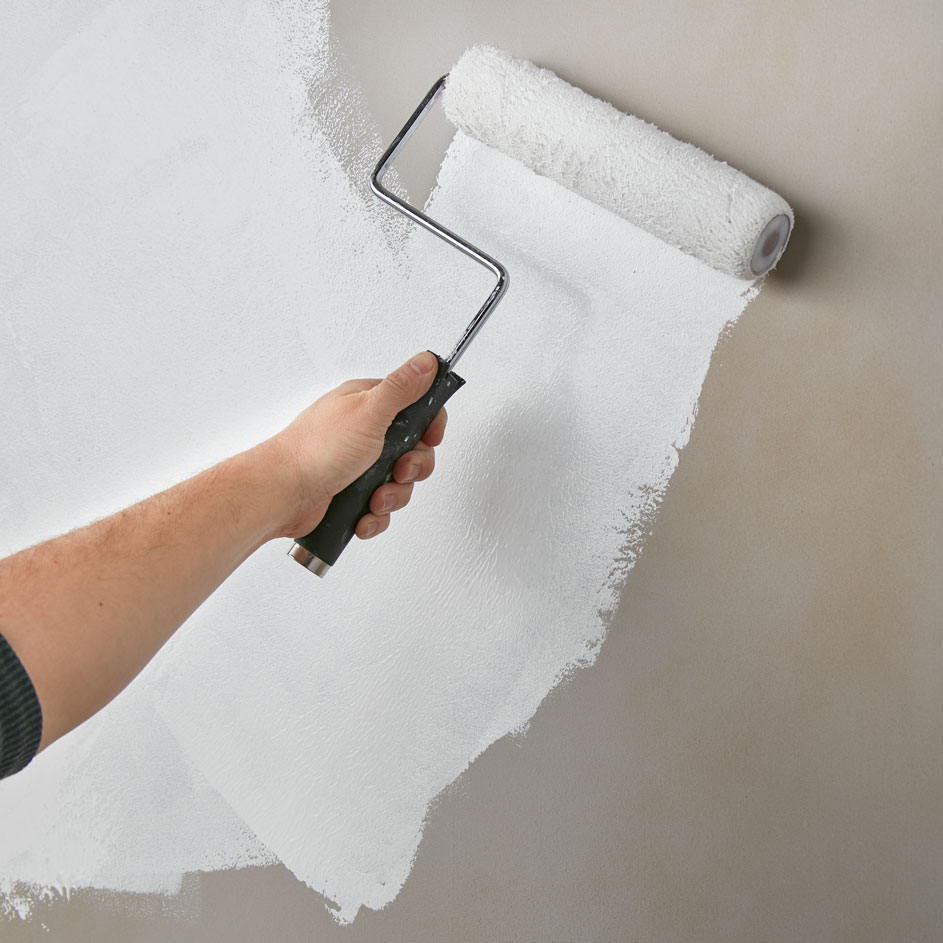
Although the ceilings were previously painted, there are spots where the paint has been chipped or scuffed. Because of this, we need to prime the ceiling with an oil-based primer to prevent the tin from rusting when painted. Priming is fundamental for completing any paint project. It is the difference between a job done and a job done right. Quite simply, primers create an ideal surface coat for the topcoat paint to perform and look its best: paint delivers color and makes that color and beautiful finish last as long as possible, while primers do the “dirty work” underneath. Of course, we would use no other primer on this project than our favorite KILZ Original Interior Primer.
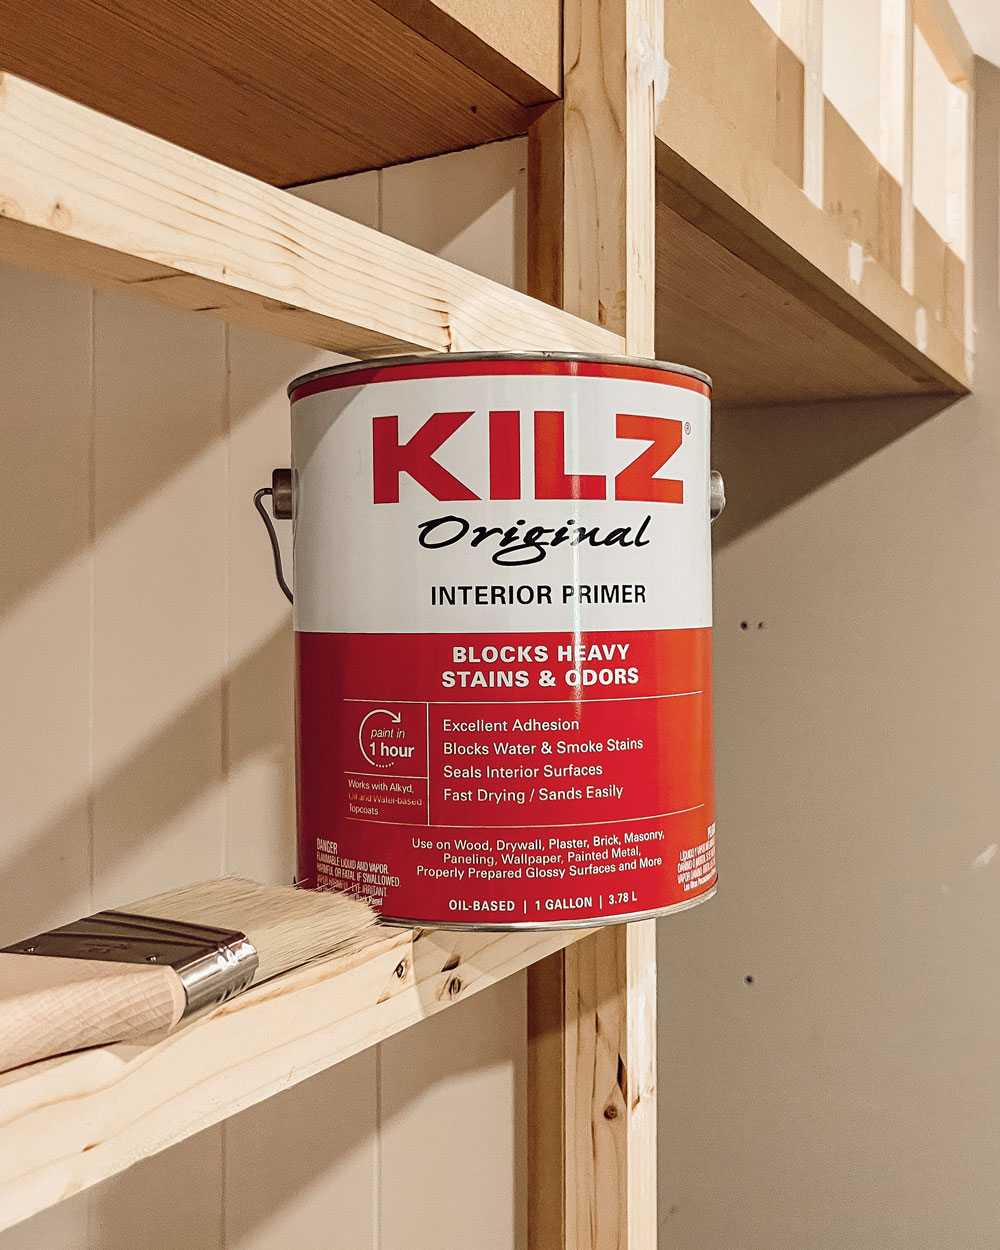
When painting over an existing color, thick, high-hide primer formulas like KILZ Original Interior Primer are important for preparing surfaces, blocking color bleed-through, and covering surface imperfections. And believe us, these 100+-year-old tin ceilings have some imperfections!
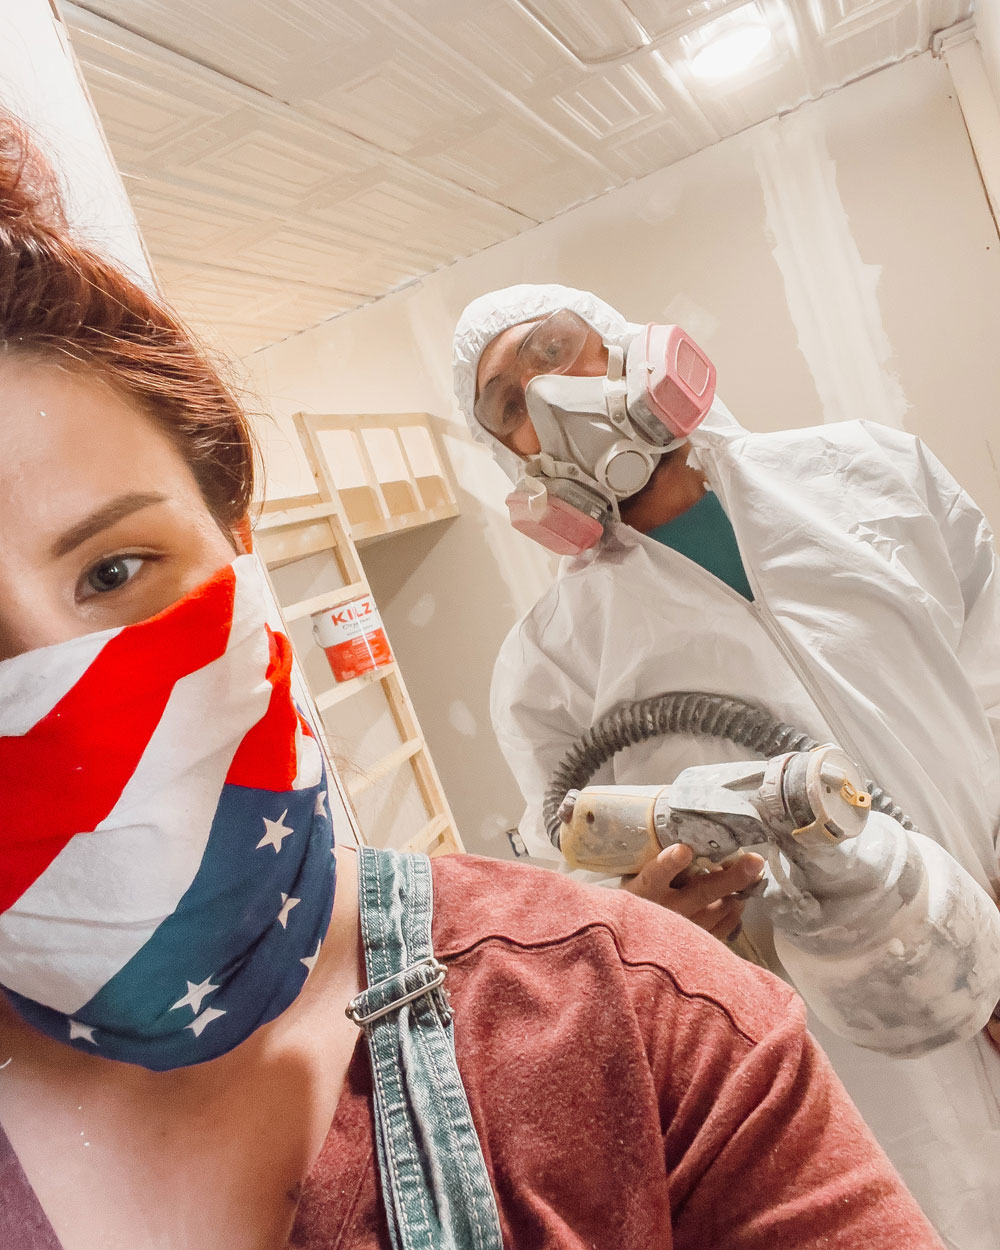
First things first, we need to cover the recessed lighting with plastic bags and lay drop cloths over the hardwood flooring. We will be spraying the primer over some areas that also need to be primed (like the walls and bed), so there is no worry of overspray on these areas.
We always, always make sure to stir KILZ Original Interior Primer before painting because it is very common for the ingredients to separate while sitting in the can.
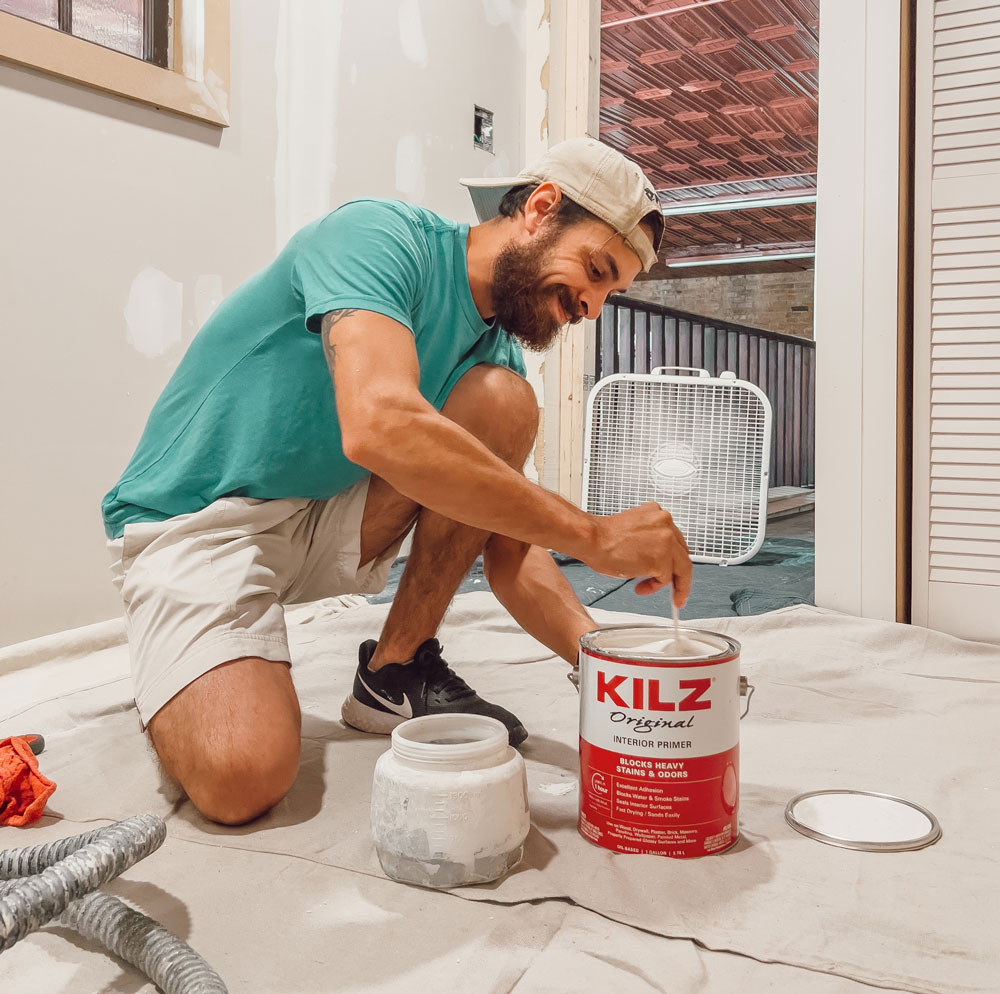
Now that our primer is stirred and the bedroom is fully prepped and ready, it is time to start painting. Always be sure to use proper PPE when painting with oil-based paint. We like to gear up with a face respirator mask, a hooded paint suit, and protective eyewear.
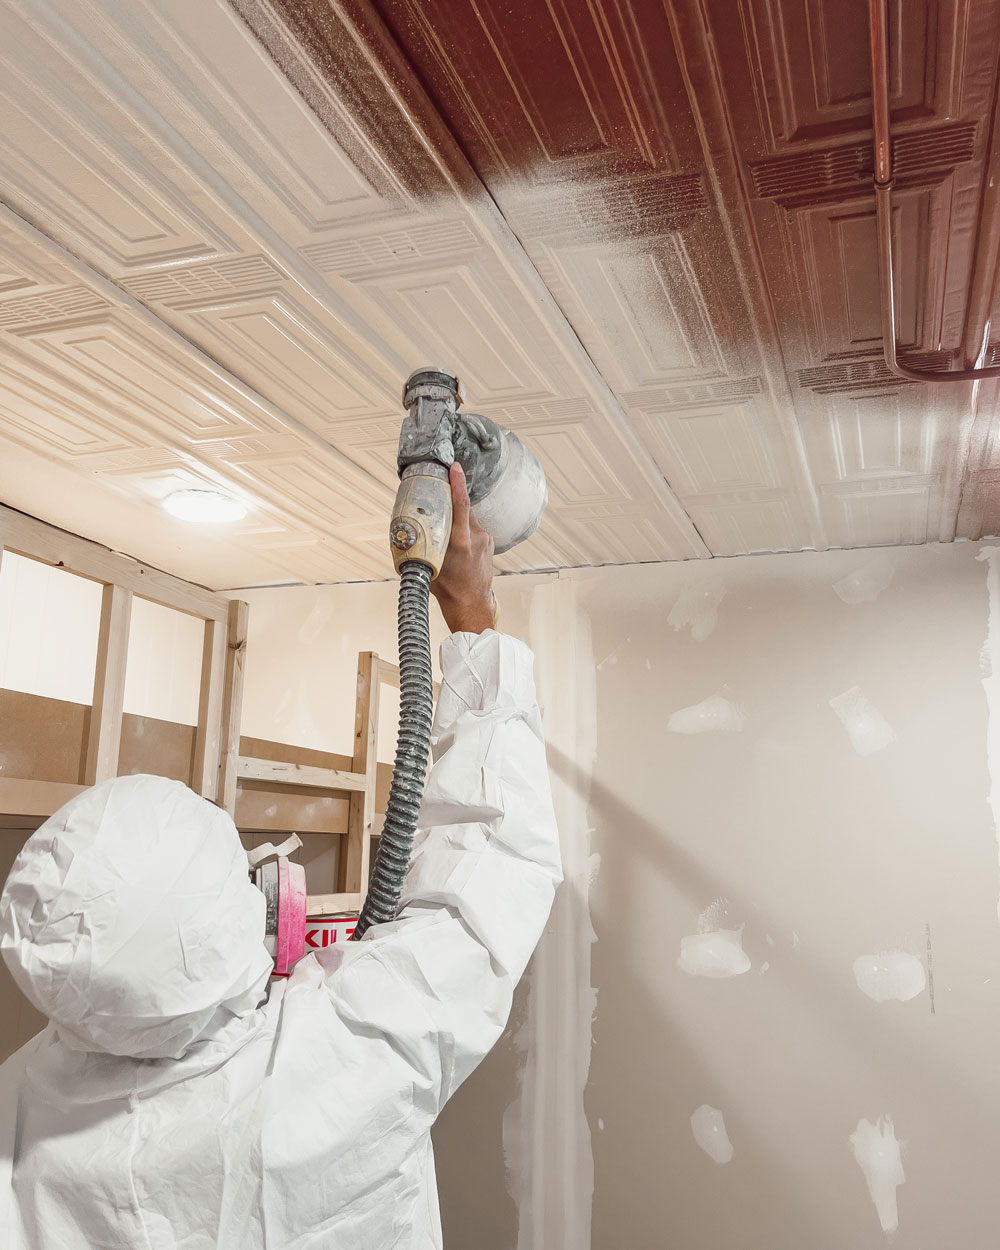
We have found that slow and steady is the best method for even coverage with KILZ Original Interior Primer. It dries quickly, but not so quickly that the process needs to be rushed. Back and forth motions are the easiest way to get in all the grooves of this super detailed tin ceiling.
And without further ado…drumroll, please… it is time for the final reveal of the painted tin ceiling!
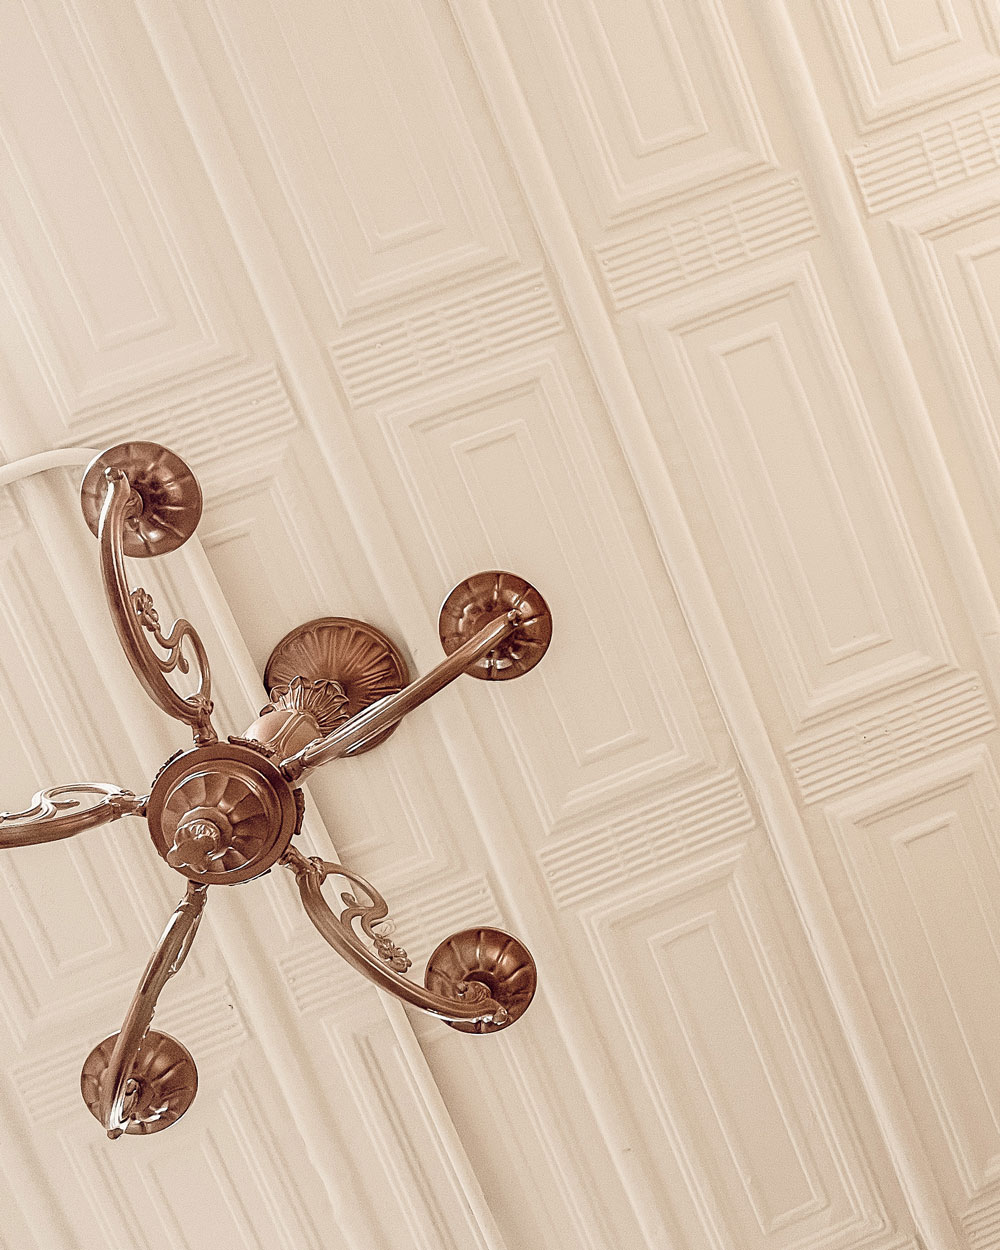
We finished this project by coating the primer with Behr Premium Plus Interior Ceiling Flat paint in the shade Warm Marshmallow. The ceiling now has a soft, warm glow to it, and all of the scuffs, scratches, and imperfections are covered. We could not be happier with this finish. If you have ever wanted to paint a tin ceiling of your own, KILZ Original Interior Primer. is the way to go. It can be used on wood, drywall, plaster, paneling, wallpaper, masonry, brick, painted metal, and properly prepared glossy surfaces. It is, however, not recommended for mold or mildew-prone surfaces or flooring. You can learn more about preparation, application, and product specifications HERE.
Thank you for following along on this project!
Kenny & Kate
*This is a paid partnership with Kenny and Kate
Always remember to refer to our website kilz.com or product back labels for additional information on which primer is right for your project and detailed instructions on how to apply our products. Check out our Coverage Calculator to understand your estimated paint needs for your upcoming project.
RELATED ARTICLES
get inspired:
FOLLOw us:
@kilzbrand
SHOP
PRODUCTS
Restoration vs. Original – What’s the Difference?
February 25, 2022 For the last 7 years, John Golamco has led the primer category at KILZ®. He is the Product Manager representing this category and has over 25 years of collective experience in sales and marketing. He lives in Southern California and enjoys traveling and cooking when he isn’t priming various surfaces!
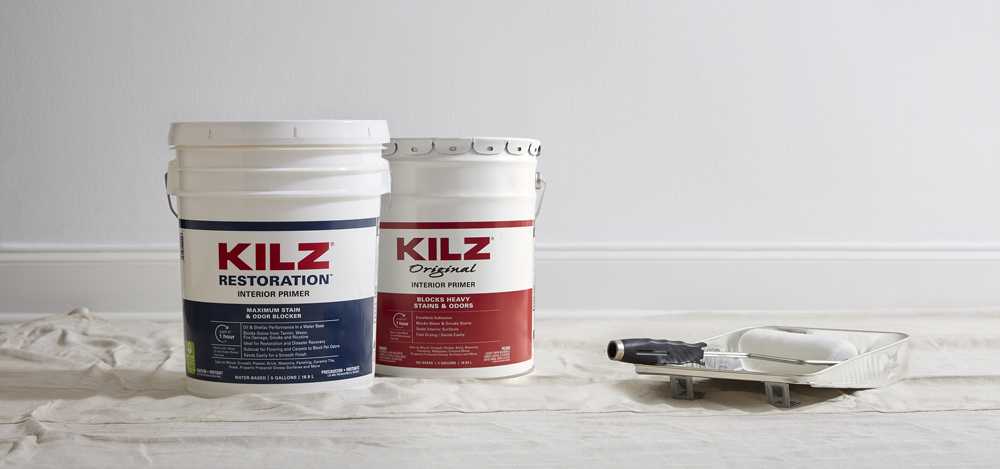
Why are we comparing KILZ® Original and KILZ Restoration® Primers?
When our customers have a project that involves severe stains and/or persistent unwanted odors, they turn to KILZ primers. Two products that help solve these problems are KILZ Restoration water-based primer and KILZ Original oil-based primer. KILZ Restoration is an innovative water-based primer which provides similar performance in stain and odor blocking as the long-established oil-based KILZ Original primer. Shellac and oil-based are traditionally better known to block severe stains especially water-soluble stains.
What are the differences between KILZ Original & Restoration Primers?
KILZ Original is an oil-based primer and stain blocker which can block/seal severe stains and odors but has higher volatile organic compounds (VOC’s) which are organic chemical compounds that vaporize and enter the atmosphere. It also has a stronger solvent odor and requires mineral spirits or paint thinner to clean-up. KILZ Restoration is a water-based primer which also blocks severe stains and odors, however, has lower VOC’s which meets all national regulations. It is also a low odor primer and has easy clean-up with soap and water.
What is an oil-based primer? What are the benefits?
Oil-based primers are better at blocking or sealing stains, especially water-soluble stains. They’re also superior at blocking tannin. Oil-based primers have natural (i.e. linseed oil) and synthetic (i.e. alkyd oil) variants as their base technology. Alkyds have become popular in recent decades due to more easily sourced raw materials, lower cost and durability of the coating film.
TOP BENEFITS
1. It dries to a hard finish, making it durable against wear and weather.
2. Feels thick to apply and feels like it adheres well upon application which makes for an outstanding application experience.
3. Penetrates wood fibers well, making it ideal in sealing and protecting the wood.
4. Slower dry time compared to water-based which has some advantage in giving more open time to apply and for touch-ups.
KILZ Original interior primer for example, is a legacy product trusted by pro painters for 50 years! It delivers excellent stain blocking, odor blocking, adhesion performance, durability and is a fast-drying oil so pros can get more done in less time. KILZ Original line of oil-based primers use top quality modified alkyd resins as the base technology of their primer formulas.
What is a water-based primer? What are the benefits?
Water-based primers, also known as “latex” primers, are easier to clean (using soap and water), dry fast and have low VOC’s, making them healthier to use for you and the environment. In terms of their formulations, water-based primers, like water-based paints, use water as the solvent. Several other ingredients such as binders, pigments, fillers, and additives are then mixed in to create the final product.
TOP BENEFITS
1. Not combustible or flammable.
2. Low in odor making it ideal for use in interior spaces while oil-based needs very good ventilation.
3. The advancements in coatings technology have allowed water-based primers to dramatically improve and are beginning to perform on par with oil-based primers in terms of adhesion, stain blocking, and even odor blocking; and they have a faster dry time which saves time and money.
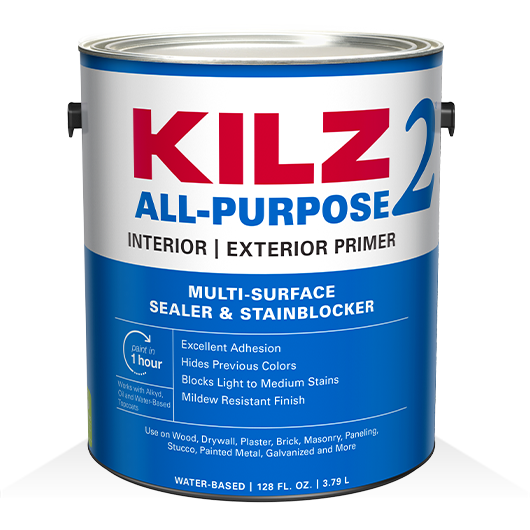
KILZ 2® ALL-PURPOSE, which is KILZ best-selling primer, is an acrylic polymer since it uses an acrylic plastic resin as its base ingredient – this is what makes the primer stick well to the surface and gives topcoat paint a sound, uniform surface to stick to – making it look better and last longer. KILZ RESTORATION is a new innovation in water-based primer technology which gives this product the performance of an oil-based (in severe stain blocking and odor blocking) but with the low VOC’s, low odor, easy clean-up and faster drying time that water-based provides. It’s the “best of both worlds”!
When would you choose to use an oil-based primer over a water-based primer? And vice versa?
TEAM OIL-BASED
• Choose an oil-based primer if priming over a previous oil-based paint and/or priming on fresh wood.
• Oil-based will seal the wood better and block any tannin stains that might bleed out.
• Oil-based is also ideal if blocking smoke and water stains as well as unwanted odors.
TEAM WATER-BASED
• Choose water-based if priming indoors where ventilation may be poor and in spaces sensitive to strong odors.
• Ideal choice when projects require a lower VOC level product, there is a flammability concern, and/or there is preference for clean-up without the use of harsh chemicals.
• State and local regulations might make oil-based products limited in availability or access. In such cases, water-based is a great choice.
What are the best use cases for Oil-based? For Water-based? Project examples?
Oil-Based: priming over water stains on ceiling tiles or priming over bare wood especially redwood varieties that bleed tannin/sealing wood knots would be some specific examples of best use cases for oil-based. Also ideal for blocking/sealing severe stains especially water-soluble stains that might be “activated” and bleed through if a water-based primer is used. Oil-based primers are also durable since they dry to a harder finish. KILZ Original Interior/Exterior primer for example is an excellent choice for exterior application due to its weather resistance, especially on wood surfaces.
Water-Based: priming indoor walls and cabinets in a space with limited ventilation or a project where low VOC emissions are a requirement. In both cases, do not apply too many coats of the primer. Even if the primer does not look like a finished coat, it is adequate to do the job of sealing the surface, blocking the stain (if any) and laying a good foundation coat to help the topcoat adhere (stick). It’s the paint’s job to completely cover everything and deliver the expected final color. The primer will help the paint look its best. A paint coatings calculator is available on https://www.kilz.com/calculator.
Always remember to refer to our website kilz.com or product back labels for additional information on which primer is right for your project and detailed instructions on how to apply our products.
RELATED ARTICLES
get inspired:
FOLLOw us:
@kilzbrand
Ask the Pro: Primer Makes a Paint Job Better
April 19, 2021
It’s no secret that here on The Perfect Finish we’re advocates of proper prep work, and for us that conversation always includes priming before you paint. Primer can do a lot for your paint job, and the professionals know it’s worth the extra step.
To share all the reasons why and how primer makes your paint job better, and answer some often asked primer questions, we brought back Product Manager John Golamco. He’s been on the KILZ team for over six years and has a wealth of primer knowledge. Ready to learn more? Let’s get rolling!
Is primer only necessary when your paint does not have primer in it?
Applying primer is an essential prep step when you apply paint or a topcoat coating. As such, it is important to apply primer first and then (once it’s dry) apply the topcoat/paint over the primer coat. Primer is engineered differently from paint – primer has more resin/binder in the formula, which is the “sticky stuff” that helps with adhesion and other additives that give the primer its ability to solve a variety of problems. Paint, on the other hand, has more pigment in the formula in order to deliver color.
How does primer make my paint job more durable and long-lasting?
Primer helps the paint or topcoat stick to the surface better and prevent problems like peeling and cracking – ensuring the topcoat lasts longer on the surface. Depending on the type of primer (there are several types), it can solve a variety of surface related conditions and problems that could ruin your topcoat paint if you didn’t apply primer first. Primers can evenly and uniformly seal porous surfaces; hide previous colors or marks and stains; block and seal in bleeding stains (like tannin, grease, nicotine, water stains… just to name a few!); seal in unwanted odors; enhance adhesion and help bond the paint/topcoat to the surface; and prevent mold or mildew on the primer film surface, and other special features. There are even primers formulated for different spaces in the home, like KILZ Kitchen & Bath Primer.
How many coats of primer do I need?
Typically, you only have to apply one or two coats of primer to achieve optimal results for which it is intended. One common misconception is that you need to continue to apply coats of primer until you completely cover the surface in a white finish or hide every area possible like you would do a paint. It is not the primers job to provide the final complete paint finish – that’s the paint’s job. Even if it doesn’t look completely covered, one or two coats is all you need as long as it is evenly applied. For blocking water stains or tannin from a “fresh” red wood surface, more premium stain blocking primer is recommended.
Does primer work on all previous paint sheens?
Just like most things you can buy, there are different types of primers ranging from the simpler ones that are made to just seal porous surfaces to the more sophisticated ones that offer additional features and benefits. Typically, the higher performing, more premium primers have better adhesion performance that allows it to stick to more surface types. Typically, the denser/harder the surface and the more sheen (higher gloss), the more difficult it is for paint or primer to adhere to. We recommend using high adhesion bonding primers for dense, glossy surfaces. Sometimes it is also necessary to perform a light sanding of the surface to help the primer bond to it. A high-performance primer such as KILZ 3® Premium Primer or KILZ® Restoration Primer will work with most paint sheens.
Can I apply primer on wallpaper?
When it comes to painting over old wallpaper, the best practice is to remove it completely, remove any old wallpaper glue and dirt residue, ensure the surface is clean and smooth and then apply primer and then topcoat with new paint. However, if painting over old wallpaper is needed, we recommend ensuring the old wallpaper is not peeling and adhesion to the wall is still sound. Then use an oil base primer such as KILZ® Original Primer to prime the surface before applying paint. Using an oil base primer will make sure there is less chance the adhesive of the wallpaper (which may be exposed at the seams) is compromised.
Is there a primer with a clear finish?
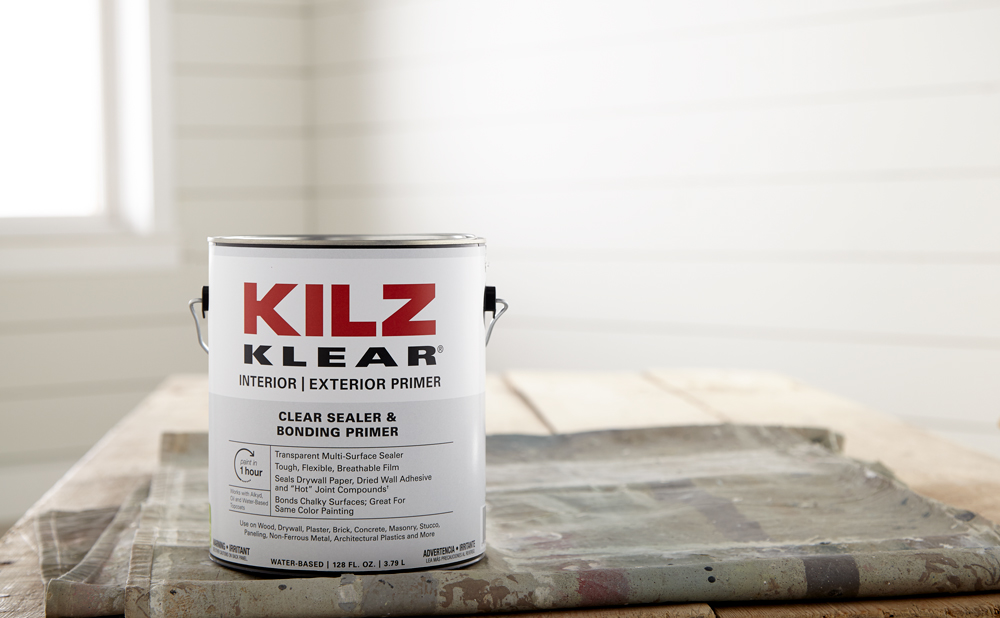
Most primers will adhere to wood however there are special primers that will apply in a clear transparent finish. We recommend KILZ KLEAR® Clear Sealer & Bonding Primer – a high performance fast-drying, multi-surface clear primer developed to seal highly porous surfaces inside and outside your home. It is also recommended for use when painting the same topcoat paint color on top of an existing paint coat.
Can primer be applied to peeling paint?
Applying primer or any additional topcoat coating to already peeling paint is not recommended. The adhesion or bonding of the paint to the surface is already compromised. Adding more layers of primer or any coating will add weight to the compromised paint and might cause it to peel off completely. We recommend removing the peeling paint and starting fresh with a clean surface.
Always remember to refer to our website kilz.com or product back labels for additional information on which primer is right for your project and detailed instructions on how to apply our products.
RELATED ARTICLES
get inspired:
FOLLOw us:
@kilzbrand
Ask the Pro: Misconceptions About Primer and How Many Coats of Primer To Use
February 12, 2021Here on The Perfect Finish, we’ve shared what primer can do for your paint job, tips on choosing the right primer for your project and step-by-step instructions on how to prime various surfaces. In this post, we’re excited to turn the tables and talk about what primer is not – debunking seven common misconceptions about primer.
To discuss these often-believed myths and misunderstandings about primer, we sat down with John Golamco – Product Manager, Primers at KILZ. A member of the KILZ team for over six years, John is a true expert on all things primer and has a wealth of knowledge to share. Ready to learn more? Let’s get rolling!
Misconception #1: Primer is just paint without color in it.
Although both primer and paint are classified as “architectural coatings” they are not the same. The formula of paint is different from the formula for primer. Paint is formulated to deliver color while primer is formulated to stick, better protect the surface, and in some cases block stains.
Misconception #2: Priming before painting takes too much time and won’t have a considerable effect my paint job.
Applying primer is indeed an additional step in the painting process but, depending on the surface condition and problem areas that might be present, investing in the primer step might actually save time and money. Applying primer to solve the problem (for example uneven, porous surfaces, strong colors or stains that might bleed through the paint, or adhesion issues that might cause peeling of the paint) before applying paint may prevent the need to re-paint or add several more coats of paint to get desired results.
Misconception #3: If I use primer over a stain and I can still see the stain through the coat of primer, the primer didn’t work.
This is a quite common misconception about primer. A primer coat or coats is not meant to look like the finished topcoat paint. Primer is supposed to work underneath the paint to create a uniform surface, hiding strong or bright colors, block stains that might bleed through or show through the paint and enhance the paint’s ability to stick to the surface better and last longer. So even if the primer coat does not look like a fully painted wall, it will still perform the above functions. Then it is the paint’s job to completely cover the surface, deliver the color and look great.
Misconception #4: Primer is only for the walls.
Primer is mainly applied to walls, but it is not only used for that surface. It can also be used on other vertical surfaces like wood paneling, brick or stone fireplaces or other masonry. Some types of primers are also designed to apply to horizontal surfaces like furniture, windowsills, floors and countertops. It depends on the type of primer and where it is designed to be used for – always read the label and follow label instructions.
Misconception #5: I’m using primer, I don’t need to clean the surface first.
It is always important to properly prepare the surface before applying primer. At the very least, the surface has to be clean and free of dust, dirt and debris. Failing to clean the surface prior to applying primer may compromise the adhesion of the primer to the surface – which could lead to peeling and blistering.
Misconception #6: I need to add multiple coats of primer if I can still see my previous color.
Depending on how strong or bold the previous color is, it may be necessary to apply more than one coat of primer. However, it is not necessary to over apply the primer with so many coats. As long as the primer applies uniformly over the previous color, then one or two coats should be sufficient. Again, it is not necessary to apply several coats of primer to try to get a perfect white finish. That is the job of the topcoat (paint) which has to be applied on top of the primer.
Misconception #7: I don’t need to prime when painting outside.
Priming outside is just as important, if not more important, than priming inside. Exterior surfaces are typically exposed to the elements and are subject to expansion (from heat) and contraction (from cold). This and the exposure to wind, rain, snow and even dust, dirt, pollution, sunlight (UV) may cause the paint to fail due to lack of adhesion to the surface. Using an exterior primer first on a properly prepared surface can make a big difference to whether the paint lasts or potentially cracks, peels or blisters after a short period of time.
Always remember to refer to our website kilz.com or product back labels for additional information on which primer is right for your project and detailed instructions on how to apply our products.
RELATED ARTICLES
get inspired:
FOLLOw us:
@kilzbrand
SHOP
PRODUCTS
5 Things Primer Does for Your Paint Job
January 19, 2021Primer and paint belong together. A match made in design-heaven, primer helps paint to be the best it can be and is key to getting professional quality results. Read on below to learn five things primer does for your paint job and get inspiration for your next painting project.
Primer Makes Your Paint Job Durable
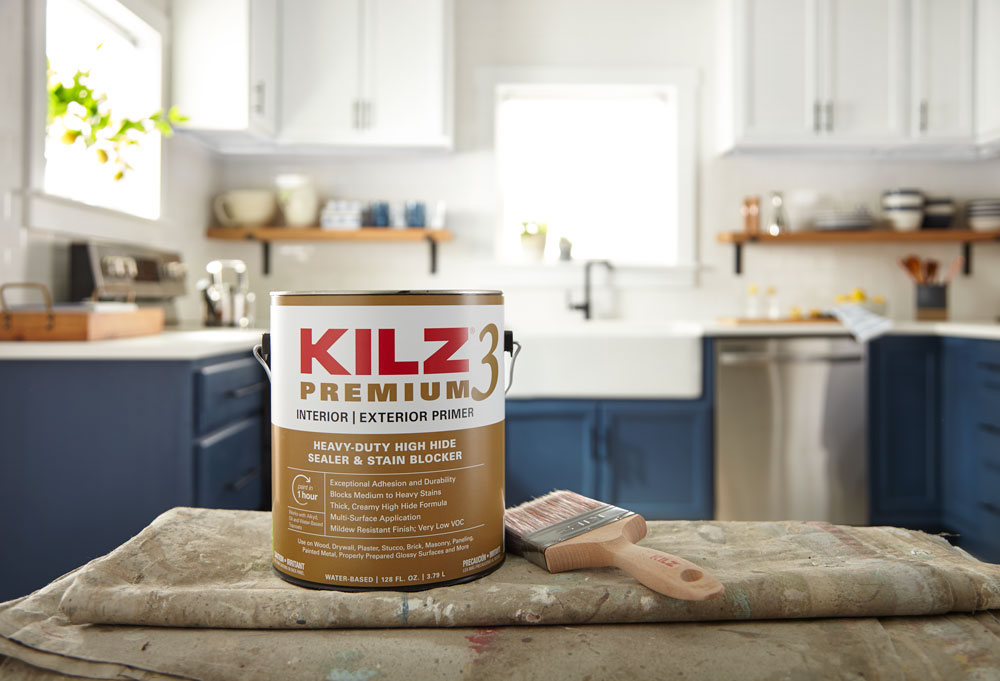
Over time, fluctuating temperatures and humidity levels can make paint peel. For spaces where this is normal like kitchens, using KILZ 3® Premium Primer (known for its exceptional adhesion and durability) before you paint can help ensure your paint job lasts longer. See the full kitchen transformation with step-by-step instructions here.
Primer Seals and Blocks Stains
If you have a wall with unpleasant stains, for example smoke stains from a previous homeowner in a bedroom, KILZ® Original Primer with its powerful stain blocking formula is the one for the job. See how we freshened up a mid-century modern bedroom with primer here.
Versatile Multi-Surface Sealer
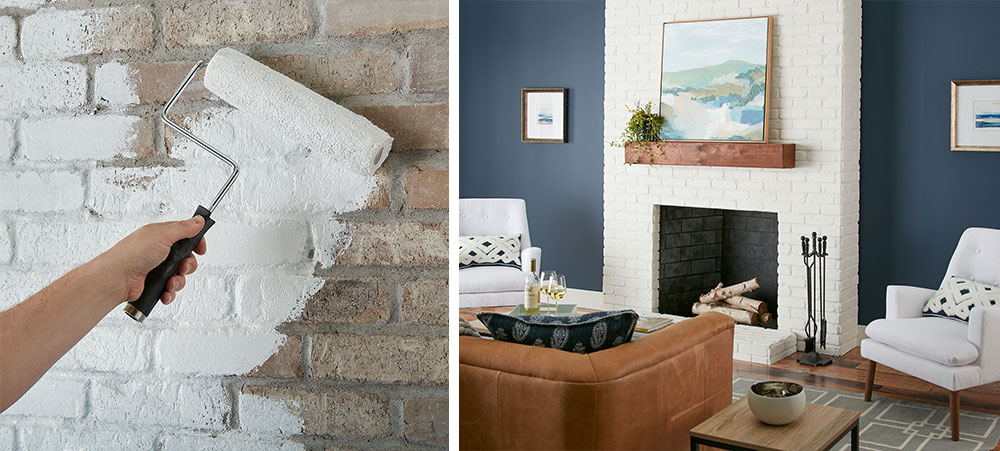
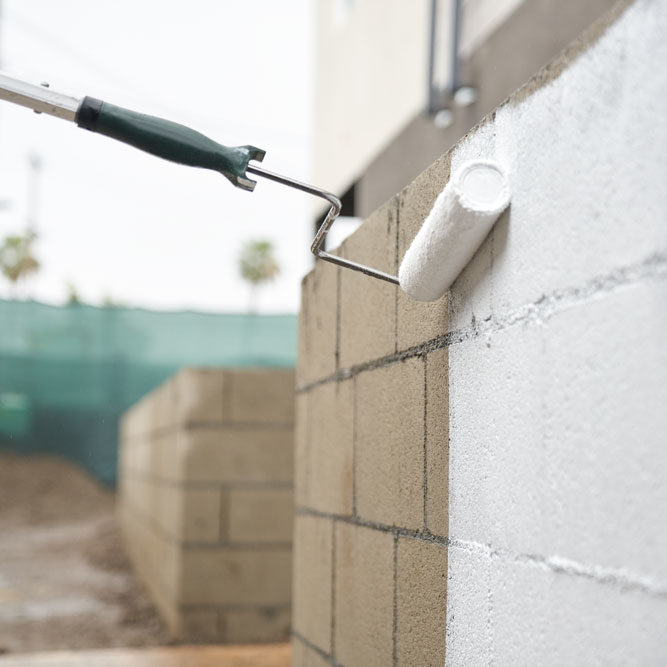
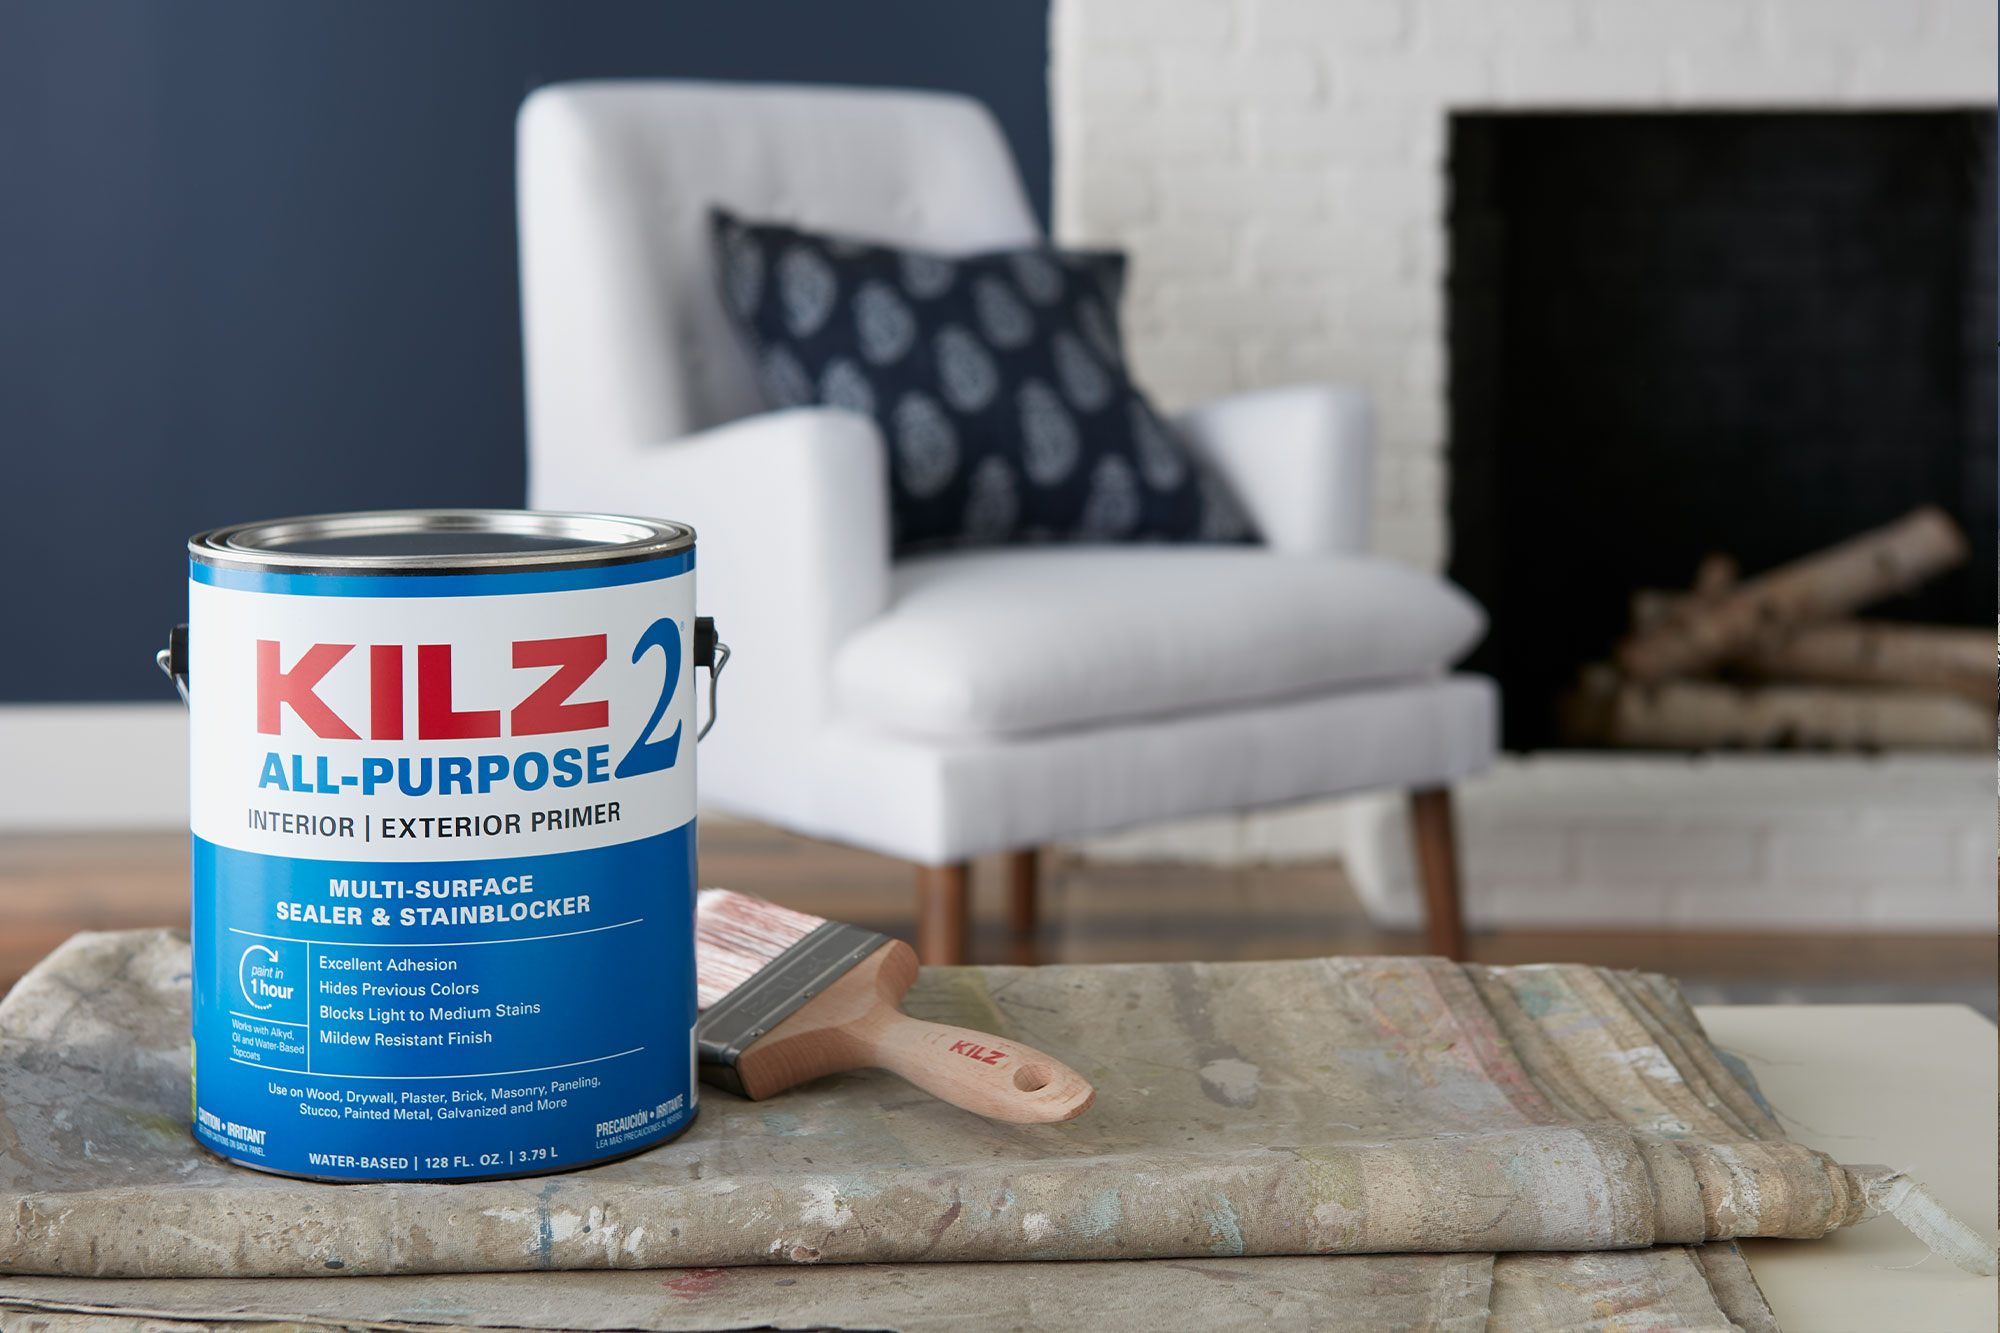
When you want to paint a porous surface like brick, you want a primer that seals the surface. KILZ 2® All-Purpose Primer is a versatile multi-surface sealer perfect for the task. See how a freshly primed and painted fireplace pops against on-trend navy walls in this post.

Primer Hides Dark Colors
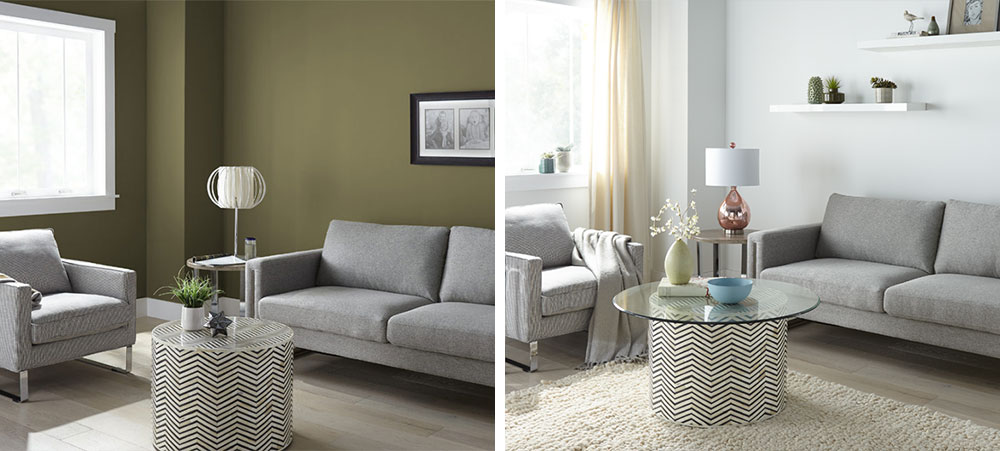
When you’re applying a new paint color, the last thing you need is your old color seeping through. That’s why KILZ 3® Premium Primer is a great primer choice when going from a darker color to a lighter color. It hides dark colors and creates the perfect base for your new topcoat paint. See how KILZ primer turned a dark spare room into a sunny and sweet nursery here.
Primer Has a Mildew Resistant Primer Finish
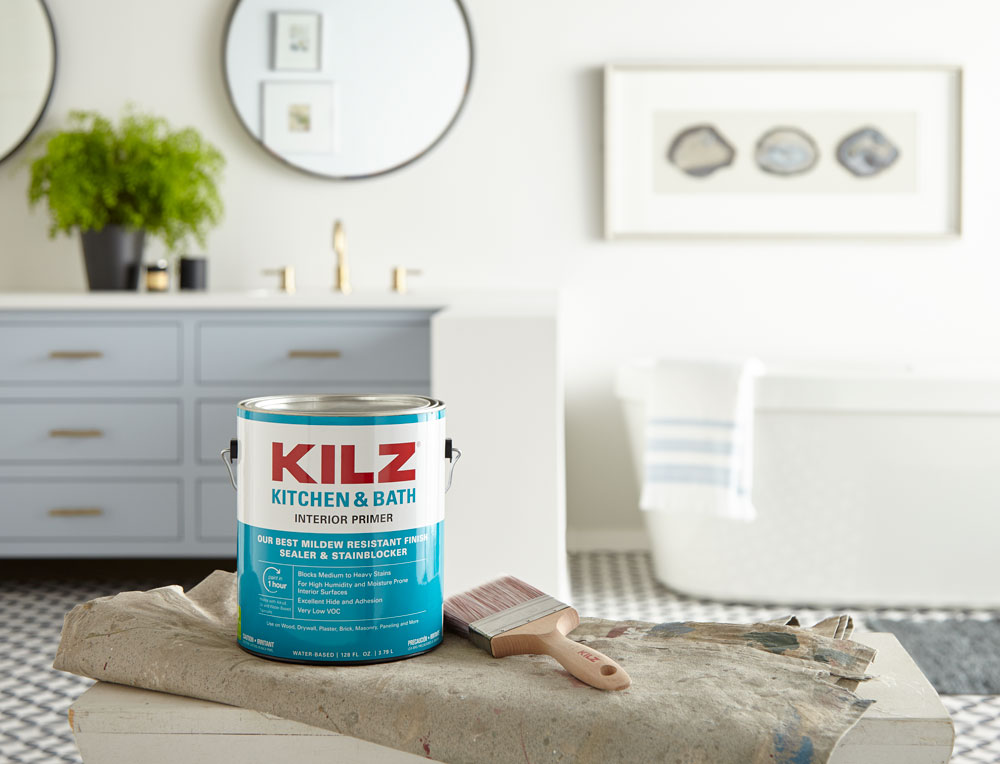
In high humidity areas, like bathrooms, KILZ® Kitchen & Bath Primer is up to the task. It dries with a mildew resistant primer finish that helps protect and support paint. See the full bathroom transformation here.
Always remember to refer to our website kilz.com or product back labels for additional information on which primer is right for your project and detailed instructions on how to apply our products.
RELATED ARTICLES
get inspired:
FOLLOw us:
@kilzbrand
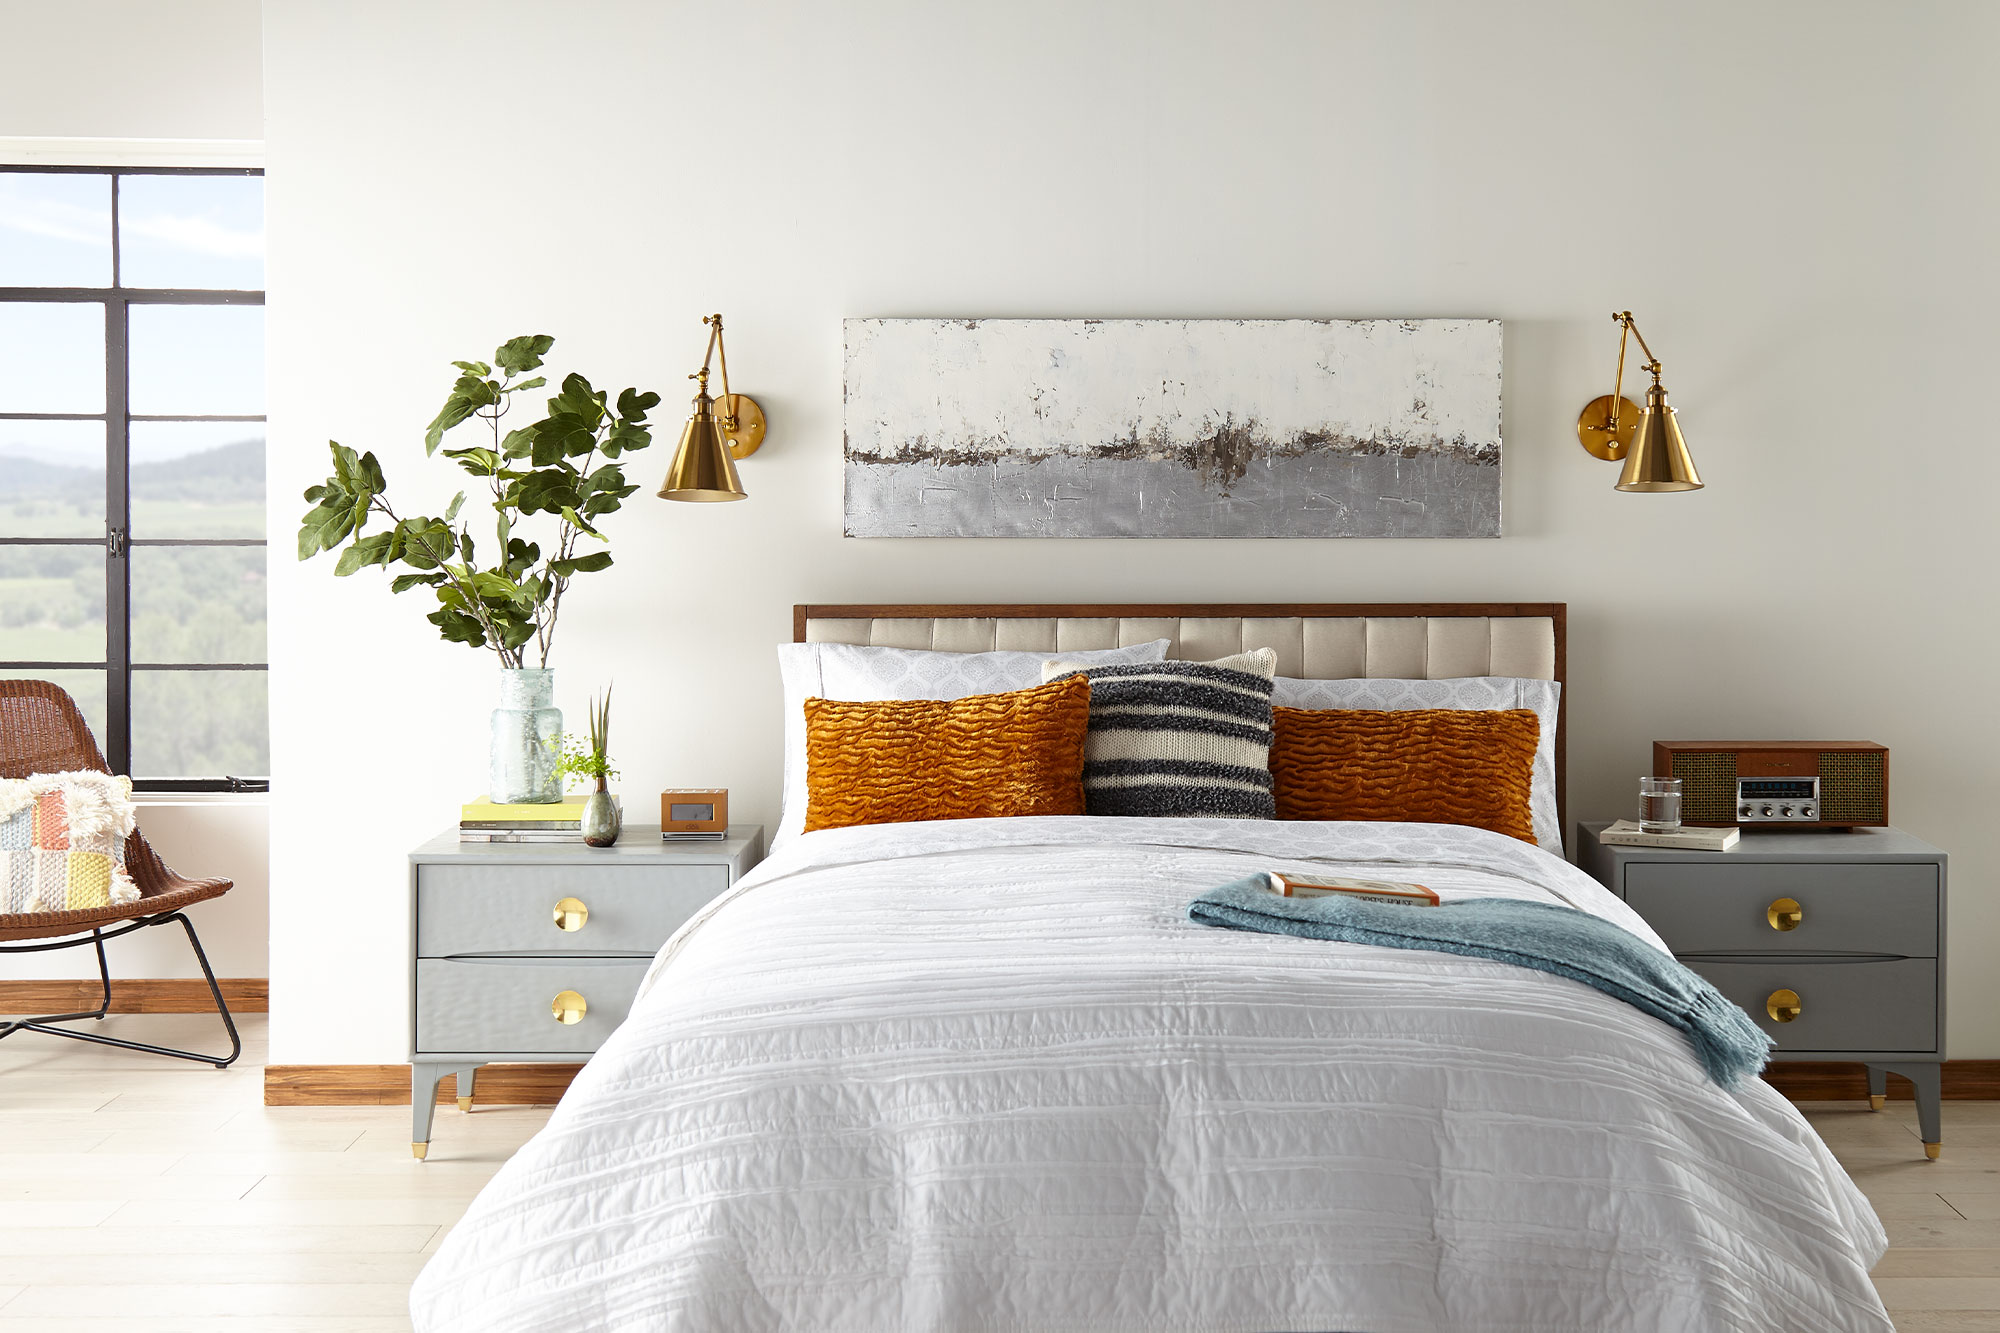
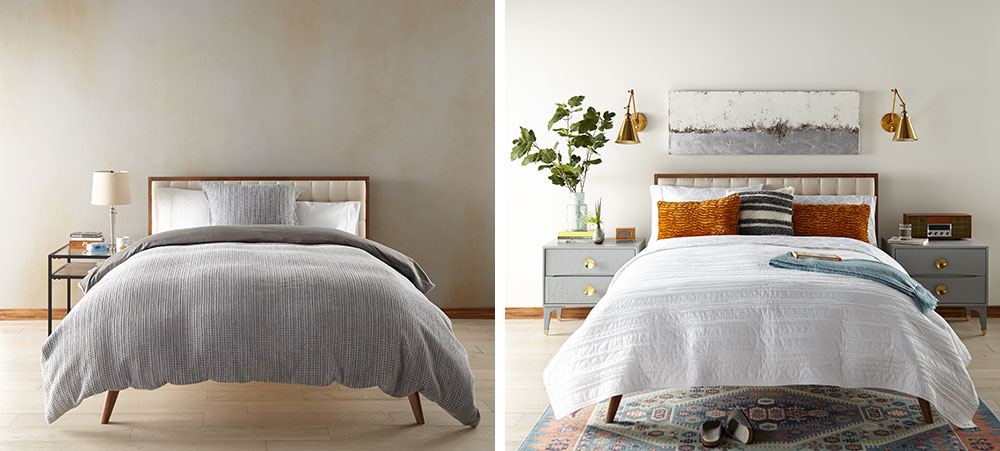
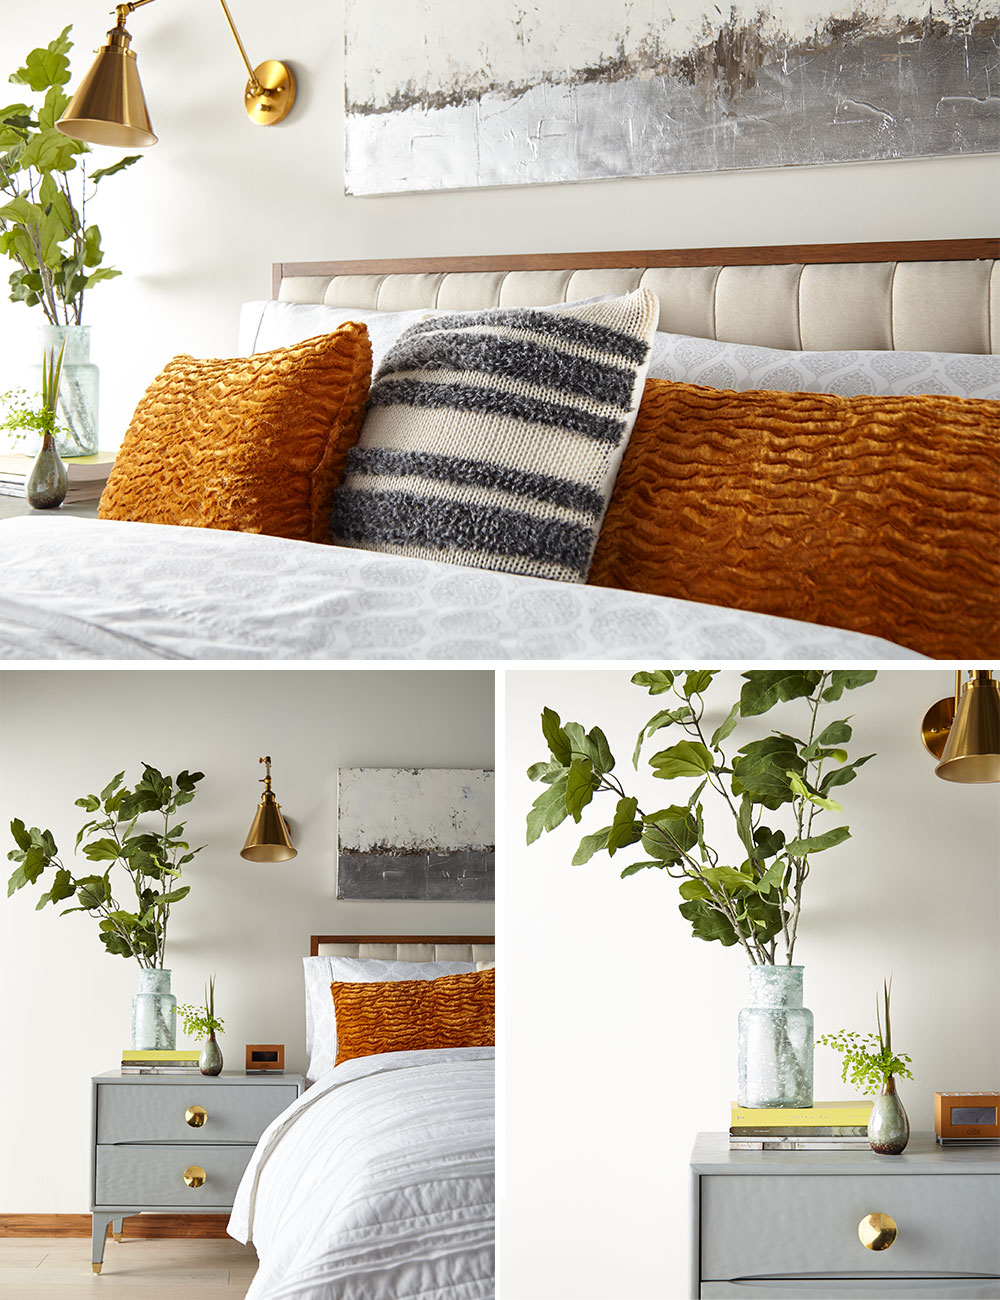
Mid-Century Modern Master Bedroom
January 13, 2021An otherwise airy master bedroom is marred by smoke-stained walls, made worse by an unpleasant lingering odor. A much-needed transformation starts with KILZ® Original primer, featuring a powerful stain and odor blocking formula that is the first step in taking this master bedroom from dreary to bright.

Simply painting over stained walls will likely leave you with unwanted stains and odors seeping through, which is why starting with the right primer before painting is key! Trusted by pros for over 40 years, KILZ Original interior primer is formulated to block most heavy interior stains including water, smoke, tannin, ink, and more. It also seals pet, food and smoke odors and has excellent adhesion properties, helping paint better adhere to most interior surfaces.
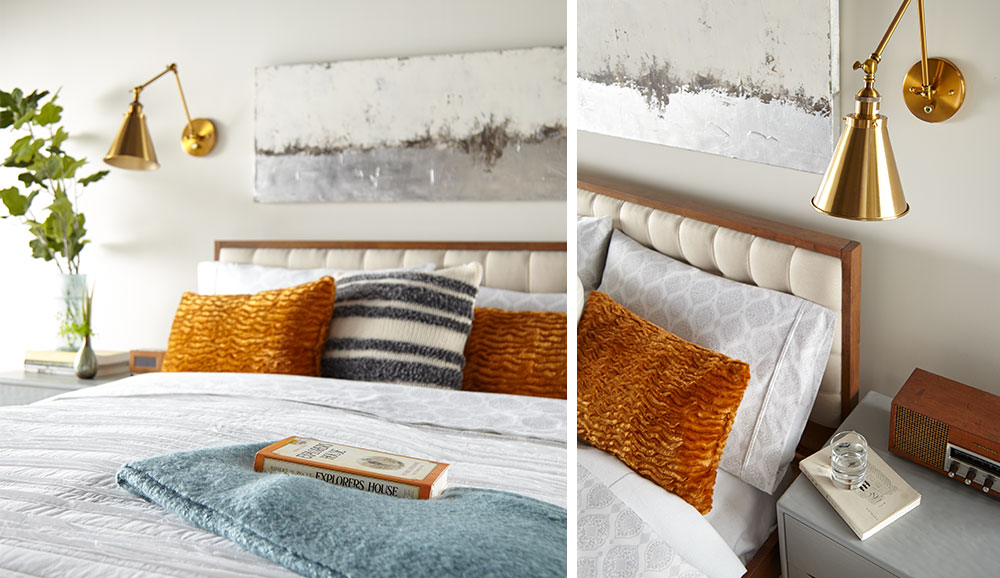 After the smoke stains and odors are covered and sealed with KILZ Original primer and the primer has had time to dry, it’s time for a fresh coat of paint. Magnolia Home by Joanna Gaines® Interior Paint in Pearly Cotton MAG041 is the perfect almost-white bleached beige shade for this master bedroom makeover. Available in 150 timeless colors personally crafted by Joanna Gaines, Magnolia Home by Joanna Gaines premium interior paint is low VOC and remarkably durable.
The new white master bedroom walls are the perfect backdrop for the mid-century modern bed (an existing piece of furniture that looks almost brand new in the freshly painted room!). New grey-blue side tables with gold hardware are complemented by gold light fixtures, a colorful rug, soothing artwork and soft pillows that add a perfect pop of color.
Do your bedroom walls need a fresh coat of primer and paint? Read on below for step-by-step instructions!
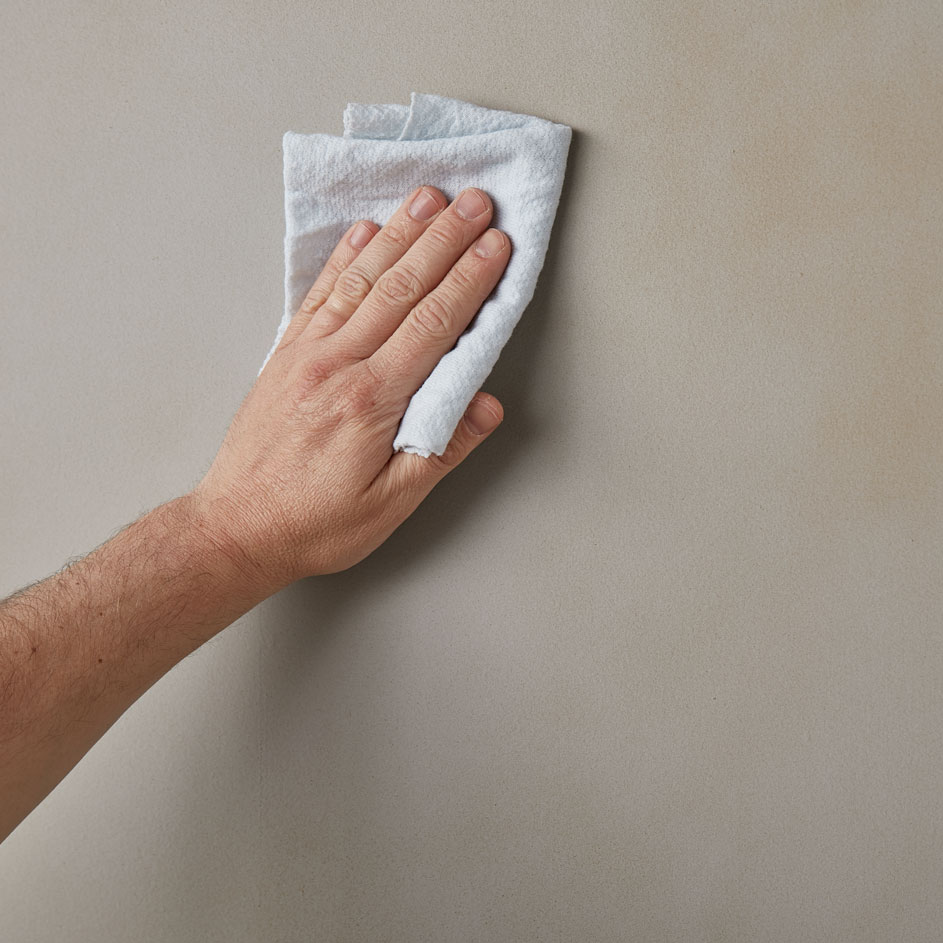
Step 1:
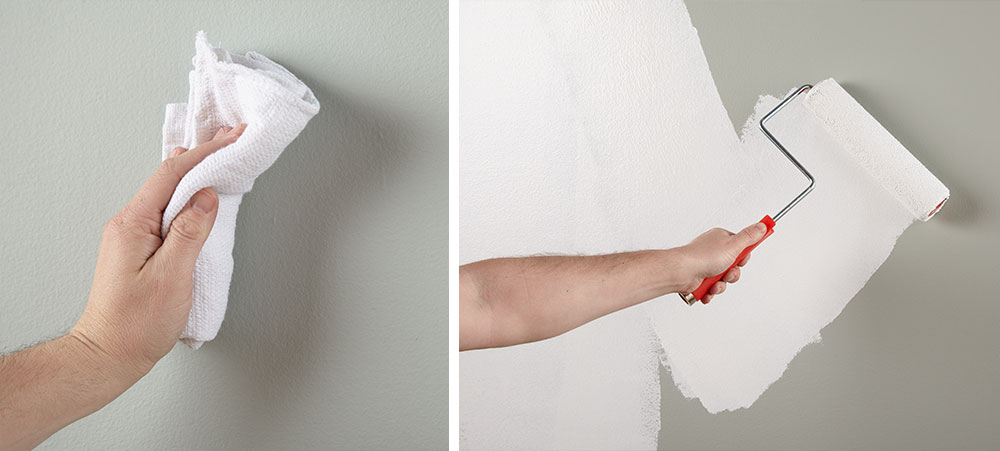
Wipe down walls with a damp cloth to ensure they are clean and free of dust. Allow to dry.
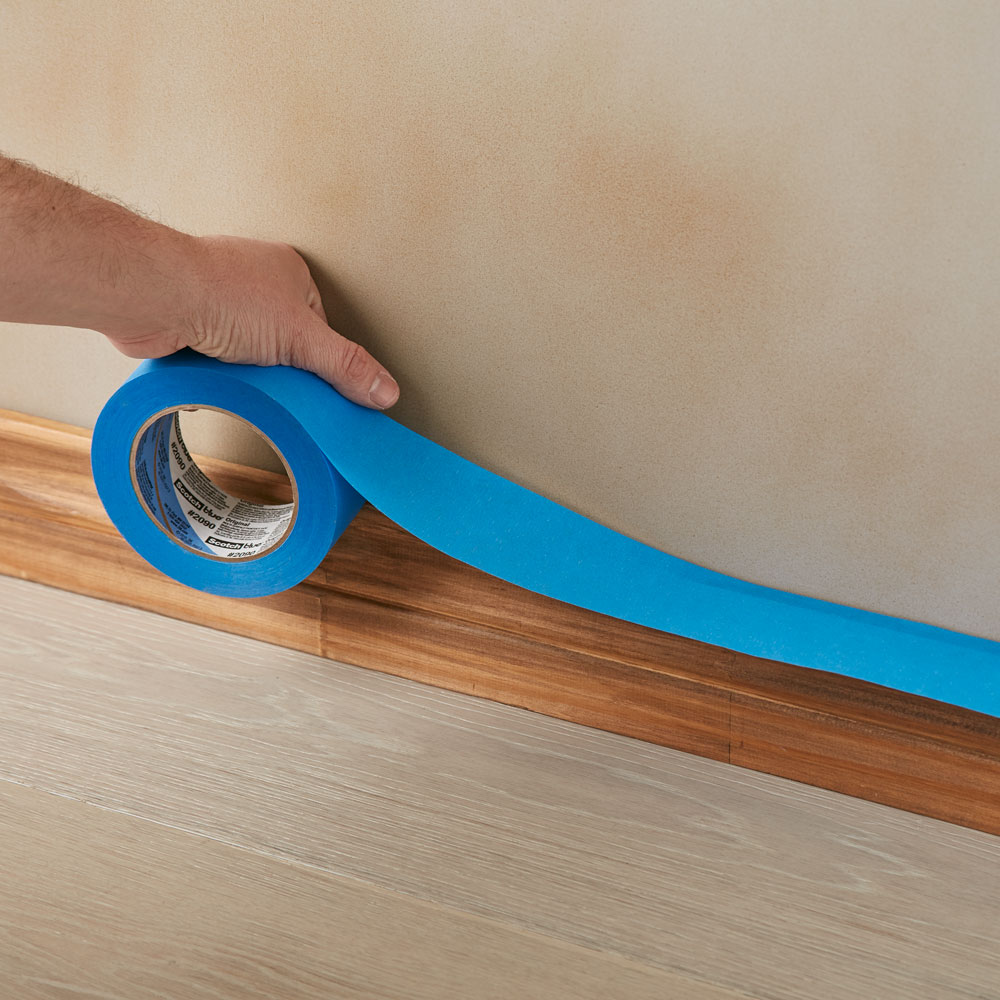
Step 2:
Tape around the baseboards and moldings with painter’s tape to ensure you don’t get primer or paint where you don’t want it!
Step 3:
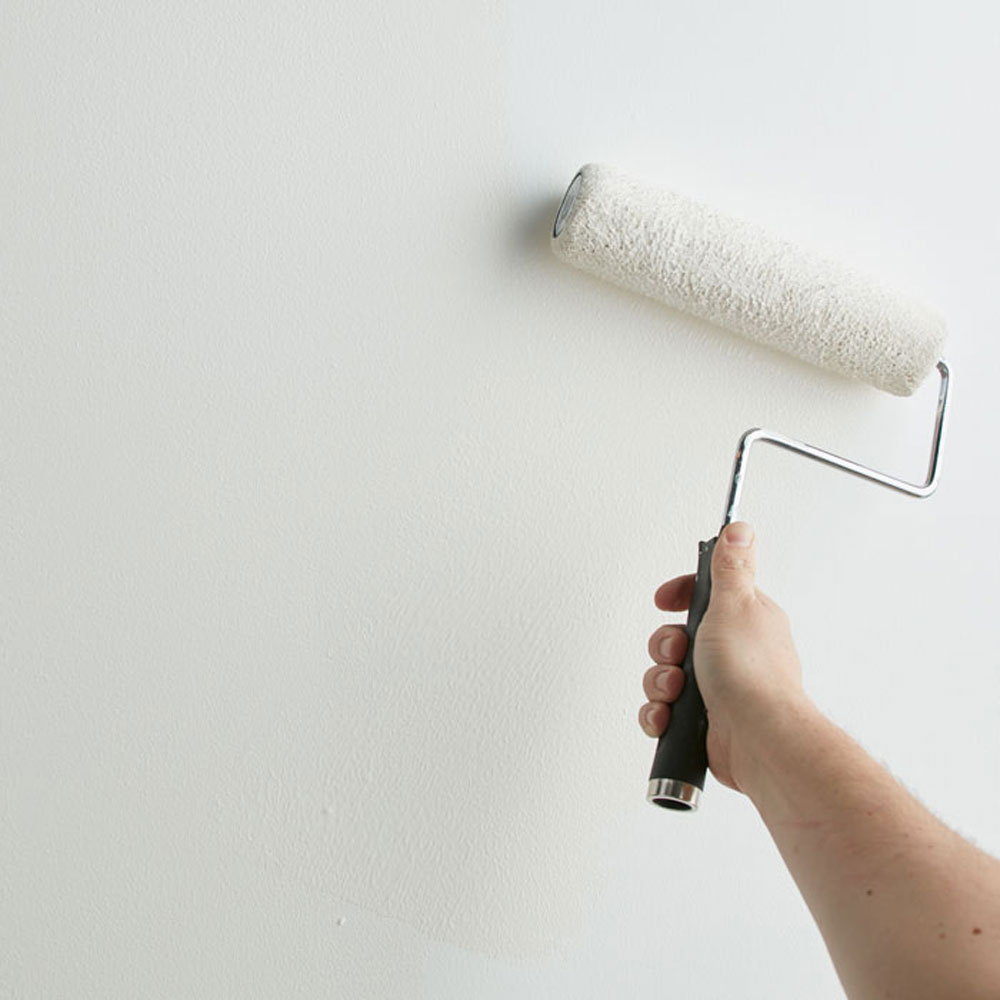
To seal and block smoke stains and odors, apply 1 coat of KILZ® Original (stirring thoroughly before and occasionally during use) to the walls and allow to dry. Apply primer using a brush first to “cut in” around the edges, then use a roller to fill in.
Step 4:
Once primer is dry, apply Magnolia Home by Joanna Gaines® Interior Paint in Pearly Cotton using the same application method as the primer (using a brush first to cut in around the edges 4 to 6 feet at a time, then use a roller to fill in those sections before moving along).
Step 5:
Remove the tape before the paint is fully dry.

Always remember to refer to our website kilz.com or product back labels for additional information on which primer is right for your project and detailed instructions on how to apply our products.
RELATED ARTICLES
get inspired:
FOLLOw us:
@kilzbrand

Primers for Small Projects
August 19, 2020As we move into the start of fall, there is still ample to tackle painting projects you might not have gotten to during the summer months before the winter and holiday season begins. Small projects that, including furniture repainting or refreshing, can be completed in as little as a day or a weekend – but can still make a big difference in the look and feel of your space.
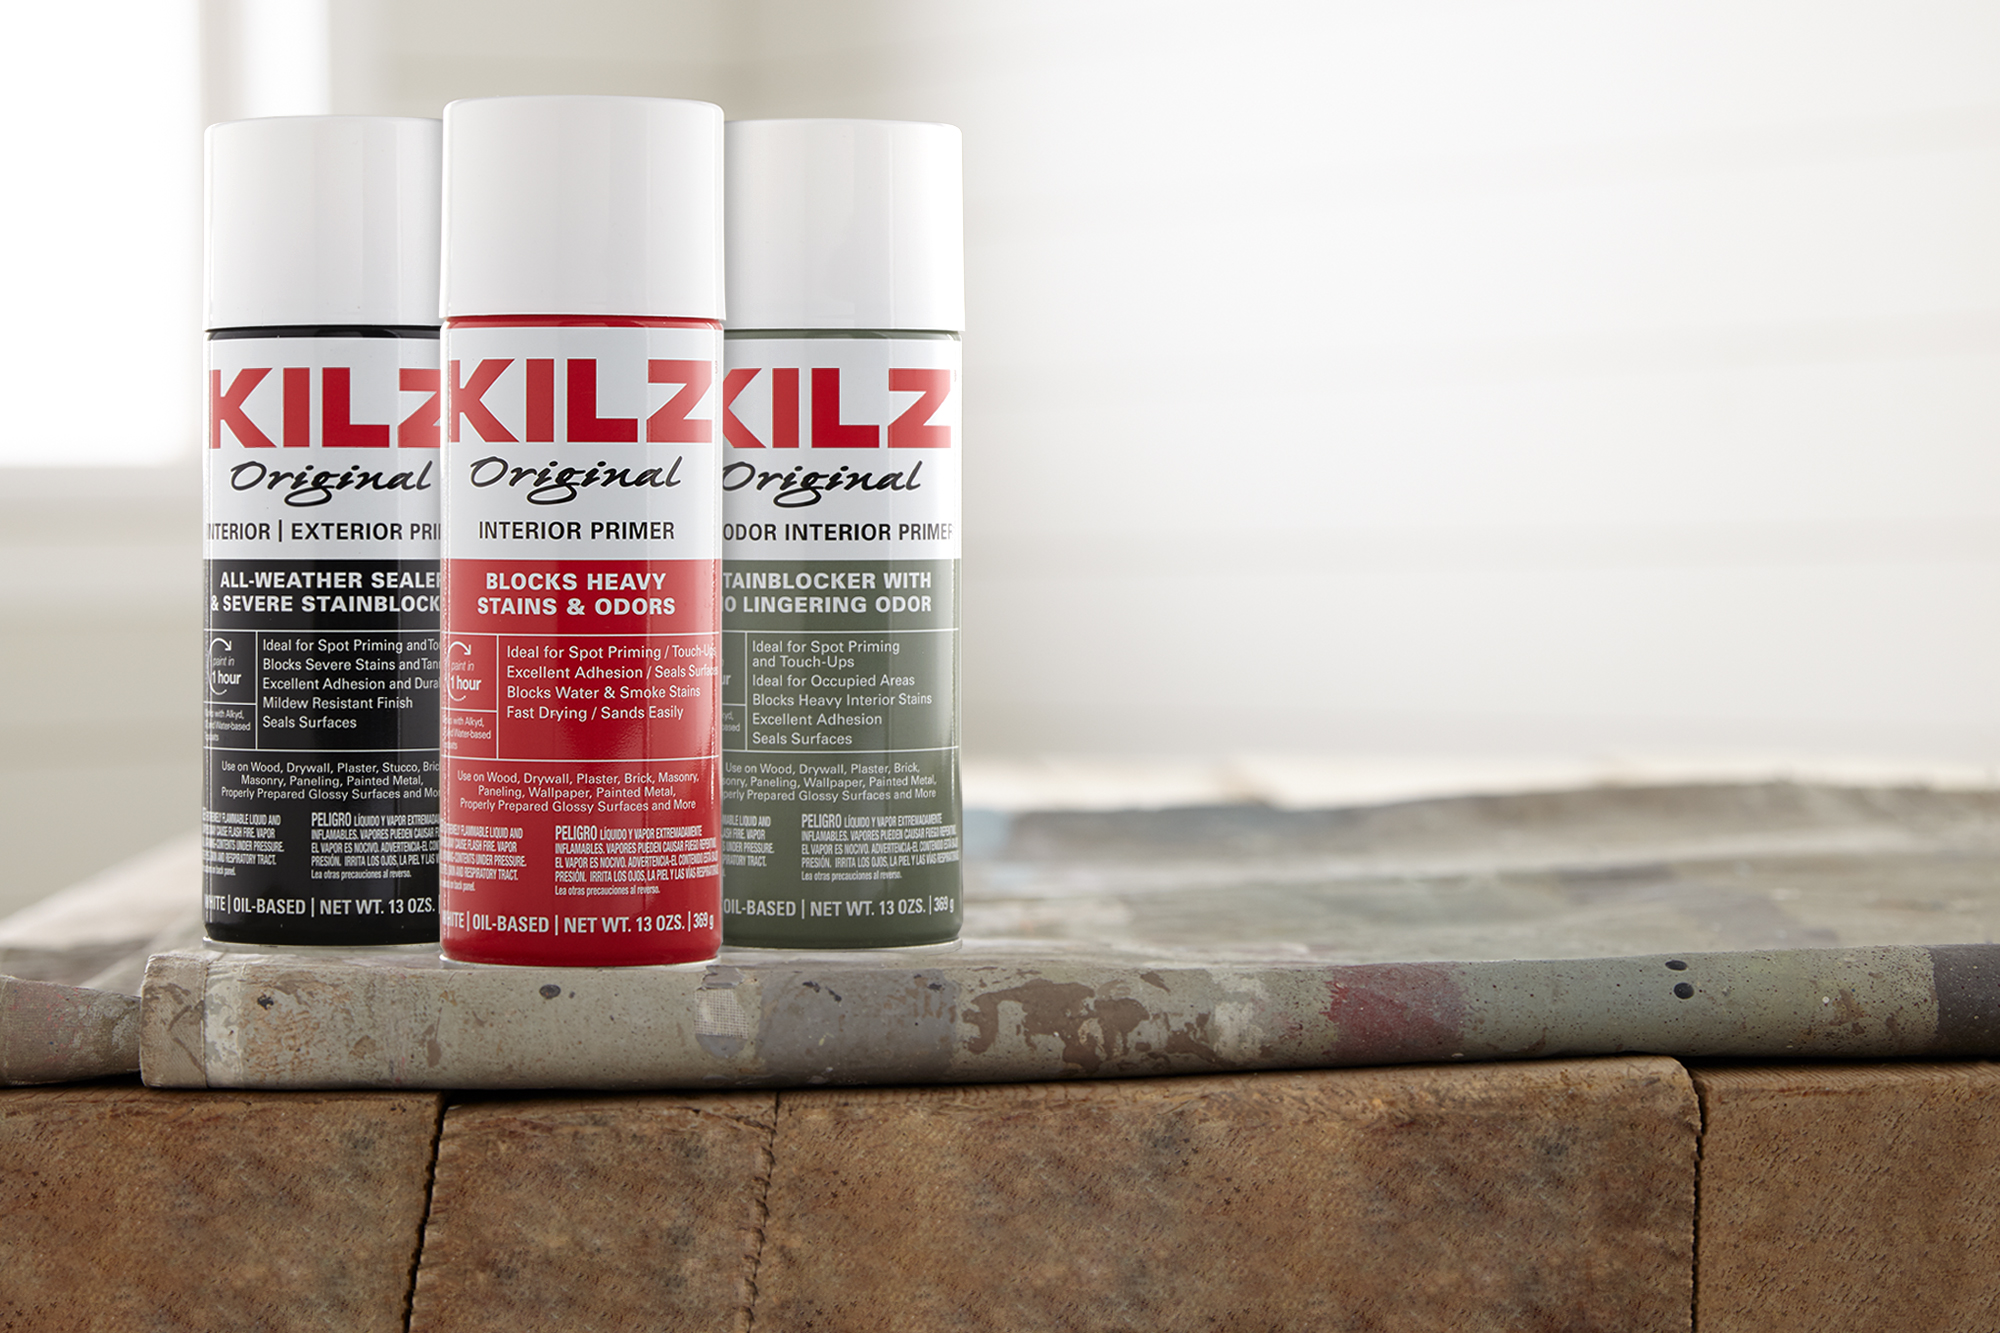
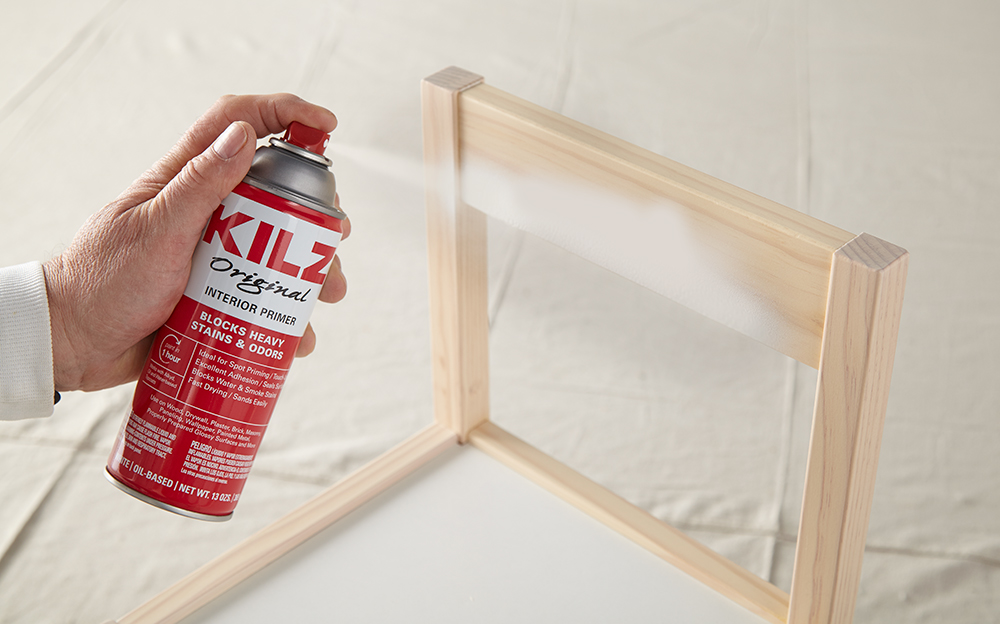
Do you need to prime when painting a small piece of furniture? Our answer is emphatically yes! But do you need entire gallon of primer to get the job done? Most likely the answer there is no. KILZ® Brand offers a family of hardworking primers suitable for all types of painting projects large and small, indoor and outdoor. Trusted by pros for over 40 years, KILZ® Original Interior Primer is available in a convenient aerosol formula, ideal for small painting projects and spot priming interior surfaces.
If you’ve never used an aerosol primer before, we have a few tips to get you started! Similar to priming a wall or set of cabinets, when using an aerosol primer you’ll want to be sure the surface is clean and free of dust. For glossy surfaces, we recommend scuff sanding the surface before priming to ensure maximum adhesion. When using an aerosol primer, wearing eye protection is advised, as well as covering adjacent areas to protect from any primer overspray. For best results, you’ll want to use the aerosol primer at room temperature.
Once your area and surface are prepped, shake the primer can vigorously for one minute after the mixing ball begins to rattle, and shake often during use. Hold the can upright, moving from side-to-side while spraying lightly and evenly about 12″ from area being painted. We recommend 2-3 thin coats to produce the best results. Dry time for most of our aerosol primers is about one hour, and then you’re ready to paint!
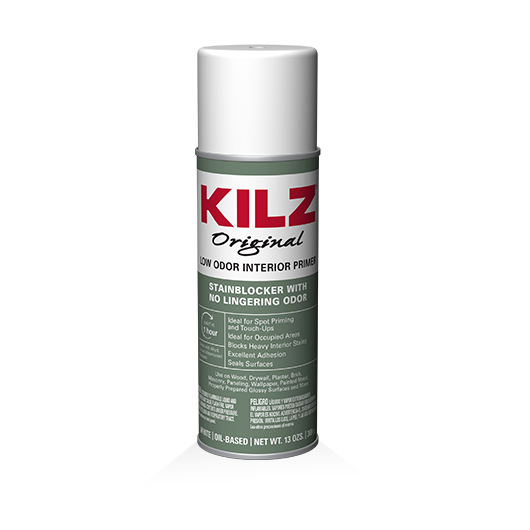
If you don’t want the odor of an aerosol primer, we suggest KILZ Original Low-Odor Interior Aerosol Primer. Formulated with the same stainblocking performance as KILZ Original, it features fast odor dissipation technology which means no lingering odor†. Ideal for use in dining areas, small apartments and other areas which are sensitive to high odor levels.

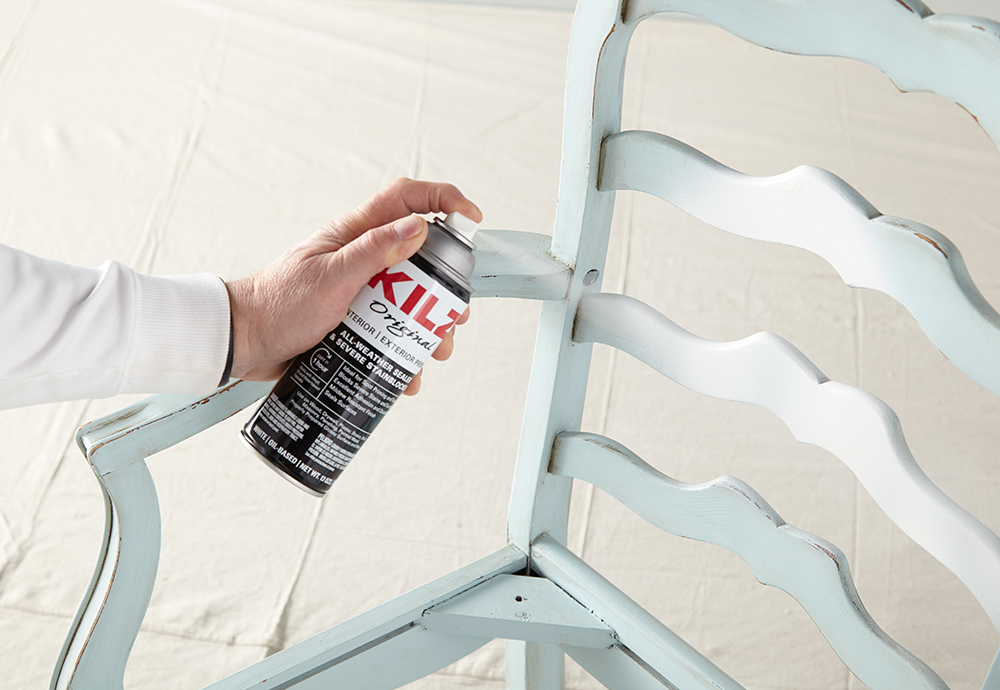
For furniture pieces that might be exposed to the elements on your porch or patio, KILZ Original Interior | Exterior Aerosol Primer is a great choice. We used this primer as the first step in repainting a thrift-store furniture find, meant to be used as an outdoor dining chair. Another reason to use aerosol primers is when covering intricate and detailed surfaces, like the back of this chair. Not only did the aerosol primer work to seal the surface, but it made priming the scalloped details a breeze!
Looking for more small project priming and painting tips? Check out our recent post on using KILZ Chalk Style paint to upcycle furniture.
Always remember to refer to our website kilz.com or product back labels for additional information on which primer is right for your project and detailed instructions on how to apply our products.
RELATED ARTICLES
get inspired:
FOLLOw us:
@kilzbrand
Renovating After Natural Disasters
March 30, 2020Fixing or rebuilding a home after a natural disaster like a flood, hurricane or fire is no easy task. In the worst-case scenarios, the help of a professional contractor might be in order. But if you’re looking to DIY your renovation after a disaster has left your home with water, fire or smoke damage, KILZ® Primers can help! Trusted by pros for over 40 years, KILZ primers are often the go-to products for tackling stains caused by fires, floods and persistent exposure to smoke.
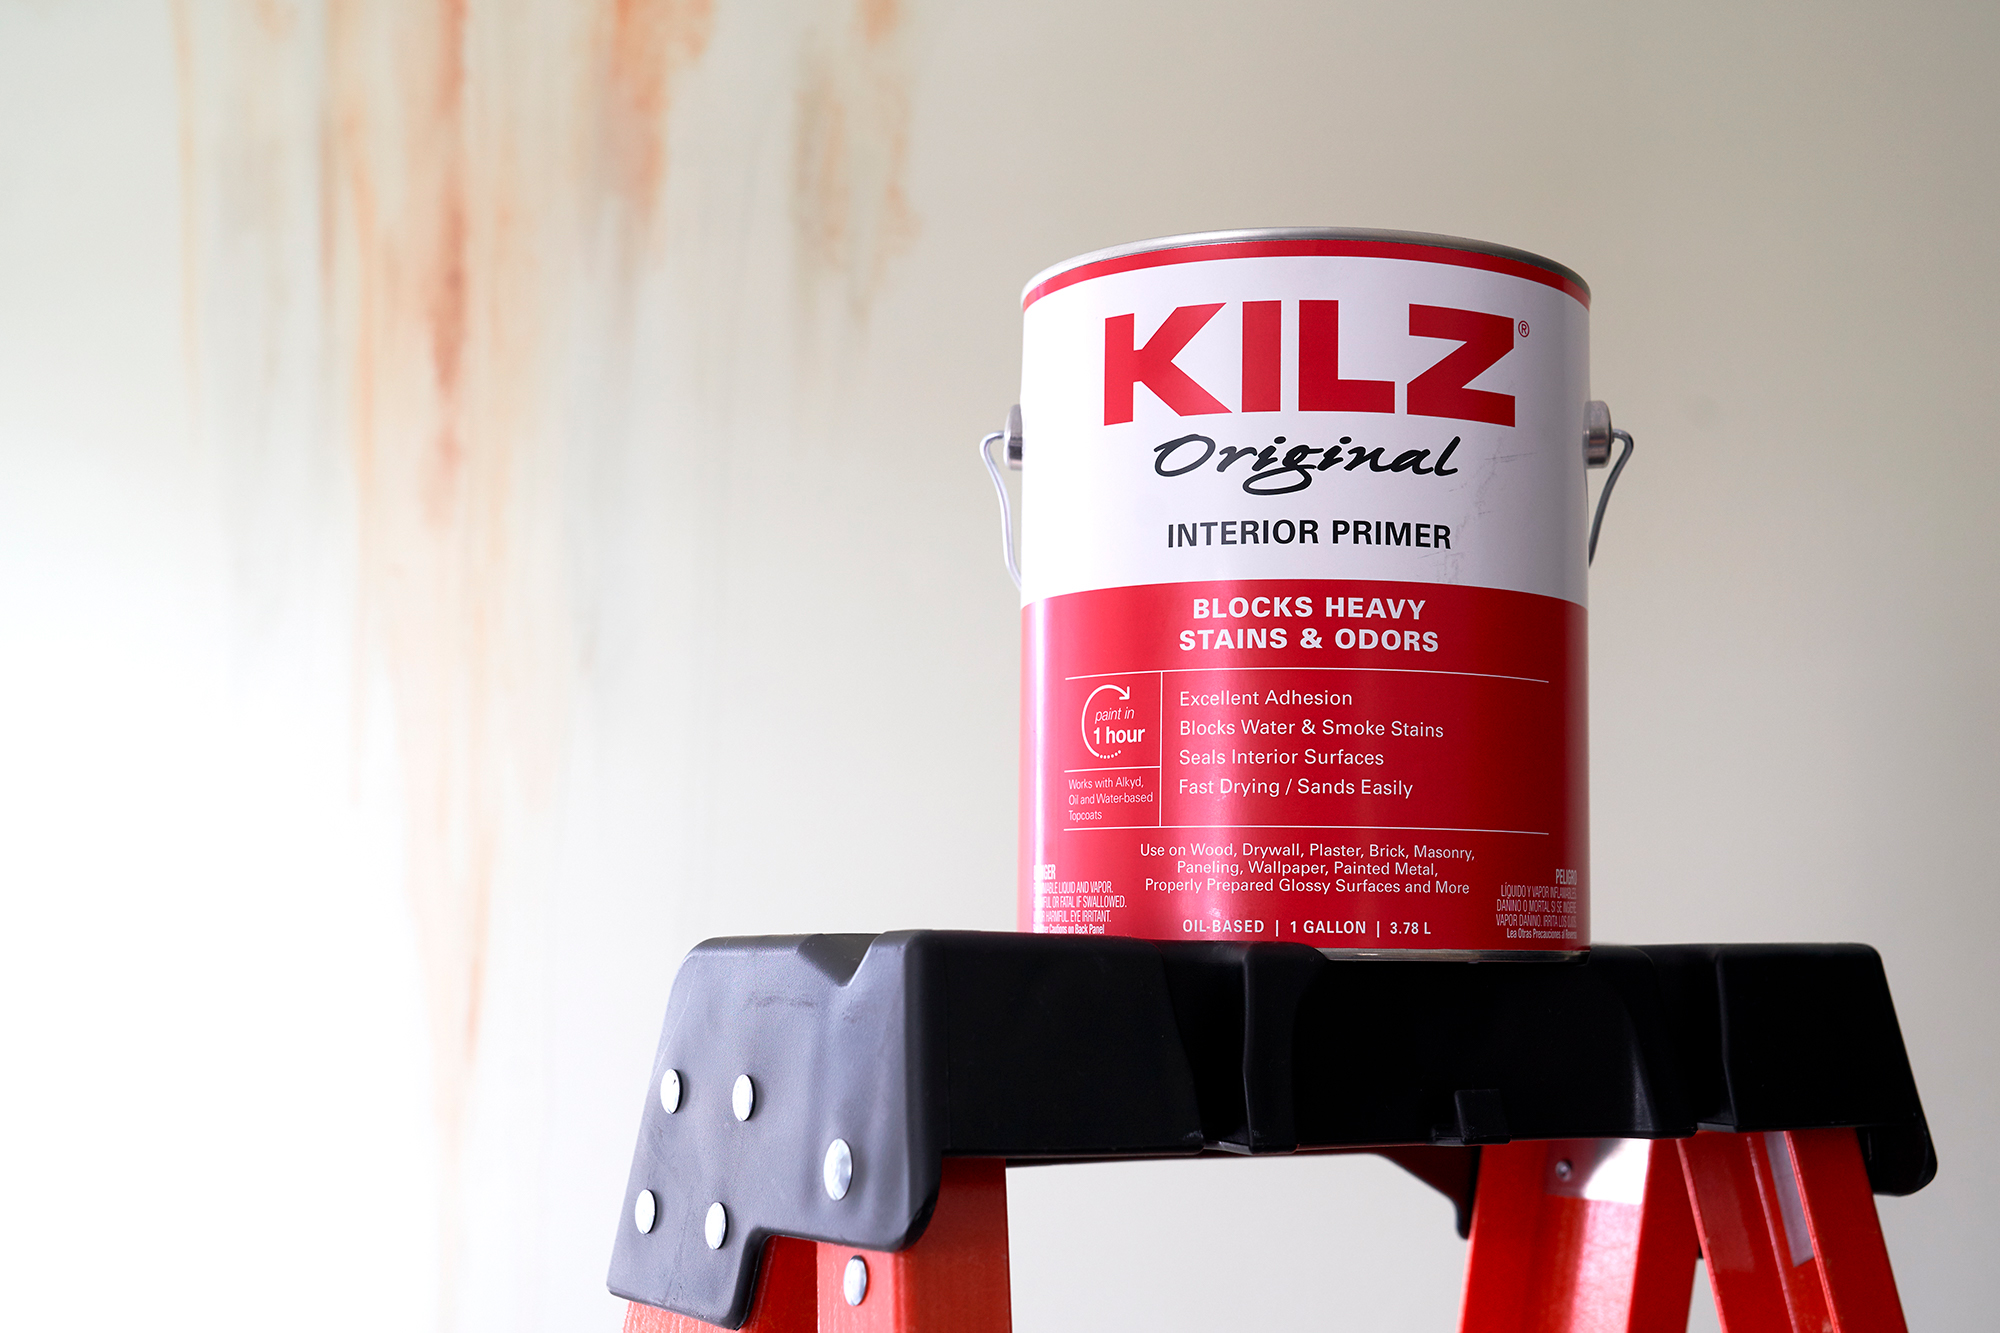
If you’ve got your work cut out for you after a flood or fire has necessitated a renovation, KILZ® Original Interior Primer is made for the job. This hardworking oil-based primer is formulated to block heavy stains including those caused by water or smoke, and its fast-drying formula can help you get on with your renovation project faster.
For restoration jobs on the outside of your home, KILZ Original Interior | Exterior Primer offers the same power of KILZ Original Interior Primer in an all-weather formula. Offering excellent adhesion and durability, KILZ Original Interior | Exterior can be used on wood, drywall, plaster, stucco, brick, masonry, paneling and more.
Always remember to refer to our website kilz.com or product back labels for additional information on which primer is right for your project and detailed instructions on how to apply our products.
RELATED ARTICLES
get inspired:
FOLLOw us:
@kilzbrand
join the conversation:
SHARE this post: