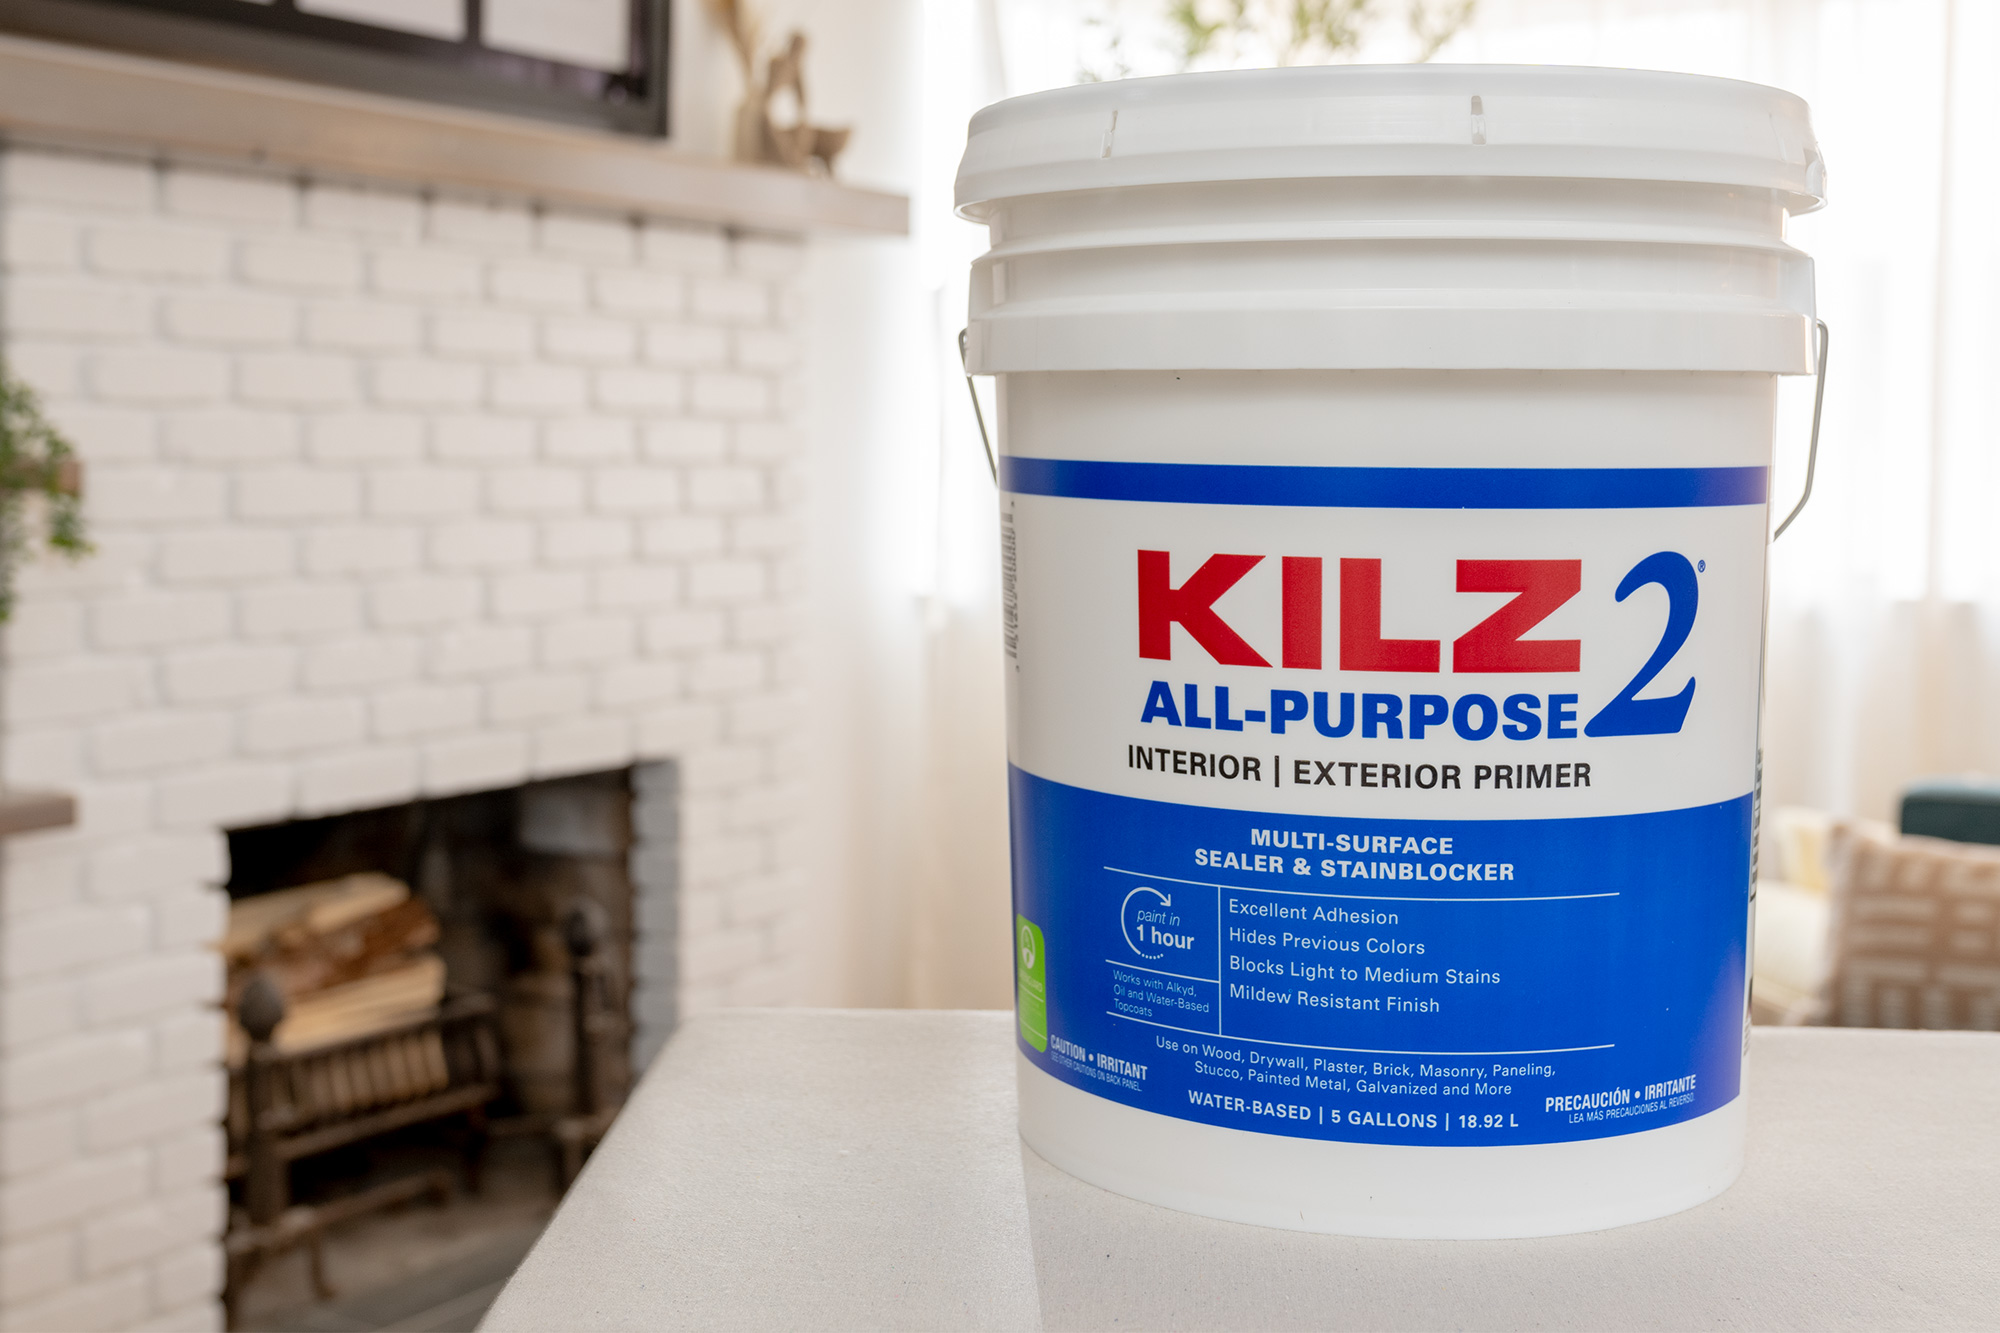
Tag: KILZ 3 Premium Primer

Why I Used KILZ 3® Premium Primer for a Basement Refresh Project
June 3, 2026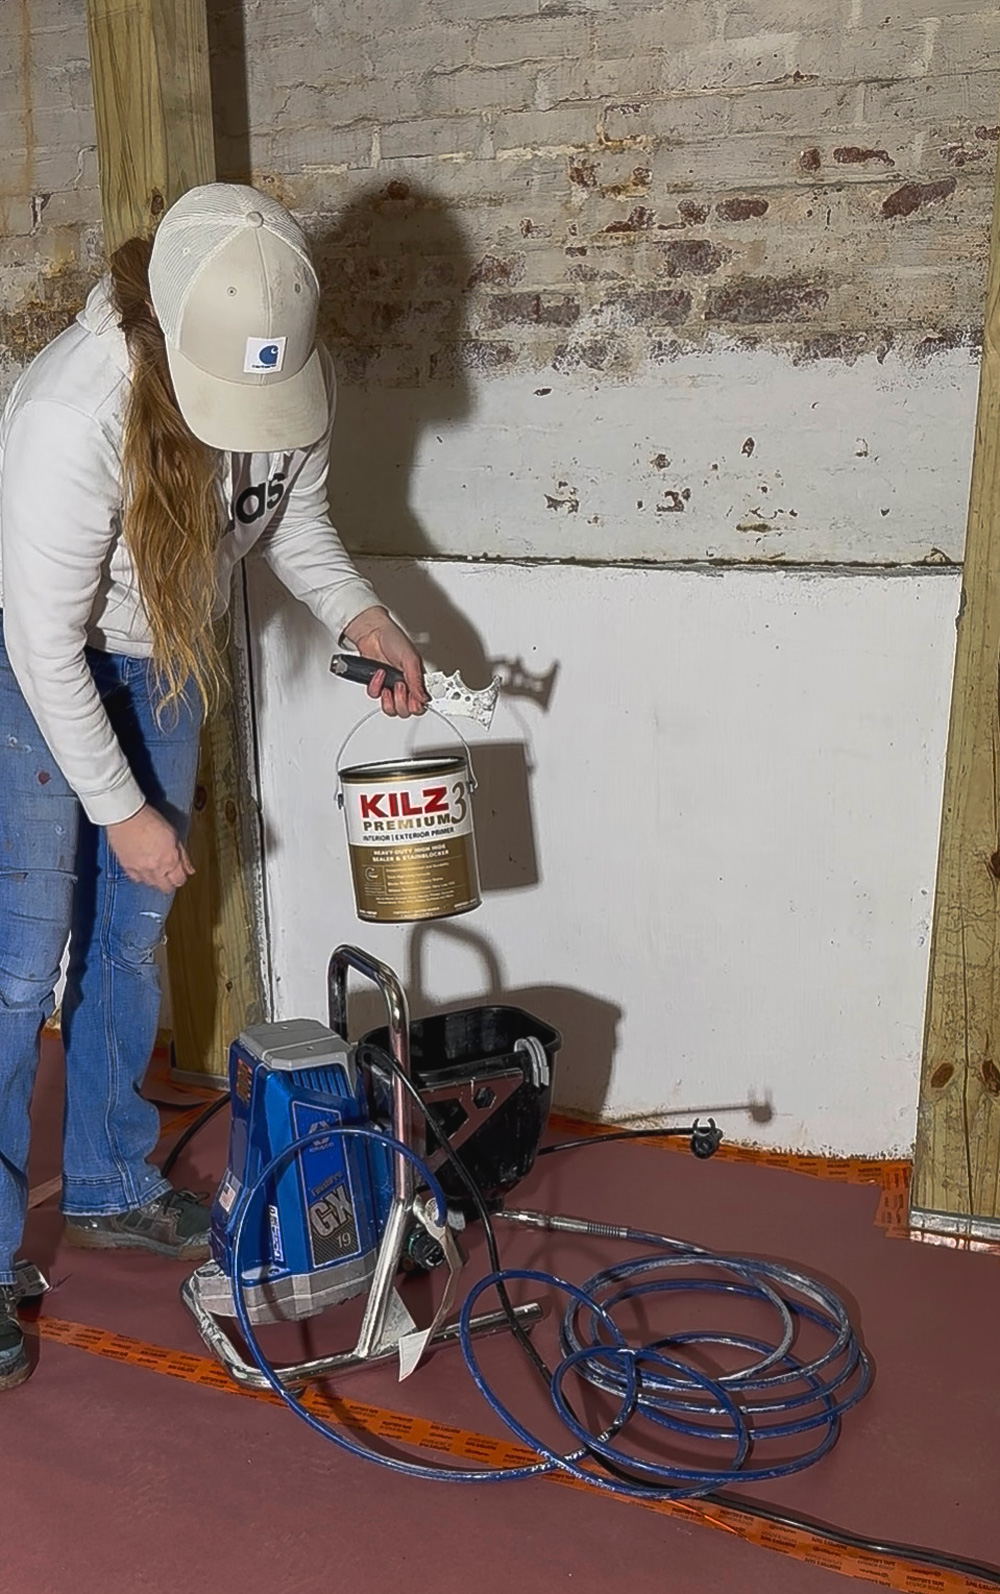
Not every basement needs a full renovation to feel dramatically better. Sometimes, the right prep, materials, and attention to detail are enough to completely change how the space feels. On a recent basement project, the goal wasn’t to turn it into finished living space—it was to refresh it, brighten it, and eliminate that musty, dungeon-like feeling the client had been dealing with for years.
The project included previously painted concrete brick walls and previously painted ceiling joists, both showing signs of age, discoloration, and wear. Combined with outdated insulation issues, this basement needed a thoughtful approach.
Existing Conditions: Old Paint, Discoloration, and a “Dungeon” Feel
The concrete brick walls had been painted in the past, but the coating was failing in multiple areas. There was visible flaking and peeling, especially where the masonry had absorbed moisture over time. This is common in basements and always needs to be addressed before any new coatings go on.
The ceiling joists had also been painted previously, but the paint had become heavily discolored. Between age, dust, and old staining, the ceiling felt dark and neglected. The client didn’t want perfection—they just wanted the space to feel cleaner, brighter, and more usable.
During the walkthrough, I also noticed an issue that had nothing to do with paint but contributed heavily to how the basement felt: the insulation was old, improperly installed, and facing the wrong direction. It wasn’t the correct R-value for the space and wasn’t helping with moisture or odor control.
The client planned to replace the insulation as part of sealing the space up properly, which made primer selection even more important. This refresh was part of a larger effort to make the basement feel dry, clean, and intentional.
Prep Work: Removing Loose Paint Is Non-Negotiable
Before any priming began, the failing paint on the concrete brick had to be dealt with. Painting over loose material is one of the fastest ways to guarantee premature failure.
All loose and flaking paint was removed from the concrete brick walls. Once only sound material remained, the surface was thoroughly cleaned to remove dust and debris. This step ensured that the primer would bond to a stable substrate rather than locking down failure underneath.
The ceiling joists didn’t have peeling paint, but they did require a primer capable of blocking discoloration and evening out the appearance, so the ceiling wouldn’t continue to feel dark after repainting.
Why Primer Matters in a Basement Refresh
Basements are harsh environments for coatings. Masonry is porous, framing lumber ages unevenly, and discoloration tends to bleed through if it’s not properly sealed. Even when the goal is “just a refresh,” the primer does most of the heavy lifting.
This was especially important here, since the client was also upgrading insulation and working toward sealing the space more effectively. The paint system needed to support that effort, not work against it.
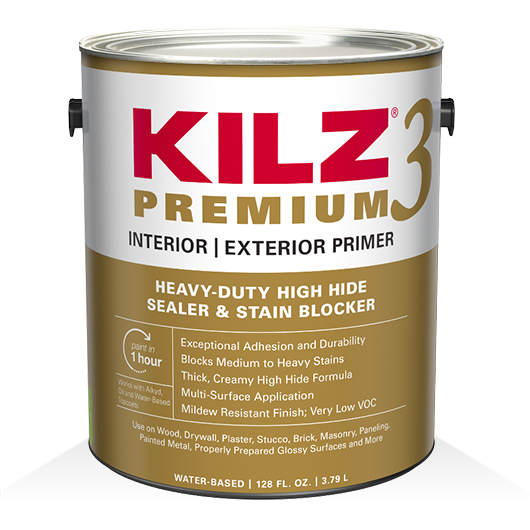
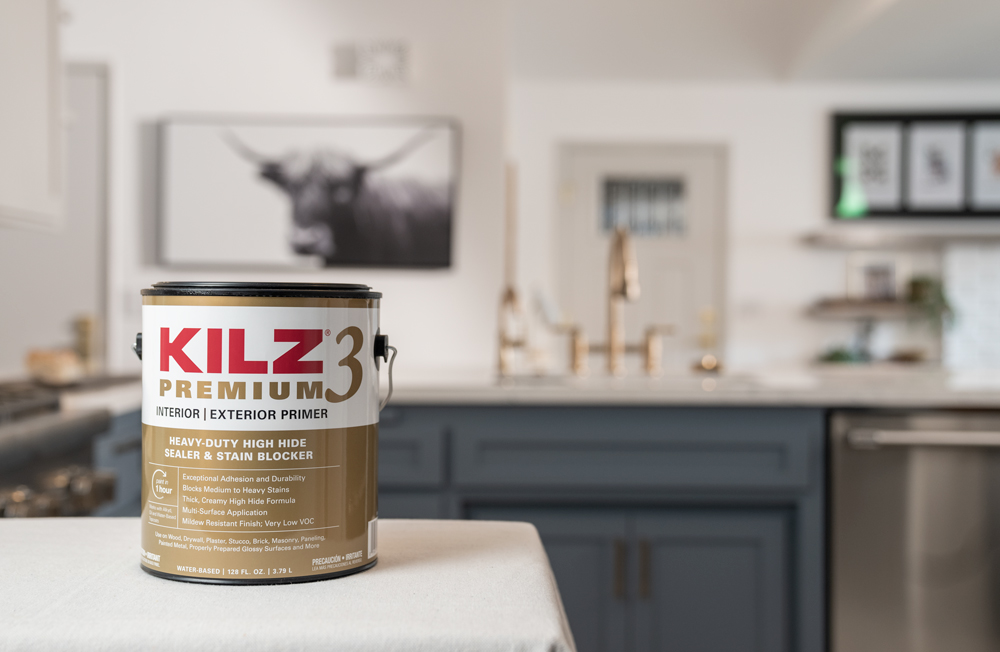
Why I Chose KILZ 3® Premium Primer
For this project, I chose KILZ 3® Premium Primer because it struck the right balance between performance and practicality.
KILZ 3® Premium Primer offers:
• Strong adhesion to masonry and previously painted surfaces
• Effective stain and discoloration blocking
• Excellent sealing on porous substrates
• A water-based, low-VOC formula suitable for enclosed basement spaces
• Fast dry times that keep projects moving efficiently
Since this was an interior basement and not a wide-open job site, low odor and air quality were important considerations. KILZ 3® Premium Primer delivered professional-level performance without the heavy fumes of oil-based primers.
Application on Previously Painted Concrete Brick
Once prep was complete, KILZ 3® Premium Primer was applied to the concrete brick walls using a combination of brush and roller. The goal was to work the primer into the texture of the brick and mortar joints to properly seal the surface.
One of the standout benefits was how well it handled mixed conditions—areas where old paint remained sound blended seamlessly with exposed masonry. Instead of flashing or absorbing unevenly, the primer created a consistent, uniform appearance across the wall.
After drying, the surface was fully sealed and ready for paint without concern about uneven absorption or future failure.
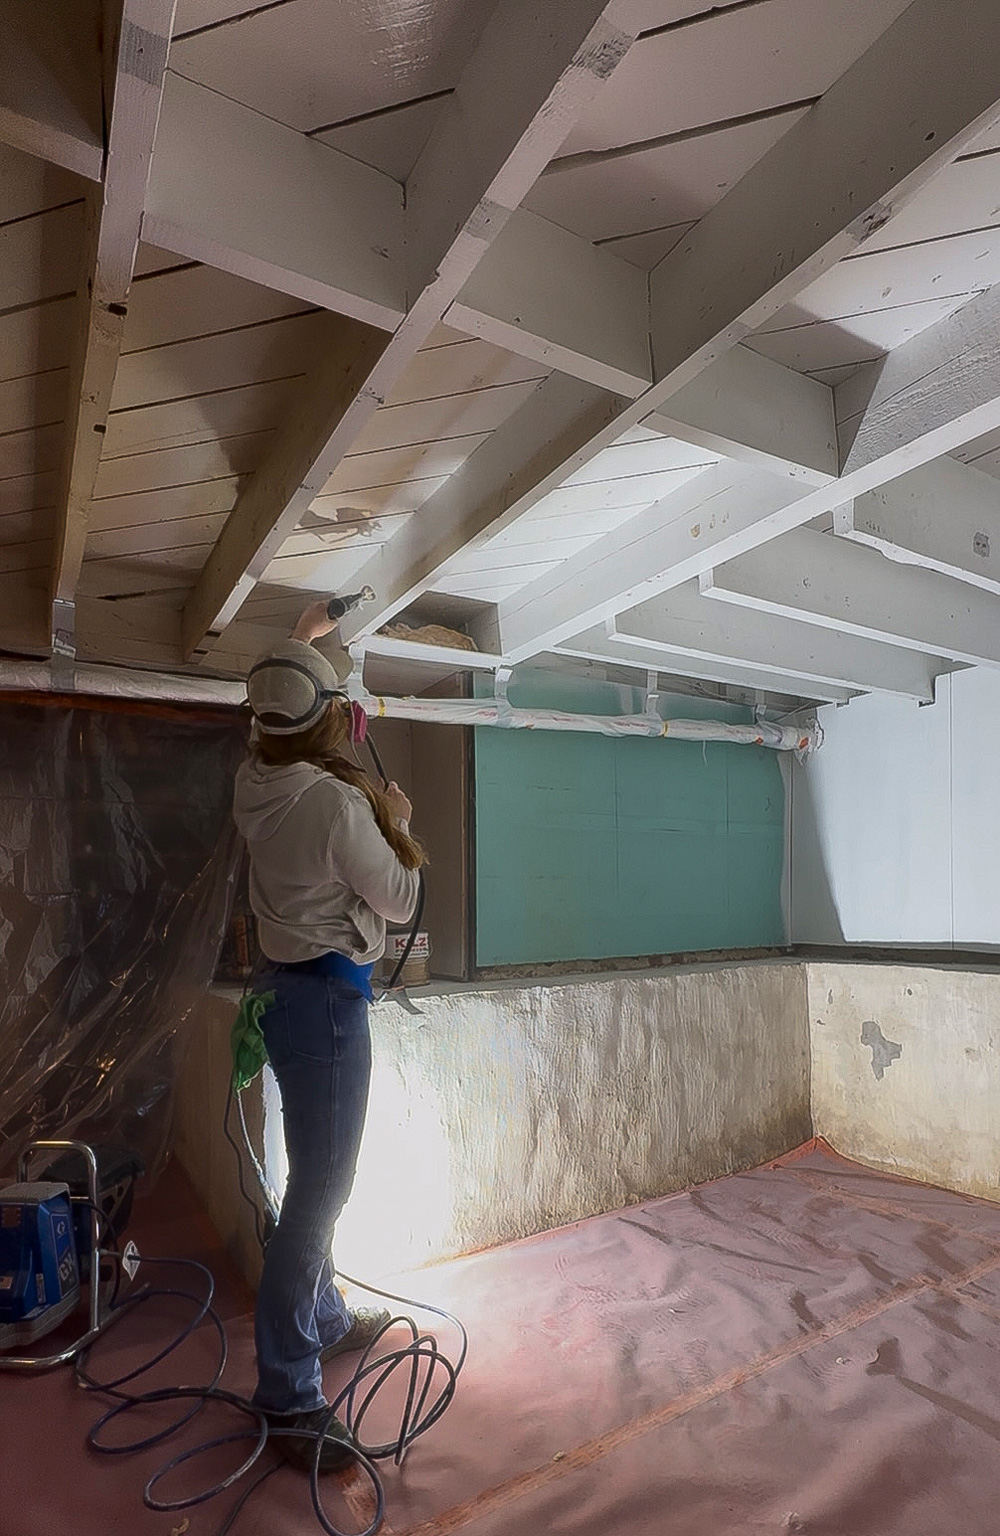
Application on Discolored Ceiling Joists
The ceiling joists were all about improving the overall feel of the space. Dark, discolored ceilings make basements feel lower and more closed in.
KILZ 3® Premium Primer adhered well to the previously painted wood and did an excellent job blocking stains and evening out color. It locked down residual dust and helped brighten the ceiling, immediately making the basement feel cleaner and more open.
Being water-based, it was also far more comfortable to apply overhead than oil-based alternatives—an important factor in an enclosed basement environment.
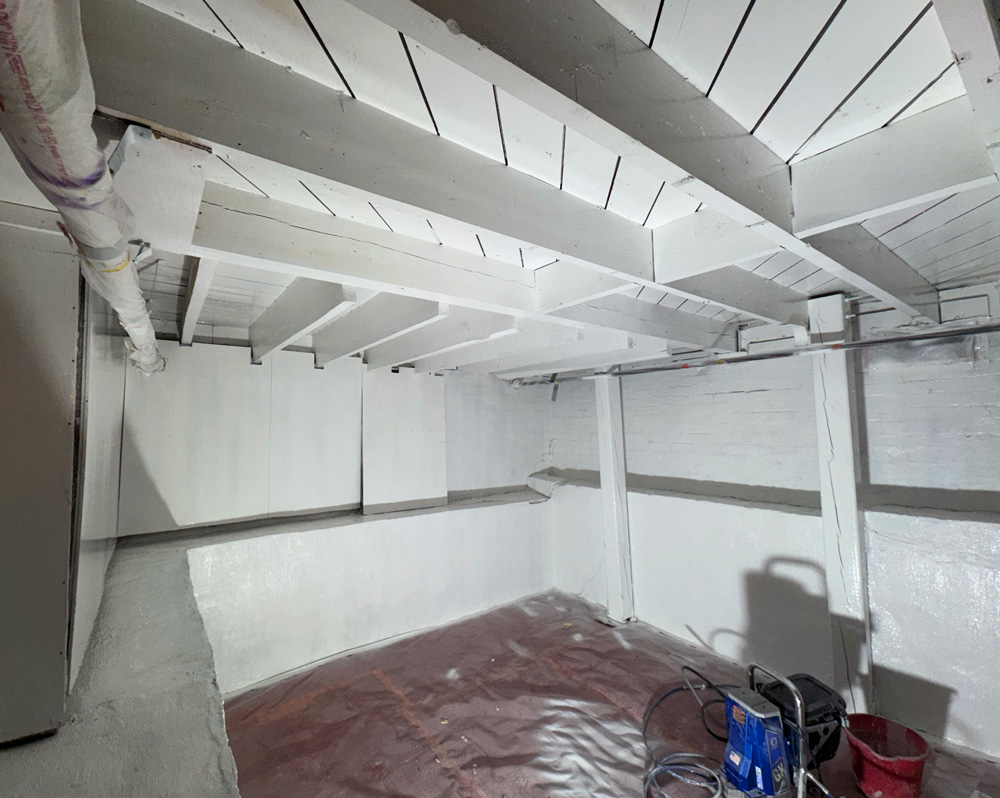
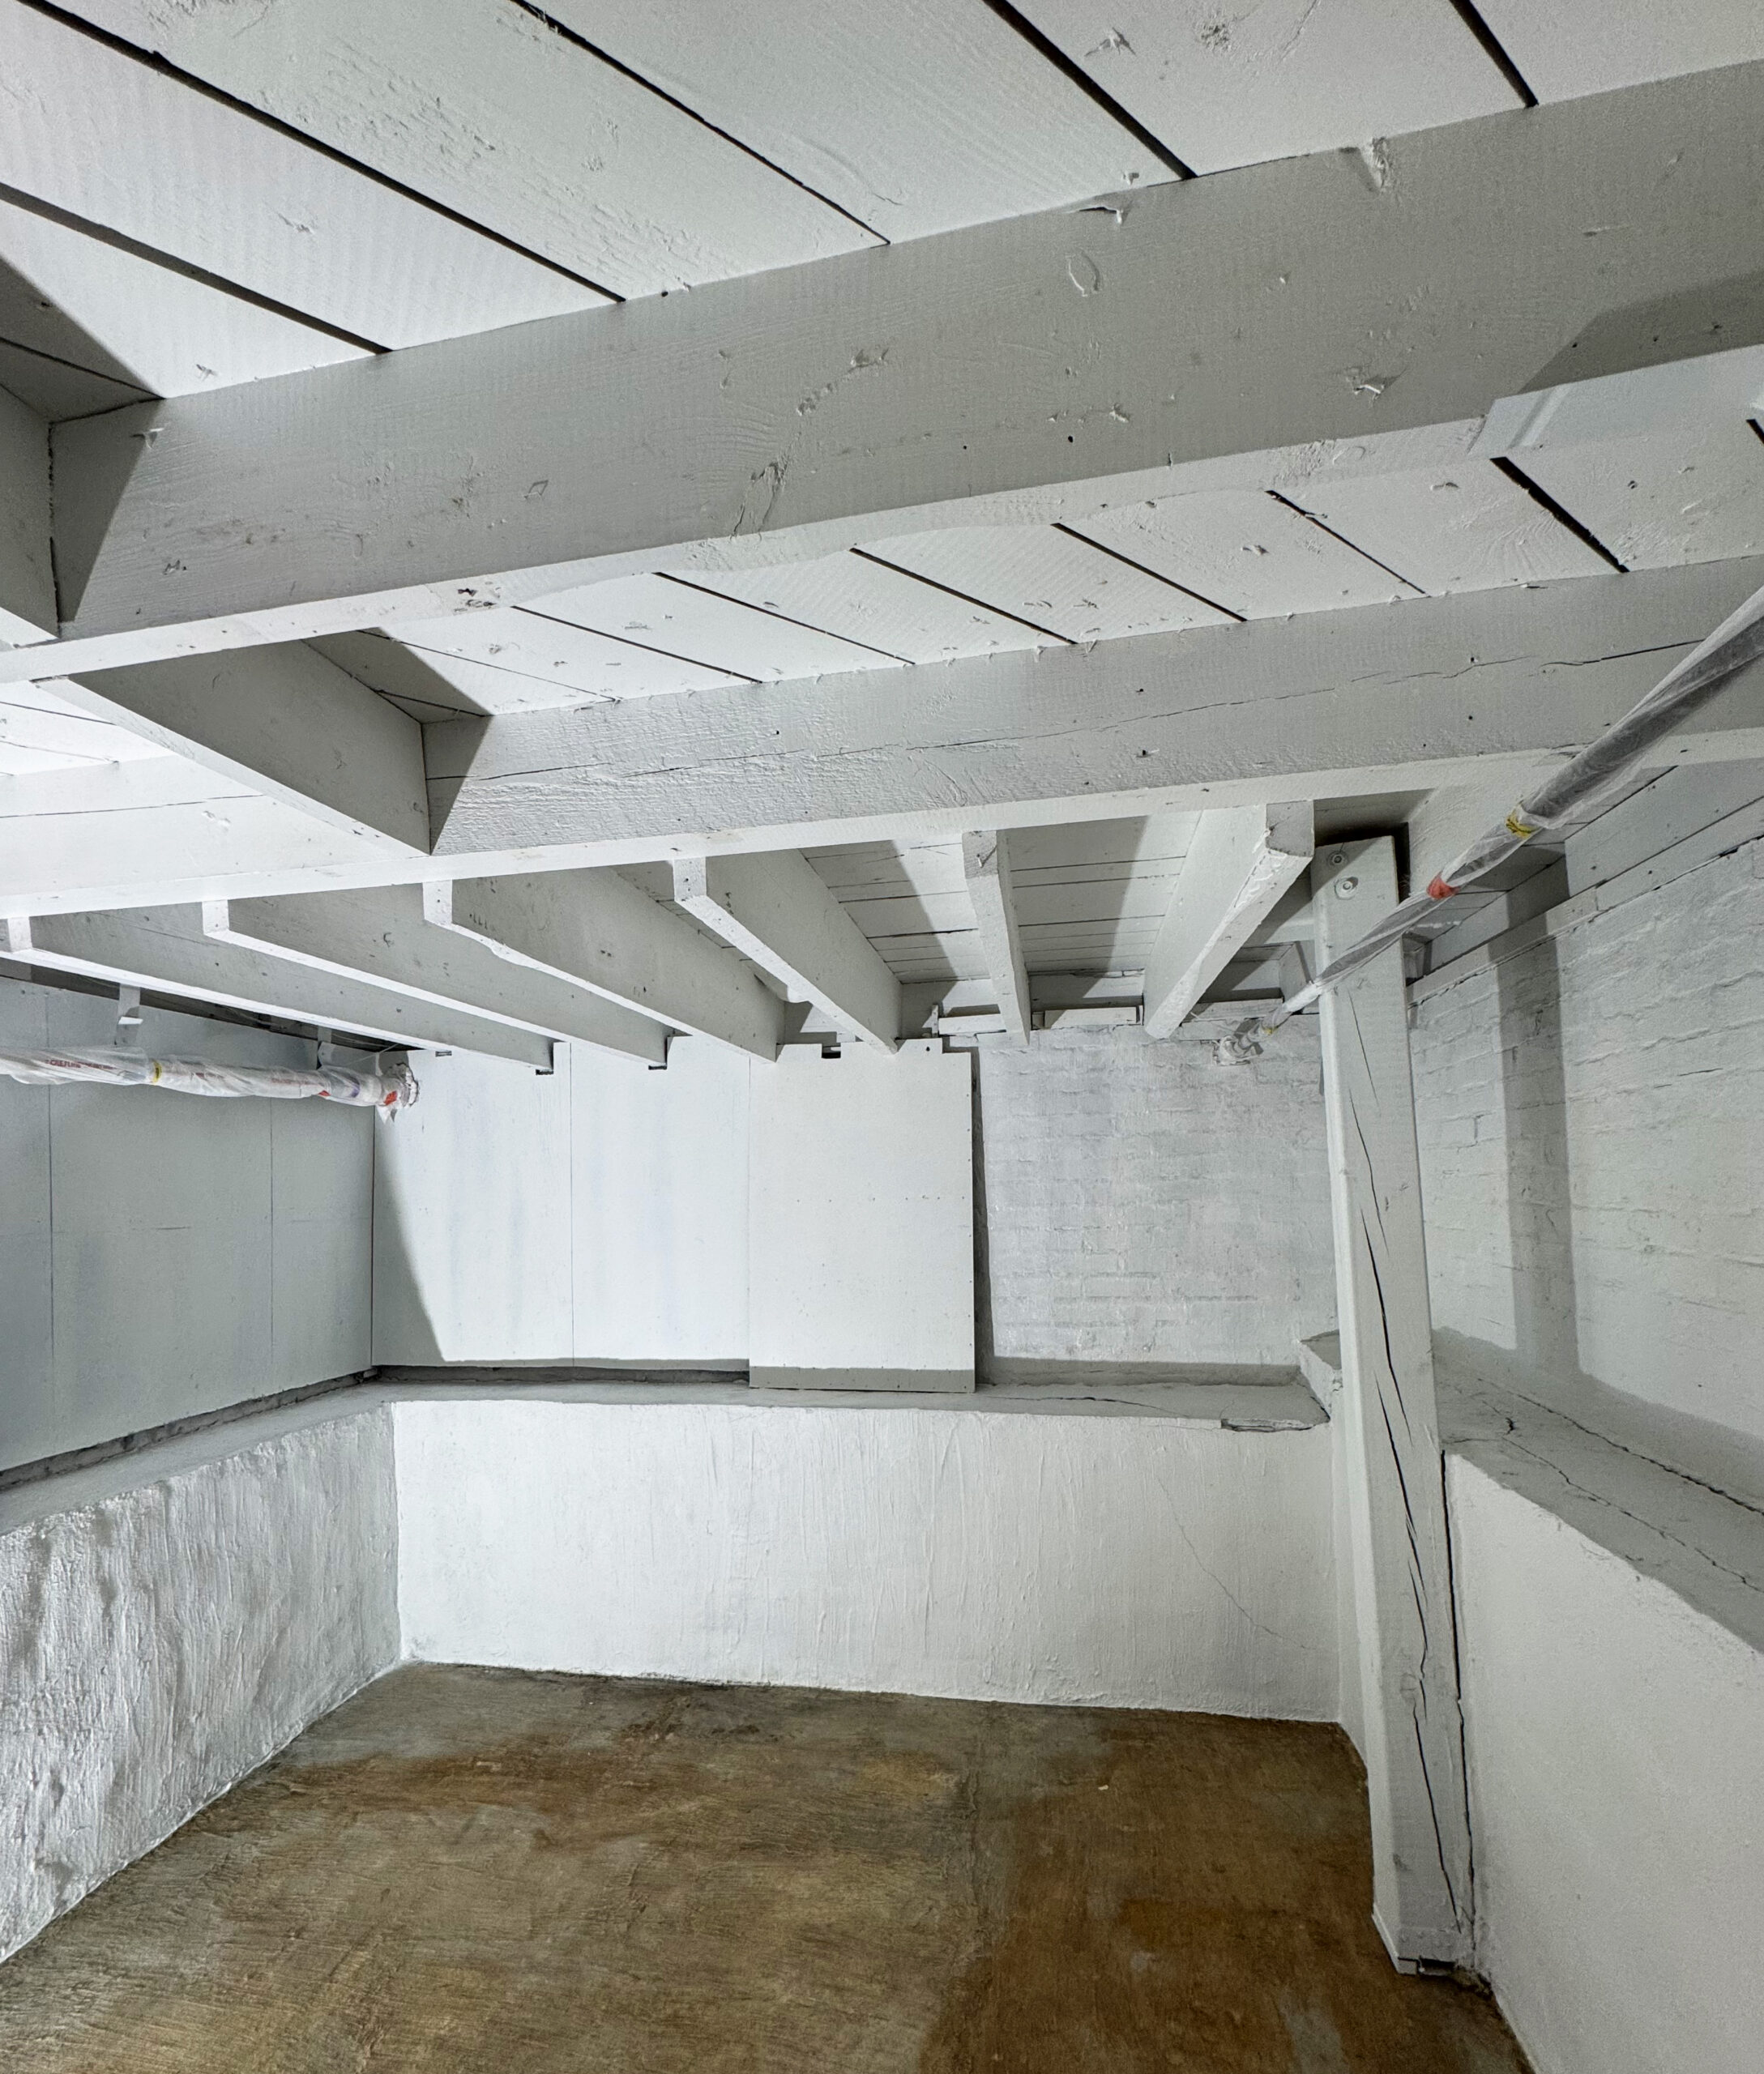
Results: Supporting a Cleaner, Sealed Space
Once primed, the basement felt noticeably different. The walls looked clean and uniform, the ceiling felt brighter, and the space no longer had that neglected, dungeon-like appearance.
Combined with the client’s plan to replace the improperly installed insulation with the correct R-value, the primer played a key role in sealing and refreshing the space—not just visually, but functionally.
There was no bleed-through, no flashing, and no lingering odors—just a solid foundation for the finish coat and a basement that finally felt cared for.
RELATED ARTICLES
get inspired:
FOLLOw us:
@kilzbrand
SHOP
PRODUCTS
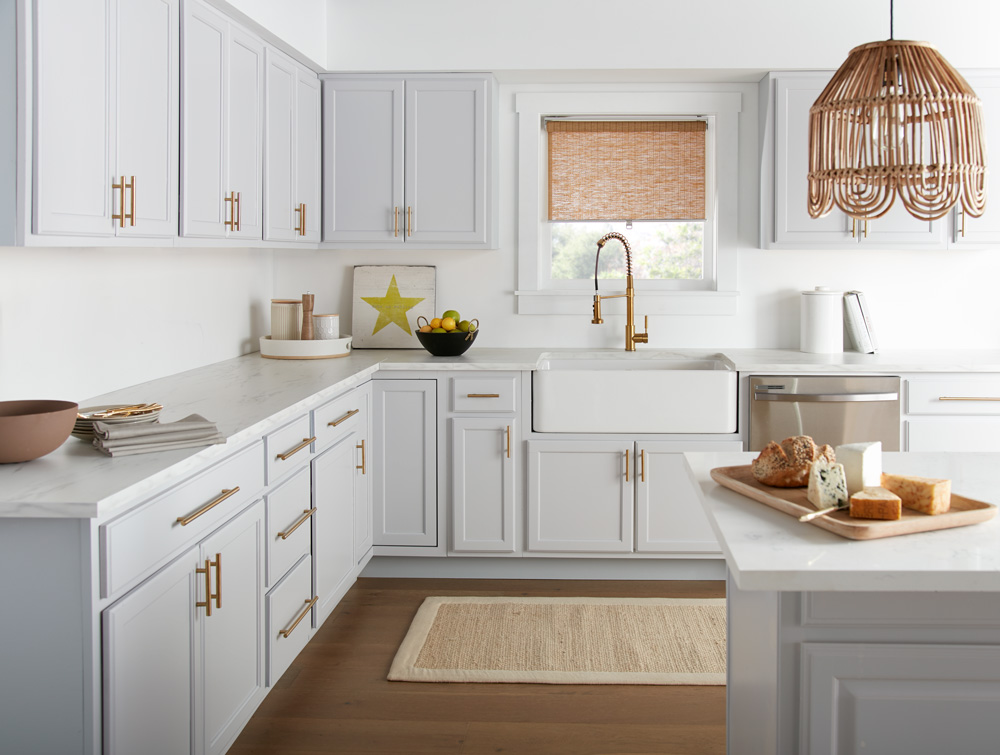
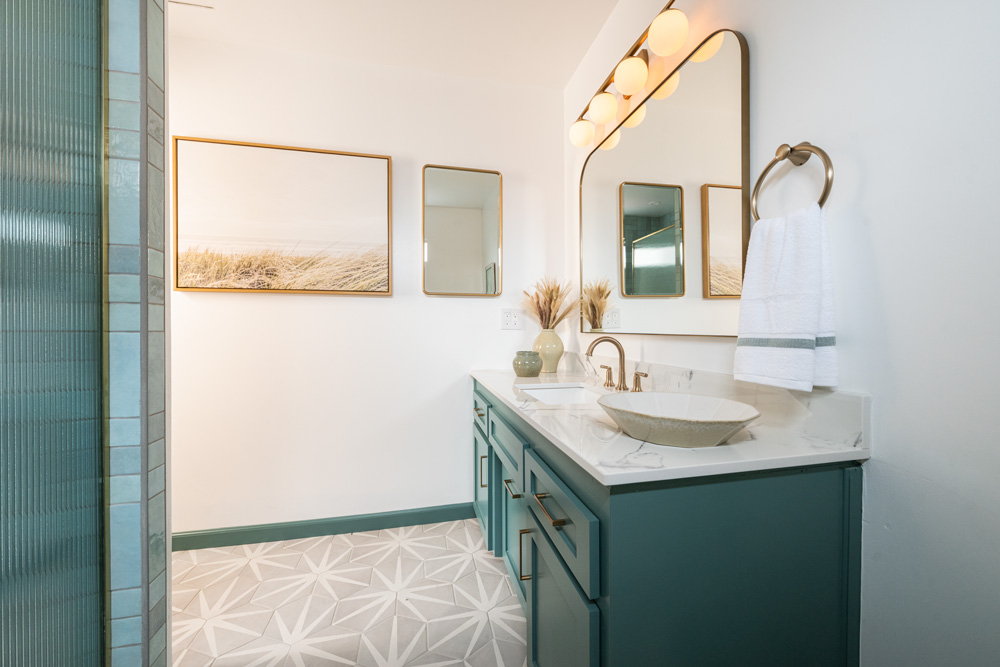
Project Spotlight: A Bright Bathroom Refresh
June 25, 2024Who We Are and How We Arrived Here

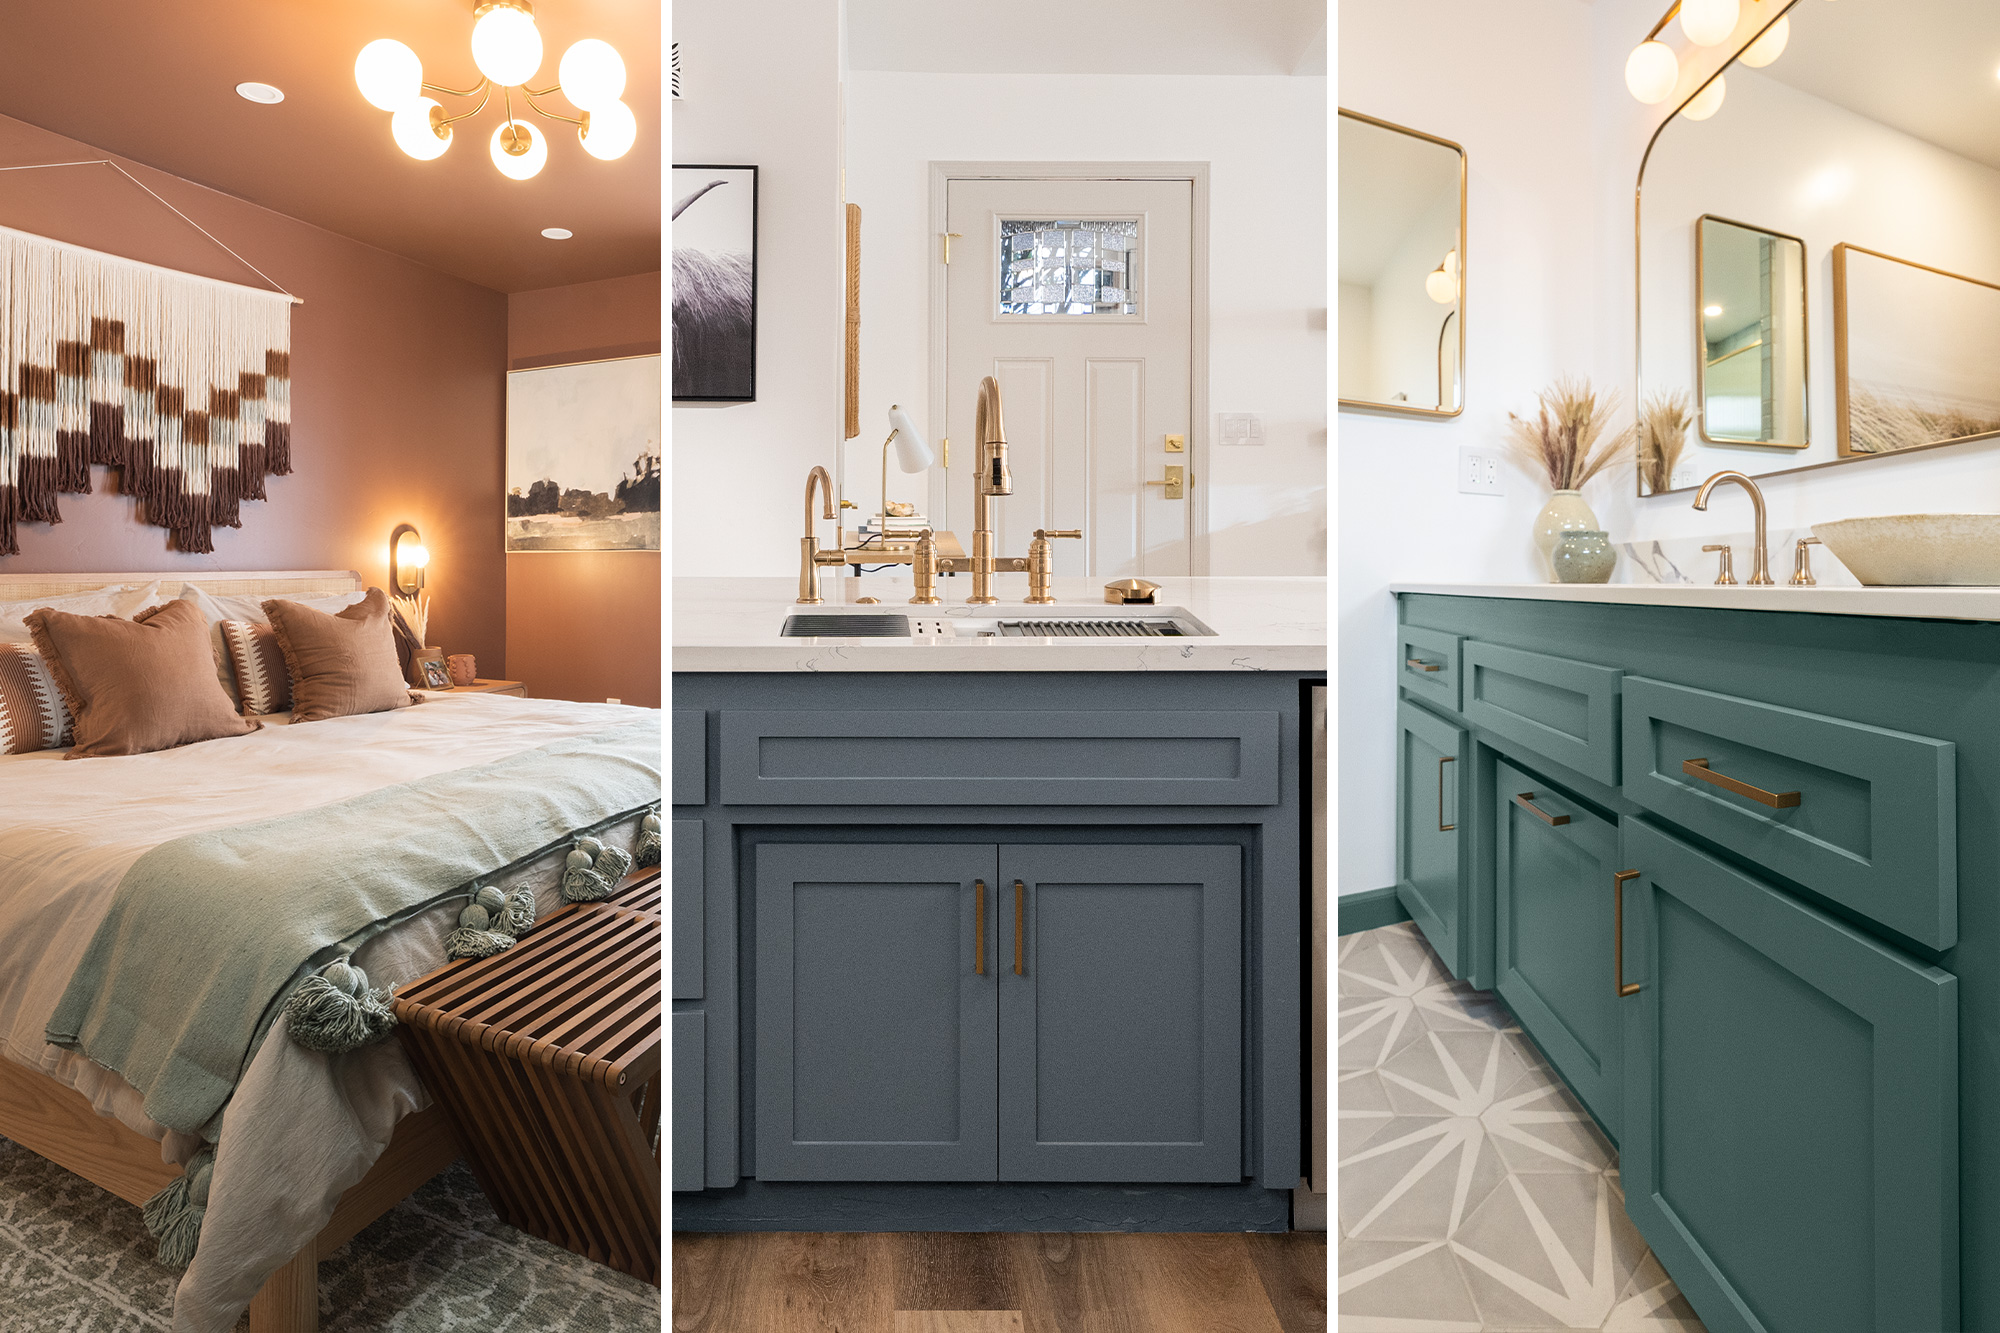
Hi, we’re David and Edward Guerra, also known as Midwest Husbands! We met in Madison, Wisconsin where we taught ourselves a lot of DIY skills by flipping a property. We then moved to Cleveland, Ohio where we enjoyed a well-lived in home before our custom build, where we hope to raise a family one day soon. We also seek travel adventures and bring the inspiration from the experiences into our home through unique design choices.
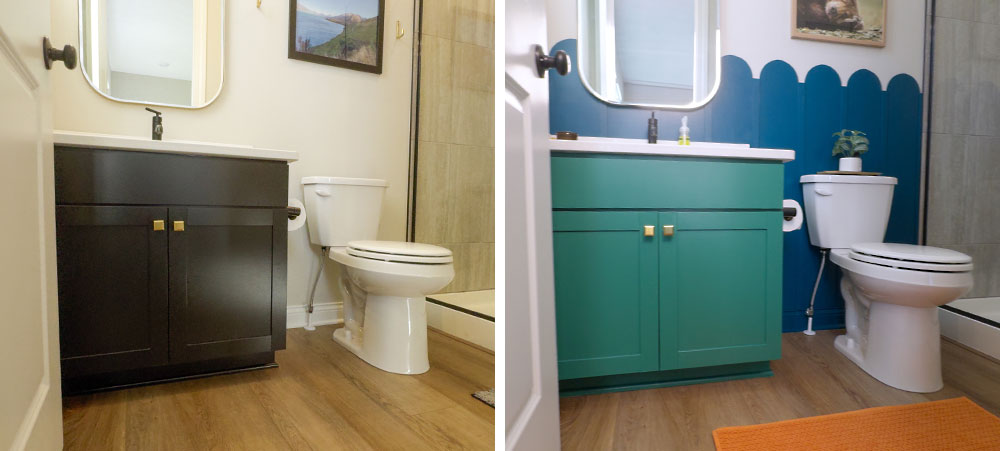
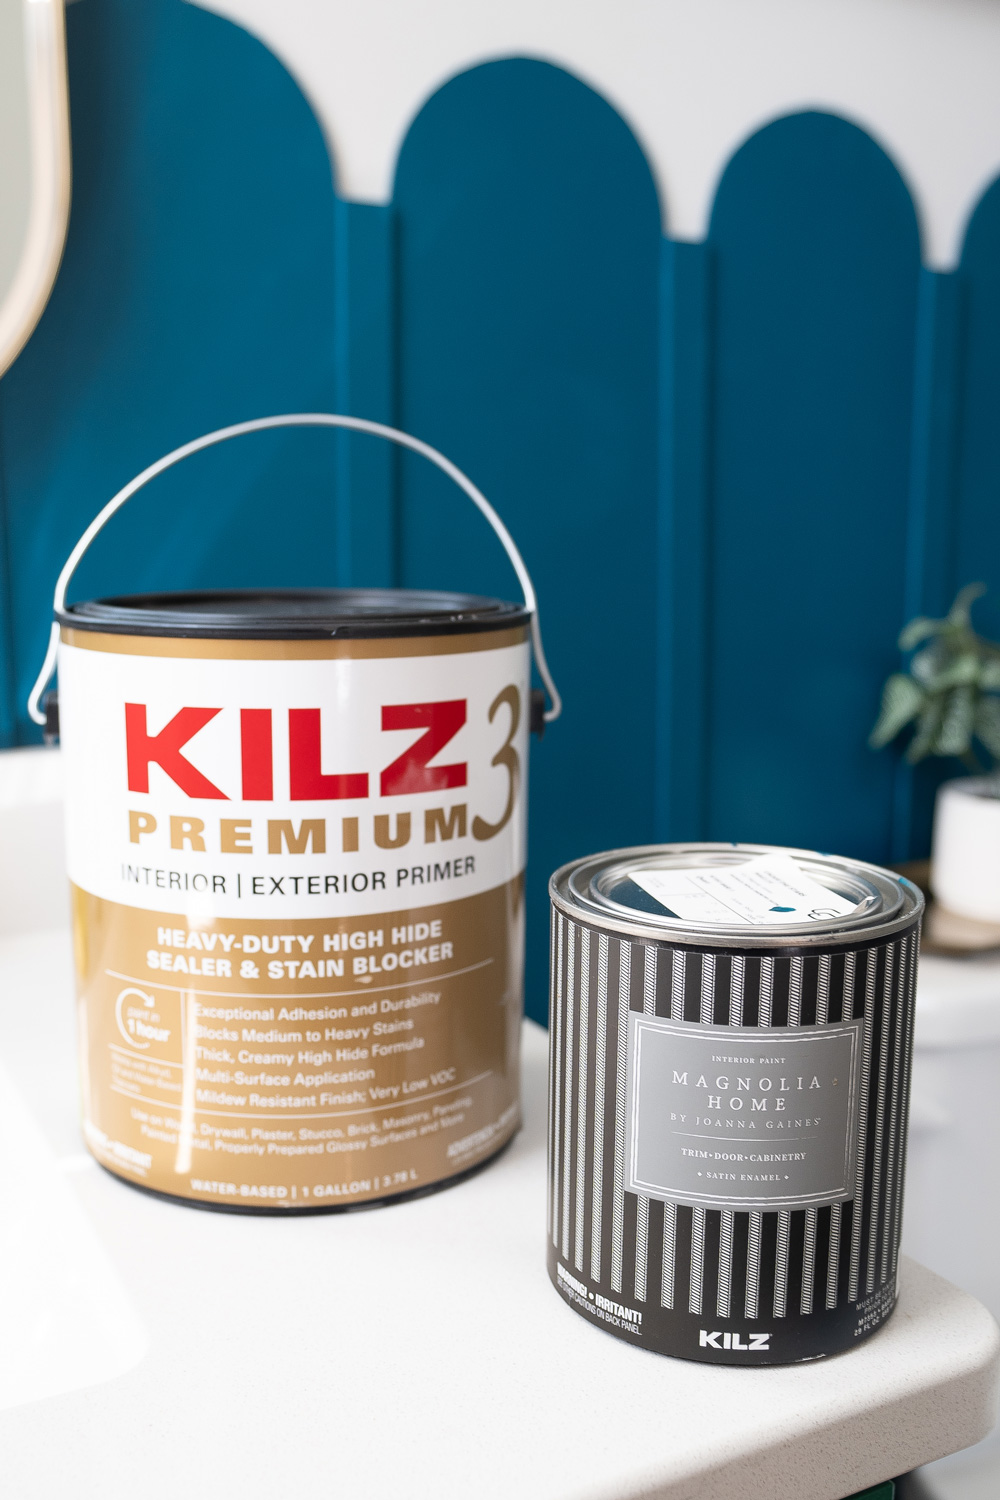
We designed and built our current house less than two years ago, yet here we are, already wanting to change the color of a cabinet in one of our bathrooms! Decision fatigue during the home-building process is real. Initially, we thought a dark-stained vanity would be beautiful for a second primary suite bathroom on the first floor of our New England-style colonial. However, this cabinet was too dark, and we thought it would be fun to incorporate more life and color into this space since it serves as the bathroom connected to what is currently used as a work-from-home office. To change from a dark cabinet to any other color, priming with a premium high-hiding primer is the first step to get the best results.
For other crafted wood pieces in our home and pre-wallpaper, we have used KILZ 2® All-Purpose Primer in previous years. Since this bathroom project involved a starting point of a dark color on the cabinets, we turned to KILZ 3® Premium Primer for its high hide formula and mildew resistant coating, which was perfect for our dark bathroom cabinet.
Inspiration and Implementation
After consulting a few of our favorite magazines, we created a palette with the incredible colors in Magnolia Home by Joanna Gaines® collections. Then, we were off to our local Ace Hardware store to pick up the paint, supplies, and, of course, the KILZ 3® Premium Primer for this bathroom glow-up.
KILZ 3® Premium Primer was incredible to use on the cabinet doors. It’s fast drying (which makes it ideal for a weekend project), has low odor, and is very low VOCs. It has exceptional adhesion to a wide variety of surfaces which will help ensure the paint finish lasts for years to come, plus it’s water-based which makes clean-up a breeze. We liked how it worked for the glossy finish on the doors, and we also used this primer on the arch panels and molding we created for the feature wall.
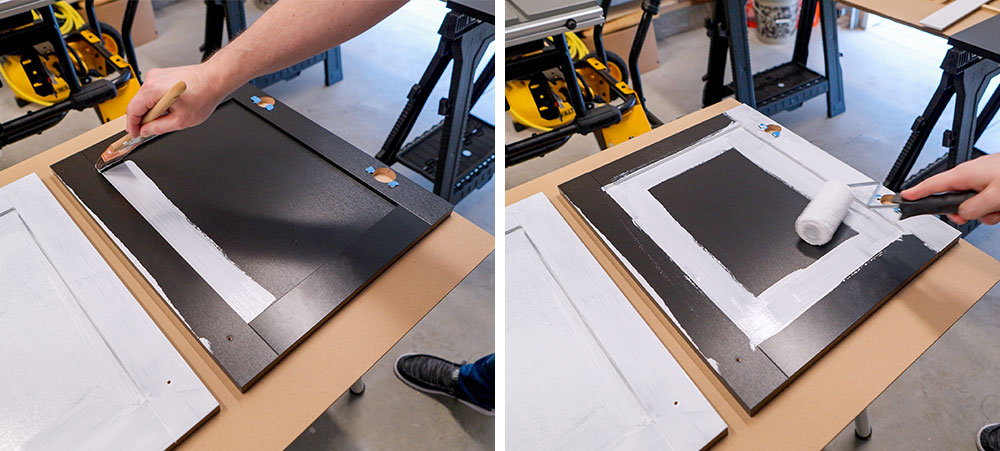
It’s important to not jump into painting cabinets or wood without a quality primer. This step saves time and money because, without a primer, you will likely end up applying more coats of your paint, which ends up costing more than primer.
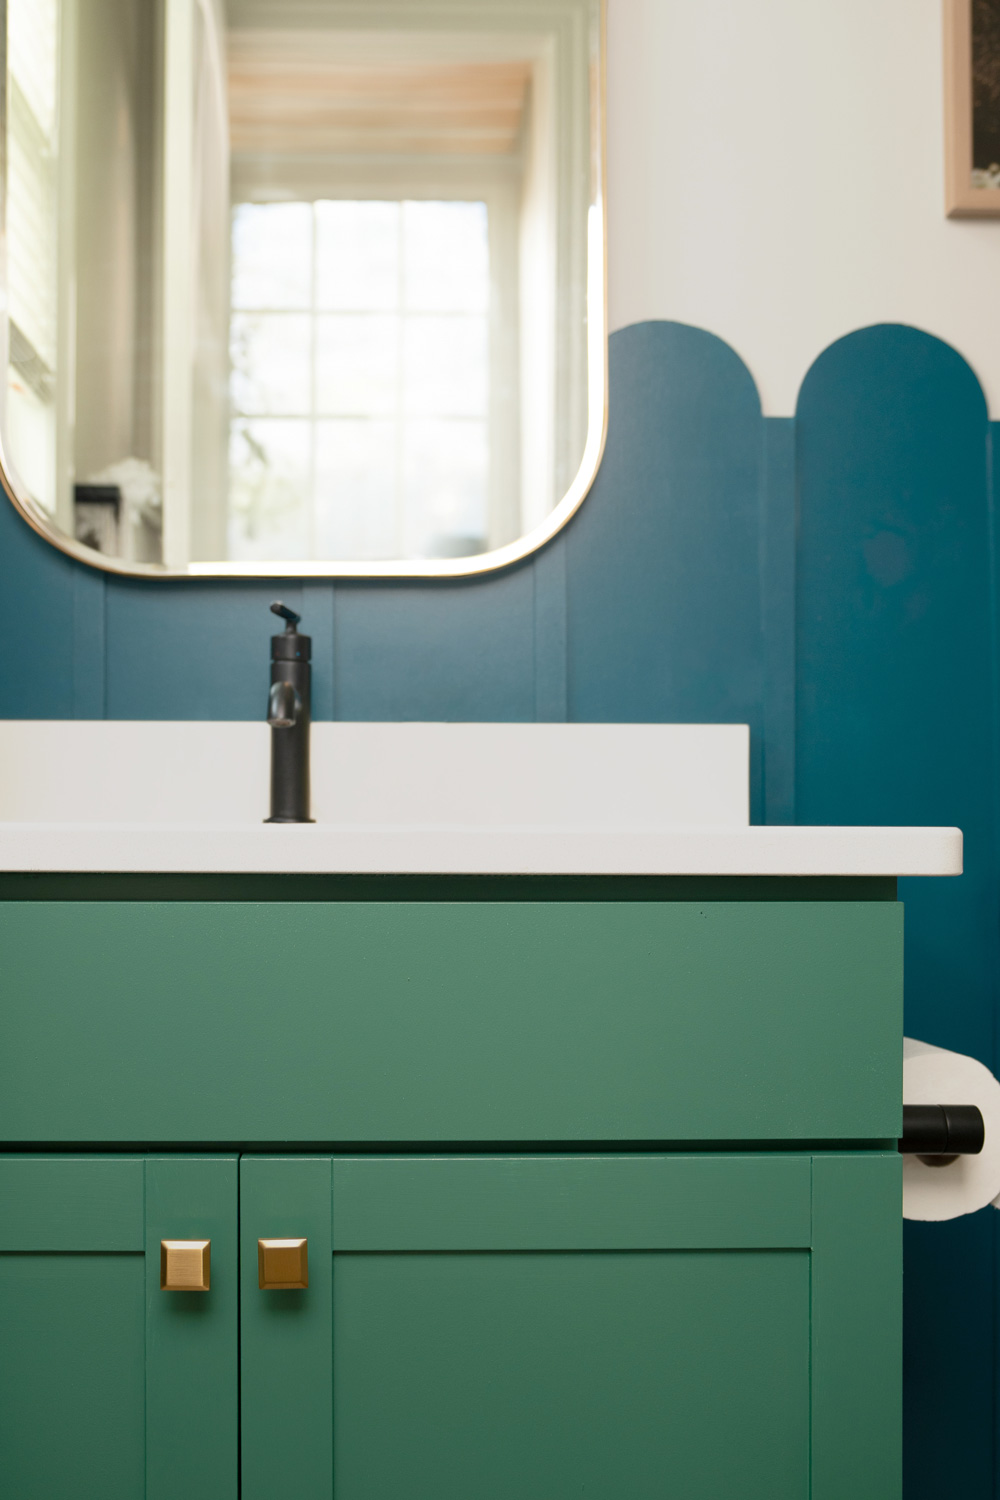
Within an hour, we were painting the first of two coats of paint on the cabinet doors, the paneling, and trim pieces. The paint color we used was Under The Stars, a deep teal-blue color that evokes a seaside feel. The cabinet contrasts with Aspen Leaf, a green that brings refreshment and peace into the space. Since the paneling is just over 4′ tall, Yarn completes the look by rising to the ceiling with crisp and inviting tones.
Putting Fun in Functionality
Knowing that we used KILZ 3® Premium Primer as a surface prep measure in our project gives us confidence that the cabinet, paneling, and trim will look good for years to come. We are so excited to have taken a dark-stained, glossy sheen built-in vanity to a new level of life. KILZ 3® hides dark and bold colors as well as blocks stains therefore creating a clean slate for lighter color conversions ensuring better results!
Previously, the door to the bathroom was often closed during the workday while on video conference calls. But now, keeping the door open with the pops of color achieved with Magnolia Home by Joanna Gaines® Paint is quite a boost for our environment. Walking into the bathroom welcomes us, and we must admit that despite being in a small space, we don’t want to leave!
We needed to keep this cabinet in the bathroom as it provides storage for all the essentials and toiletries. Thanks to the amazing products KILZ offers, we were able to take this space from builder-grade to a degree of personalization that matches up to what we love to do.
RELATED ARTICLES
get inspired:
FOLLOw us:
@kilzbrand
SHOP
PRODUCTS
DIY Made Easy with KILZ® Primer
April 2, 2024Getting started
DIY’ers know that when it comes to home restoration and remodeling, shortcuts can’t be taken. Perfect painting requires the perfect primer to solve the multitude of problems that any surface presents. Ensuring you have the right foundation with a quality primer like KILZ® can set you up for success. This guide simplifies the selection process for primers that best fits your project and outlines the essential tools for application.
Why Prime?
Primer ensures your paint adheres to the surface properly, making it last longer. It achieves even color and full coverage with fewer coats, prevents old stains and colors from bleeding through, and adds a protective layer, which is vital for exterior projects.
The first step in any project is making a Painting Checklist of all the tasks you’ll need to take on. Know your surfaces and space. Whether you’re priming to paint outdoors or indoors, on wood, glass, metal or drywall, each scenario requires a specialized primer and process.
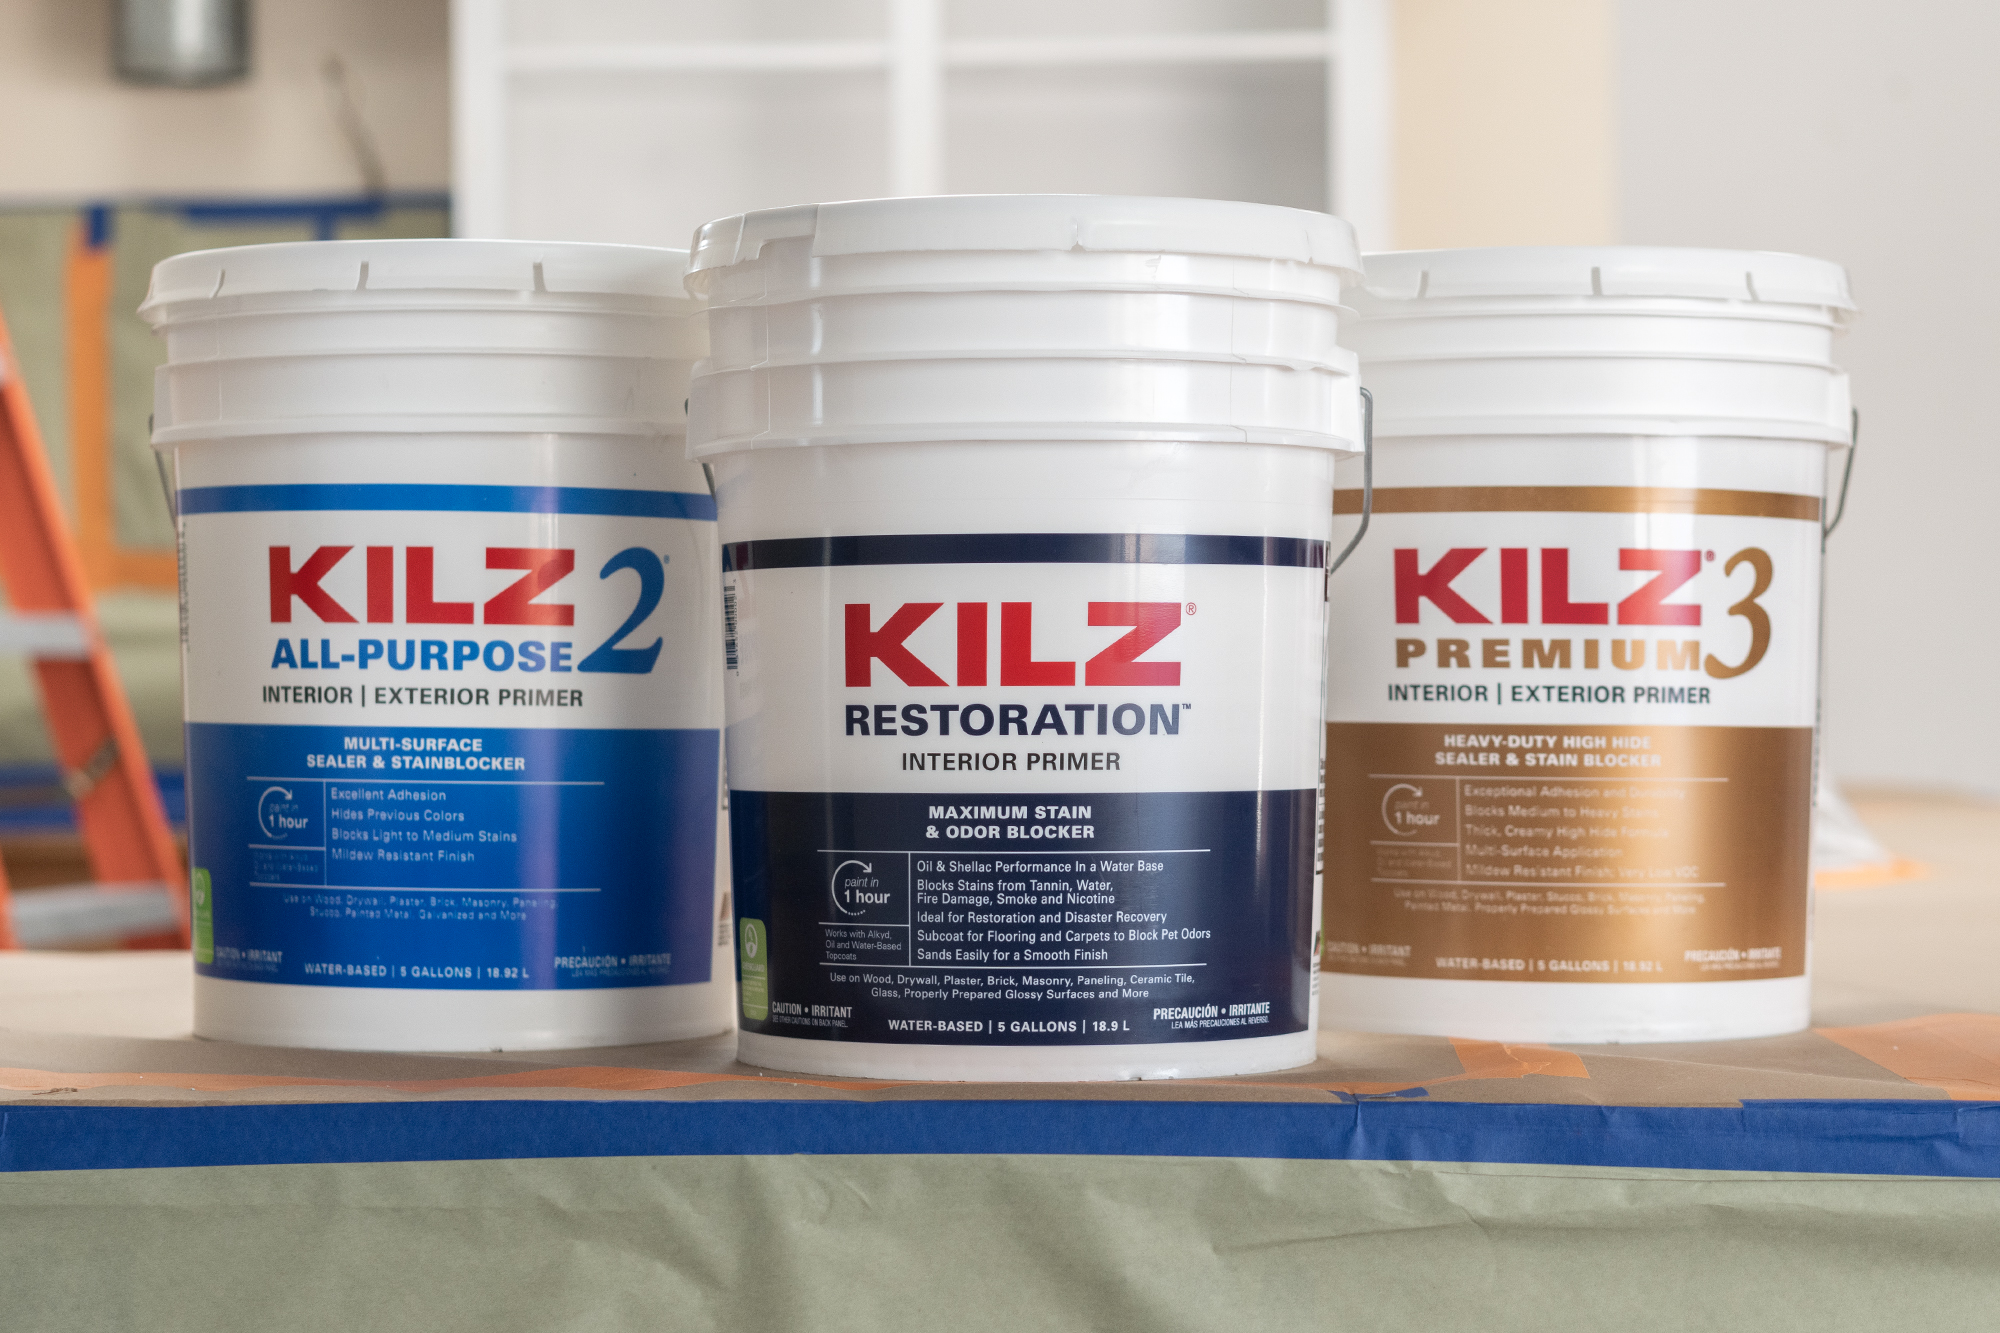
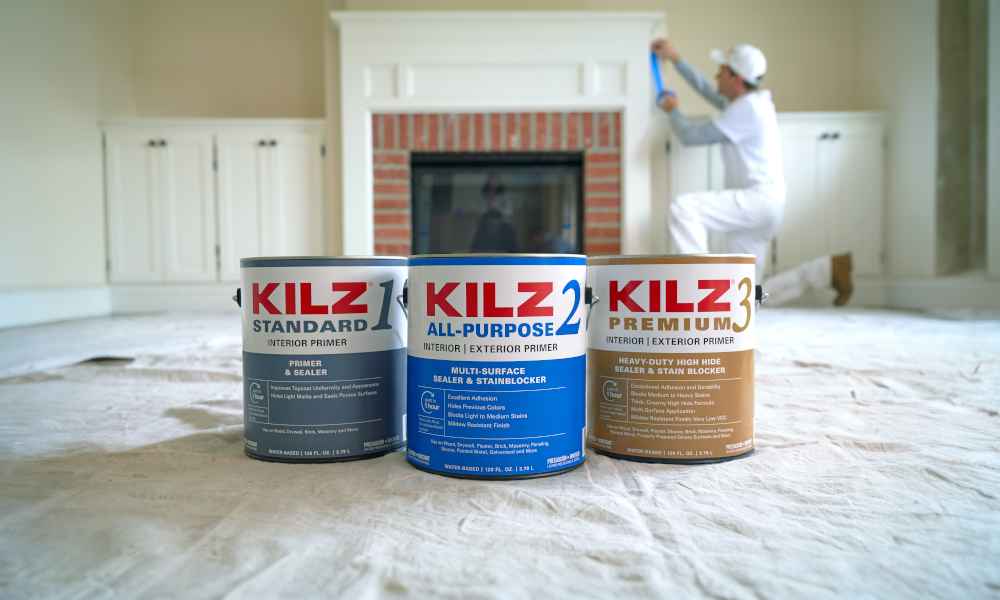
Choosing the Right KILZ® Primer
KILZ 2® All Purpose
• Ideal For: Indoor/outdoor use.
• Highlights: Fast drying, water-based, multi-surface primer-sealer-stain blocker with excellent adhesion and mildew resistance.
KILZ 3® Premium
• Ideal For: Versatile indoor/outdoor use on wood, plaster, concrete, etc.
• Highlights: High-hiding formula is great for color change and blocking medium to heavy stains.
KILZ Restoration®
• Ideal For: Addressing heavy-duty stains like smoke or water damage.
• Highlights: Combines oil-based primer benefits with water-based formula ease.
KILZ® Adhesion
• Ideal For: Difficult surfaces like glossy finishes, PVC, or metal.
• Highlights: Enhances paint adhesion where traditional primers fail.
KILZ® Mold & Mildew
• Ideal For: Moisture-prone and high-humidity environments such as kitchens, bathrooms, and laundry rooms.
• Highlights: A stain-blocking primer that resists mold and mildew growth on the primer film.
Required Tools And Preparation
Preparing your surface is an important step before applying primer, never prime over a dirty surface, clean your surface as best you can before you apply primer.
Here’s what you’ll need for primer application:
• Brushes: High-quality brushes are essential for cutting in around edges and in tight spaces. A 2-3 inch angled brush is versatile for most projects.
• Rollers: For larger surfaces, a roller can make the application quicker and more efficient. Use a roller with the appropriate nap length for your surface; smoother surfaces require a shorter nap.
• Paint Tray: Essential for holding primer and rolling out excess before application.
• Sandpaper: After the primer dries, you might need fine-grit sandpaper (around 220 grit) for smoothing out any bumps or imperfections.
• Drop Cloths: Protect your floors and furniture from drips and spills.
• Painter’s Tape: Use this to mask off areas you don’t want primed, such as trim or windows.

Applying Primer
Follow these 4 steps for proper primer application:
1. Surface Prep: Clean and sand your surface as needed to ensure it is smooth and ready for primer.
2. Apply Primer: With your chosen tools, apply the primer in even, controlled strokes or rolls, following the specific directions for your Kilz product.
3. Inspect and Sand: After drying, check for drips or rough spots, sanding lightly if necessary.
4. Paint Application: Once the primer is dry, proceed with painting, enjoying the smooth base your primer has created.
Your Surface Is Now Ready For Paint
Selecting the right KILZ® primer and using the proper tools for application can dramatically affect the quality and longevity of your project. Whether tackling a small piece of furniture or an entire room, starting with a solid foundation will ensure a professional-looking finish that lasts. Dive into your project with confidence, knowing you’re equipped with the best products and tools for the job.
Happy DIYing!
RELATED ARTICLES
get inspired:
FOLLOw us:
@kilzbrand
SHOP
PRODUCTS
How to Transform an Ordinary Primary Bedroom into a Sophisticated Sanctuary
December 19, 2023As a Certified Aging-in-Place Specialist (CAPs) and certified color consultant, I share DIY projects, tool how-to guides, and home makeovers as a book author, home show speaker, DIY workshop coach, and radio host. I contribute regularly to BobVila.com and Architect and JLC magazines. I’ve been lucky to create fast-paced makeovers for TV shows, and enjoy sharing home trends and DIY tips as a guest on news shows and satellite media tours for TV and radio.
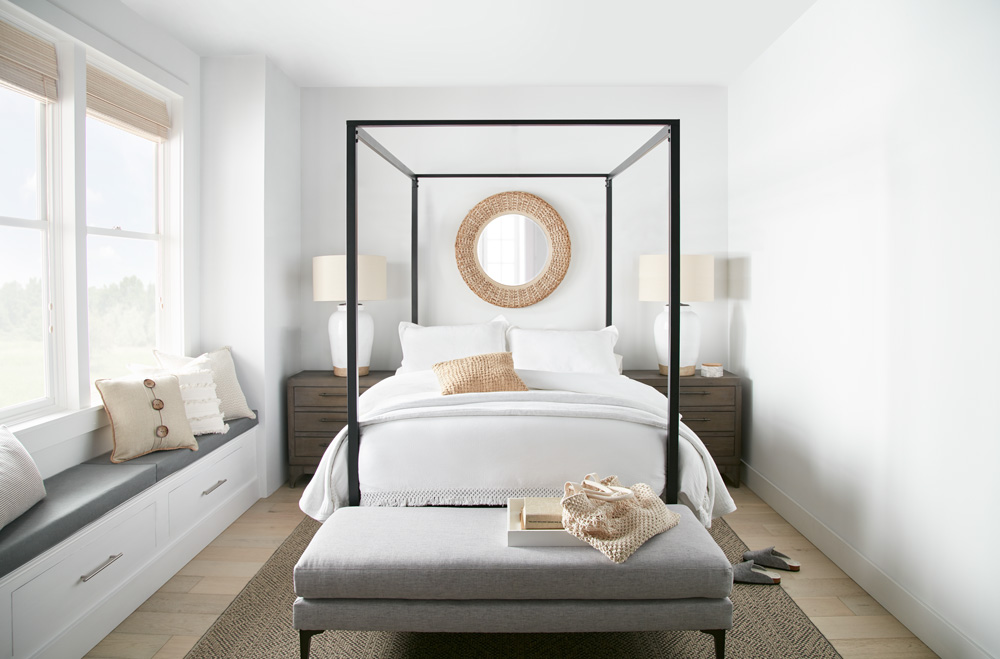
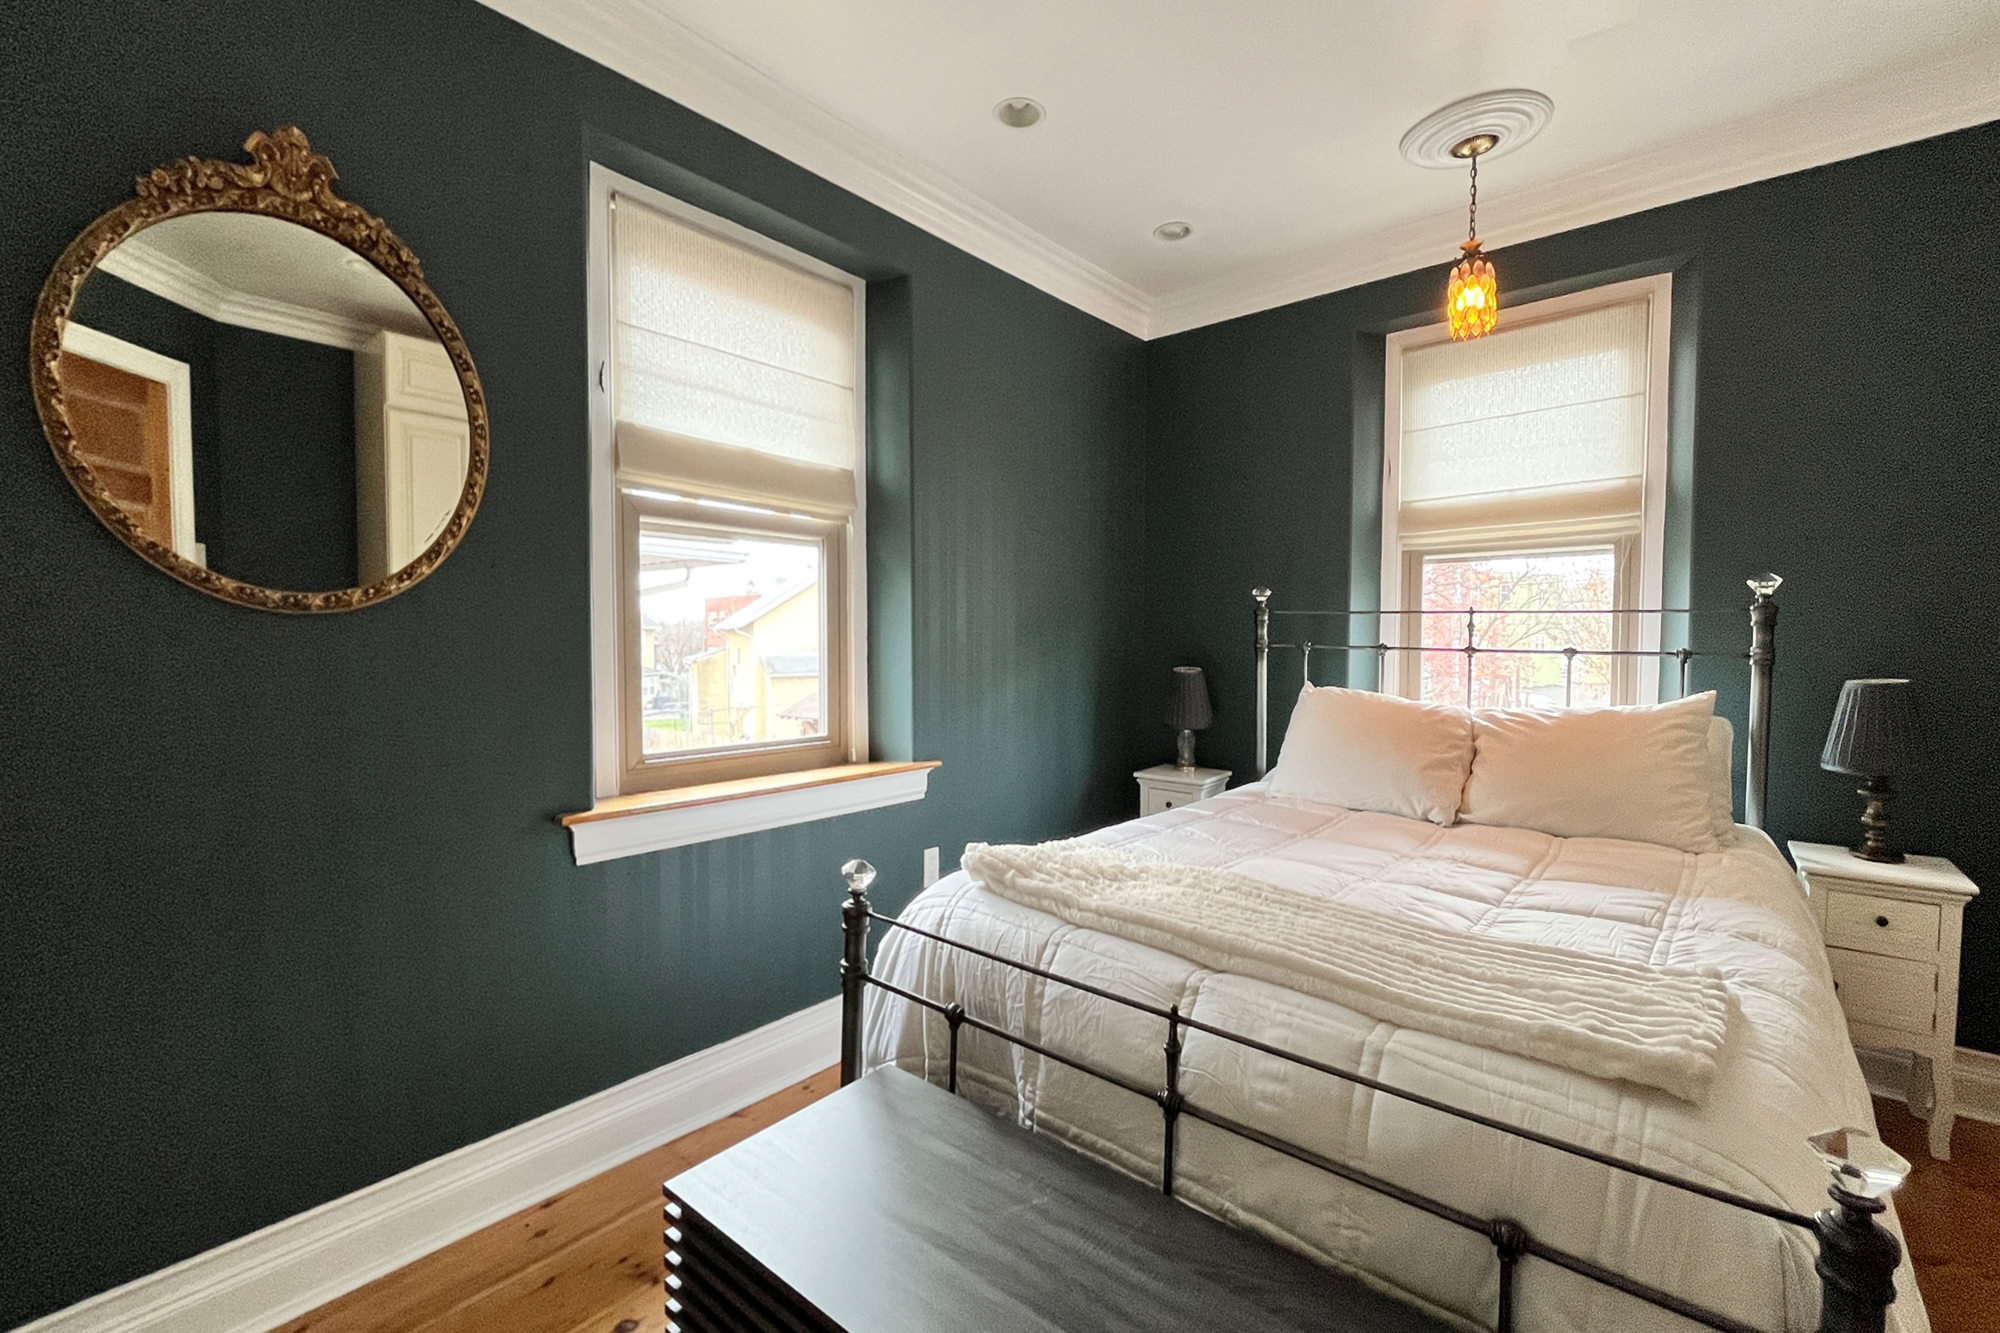
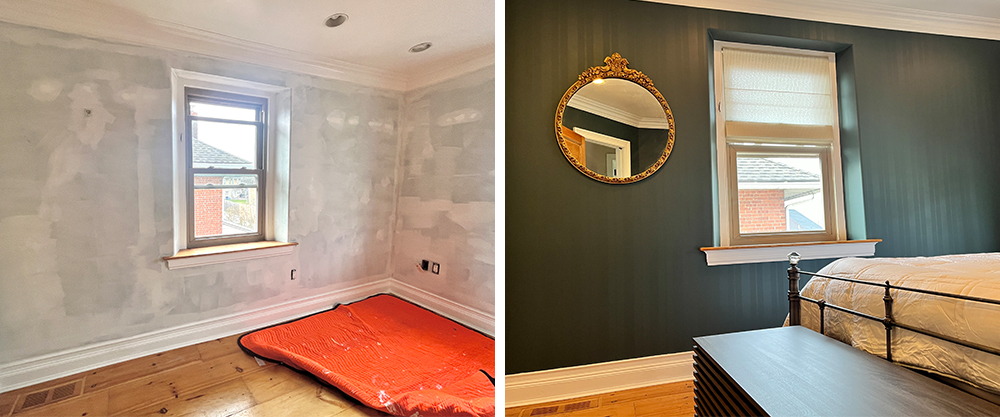
Our primary bedroom was more than ready for a paint makeover. It was not the rejuvenating sanctuary that we needed while managing a busy household, especially with the added pressure of the holidays.

What’s the makeover motivation?
I started paint prep during the pandemic, and never actually painted the room. We’ve been living with patched walls for way too long, and it was time to give the room a refresh.
The goal was to create a more sophisticated and modern look with a richer and more soothing hue that exudes a calm and relaxing vibe. By painting the walls using contrasting sheens to create a stripe pattern, I’m adding subtle sophistication through gentle texture that will catch the light from the overhead dimmable lighting.
Select the color.
You’ve probably heard the advice from designers to paint a few samples on the wall before selecting the paint color for a room. It’s such a common tip that paint companies often offer small samples for less than $10. While I agree with this advice, there’s a step that’s missing.
It’s important to prime the wall before applying the sample colors. For this project, I chose KILZ 3® PREMIUM Primer to prime ahead of painting. The current color on your walls can affect how the new color looks to you and whomever else is picking the paint. Then make sure you view the samples during the day, at night, in natural light, and with artificial light, so you have a good idea of what the color will look like throughout the day.
Also, don’t unload the room before putting the samples on the wall, especially if you plan to use the same furnishings in the room after the paint job is complete. The reason? The colors from the other home decor items can affect how a paint color looks to you.
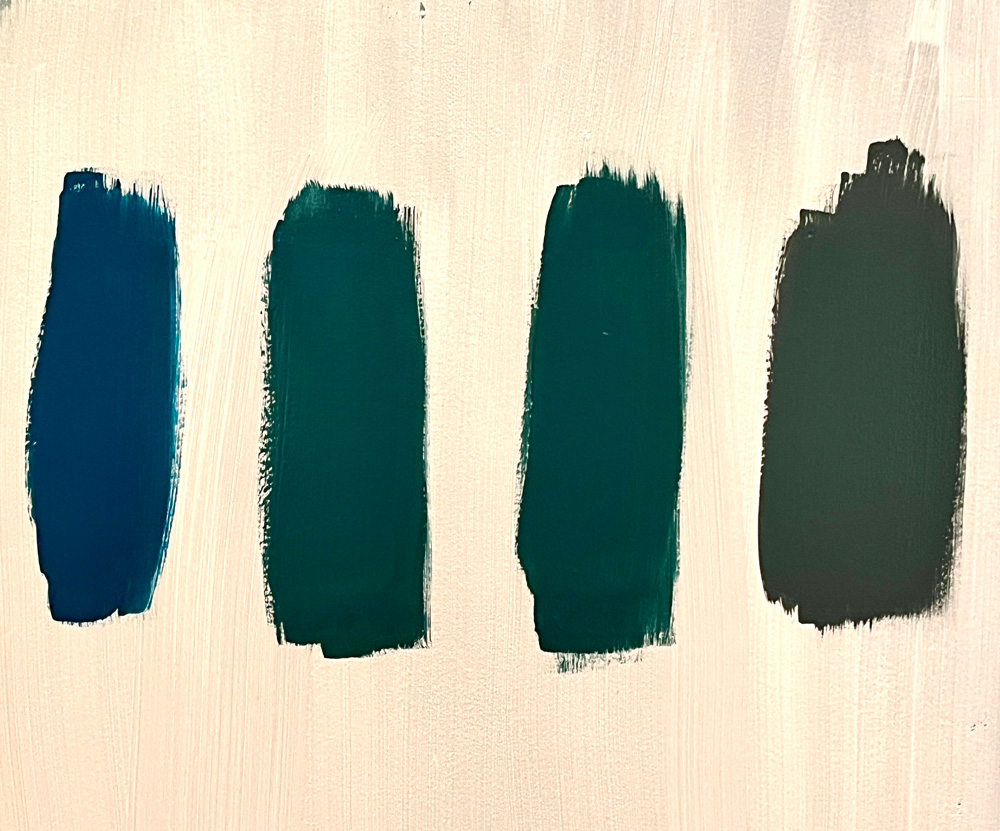
For this project, I chose four colors and asked my husband Mark to pick his favorite. He chose Secondhand Find from Magnolia Home by Joanna Gaines® by KILZ (the color on the right), which is a rich and very saturated bluish-green. An excellent modern color that fits with our goal of a calm and sophisticated vibe.
Select the primer.
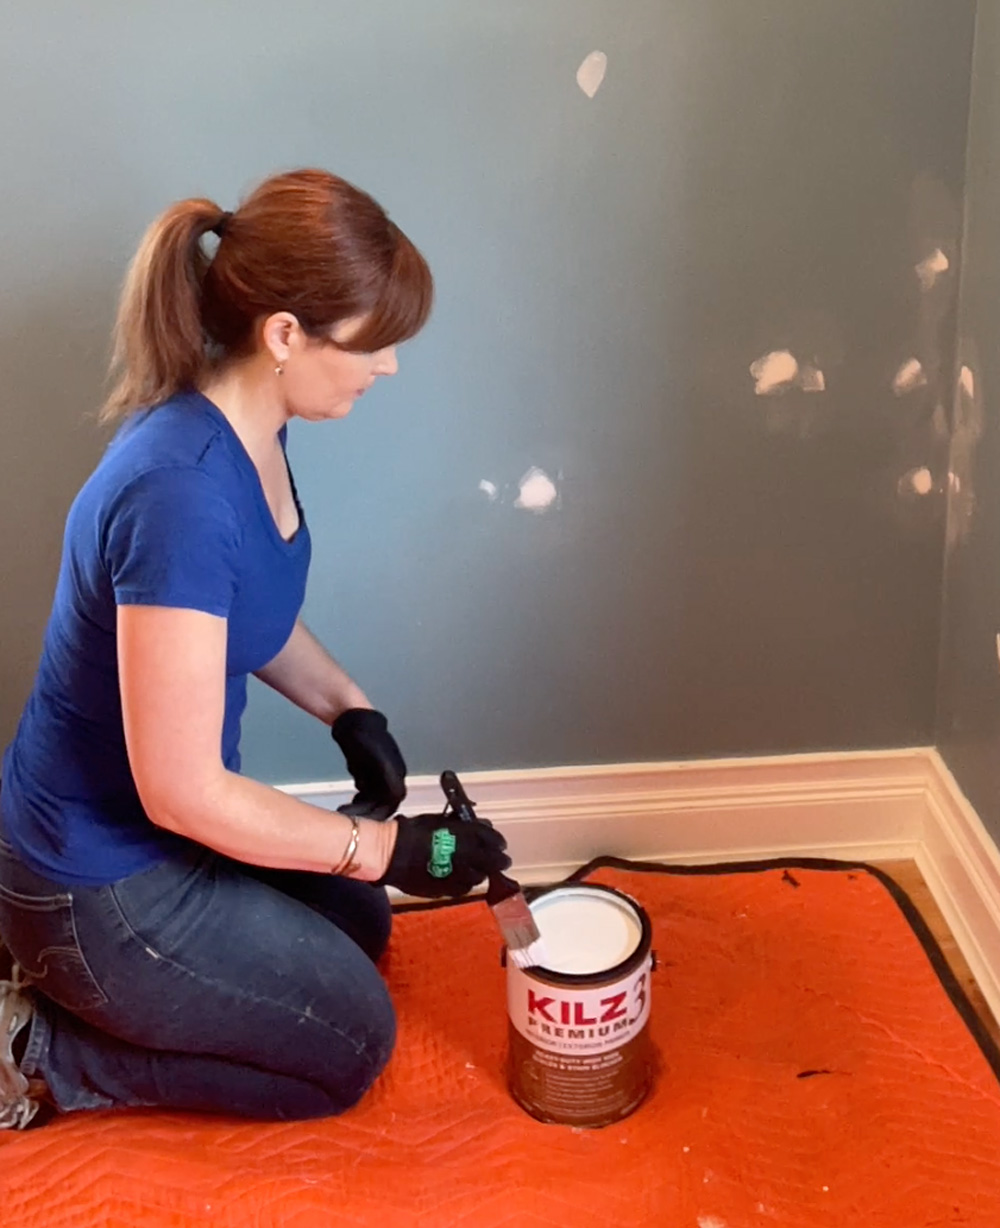
While you might be tempted to skip the primer or choose a paint-and-primer in one, we don’t. We always use a high quality primer because it sets the foundation for a good quality paint job and a professional finish. Even though the KILZ brand partnered with us on this makeover, KILZ has been our go-to primer for more than a decade because it delivers long-lasting results for our home and our clients’ homes.
For this project, we chose KILZ 3® PREMIUM Primer because it’s fast drying, low odor, very low VOC, and it has excellent adhesion. The thicker formula also hides surface imperfections, which is ideal for this house that was built in 1903 and has a lot of ‘character’ marks from the previous owner and our busy family.
Gather primer, paint, tools, and materials.
The next step in this makeover is gathering the tools and materials. For this project, I needed:
• Drop cloth (We like to use a moving blanket because it has more weight to it.)
• Multi-tool
• Awl
• Hammer
• Ladder
• 1½-inch angled paint brush
• Paint roller and extender
• Paint tray
• Painter’s tape
• Paint Samples in selected colors
• Magnolia Home by Joanna Gaines® by KILZ Interior Paint in Secondhand Find, Matte Finish
• Magnolia Home by Joanna Gaines® by KILZ Interior Paint in Secondhand Find, Eggshell Finish
Paint the trim.
 While many might paint the ceiling or prime the walls first, we don’t. We often paint the trim first, especially if the ceiling has previously been primed and painted white and will be painted white again, and if the trim will be painted white. The reason is that it’s easier to go quickly and over-paint the trim on the first pass, and then cut in the ceiling and wall color later. We find that it gives the trim a crisper line.
I used Magnolia Home by Joanna Gaines® by KILZ Interior Paint in True White, semi-gloss finish for the trim, and gave it two coats.
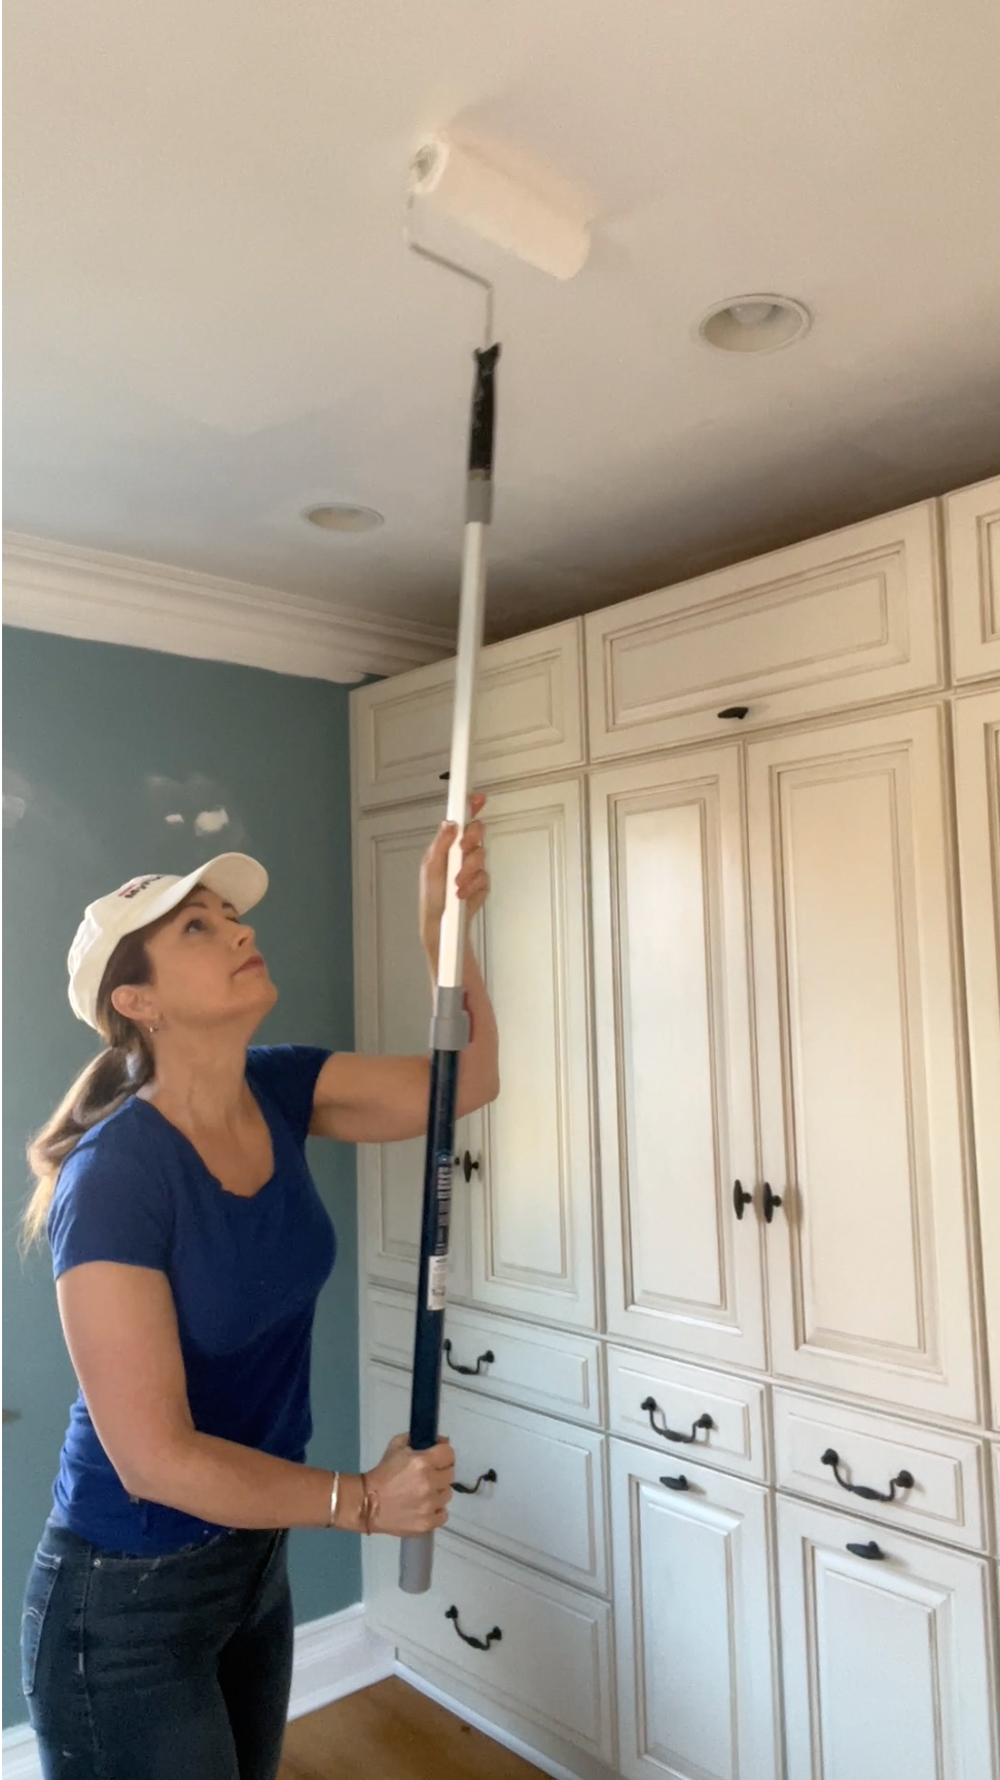
Paint the ceiling.
The next step before priming the walls is painting the ceiling. Since this ceiling was primed before and is painted flat ceiling white, it didn’t need another coat of primer, just a fresh coat of white paint. I used Magnolia Home by Joanna Gaines® by KILZ Interior Paint in True White, matte finish.
If the ceiling was freshly installed drywall, was looking less-than-stellar, or was painted a color other than white, I would have primed it first. Still, I painted two coats.
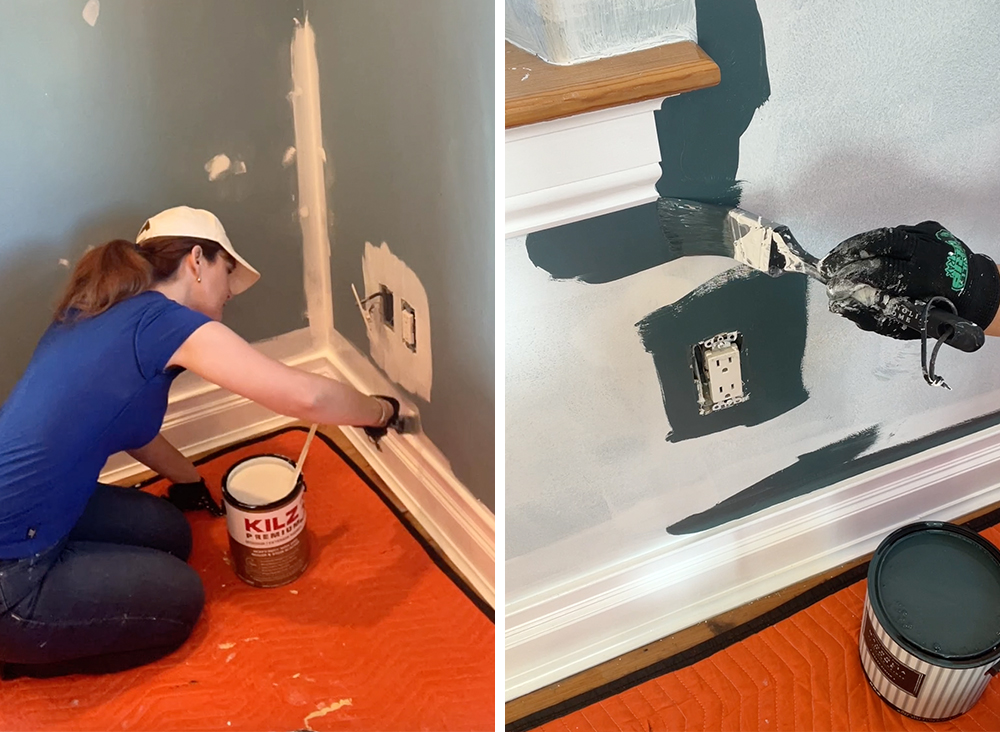
Prime the walls.
After the ceiling and trim were done, it was time to prime the walls. I first cut in the primer using a brush along the painted baseboard, and then the inside corners and other areas that a roller can’t fit: along the window sill, window trim, door casing, and our built-in cabinets
I then primed the joint compound patches all over the walls. While KILZ 3® PREMIUM Primer is thick and hides imperfections, I still wanted to be sure that the patches would disappear after rolling out the primer. This little double primer on the patches is a belt-and-suspenders approach that might not be necessary in your project.
Then I rolled out the field—-the walls—with a paint roller.
Paint the walls.
The primer dried super fast, so I didn’t have to wait long to start cutting in the color on the walls. (I can’t tell you how much of a joy it is to not wait long for paint to dry.) I started by cutting in the wall color along the baseboard, window trim, door casing, and cabinets. And then used the paint roller to finish. The color immediately popped on the wall, which is a sign of a good primer. Still, I painted two coats.
Paint the stripe.
After the paint was dry, the next step was painting the stripe. I’ve been dreaming about painting a contrasting sheen in the same color for years, and was very excited to finally create the look. The idea is to use a flat or matte color and then use the same wall color but in another sheen. For this project, I chose eggshell, since we wanted to create a subtle and calm vibe. If I was creating a dining room or a playroom, I’d probably choose a different combination of sheens for greater contrast.
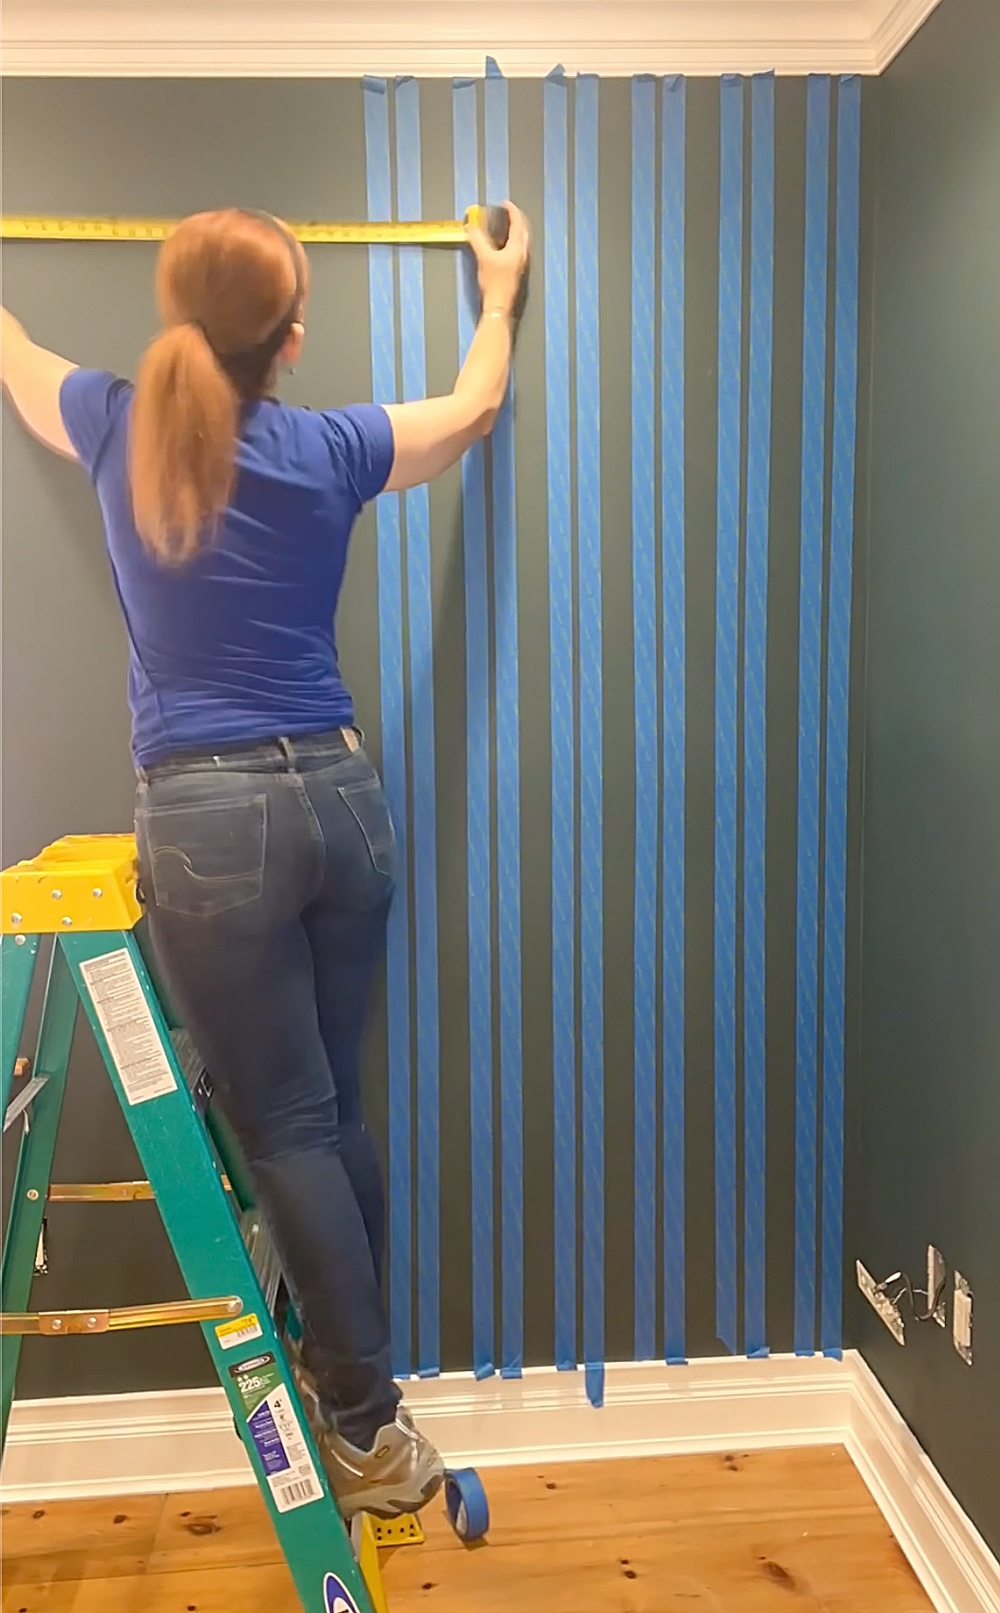
After marking the layout of each stripe with a tape measure, level, and pencil at the top, middle, and bottom of the wall, I extended the painter’s tape from the top of the wall to the bottom. For a stripe to work, it needs to look vertical and consistent. So, after each set of stripes, I checked for plumb and measured the distance between the stripes to be sure I was on the mark.
The painstaking part is applying the tape. The fun part is applying the paint. But, before painting, I make sure that every bit of tape is adhered to the wall so that no paint can infiltrate beneath it. Then I rolled Secondhand Find in Eggshell on the wall. After waiting for the first coat to be dry to the touch, I applied a second coat. And then I removed the tape. I make sure to keep a low angle to the wall when I remove the tape so it comes off without messing with the paint on the wall.
No, I don’t wait for the paint to dry to remove the tape, as it can take a long time and it can be more difficult to remove. Just be sure to have a trash bag ready to drop the wet tape into after removing each strip. It can be a mess if you need to go searching for a place to dispose of the bundle of wet tape.
Update the decor.
When the paint was dry, the electrical faceplates needed to be put back. Before rehanging the antique pineapple light, I installed a ceiling medallion to help accentuate the little glass light fixture so it looks less like an afterthought and more like a featured player in our primary bedroom.
The old bedspread was swapped for a white quilt, the bedside table lamps have new shades, and the antique mirror went back in its spot. Since the yellow deacon’s bench is a family heirloom, we decided to use it in another room, and swapped it out with a backless modern bench that fits in better with the goal vibe.
Now we have a hotel-like sanctuary to retreat at the end of each day, instead of a looming project with decor that didn’t quite go together. It’s a calm primary bedroom with a perfect paint finish.
Learn more at kilz.com
*This is a sponsored blog post with MyFixItUpLife.
RELATED ARTICLES
get inspired:
FOLLOw us:
@kilzbrand
SHOP
PRODUCTS
Project Spotlight: A Bathroom Remodel With KILZ® Primers – Part 1
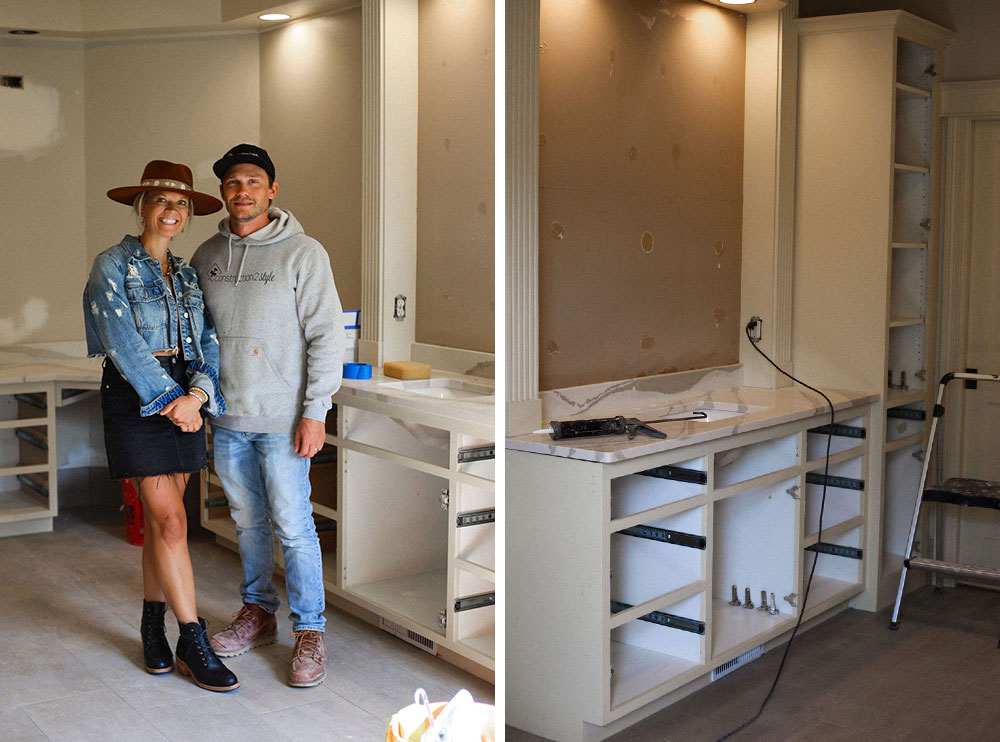
November 20, 2023We are Jamie and Morgan Molitor, a dynamic duo in both life and business, and the driving force behind our journey in home remodeling, interior styling, and the world of small media. Since 2012, we’ve been all about keeping it real.
What started as a lifestyle blog has since blossomed into c2s, a thriving design and build business combined with a small media enterprise. With over a decade of experience, we’ve mastered the art of transforming houses and crafting spaces filled with joy, not only for our clients but for ourselves as well. We’re here to take you on a journey through every step, from design and construction processes to the intricacies of digital marketing.
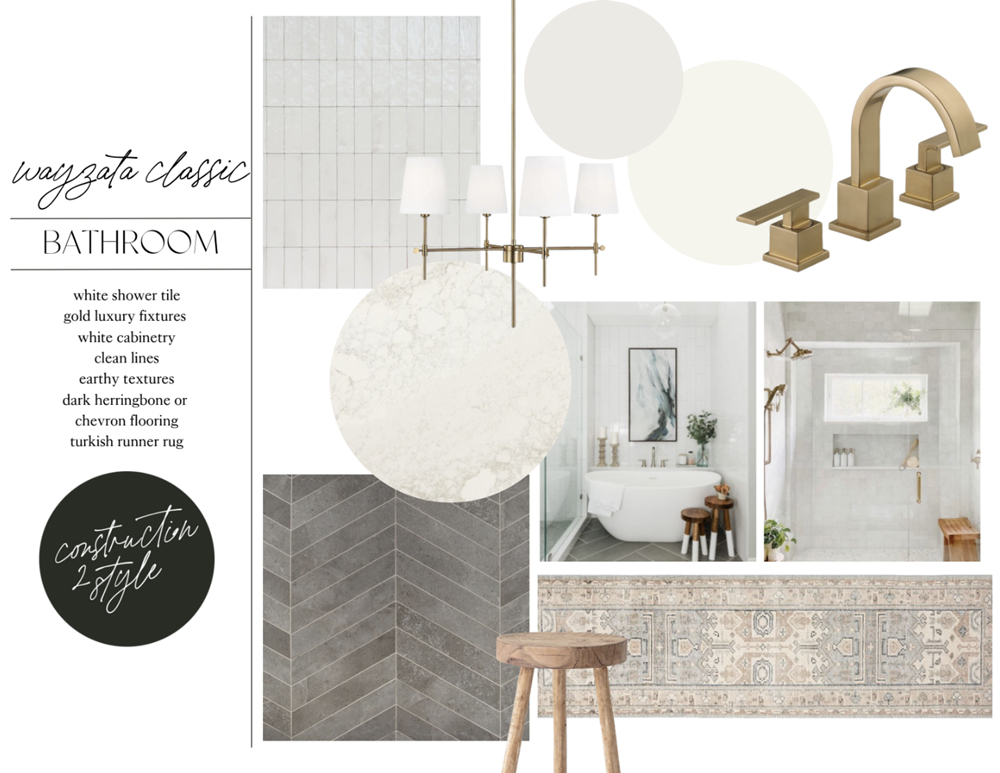
Our most recent bathroom design and remodel project is in Wayzata, MN for the fabulous Chris Freytag, a local health and fitness expert, blogger, author, and popular keynote speaker here in the Twin Cities.
At our core, we have a genuine passion for remodeling primary bathrooms, and there’s a unique excitement when we embark on a total transformation while preserving the existing layout. It’s like unlocking the hidden potential within the familiar confines. Each year, we take on approximately 10 bathroom projects that follow this transformative approach, where we breathe new life into the space without altering its fundamental structure. There’s an art to retaining the essence of the layout while infusing it with modern elegance and functionality. It’s about enhancing the existing beauty, ensuring that every corner reflects the homeowner’s vision, and delivering a space that feels both rejuvenating and utterly luxurious. These projects allow us to showcase our expertise and creativity, creating bathrooms that are not just functional but also awe-inspiring havens within the home.
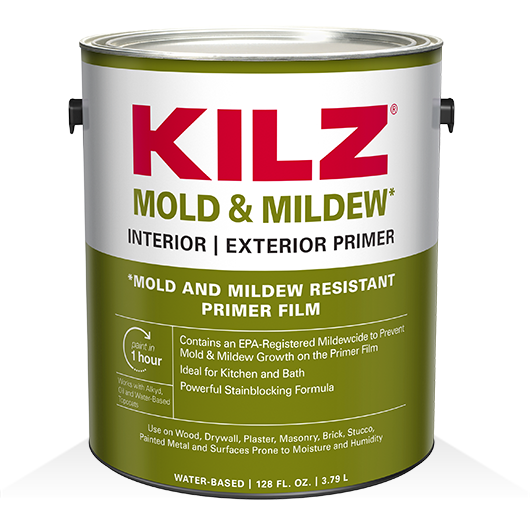
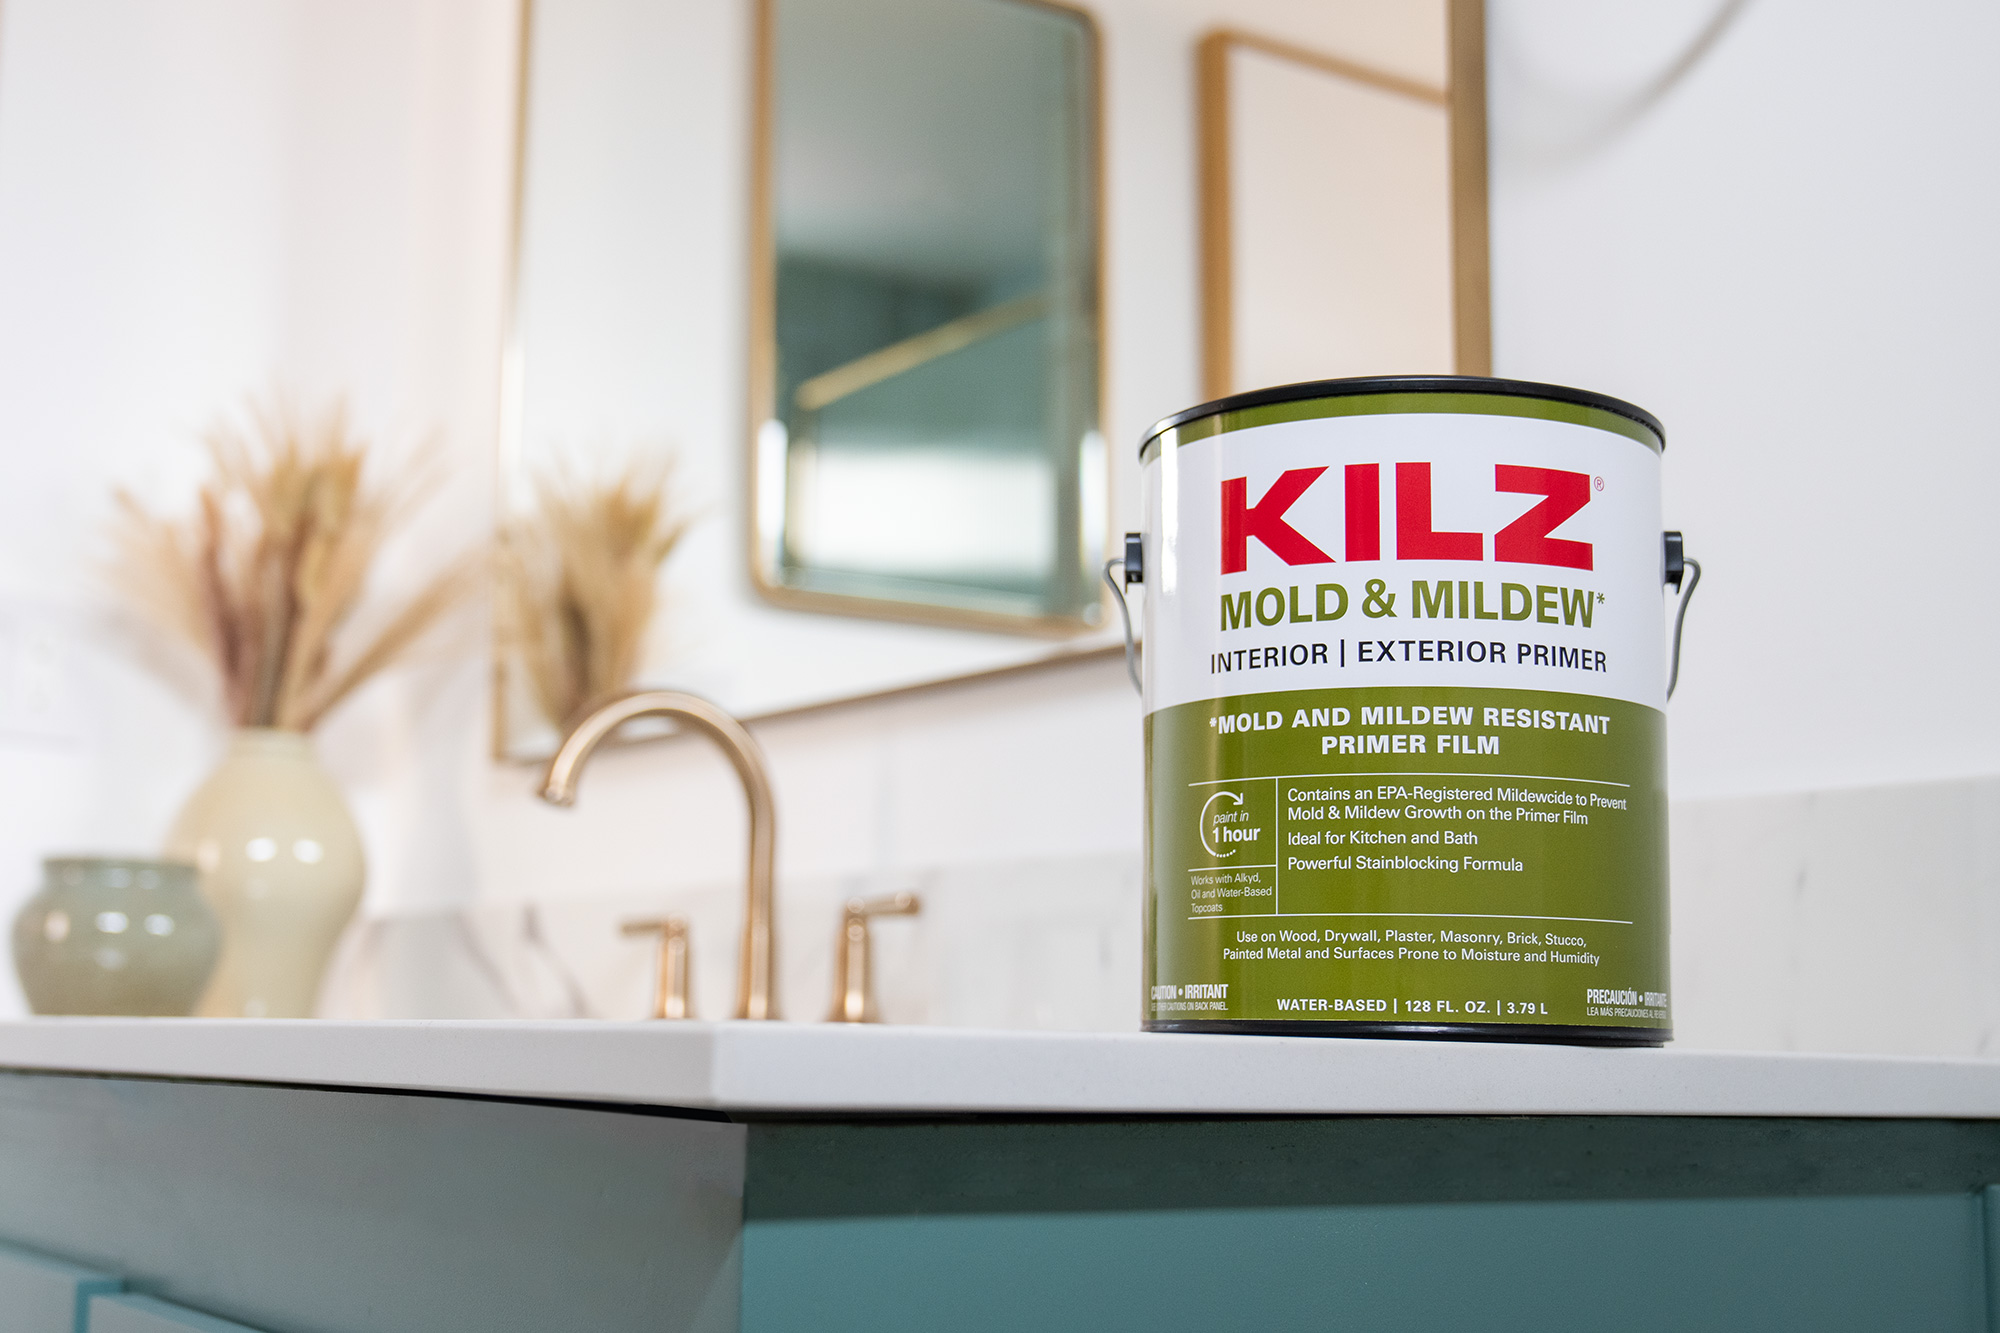
 And one of the best ways to do this is through paint! The KILZ® brand is one of c2s’ go-to brands, especially for bathroom remodels. In high-humidity areas, such as bathrooms, finding the right primer that can withstand moisture is crucial. That’s where KILZ® MOLD & MILDEW Primer truly shines. Specially designed for these challenging environments, it forms a protective barrier that not only prevents mildew growth but also supports the paint, ensuring it thrives in its best condition. With KILZ® MOLD & MILDEW Primer, you can confidently transform your spaces, knowing that your paint will stand strong against the challenges of high humidity, allowing your home to look its best for years to come. Say goodbye to worries and hello to enduring, vibrant walls!
THE PROJECT
At first, Chris and her husband aimed for a cosmetic refresh since the space’s layout was already well-designed. Removing the jetted tub was a priority, and the only structural change involved expanding the shower entrance. Everything, except the cabinetry, underwent a transformation — from paint and countertops to tiles and fixtures. A complete makeover to match their vision! The whole goal of this project was to say goodbye to the beige and hello to white, white, white. A light and bright bathroom makeover!
A classic bathroom remodel is like a timeless makeover that keeps things stylish and comfy. It’s all about simple lines, cool fixtures, and a calming color scheme that makes your bathroom a chill space to be in. Think subway tiles, vintage tubs, and those shiny chrome fixtures you love. Classic bathrooms never go out of style and give you a space that’s not just pretty but also super practical. Whether it’s the retro vibes of black and white or the cozy feel of wood accents, classic bathroom makeovers keep things cool and comfy for years to come.
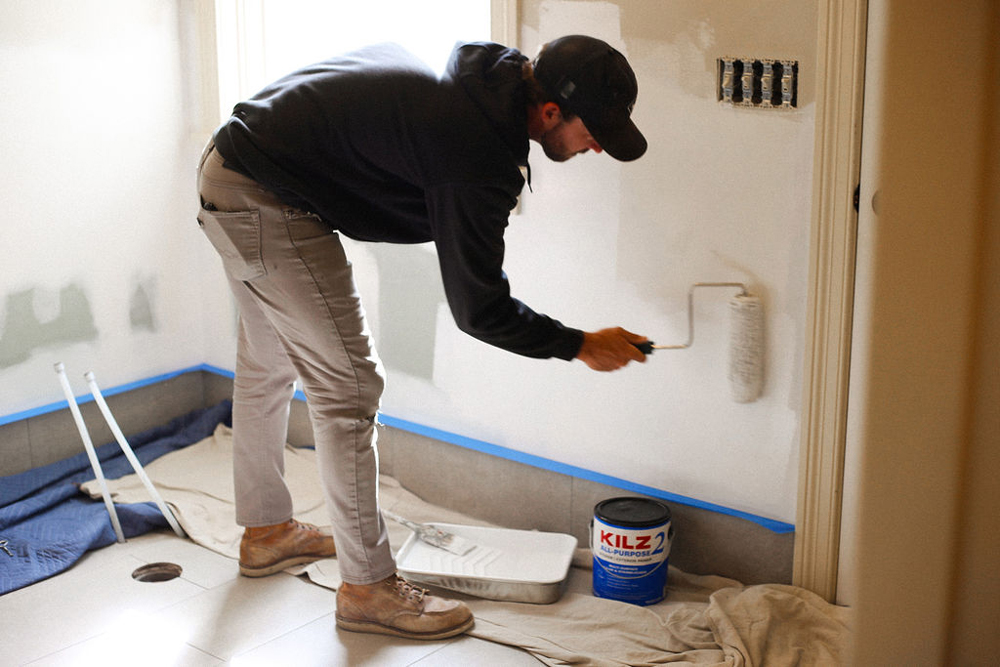
This project has been smooth sailing. Painting is underway, plumbing up next – and this project will be a wrap! Can’t wait to share the final reveal with you all soon. But today – we wanted to chat about priming and painting! Especially the importance of primer, something that is so often overlooked. We see so often those buying the cheapest primer or even worse, not priming at all. Once you get done reading this blog post – we hope you will never be that person.
Importance of Primer
Priming is like the secret sauce for a successful paint job. It’s the difference between just getting it done and getting it done perfectly, ready for Instagram-worthy photos. Taking the time to prime is a smart move that can save you time and money down the road. With KILZ® Primers, you can achieve long-lasting results that you can show off with confidence. These go-to products always deliver the dependable and consistent performance you need.
Our Go-To KILZ Products
These are c2s’ four go-to primers when it comes to any project beyond this bathroom renovation. And we’re here to tell you the differences between them and why we love and use them.
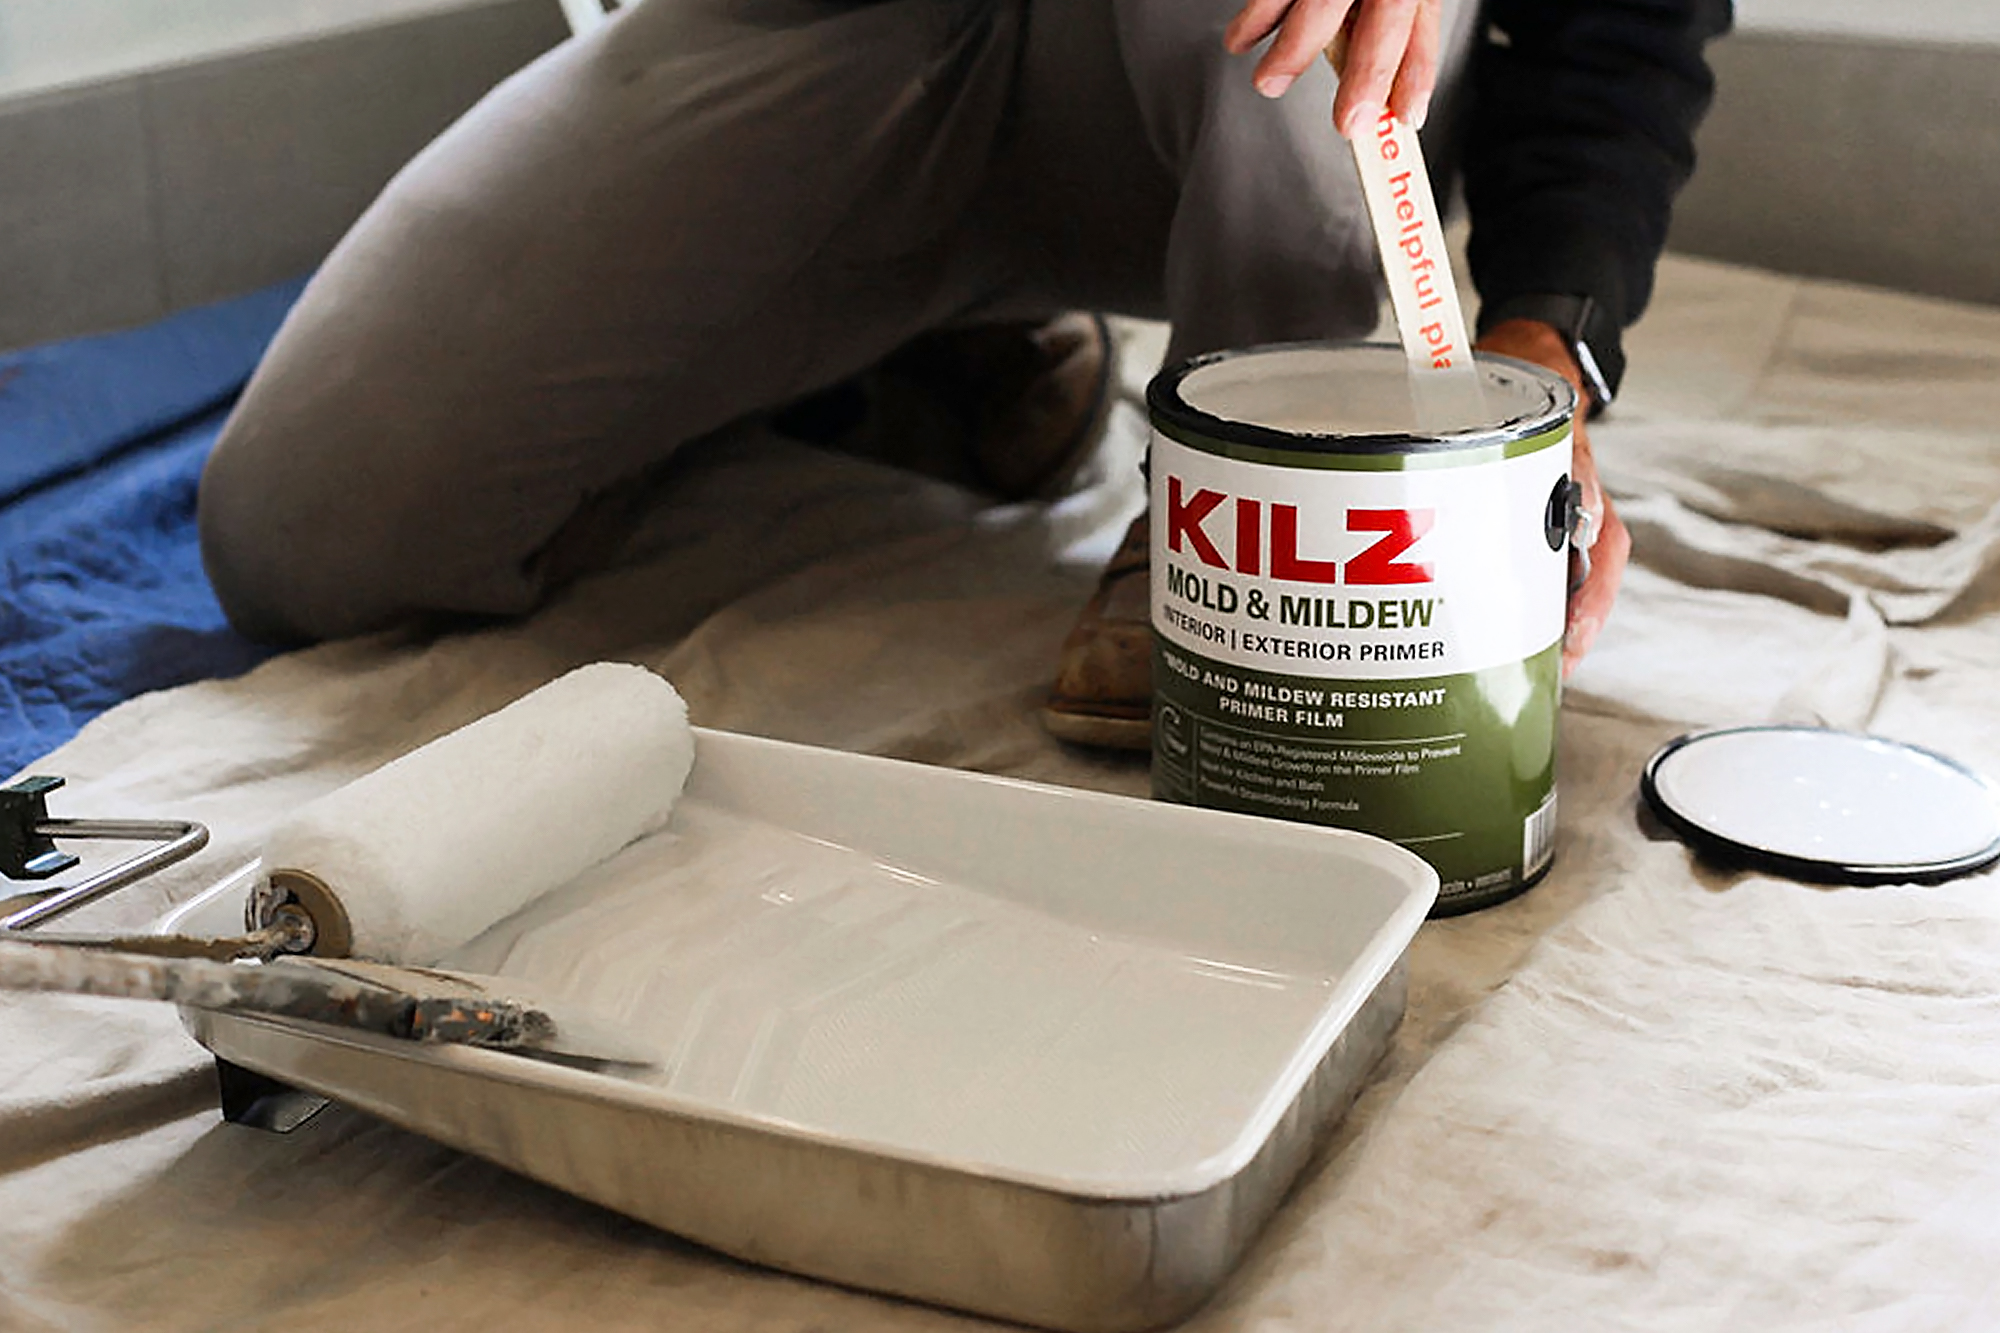
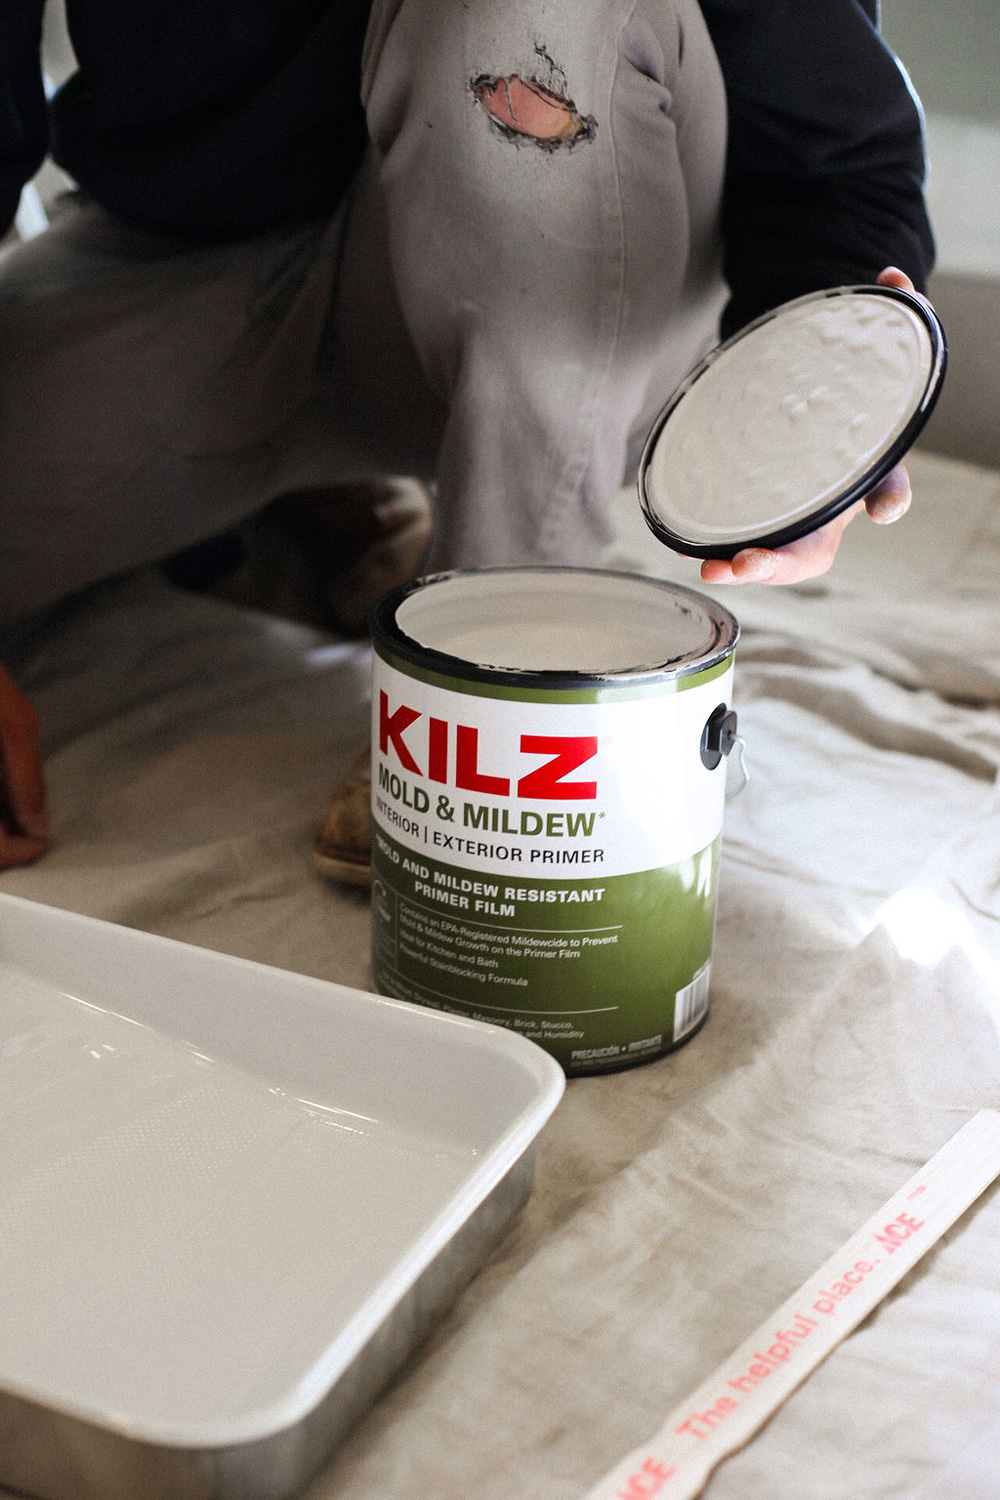
KILZ® MOLD & MILDEW Primer is your go-to solution for residential spaces that deal with high humidity, moisture, and temperature fluctuations, like kitchens, bathrooms, powder rooms, and laundry rooms. This water-based primer-sealer-stain blocker offers excellent adhesion on both indoor and outdoor surfaces, providing a solid base for paints to adhere to. What sets it apart is its EPA-registered ingredient, which forms a protective, mold and mildew-resistant layer on the primer surface, keeping these unwelcome guests at bay. It’s also a champ at blocking medium to heavy stains like markers, grease, ink, and more. Plus, it dries quickly, has a mild odor, has low VOCs, and can be easily cleaned up with soap and water.
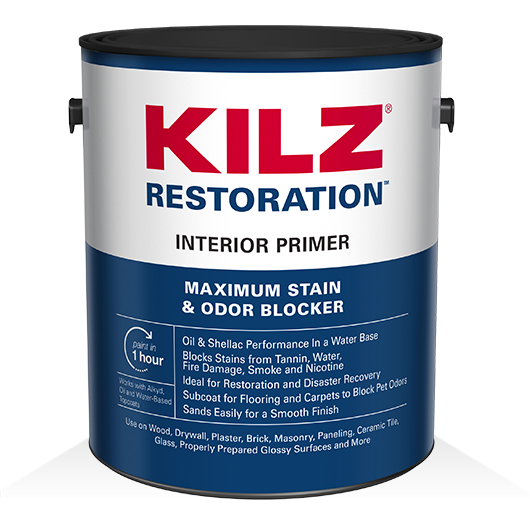
KILZ RESTORATION® Primer is like a modern superhero for your home surfaces. It’s a water-based primer, sealer, and stain blocker that rivals the performance of traditional oil and shellac-based primers. This powerhouse takes on the toughest stains, from water damage and rust to smoke, nicotine, ink, and even pesky pet stains. But it doesn’t stop there—KILZ RESTORATION® Primer is also your go-to solution for sealing in persistent odors like those from pets, food, and smoke. You can use it on a variety of indoor surfaces, from drywall and woodwork to plaster, masonry, and even glossy surfaces. It’s the perfect base for water-based or oil-based paint, and it’s a game-changer when you’re replacing carpet or wood flooring and need to block subfloor odors. Say hello to your home’s new best friend!
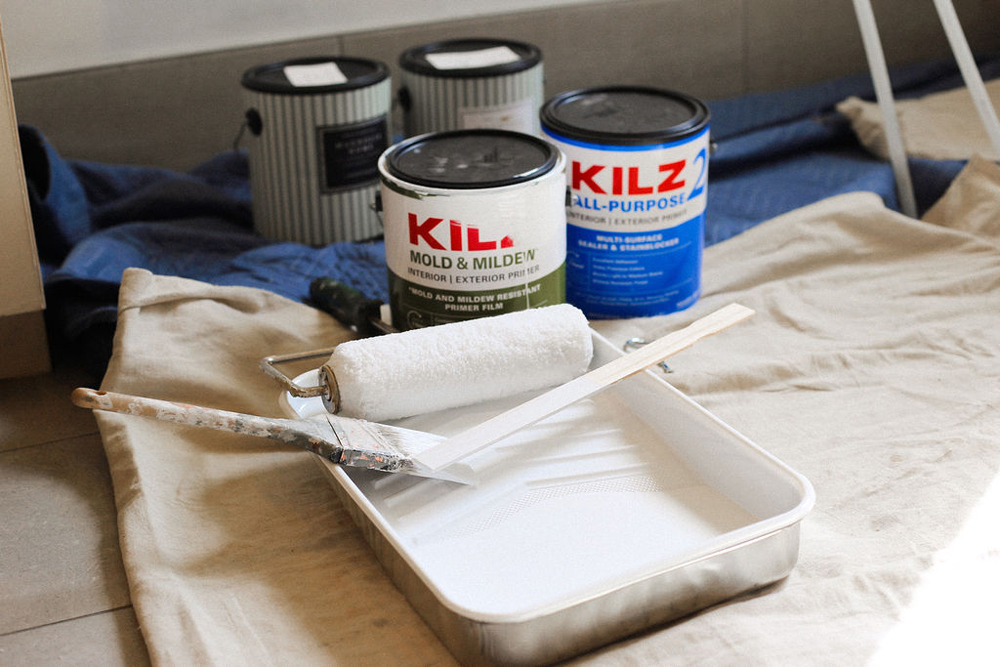
KILZ 2® ALL-PURPOSE Primer is your speedy, go-to solution for priming, sealing, and blocking stains on a variety of surfaces. This water-based wonder is known for its quick-drying, excellent adhesion, and mildew-resistant properties, all while emitting a very faint odor. It’s your trusty partner in blocking medium stains, such as minor water stains, rust, ink, and more, and it’s especially handy when you’re changing colors, reducing the need for multiple paint coats. Suitable for both indoor and outdoor surfaces like woodwork, drywall, masonry, and even glossy surfaces with proper preparation. You can confidently use it under or over water-based or oil-based paints.
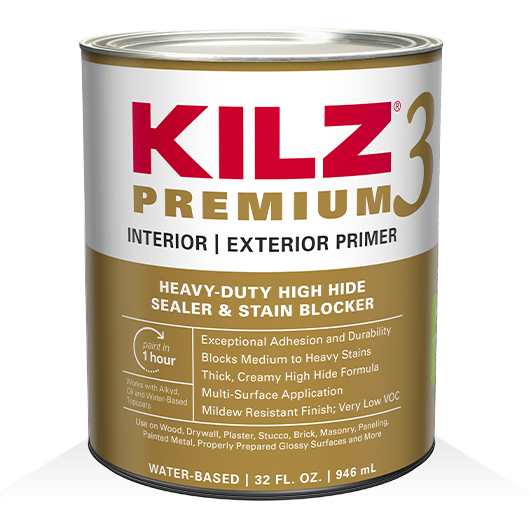
KILZ 3® PREMIUM Primer is a top-notch, quick-drying, and low-odor water-based primer-sealer-stain blocker. It’s got a very low VOC, making it environmentally friendly, and it excels in adhesion while providing a protective, mildew-resistant coating—perfect for areas prone to moisture. This powerhouse can tackle medium to heavy stains caused by water, tannin, ink, grease, and more. With its thicker, high-hiding formula, it’s a champ at concealing surface imperfections and prepping your surfaces for a fresh coat of paint. From indoor to outdoor projects, it’s versatile and suitable for woodwork, drywall, masonry, and even glossy surfaces with proper prep. Plus, it plays well with both oil and water-based paints.
We hope you enjoyed learning about our progress, and more is to come! We are waiting on a final light and the shower glass door and then this project will be a wrap. Stay tuned for the big reveal – before and after coming to KILZ’s The Perfect Finish blog soon!
*This is a sponsored blog post with c2s.
RELATED ARTICLES
get inspired:
FOLLOw us:
@kilzbrand
SHOP
PRODUCTS
Destination Restoration Rewind: A Look Back at our Best Projects of the Year
November 7, 2023At the end of the year, we like to reflect on some of our biggest accomplishments, and this year, we’re looking to our Destination Restoration series for inspiration. For this exciting video series, we enlisted the help of two paint, construction, and design experts to make over individual rooms in a single-family home. With their help, we refreshed and modernized four outdated rooms, saving time and money in the process, and extending the life of this charming residence.
Let’s recap our favorite moments from Destination Restoration and get excited to tackle another year of home improvement.
If you’re looking for kitchen remodeling ideas to inspire your DIY dreams, this is a great example of how you can make a big design change while keeping the integrity of the room intact. Our team of pros took a dark and dated kitchen, and, with a vision and some ingenuity, achieved a bright and modern space, renewed for the next generation. The striking cabinet transformation came to life with some light refinishing, KILZ 3® Premium Primer and a fresh coat of paint.
See the full project here.
If you have a DIY bathroom project in mind for the new year, be sure to check out this stunning refresh for tips. Our Destination Restoration team made this makeover look easy to give you the bathroom inspiration you need to tackle your own transformation in 2024. With just a few cosmetic fixes, and the help of KILZ Mold & Mildew Primer, our pros converted this outdated room into a beautifully modern space that will last for the next generation to enjoy.
See the full project here.
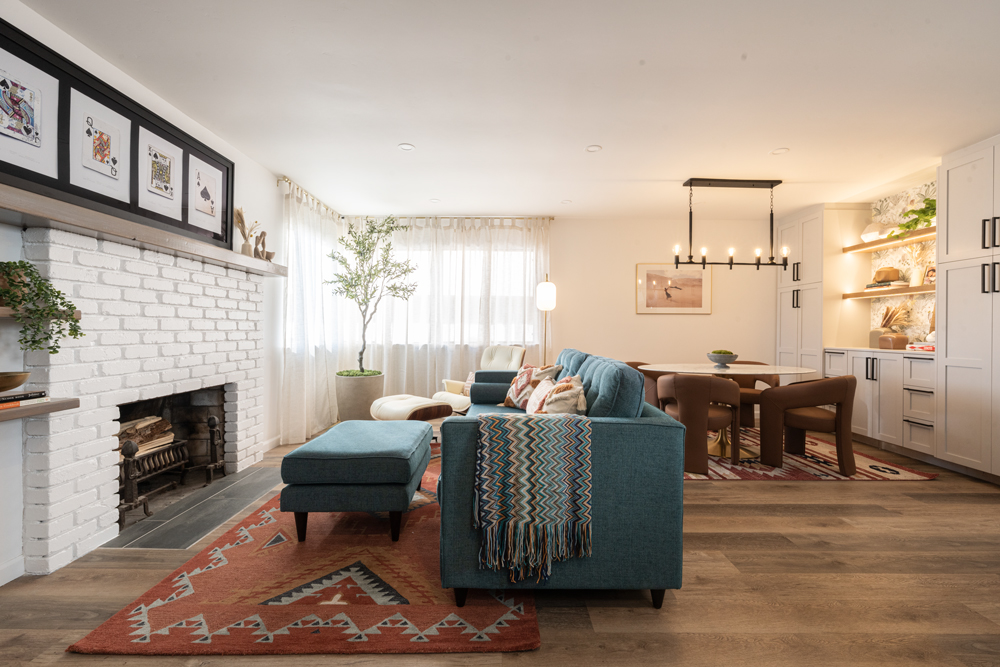
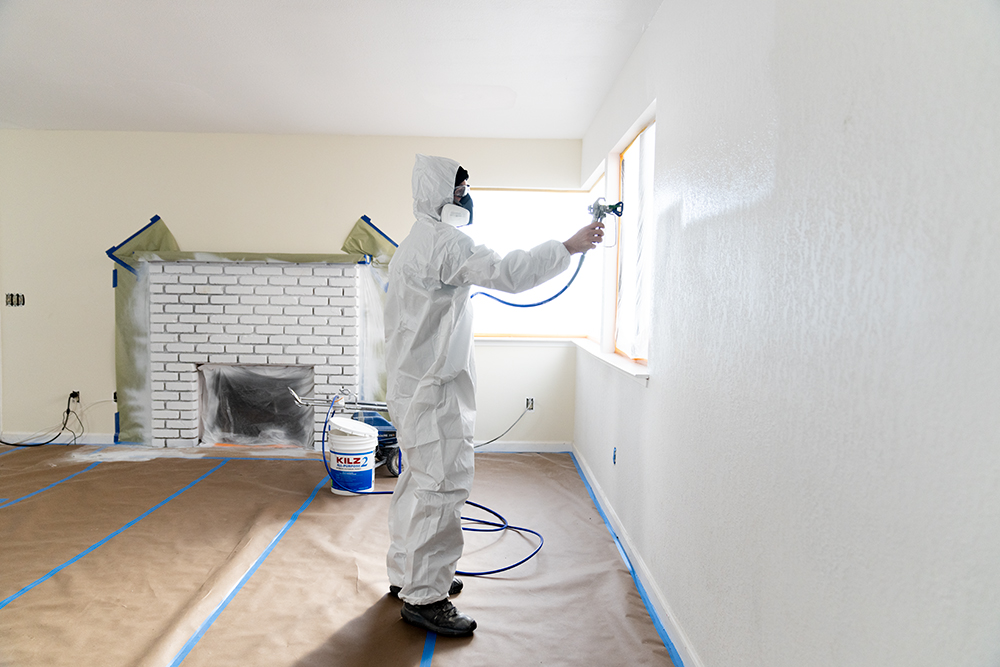
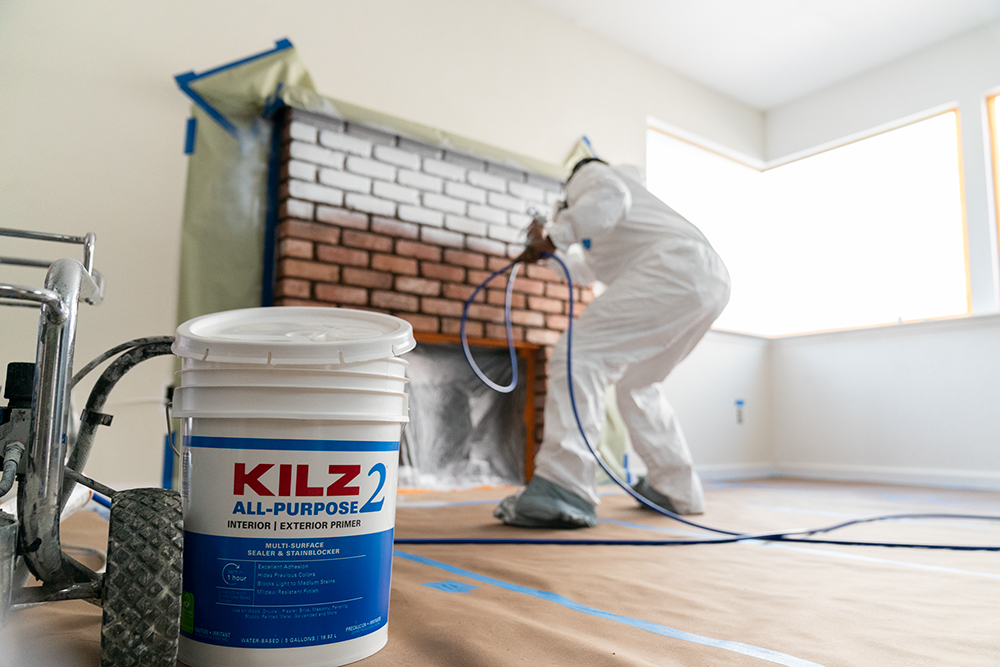
The power of KILZ 2® All-Purpose Primer did wonders for this open-concept living/dining room, where it helped to completely restore an old fireplace and brighten up the room. Rather than put the home through an expensive and time-consuming remodel, our pros reimagined the space and rejuvenated it for years to come with a few simple changes. DIY living room inspiration at its peak, this is a great example of how you can breathe new life into an older home while sticking to a budget.
See the full project here.
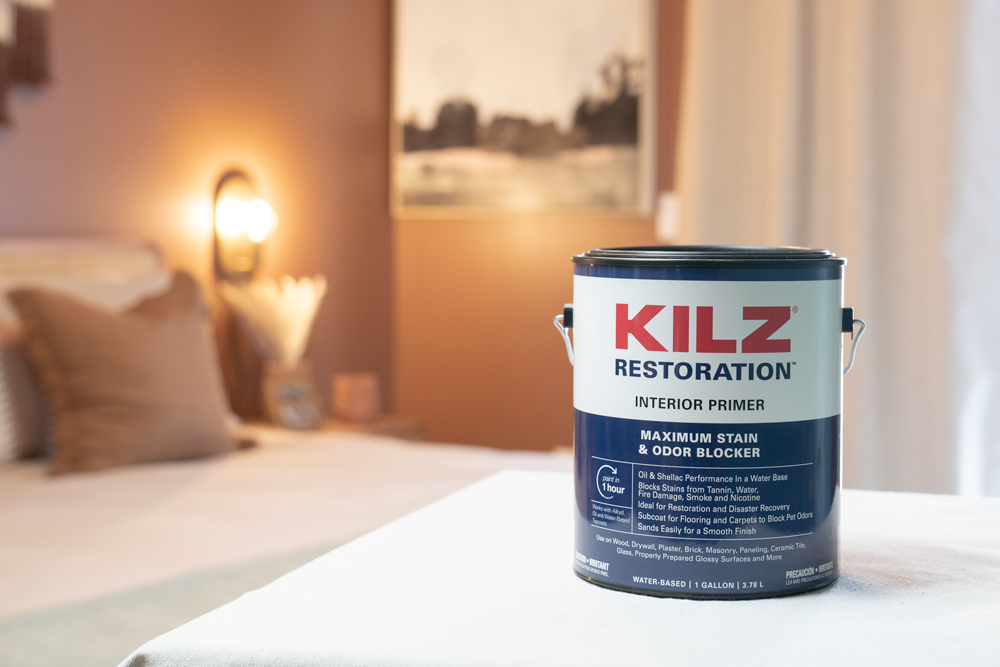
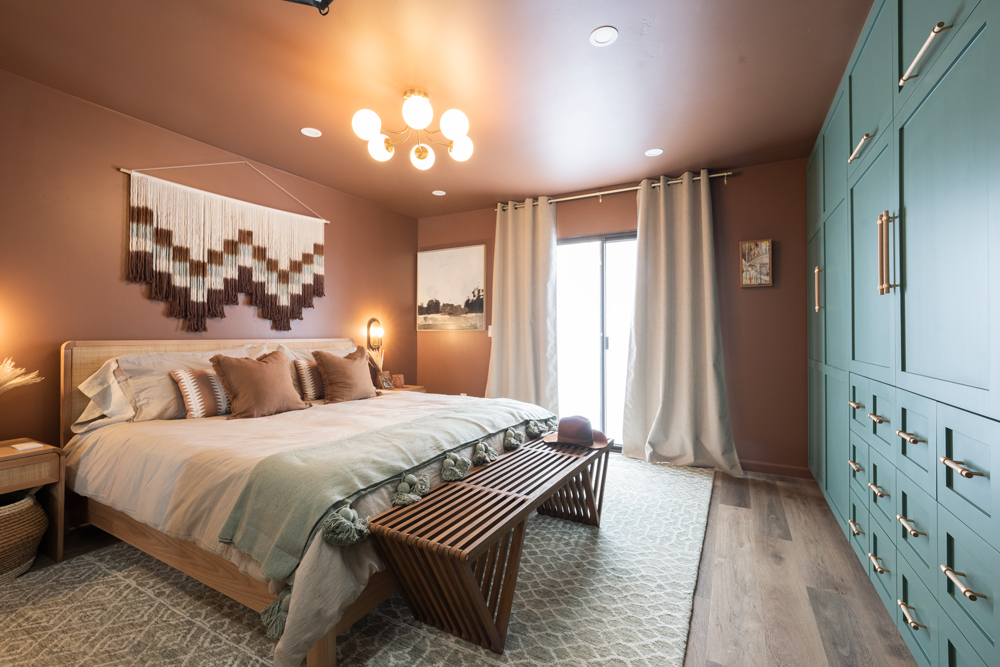
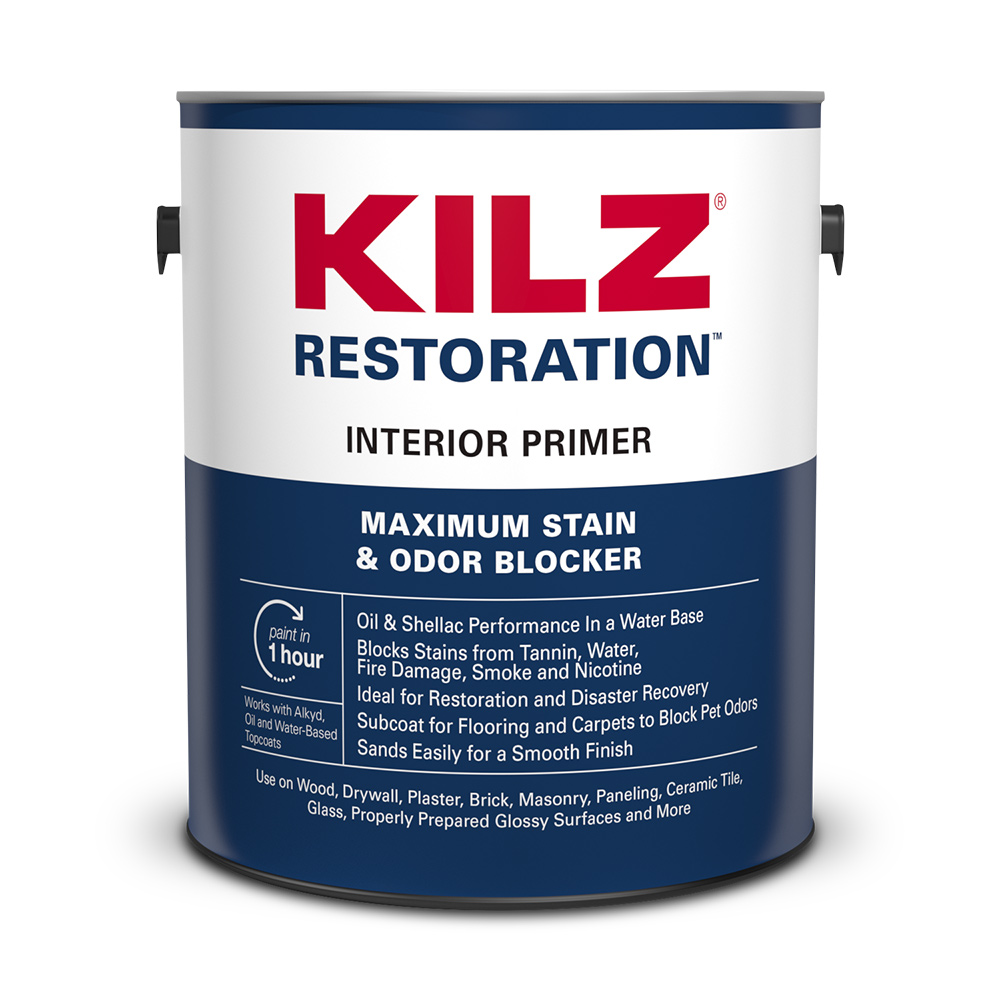
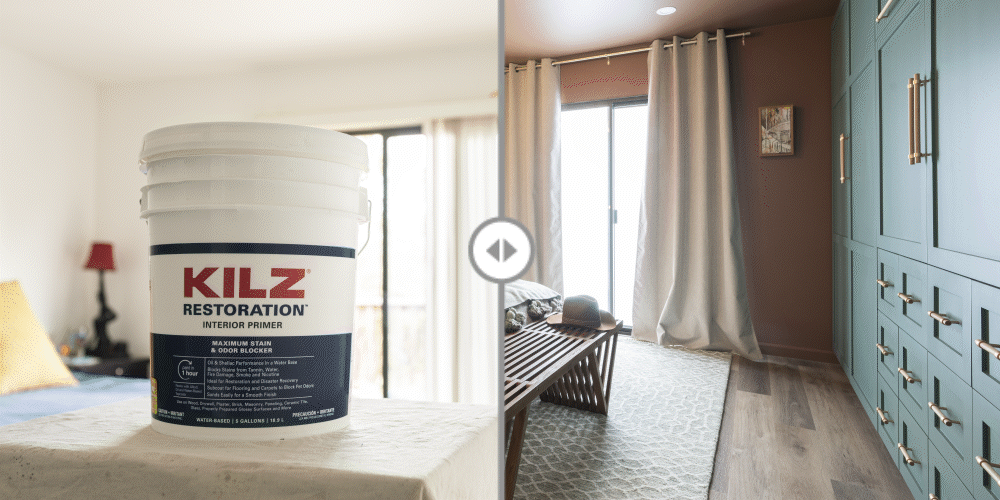
We finish our look back at the series with the primary bedroom remodel. This room’s biggest issue was that it had a large ceiling stain from water damage. Our pros didn’t let this stop them, and instead, used KILZ RESTORATION® Interior Primer to cover and seal the stain and a beautiful terracotta color paint to transform this room into a warm and luxurious space. To finish the look, they upgraded the old closet with a custom, built-in storage unit with a hidden TV display, painted in a complimentary forest green. We couldn’t be more pleased with the result, which reminds us of a chic and cozy desert retreat.
Note: The cause of the water damage had been remedied prior to our pros coming in to fix the cosmetic side.
See the full project here.
This was another great year for home makeover inspiration, and even though the year is winding down, our motivation is full steam ahead. Whether you’re taking it easy or busy organizing next year’s DIY game plan, we hope these projects inspire you to bring your dream home to life. Thanks for spending the year with us. We can’t wait to see what you choose to tackle in 2024.
Always remember to refer to our website kilz.com or product back labels for additional information on which primer is right for your project and detailed instructions on how to apply our products. Check out our Coverage Calculator to understand your estimated paint needs for your upcoming project.
RELATED ARTICLES
get inspired:
FOLLOw us:
@kilzbrand
SHOP
PRODUCTS
Project Spotlight: A Step-by-Step Guide to Painting Your Kitchen Cabinets
November 1, 2023Hi! My name is Abby from Making It With Abby. I am a self-taught DIYer who loves to learn new things and take on all sorts of different projects. I find so much joy in creating with my own two hands and teaching others how they can do it too! As a new homeowner, I started building furniture, but it wasn’t until 7 years later that I started taking on other types of home projects, which is when Making It With Abby was born!
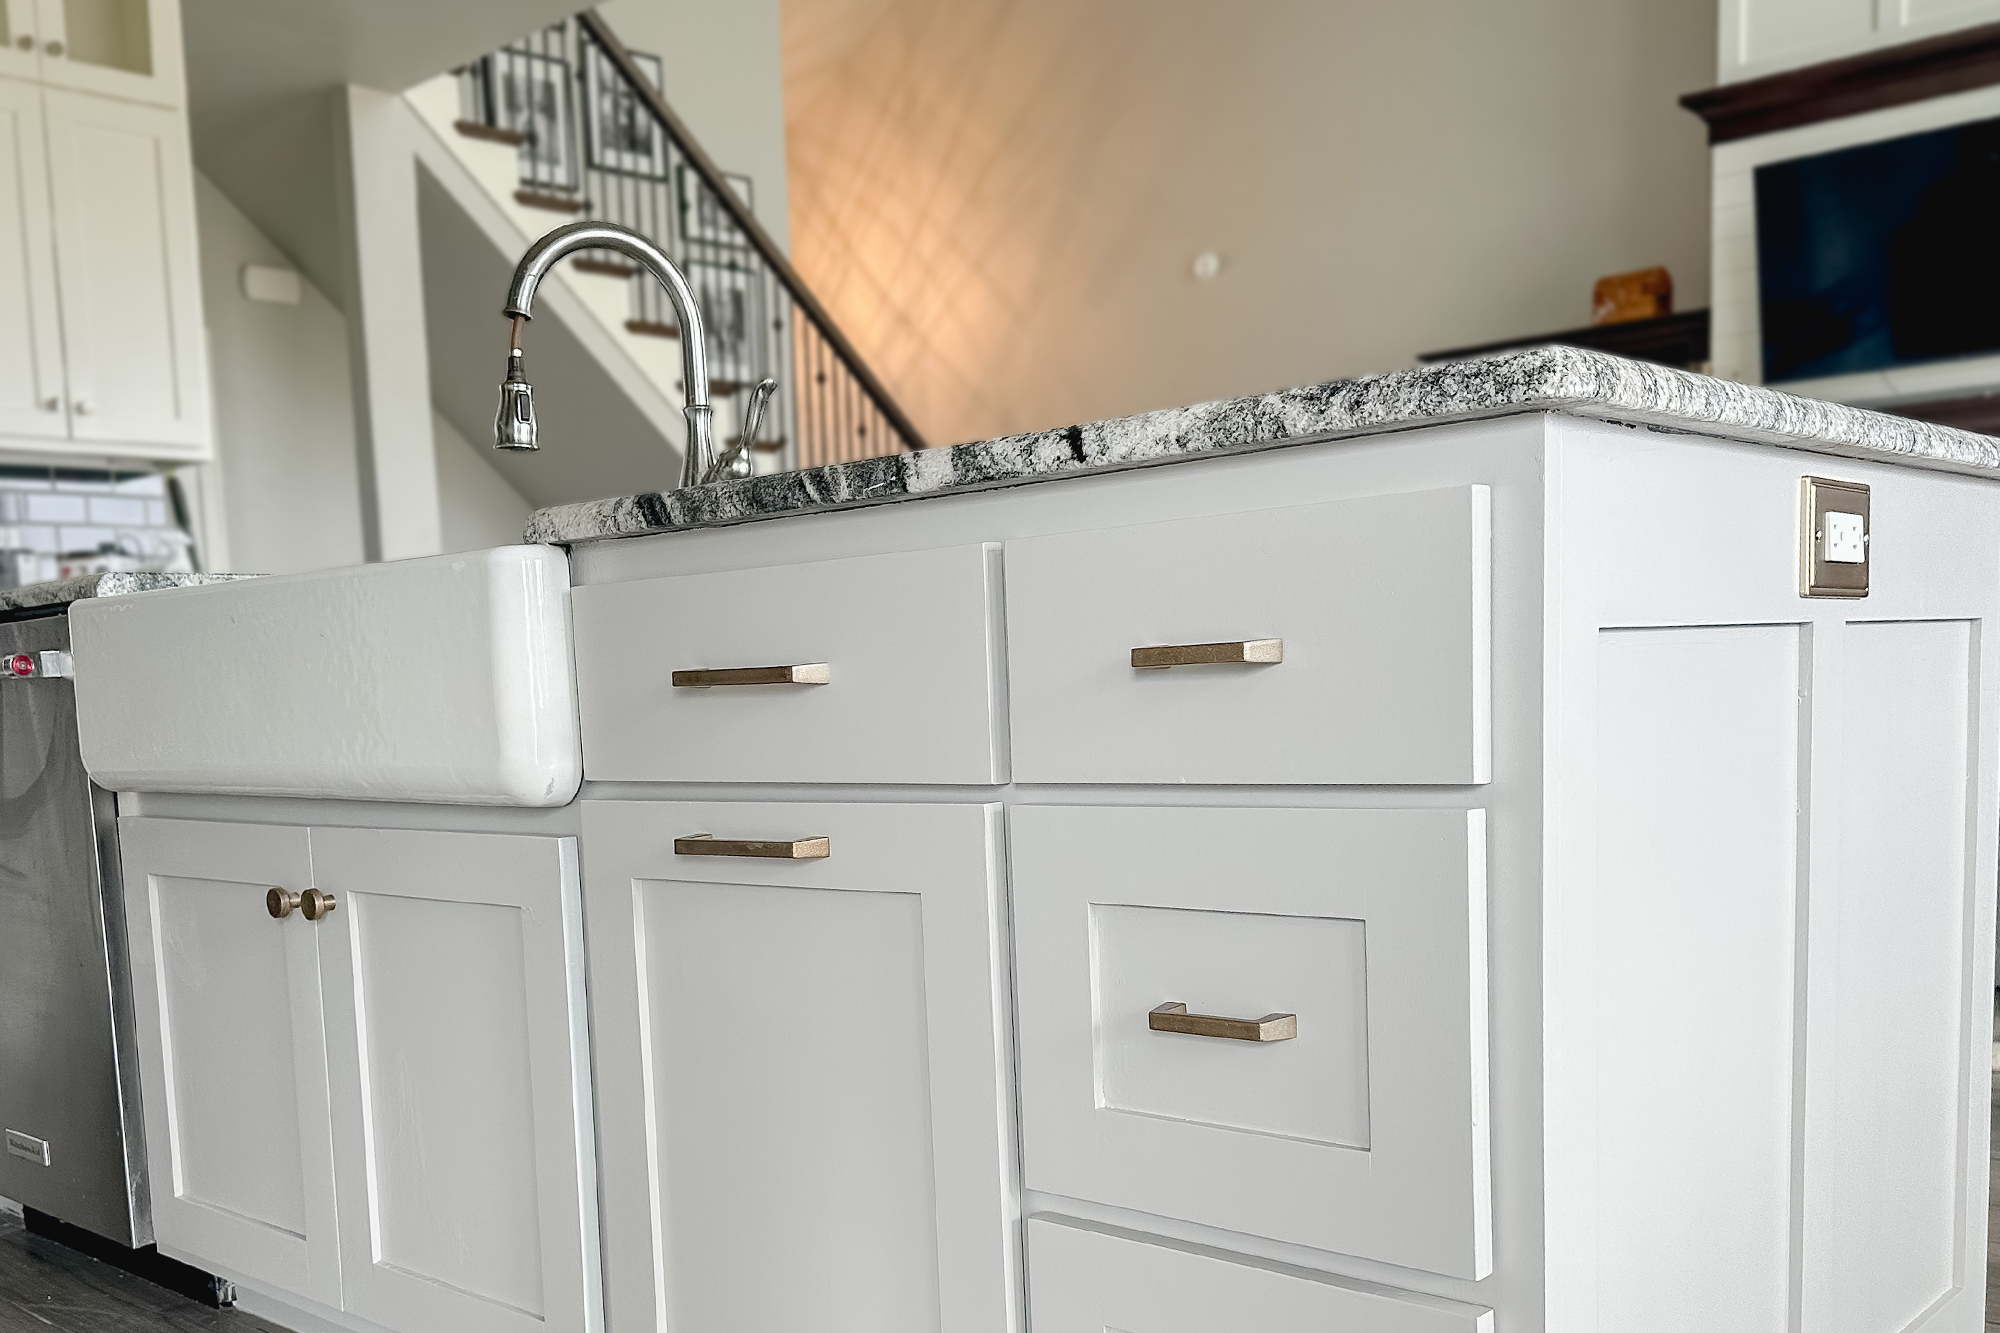
When we built our second home 7 years ago, I didn’t have a strong design sense or style, so when my builder suggested a dark gray/brown stain for our kitchen island, I agreed. I never really liked it and especially disliked how much dirt it showed. I recently renovated our dining area, and it left our island looking out of place. I started thinking about painting it to better fit the space and be a color I actually love.
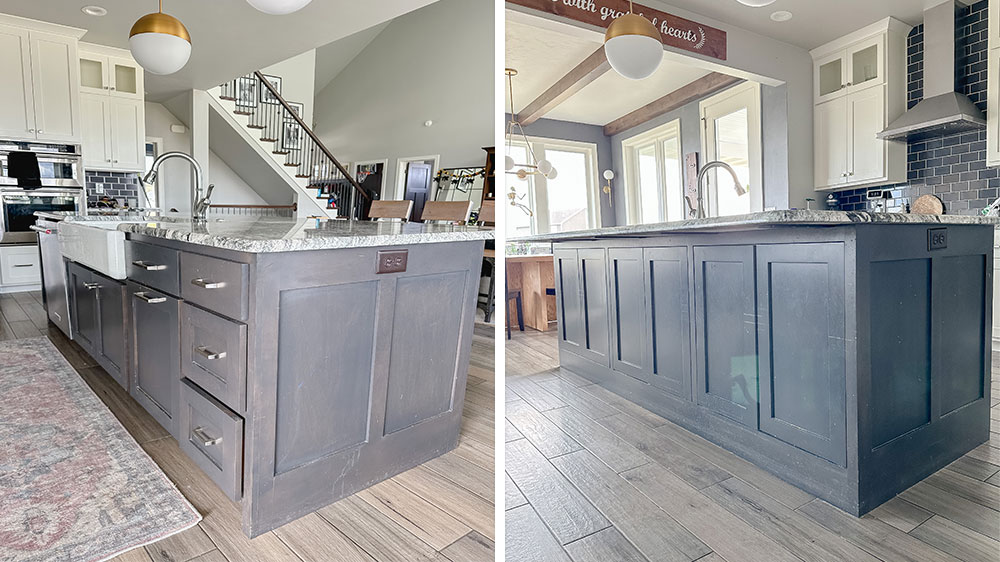
I think a lot of people are in the same boat and don’t like the color of their cabinets, or their cabinets just need a fresh coat of paint. It may seem daunting to think about painting your kitchen cabinets or an island, but it is actually very simple. Best of all, painting your cabinets can breathe new life into your kitchen, giving it a fresh and updated look. In this tutorial, I’ll take you through the entire process using KILZ 3® PREMIUM Primer, ensuring a durable and beautiful finish that will stand up to the demands of a high-traffic kitchen. Let’s get started!
Step 1: Prepare Your Cabinets
The first step in this cabinet transformation journey is preparation. To do this, you’ll need to:
• Remove Decorative Hardware: Begin by taking off all the hardware from your cabinets. Place screws, hinges, and other small parts in a secure place to ensure you don’t lose any.
• Remove Cabinet Doors: Carefully remove the cabinet doors so you have easy access to the cabinet frames for painting. I also removed the hinges where it was blocking areas that needed to be painted, but the other hinges just needed to be covered with painter’s tape.
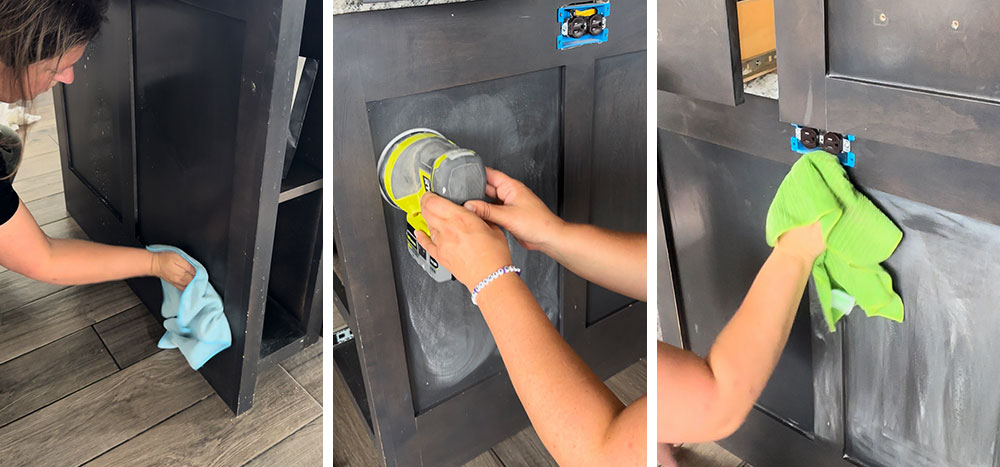
Step 2: Clean and Degrease
Before applying any primer or paint, it’s important to clean your cabinets thoroughly to remove dirt and grease buildup. Use a degreaser to cut through kitchen grime, ensuring a clean surface for the products.
Step 3: Scuff Sand the Cabinets
To improve paint adhesion, lightly scuff sand the cabinet surfaces. This step removes any sheen and provides a better grip for the primer. I recommend using 150 or 180 grit sandpaper.
Step 4: Wipe Down the Cabinets
After sanding, wipe down the cabinets with a damp cloth to remove any dust and residue from sanding. A clean surface is essential for a smooth finish.
Step 5: Primer Application
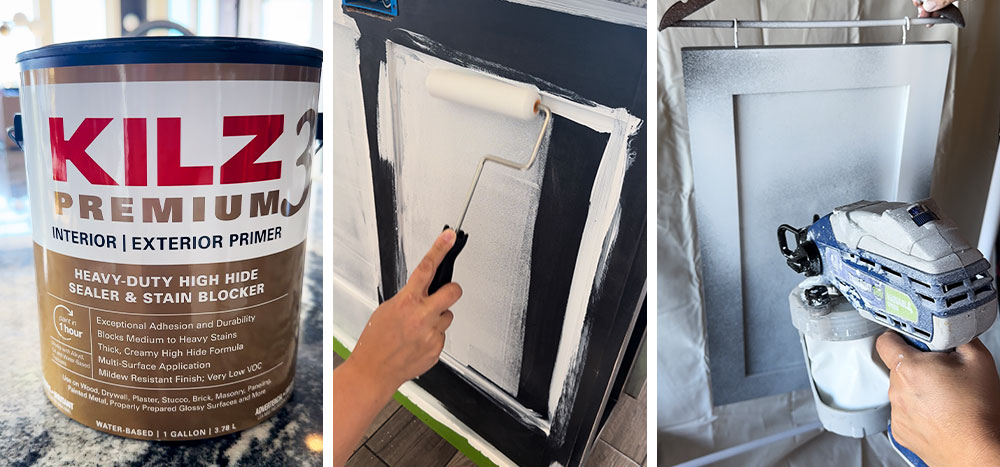
Priming is a crucial step in cabinet painting, especially in a high-traffic area like a kitchen. It makes all the difference between a job done and a job done correctly. I selected KILZ 3® PREMIUM Primer because it provides excellent adhesion to prevent any paint chipping or peeling in the future, and the mildew-resistant coating prevents any mildew growth in moisture-prone areas like a kitchen. There is nothing worse than fixing your old mistake; using a primer helps ensure that this job is done right the first time. KILZ 3® PREMIUM Primer was also the best choice for my project because it provides coverage for medium-to-heavy stains, which will ensure that the current dark color of my island doesn’t bleed through the paint.
Apply a uniform coat of KILZ 3® PREMIUM Primer to your cabinet frames and doors. The thicker formula fills in imperfections in the wood grain of your cabinets, creating a smooth surface for paint application.
I used a brush to get into corners and crevices and a mini foam roller on the rest of the surface and to cover any visible brush strokes. I find a mini foam roller gives the best and smoothest finish when painting cabinets or furniture without the use of a paint sprayer. I decided to use my paint sprayer on the cabinet doors, but you can definitely use a brush and roller for the doors as well.
Using a paint sprayer may seem intimidating, but it’s really quite easy to use. I like to use an airless sprayer, and it really is as simple as pulling the trigger and moving in a slow, even motion. I have used a few different kinds of sprayers at all different price points, and all have been easy to use and have given an impeccable finish.
Step 6: Sand and Wipe Down Again
KILZ 3® PREMIUM Primer is ready for paint in just one hour. After the primer has dried, lightly sand the surfaces once more to ensure a smooth finish. Be sure to remove any dust with a tack cloth or damp cloth.
Step 7: Paint Your Cabinets
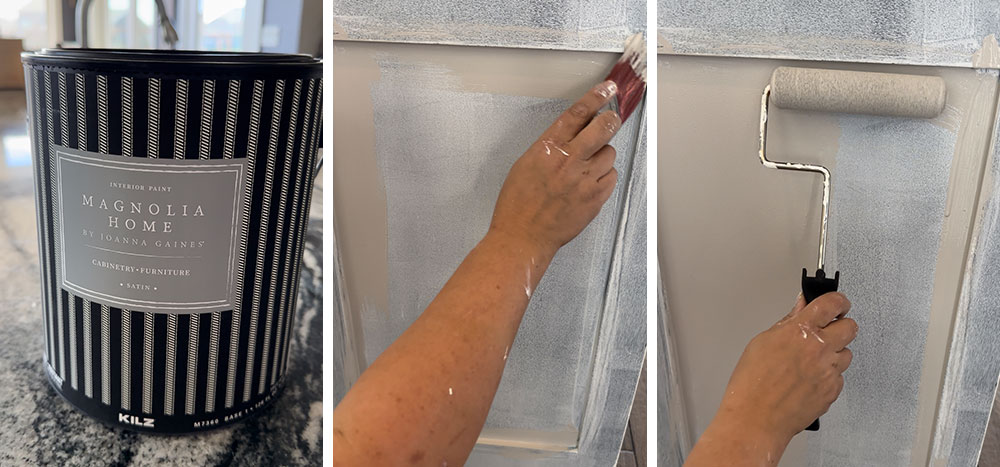
For the paint, I used Magnolia Home by Joanna Gaines® Cabinetry and Furniture Paint. Choose a color that suits your kitchen’s style. There are so many gorgeous colors to choose from in the Magnolia Home by Joanna Gaines® Paint line, but I decided on the color Anatolian, a perfect warm tan with gray undertones. I love this line of paint because of the perfectly curated color options and the superior durability and stain resistance. Their cabinetry and furniture paint offers superior flow and self-leveling which is crucial when painting cabinets to get a smooth and sleek finish.
Apply the paint in even, thin coats to achieve a sleek and professional finish. Be sure to allow each coat to dry thoroughly before applying the next. Once again, I used a brush for corners and crevices and then went over the surfaces with a mini foam roller.
Step 8: Sand and Wipe Down Between Coats
Between coats of paint, lightly sand the surfaces again and remove any dust with a tack cloth or damp rag. This step ensures a flawless finish.
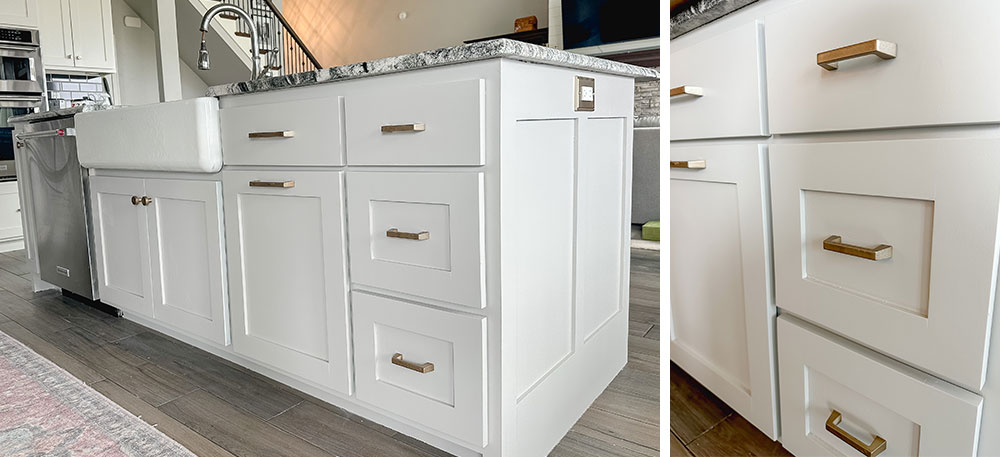
Step 9: Hardware Upgrade
After painting the cabinets, you might want to also update the hardware for a complete transformation. I used KILZ® ORIGINAL Aerosol to prime the metal hardware and then BEHR PREMIUM™ Metallic Spray Paint to give it a fresh, new look. This small change can make a significant impact on the overall look of your kitchen.

Step 10: Reinstall Hardware and Cabinet Doors
Once everything is dry, reinstall the hardware onto your newly painted cabinet doors, and then reinstall the doors to the cabinet frames. Painting your kitchen cabinets can be a rewarding DIY project that transforms your kitchen’s appearance. By following these steps and using KILZ 3® PREMIUM Primer and Magnolia Home by Joanna Gaines® Cabinetry and Furniture Paint, you’ll achieve a beautiful, durable finish that will make your kitchen feel like new. Enjoy your freshly updated space!
*This post is a paid partnership with Making It With Abby.
Always remember to refer to our website kilz.com or product back labels for additional information on which primer is right for your project and detailed instructions on how to apply our products. Check out our Coverage Calculator to understand your estimated paint needs for your upcoming project.
RELATED ARTICLES
get inspired:
FOLLOw us:
@kilzbrand
SHOP
PRODUCTS

Tinting Primer
October 31, 2023What is tinting primer and what is the purpose?
Primer acts as a base coat and helps the paint adhere to the surface. Tinting the primer can help you achieve color matching with your desired paint color in fewer coats.
 When is tinting primer necessary?
It is not absolutely necessary but recommended to help the topcoat paint achieve its true color in fewer coats. By tinting the primer especially if painting dark, deep, and rich colors or going from darker shade to a lighter one, it will lessen the work and coats needed to closely match the desired topcoat color.
Can I tint primer for drywall or previously painted walls?
Yes, most primers are white in color and can be tinted to a limited color palette.
How do I tint primer? Should I have a professional tint for me?
Most paint stores or home centers that sell paint have tinting machines and associates/employees who know how to do this.
Is there anything I should know before tinting the primer?
Label instructions about tinting of the primer should be followed. It is recommended to tint to a lighter shade than the topcoat color.
Can all primers be tinted?
Primers for residential painting typically come in white color and this is most suitable for tinting. Gray or pre-tinted primers do not need to be tinted. Aerosol primers cannot be tinted.
Can you tint a water-based primer?
Yes, water-based primers that are white or light color can be tinted.
Should I tint primer that will be used on mold and mildew?
These types of primers can typically still be tinted unless the label claims it should not be tinted or does not say that it is tintable.
Do I tint my primer with regular colored paint, or with a colorant?
Most paint stores or home centers and hardware stores that sell paint and have tinting capabilities will use tint machines which have the color formulations specific to brand, tint base type and other specifics already in their tint machine software. It is recommended to have the primer tinted in a store using colorants dispensed by a tinting machine.
What is a colorant?
Universal colorants are materials containing a color pigment dispersed in a blend of surfactants and a liquid (most often a glycol). The level of pigment is dependent on the type, color strength and pigment surface area – from paintinfo.com
In what use cases should you not tint primer?
Tinting primers is not needed if you are painting the same color as before or there is little change from the old color and the new one. Tinting primers is particularly helpful to lessen the number the coats needed to achieve truest color and when doing dramatic color changes.
Always remember to refer to our website kilz.com or product back labels for additional information on which primer is right for your project and detailed instructions on how to apply our products. Check out our Coverage Calculator to understand your estimated paint needs for your upcoming project.
RELATED ARTICLES
get inspired:
FOLLOw us:
@kilzbrand
SHOP
PRODUCTS
Primer Myths – 5 Common Myths About Primer
October 3, 2023If you’re new to DIY home improvement, there can be a lot to learn, which is why we’re here to help. We talk a lot about all the things primer can do—how it can improve your paint results, save you time and money, cover up stains, and block irritants like odors, mold, and mildew—but we don’t always discuss the many misconceptions about primer that prevent people from using it. So, today we’re going to address some common primer misconceptions, so you can feel confident you’re making the right choice for your next project.
Myth#1: Primer is Just Paint Without Color
This is one of the most common misconceptions, but the fact of the matter is, primer and paint are two completely different formulas. Paint is formulated to deliver color, and primer’s purpose is to adhere to the surface, create a clean and smooth foundation, protect the surface, and in some cases block stains or hide other imperfections.
Myth #2: Primer Doesn’t Make a Difference and It Takes Too Much Time
Applying primer will actually save you time and money in the long run. Depending on the condition and problem areas that exist on your surface, it’s smart to spend the extra step priming. Using primer to address a problem before applying paint may prevent the need to re-paint or add additional coats of paint to get the results you want.
Myth #3: I Should Use Multiple Coats of Primer if I Can Still See a Stain or Previous Color
Not necessarily. If the previous color or stain is severe, you may need to apply more than one coat of primer, however, it’s not necessary to keep applying coats until a stain or previous color disappears. If the primer is applied uniformly over the previous color or stain, then one or two coats should be sufficient.
Primer works underneath a coat of paint to give you a uniform surface, hide robust colors, block stains, and enhance the paint’s ability to stick to the surface better and last longer. But even if the primer coat does not fully hide the stain or former paint, it will still perform these functions. With help from primer, a coat of paint should completely cover the surface — including previous paint or stains — and get you the results you want.
Myth #4: You Only Need to Prime Indoors, Not Outdoors
Priming outside is just as important, as priming inside because exterior surfaces are exposed to the elements and can experience expansion and contraction (from heat and cold), as well as UV exposure that may cause your paint application to fail due to lack of adhesion to the surface. For these reasons, using an exterior primer first on a properly prepared surface can make a huge difference. If you want to protect your painted outdoor surfaces from cracks, peels, and blisters, and ensure your paint lasts longer, using a primer formulated for these circumstances is a must.
Myth #5: You Don’t Need to Use Primer If Your Paint Contains Primer
Most paints do not contain primer, and if they do—such as an ‘all-in-one’ product—most pros and experienced DIYers will tell you to apply an external coat or two anyway to cover yourself. The only time you should use a combination paint and primer is if you’re touching up paint of the same color. For all other jobs, whether you’re changing the color, starting from scratch, or refreshing a surface, priming before you apply paint is always going to give you superior results.
We hope this information helps you with your next paint project. Be sure to come back to the blog for more tips like these and to get all your primer and paint questions answered beforehand to save you time and money.
To learn more about primer solutions, visit kilz.com.
Always remember to refer to our website kilz.com or product back labels for additional information on which primer is right for your project and detailed instructions on how to apply our products. Check out our Coverage Calculator to understand your estimated paint needs for your upcoming project.
RELATED ARTICLES
get inspired:
FOLLOw us:
@kilzbrand
join the conversation:
SHARE this post: