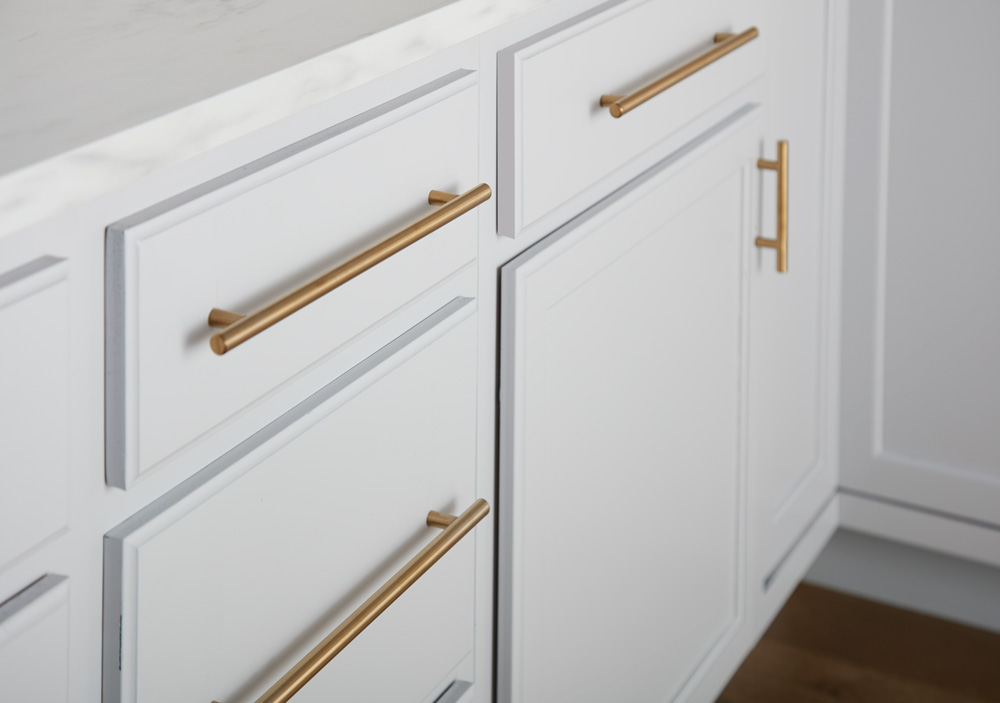
Tag: Bedroom
How to Transform an Ordinary Primary Bedroom into a Sophisticated Sanctuary
December 19, 2023As a Certified Aging-in-Place Specialist (CAPs) and certified color consultant, I share DIY projects, tool how-to guides, and home makeovers as a book author, home show speaker, DIY workshop coach, and radio host. I contribute regularly to BobVila.com and Architect and JLC magazines. I’ve been lucky to create fast-paced makeovers for TV shows, and enjoy sharing home trends and DIY tips as a guest on news shows and satellite media tours for TV and radio.
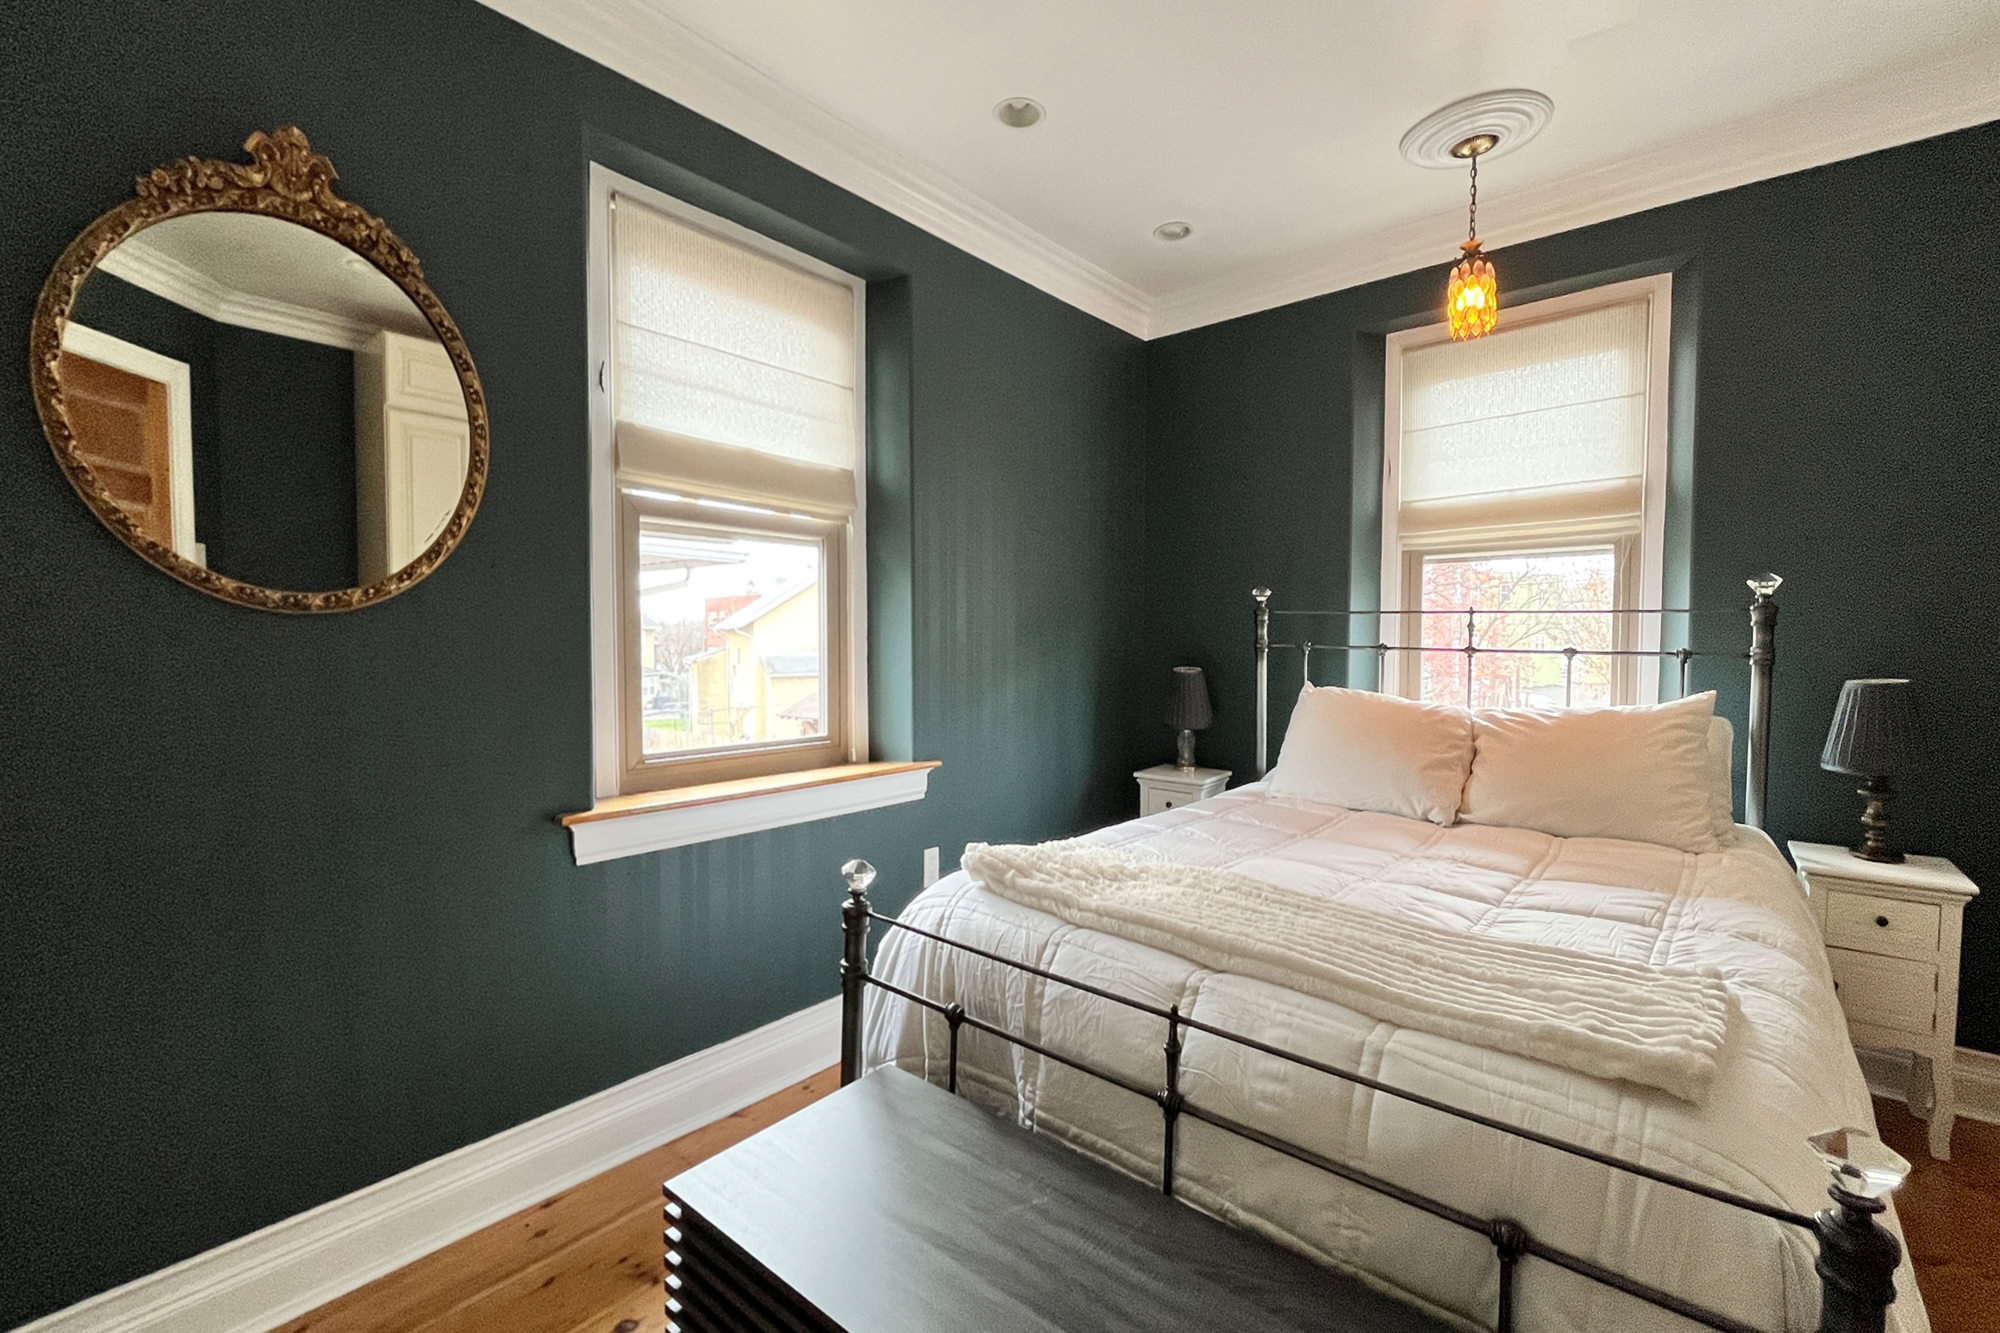
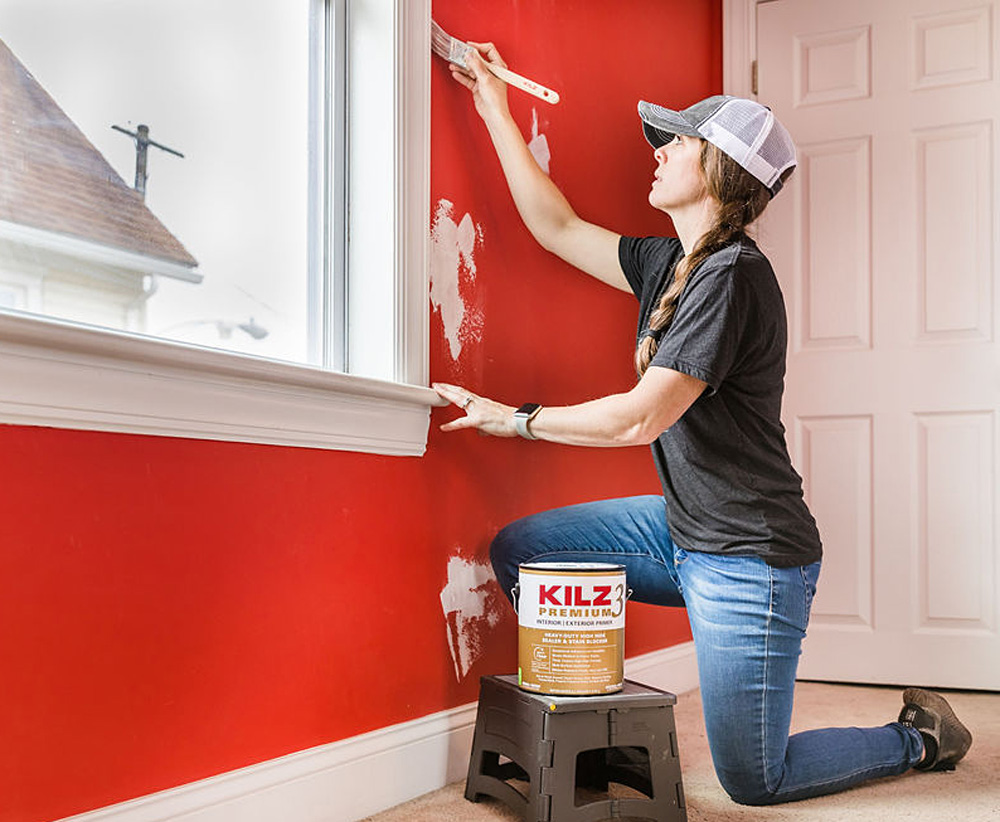
Our primary bedroom was more than ready for a paint makeover. It was not the rejuvenating sanctuary that we needed while managing a busy household, especially with the added pressure of the holidays.

What’s the makeover motivation?
I started paint prep during the pandemic, and never actually painted the room. We’ve been living with patched walls for way too long, and it was time to give the room a refresh.
The goal was to create a more sophisticated and modern look with a richer and more soothing hue that exudes a calm and relaxing vibe. By painting the walls using contrasting sheens to create a stripe pattern, I’m adding subtle sophistication through gentle texture that will catch the light from the overhead dimmable lighting.
Select the color.
You’ve probably heard the advice from designers to paint a few samples on the wall before selecting the paint color for a room. It’s such a common tip that paint companies often offer small samples for less than $10. While I agree with this advice, there’s a step that’s missing.
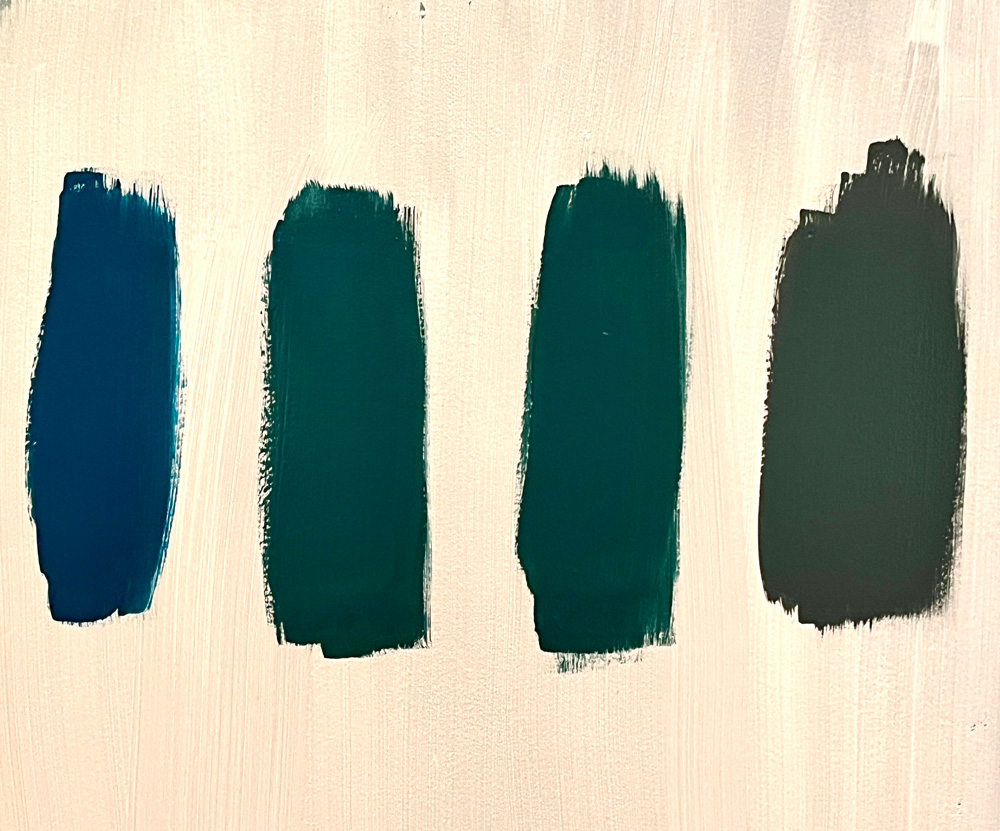
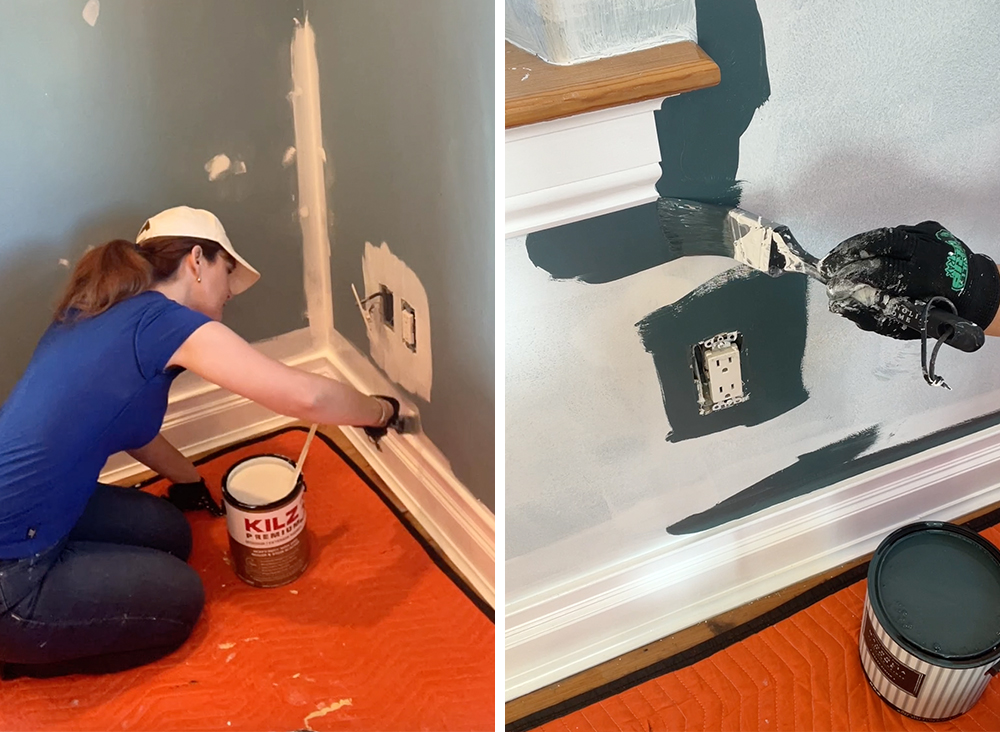
It’s important to prime the wall before applying the sample colors. For this project, I chose KILZ 3® PREMIUM Primer to prime ahead of painting. The current color on your walls can affect how the new color looks to you and whomever else is picking the paint. Then make sure you view the samples during the day, at night, in natural light, and with artificial light, so you have a good idea of what the color will look like throughout the day.
Also, don’t unload the room before putting the samples on the wall, especially if you plan to use the same furnishings in the room after the paint job is complete. The reason? The colors from the other home decor items can affect how a paint color looks to you.
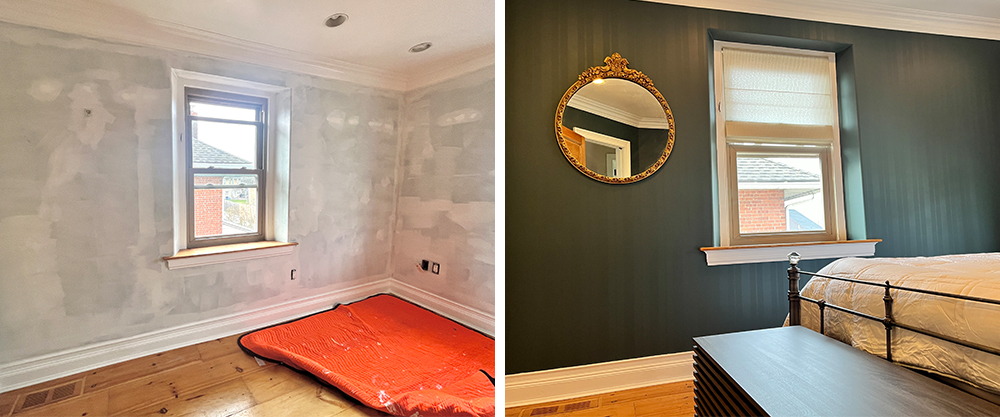
For this project, I chose four colors and asked my husband Mark to pick his favorite. He chose Secondhand Find from Magnolia Home by Joanna Gaines® by KILZ (the color on the right), which is a rich and very saturated bluish-green. An excellent modern color that fits with our goal of a calm and sophisticated vibe.
Select the primer.
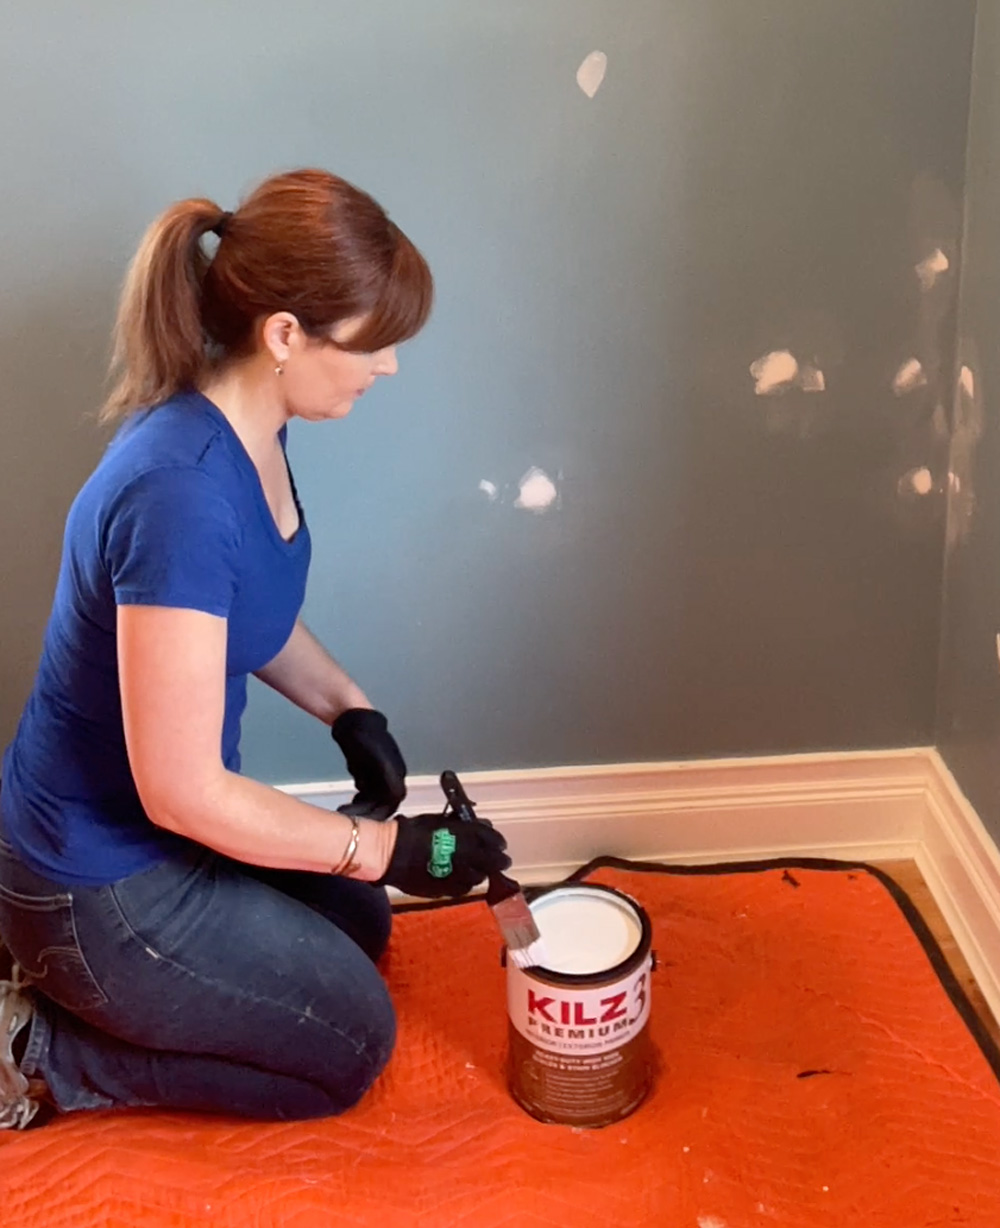
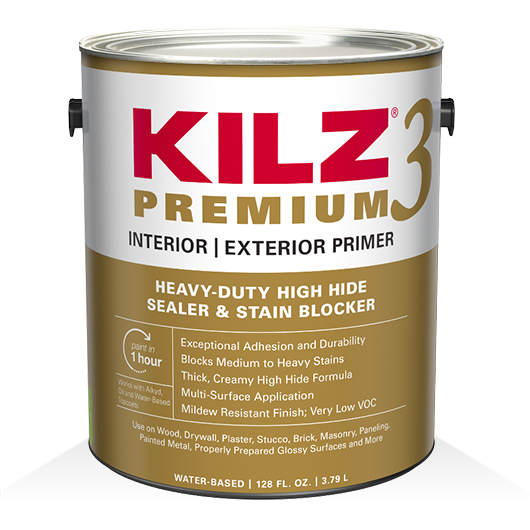
While you might be tempted to skip the primer or choose a paint-and-primer in one, we don’t. We always use a high quality primer because it sets the foundation for a good quality paint job and a professional finish. Even though the KILZ brand partnered with us on this makeover, KILZ has been our go-to primer for more than a decade because it delivers long-lasting results for our home and our clients’ homes.
For this project, we chose KILZ 3® PREMIUM Primer because it’s fast drying, low odor, very low VOC, and it has excellent adhesion. The thicker formula also hides surface imperfections, which is ideal for this house that was built in 1903 and has a lot of ‘character’ marks from the previous owner and our busy family.
Gather primer, paint, tools, and materials.
The next step in this makeover is gathering the tools and materials. For this project, I needed:
• Drop cloth (We like to use a moving blanket because it has more weight to it.)
• Multi-tool
• Awl
• Hammer
• Ladder
• 1½-inch angled paint brush
• Paint roller and extender
• Paint tray
• Painter’s tape
• Paint Samples in selected colors
• Magnolia Home by Joanna Gaines® by KILZ Interior Paint in Secondhand Find, Matte Finish
• Magnolia Home by Joanna Gaines® by KILZ Interior Paint in Secondhand Find, Eggshell Finish
Paint the trim.
 While many might paint the ceiling or prime the walls first, we don’t. We often paint the trim first, especially if the ceiling has previously been primed and painted white and will be painted white again, and if the trim will be painted white. The reason is that it’s easier to go quickly and over-paint the trim on the first pass, and then cut in the ceiling and wall color later. We find that it gives the trim a crisper line.
I used Magnolia Home by Joanna Gaines® by KILZ Interior Paint in True White, semi-gloss finish for the trim, and gave it two coats.
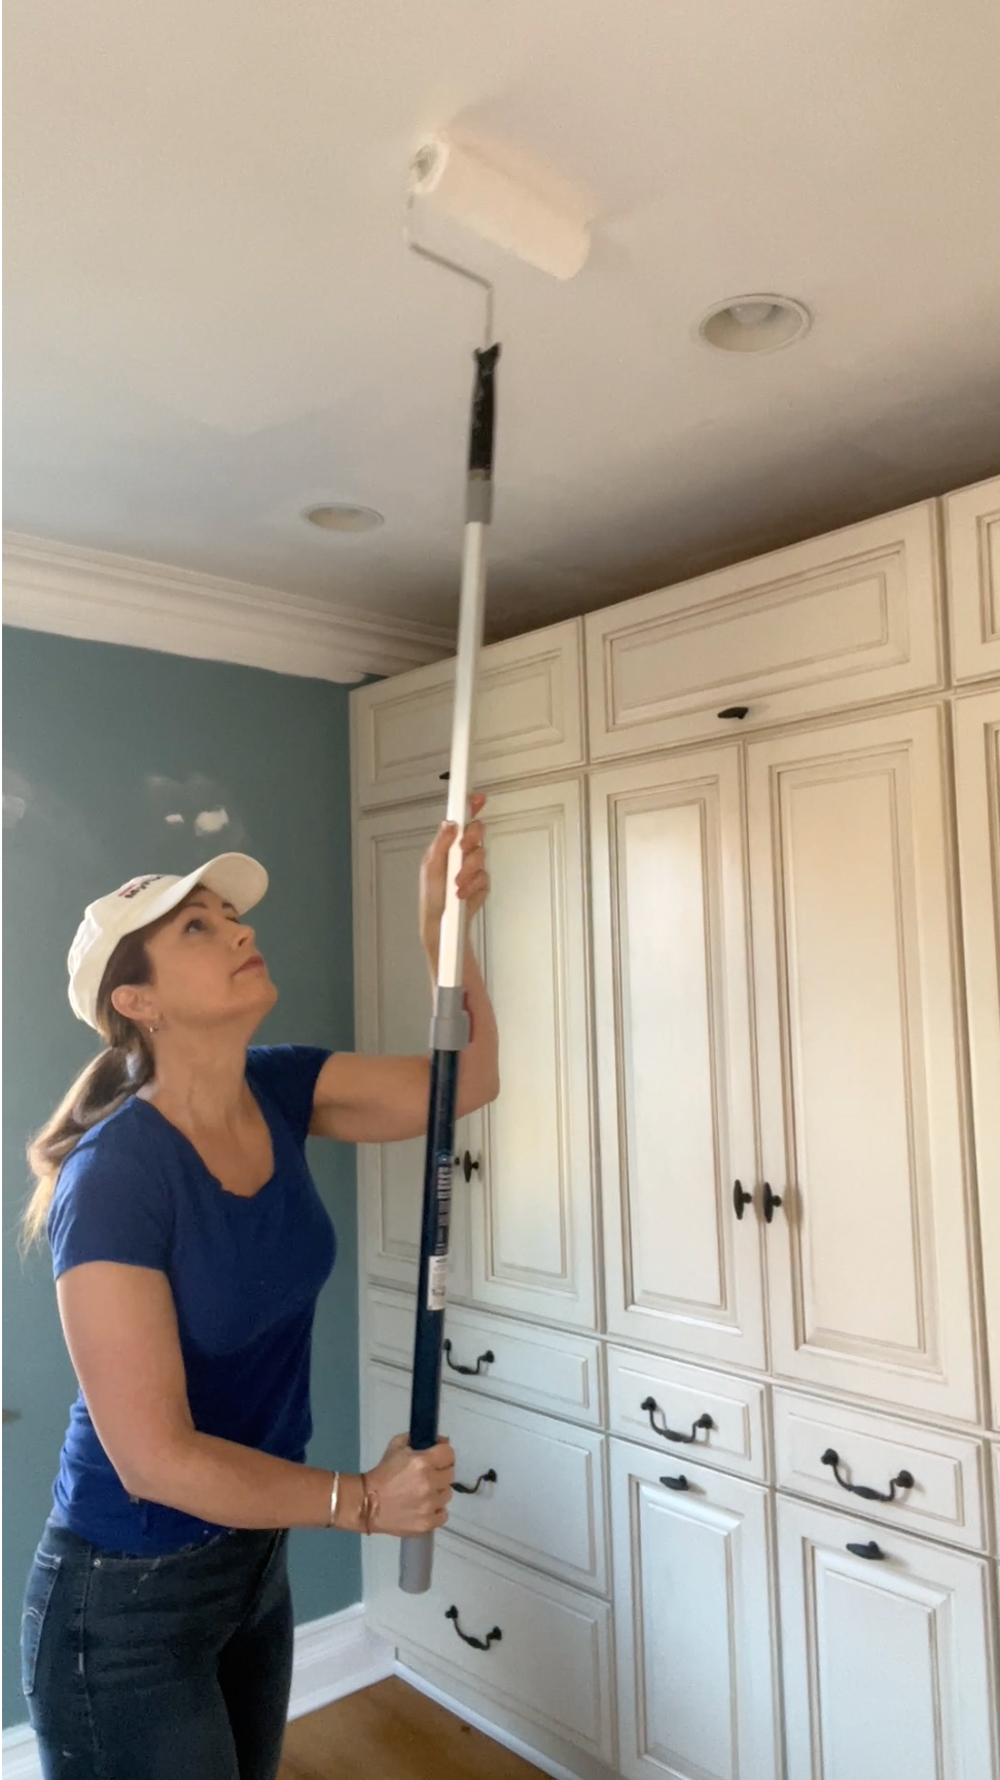
Paint the ceiling.
The next step before priming the walls is painting the ceiling. Since this ceiling was primed before and is painted flat ceiling white, it didn’t need another coat of primer, just a fresh coat of white paint. I used Magnolia Home by Joanna Gaines® by KILZ Interior Paint in True White, matte finish.
If the ceiling was freshly installed drywall, was looking less-than-stellar, or was painted a color other than white, I would have primed it first. Still, I painted two coats.
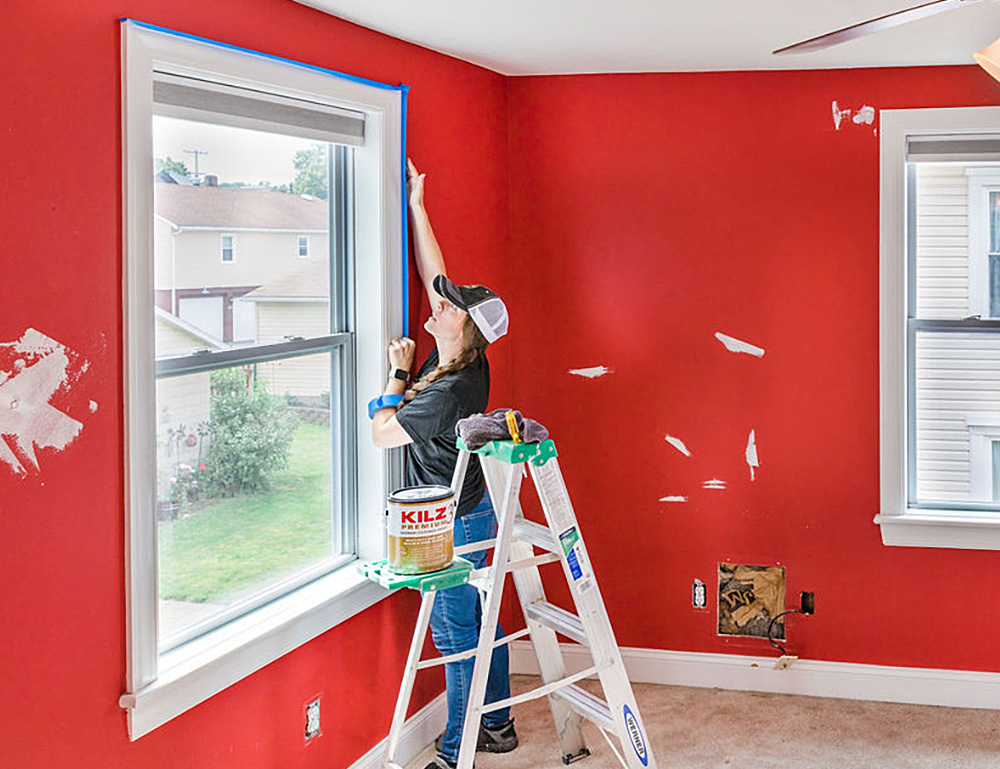
Prime the walls.
After the ceiling and trim were done, it was time to prime the walls. I first cut in the primer using a brush along the painted baseboard, and then the inside corners and other areas that a roller can’t fit: along the window sill, window trim, door casing, and our built-in cabinets
I then primed the joint compound patches all over the walls. While KILZ 3® PREMIUM Primer is thick and hides imperfections, I still wanted to be sure that the patches would disappear after rolling out the primer. This little double primer on the patches is a belt-and-suspenders approach that might not be necessary in your project.
Then I rolled out the field—-the walls—with a paint roller.
Paint the walls.
The primer dried super fast, so I didn’t have to wait long to start cutting in the color on the walls. (I can’t tell you how much of a joy it is to not wait long for paint to dry.) I started by cutting in the wall color along the baseboard, window trim, door casing, and cabinets. And then used the paint roller to finish. The color immediately popped on the wall, which is a sign of a good primer. Still, I painted two coats.
Paint the stripe.
After the paint was dry, the next step was painting the stripe. I’ve been dreaming about painting a contrasting sheen in the same color for years, and was very excited to finally create the look. The idea is to use a flat or matte color and then use the same wall color but in another sheen. For this project, I chose eggshell, since we wanted to create a subtle and calm vibe. If I was creating a dining room or a playroom, I’d probably choose a different combination of sheens for greater contrast.
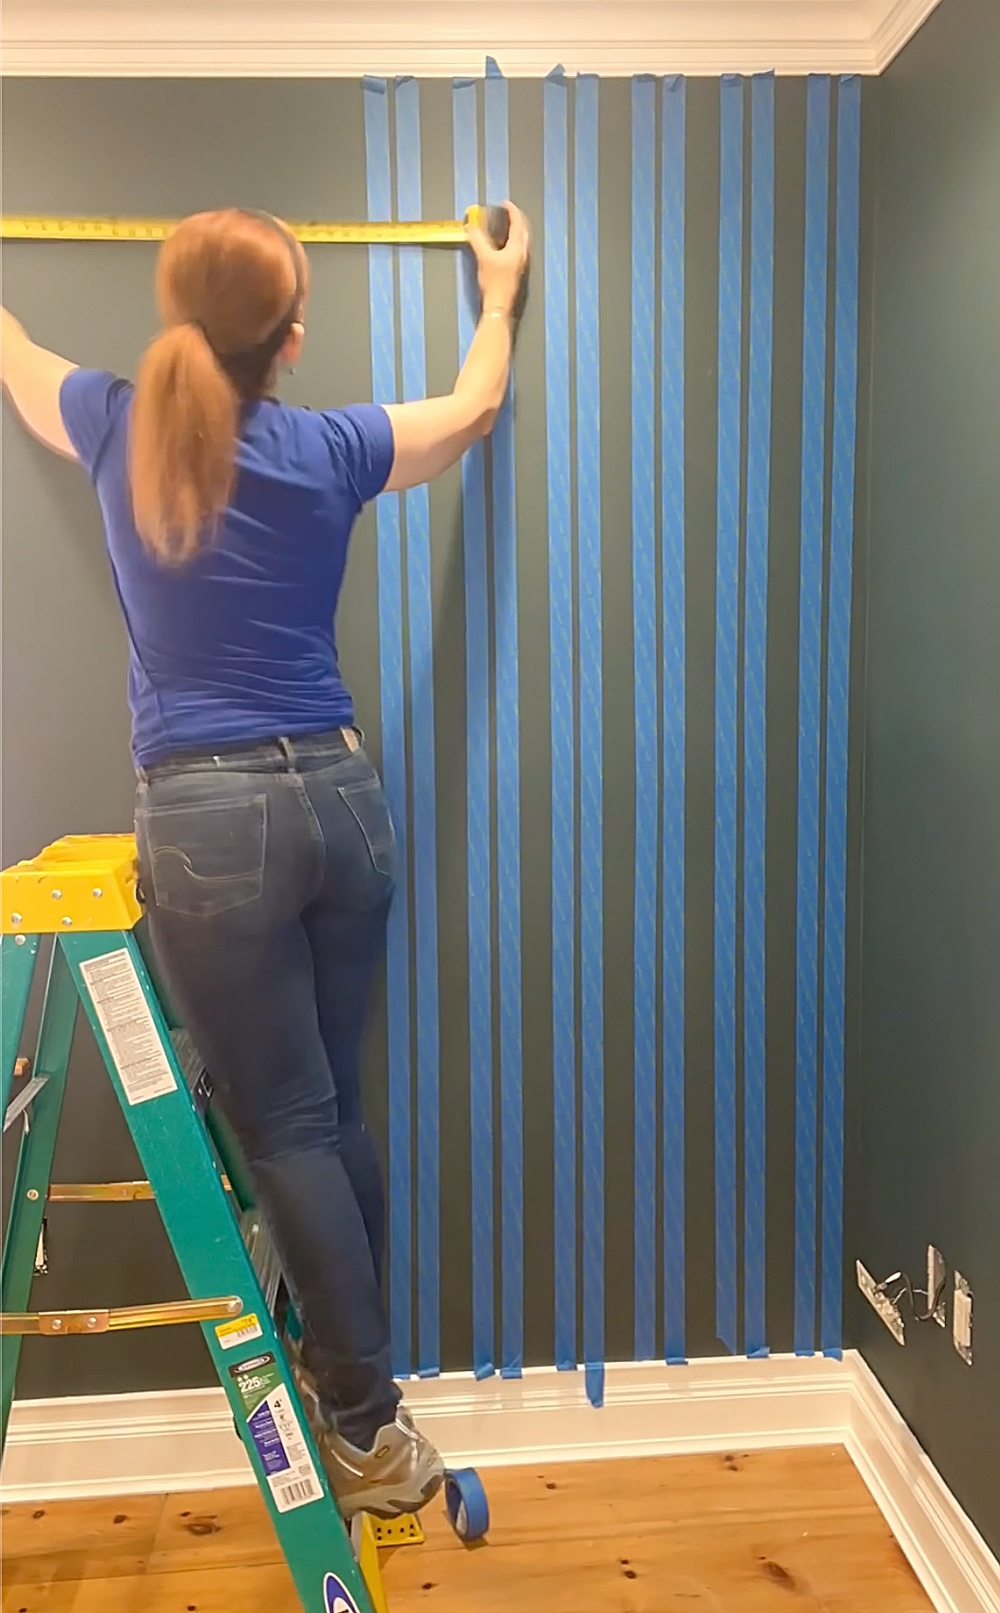
After marking the layout of each stripe with a tape measure, level, and pencil at the top, middle, and bottom of the wall, I extended the painter’s tape from the top of the wall to the bottom. For a stripe to work, it needs to look vertical and consistent. So, after each set of stripes, I checked for plumb and measured the distance between the stripes to be sure I was on the mark.
The painstaking part is applying the tape. The fun part is applying the paint. But, before painting, I make sure that every bit of tape is adhered to the wall so that no paint can infiltrate beneath it. Then I rolled Secondhand Find in Eggshell on the wall. After waiting for the first coat to be dry to the touch, I applied a second coat. And then I removed the tape. I make sure to keep a low angle to the wall when I remove the tape so it comes off without messing with the paint on the wall.
No, I don’t wait for the paint to dry to remove the tape, as it can take a long time and it can be more difficult to remove. Just be sure to have a trash bag ready to drop the wet tape into after removing each strip. It can be a mess if you need to go searching for a place to dispose of the bundle of wet tape.
Update the decor.
When the paint was dry, the electrical faceplates needed to be put back. Before rehanging the antique pineapple light, I installed a ceiling medallion to help accentuate the little glass light fixture so it looks less like an afterthought and more like a featured player in our primary bedroom.
The old bedspread was swapped for a white quilt, the bedside table lamps have new shades, and the antique mirror went back in its spot. Since the yellow deacon’s bench is a family heirloom, we decided to use it in another room, and swapped it out with a backless modern bench that fits in better with the goal vibe.
Now we have a hotel-like sanctuary to retreat at the end of each day, instead of a looming project with decor that didn’t quite go together. It’s a calm primary bedroom with a perfect paint finish.
Learn more at kilz.com
*This is a sponsored blog post with MyFixItUpLife.
RELATED ARTICLES

get inspired:
FOLLOw us:
@kilzbrand
SHOP
PRODUCTS
Destination Restoration Rewind: A Look Back at our Best Projects of the Year
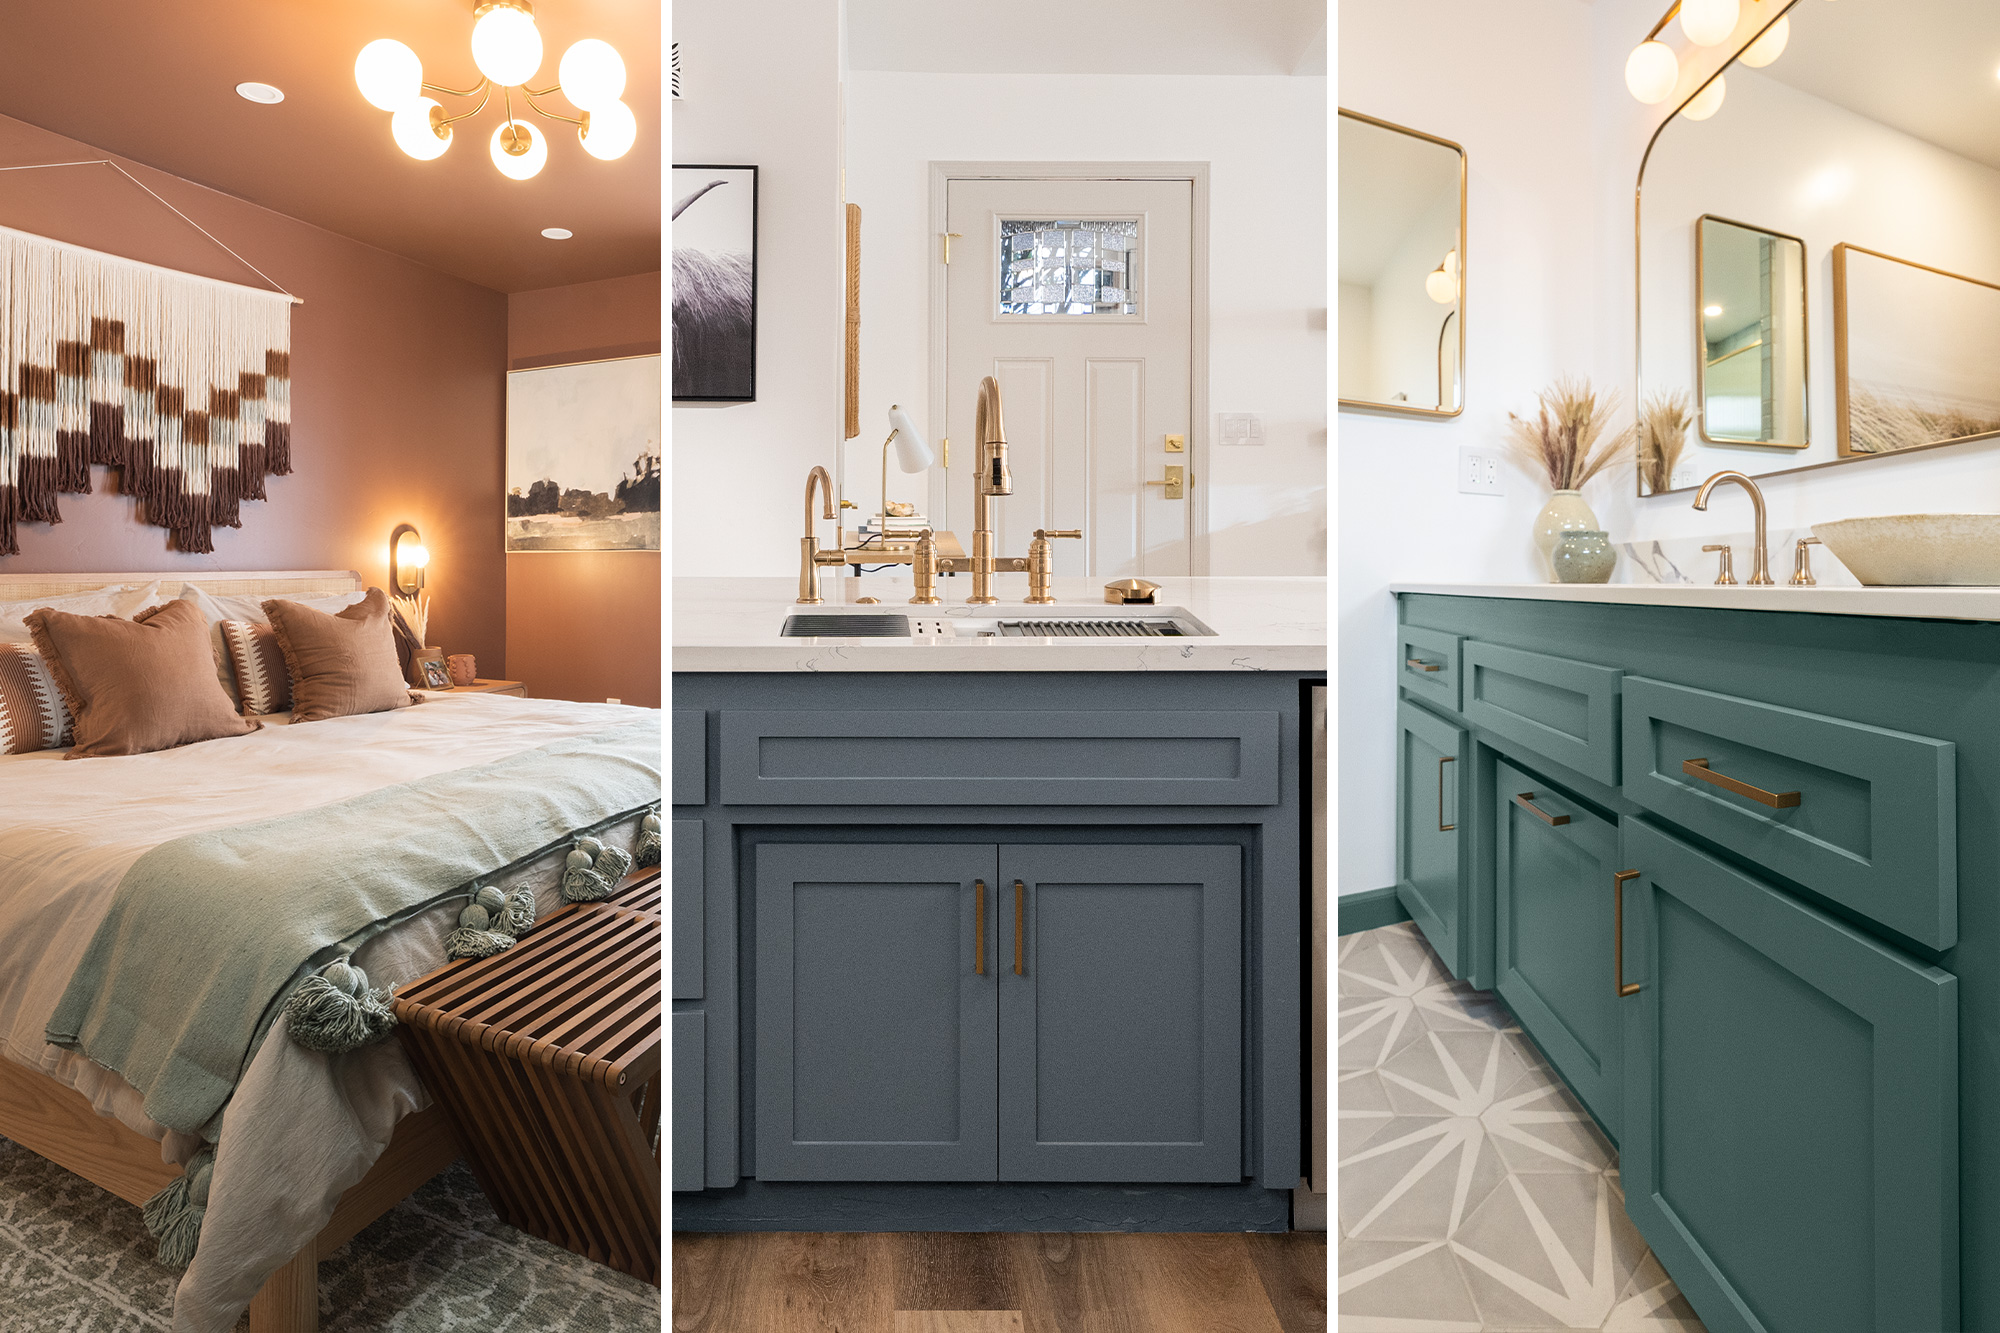
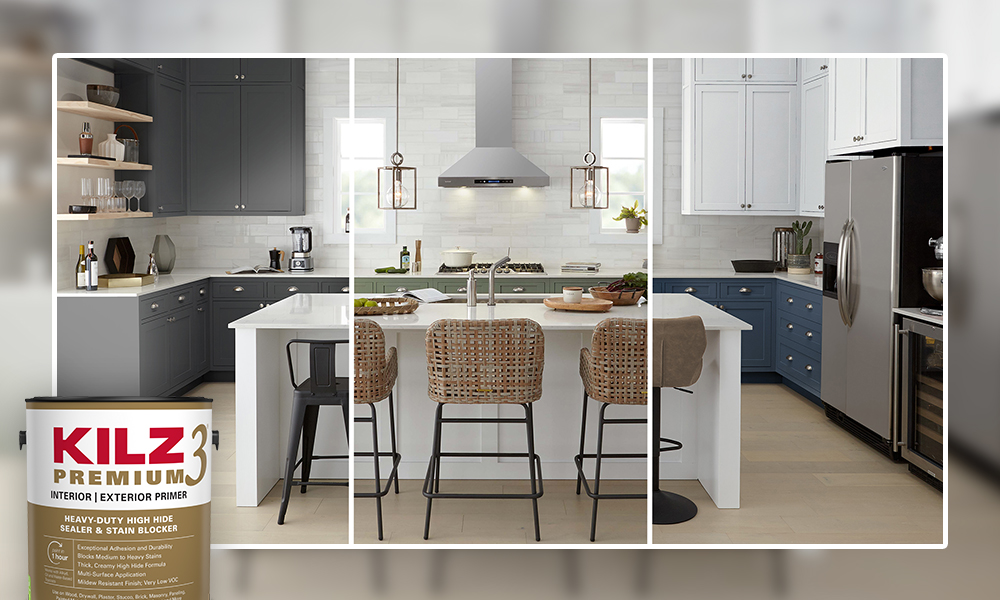
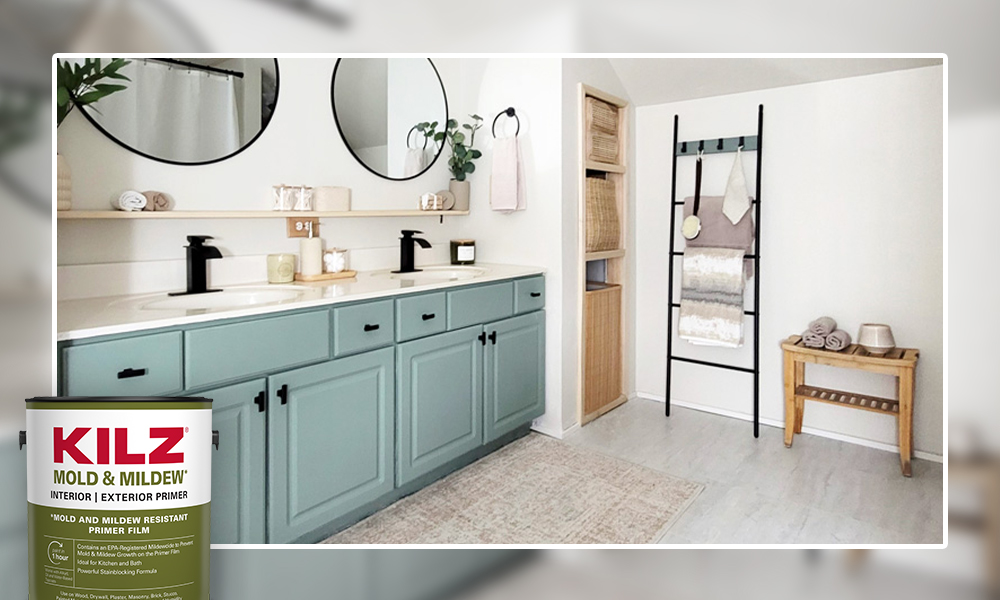
November 7, 2023At the end of the year, we like to reflect on some of our biggest accomplishments, and this year, we’re looking to our Destination Restoration series for inspiration. For this exciting video series, we enlisted the help of two paint, construction, and design experts to make over individual rooms in a single-family home. With their help, we refreshed and modernized four outdated rooms, saving time and money in the process, and extending the life of this charming residence.
Let’s recap our favorite moments from Destination Restoration and get excited to tackle another year of home improvement.
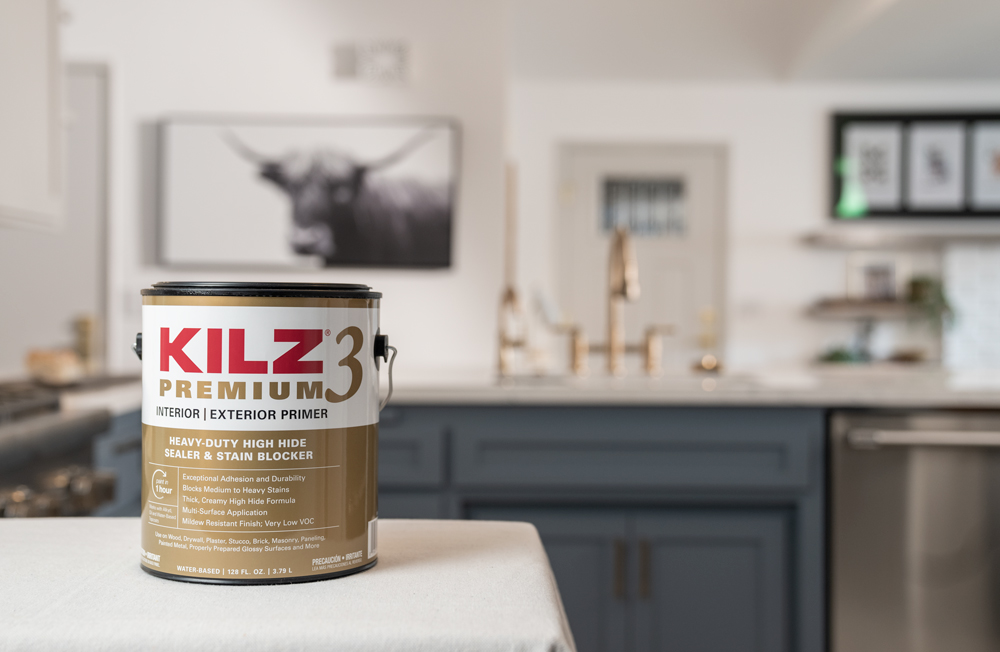
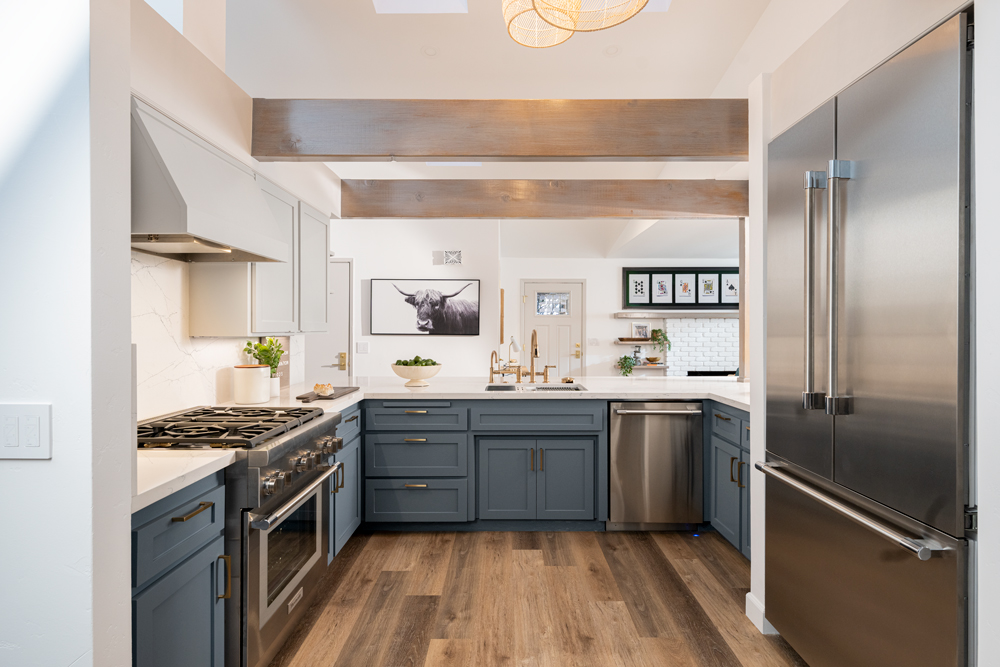
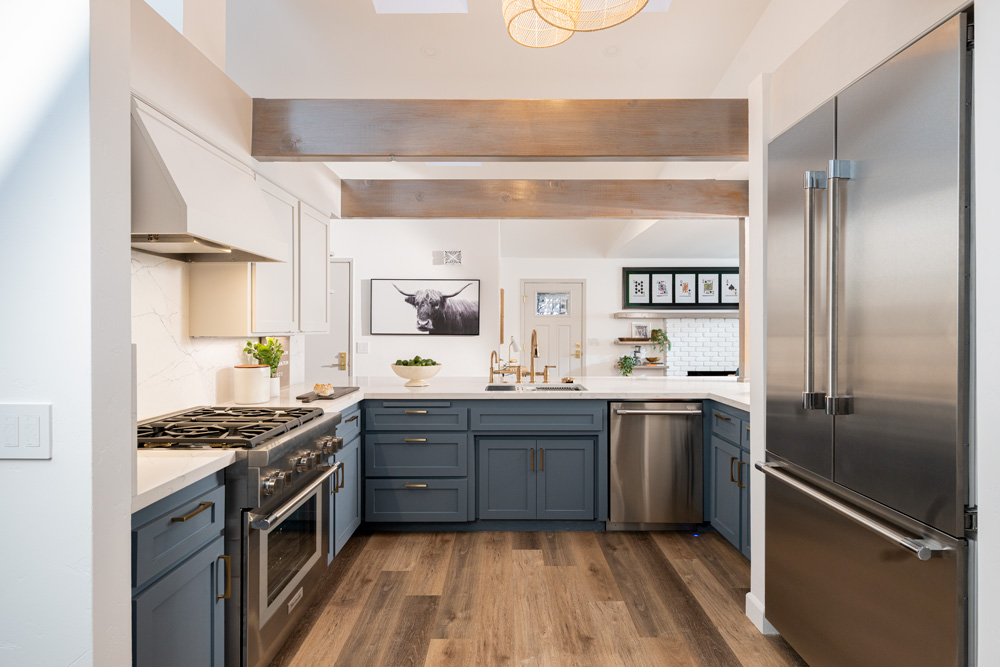
If you’re looking for kitchen remodeling ideas to inspire your DIY dreams, this is a great example of how you can make a big design change while keeping the integrity of the room intact. Our team of pros took a dark and dated kitchen, and, with a vision and some ingenuity, achieved a bright and modern space, renewed for the next generation. The striking cabinet transformation came to life with some light refinishing, KILZ 3® Premium Primer and a fresh coat of paint.
See the full project here.
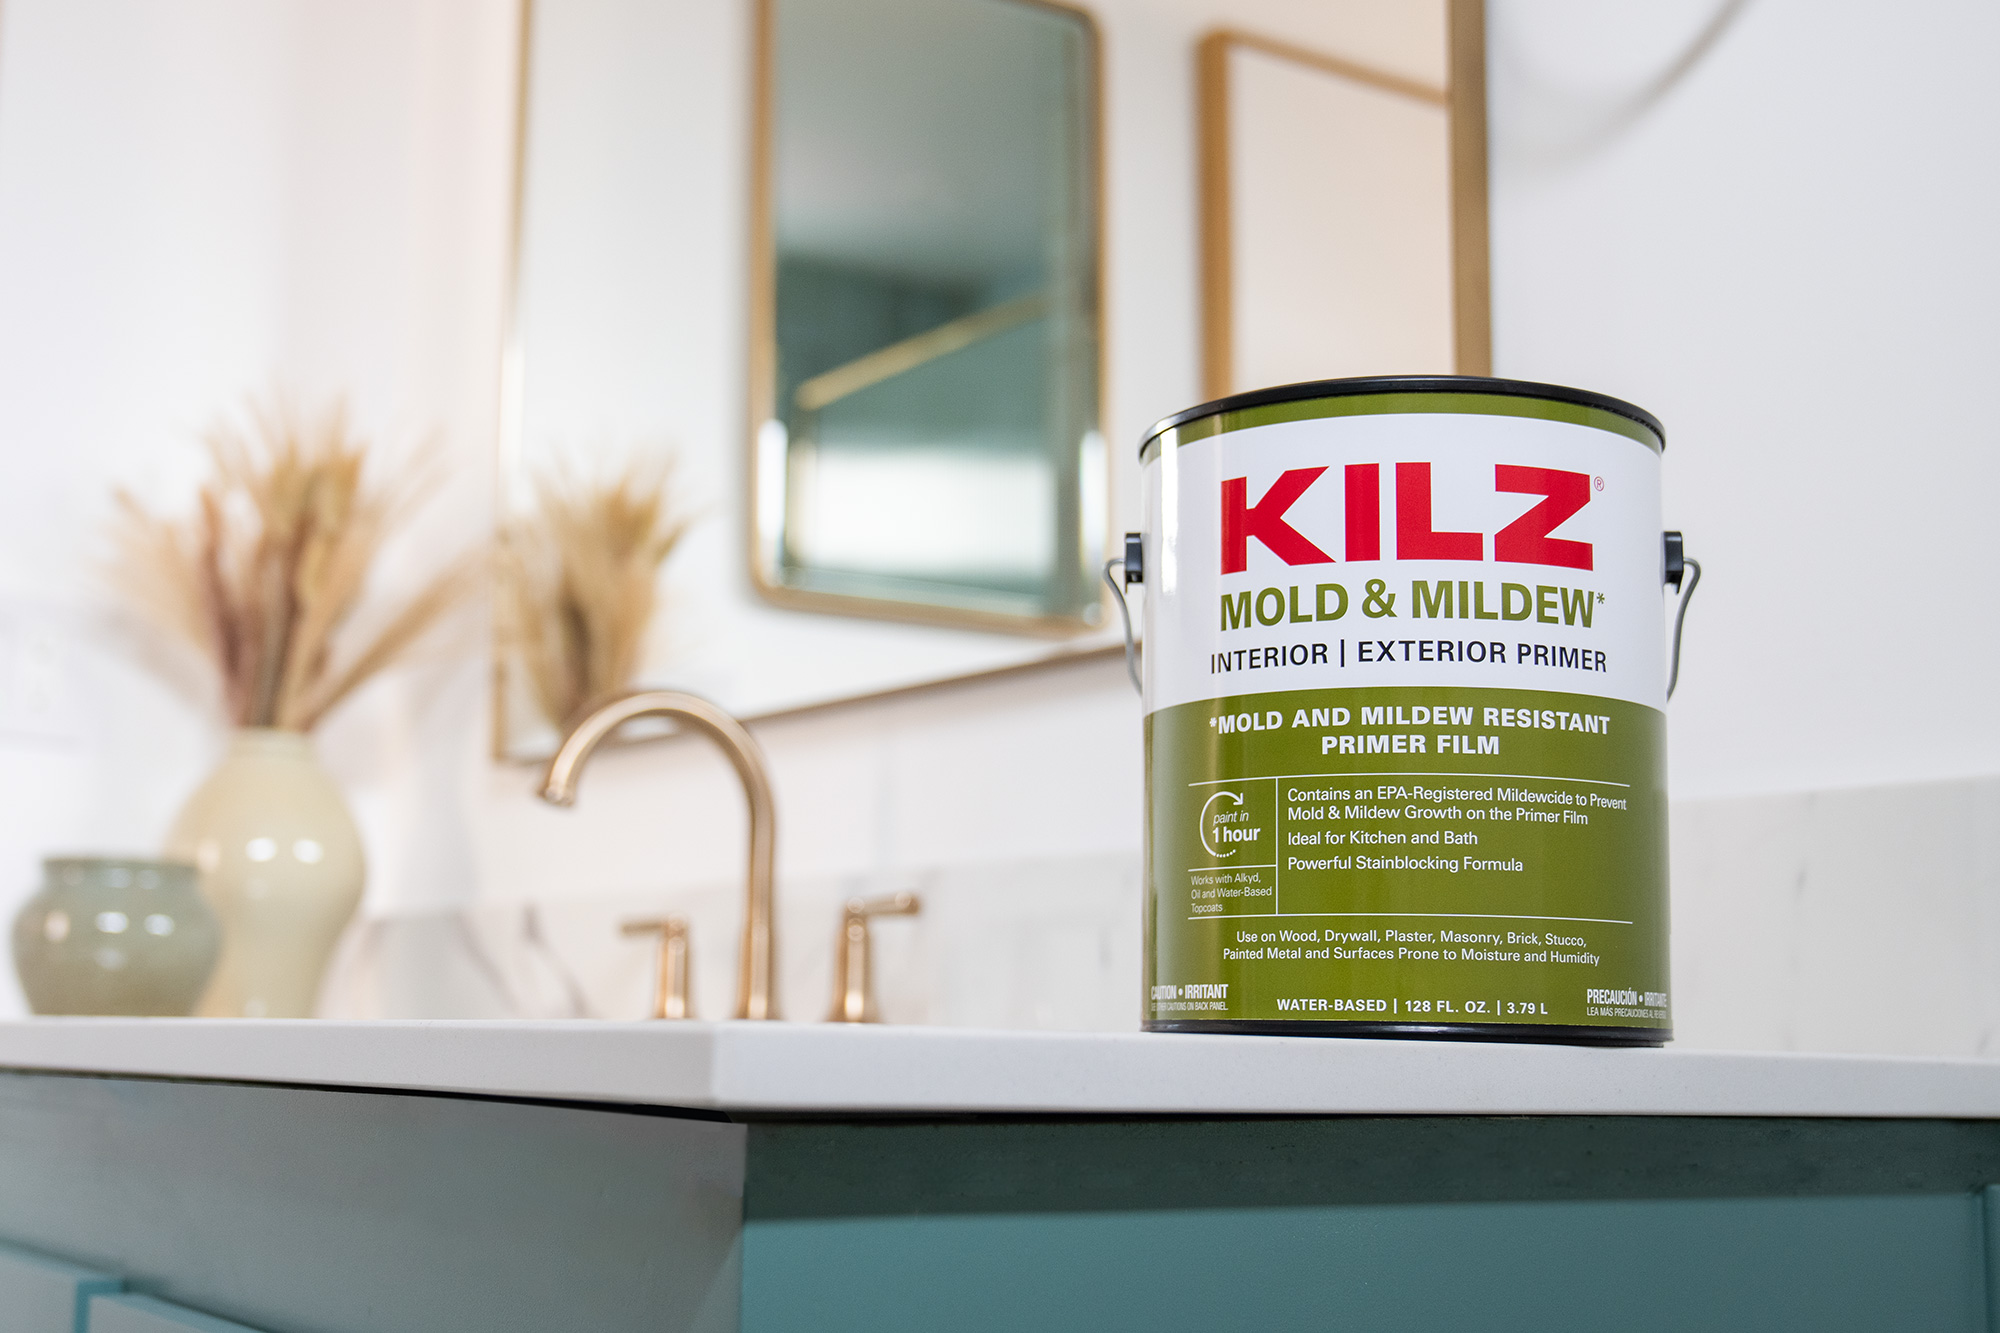
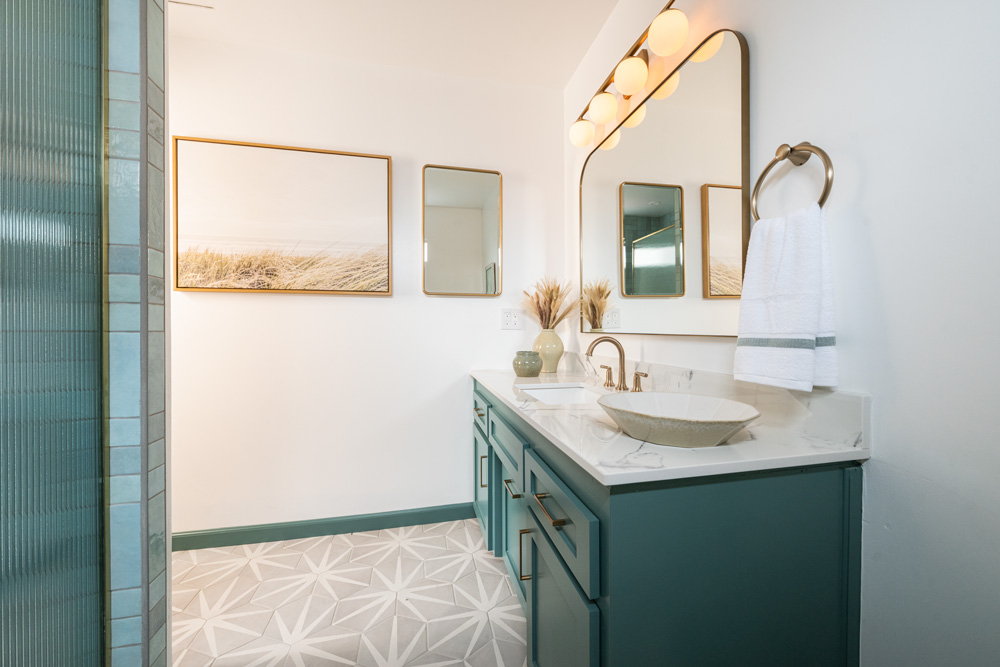
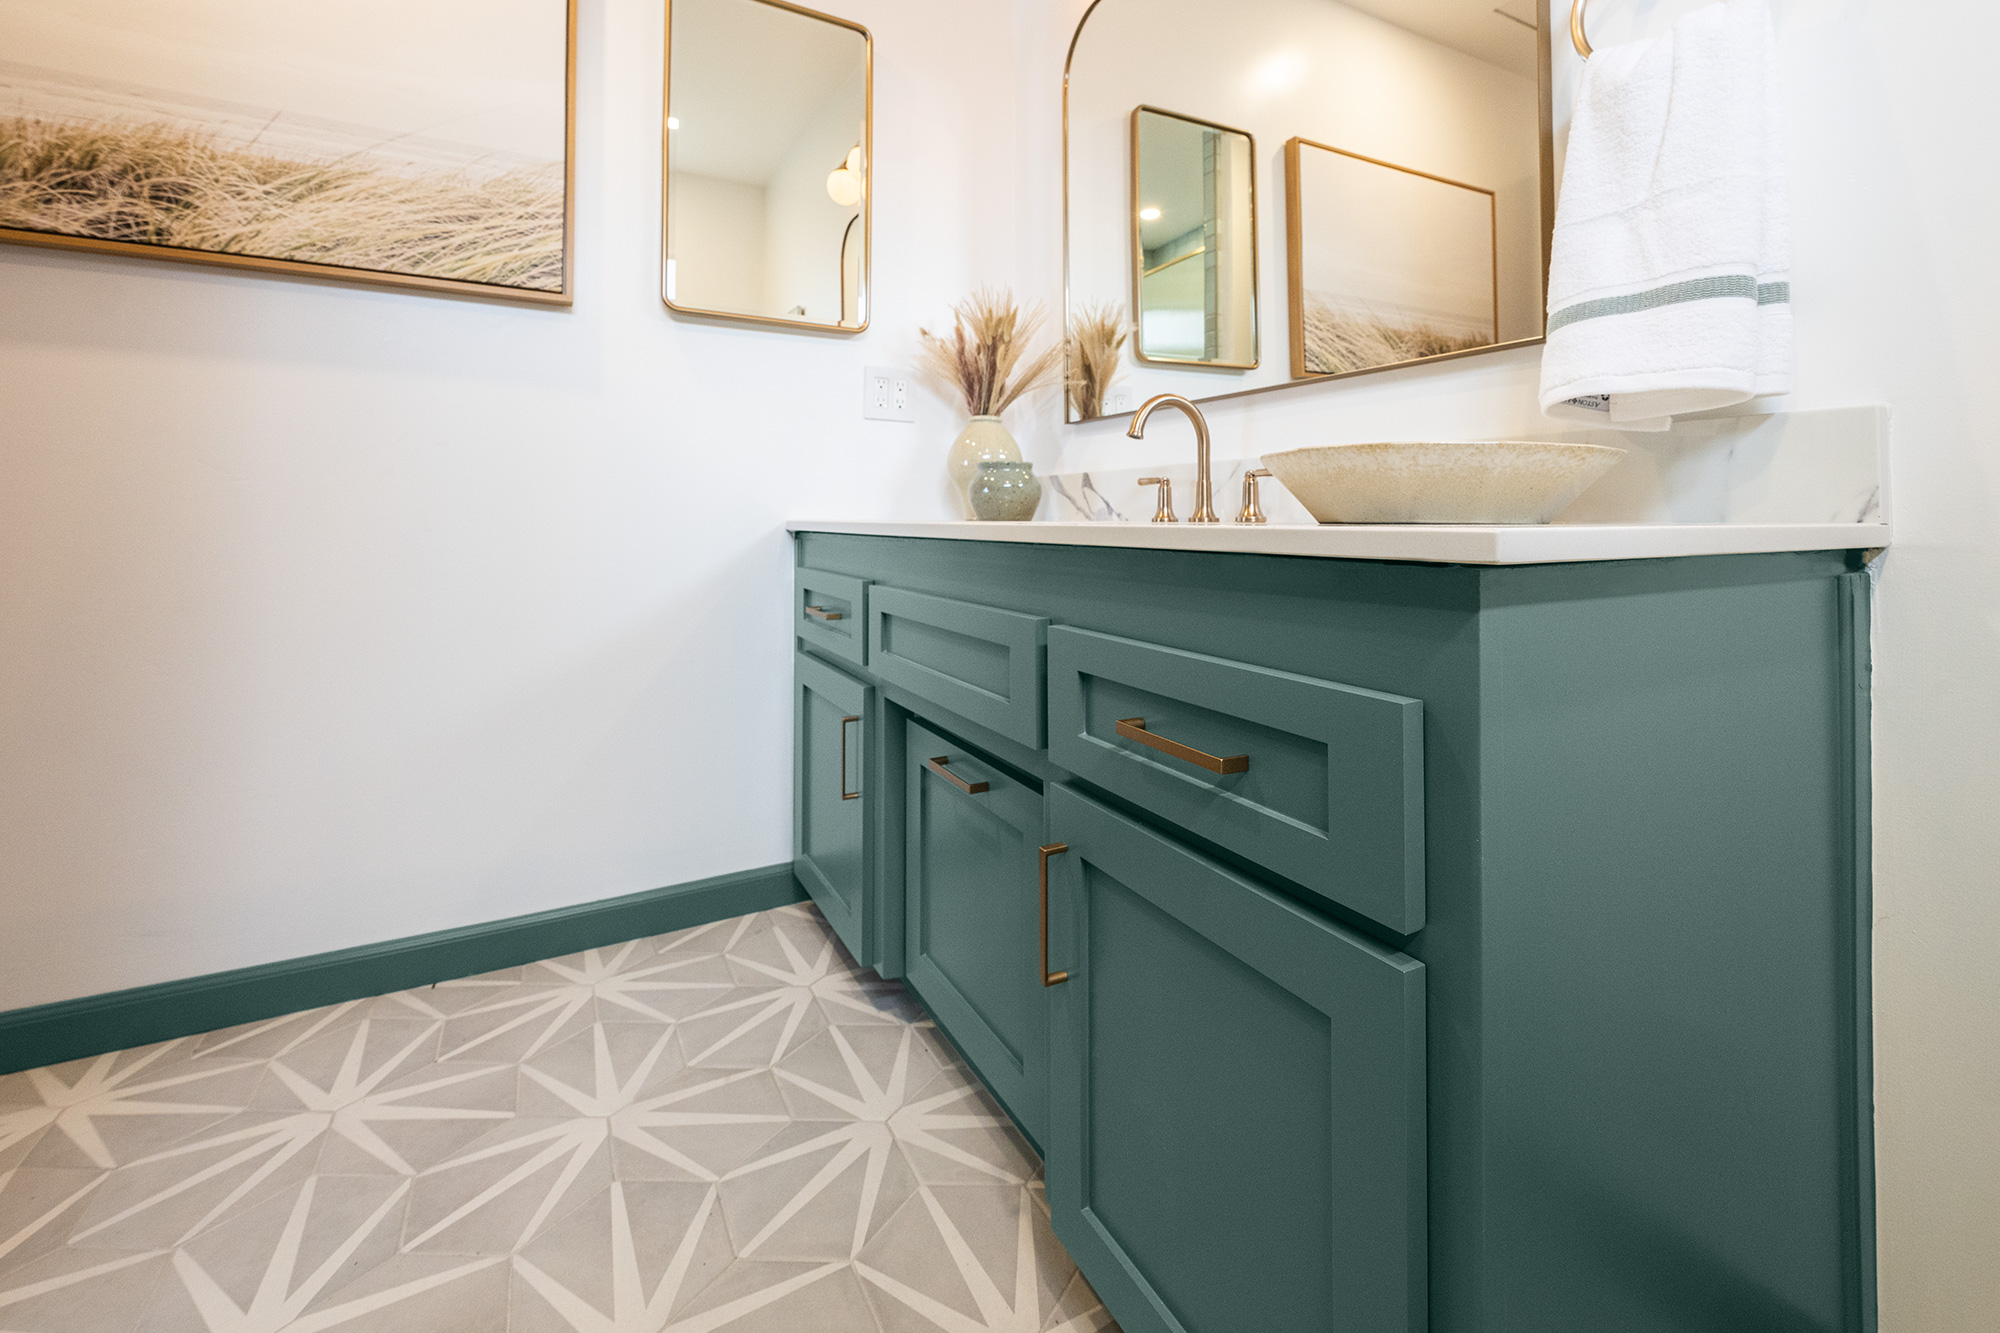
If you have a DIY bathroom project in mind for the new year, be sure to check out this stunning refresh for tips. Our Destination Restoration team made this makeover look easy to give you the bathroom inspiration you need to tackle your own transformation in 2024. With just a few cosmetic fixes, and the help of KILZ Mold & Mildew Primer, our pros converted this outdated room into a beautifully modern space that will last for the next generation to enjoy.
See the full project here.
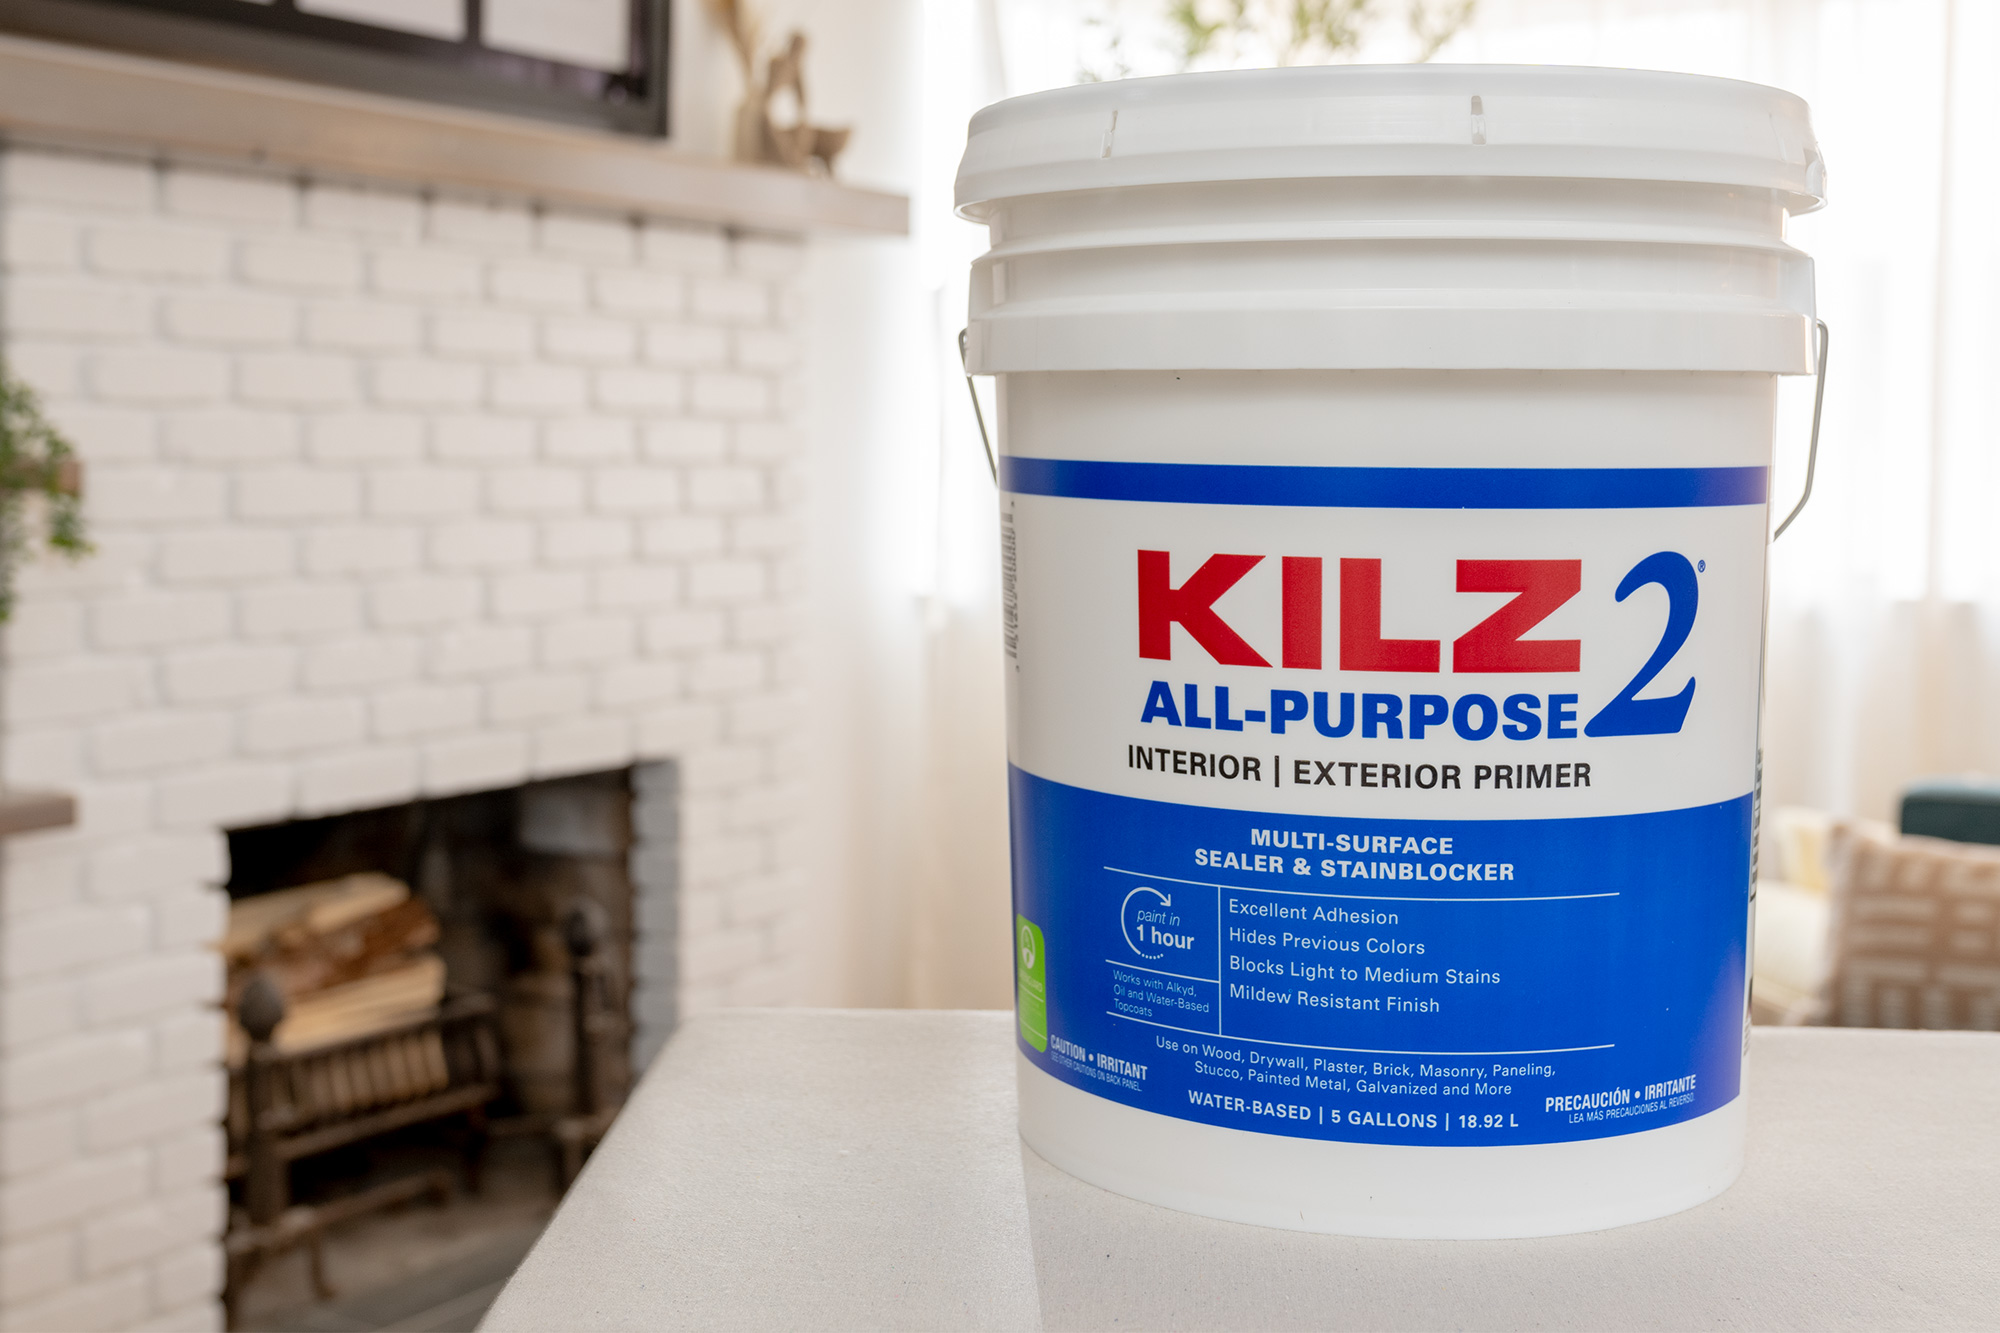

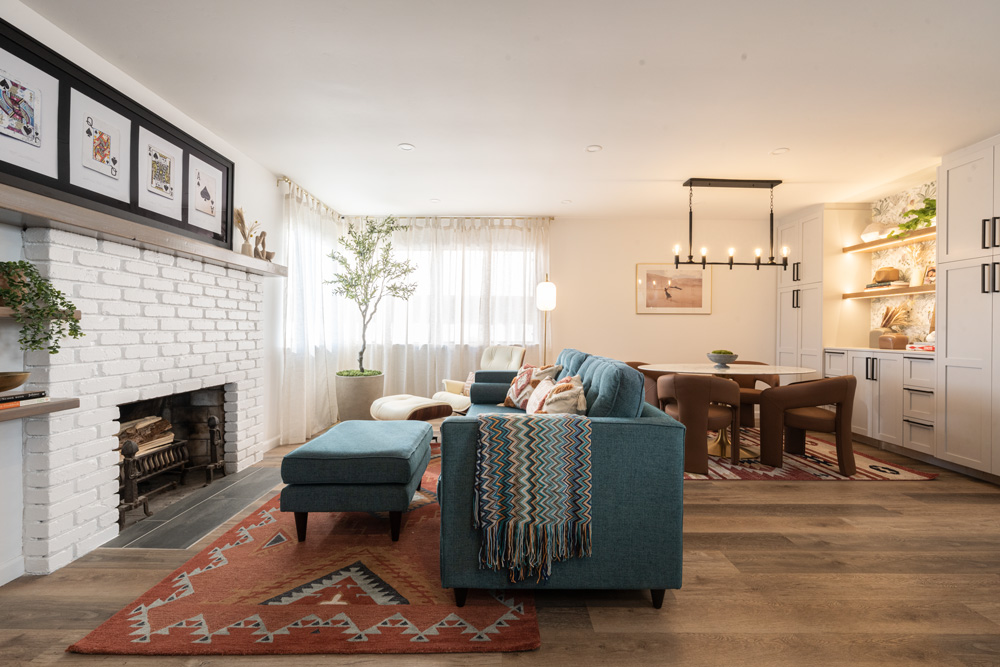
The power of KILZ 2® All-Purpose Primer did wonders for this open-concept living/dining room, where it helped to completely restore an old fireplace and brighten up the room. Rather than put the home through an expensive and time-consuming remodel, our pros reimagined the space and rejuvenated it for years to come with a few simple changes. DIY living room inspiration at its peak, this is a great example of how you can breathe new life into an older home while sticking to a budget.
See the full project here.
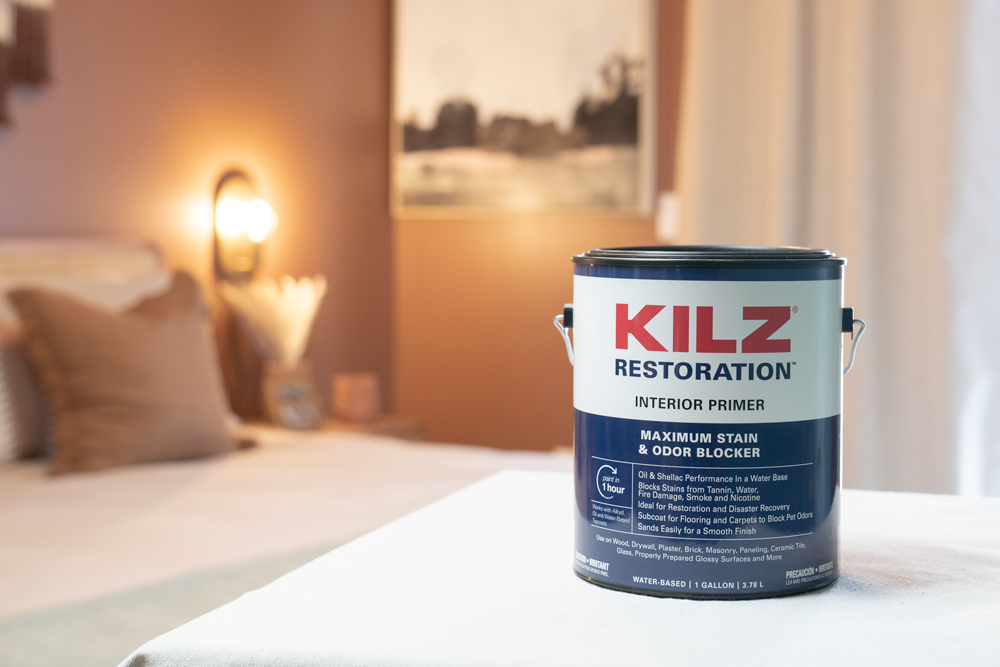

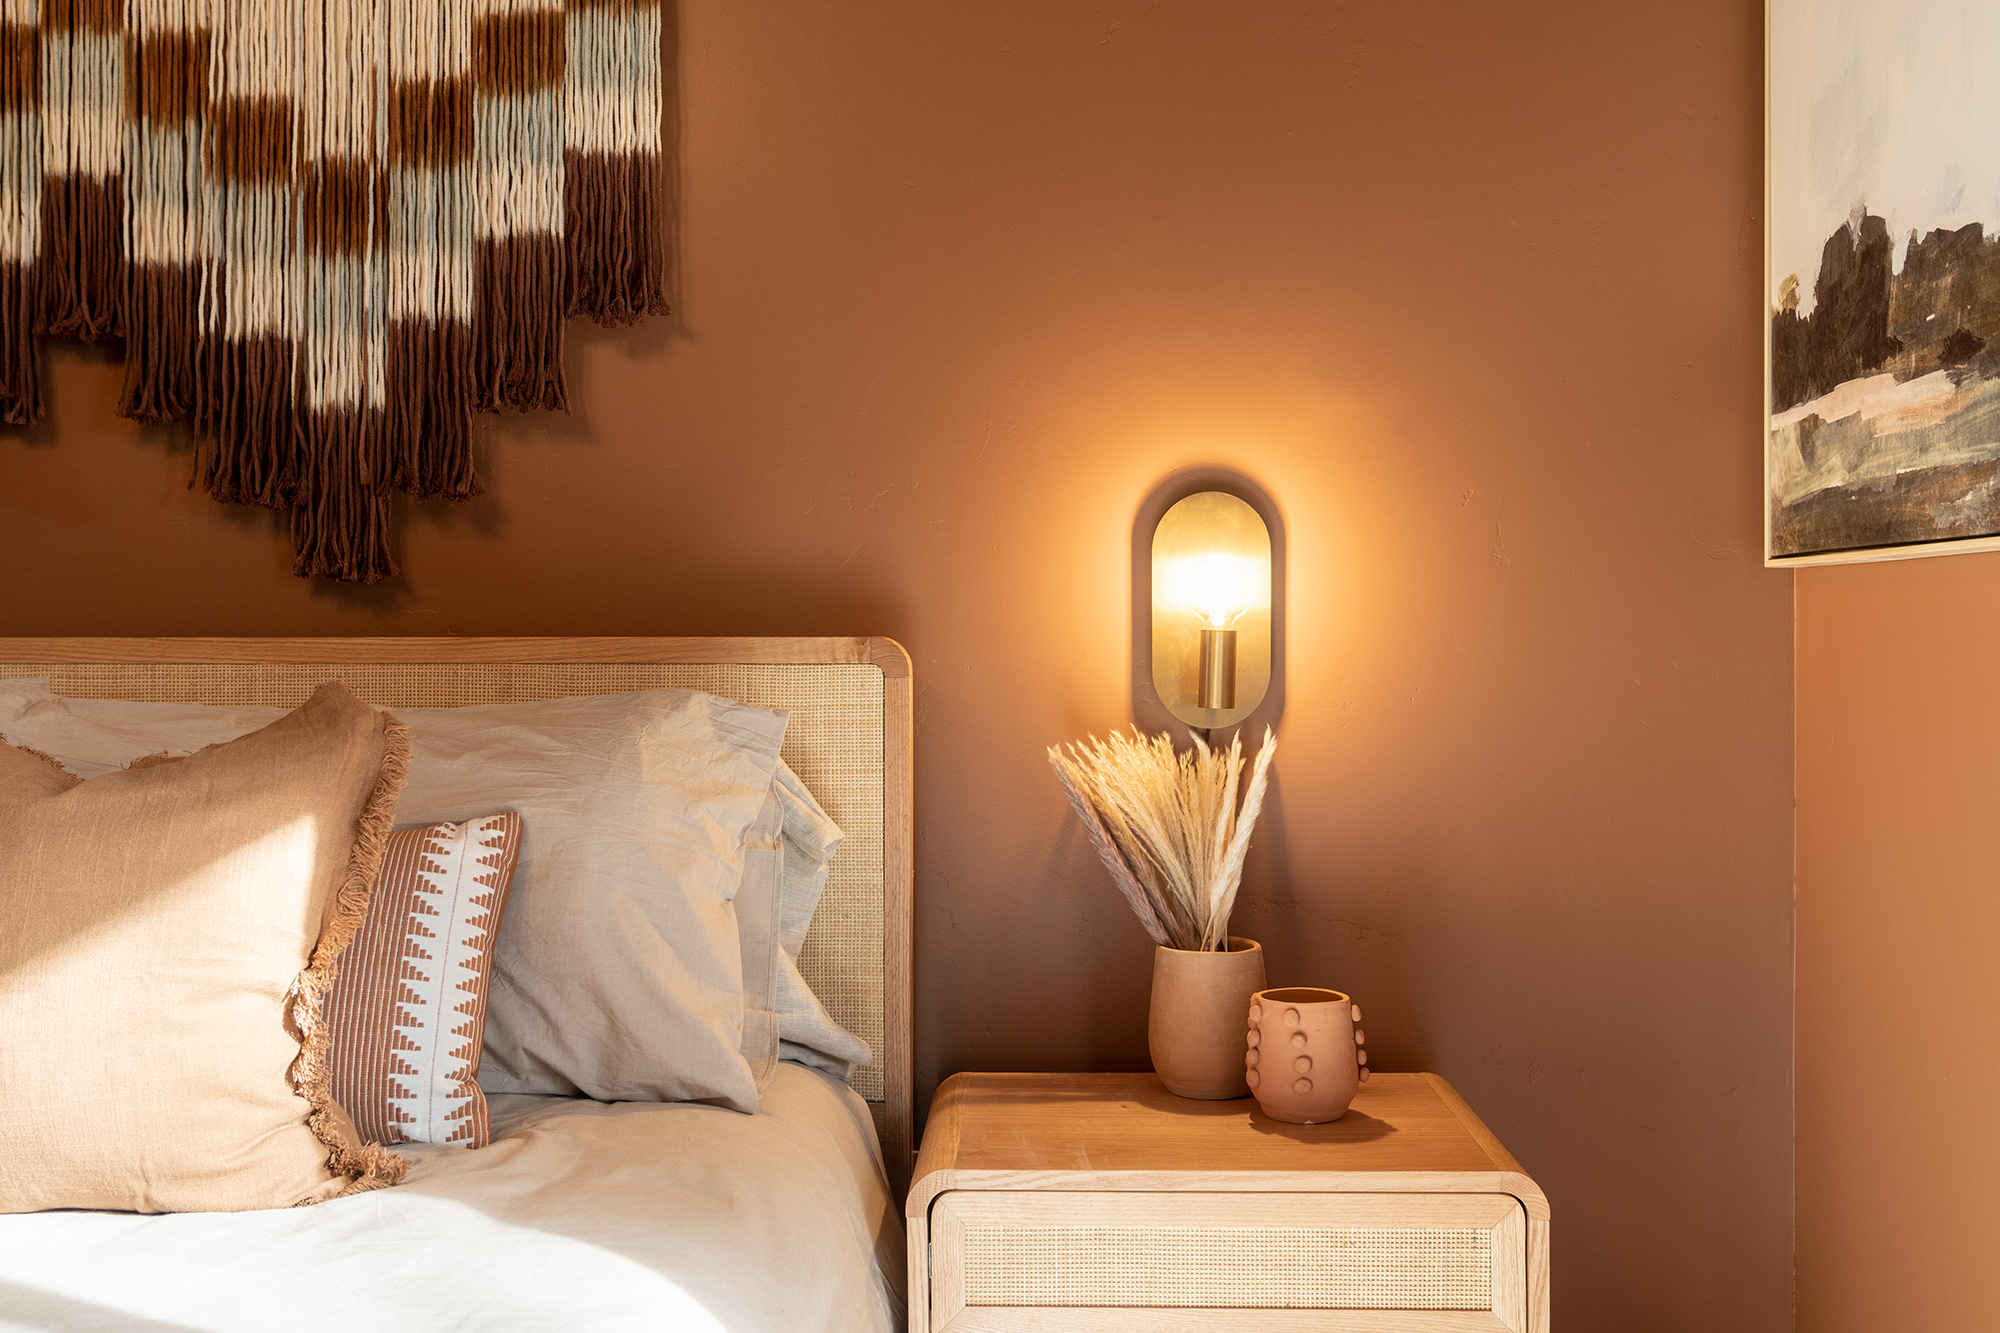
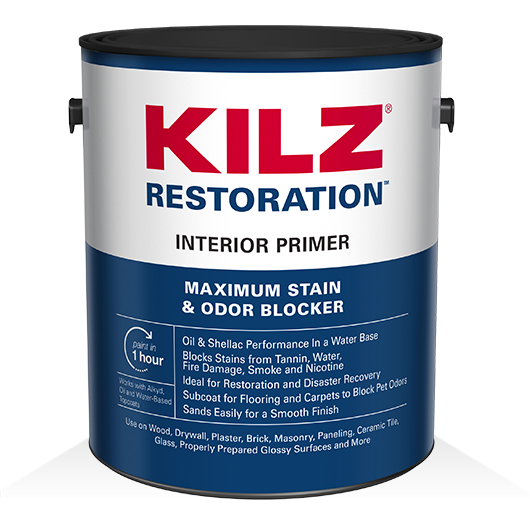
We finish our look back at the series with the primary bedroom remodel. This room’s biggest issue was that it had a large ceiling stain from water damage. Our pros didn’t let this stop them, and instead, used KILZ RESTORATION® Interior Primer to cover and seal the stain and a beautiful terracotta color paint to transform this room into a warm and luxurious space. To finish the look, they upgraded the old closet with a custom, built-in storage unit with a hidden TV display, painted in a complimentary forest green. We couldn’t be more pleased with the result, which reminds us of a chic and cozy desert retreat.
Note: The cause of the water damage had been remedied prior to our pros coming in to fix the cosmetic side.
See the full project here.
This was another great year for home makeover inspiration, and even though the year is winding down, our motivation is full steam ahead. Whether you’re taking it easy or busy organizing next year’s DIY game plan, we hope these projects inspire you to bring your dream home to life. Thanks for spending the year with us. We can’t wait to see what you choose to tackle in 2024.
Always remember to refer to our website kilz.com or product back labels for additional information on which primer is right for your project and detailed instructions on how to apply our products. Check out our Coverage Calculator to understand your estimated paint needs for your upcoming project.
RELATED ARTICLES
get inspired:
FOLLOw us:
@kilzbrand
SHOP
PRODUCTS
What Are Paint Sheens and What’s the Difference?
June 29, 2023If you’re unfamiliar with the nuances of paint sheen, you’ve come to the right place. In the broadest terms, the higher the sheen a paint has, the higher the shine and the more durable it will be. Flat paint has no shine, while high-gloss paint is all shine, and the rest of the spectrum includes matte, eggshell, satin, and semi-gloss, which can be used for practical and decorative purposes alike.
What’s a Paint Sheen?
 The paint sheen tells you how much light the paint reflects. Paints with higher sheens are shinier, and paints with lower sheens reflect less light. Higher-sheen paints have more enamel in them, which makes them shinier, more durable, and easier to clean. Lower-sheen paints are easier to look at because they have little to no glare.
Why does it matter?
 If chosen incorrectly, sheen can amplify surface imperfections, make a surface shinier (or flatter) than intended, or not provide enough durability for the space. Some sheens are easier to clean than others and can provide a barrier against moisture, mildew, and other grime.
The darker and richer a paint color is, the more colorant it contains, which boosts sheen. If you’ve chosen a rich or dark paint, and you don’t want it to turn out super shiny, choose one with a lower sheen. In the same vein, if painting a large, sun-washed, or flawed surface, a lower sheen paint is best for hiding imperfections.
What Are the Different Paint Sheen Types?
• High Gloss: A highly reflective, glass-like finish that’s most durable and easiest to clean.
• Semi-Gloss: A sleek and luminous finish that is mildew, moisture, and wear resistant.
• Satin: A pearl-like finish that’s easy to clean and has moderate durability.
• Eggshell: A soft, velvety finish that covers imperfections while offering some durability.
• Matte: A low-luster finish that’s less durable, but easy to clean, touches up well, and hides minor surface imperfections.
• Flat: A non-reflective finish that touches up well and can hide minor surface imperfections.
Where to Use Common Types of Sheen
The type of sheen you choose for a particular room or surface is up to you, and many types can work well for the same area, but you may choose one over another depending on how much traffic the room sees (durability), how prone to dirt or moisture it is, or simply the decorative look you’re going for. Here are some recommendations to help get you started.
• Kitchens: A high or semi-gloss finish in the kitchen ensures your surfaces are more durable and easier to clean.
• Dining Rooms: For moderate-traffic areas like dining rooms, an eggshell finish will provide smooth, clean-looking walls.
• Bedrooms: A flat or matte finish is recommended as these absorb light, which can make those bright mornings more bearable.

• Bathrooms: Semi-gloss is great at protecting surfaces without being too reflective.
• Living Rooms: A satin finish is your best bet. It’s easy to clean and can stand up to high traffic.
• Hallways: An eggshell finish that’s easy to clean and resists dirt and grime is perfect for these moderate-traffic areas.
• Ceilings: Ceiling flat sheens are designed for ceilings and are extra splatter resistant.
• Brick/Masonry: Satin or eggshell is perfect for highly textured surfaces like brick; a moderate shine can help to conceal imperfections while giving off a pleasing glow.
• Cabinets: The higher the gloss, the easier it will be to clean and care for your cabinets.
Always Prime Before You Paint
We always recommend using one of our professionally trusted primers to ensure your hard work turns out as beautifully as you intended. Primer provides adhesion for any paint you choose, covers stains, prevents chips, and blocks odors, and helps your topcoat perform its best while achieving the truest possible color. Our primers are made for every project, so choosing the best one for the job is easy.
Always remember to refer to our website kilz.com or product back labels for additional information on which primer is right for your project and detailed instructions on how to apply our products. Check out our Coverage Calculator to understand your estimated paint needs for your upcoming project.
RELATED ARTICLES
get inspired:
FOLLOw us:
@kilzbrand
SHOP
PRODUCTS

Meet Jared and Jason: The Pros of Destination Restoration
April 18, 2023Are you looking for inspiration for your next home renovation project? Look no further than Destination Restoration, a new mini-series from KILZ that celebrates the power of restoration. Meet the talented Pros, Jared Foster and Jason Lai, who bring their expertise in design and painting to restore a fourth-generation family home. With their unique blend of skills and passion for craftsmanship, they transform old and outdated spaces into something new and beautiful using primer and paint.
 Jared Foster is a master painter, builder, and business owner with over a decade of experience in the industry. He’s known for his attention to detail, his skilled craftsmanship, and his ability to turn even the most challenging of spaces into beautiful homes. Before finding his passion for home improvement, Jared was a Grammy-nominated singer-songwriter, traveling the country and touring with some of the biggest names in the music industry. Now, he channels his creativity into building projects that are both functional and beautiful.

Jason Lai has over 15 years of experience in the design industry and owns his own design firm. He’s worked on a wide range of projects, from contemporary homes to traditional spaces, and everything in between. Jason’s clients appreciate his adaptability, relatability, and humility while also acknowledging his confidence in standing by his recommendations. Having worked with such a variety of clients and spaces, Jason brings a unique perspective to each restoration project he’s a part of.
Together, Jared and Jason make an unstoppable duo, with skills that complement each other perfectly. Throughout the series, viewers get an immersive behind-the-scenes look at each restoration project, from painting over water stains to painting bathroom cabinets using KILZ primers.

Whether you’re a DIY enthusiast or simply looking for home inspiration, Destination Restoration is a must-watch series that showcases the beauty of home restoration. Jared and Jason bring their passion, expertise, and eye for design to each project, and show viewers how to transform old and outdated spaces into something incredible. Tune in to Destination Restoration and start your journey to creating your dream home today.
RELATED ARTICLES
get inspired:
FOLLOw us:
@kilzbrand
SHOP
PRODUCTS
From Stained to Stunning: Restoring a Primary Bedroom
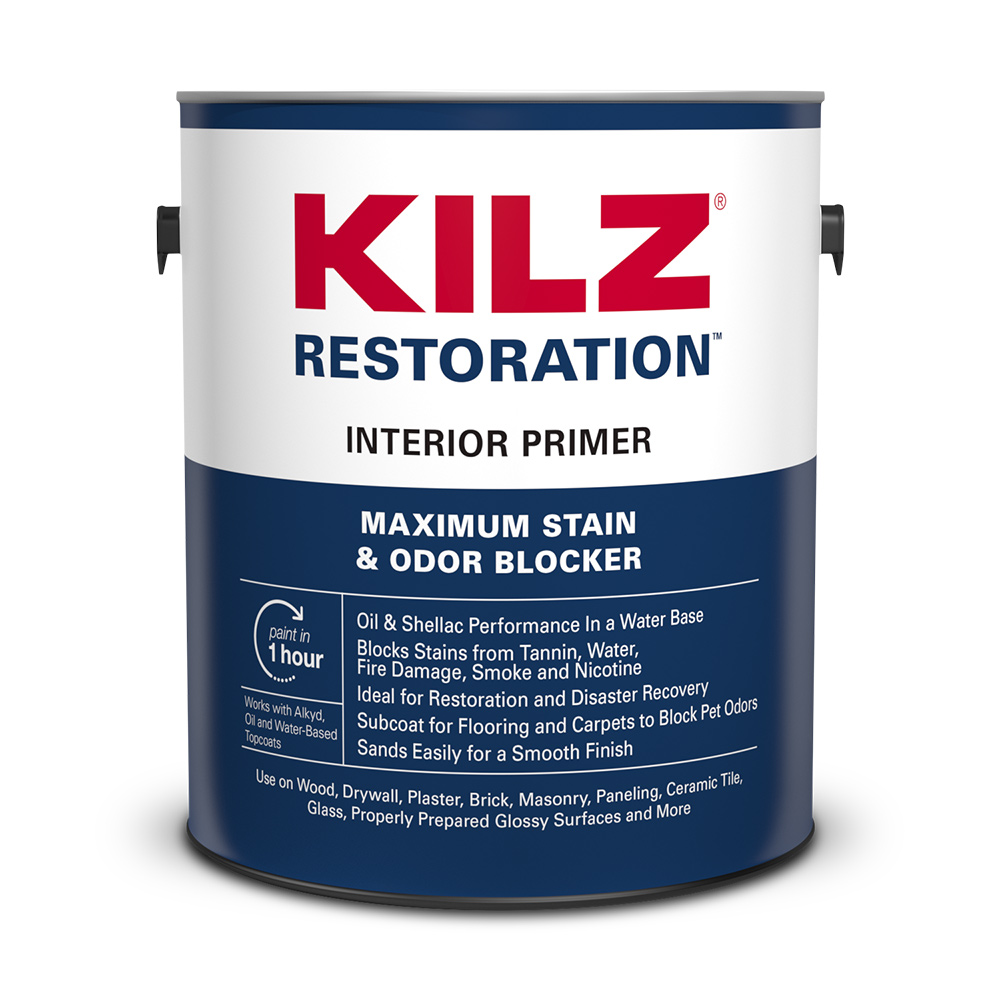
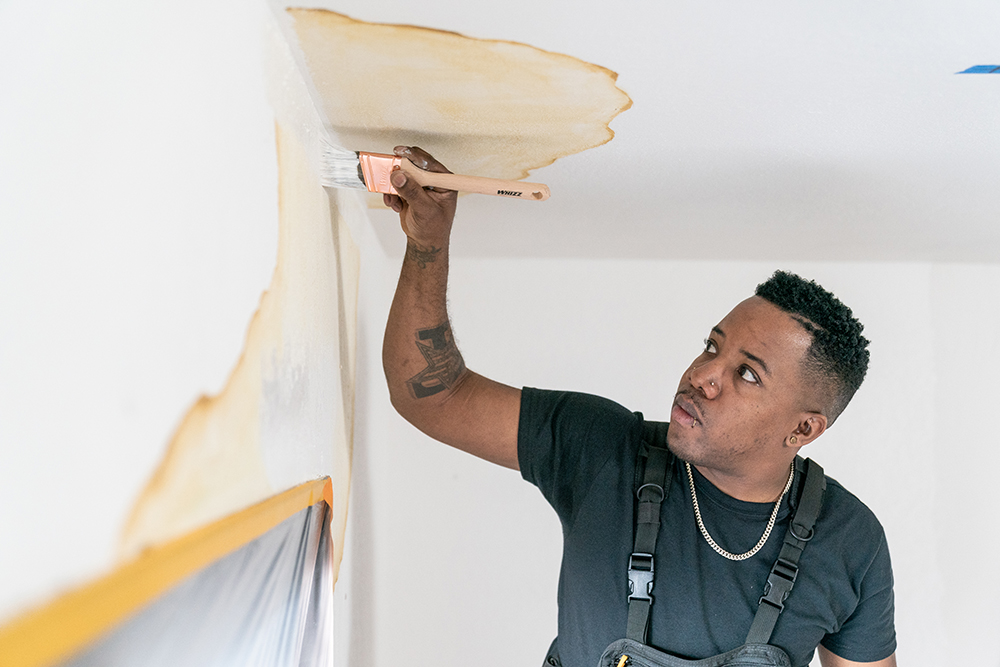
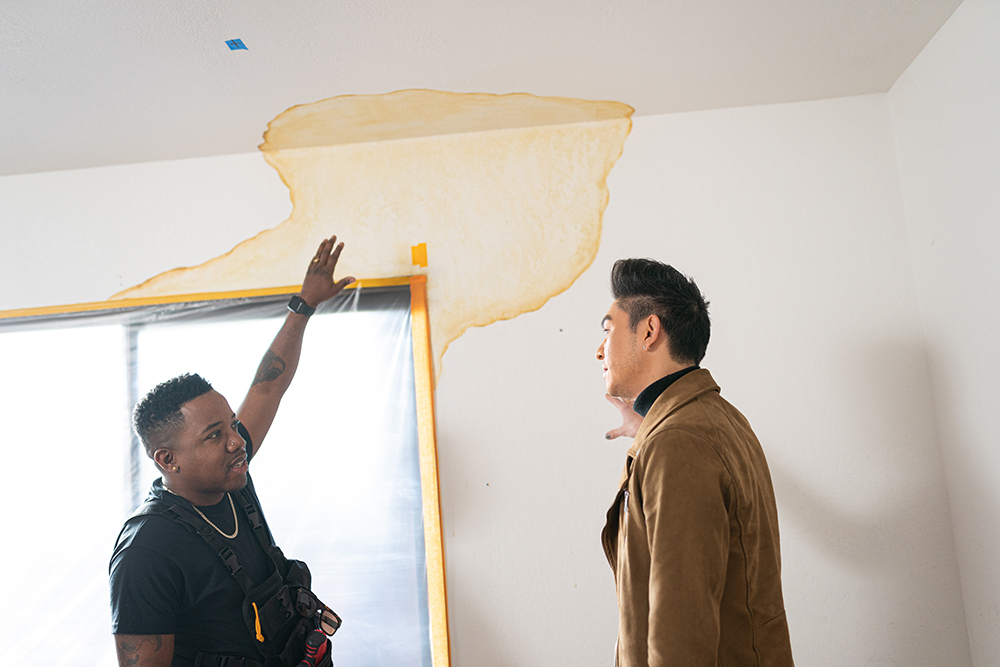
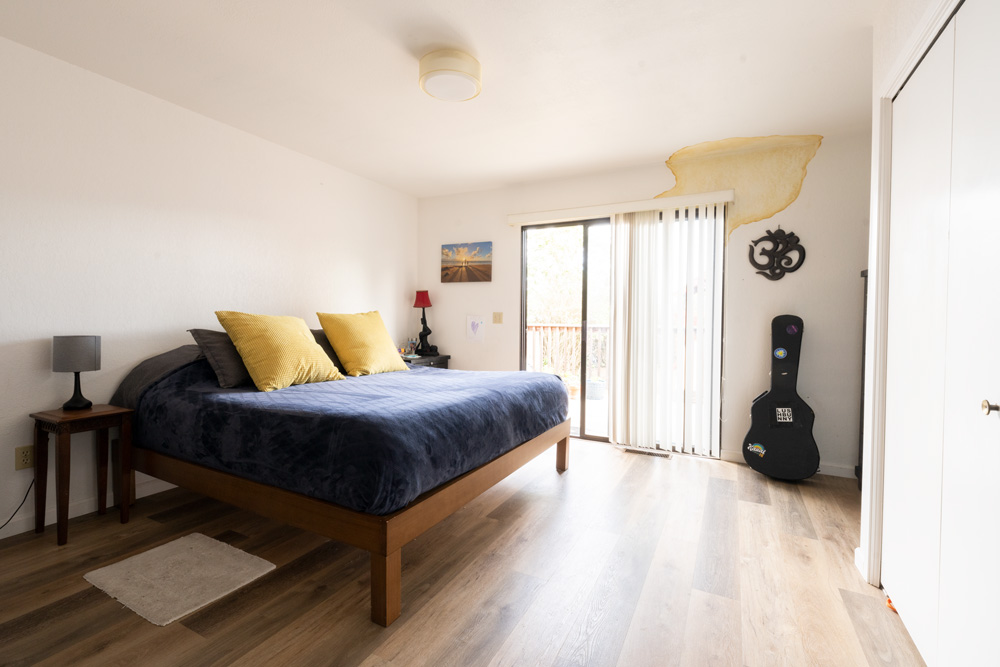
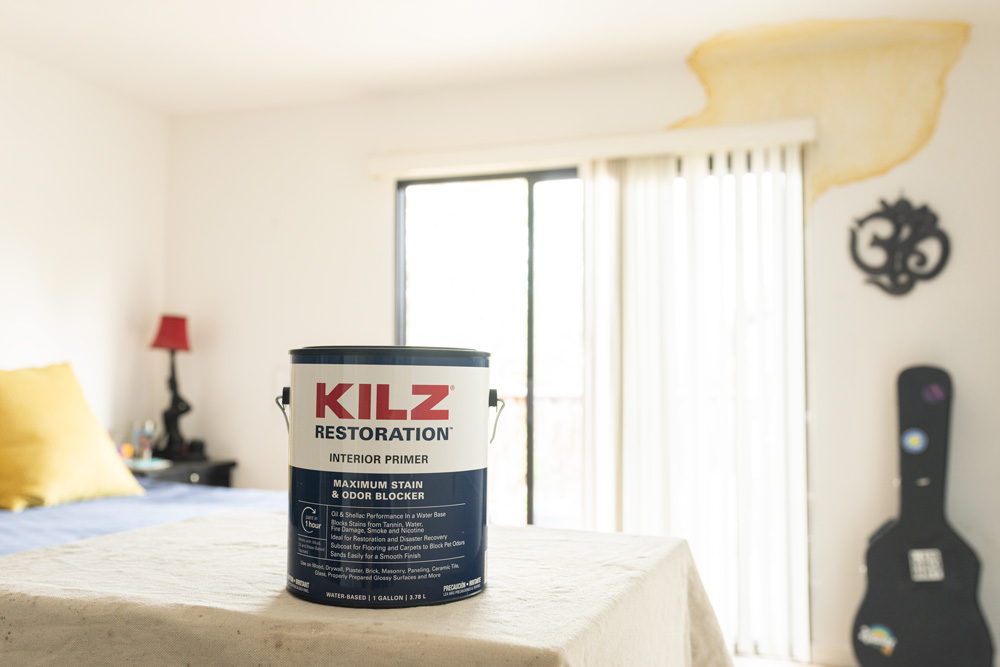
April 17, 2023On this episode of Destination Restoration, we show you how to restore a room that’s suffered a bit of damage. Older generational homes can accumulate imperfections over time, especially stains from things like water damage. In the case of today’s refresh, not only do we take a standard primary bedroom and update it for a new era, but we also tackle how to restore unsightly, odorous stains using primer and a fresh coat of paint.
This series demonstrates how you can breathe new life into an older home (in this case, a 4th generation family home), while keeping its structural integrity intact.
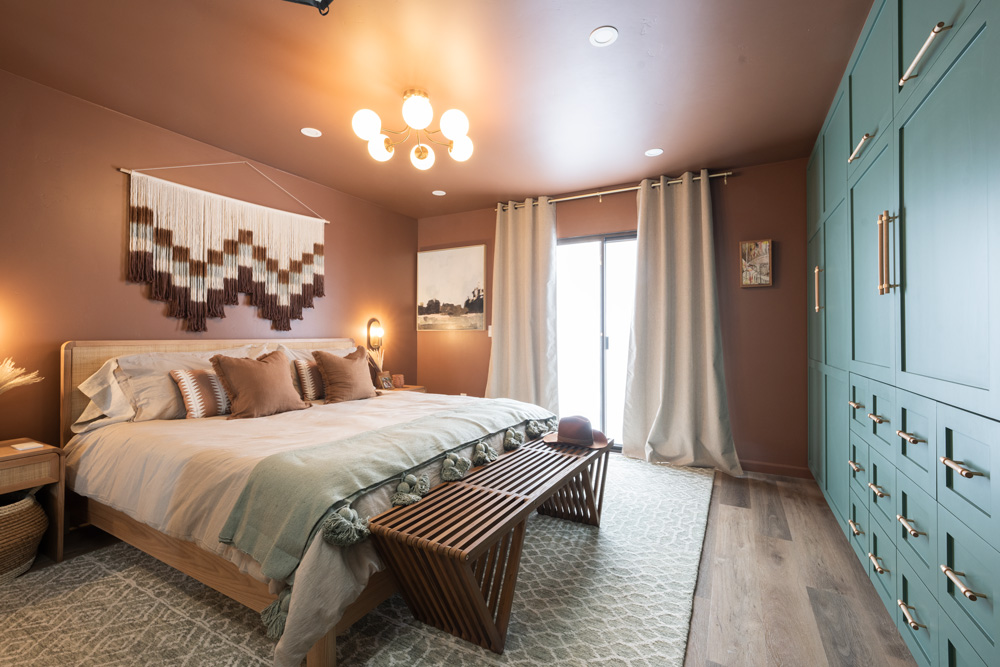
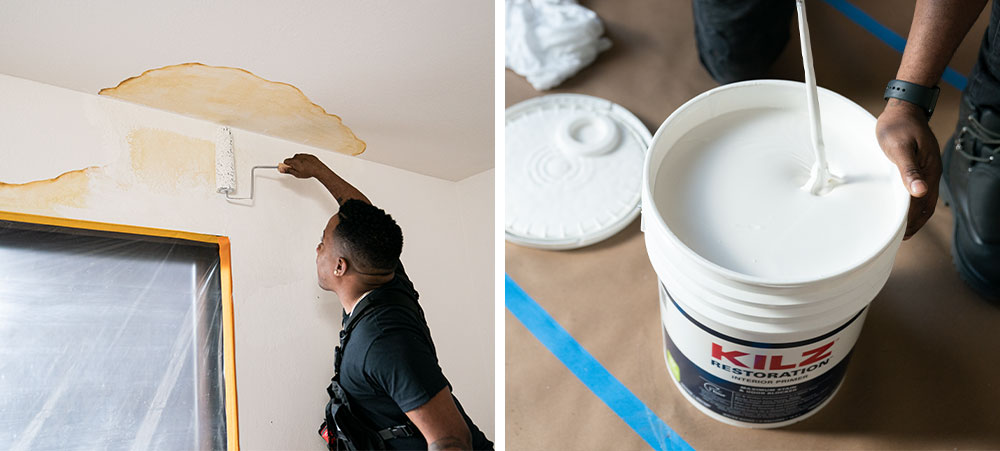
Once again, our fabulous design duo—Jason Lai (interior designer) and Jared Foster (contractor/pro painter) —found a way to update this modest room while addressing the large yellow stain that had leaked its way around the sliding glass door. Our goal was to both cover it up and ensure it wouldn’t show through, which we achieved with a thorough coat of primer and a new coat of paint. Due to the lack of storage in the room, we also wanted to install a custom unit, with ample cabinets to make the space more functional and a modern haven for the parents of this lovely family home.
Covering up stains takes a little extra effort but is totally doable with the right tools. Make sure you choose a sturdy primer that’s right for the job, like KILZ RESTORATION® Interior Primer when tackling a similar project of your own, and follow along to see how our pros approached this room makeover. We’ve also included a step-by-step guide on how to paint over water stains using primer.
Stain Coverage
The main goal of this room refresh was to remove any trace of the water stain and get rid of its foul odor at the same time. To do this, we primed over the water stain using KILZ RESTORATION® Interior Primer then painted the walls, ceiling, and molding with Rio Rust, a color by Behr Paint.
Extra Storage
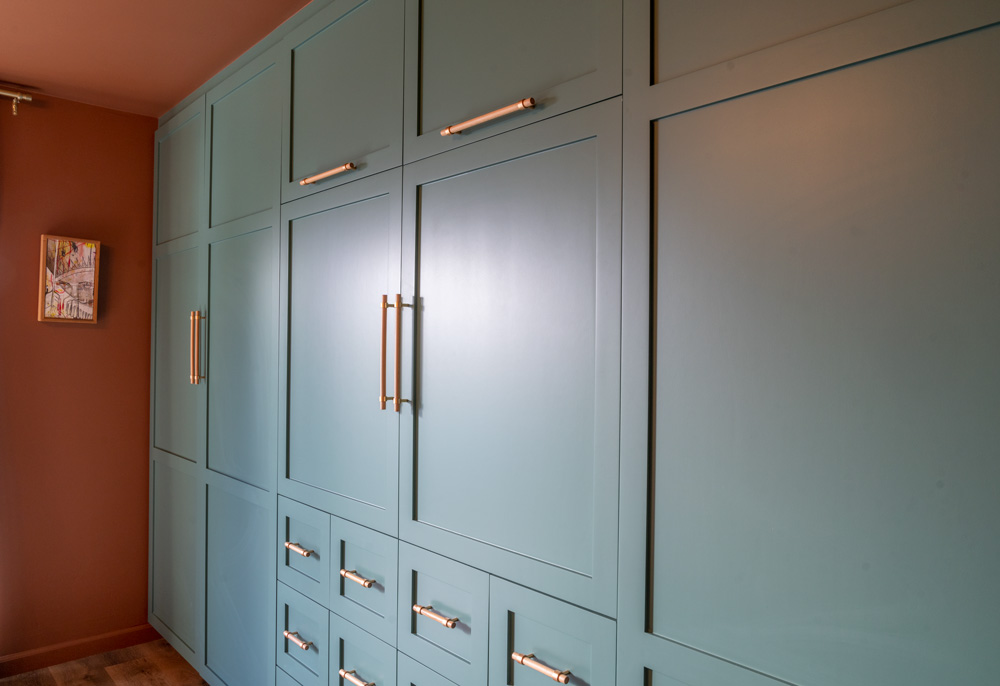
To replace the lackluster closet, we added a custom, built-in closet system with a hidden TV display, perfect for unwinding after a long day. We primed the unit, and then painted it with Forest Edge, a color by Behr Paint, for its ability to stand out and complement the color of the rest of the room. Together, these colors elevated the room and gave it a warm, modern, and cozy feel.
Other Changes
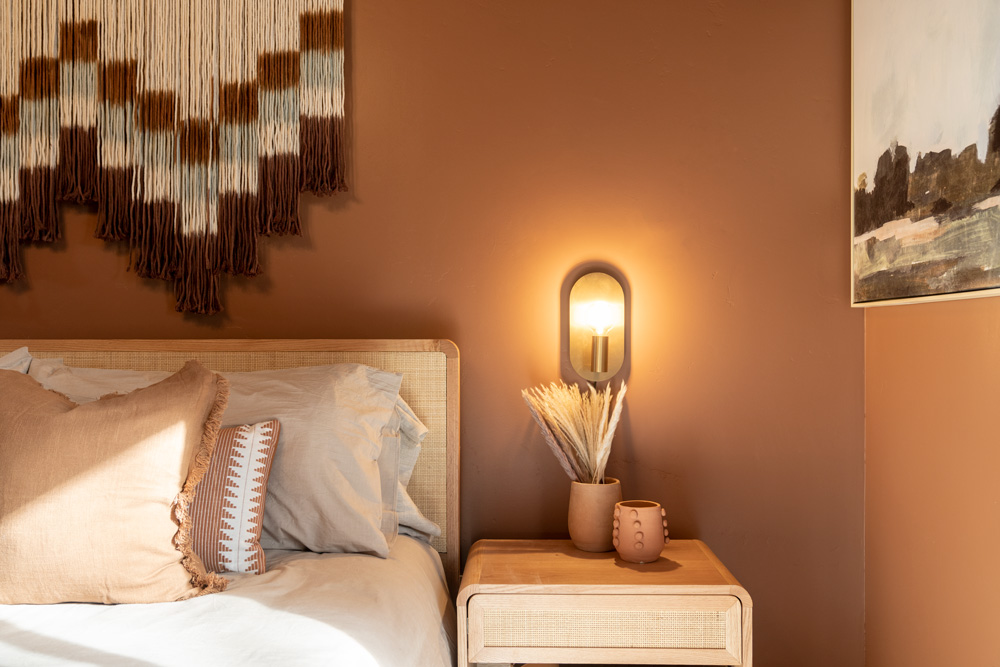
We wanted to update the existing lighting to complement the new design and bring more warmth to the space, so we added a modern chandelier by Kichler Lighting, as well as additional recessed lighting fixtures on the ceiling. We also replaced the door hardware, updated the electrical throughout, and added carefully chosen décor to bring this refined boho-chic look together.
Why Do You Need to Prime?
Priming is essential for proper surface preparation for any paint project. It’s the difference between a job done and a job done right. Priming helps solve a wide range of problems, including highly porous surfaces, stains, odors, uneven surfaces, texture differences, and adhesion problems.
Because this room required stain coverage we used, KILZ RESTORATION® Interior Primer for its superior, water-based sealing and stain blocking formula. It can tackle tough stains from heavy water damage, rust, smoke, nicotine, grease, tannin, ink, pencil, felt marker, pet stains and more. It’s also a champion odor blocker and can be used on many interior surfaces including drywall, woodwork, plaster, masonry, brick, painted metal, ceramic tile, glass, and most other glossy surfaces.
Step-By-Step Guide to Stain Blocking and Priming Walls:
Painting over water stains requires a few basic steps from start to finish. Here’s an easy guide to follow for your next project:
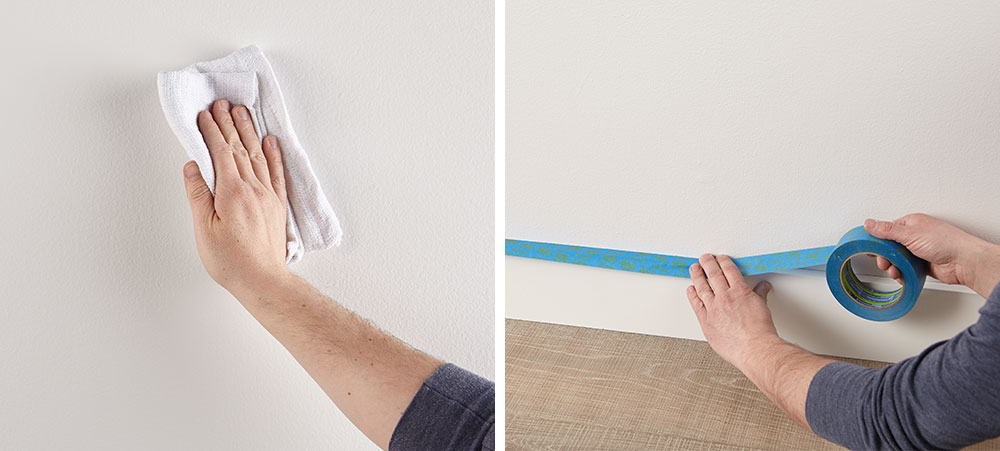
1. Patch any holes from damage and sand smooth to prep the surface (if needed)
2.Thoroughly clean your surfaces with a damp cloth to ensure they are clean and free of dust. Allow to dry.
3. Tape around the baseboards, trim and moldings.
4. Protect your floors and furniture from paint and primer by covering it with a drop cloth or plastic sheets.
5. For major stains like water, grease, or smoke, select a heavy-duty stain blocker like KILZ RESTORATION® Interior Primer.
6. Now it’s time to prime! Using a brush first to “cut in” around the edges and small crevices, then use a roller to fill in the larger areas.
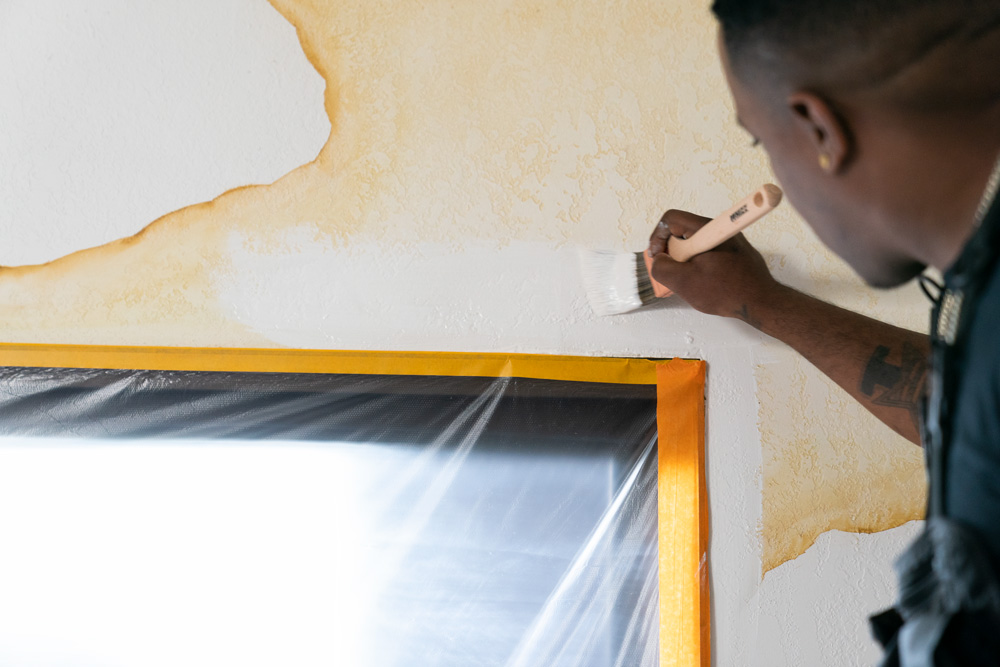
7. Allow to dry for 1 hour.
8. Once the primer is dry, apply paint of your choice using the same application process at the primer.
9. Remove the painter’s tape before your paint is fully dry.
You Will Need:
• Dust mask
• Pole sander with sandpaper, 60-80 grit
• Extension pole for prep and painting, 3’-7′
• Step ladder for hard-to-reach areas
• Rags to wipe dirty and dusty surfaces
• Painter’s tape
• Drop cloths, canvas, or other reusable material
• Plastic sheets, for protecting furniture
• Spackle and applicator
• Paint roller, brush, and paint tray
• Paint of choice
• KILZ RESTORATION® Interior Primer
We hope this episode of Destination Restoration inspires you to tackle your own bedroom remodel this year. Be sure to keep KILZ® products in mind for your next project, and come back for more ideas, tips, and project inspiration.
If you loved this restoration, be sure to check out the other episodes of Destination Restoration. Jason and Jared took on the Kitchen, Living/Dining Room, and Primary Bathroom.
Always remember to refer to our website kilz.com or product back labels for additional information on which primer is right for your project and detailed instructions on how to apply our products. Check out our Coverage Calculator to understand your estimated paint needs for your upcoming project.
RELATED ARTICLES
get inspired:
FOLLOw us:
@kilzbrand
SHOP
PRODUCTS

THE CASTLE COLLECTION: THE BEDROOMS
February 22, 2023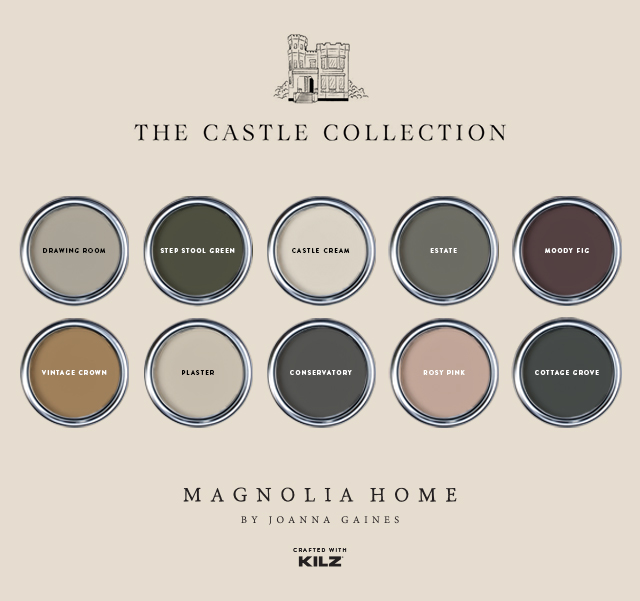 In case you missed it, Magnolia Home by Joanna Gaines® has released ten brand new colors, The Castle Collection, specially designed for Chip and Joanna Gaines’ Castle renovation in Waco,Texas. Featuring a beautiful range of warm neutrals to moody accents, these deep and rich colors will turn any space into a timeless classic.
This year on The Perfect Finish, we will be highlighting specific rooms to showcase the Castle Collection in detail. And be sure to check out the newest season of the Gaines’ hit TV show Fixer Upper: The Castle to catch these colors in action.
Today, we are highlighting two of the featured rooms inside the Castle project: the Girls’ Room and the Boys’ Room, each painted in one of the Castle Collection Colors.
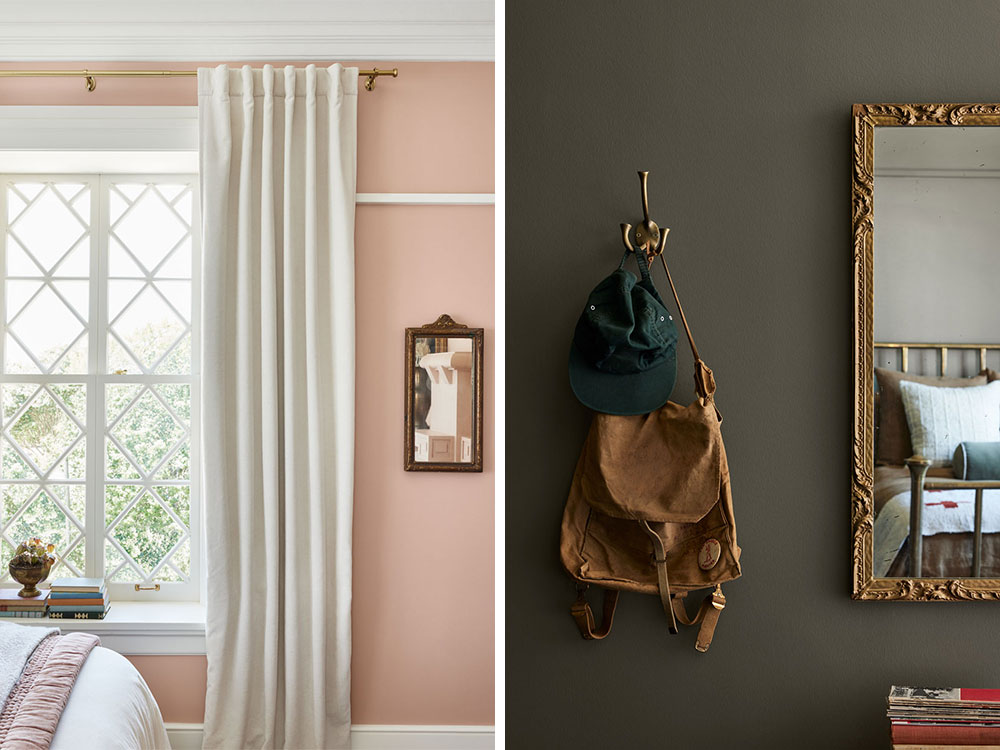
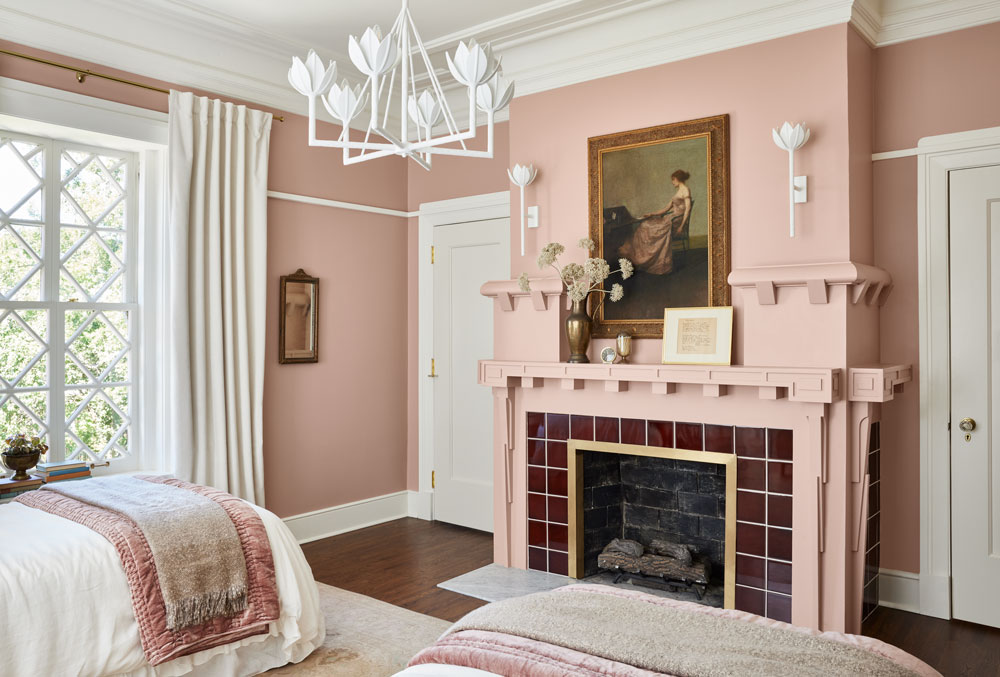
THE GIRLS’ ROOM
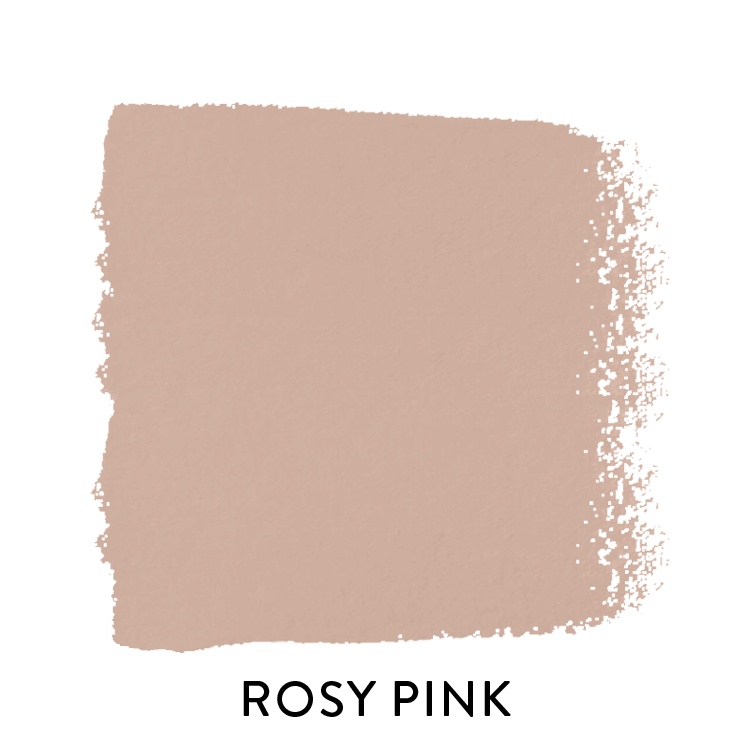
This bedroom is painted Rosy Pink, a dusty, subtle pink with a nostalgic tone, which was specifically created with this room in mind. Paired with clean white trim and white light fixtures, this room becomes a soothing and inviting space.
With natural light streaming into this room from the large windows, Rosy Pink gives the space a warm glow. Named after Joanna Gaines’s grandmother, this paint color is bound to make any child (and adult) excited to call this room their own.
“This color is inspired by my grandmother, Agnes Rose. It’s a subtle pink with a vintage style.” – Joanna Gaines

Metal accents and vintage style décor add to this nostalgic vibe and make the timeless tone of the color really stand out.
This bedroom also features a fireplace, just one of seven throughout the Castle project. Coated in Rosy Pink with a moody mauve tile surround, this becomes a centerpiece of the space.
THE BOYS’ ROOM
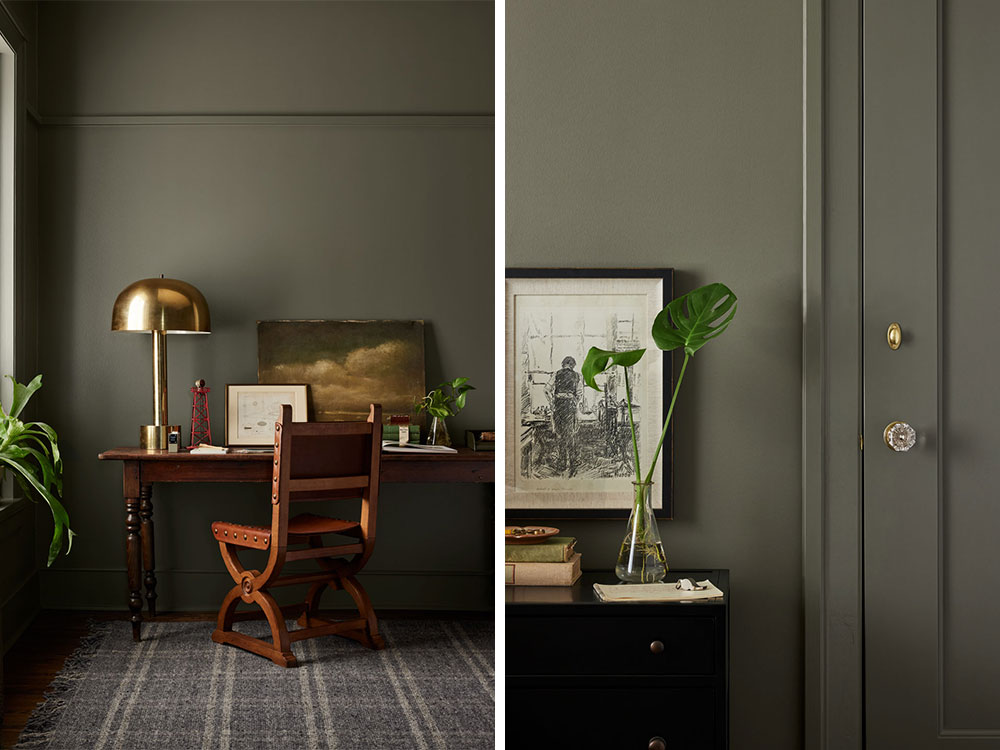
The Boys’ Room features Castle Collection color, Estate, a deep sage with a soft gray undertone. With Estate cascading up onto the ceiling and trim, over the fireplace, and onto the doors, there is a grandeur and sophistication that envelopes this room.

This color was specially curated and designed for this room in the Castle, like many of the colors in the Castle Collection. With Estate covering every crevasse in this space, it’s easy to see the depth of this regal color.
Complemented by a black leather chair, brass bedframe, an antique desk, and décor accents with a classic style, this room’s design will make anybody swoon.
A special edition of Fixer Upper: The Castle is available on the Gaines’ Magnolia Network, Discovery+ and HBOMax. The season follows Chip and Joanna through six episodes of the renovation journey, including the development of The Castle Collection color palette.
Don’t forget to check back here at the Perfect Finish to read more about specific rooms and paint colors featured in the Castle project.
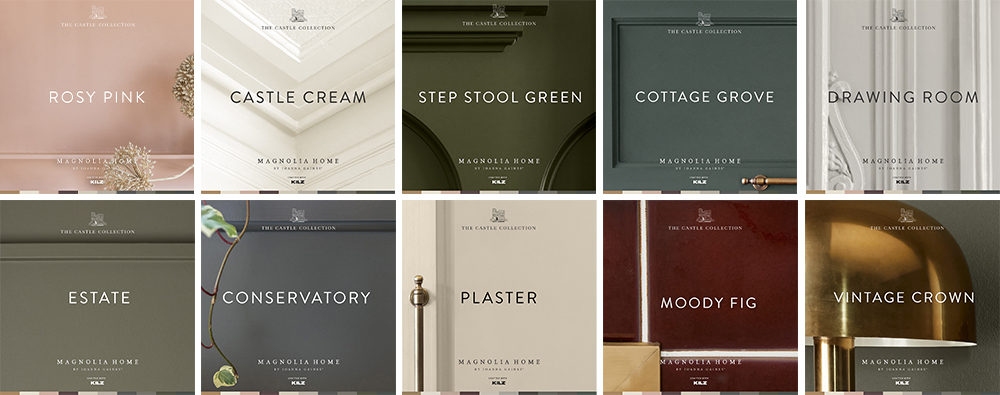
Inspired by these bedrooms and looking for complementary colors for your own space? The curated palette below offers shades that complement and coordinate with Estate and Rosy Pink from Magnolia Home by Joanna Gaines.
ROSY PINK COMPLEMENTARY PALETTE

Moody Fig (From the Castle Collection)

Garden Party

Rocking House

Solid Wood

Silos White
ESTATE COMPLEMENTARY PALETTE

Vintage Crown (From the Castle Collection)

Renewed

Coffee Nook

One Horn White

Vintage Weathervane
These paint colors are available at Ace Hardware, Lowe’s and Magnolia.com/shop.
RELATED ARTICLES
get inspired:
FOLLOw us:
@kilzbrand
SHOP
PRODUCTS

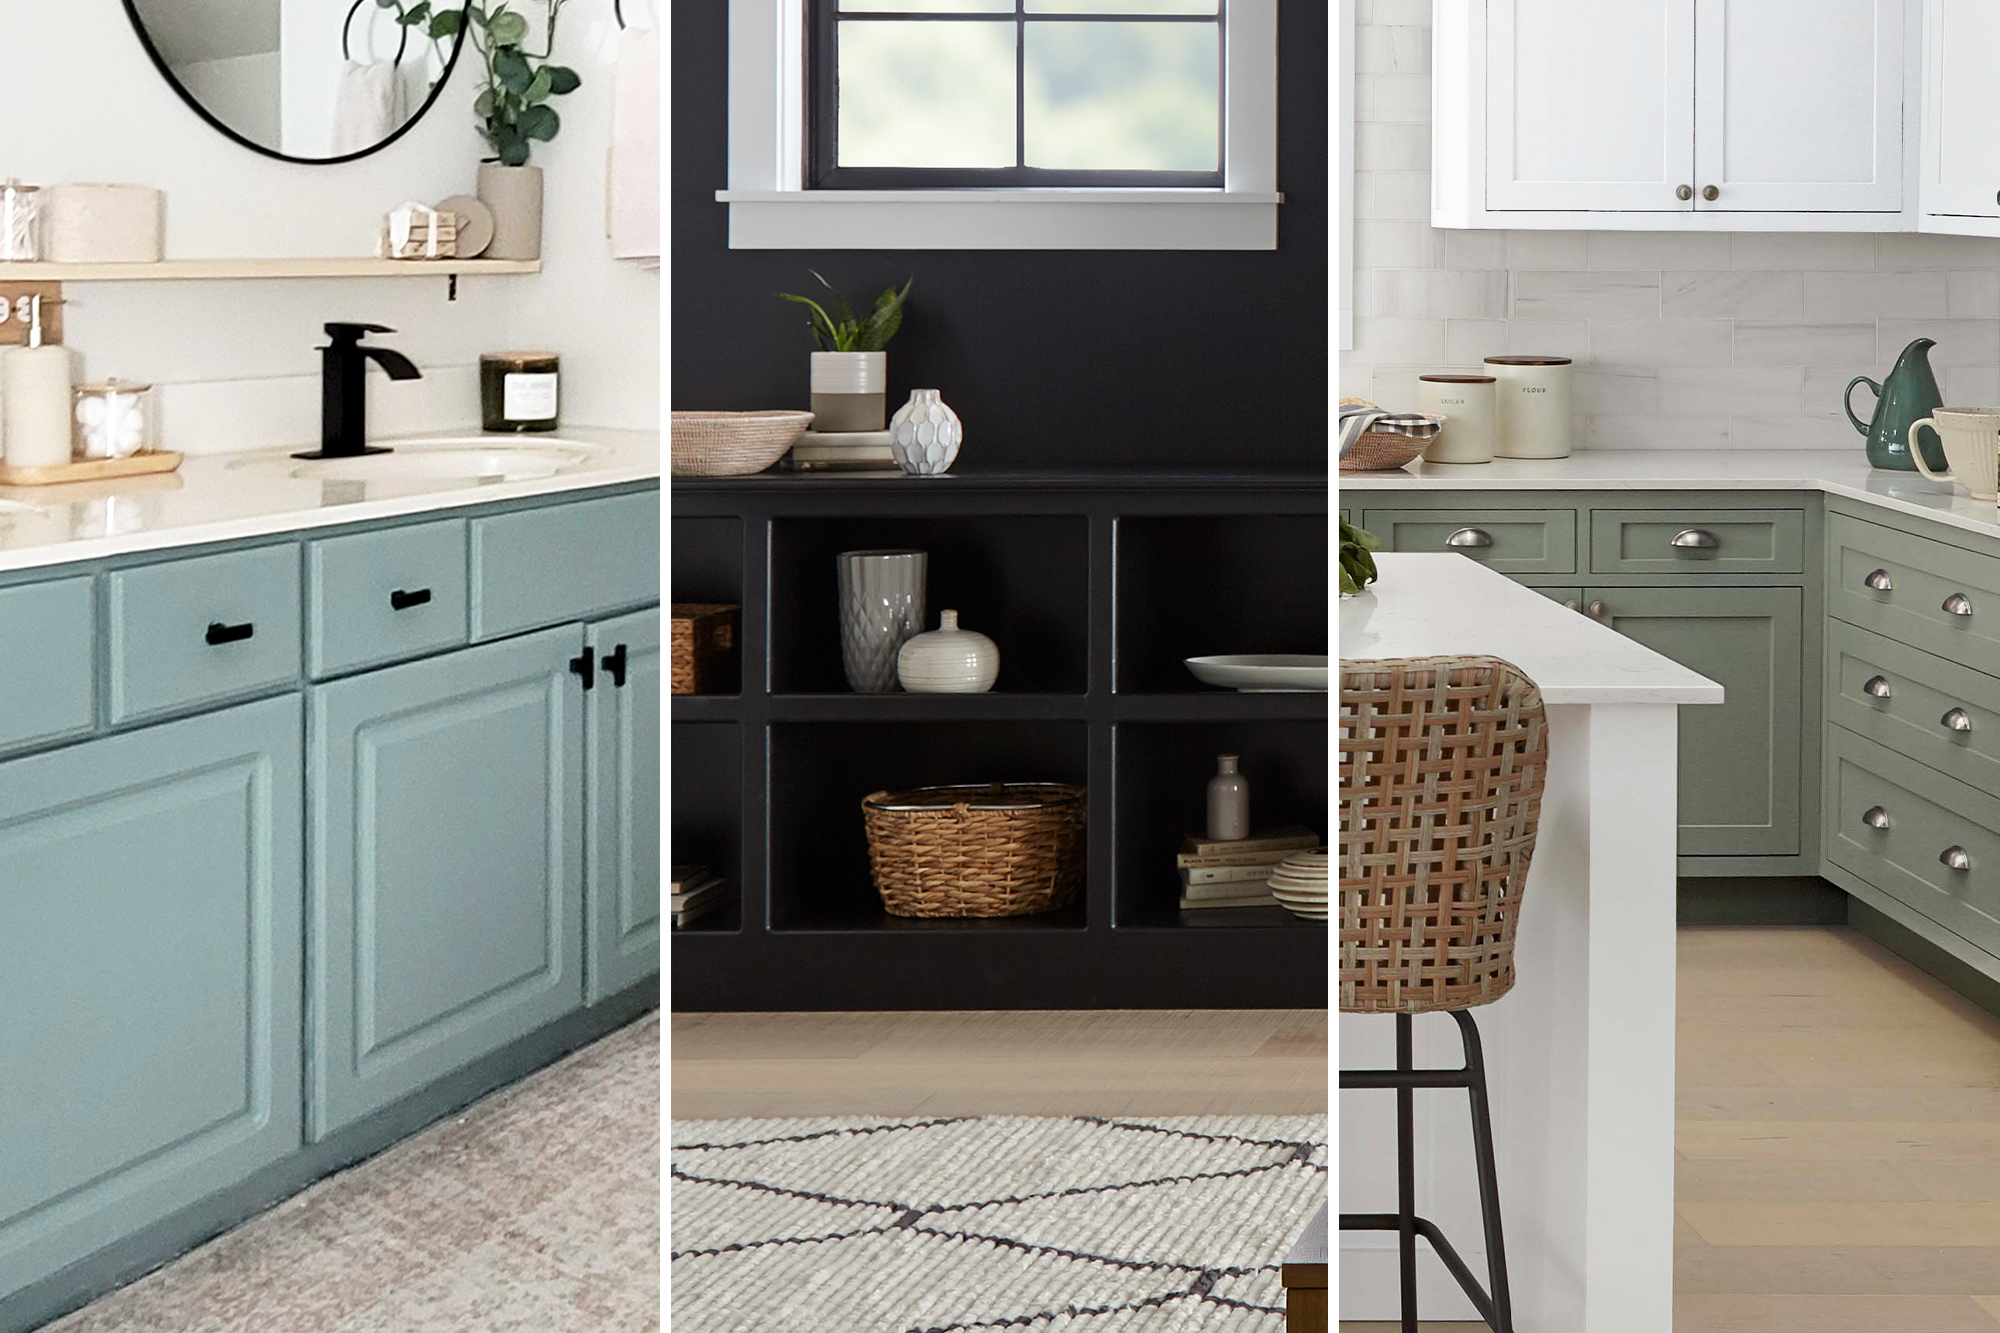
Our Favorite Projects of 2022
November 17, 2022The end of the year is right around the corner, which means it’s time to look back on some of our biggest accomplishments of 2022. What better way to recap the last 12 months than to revisit some of your favorite projects? From kitchens to bathrooms to living spaces, 2022 did not disappoint. When it came to updating, revamping, and overhauling, the year was full of inspiring home makeovers, so let’s recap some of our biggest standouts, and get excited to tackle another year of home improvement.
1. How to Prime Kitchen Cabinets for Color That Pops
You may remember this gorgeous kitchen update from earlier in the year. This project featured three different kitchen inspirations, all using KILZ 3®PREMIUM Interior and Exterior Primer, which came to life thanks to varied design concepts and paint combos that gave the original space some much needed personality. Two toned kitchen cabinets were a theme for this project, and using subtle, yet distinct colors that played off one another, we achieved a polished effect that would make any pro proud. See the full project.
2. Pro Spotlight: Angela Cacace Creates a Spacious and Fresh Feeling Bathroom
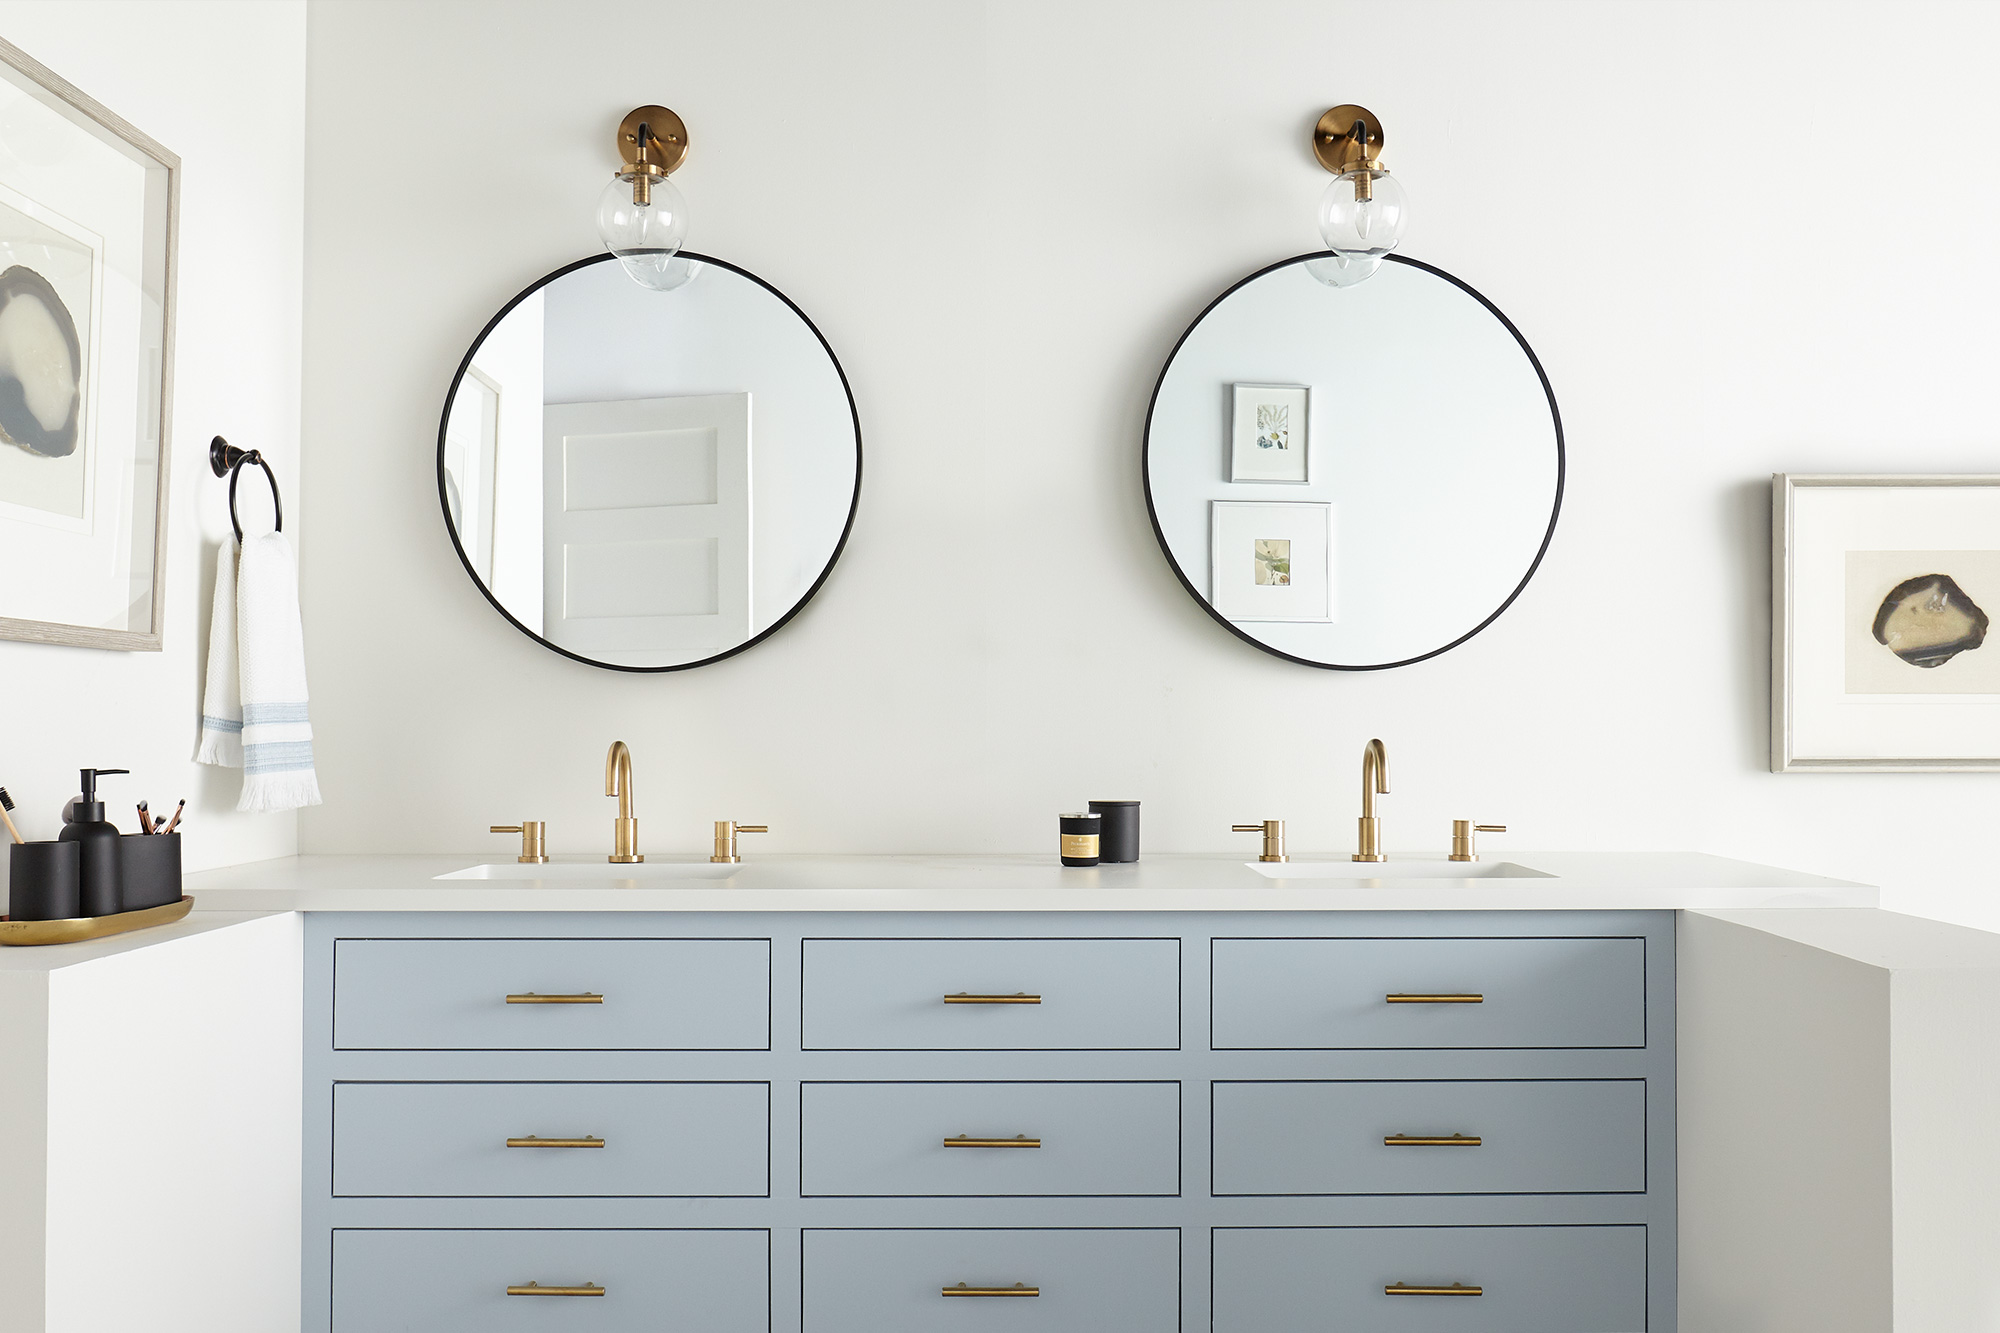
This outdated bathroom was in desperate need of a makeover, and pro designer and contractor, Angela Cacace, took everything from budget to aesthetic to difficulty into consideration. She used KILZ® Mold and Mildew Resistant Primer to start, and then finished the room using light and airy paint selections from the Magnolia Home by Joanna Gaines® collection to make the bathroom feel fresh, bright, and spacious. Achieving the creamy and neutral result was no small feat considering the hot pink “before” color of the walls and the heavy black cabinets. Primer was an absolute must for this project, and the true star of the show. See the full project.
3. Restoration vs. Original – What’s the Difference?
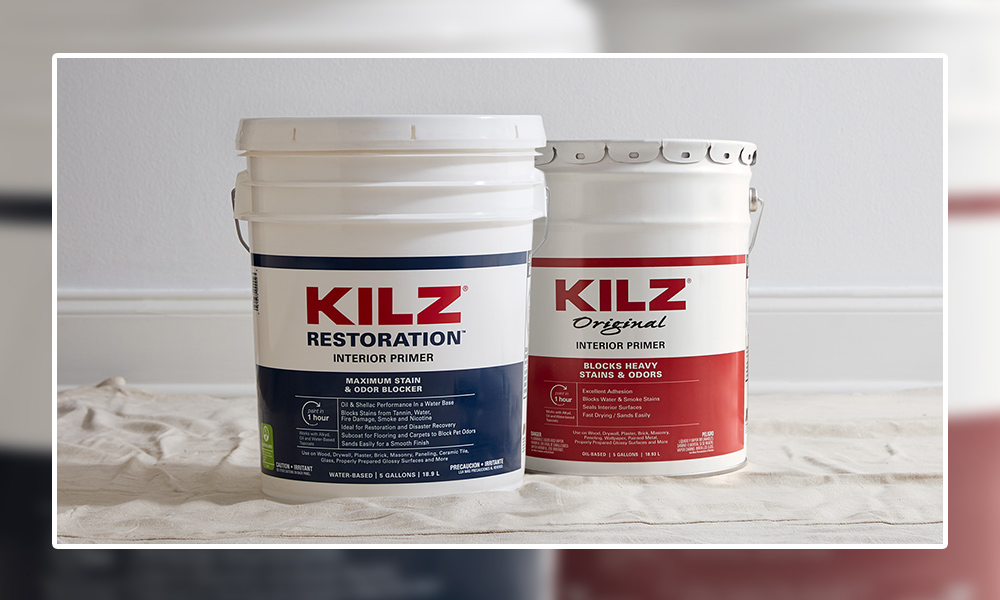
For this article, we talked to John Golamco, Project Manager and Primer Category lead with the KILZ® brand. His 25 years of experience gave him critical insight into this category. He explained the fundamental differences between the primers and compared them in more detail. According to John, KILZ® Original is an oil-based primer that works great for blocking severe stains and odors. It also has a more pungent solvent odor and requires mineral spirits or paint thinner to clean up. KILZ Restoration® on the other hand is a water-based primer that also blocks severe stains and odors but has lower VOCs and meets all national regulations. It’s a low-odor primer and can be cleaned up easily using soap and water. See the full article.
4. PRO SPOTLIGHT: Make A Front Door Pop with Jared Foster
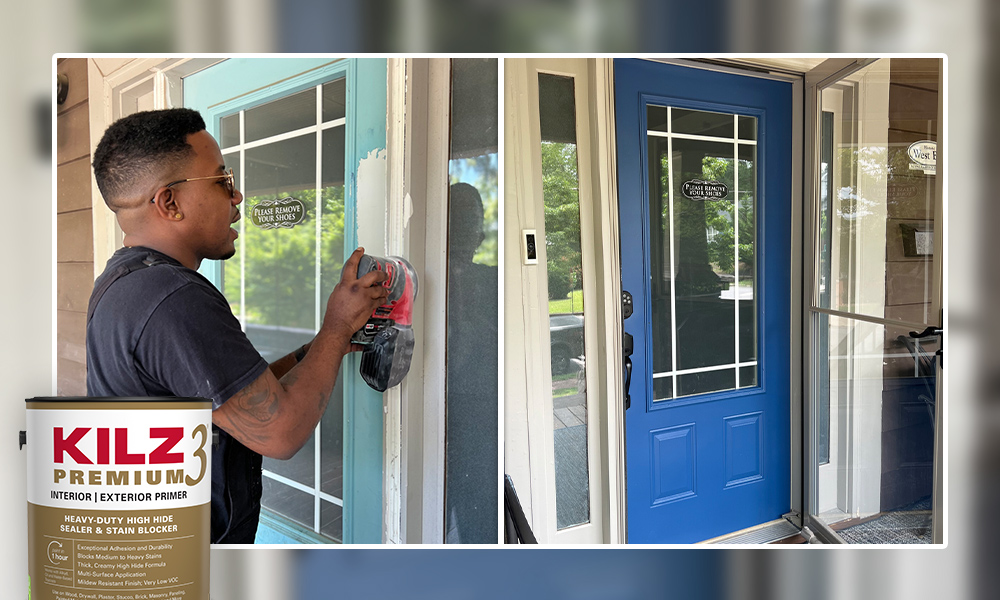
We know a thing or two about details, which is exactly what we wanted to highlight with this front door refresh. Carpenter, Jared Foster, sought to complement the already calm vibe of his front porch with an equally relaxed color scheme, and he walked us through his process in bringing it to life. “Once I laid on the primer and allowed it to dry, I was able to spray the door and trim using BEHR® paint, remove all the paper and tape and enjoy the new look. All and all, this project was completed in 48 hours. Having used KILZ 3® PREMIUM Interior and Exterior Primer,I knew this door color would pop,” said Jared. See the full project.
5. Creating a Family Room that Brings People Together
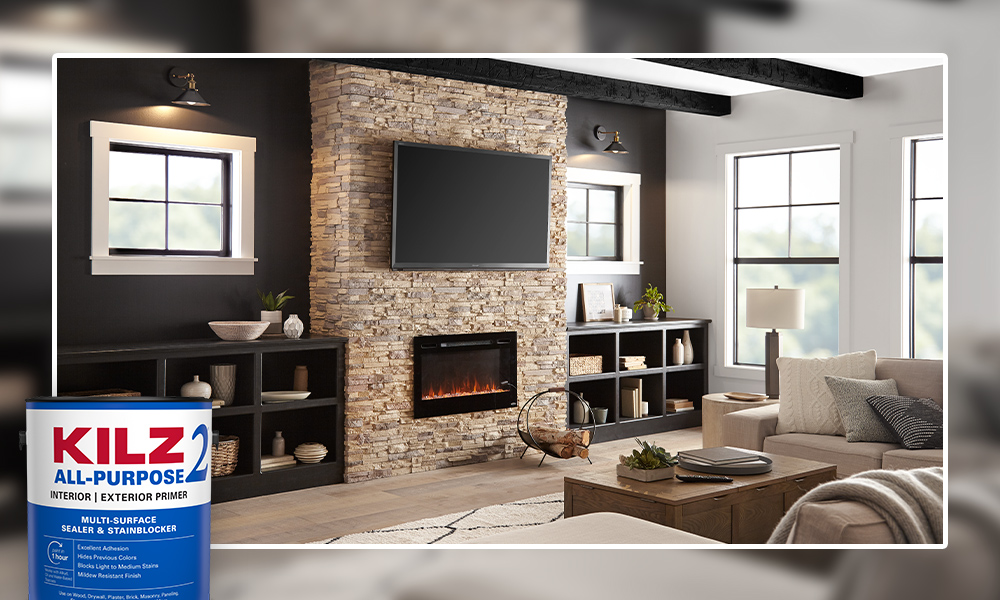
This chic, yet cozy family room makeover was all about encouraging togetherness. Using a modern farmhouse look as inspiration, we crafted a similar feel with soft white paint, dark accents, and intentional décor. Taking the room from light to dark meant priming the walls for the best possible paint application, so we used KILZ 2® All-Purpose Primer, which made the job a breeze thanks to its great adhesion and fast-drying formula. The finished room breathed new life into a familiar space and created a relaxed, yet sophisticated atmosphere, perfect for spending time with loved ones. See the full project.
This was a great year for DIY home makeovers, and even though the year is ending, we’re not slowing down. Whether you’re taking a little break or busy planning next year’s projects, we hope this inspirational list gives you the motivation you need to make your vision come to life. Thanks for spending the year with us. We can’t wait to see what new ideas you’ll bring to life in 2023.
Always remember to refer to our website kilz.com or product back labels for additional information on which primer is right for your project and detailed instructions on how to apply our products. Check out our Coverage Calculator to understand your estimated paint needs for your upcoming project.
RELATED ARTICLES
get inspired:
FOLLOw us:
@kilzbrand
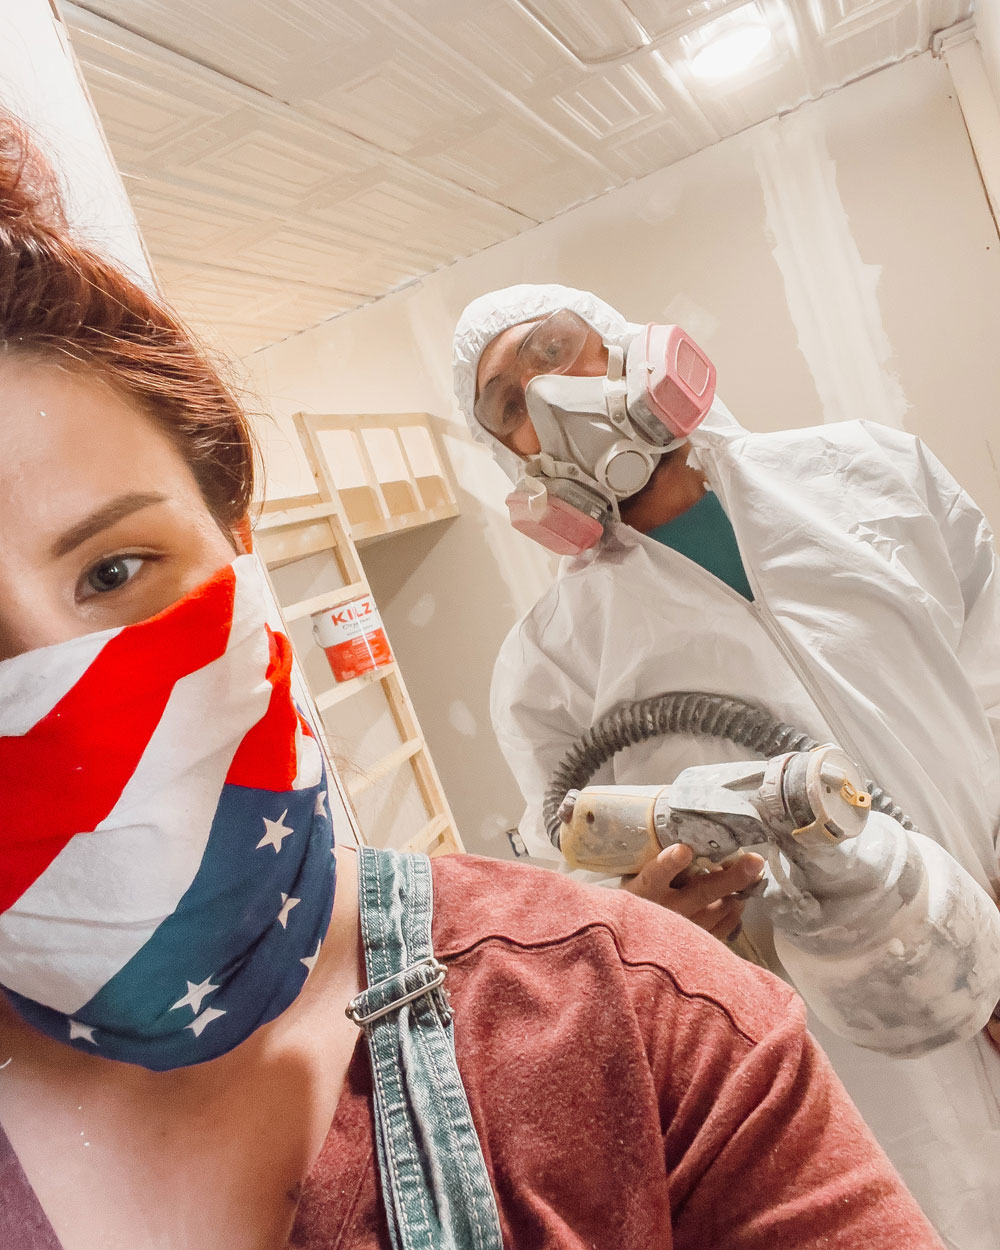
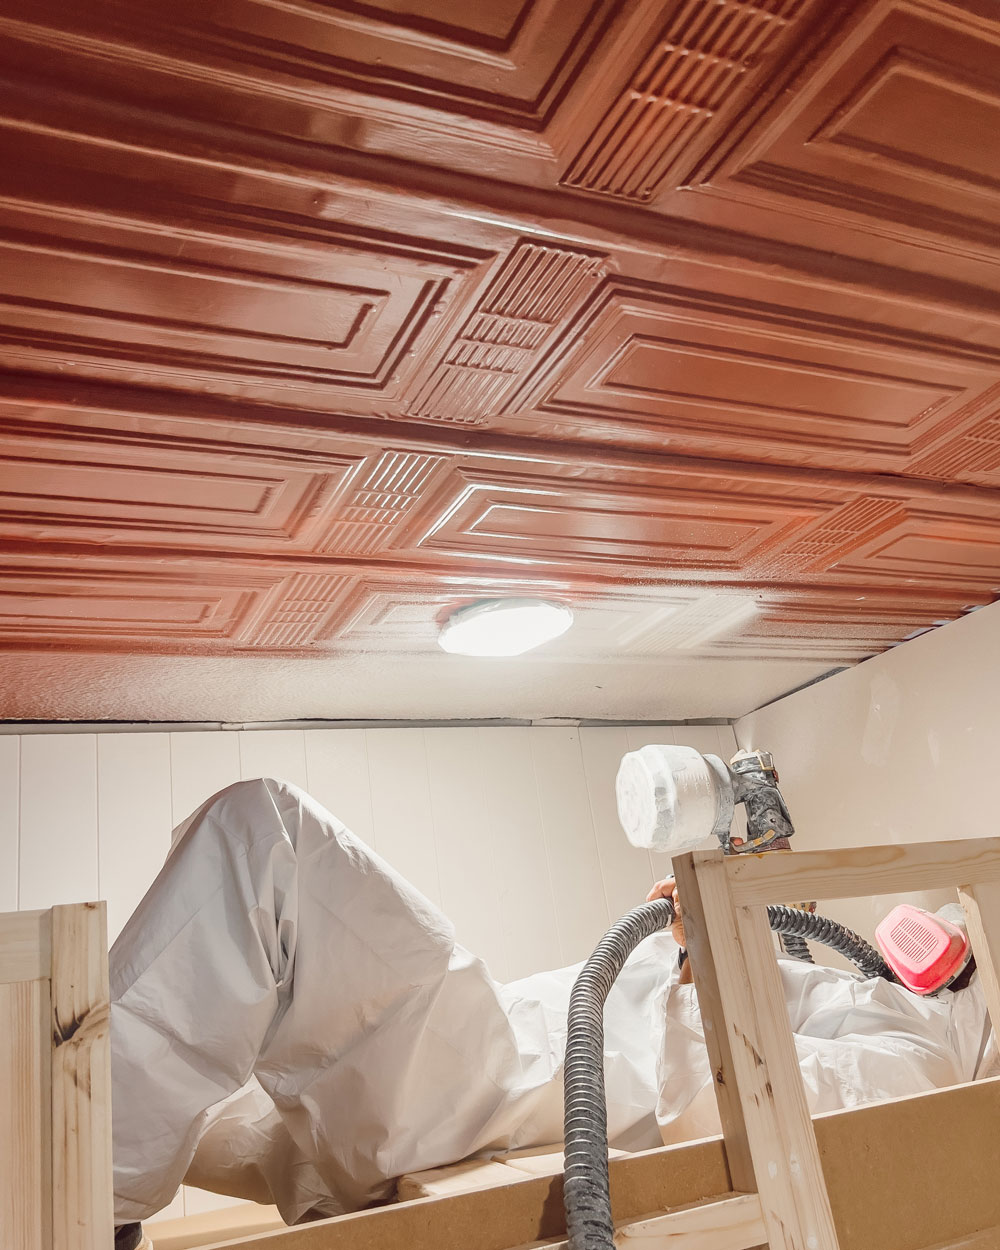
Pro Spotlight: Kenny and Kate Transform Historic Tin Bedroom Ceiling
August 31, 2022Hi there! We are Kenny and Kate-Home Renovation/DIY husband and wife duo based in northern Alabama. Although most of the time you will find us renovating a space or DIYing a project, on the weekends we can often be found on a hike at our nearby state park with our daughter Remi. Whether playing fetch with one of our three dogs, Kessa, Scout, and Lola or snuggling our guinea pigs, Kipper and Gus, we are also huge animal lovers. Our DIY journey began when we purchased our little 1972 fixer-upper home in 2019. We began renovating the home room by room and ultimately fell in love with the process of transforming each space. When most of the world was shut down in 2020, we found comfort in making our home a place of peace and restoration. We loved it so much that in January of 2021 we started our own local home remodeling business, Kaleidoscope Home Co. LLC, to help others embrace and improve the spaces that make up their homes. As the business grew, so did we. By the end of 2021, we had decided to sell our 1972 fixer-upper home and purchase an 1800s downtown brick mercantile building to live in/operate our business out of. That building is currently where we reside. Our business is located on the ground level and our living space is located on the second floor.
Because the decision to purchase and move into the building was made rather quickly, we did not have the time or resources to renovate any of the spaces before moving in. Our daughter, Remi, has been sleeping in a makeshift closet area for the last seven months. It is finally time to give her the room she deserves!
As mentioned above, this is a commercial property (now zoned for mixed-use). This means it does not have designated bedrooms. We have quite literally built Remi’s “big girl bedroom” from the ground up in a portion of the upstairs loft. Now that the walls are up, the closet and bed are built, and the hardwood floors are sanded, it is time to paint the ceiling. The beautiful, crimson red ceiling color works wonderfully in the rest of the building, however, it is just not the vibe in this room. We are painting the walls green and we’re afraid it would look like the holiday season threw up in here. So, as you might have guessed, we’ve decided to paint the ceiling a creamy white color. The historical tin ceilings in this building are worth preserving, and we believe a creamy white color will help accentuate all of the intricate details.

Although the ceilings were previously painted, there are spots where the paint has been chipped or scuffed. Because of this, we need to prime the ceiling with an oil-based primer to prevent the tin from rusting when painted. Priming is fundamental for completing any paint project. It is the difference between a job done and a job done right. Quite simply, primers create an ideal surface coat for the topcoat paint to perform and look its best: paint delivers color and makes that color and beautiful finish last as long as possible, while primers do the “dirty work” underneath. Of course, we would use no other primer on this project than our favorite KILZ Original Interior Primer.
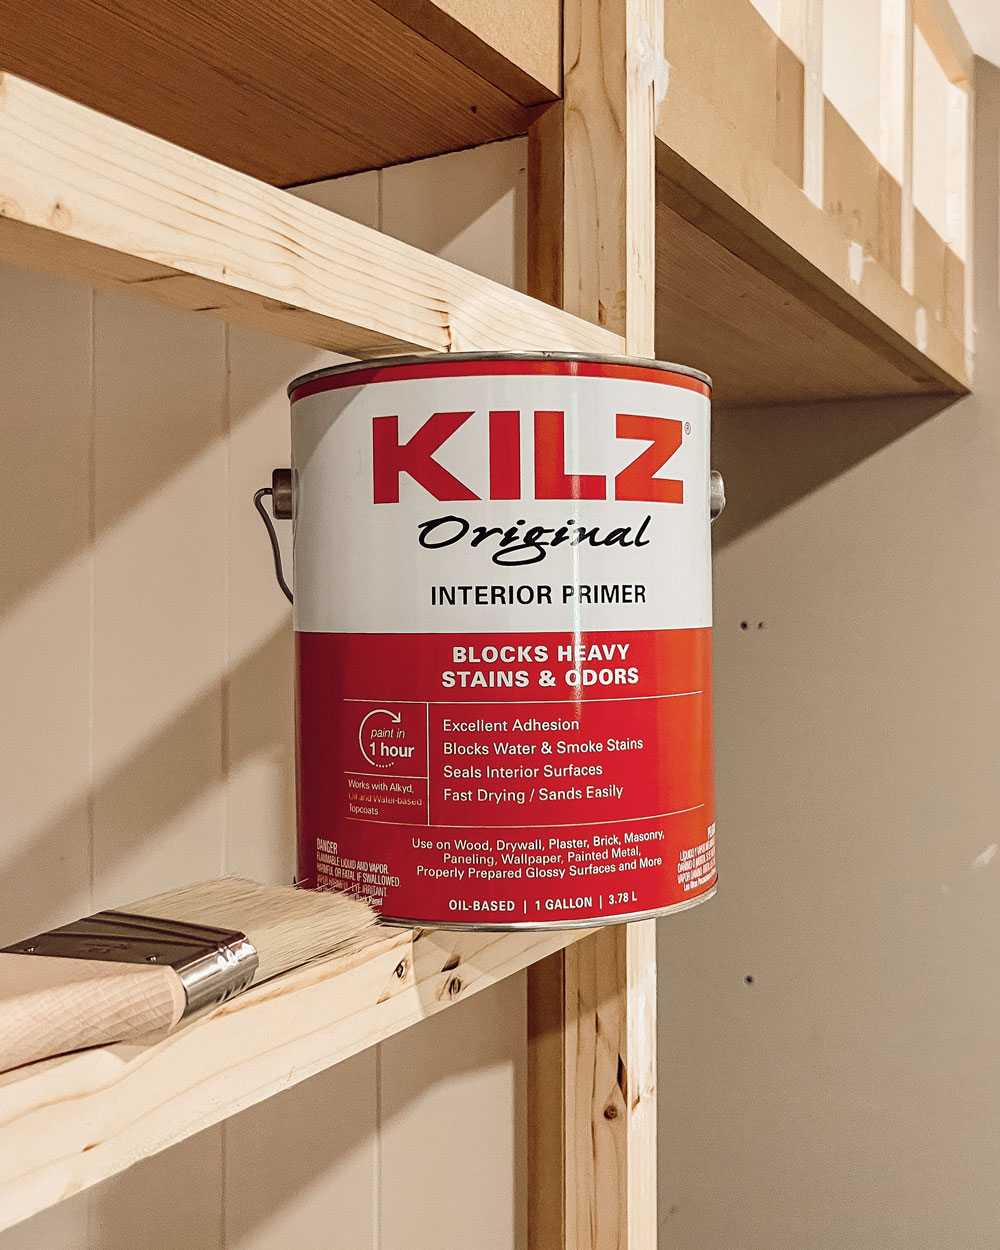
When painting over an existing color, thick, high-hide primer formulas like KILZ Original Interior Primer are important for preparing surfaces, blocking color bleed-through, and covering surface imperfections. And believe us, these 100+-year-old tin ceilings have some imperfections!
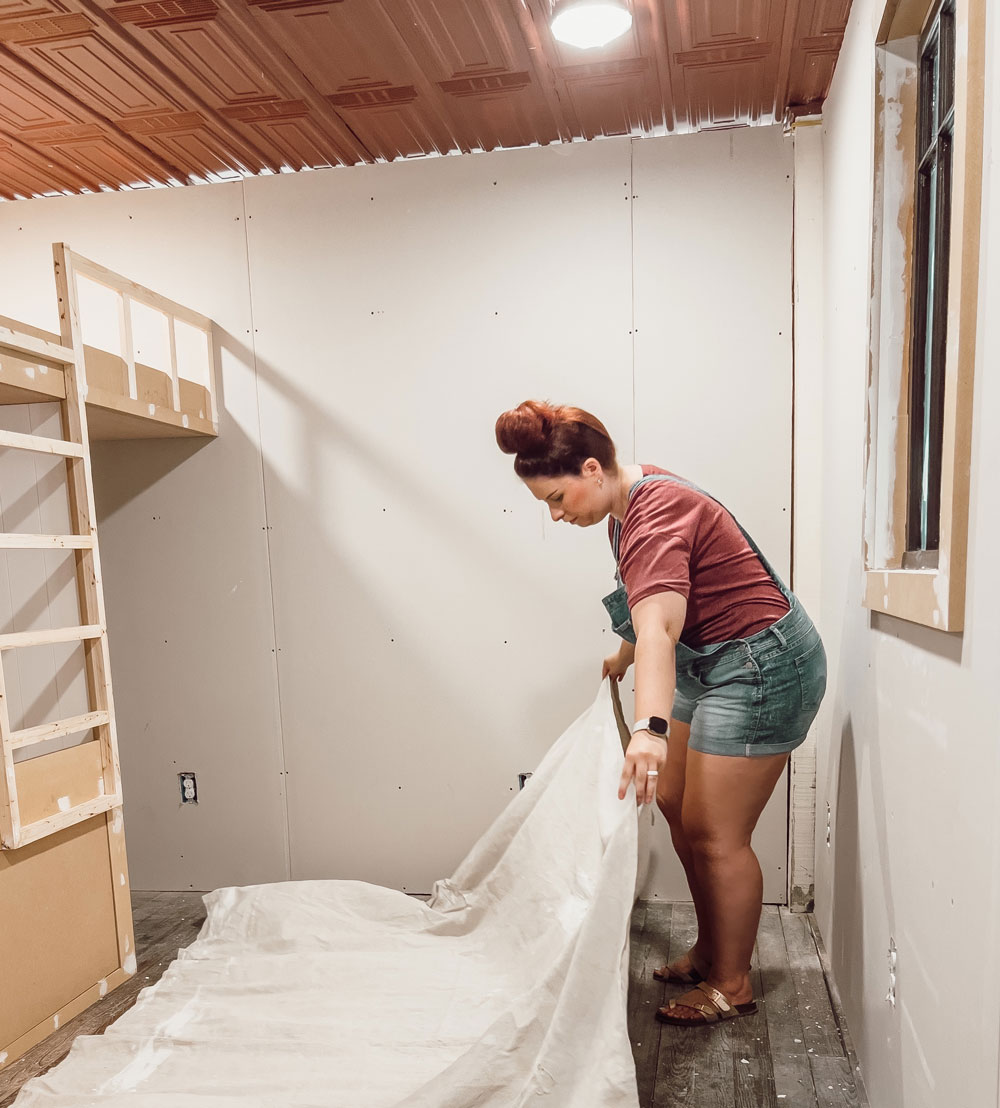
First things first, we need to cover the recessed lighting with plastic bags and lay drop cloths over the hardwood flooring. We will be spraying the primer over some areas that also need to be primed (like the walls and bed), so there is no worry of overspray on these areas.
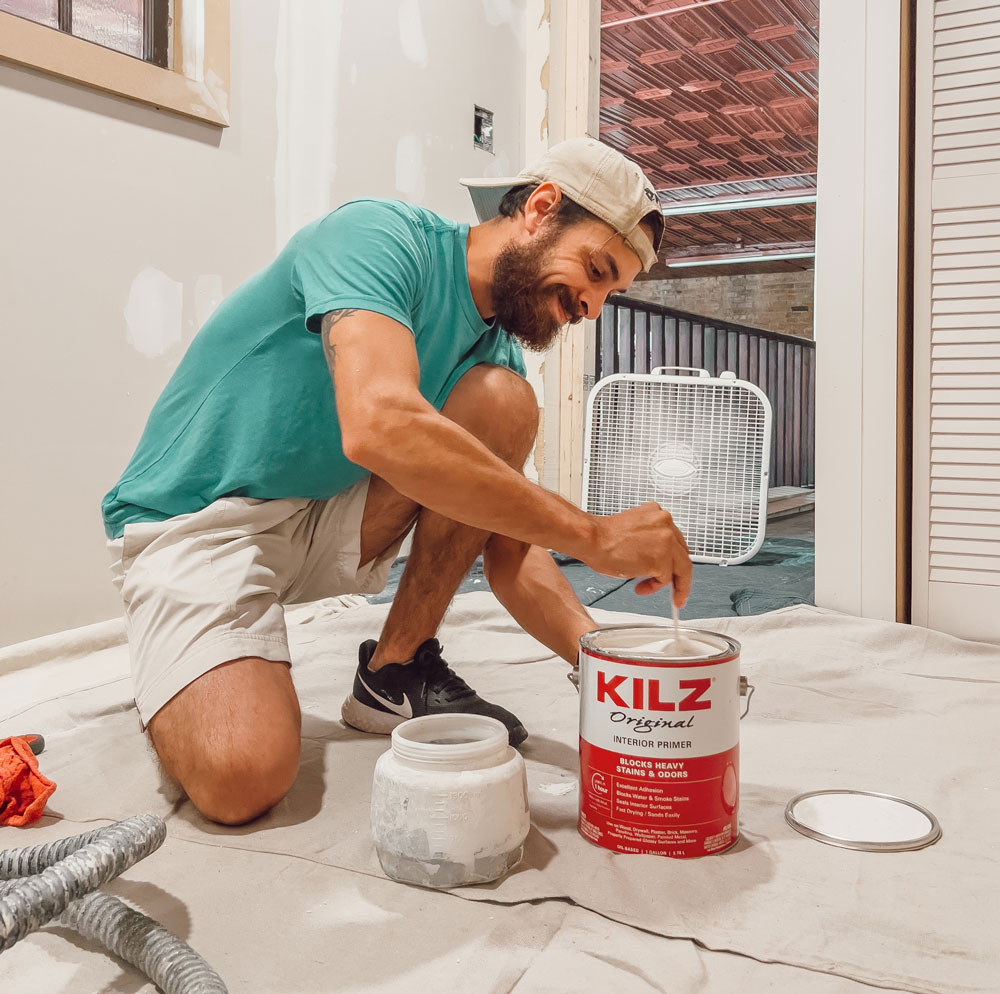
We always, always make sure to stir KILZ Original Interior Primer before painting because it is very common for the ingredients to separate while sitting in the can.
Now that our primer is stirred and the bedroom is fully prepped and ready, it is time to start painting. Always be sure to use proper PPE when painting with oil-based paint. We like to gear up with a face respirator mask, a hooded paint suit, and protective eyewear.
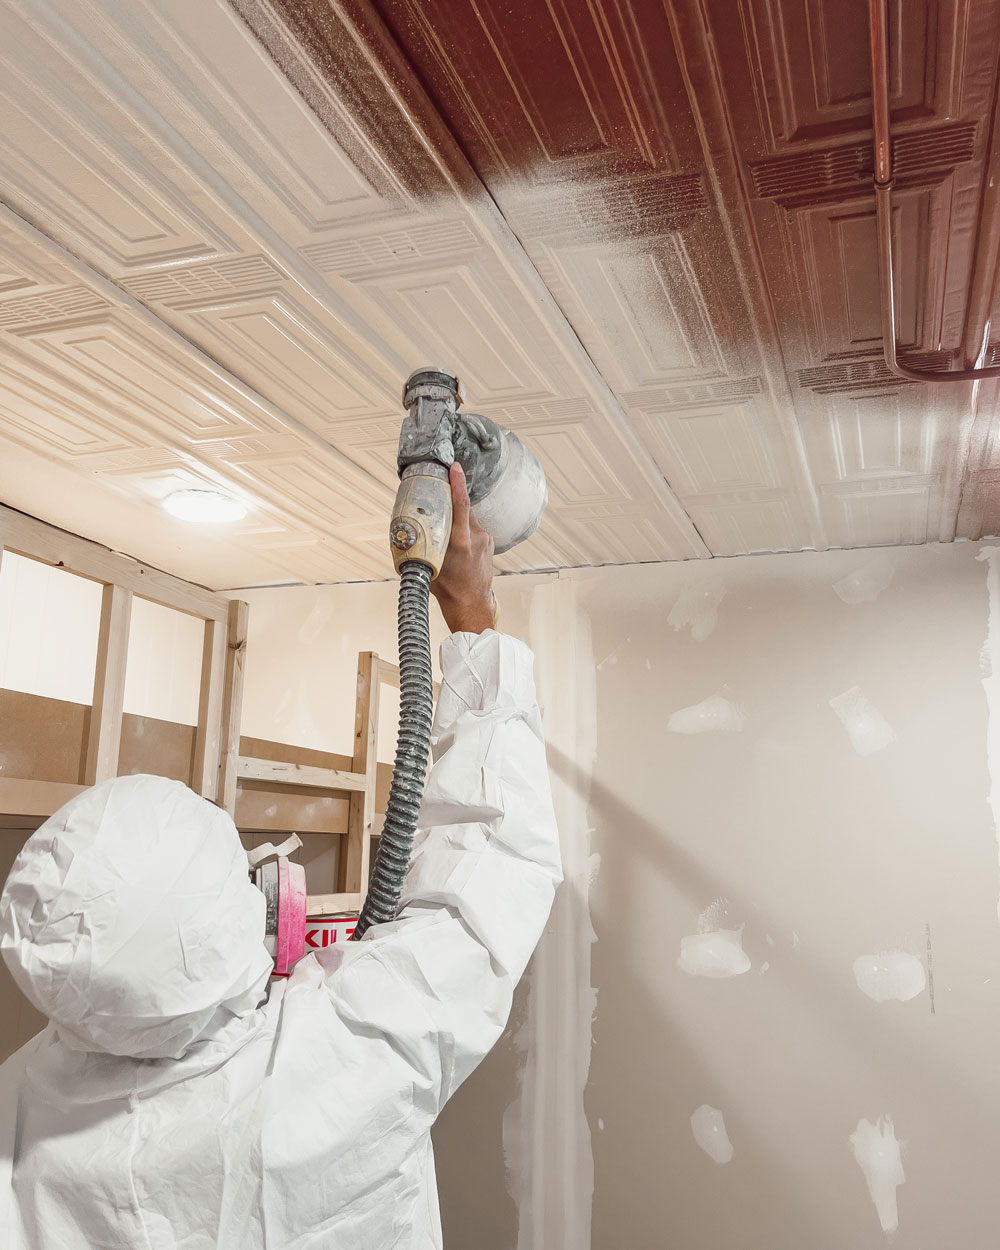
We have found that slow and steady is the best method for even coverage with KILZ Original Interior Primer. It dries quickly, but not so quickly that the process needs to be rushed. Back and forth motions are the easiest way to get in all the grooves of this super detailed tin ceiling.
And without further ado…drumroll, please… it is time for the final reveal of the painted tin ceiling!
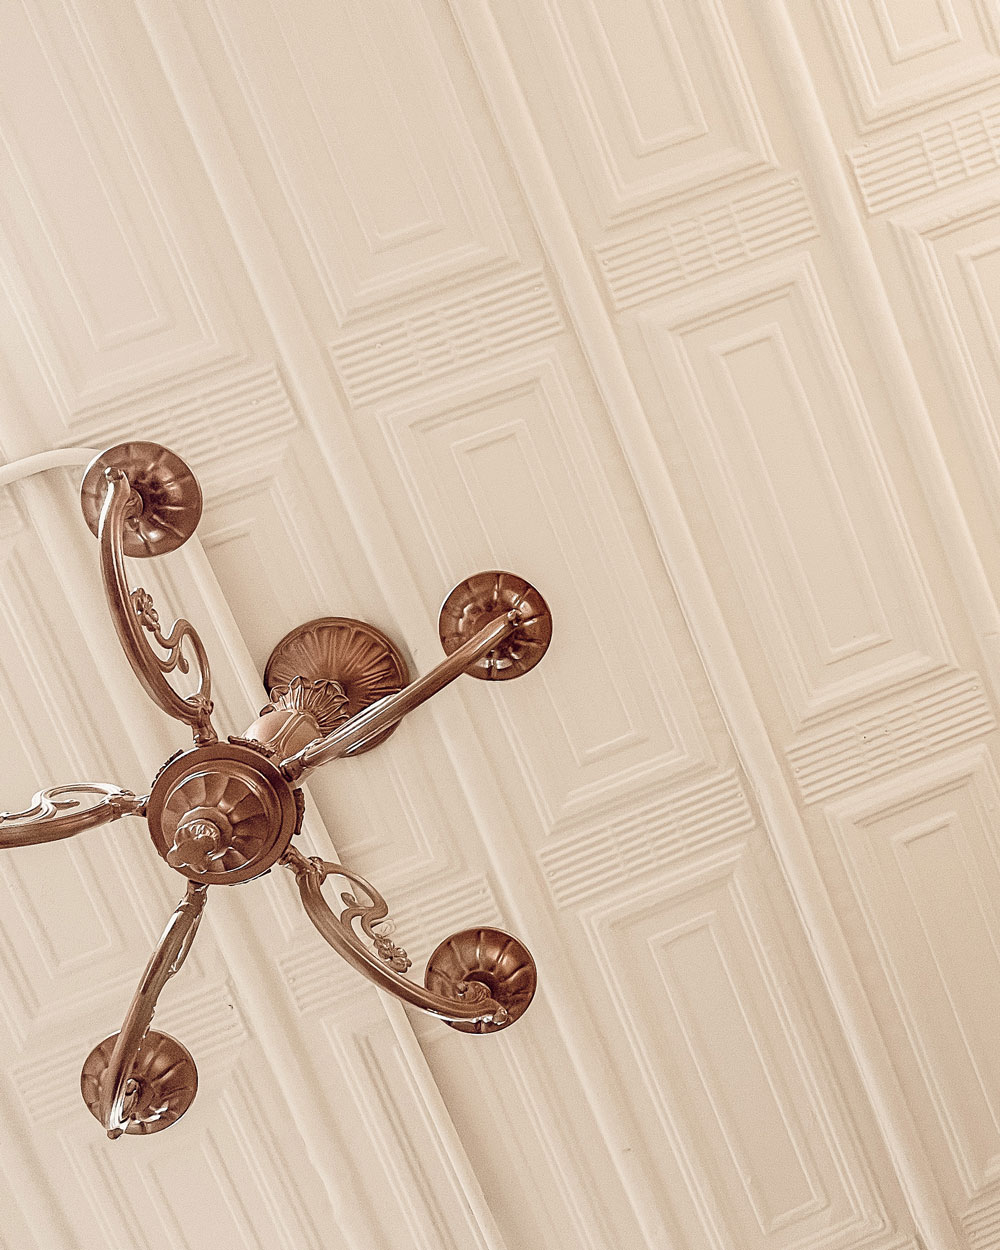
We finished this project by coating the primer with Behr Premium Plus Interior Ceiling Flat paint in the shade Warm Marshmallow. The ceiling now has a soft, warm glow to it, and all of the scuffs, scratches, and imperfections are covered. We could not be happier with this finish. If you have ever wanted to paint a tin ceiling of your own, KILZ Original Interior Primer. is the way to go. It can be used on wood, drywall, plaster, paneling, wallpaper, masonry, brick, painted metal, and properly prepared glossy surfaces. It is, however, not recommended for mold or mildew-prone surfaces or flooring. You can learn more about preparation, application, and product specifications HERE.
Thank you for following along on this project!
Kenny & Kate
*This is a paid partnership with Kenny and Kate
Always remember to refer to our website kilz.com or product back labels for additional information on which primer is right for your project and detailed instructions on how to apply our products. Check out our Coverage Calculator to understand your estimated paint needs for your upcoming project.
RELATED ARTICLES
get inspired:
FOLLOw us:
@kilzbrand
SHOP
PRODUCTS
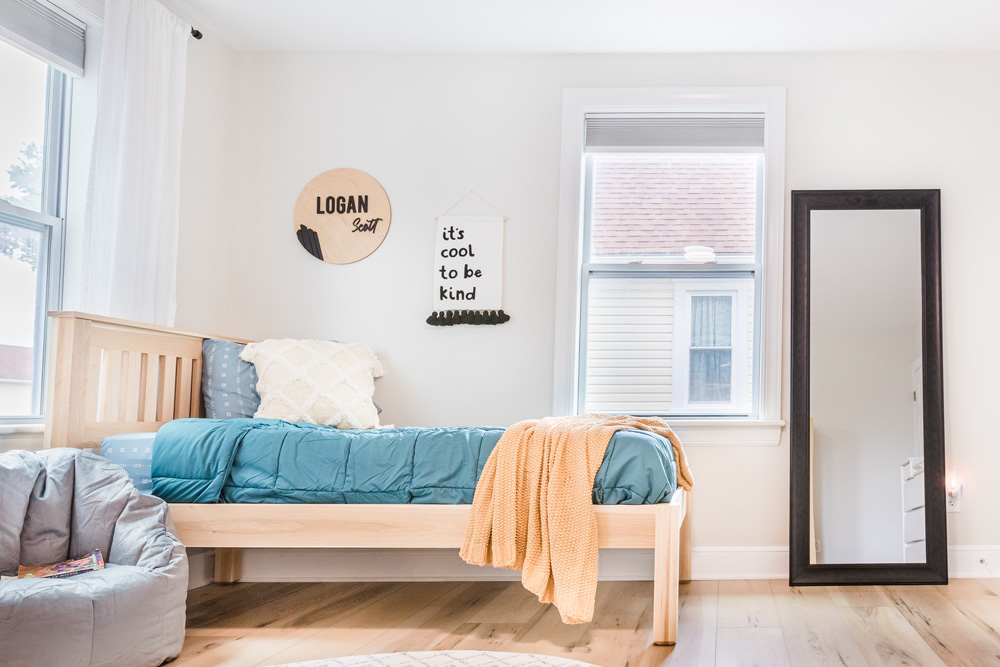
Kids Room Refresh with Oak Hill Millworks
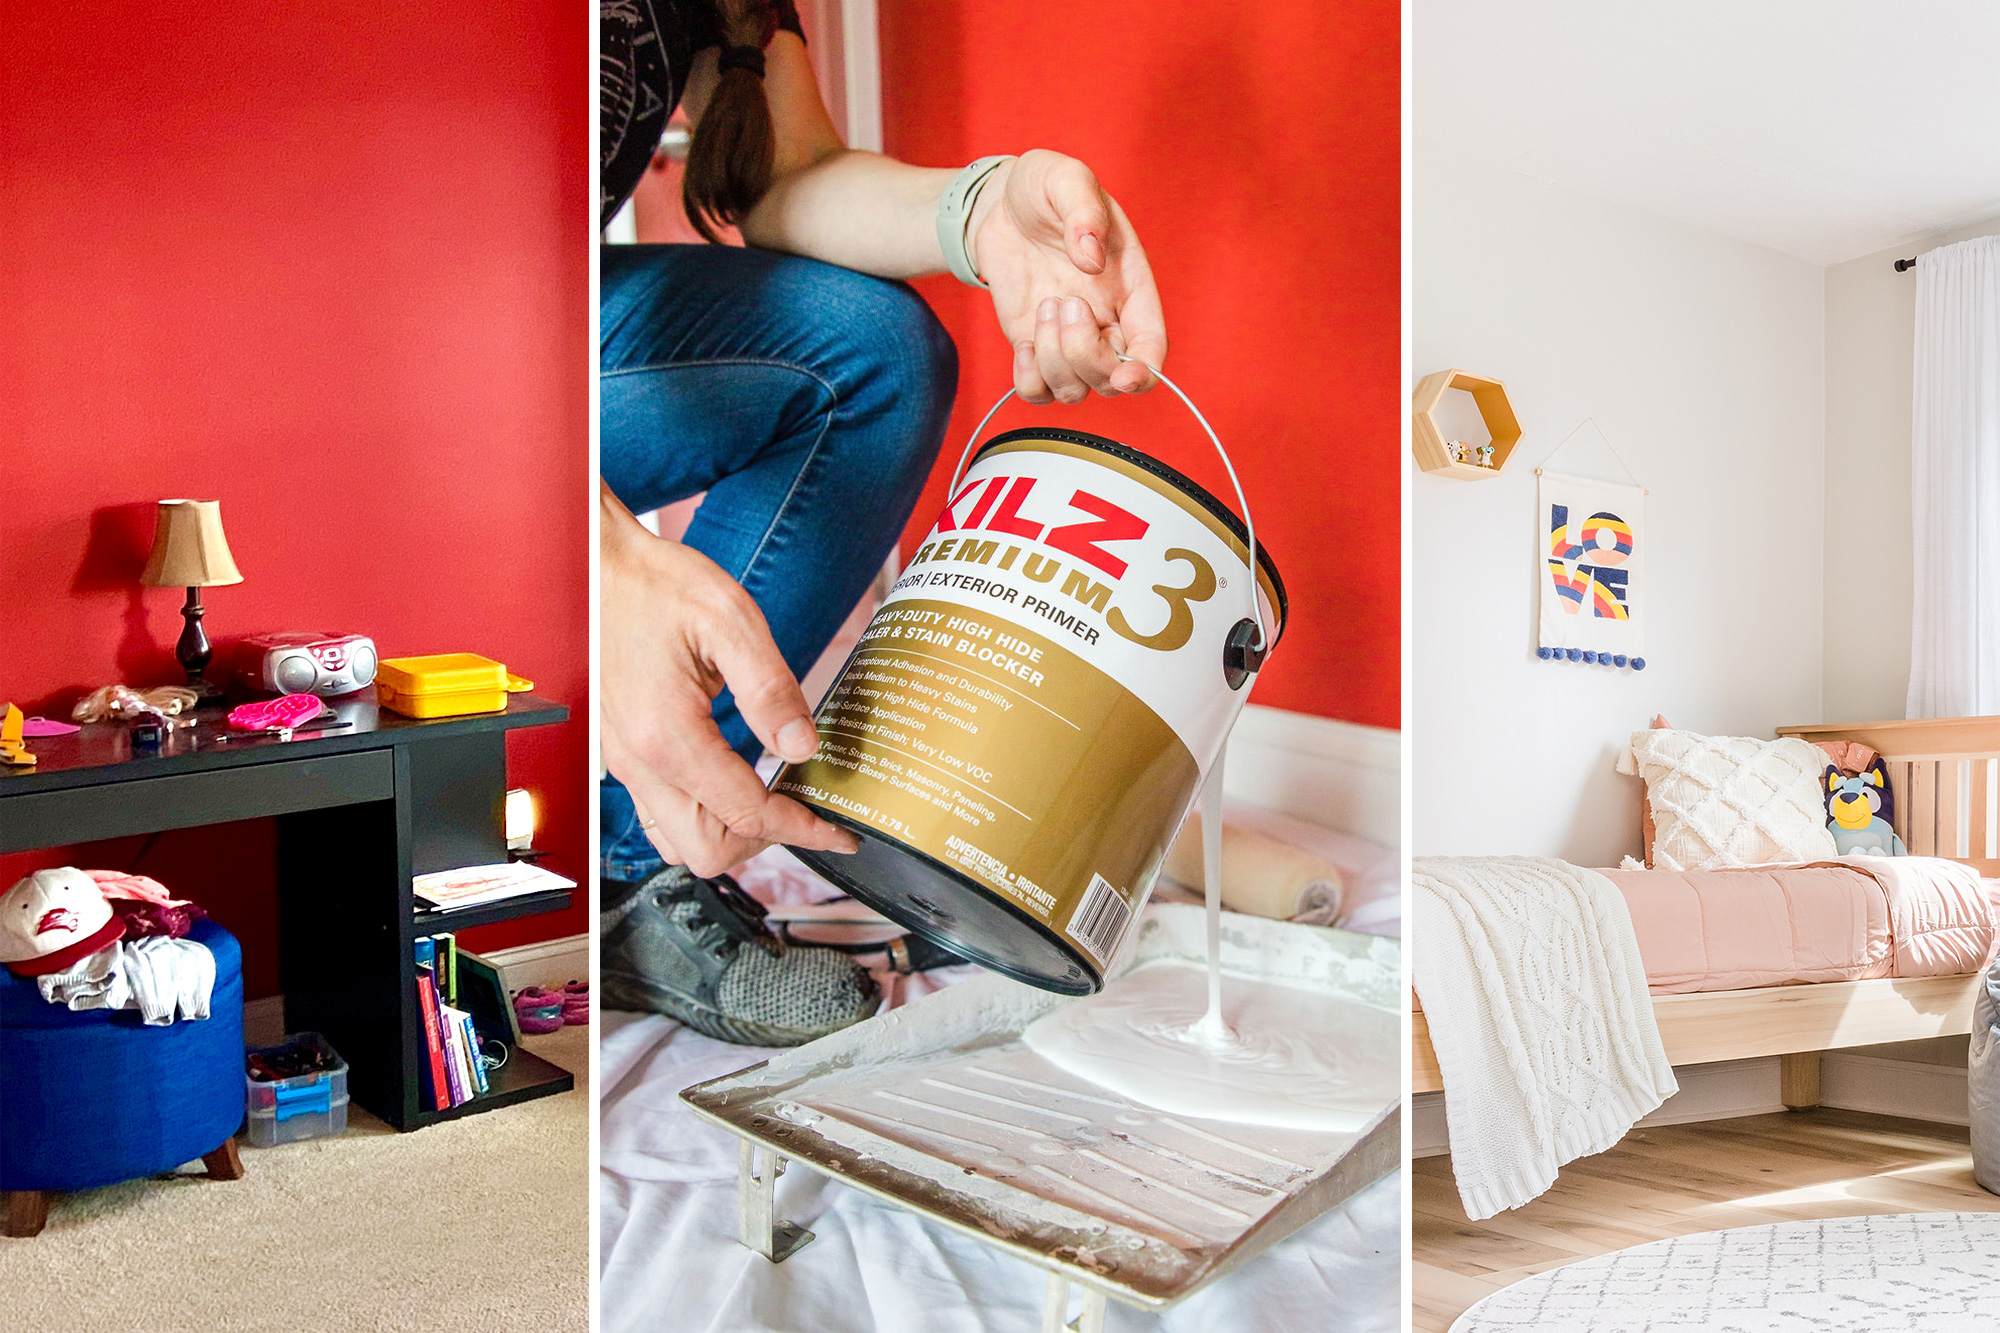
August 10, 2022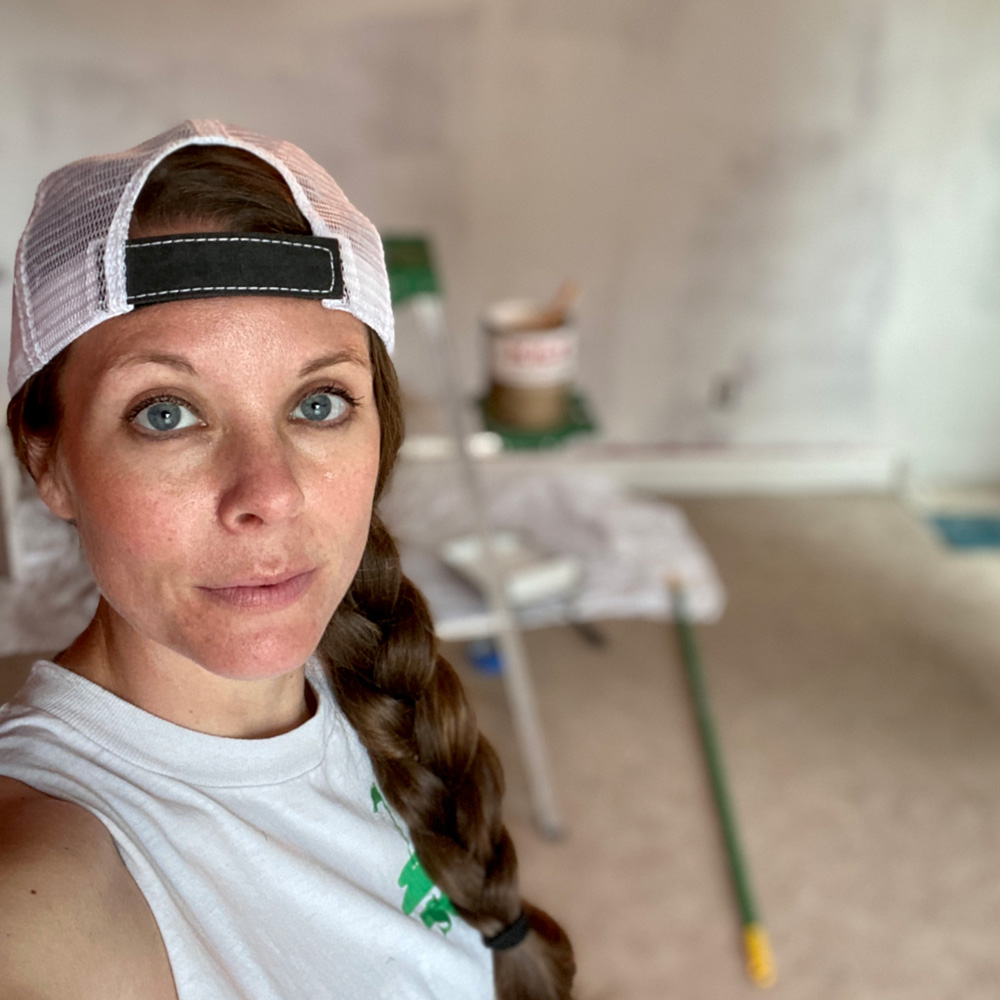 What’s up, guys? Christy here with Oak Hill Millworks and today I am recapping a home renovation project that I just wrapped up for my kids! Before we dive into the details, let me introduce myself. I am a small business owner in New Brighton, PA and my family is relocating to Kokomo, Indiana.
So, I recently found myself wanting to brighten my kids’ room up and expand it a bit. Are any fans of demolition reading this? Our house had a 2′ x 3′ foot bump out in the corner of the kids’ room, and we knew there was a chimney behind it. We assumed it was leveling off in the attic, considering there wasn’t a chimney coming out of the roof. I went against my better judgment and started what should have been a simple refresh with primer and paint with demolition instead.ͭ
ͭ Behr Paint Company strongly recommends the use of highly skilled professionals when undertaking a project that requires demolition.
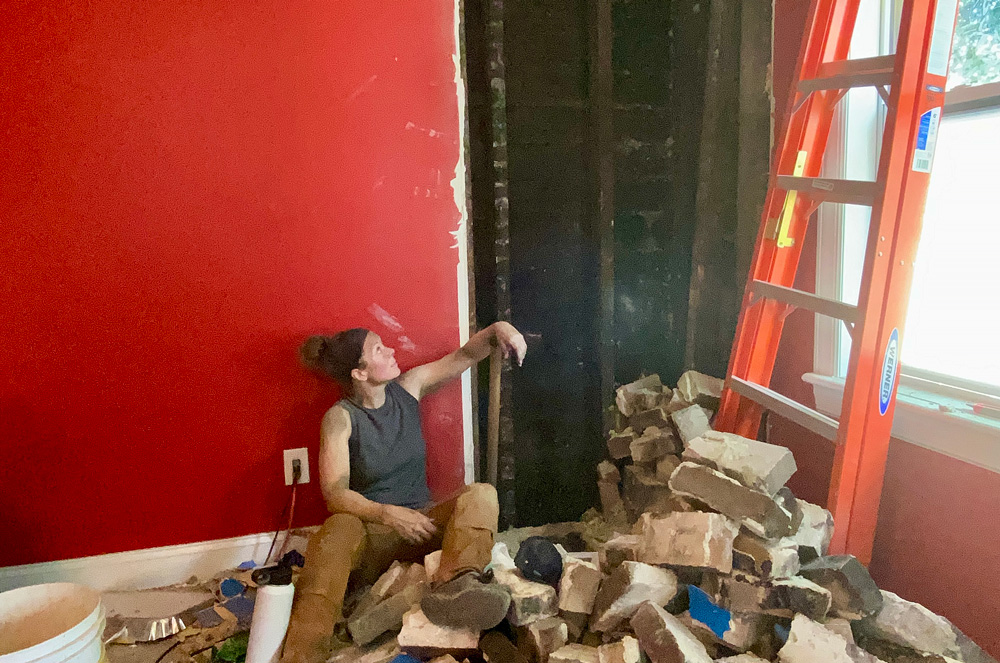
Was it worth it to go through all that manual labor to gain an extra 6 square feet of floor space in their room? I vote yes! I love to challenge myself and taking a chimney out on your own, reframing a wall, hanging new drywall, and finally doing the FUN DIY work of painting was a great challenge for me to say the least. Once I finally got the room cleaned up and the walls wiped down, it was time to prep for primer!
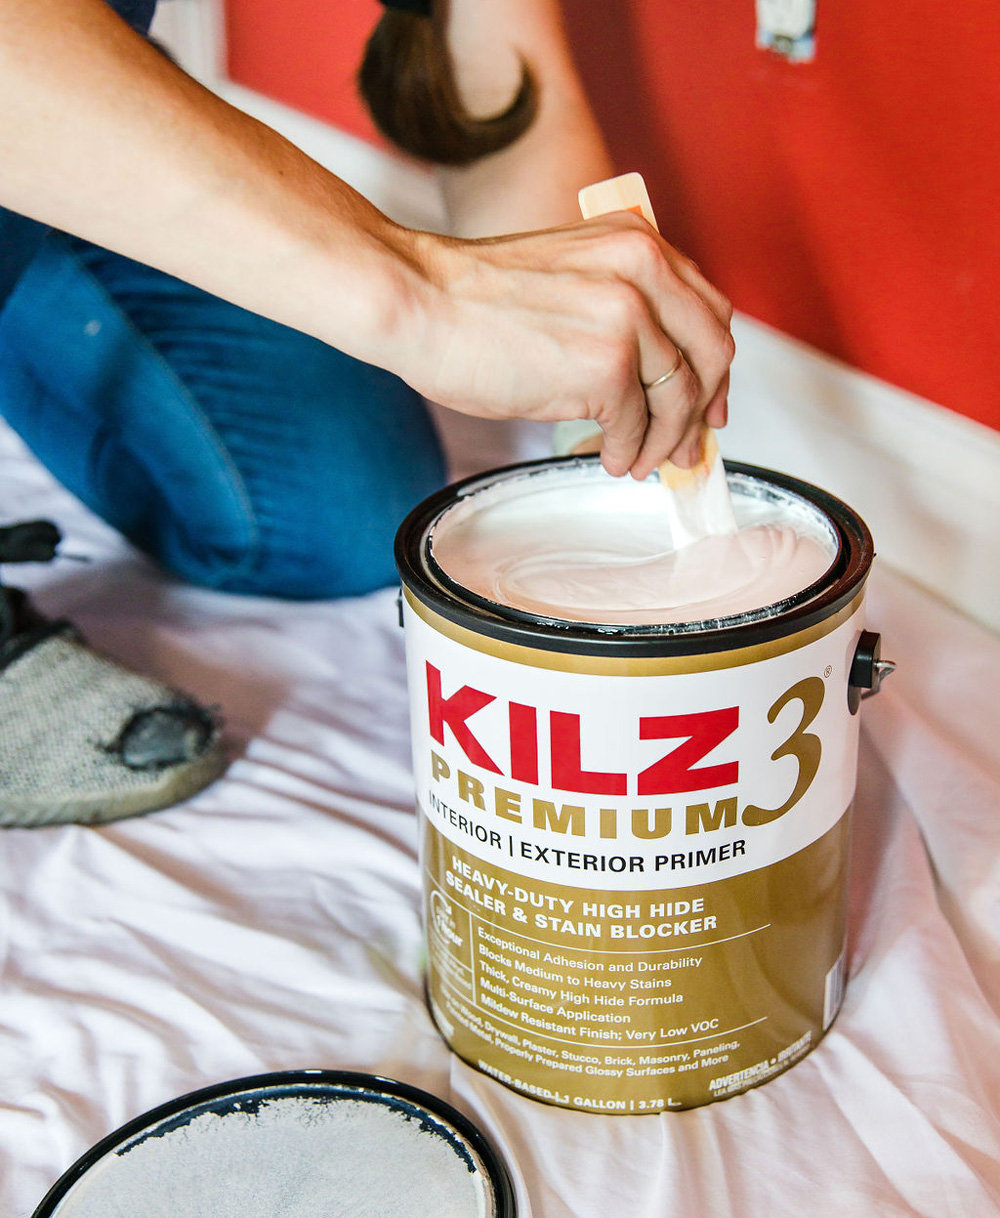
The dark red walls needed a high-hide primer formula to prevent color bleed-through and, because of its thicker formula, help fill in any small dimples or imperfections in the wall. For the majority of the room, I chose KILZ 3® Premium Primer to get the job done well, rather than just getting the job done well enough.
Priming is foundational for any painting project for good adhesion and just in case you missed things like pencil marks or greasy fingerprints when you were cleaning your walls at the beginning, KILZ 3 Premium Primer will act as a stain-blocker to prevent those marks from showing up.
My room prep this time around was minimal, I taped around windows since I tend to go rogue with my rollers! I did not use drop cloths because I knew I was also going to rip out the carpet and install new flooring, otherwise I would 100% recommend drop cloths. I almost ALWAYS spill paint one way or another!
After rolling on 2 coats of KILZ 3 Premium Primer, it was time to see the room take shape by painting with BEHR® Premium Plus Interior paint in Silver Drop. I have always felt that painting a room is truly the best and most cost-effective way to really allow a space to become something new. A great tip, if you are rolling paint on, is to wrap your roller in inters’ tape and then unwind it and watch some fuzzies come loose — this prevents those fuzzies from getting in your topcoat! Beyond that, though, don’t skimp on the roller. Spend a couple of extra bucks and get a nicer one; you won’t regret it. It truly does make a difference in the finish.
Drumroll please… here it is!
Priming was a necessary step to block that deep red color from breaking through since we went so light on the topcoat color. Not priming could cost you time and money in the long run, so don’t skip that step. I am so happy with how this room remodel turned out. Although I did some major renovations to add to the overall transformation, priming & painting were ESSENTIAL in making it look like a brand new, light & bright space.
Doesn’t it look so much bigger too? Hard to deny that primer is key for Instagram-worthy photo finishes. Time to chalk this one up as a win and get started planning my next DIY project! Cheers!

*This is a paid partnership with Oak Hill Millworks
Always remember to refer to our website kilz.com or product back labels for additional information on which primer is right for your project and detailed instructions on how to apply our products. Check out our Coverage Calculator to understand your estimated paint needs for your upcoming project.
RELATED ARTICLES
get inspired:
FOLLOw us:
@kilzbrand
join the conversation:
SHARE this post: