Tag: Products
Truer Color Starts Here
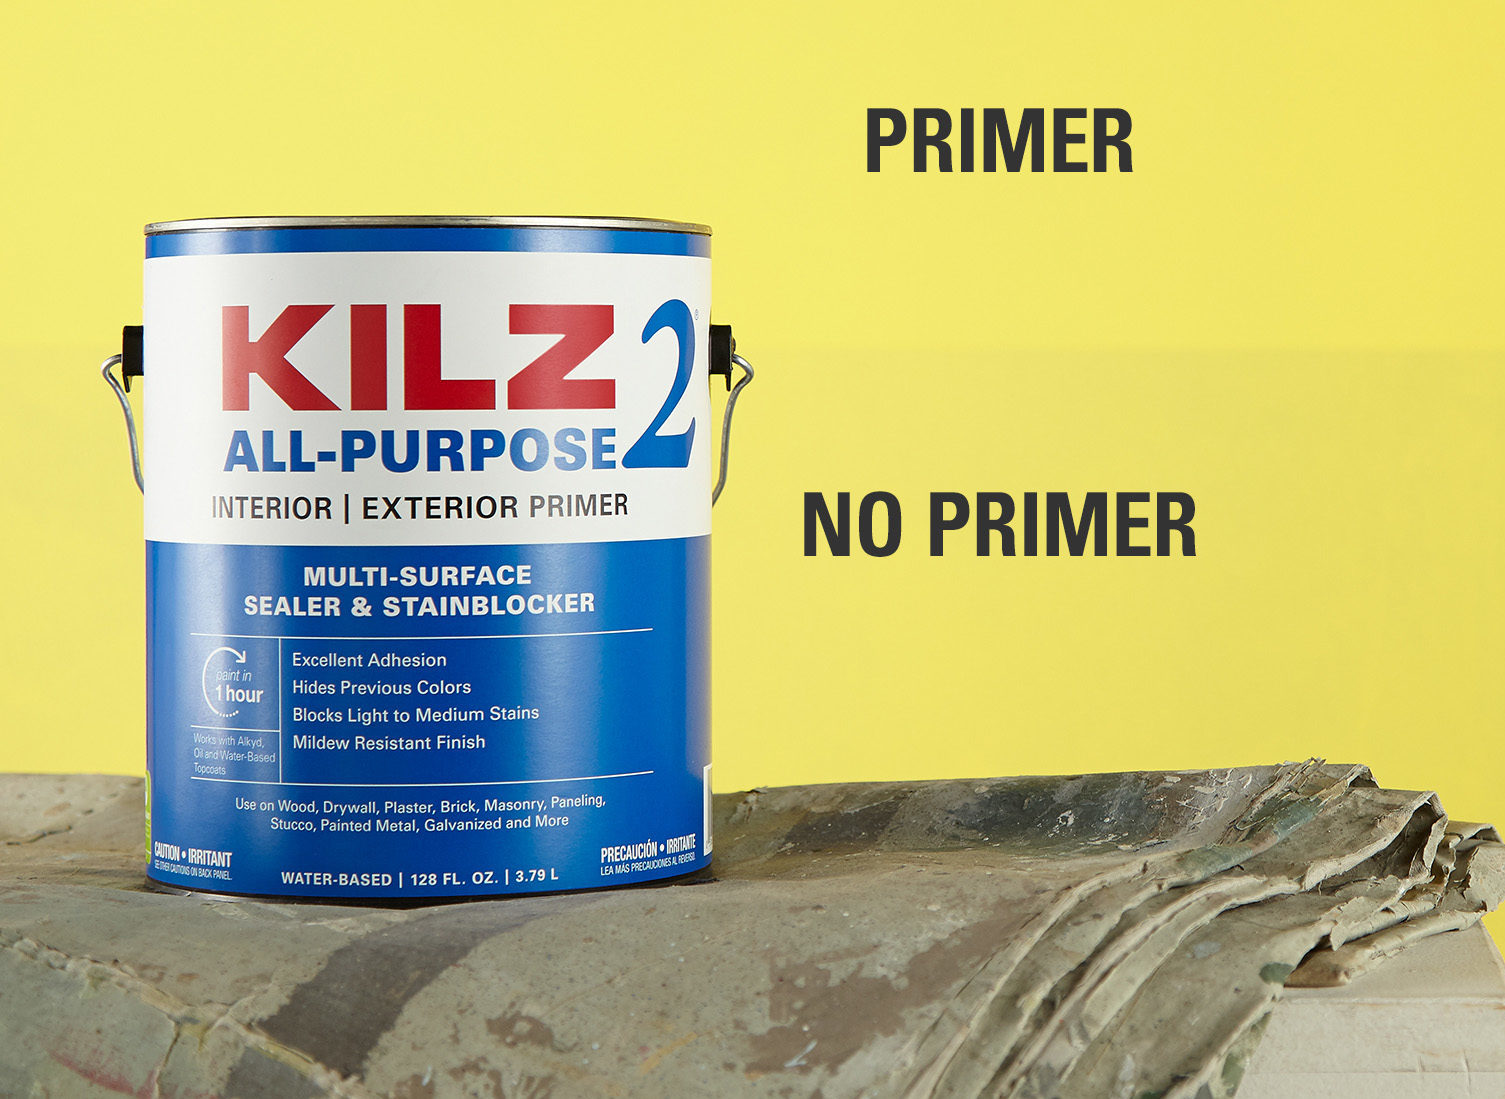
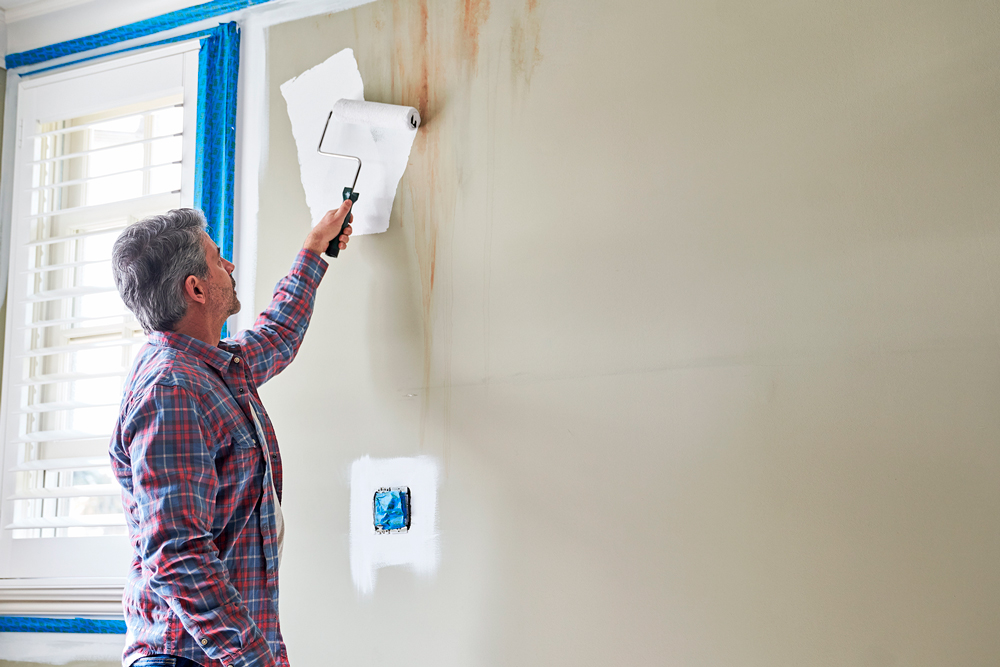
March 30, 2020Imagine that you’ve spent hours scrolling through social media sites and flipping through magazines, on the hunt for the perfect paint color. Eventually, you zero in on a color family and visit a home improvement store to select a few paint chips or samples to take home. And finally, you’ve done it! You have your perfect paint color chosen and you’re ready to transform your space. But what if, when it’s finally on your walls, it doesn’t appear to be the color you selected? If you don’t use the right primer before painting, this could happen to you.
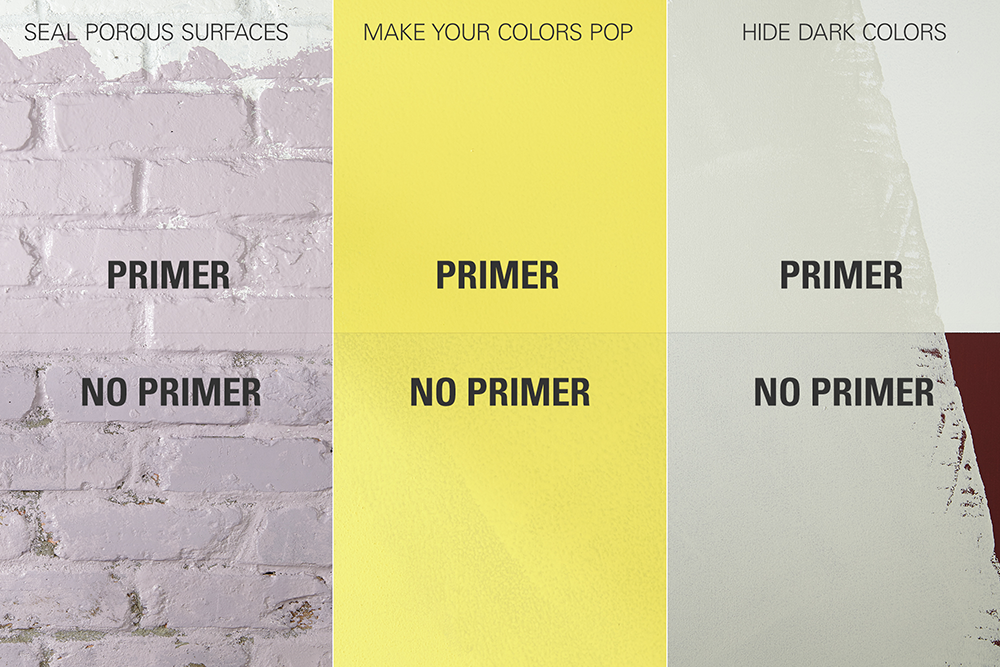
When painting a light color over an existing dark color, a primer with a high-hiding formula is recommended. KILZ® 3 Premium primer is a water-based primer that has a thicker formula with enhanced hiding. Priming a dark wall with KILZ 3 Premium before you paint over it with a lighter color will assist in a truer and richer color from your topcoat.
Specific surface types you might be painting can also affect how the final paint color turns out if the right primer isn’t applied first. If not properly sealed, porous surface like brick can soak up a lot of paint and cost you valuable time and money. Not to mention that if not properly primed, the typical red color of most brick can change the appearance of your paint color if the brick is not primed before it’s painted. For brick surfaces, we often recommend KILZ 2 All-Purpose or KILZ 3 Premium, depending on the color and current state of the brick surface.
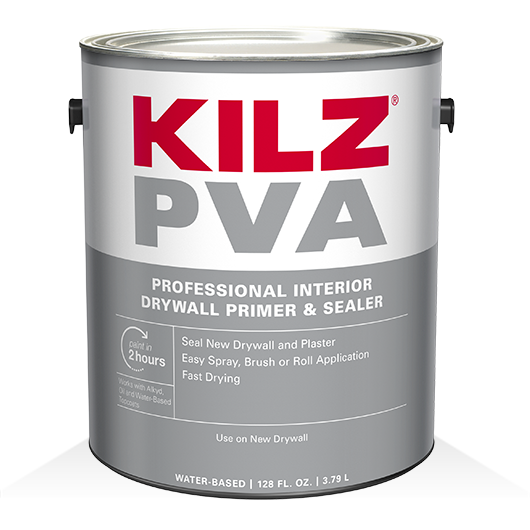
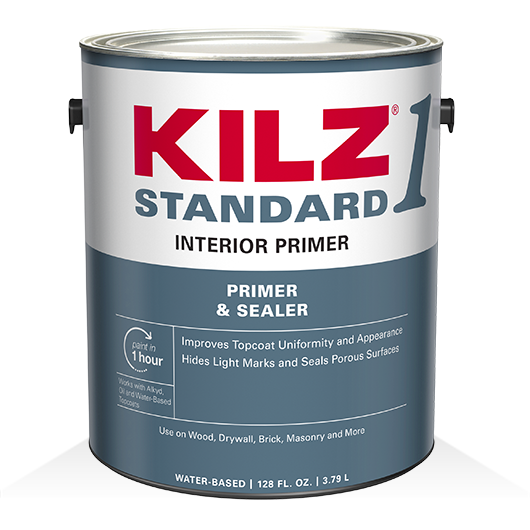
New drywall is another porous surface on which the right primer can make a big difference. When painting over new drywall, we recommend priming first with KILZ® PVA Drywall Primer – a fast-drying, interior water-based primer formulated to prime and seal new, uncoated drywall. KILZ 1 Standard primer is another great primer to use on drywall.
For almost any surface you’re working with, priming before painting is key to ensure that the paint color you selected will show up in its truest state
Always remember to refer to our website kilz.com or product back labels for additional information on which primer is right for your project and detailed instructions on how to apply our products.
RELATED ARTICLES
get inspired:
FOLLOw us:
@kilzbrand
Truer Coverage Starts Here
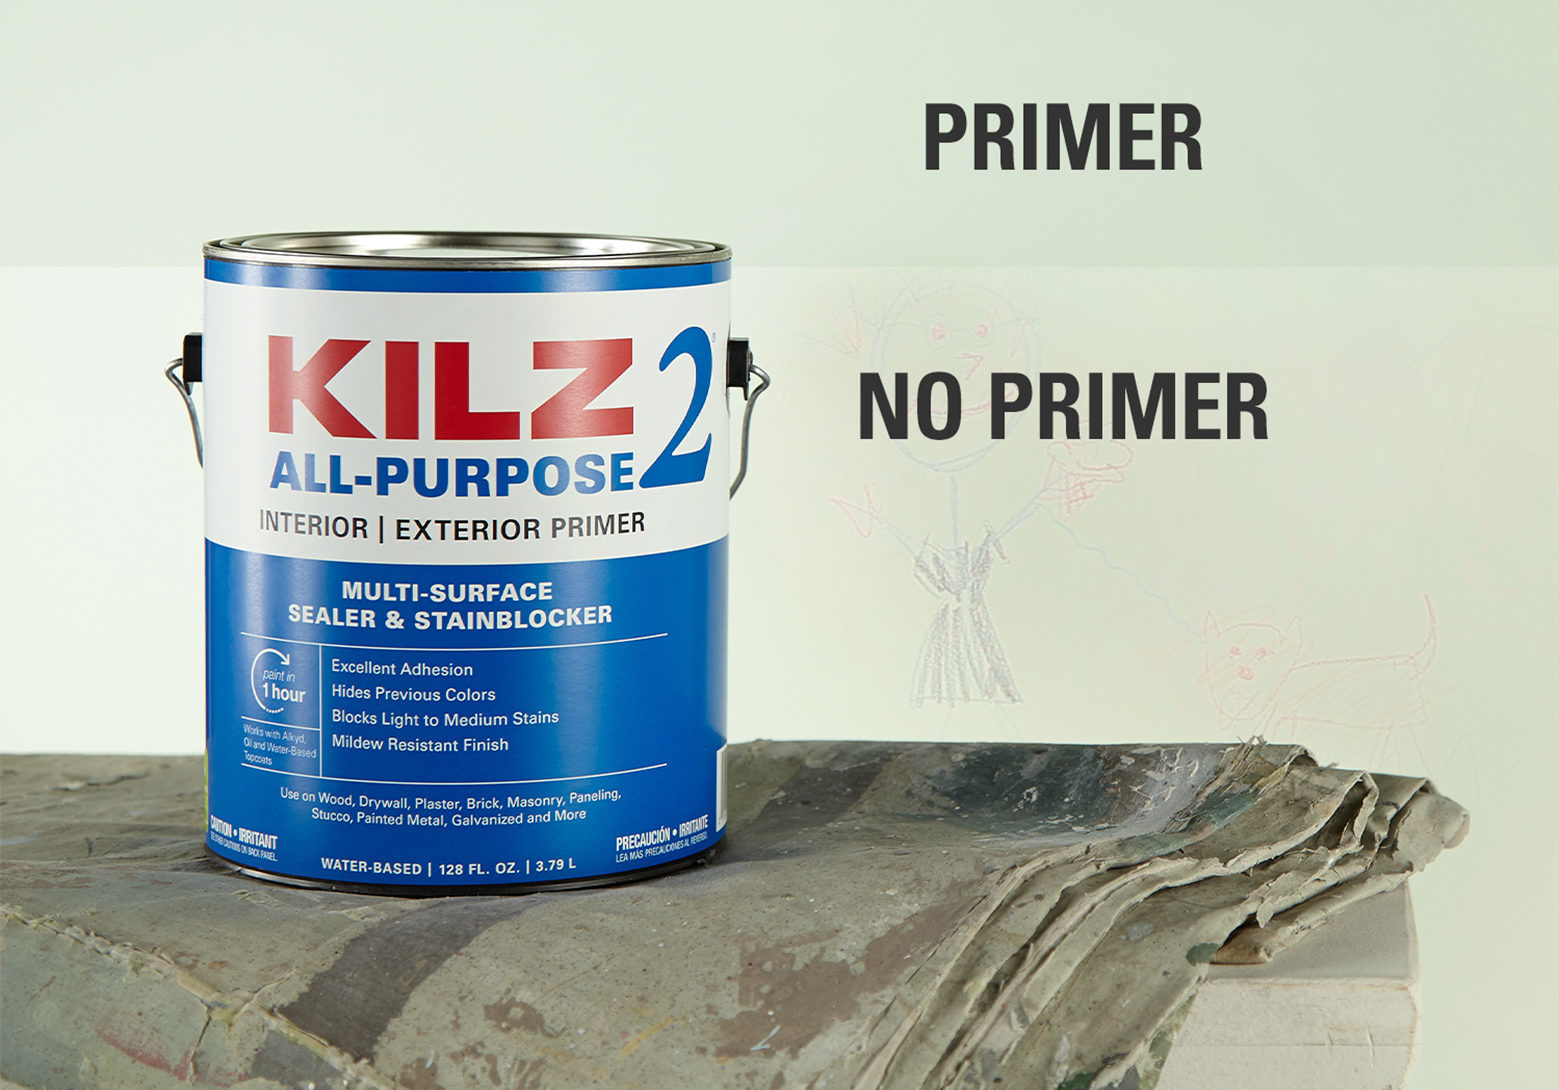
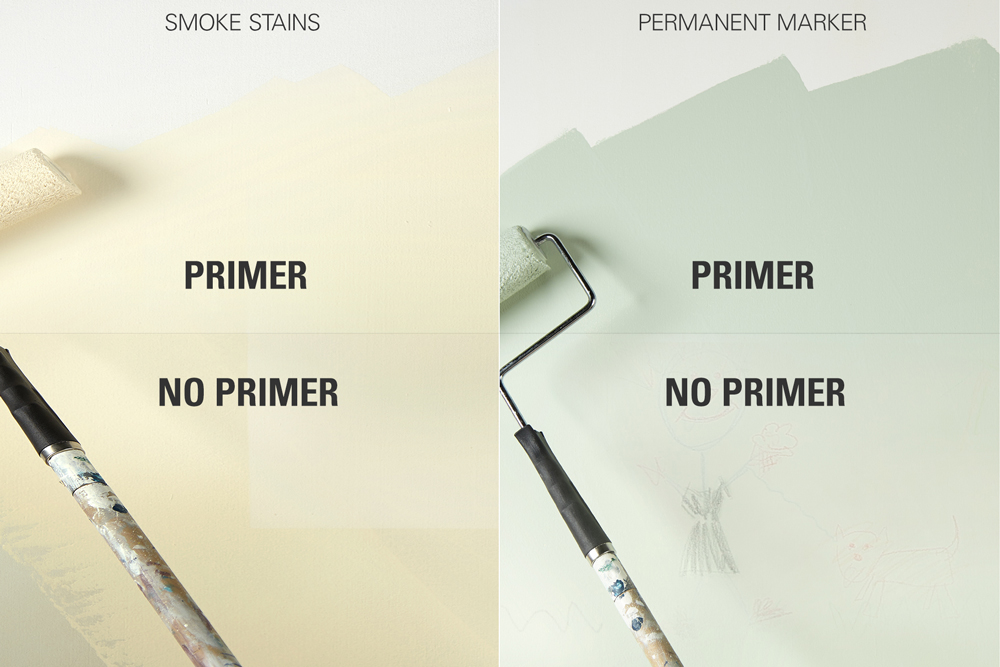
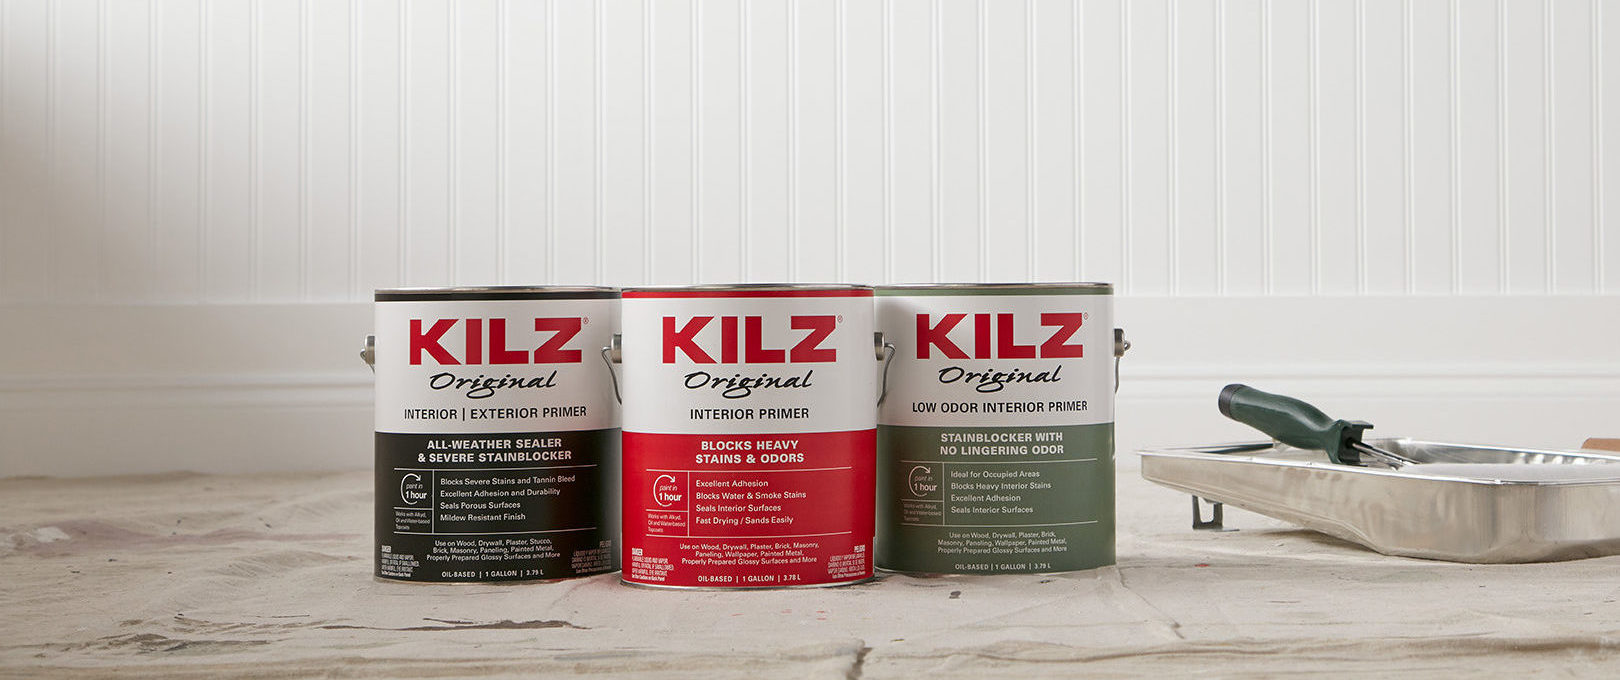
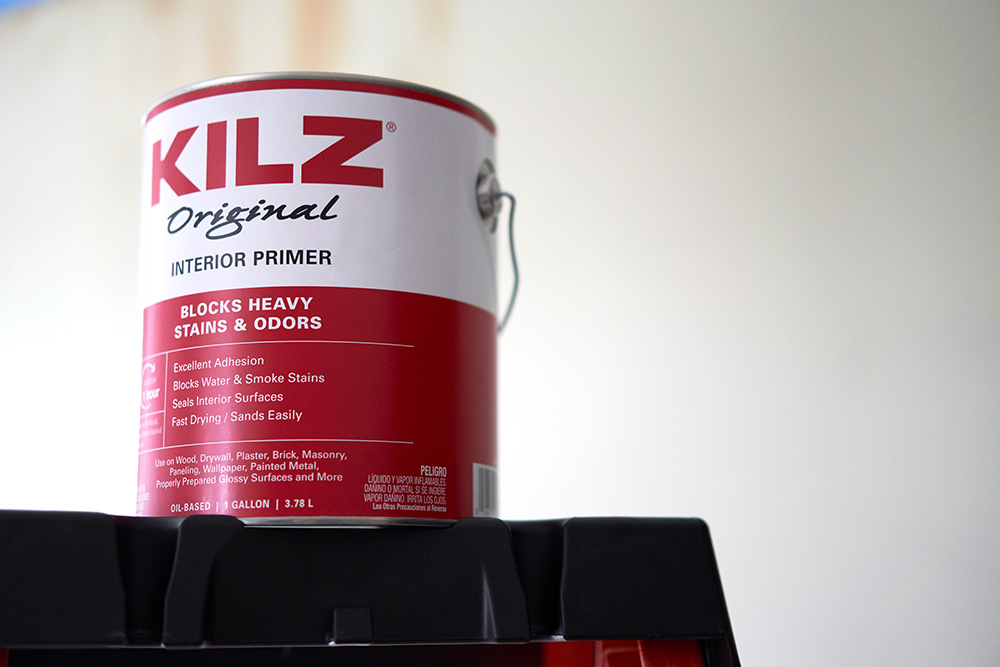
March 30, 2020When you’ve finally found that perfect paint color for your walls or furniture re-painting project, the last thing you want is a pre-existing stain to seep through and ruin your new color! Even light to moderate stains like scuff marks or crayon marks can bleed through paint, so it’s important to prime first to create a barrier. If you’re dealing with a lighter stain, KILZ 2® All-Purpose primer is a great choice. A water-based formula with enhanced hiding, KILZ 2 All-Purpose is formulated to block light to medium stains and hide previous colors.
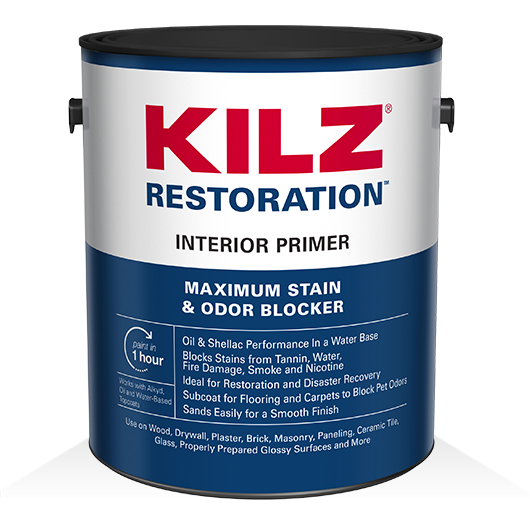
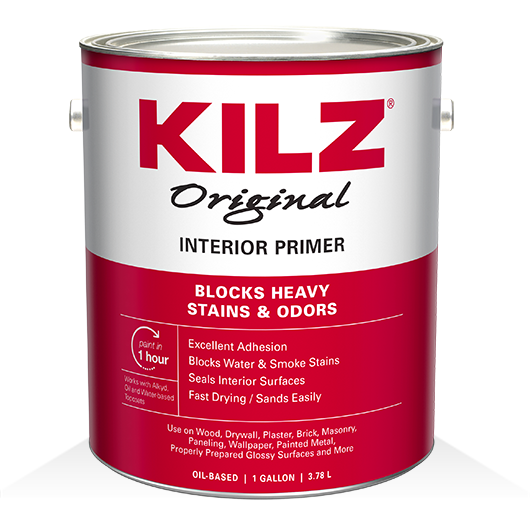
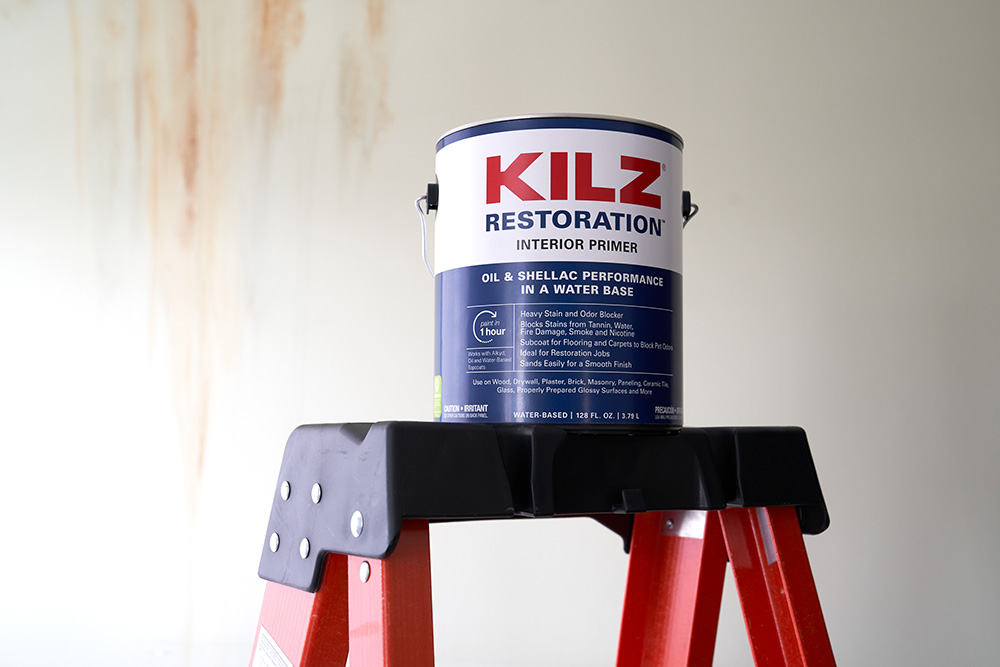
A severe stain calls for a heavy-duty primer – and we have more than one that are up for the job! KILZ® Primer is a preferred choice of pros for stains caused by fires, floods, persistent exposure to pets or smoke stains from fire damage, soot and charring. Stain blocking primers also work great on permanent marker, grease and nicotine stains. KILZ® Original, trusted by pros for over 40 years, has excellent sealing and adhesion properties and is formulated to block heavy stains. Another great choice is KILZ Restoration, a water-based primer that offers the performance of a traditional oil and shellac-based primer. A heavy stain and odor blocker, KILZ Restoration can block stains from tannin, water, fire damage, smoke, nicotine and more.
From colorful crayon stains to unsightly smoke damage, truer coverage starts with KILZ primers.
Always remember to refer to our website kilz.com or product back labels for additional information on which primer is right for your project and detailed instructions on how to apply our products.
RELATED ARTICLES
get inspired:
FOLLOw us:
@kilzbrand
Renovating After Natural Disasters
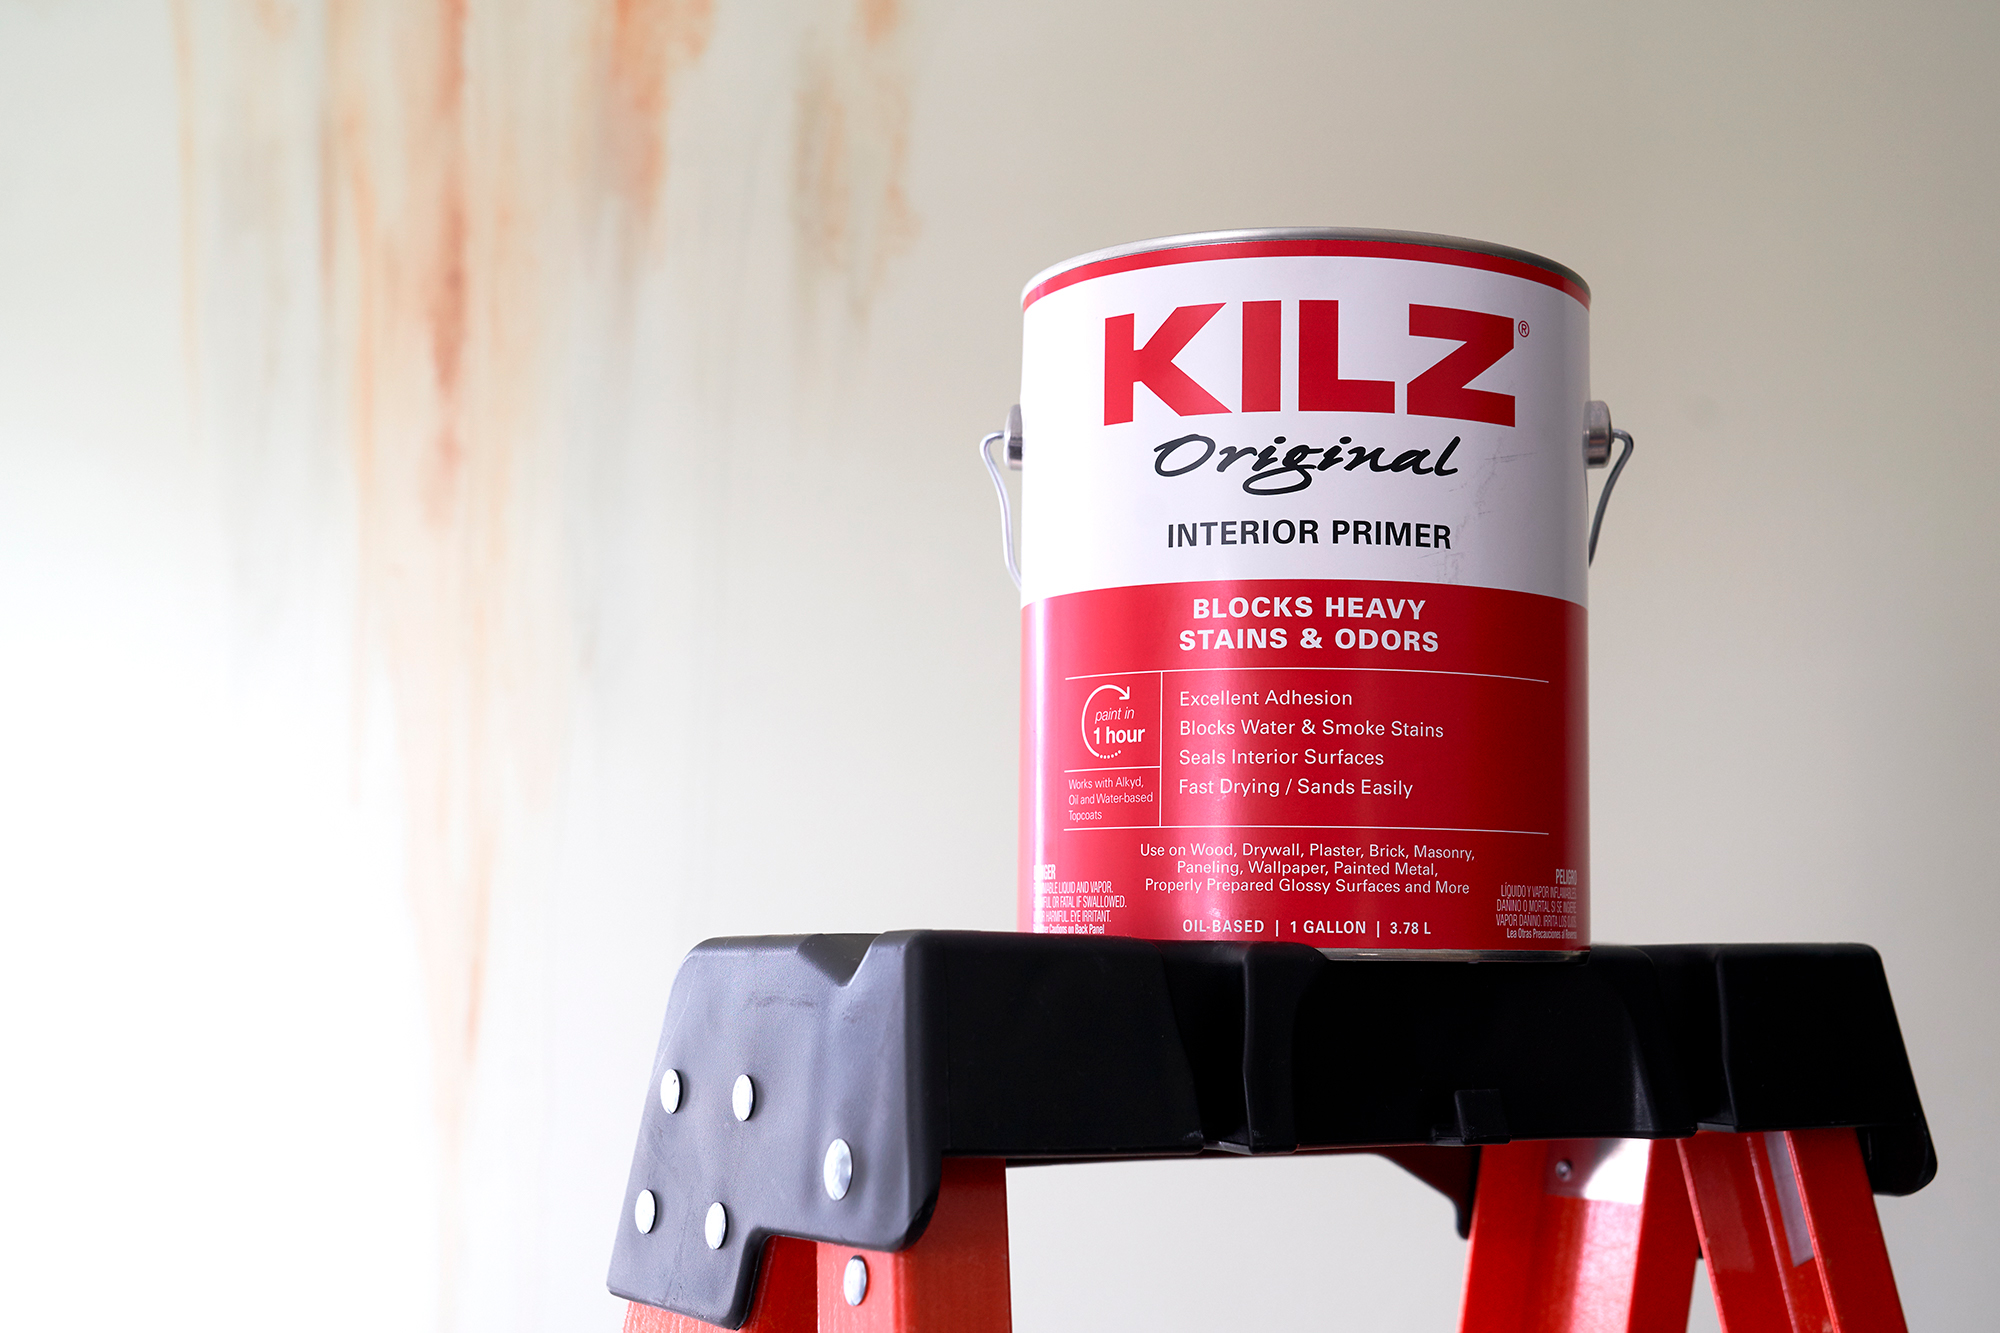
March 30, 2020Fixing or rebuilding a home after a natural disaster like a flood, hurricane or fire is no easy task. In the worst-case scenarios, the help of a professional contractor might be in order. But if you’re looking to DIY your renovation after a disaster has left your home with water, fire or smoke damage, KILZ® Primers can help! Trusted by pros for over 40 years, KILZ primers are often the go-to products for tackling stains caused by fires, floods and persistent exposure to smoke.
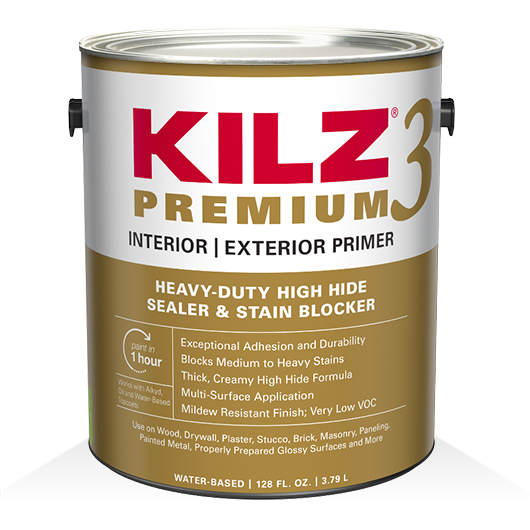
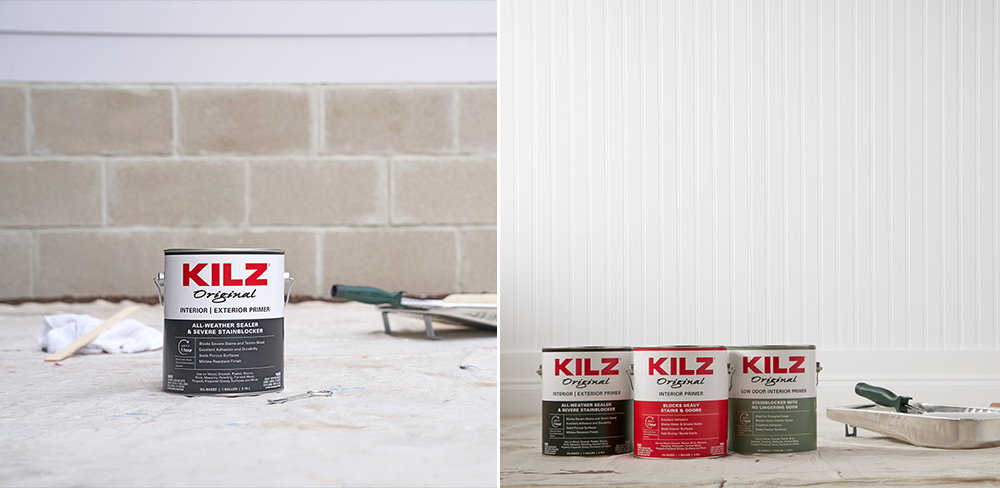
If you’ve got your work cut out for you after a flood or fire has necessitated a renovation, KILZ® Original Interior Primer is made for the job. This hardworking oil-based primer is formulated to block heavy stains including those caused by water or smoke, and its fast-drying formula can help you get on with your renovation project faster.
For restoration jobs on the outside of your home, KILZ Original Interior | Exterior Primer offers the same power of KILZ Original Interior Primer in an all-weather formula. Offering excellent adhesion and durability, KILZ Original Interior | Exterior can be used on wood, drywall, plaster, stucco, brick, masonry, paneling and more.
Always remember to refer to our website kilz.com or product back labels for additional information on which primer is right for your project and detailed instructions on how to apply our products.
RELATED ARTICLES
get inspired:
FOLLOw us:
@kilzbrand
SHOP
PRODUCTS
Odor Blocking Primers for Fresh as Spring Painting Projects
March 16, 2020Spring brings new beginnings and is often the perfect time to tackle a painting project you’ve been putting off. If you have a room renovation project that includes the added challenge of ridding the space of stale smells or bad odors, KILZ® Primers can help. From pet odor to the lingering smell of smoke (even long after the smoker is gone!), unpleasant odors can get stuck in your home and seem near impossible to remove.
Odor may penetrate fresh paint, so simply repainting the walls will likely leave you with a still smelly space. For a room that looks and smells as fresh spring, we recommend priming before painting. Priming provides a barrier that prevents odor from penetrating fresh paint and KILZ offers several primers with the ability to block medium to severe odors. So which primer is right for your project?
If you’re looking for a heavy-duty odor blocking primer, KILZ® Original primer is a great choice. Trusted by pros for over 40 years, it has excellent sealing properties and can block heavy odors and stains.
Working on a project outdoors? KILZ® Original Interior | Exterior primer offers the heavy-duty power of KILZ Original in an all-weather formula with excellent adhesion to both interior and exterior surfaces.
For spaces or areas that might be sensitive to solvent odors, KILZ® Original Low Odor is an interior oil-based stain and odor blocking primer that puts off less odor than typical oil-based primers.
Looking for a water-based primer? KILZ Restoration® is a new generation water-based primer, sealer and stain blocker that offers the performance of traditional oil and shellac-based primers. It tackles tough stains and seals persistent pet, food and smoke odors. It can also be used to block odors from subfloor when replacing carpet or wood flooring.
If your next painting project includes tackling lingering odors, you can breathe easy knowing that KILZ primers can help you get the job done.
Always remember to refer to our website kilz.com or product back labels for additional information on which primer is right for your project and detailed instructions on how to apply our products.
RELATED ARTICLES
get inspired:
FOLLOw us:
@kilzbrand
Prep & Paint a Porous Surface
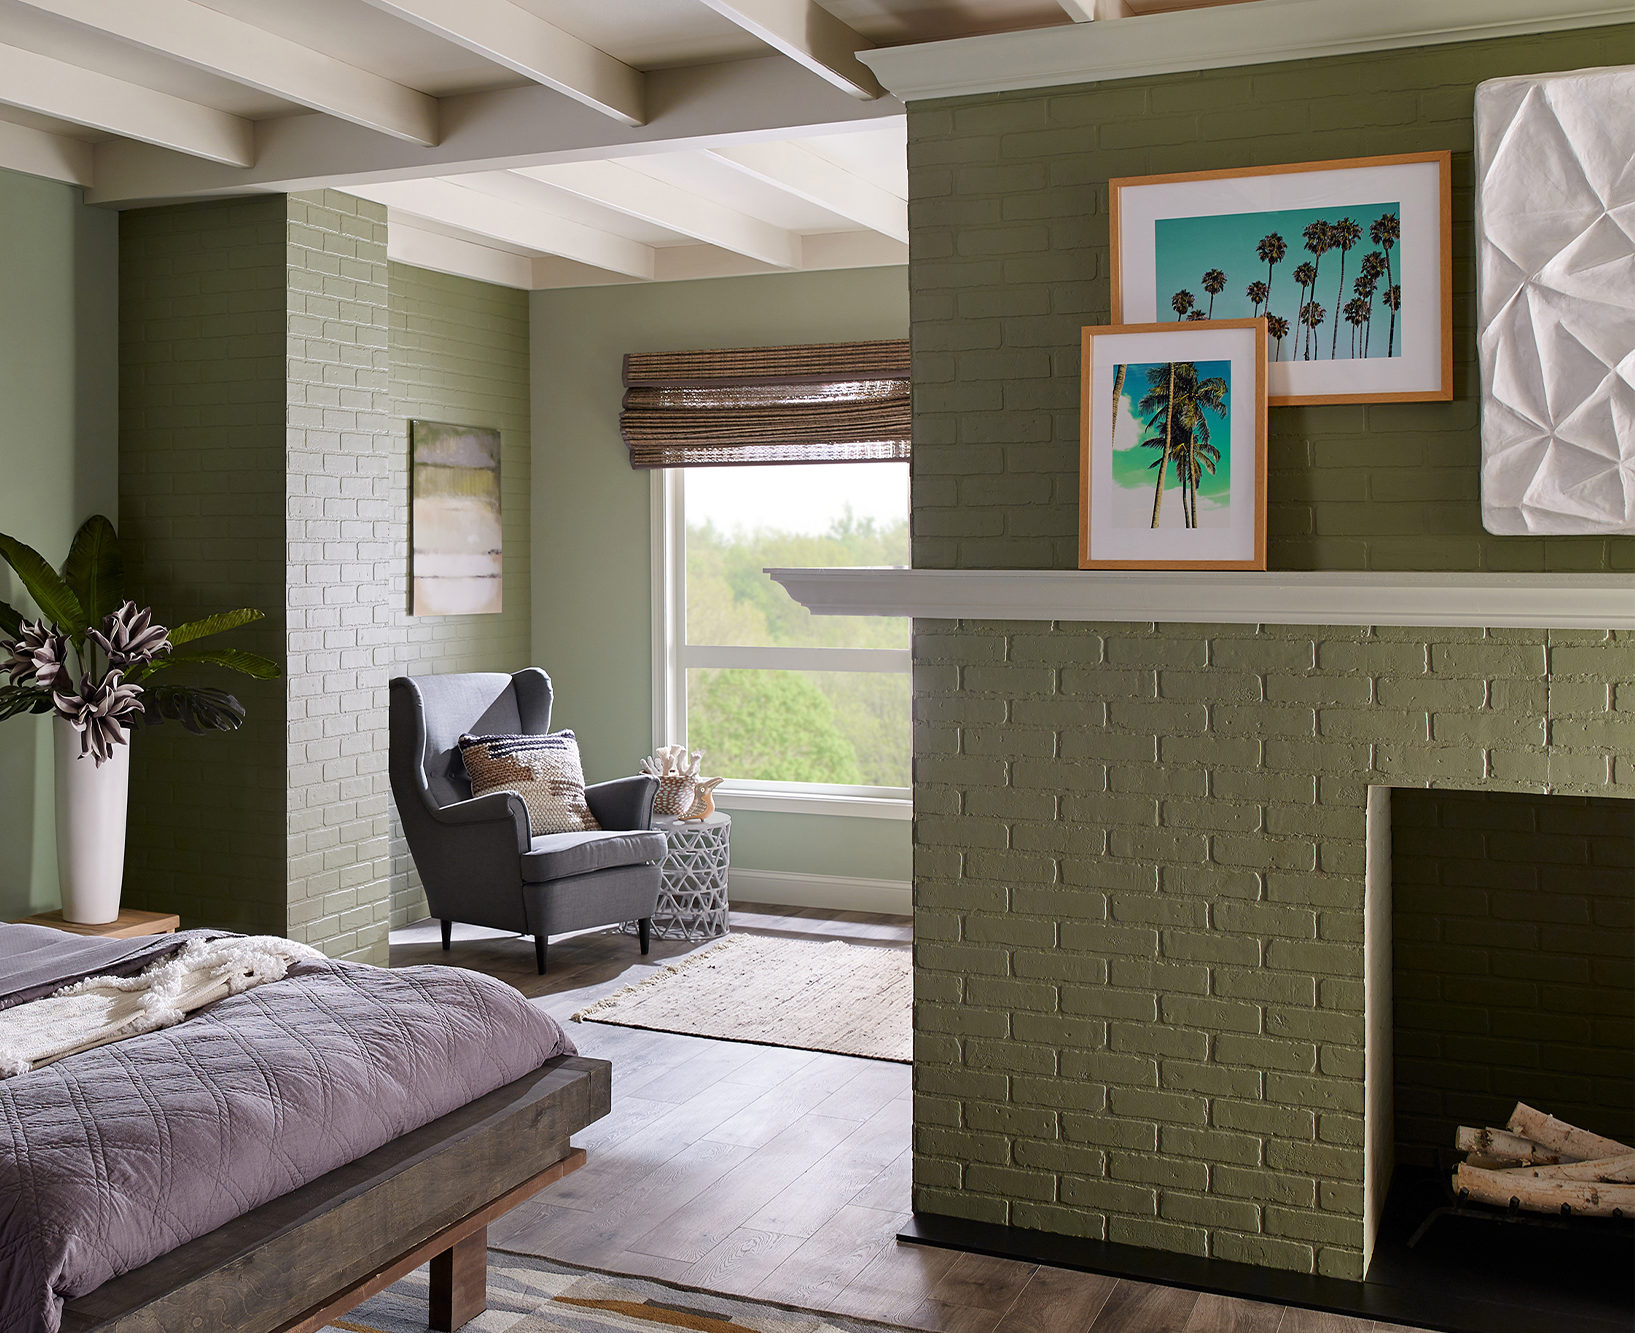
August 20, 2019As with most any painting project, prepping and priming the surface is key before its time to paint. Choosing the right primer depends a lot on the surface type you’re painting, a choice that is second nature to professional painters but can be confusing to some! When selecting a primer, the first step is recognizing the surface you will be painting and taking into account its condition – and some surfaces are trickier than others.
In this gorgeous green bedroom, the red brick fireplace was drawing too much attention and taking away from the serene and calming feel that was desired. The fix was easy, paint the fireplace! This led us to the first step in selecting the right primer – knowing and assessing the surface that will be painted. In this case, brick, a porous surface that if not properly sealed can soak up a lot of paint. And that can cost time and money!
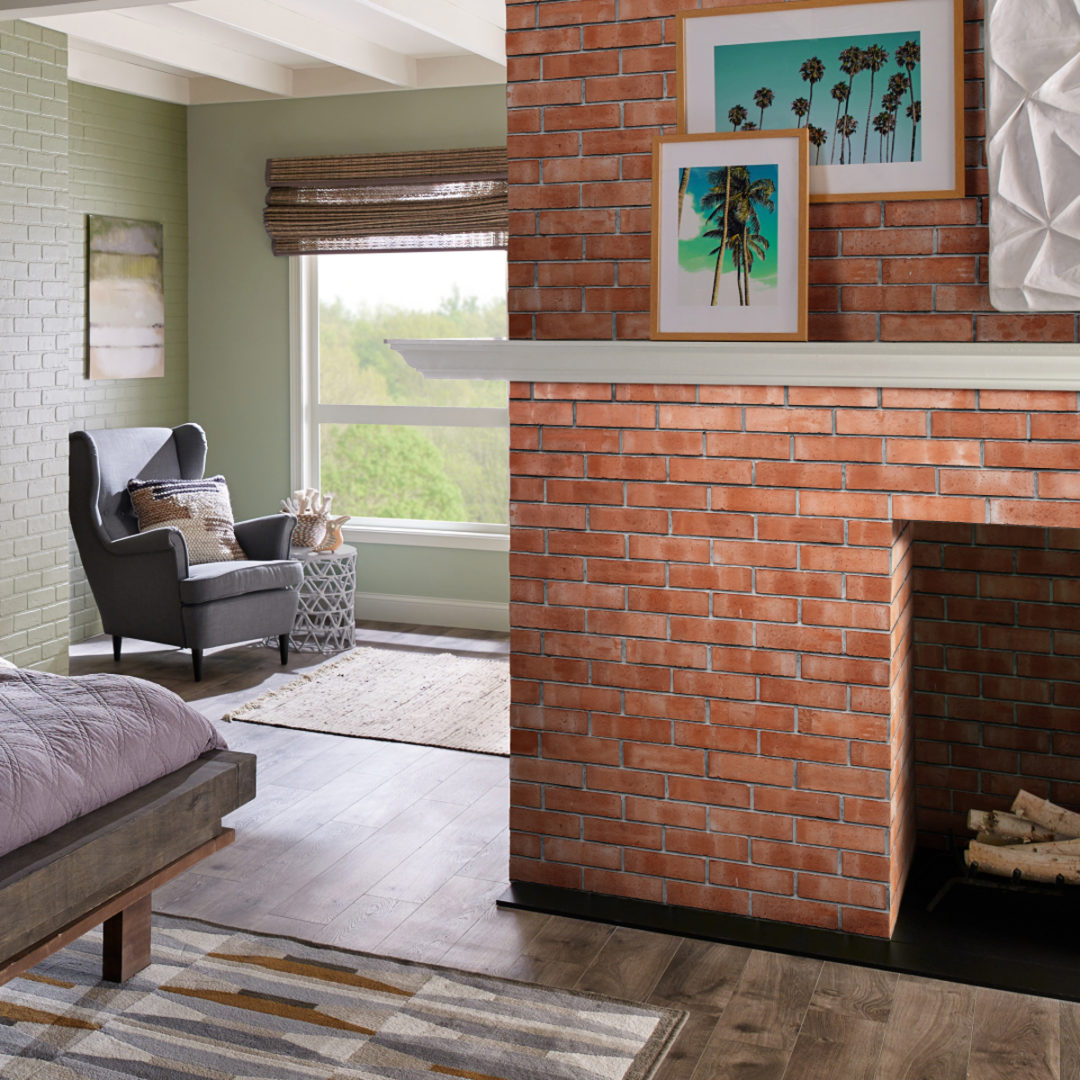
To prep this brick fireplace for painting we took a cue from the pros and chose KILZ® 1 Standard to seal the porous surface and ensure a professional looking finish. Other porous surfaces that are commonly painted include concrete, new wood and drywall. For any of these KILZ® 1 Standard or KILZ 2® All-Purpose are both great primers to choose.
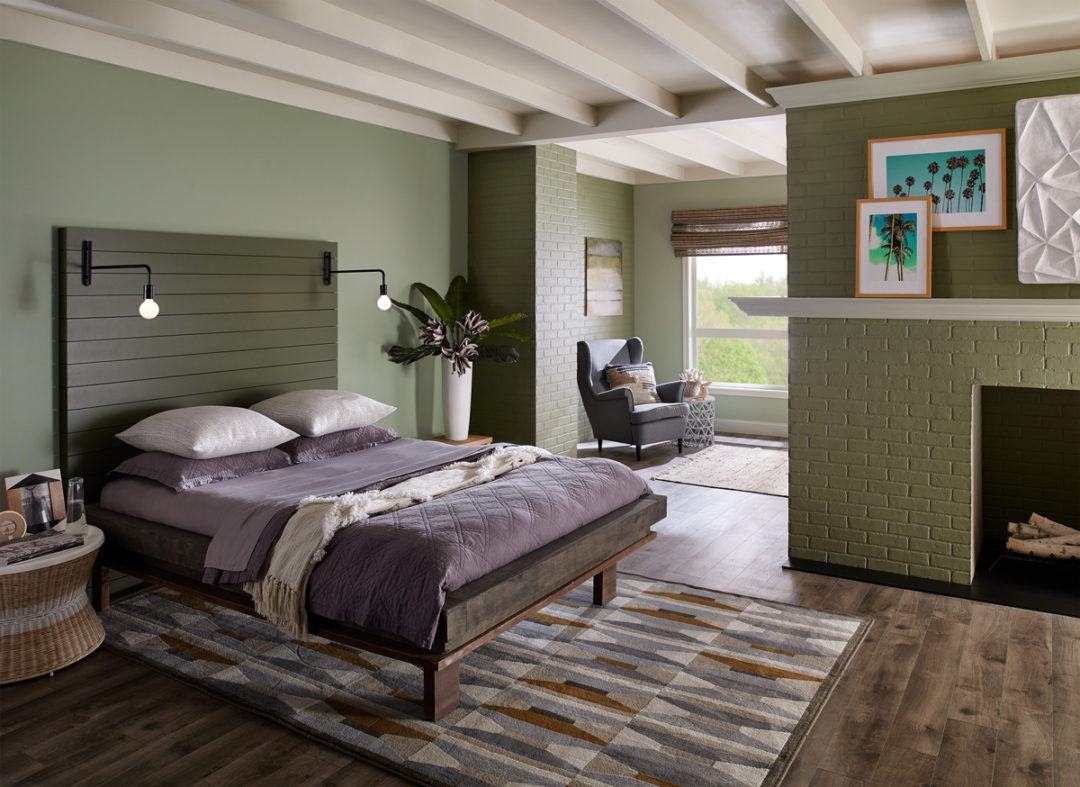
Priming a porous surface before painting ensures your topcoat will look its best.
RELATED ARTICLES
get inspired:
FOLLOw us:
@kilzbrand
Prep Mildew Prone Areas Like a Pro
August 6, 2019Professional painters know that priming can be a crucial step for any paint project. Whether you’re painting fresh drywall or looking to hide a previous wall color, a primer should always be properly applied before your topcoat. The necessity of this prep step is even more advantageous in mildew prone areas like kitchens, bathrooms and laundry rooms. These rooms often have excessive moisture making mildew a common problem, and simply painting over the issue is only a temporary solution.
For results that last, a primer created with specific mildew-resistant properties is what professionals often choose. The last thing you want is a mildew ridden kitchen or smelly bathroom and KILZ® primer is here to help with professional tips for ensuring a mildew-resistant finish on your next paint project.
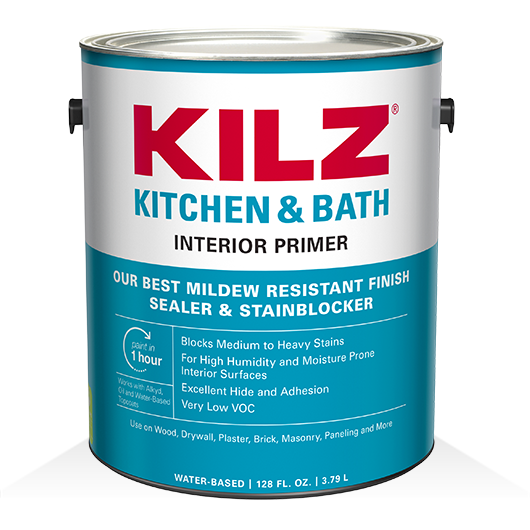
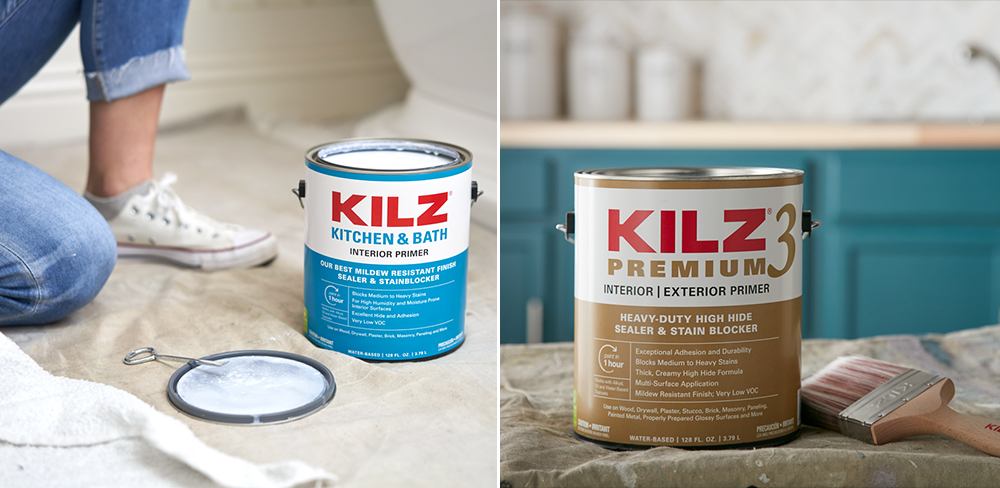 First things first, start by choosing the right primer. KILZ® Kitchen & Bath is specially designed for high-humidity and moisture-prone rooms like kitchens, laundry rooms and bathrooms. It has an enhanced mildew-resistant film that protects the primer from mildew growth. Another professional quality choice is KILZ 3™ Premium. Formulated for both interior and exterior use, this water-based primer works well for a variety of home improvement projects.
Now you’ve got the right primer, what’s next? Start by cleaning any existing mold or mildew off the surface you’re going to be priming and painting. Once the surface is fully dry, it’s time to prime!
For results that last, a primer created with specific mildew-resistant properties is what professionals often choose.
RELATED ARTICLES
get inspired:
FOLLOw us:
@kilzbrand
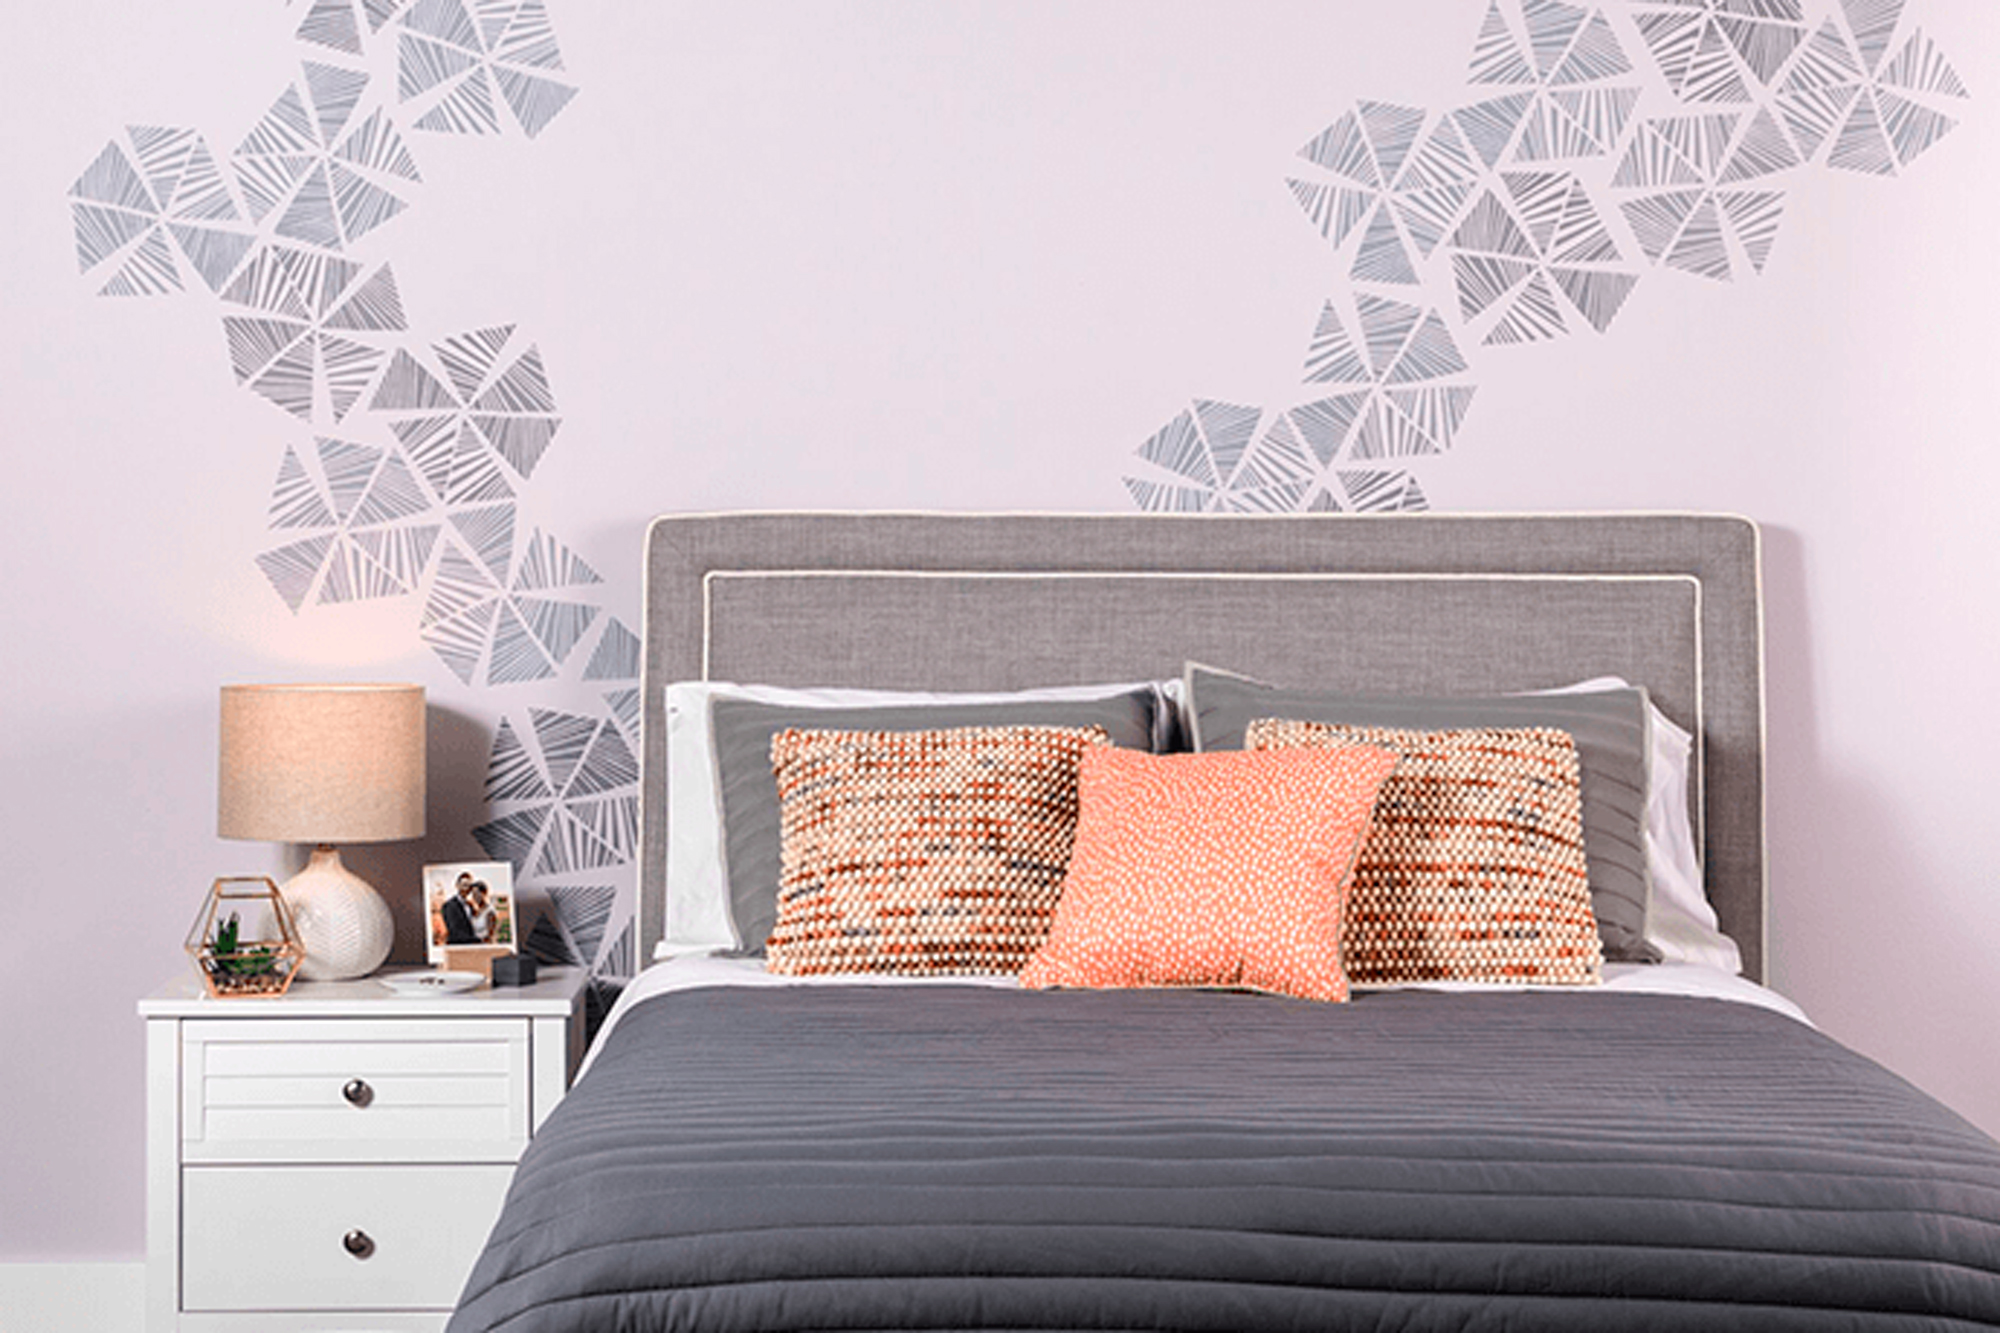
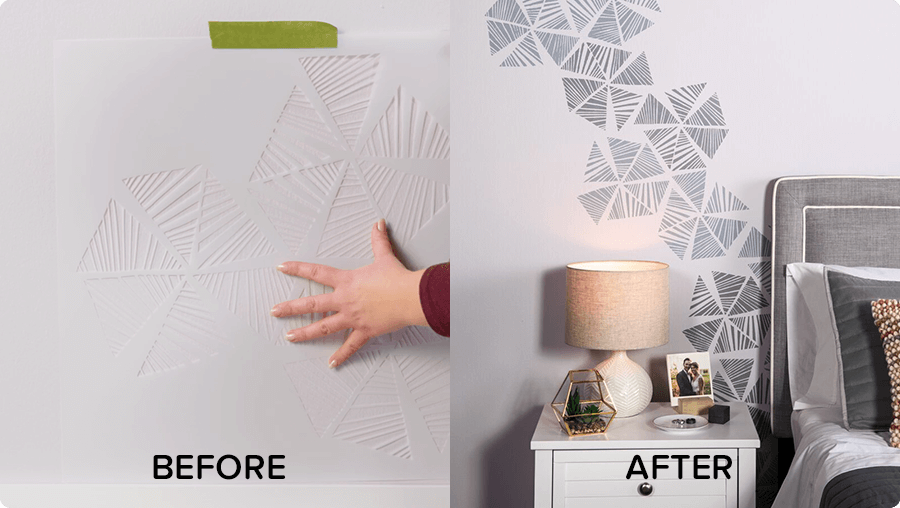
Stencil Wall Accents
December 8, 2017For this project we used our KILZ COMPLETE COAT® Paint and Primer in One in neutral based colors to transform this plain master bedroom wall into the perfect statement. Although we chose more muted colors for this specific space, you could always go bolder, repeating more (or less) of the stencil patterns to accomplish a louder more extroverted look. The great news is that the stencils come in all types of styles leaving the opportunities virtually endless when it comes to which type of look you want to create.
Mix and match! Using the stencil patterns behind or above furniture pieces is a nice way to really make them feel custom to the room. You could also pull stencils in order to frame artwork or simply add extra dimensions to your décor. The color of the stencil here subtly pulls from other colors in the room. In this case, the tone of the stencil ties in with the bedding and comforter set. We could have also opted for an orange tone to really make the accent pillows pop. This could be a nice effect in a living room space, or even in a dining room above a serving unit.
This project is simple! See below for a full tutorial about how you can achieve this look in your space. Loving it? Explore our full KILZ COMPLETE COAT® palette here.
Project Checklist:
- KILZ COMPLETE COAT® Paint and Primer in One
- Stencil
- Stencil Brush
- Painter’s Tape or Spray Adhesive
- Paper Towels
- Can Key
- Drop Cloth
- Stir Stick
Step 1:
Determine location of pattern to be stenciled on wall.
Step 2:
Stir paint to make sure it is mixed.
Step 3:
Spray stencil with adhesive or secure stencil with painters tape.
Step 4:
Level and then secure your stencil on the top middle of the wall with painter’s tape.
Step 5:
Stencil the pattern by lightly dabbing the paint until the areas are fully covered.
Step 6:
Move on to the second repeat of the pattern by following the registrations that are included in the stencil. These registration marks help you move and place the stencil along the wall perfectly every time!
Step 7:
Allow 2 hours dry time. Then call your best friend and invite them over for coffee because you’re all done.
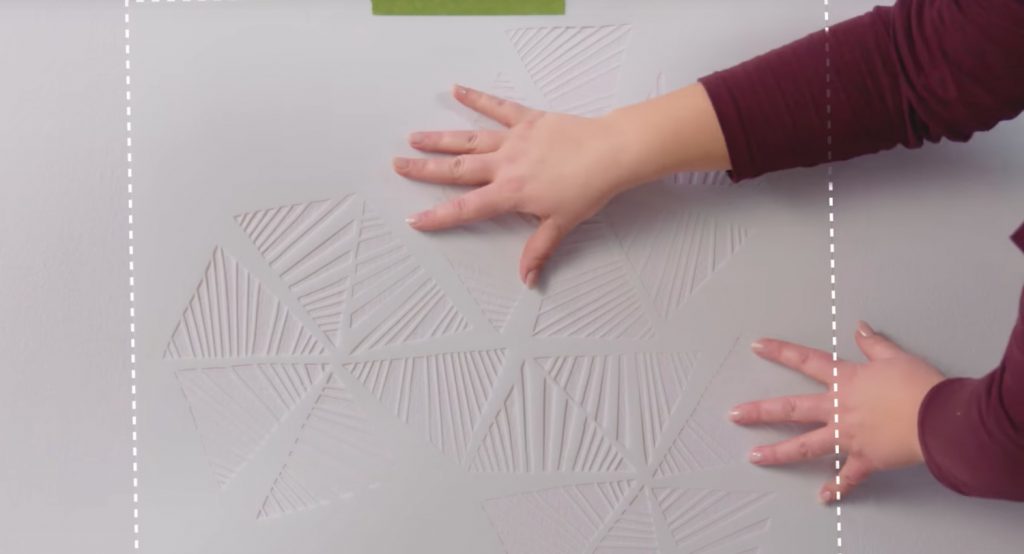 Pro-tip: Make sure the stencil is secure before you add paint.
 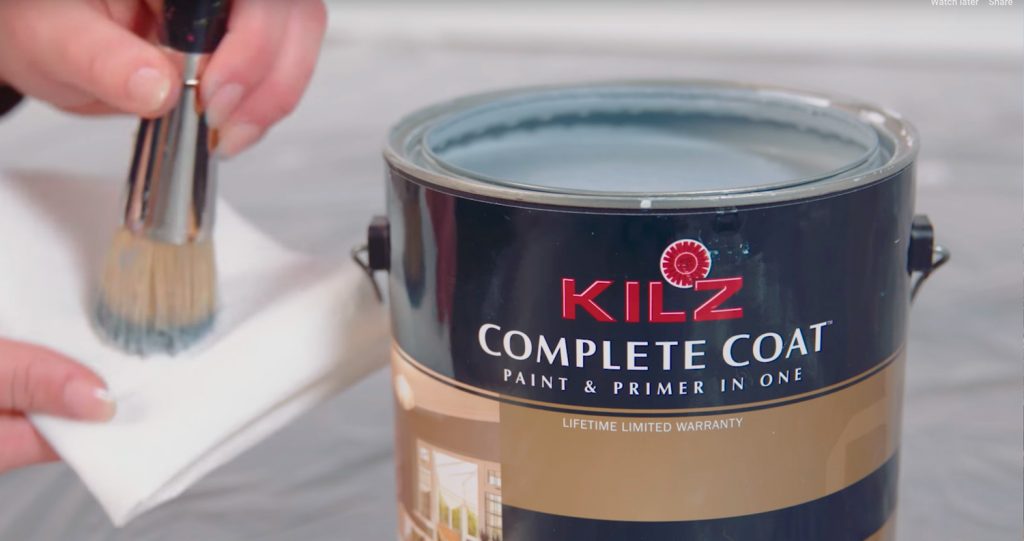 Pro-tip: Load your brush with paint and off-load most of the paint onto a paper towel. Using too much paint when stenciling is the number one reason for bleeding, so make sure to off-load excess paint before starting on the wall.
Mix and match! Using the stencil patterns behind or above furniture pieces is a nice way to really make them feel custom to the room.
RELATED ARTICLES
get inspired:
FOLLOw us:
@kilzbrand
SHOP
PRODUCTS
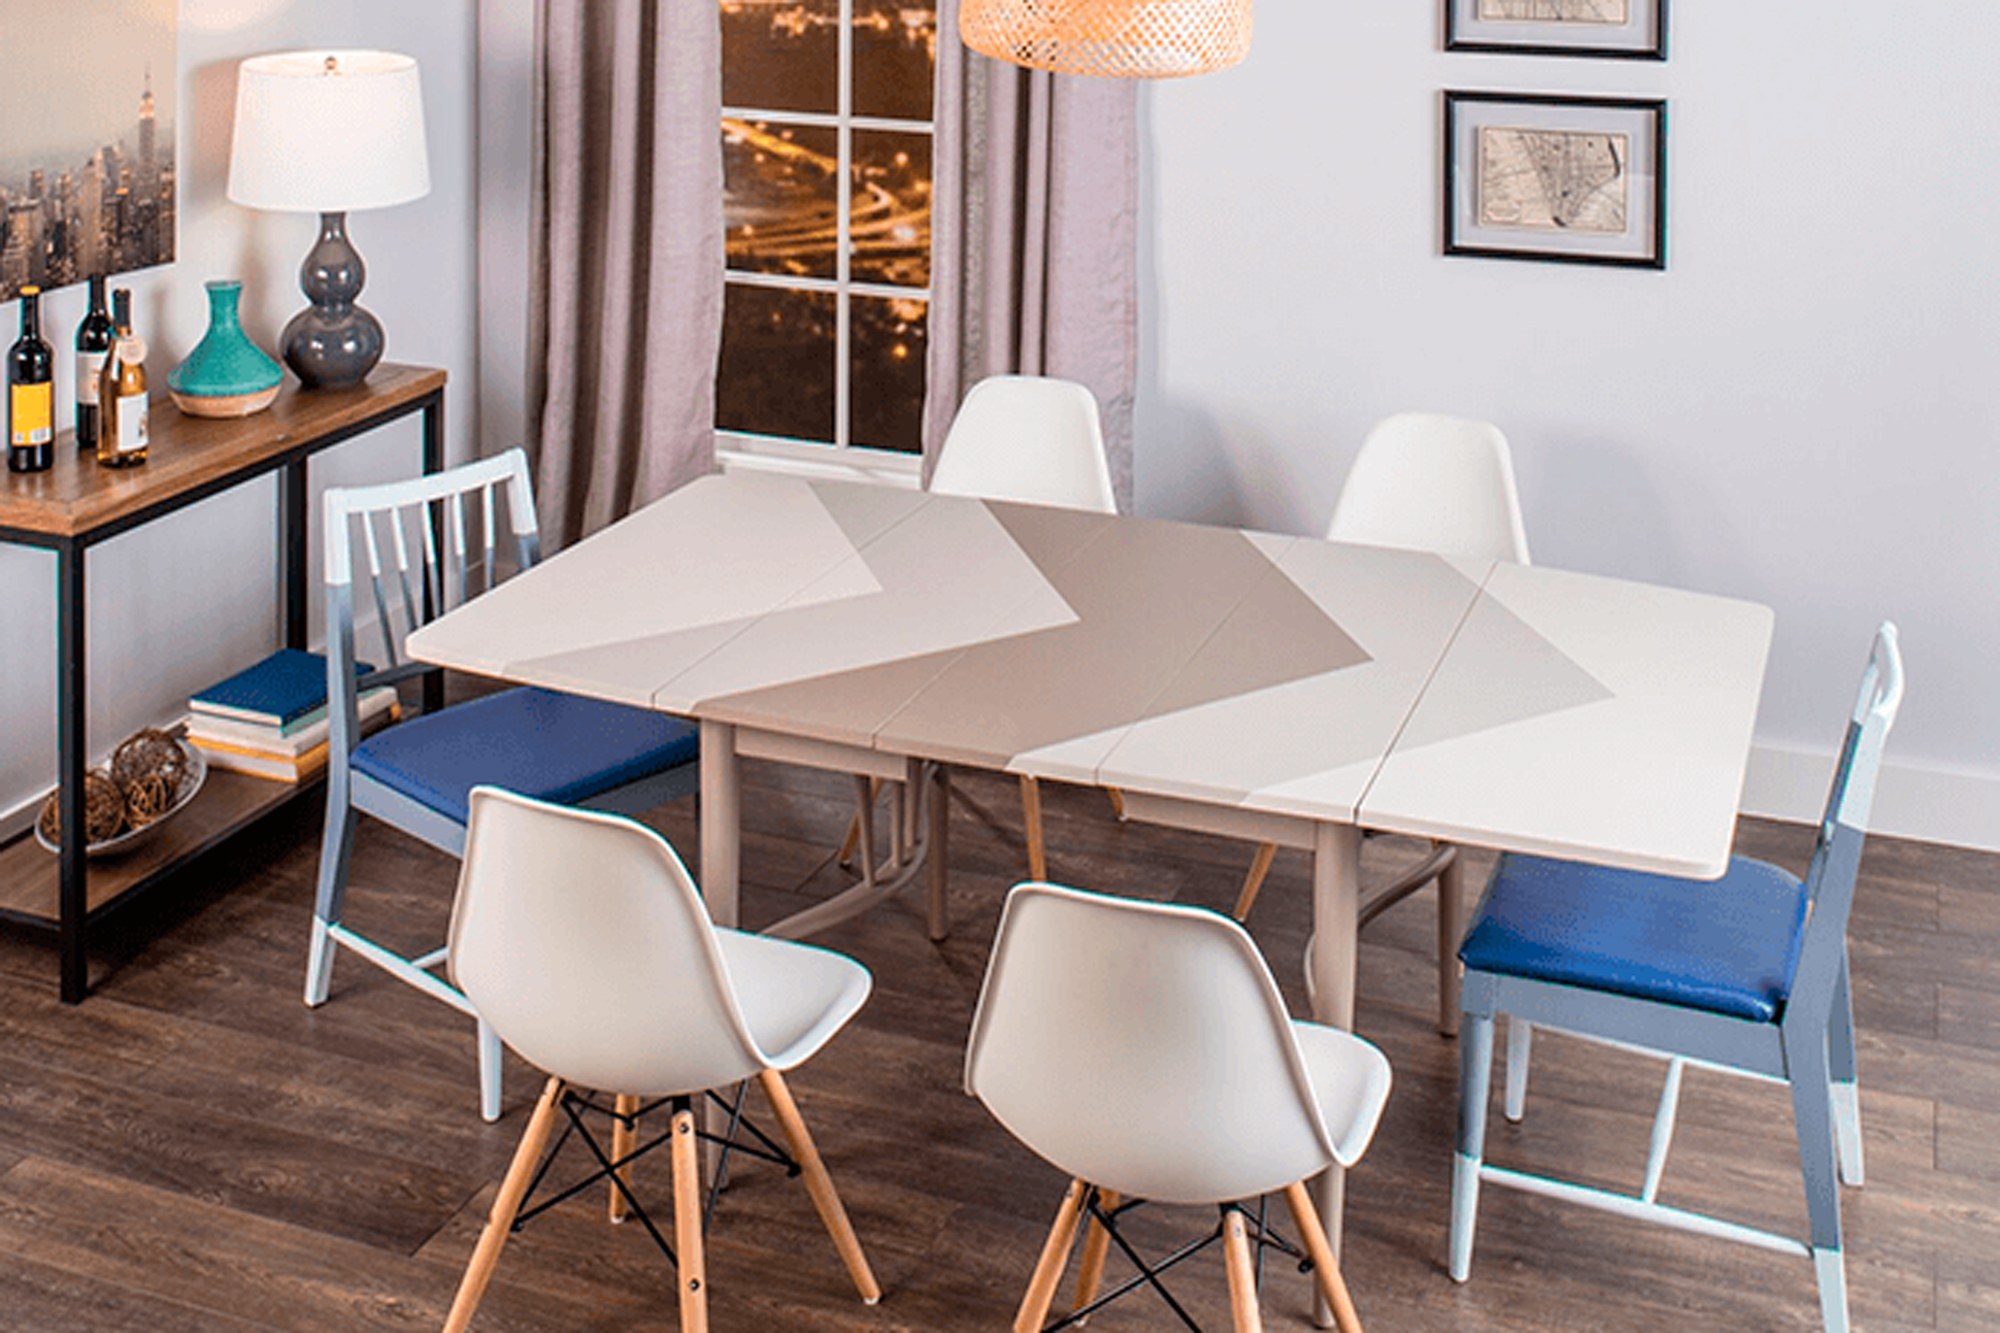
Table & Chairs Makeover
January 12, 2017Project Checklist:
- KILZ COMPLETE COAT® Paint and Primer in One
- 100-150 Grit Sandpaper
- Painter’s Tape
- Paint Brush
- Measuring Tape
- Chairs
- Table
- 3/8”-1/2” Synthetic Roller
Step 1:
For best results start with a properly prepared and previously painted or primed surfaces. Remove any loose or peeling paint and wash off dirt or grease with a non-soapy detergent or a TSP substitute. Rinse well and allow surface to dry.
Pro-tip: For glossy surfaces, scuff sand with the appropriate sandpaper prior to coating.
Step 2:
Tape off areas to be painted. To achieve a geometric pattern we recommend using measuring tape to evenly space tape.
Step 3:
Stir paint before and during application to make sure it is mixed.
Step 4:
Remove the painters tape when the paint is wet, or have a razor to cut the film if you’ve let the paint dry.
Step 5:
Allow to dry. The product dries to touch in 2 hours (at 77° F and 50% relative humidity) or longer in cooler temperatures and/or higher humidity.
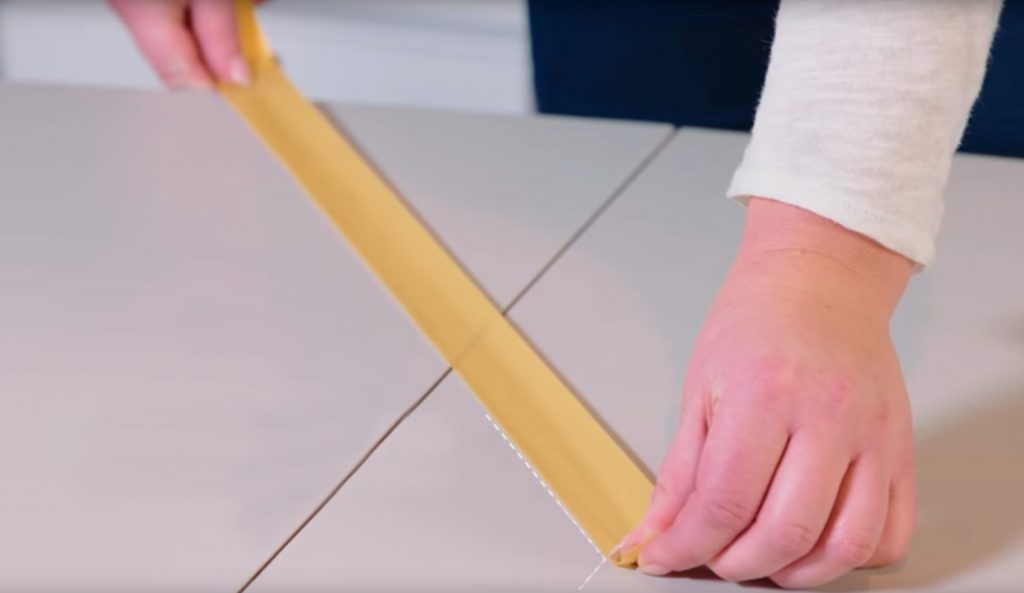
Pro-tip: Measure peak to peak, as well as the distance between the points along the side of the table.
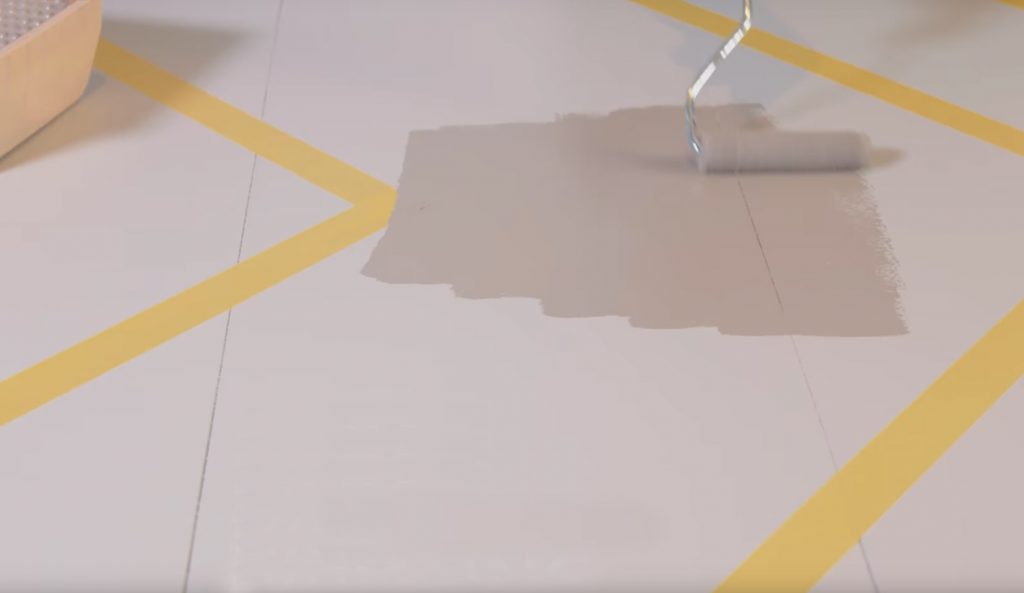
Pro-tip: Use a high quality synthetic brush or 3/8”-1/2” synthetic roller for the application. When painting a horizontal surface, like a tabletop, apply thin coats.
RELATED ARTICLES
get inspired:
FOLLOw us:
@kilzbrand
SHOP
PRODUCTS
Small Kitchen Hack & A Pop of Color
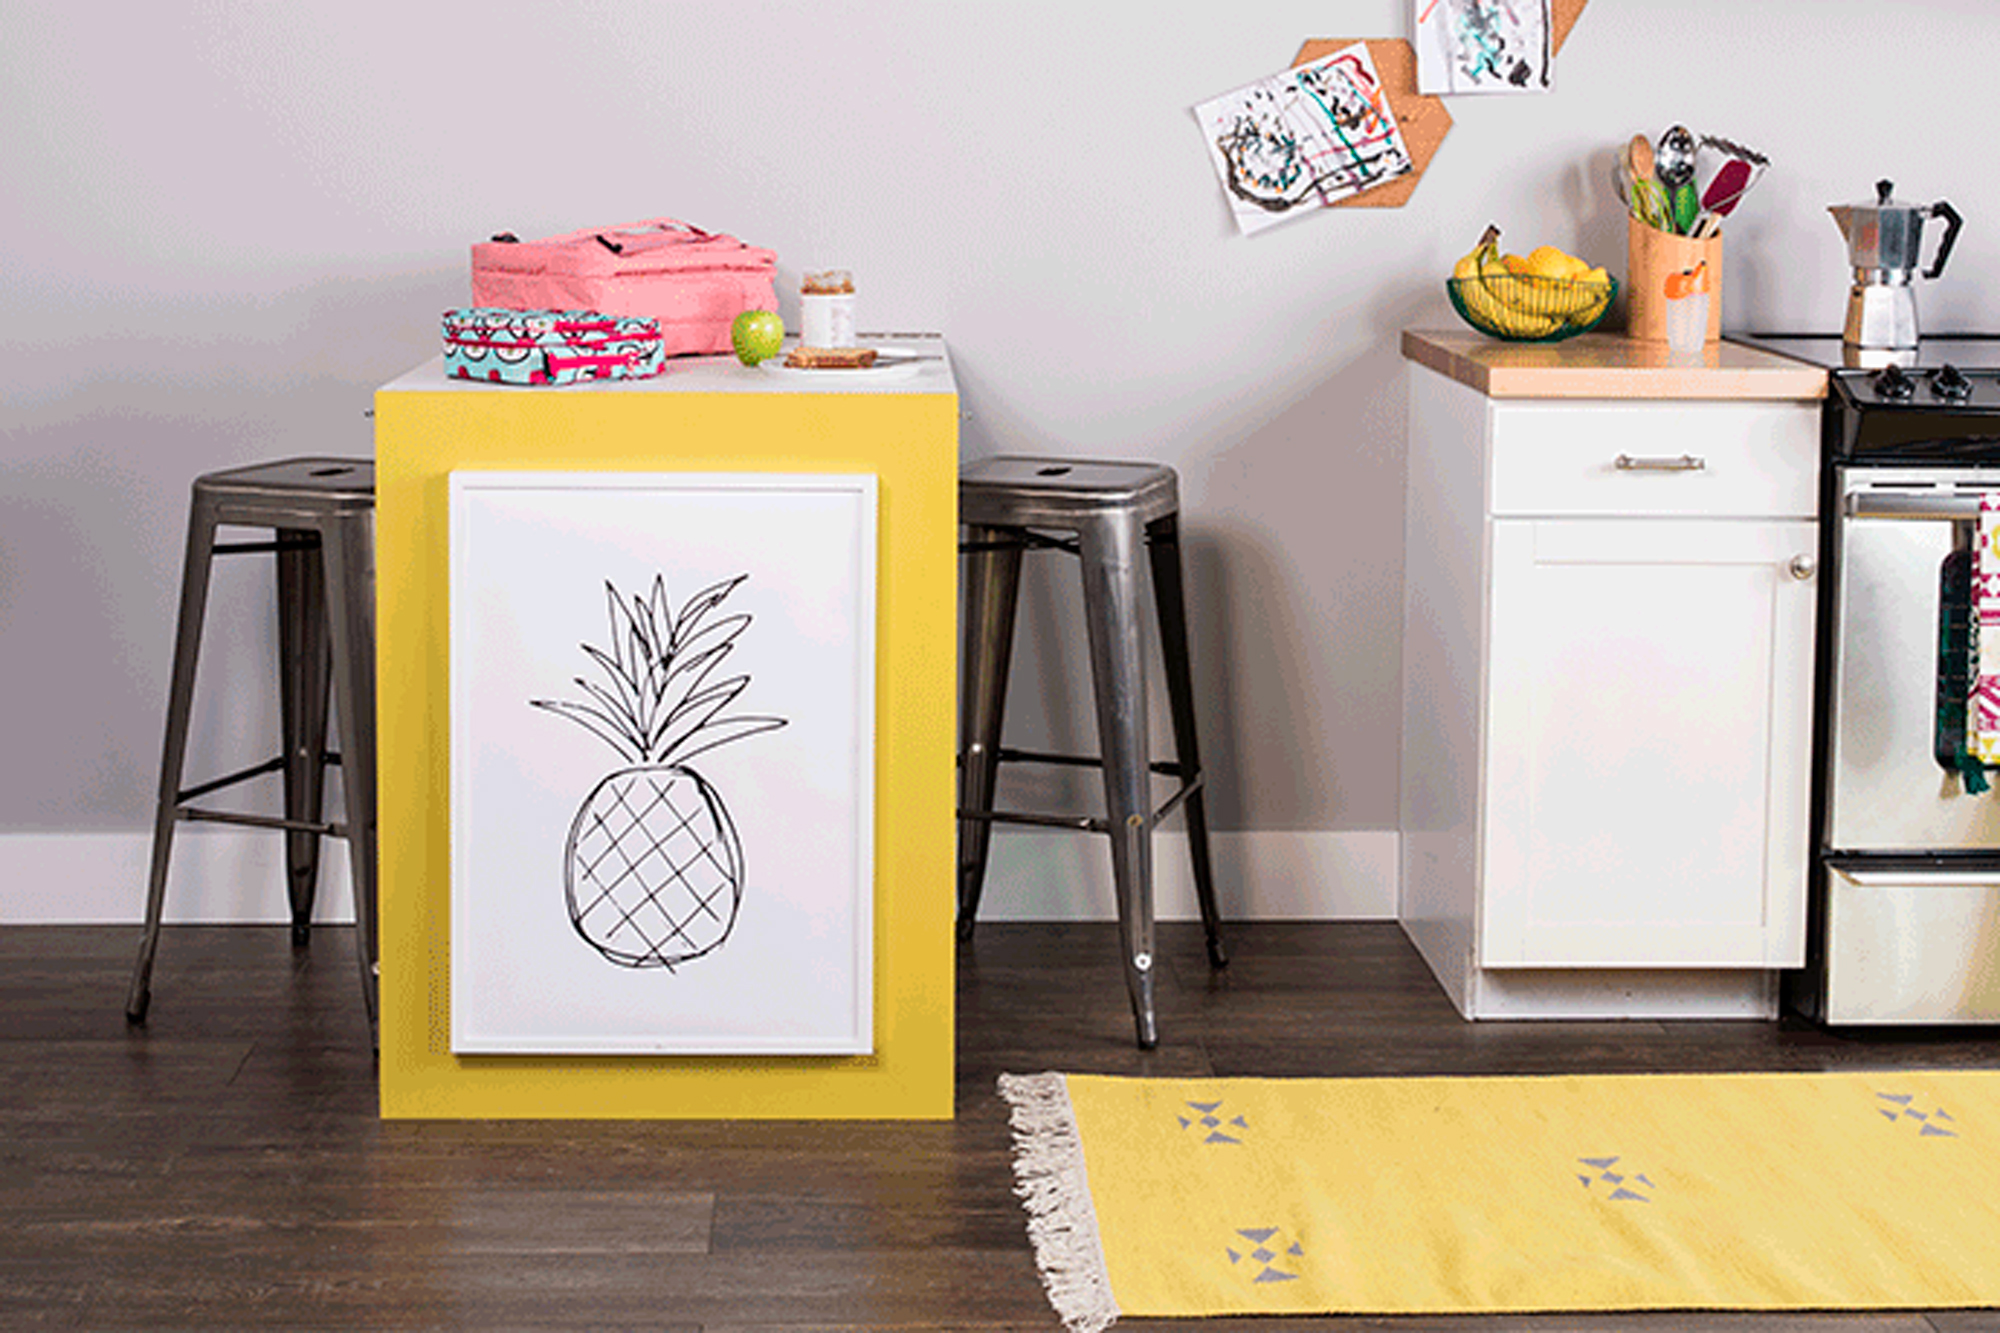
January 10, 2017This project is one of our favorites because of the unexpected twist that adds not only color but functionality to this space. If there’s not enough square footage for that 12 person dining table you’ve always dreamed of, we think you will love this solution. For this project we will show you how to create an optional tabletop space that retracts up and down allowing you to utilize at your convenience. This Murphy table will double your working counter space, and can even be used as a desk for the little ones to color! This concept can be used in a hallway, bedroom, office or garage for a working station!
Project Checklist:
- Plywood
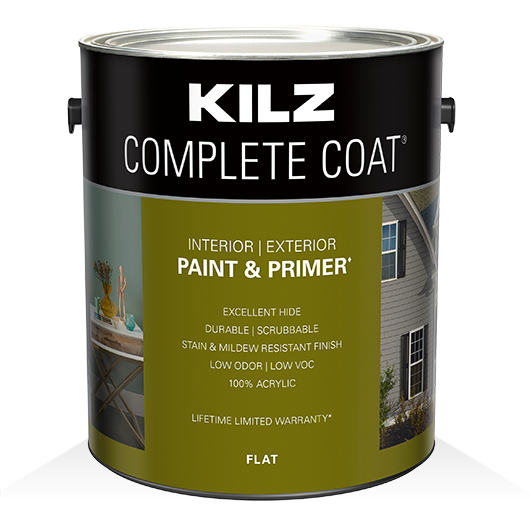
- KILZ COMPLETE COAT® Paint and Primer in One
- 100-150 Grit Sandpaper
- Dust Mask
- Damp Cloth
- Paint Brush
- 3/8”-1/2” Synthetic Roller
- Framed Artwork
- Drill or Screwdriver
- Screws
- Piano Hinge
- Hook and Eye Latch
- Stir Stick
- Can Key
- Framed Artwork
- Measuring Tape
- Level
Step 1:
Start by cutting 2 pieces of 1/2″ plywood to size 28-1/4″ X 36″. Then cut 2 additional pieces of plywood to 1″ X 28-1/4″ for the wall cleats.
Step 2:
Sand all pieces of plywood with 100-150 grit sandpaper.
Step 3:
After sanding, use a damp cloth to remove any dust from the pieces of plywood.
Step 4:
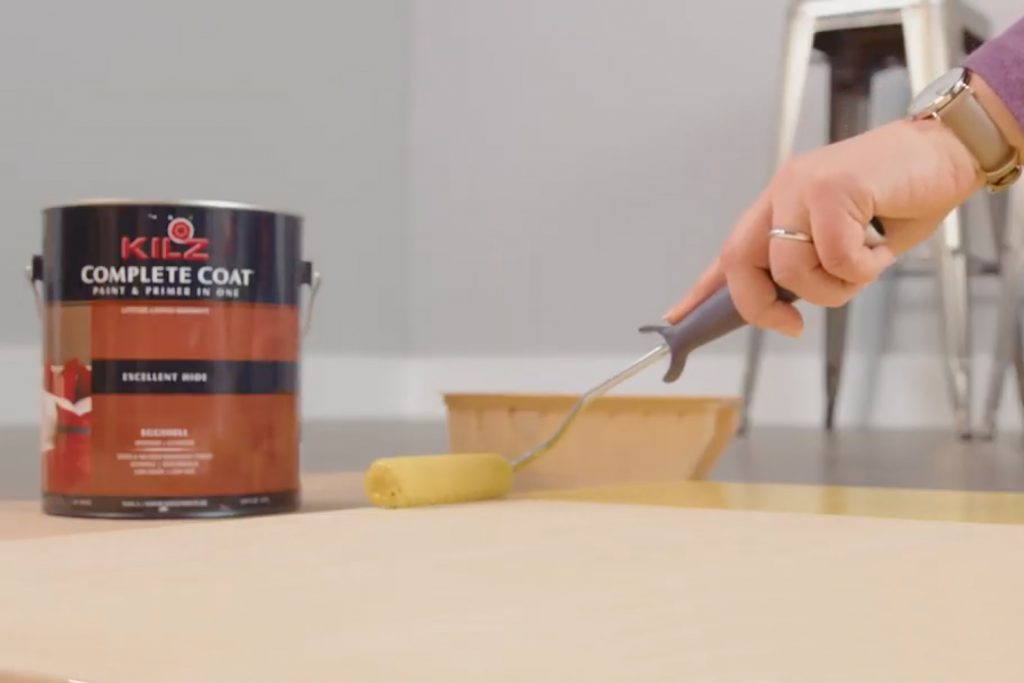
Open a can of KILZ COMPLETE COAT® Paint and Primer in One and thoroughly stir the paint.
Step 5:
Paint all of the pieces of wood with your selected colors and allow to dry.
Step 6:
Allow 2 hours dry time*, apply second coat if needed.
*Dark colors and high humidity areas may have extended dry times.
Step 7:
Next measure and cut the 2 piano hinges to size 28-1/4″.
Step 8:
Using screws, attach the first piano hinge to connect the two larger pieces of plywood (table top and leg). Then attach the second piano hinge to connect the table top to the first cleat.
Step 9:
Measure and center the picture frame onto the front of the table leg. Once centered attach the frame with screws.
Step 10:
Attach the table top and lower cleat to the wall.
Step 11:
With the table folded against the wall, measure and attach the top cleat to the wall.
Step 12:
Finish by measuring and attaching the hook and eye latch to the top wall cleat and the table leg.
Pro-tip: For best results, apply with smooth strokes that go in the same direction as the wood grain.
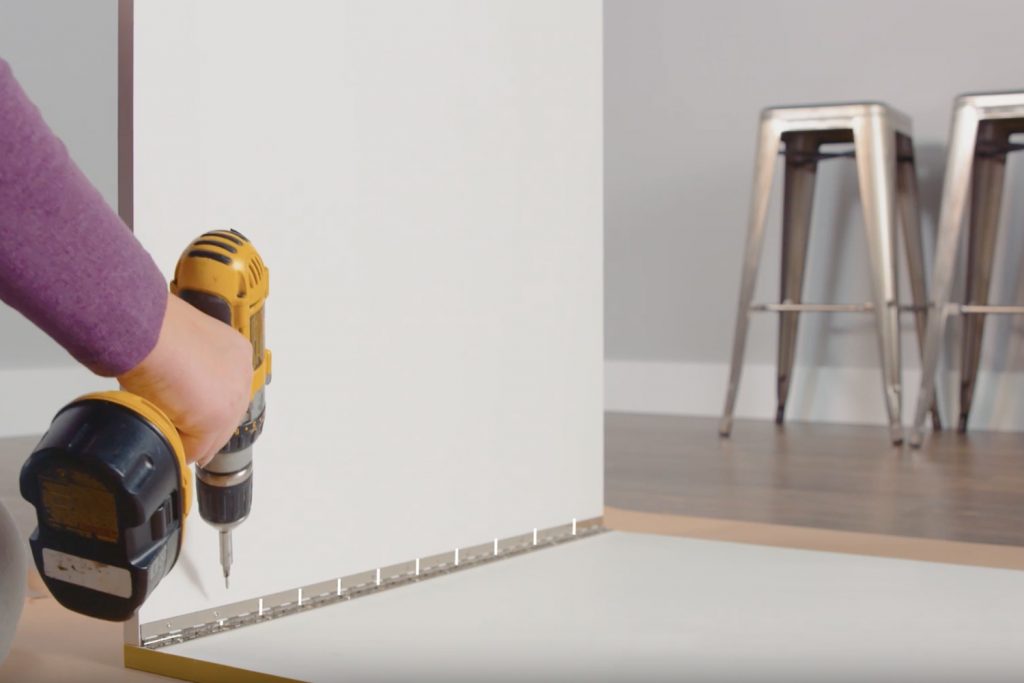
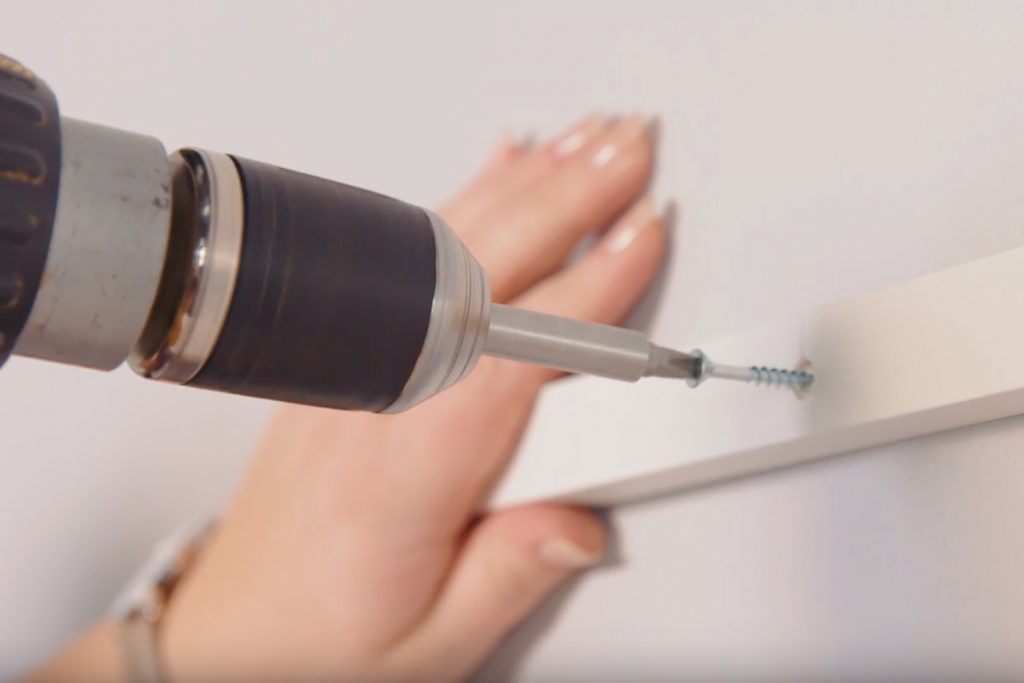
Pro-tip: Use a power drill to attach the piano hinge.
Pro-tip: Use a stud finder to ensure the table is properly secured to the wall.
If there’s not enough square footage for that 12 person dining table you’ve always dreamed of, we think you will love this solution.
RELATED ARTICLES
get inspired:
FOLLOw us:
@kilzbrand
join the conversation:
SHARE this post: