Tag: Paint
What’s Really in the Can? Primer vs Paint & Primer in One
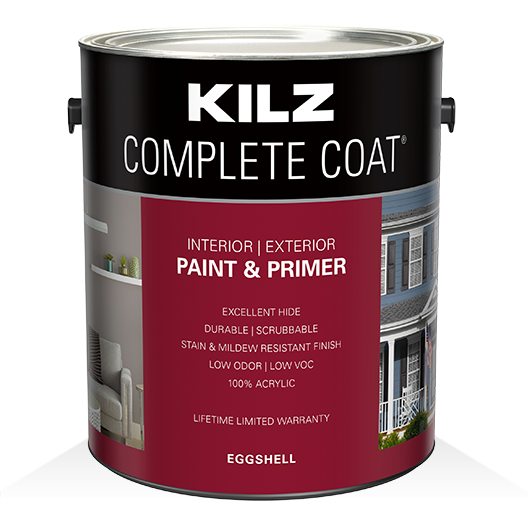
June 29, 2023Primer vs. Paint and Primer: Can All-in-One Do It All?
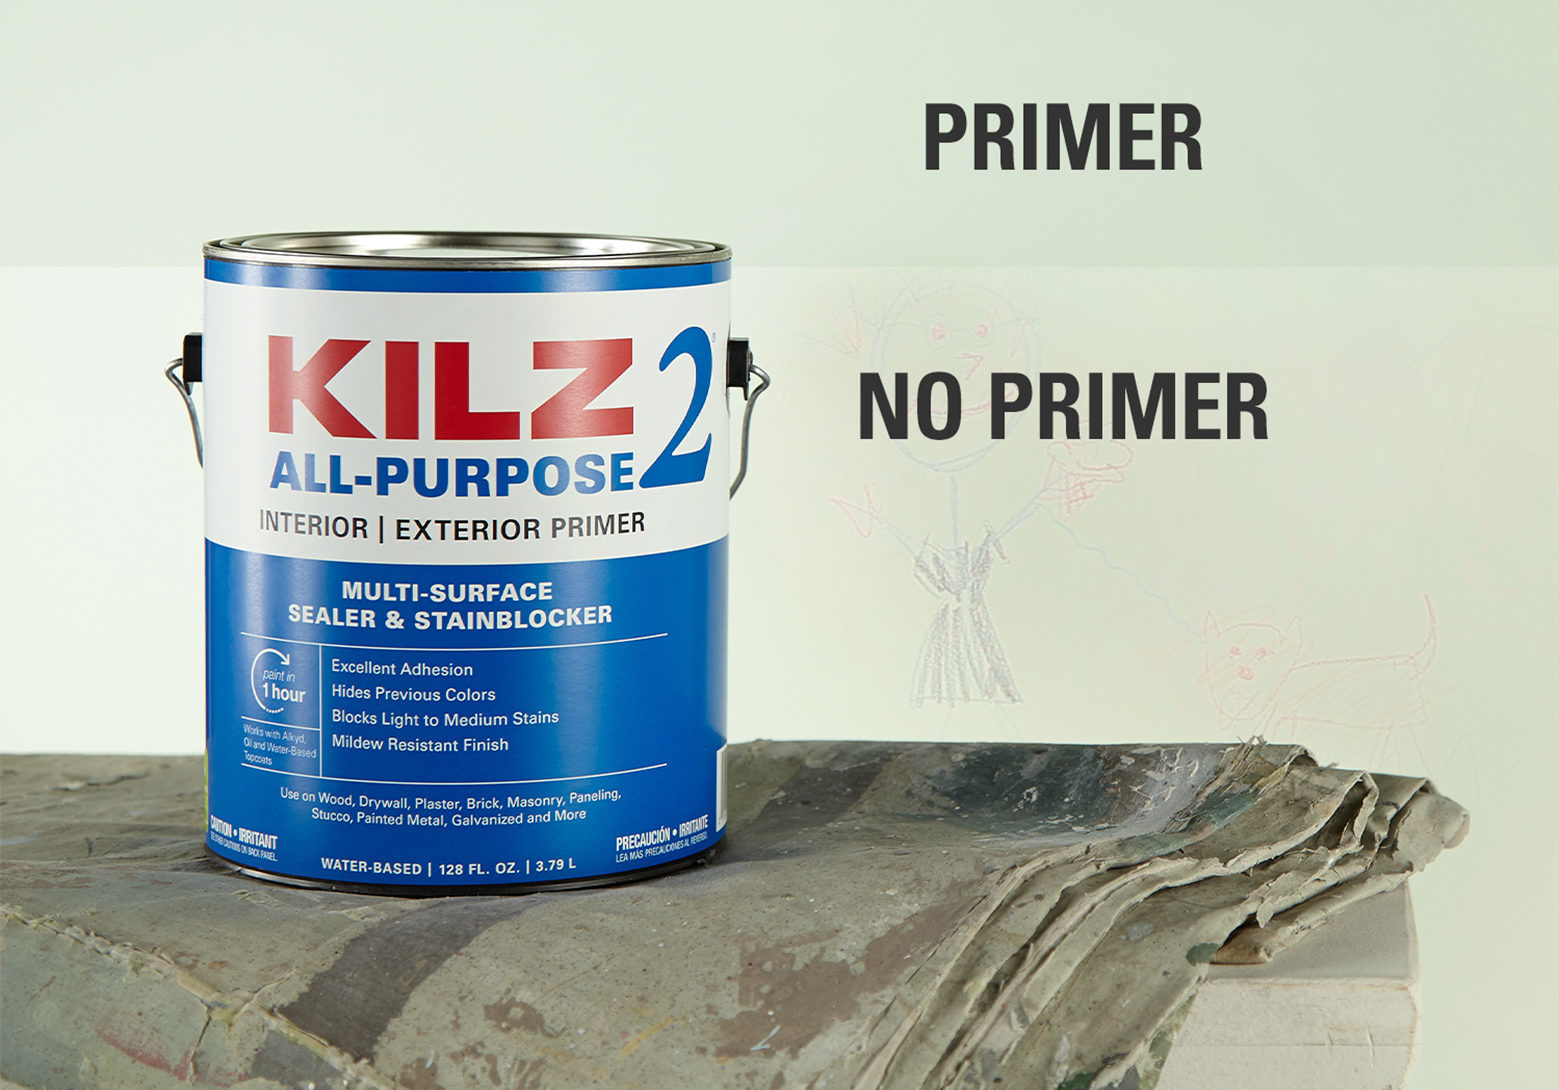
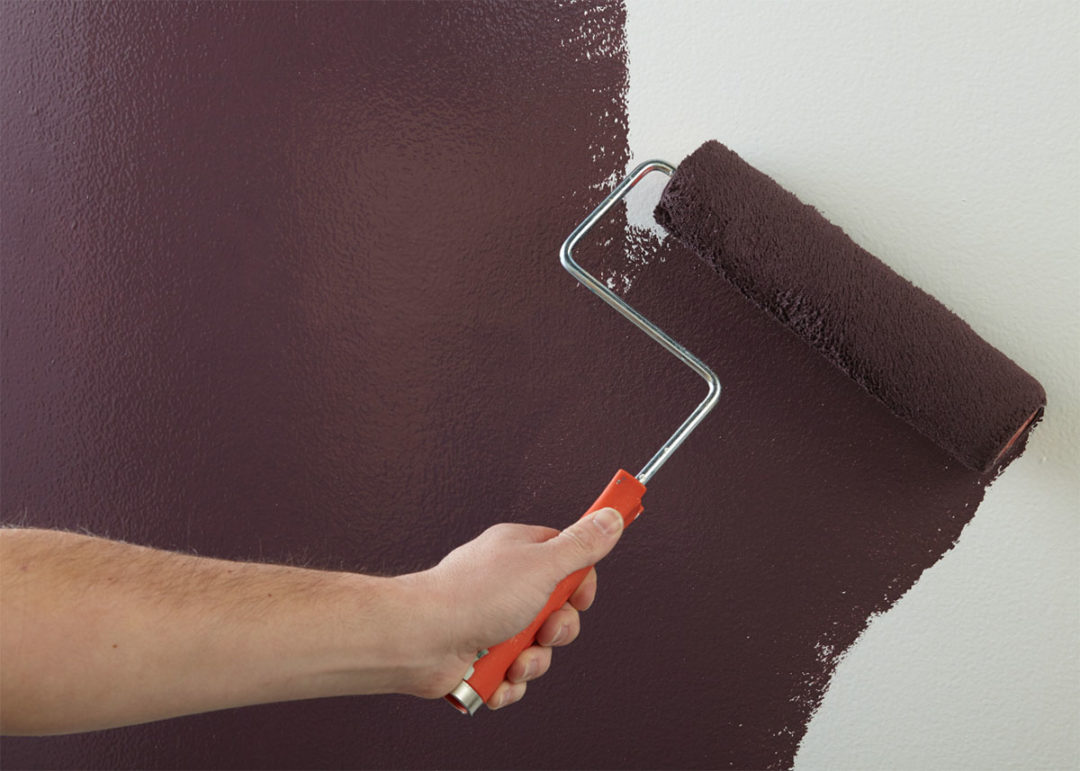
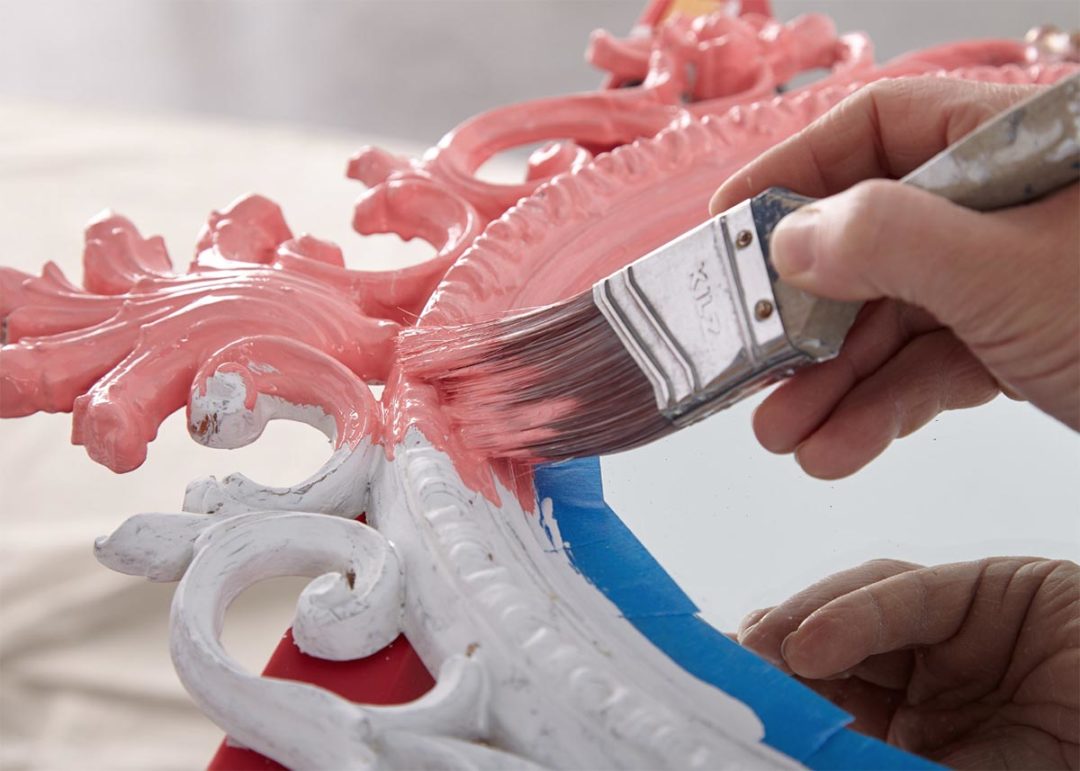
If you can skip a step in the painting process and still get the same results, it seems like a no-brainer. Many paint and primer in one (PPIO) products boast this claim, but should you always combine these steps and skip using a separate primer?
When to Choose a Self-Priming Paint
The benefit to using PPIO is that you can achieve similar results in less time. However, there are some things to know before you choose to go this route.
PPIO can work for some jobs, but different products will give you better results depending on the situation. For example, PPIO can work well on pre-painted surfaces without a drastic change in color or texture. However, this is possibly the only reason to choose it.
Why You Should Prime Separately
The goal of any primer is to prepare the surface for a coat of paint. This ensures good adhesion to the substrate and the topcoat. You may also need to block stains and odors, protect walls from mold or mildew growth, change the color, or refresh an old or damaged surface. Be mindful of the nature of your job before deciding to forgo primer as a first step, as it is often explicitly formulated to alleviate many of these surface problems, whereas an all-in-one product is typically not.
When to Choose a Primer
Suppose a surface has never been painted, as with drywall, a traditional primer is a must. If painting a glossy surface with less glossy paint, priming beforehand will ensure adhesion, and your results remain uniform. Priming separately is essential if painting over oil-based paint with acrylic or latex.
Other cases that require a primer before paint include:
• Any bare surface
• Porous surfaces
• Raw, unfinished wood
• Knotty wood
• Woods with tannins – like Cedar or Redwood
• Uncoated metal
• Unfinished drywall
• Masonry
• Stained surfaces
• Slick surfaces – like tile or laminate
Summary
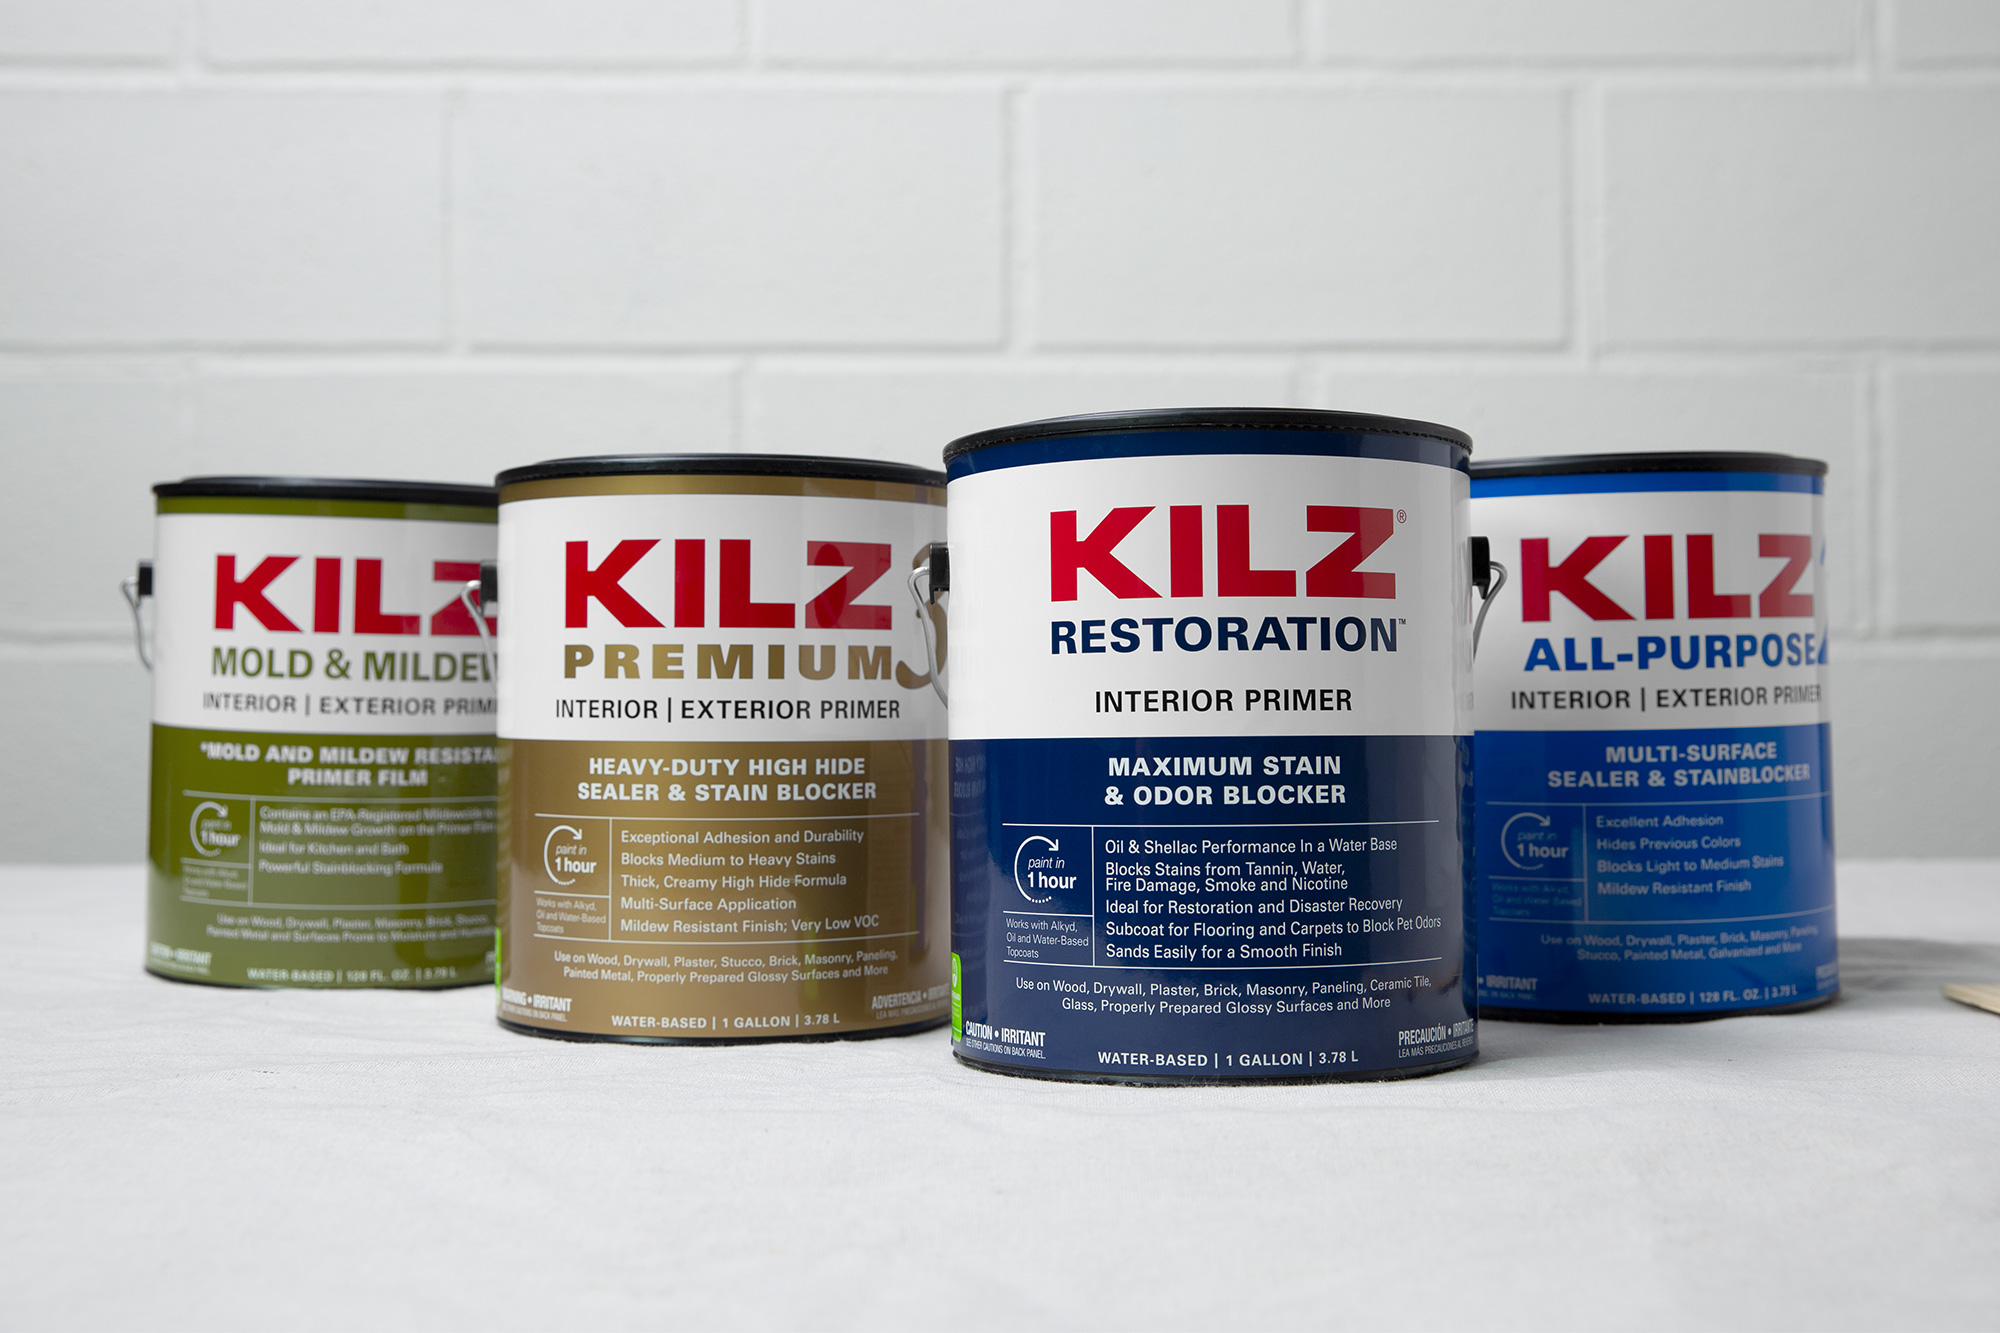
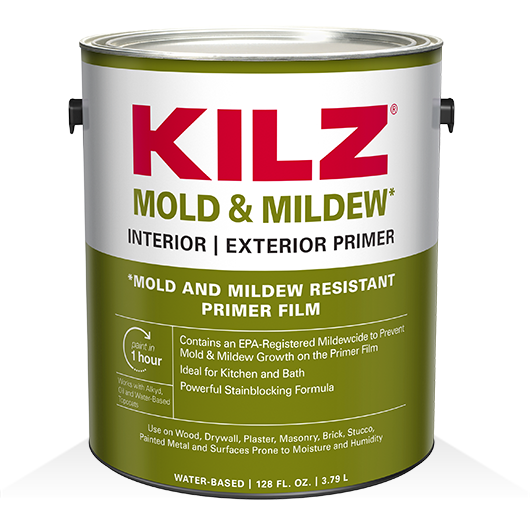
Whether you choose to go the all-in-one route or choose a separate primer and paint, choosing high-quality products suited for your surface’s condition is crucial. KILZ® primers are formulated for your specific surface issues, such as KILZ RESTORATION® to block tough stains like water damage or KILZ® MOLD & MILDEW to create a mold and mildew-resistant film for use in high-humidity rooms. KILZ 3® PREMIUM is designed to have a thicker formula to improve customer experience and hide. No matter the surface, you can be sure there’s a primer formulated for the job. When you consider how much time and money you invest in your project, choosing the best quality products from the start makes all the difference.
Come back for more tips, tricks, and inspiration, and as always, happy DIY-ing.
Refer to our website, kilz.com, or product back labels for additional information on which primer is right for your project and detailed instructions on applying our products. Check out our Coverage Calculator to understand your estimated paint needs for your upcoming project.
RELATED ARTICLES

get inspired:
FOLLOw us:
@kilzbrand
SHOP
PRODUCTS
Patio Transformation to Kick Off the Summer
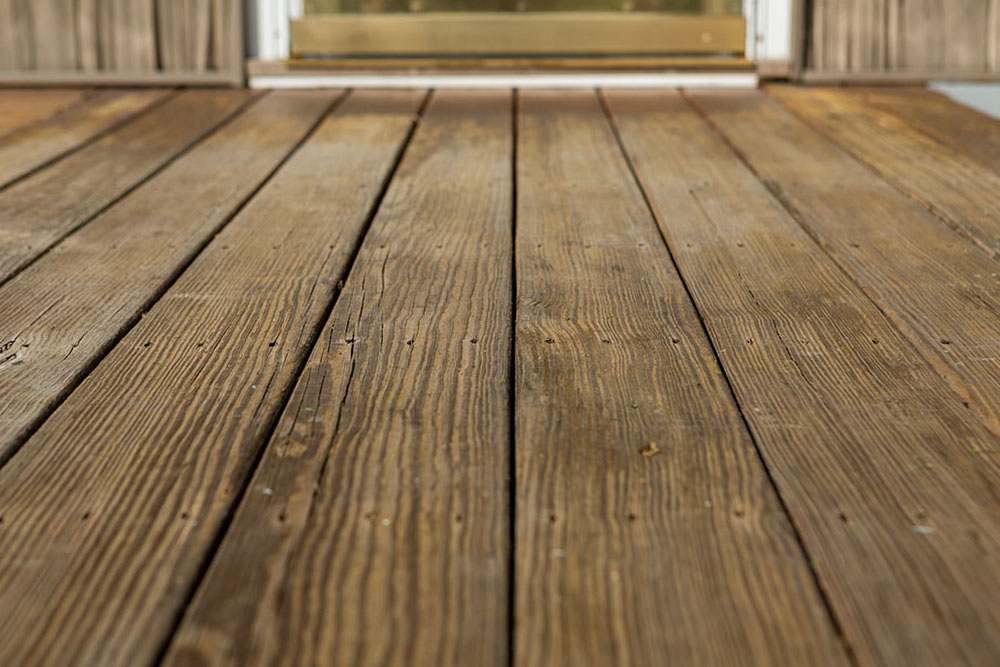
July 11, 2022A tired deck is hardly an inviting place to kick off the warm-weather season with friends and family. So don’t let another summer go by without transforming your outdoor living space into something fresh and vibrant. Cracks and splinters, stains, and mildew are sure signs your deck is ready for a new finish.
Follow along for step-by-step instructions to transform your deck into a beautiful space for you to enjoy all summer long.
Cleaning & Preparation: Before applying a new finish on your deck, be sure clean it to remove any trace of the old finish, stains, and mildew. After all, you don’t want tough stains like that old BBQ sauce Uncle Jim spilled last Labor Day to be there forever.
• Step 1: Use a wood stain and finish stripper to remove remnants of an old coating and follow it with a wood cleaner and brightener to neutralize the wood.
• Step 2: Rinse the surface thoroughly with a garden hose or a pressure washer. Pro tip, use the broadest spray pattern while keeping the nozzle at least 24-inches away from the surface.
• Step 3: Allow the area to dry for 24 hours, and sand the surface to remove any remaining stray fibers.
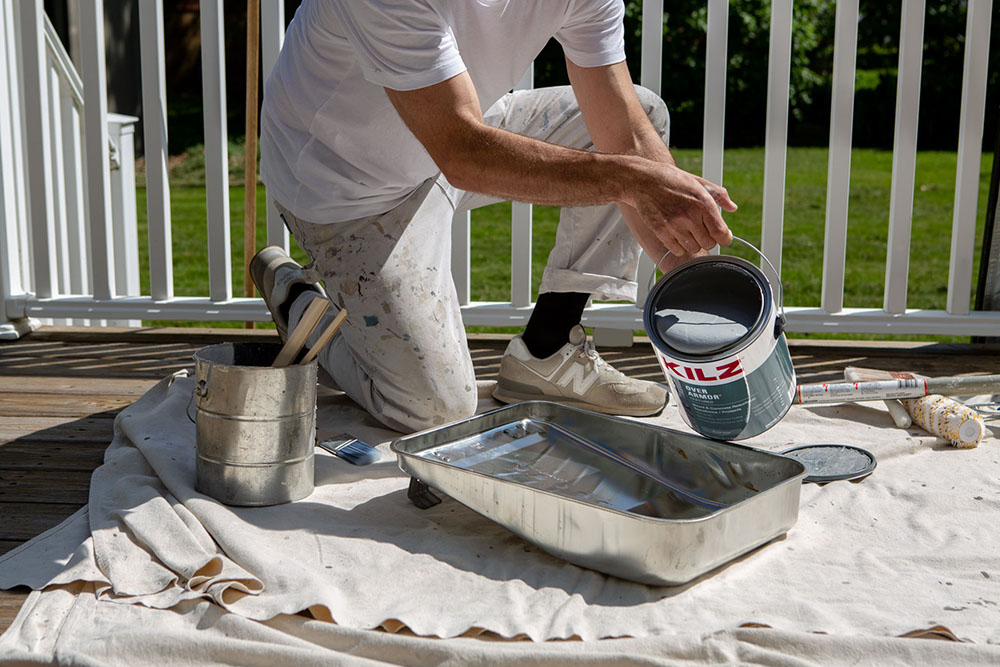
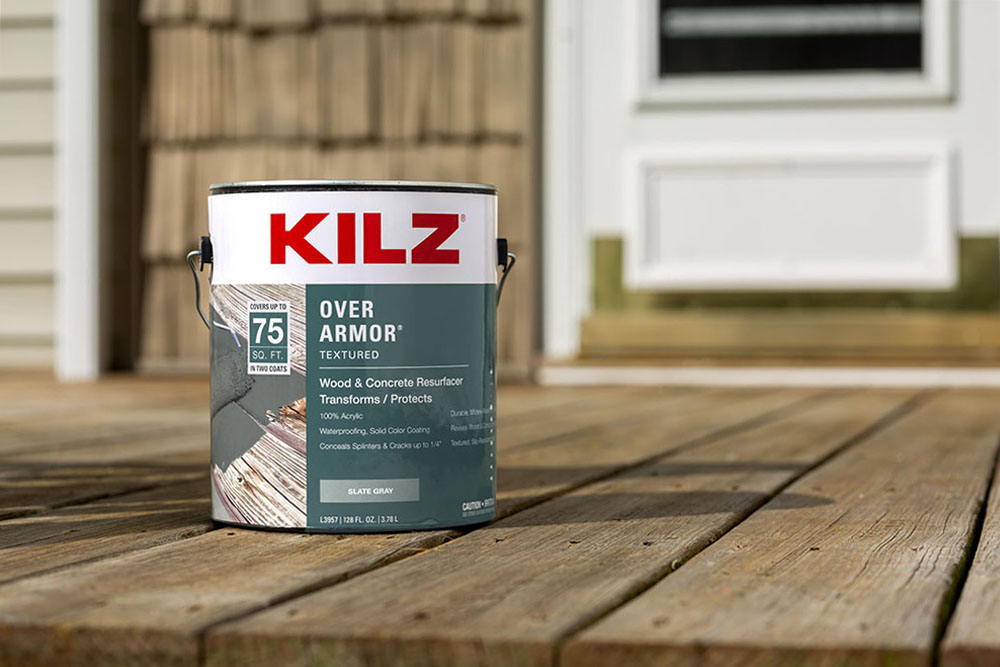
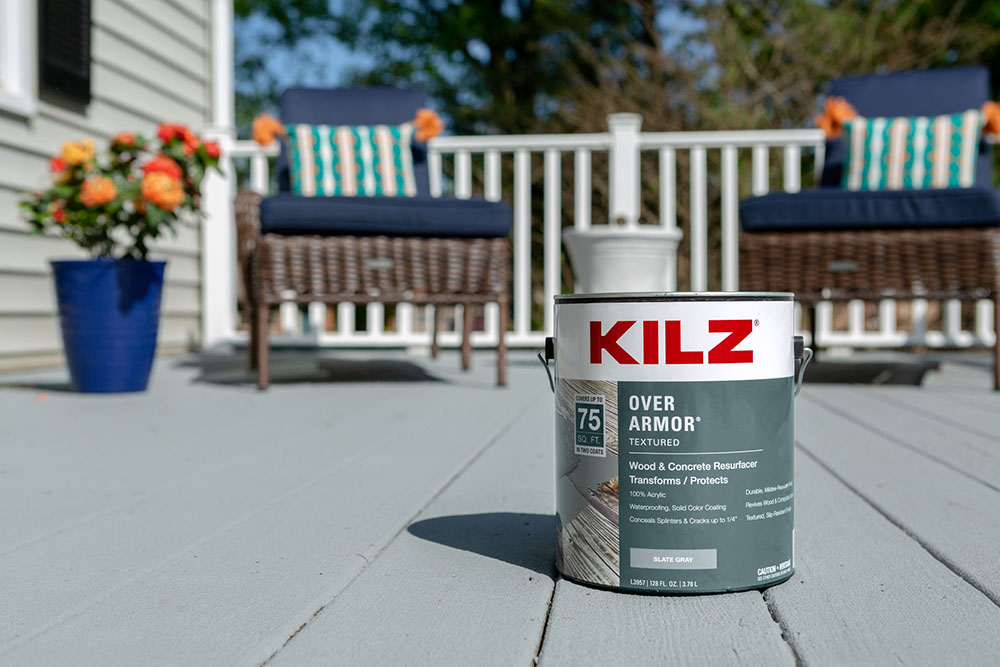
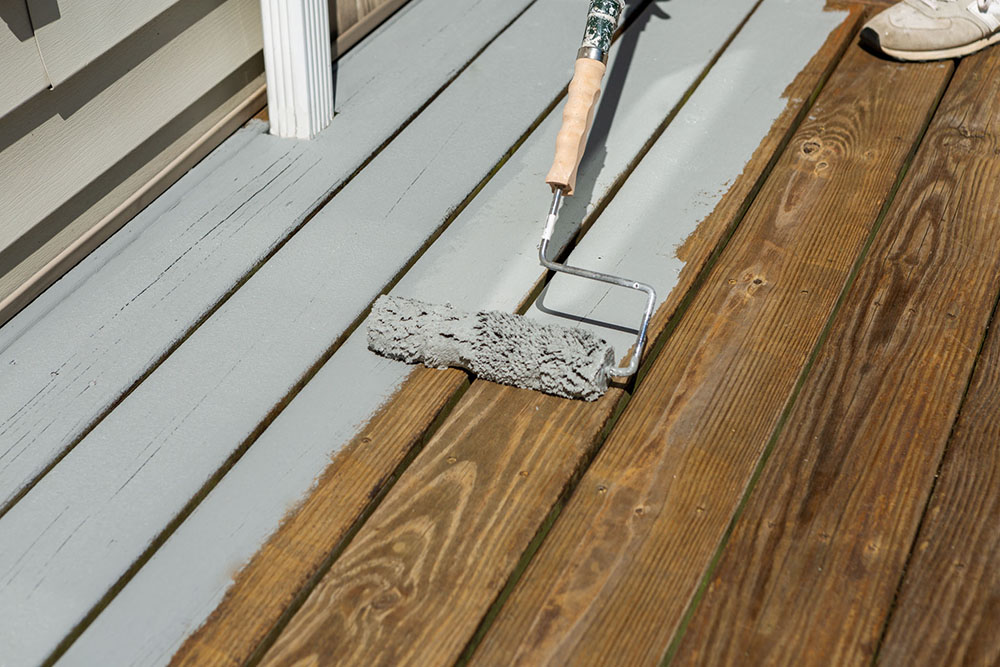
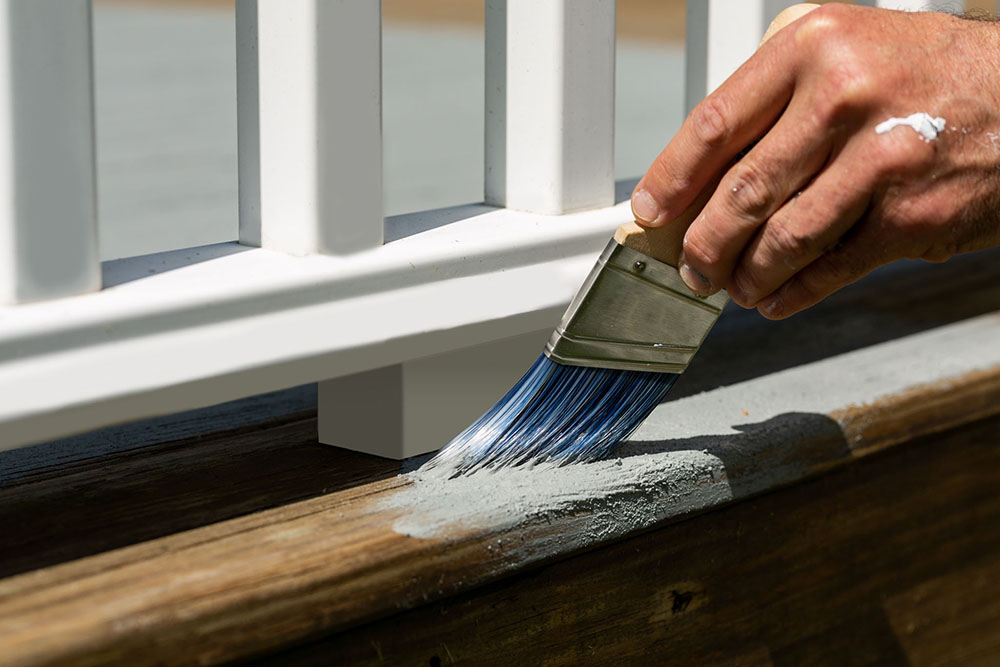
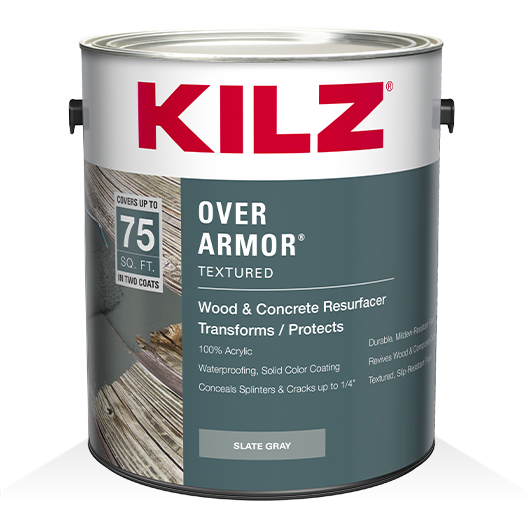
Application: Use KILZ® Over Armor® Textured or KILZ Over Armor Smooth Coating to take your deck to the next level. The solid color coating was designed to cover cracks, hide other imperfections, and provide a textured, non-slip or smooth surface. It’s the perfect choice for breathing new life into old, weathered wood and transforming your deck into a stunning outdoor space that brings the family together making it the envy of the neighborhood.
• Step 4: Stir KILZ Over Armor Coating and intermix cans of the same color to ensure color uniformity
• Step 5: Using the newly mixed coating, fill in any cracks or holes. Next, apply the first coat using a ½” nap roller
• Step 6: Let dry 4-6 hours, then apply second coat. Allow 24 hours before subjecting to light traffic and allow 72 hours before subjecting to full cure
Available in several nature-inspired colors, this deck features Slate Gray. This deep hue blends well with the home’s light gray vinyl siding, black shutters, and white vinyl deck railing. In addition, the neutral gray tone of this area is the perfect canvas for new colorful accessories.
New furnishings can always add a pop of color and give you a chance to add your own personal style. Navy seat cushions, summery striped throw pillows, and a potted rose bush add vibrancy. But, of course, you can always change out décor pending your mood or season.
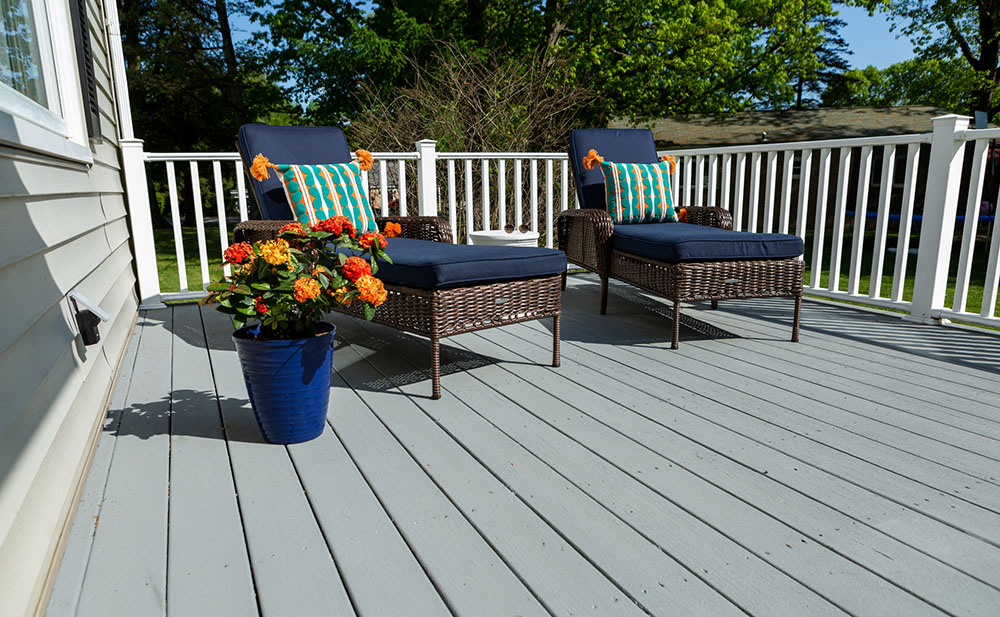
Don’t just paint the deck. Transform the space into a relaxing, fun environment to share with your world.
Features of KILZ® Over Armor Textured Coating
• Use on wood, composite, or concrete
• Suitable for horizontal or vertical surfaces
• Bridges gaps up to ¼”
• Conceals splinters
• Provides a slip-resistant finish
• It fully cures in 72 hours
• Cleans up with water
Always remember to refer to our website kilz.com or product back labels for additional information on which primer is right for your project and detailed instructions on how to apply our products. Check out our Coverage Calculator to understand your estimated paint needs for your upcoming project.
RELATED ARTICLES
get inspired:
FOLLOw us:
@kilzbrand
SHOP
PRODUCTS
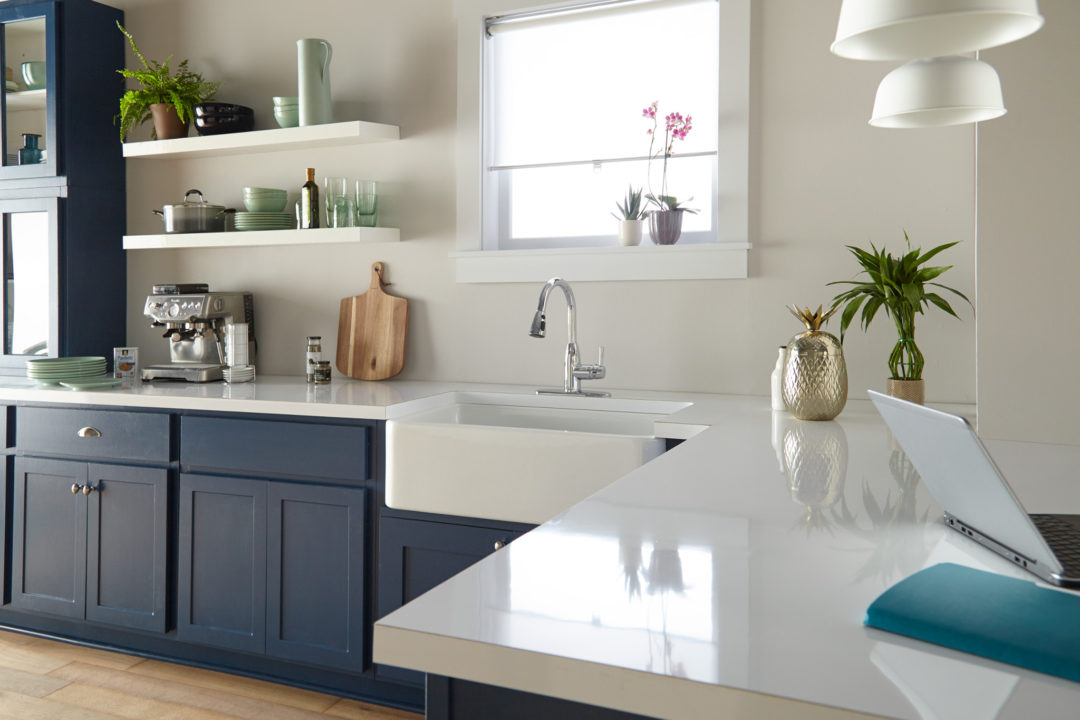
Magnolia Home: Bold Kitchen Colors
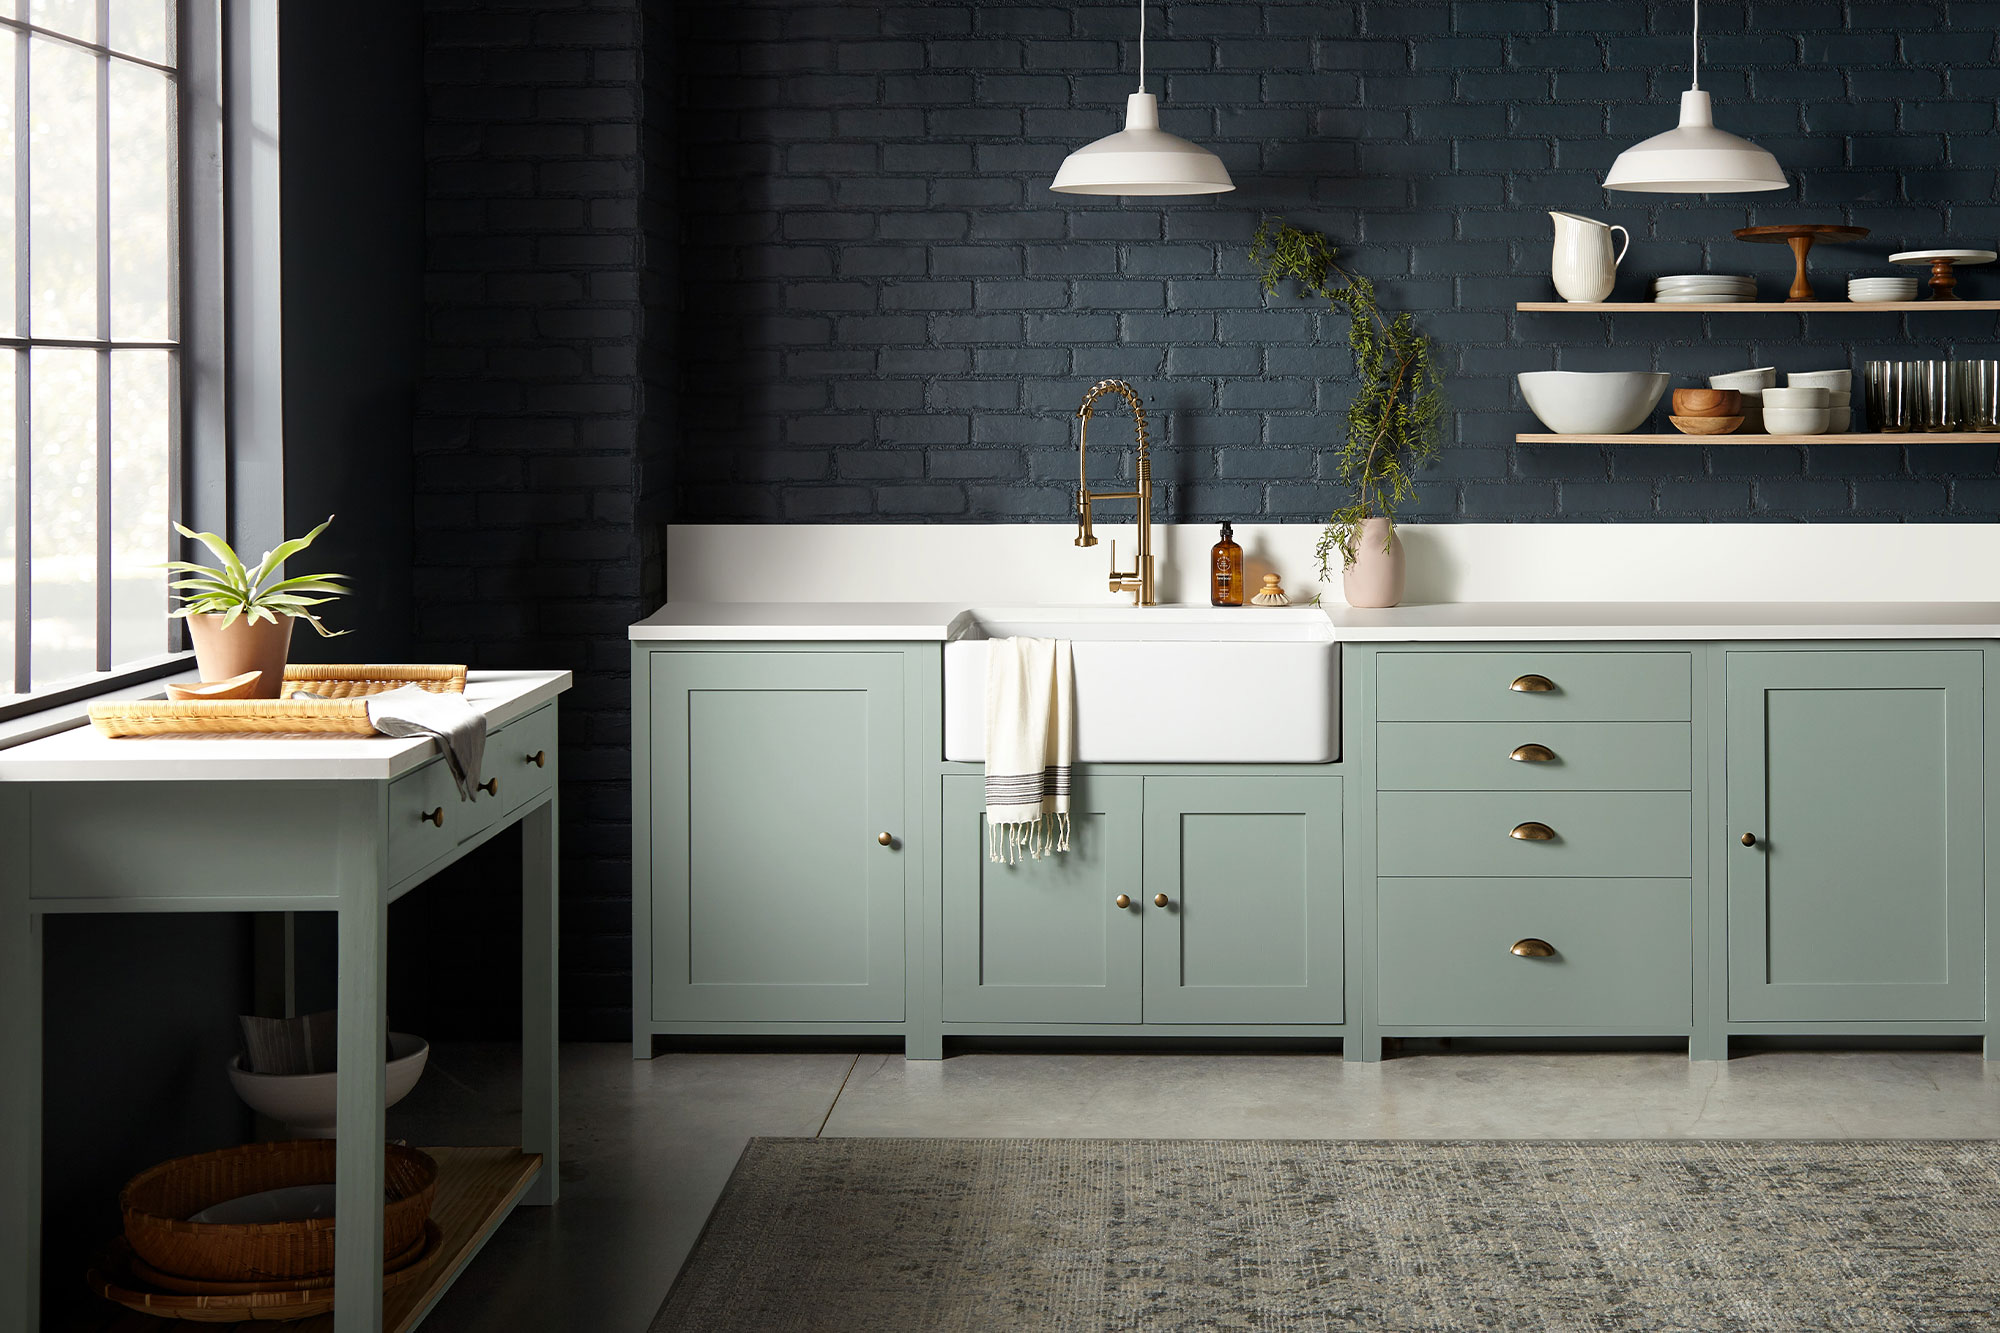
May 11, 2021While a bright white kitchen is a timeless and classic look, sometimes adding a dash of dark color in your space can be the secret ingredient to achieving an elevated design style. In this kitchen, the open and light-filled layout was ideal for a bold color choice on the walls or cabinets.
“Going with a dark paint color for a space might feel intimidating to some, but when you find deep, rich tones like these that beautifully elevate the space, the risk is worth it.” – Joanna Gaines
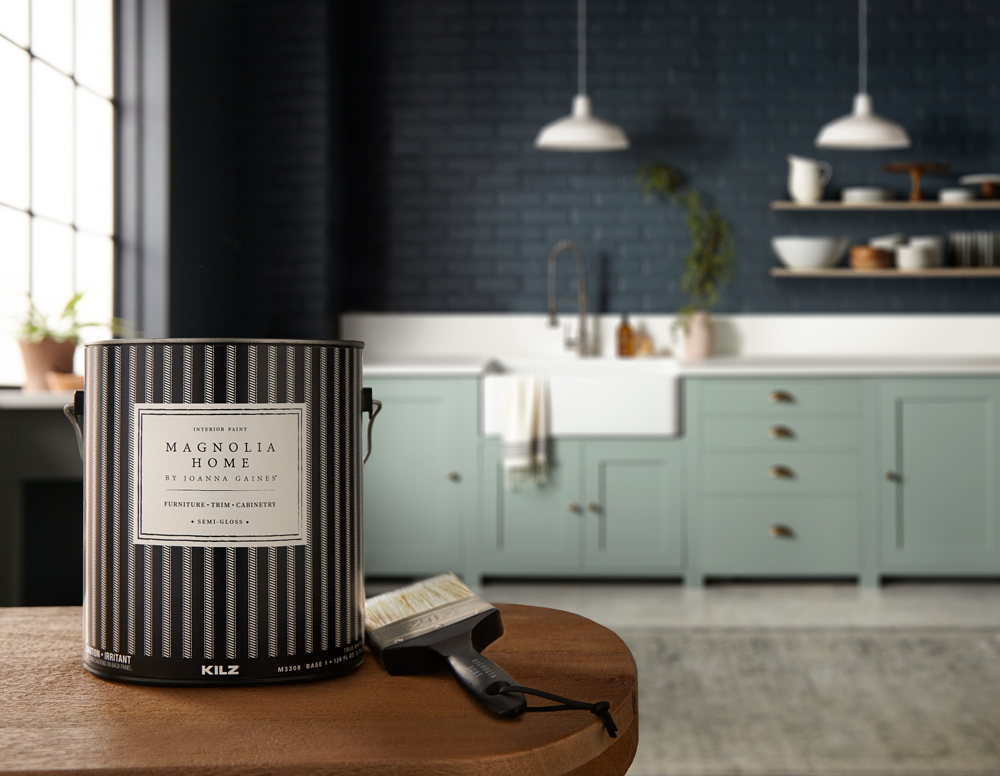
The brick walls in this kitchen had a beautiful natural texture that combined with the light pouring in from the large open window, made for an ideal surface to hold a darker paint shade. The chosen color, Magnolia Home by Joanna Gaines® paint in Coffee Nook, offered the depth desired (a dark, smoky gray) with a softness that comes through in the blue undertones.
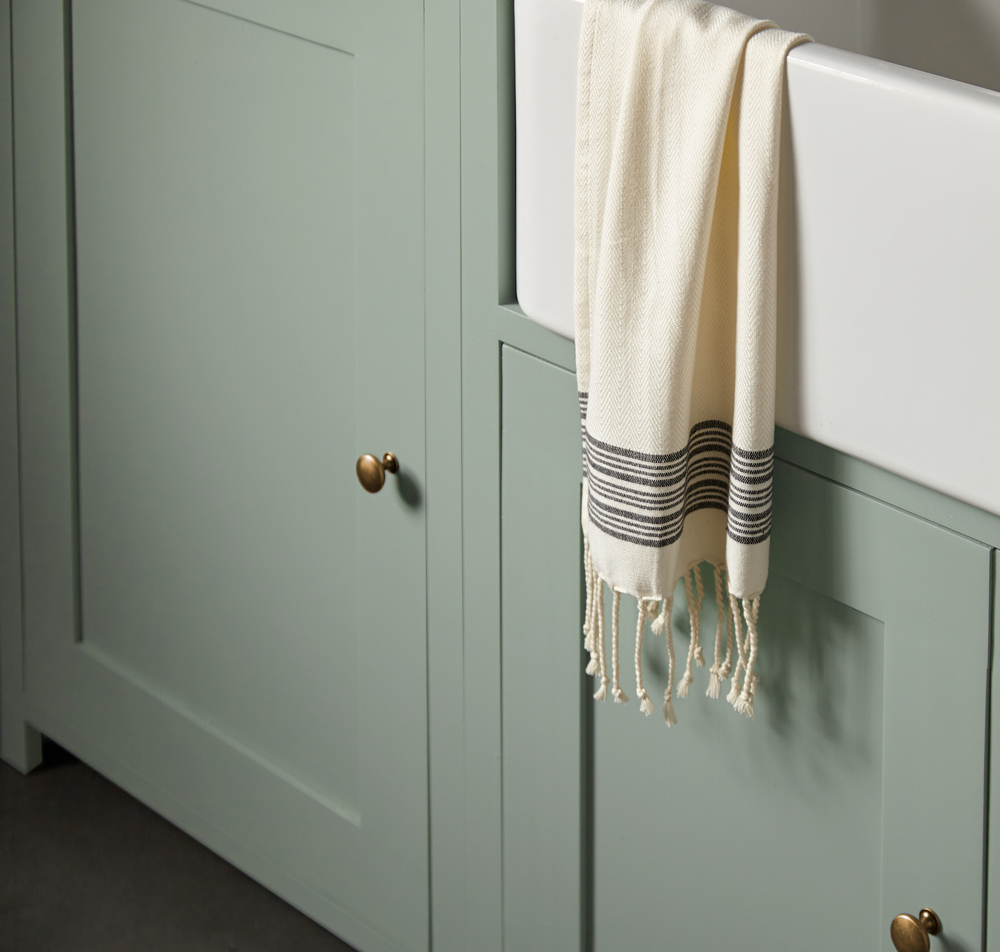
To complement the deep and dark walls, the cabinets were coated in a paint color with a similar gray hue but in a much lighter shade. The chosen color, Clean Slate, brought together a perfect pairing of cement gray and blue undertones. A white farmhouse sink and bright white countertops added airiness to the space, while minimalist open wood shelves added interest to the dark, brick wall.
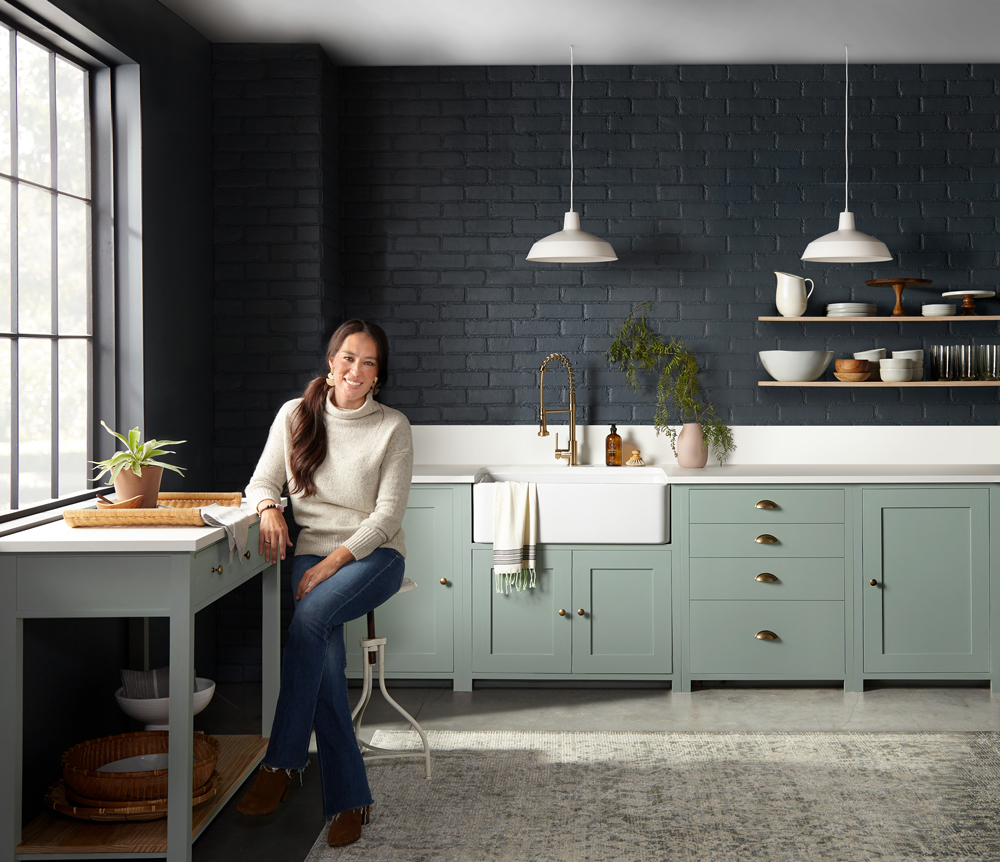
This resulting kitchen is a design and culinary masterpiece, and proof that bold and dark color choices can be just the thing to take a design from simple to decadent. If you’re looking to explore using bold colors in your space and aren’t sure what to pair them with, explore the palette below of shades that complement Coffee Nook and Clean Slate.


Magnolia Home by Joanna Gaines paint is available at select Ace Hardware store locations, and online at AceHardware.com and Magnolia.com.
RELATED ARTICLES
get inspired:
FOLLOw us:
@kilzbrand
SHOP
PRODUCTS
Truer Coverage Starts Here
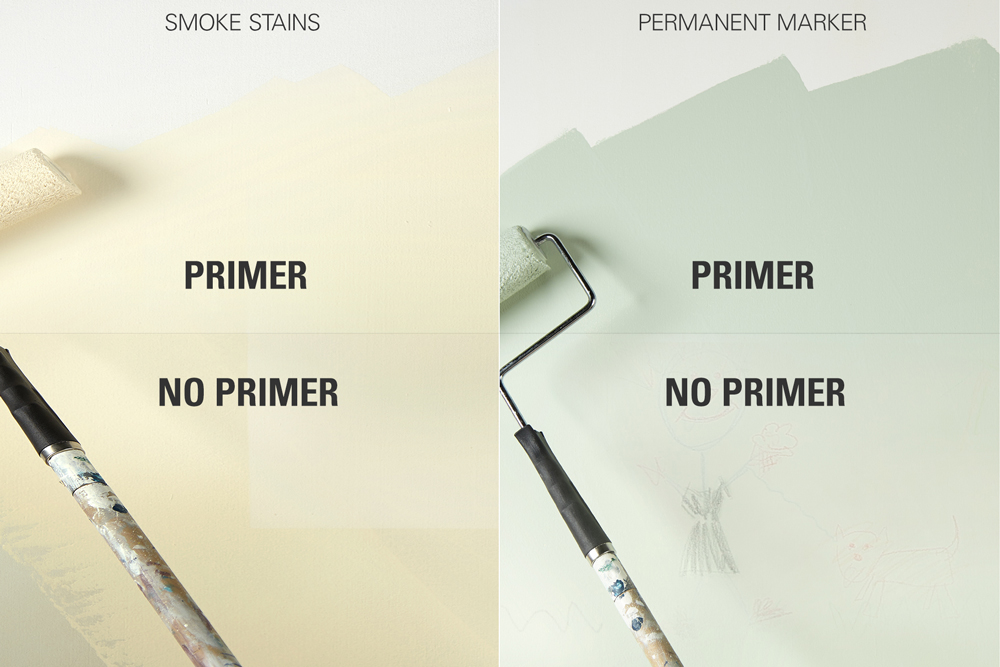
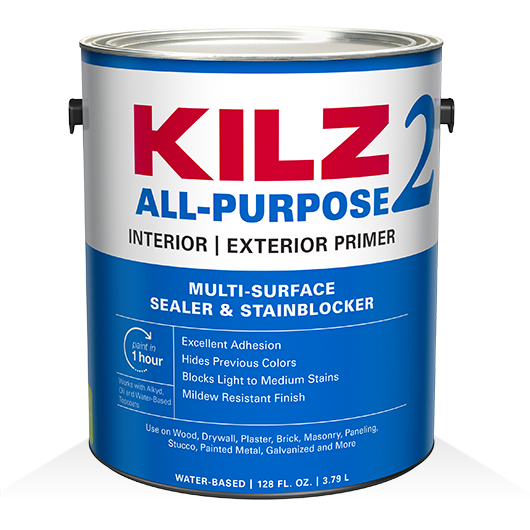
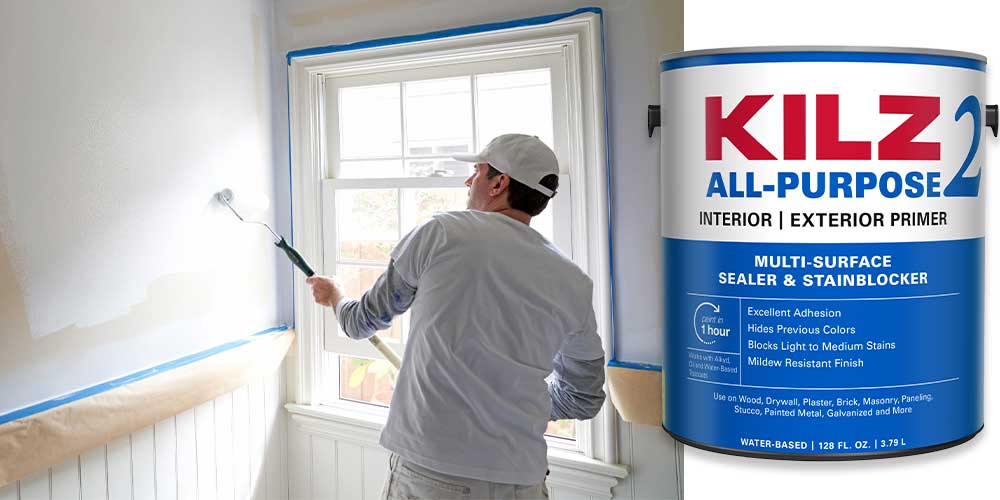
March 30, 2020When you’ve finally found that perfect paint color for your walls or furniture re-painting project, the last thing you want is a pre-existing stain to seep through and ruin your new color! Even light to moderate stains like scuff marks or crayon marks can bleed through paint, so it’s important to prime first to create a barrier. If you’re dealing with a lighter stain, KILZ 2® All-Purpose primer is a great choice. A water-based formula with enhanced hiding, KILZ 2 All-Purpose is formulated to block light to medium stains and hide previous colors.
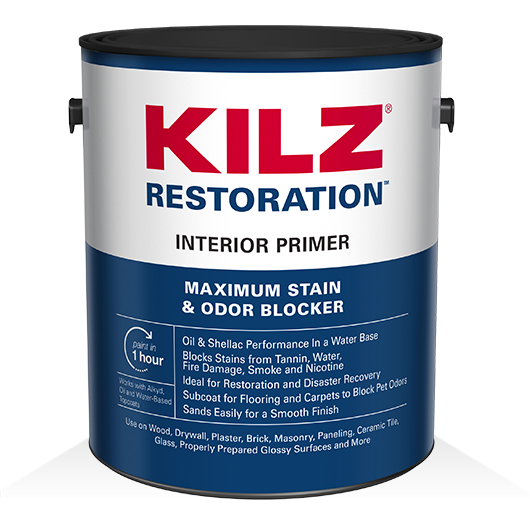
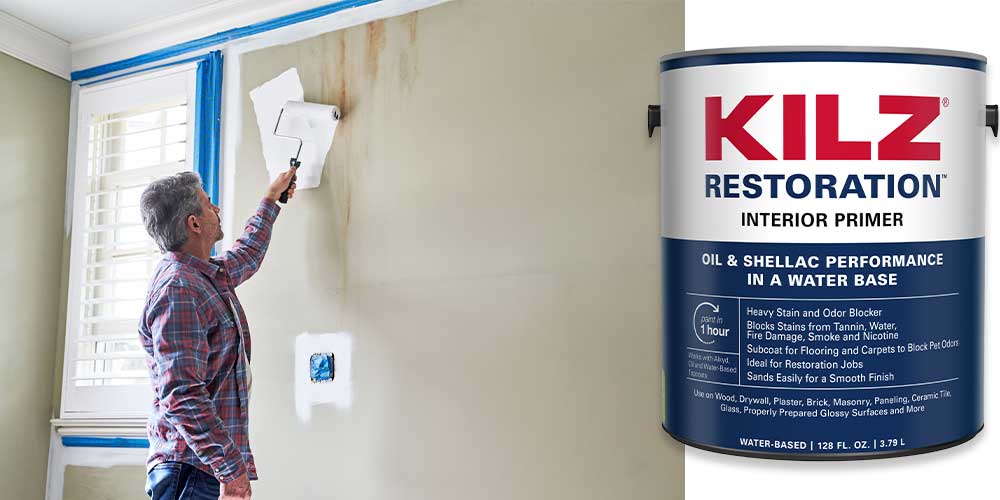
A severe stain calls for a heavy-duty primer – and we have more than one that are up for the job! KILZ® Primer is a preferred choice of pros for stains caused by fires, floods, persistent exposure to pets or smoke stains from fire damage, soot and charring. Stain blocking primers also work great on permanent marker, grease and nicotine stains. KILZ® Original, trusted by pros for over 40 years, has excellent sealing and adhesion properties and is formulated to block heavy stains. Another great choice is KILZ Restoration, a water-based primer that offers the performance of a traditional oil and shellac-based primer. A heavy stain and odor blocker, KILZ Restoration can block stains from tannin, water, fire damage, smoke, nicotine and more.
From colorful crayon stains to unsightly smoke damage, truer coverage starts with KILZ primers.
Always remember to refer to our website kilz.com or product back labels for additional information on which primer is right for your project and detailed instructions on how to apply our products.
RELATED ARTICLES
get inspired:
FOLLOw us:
@kilzbrand
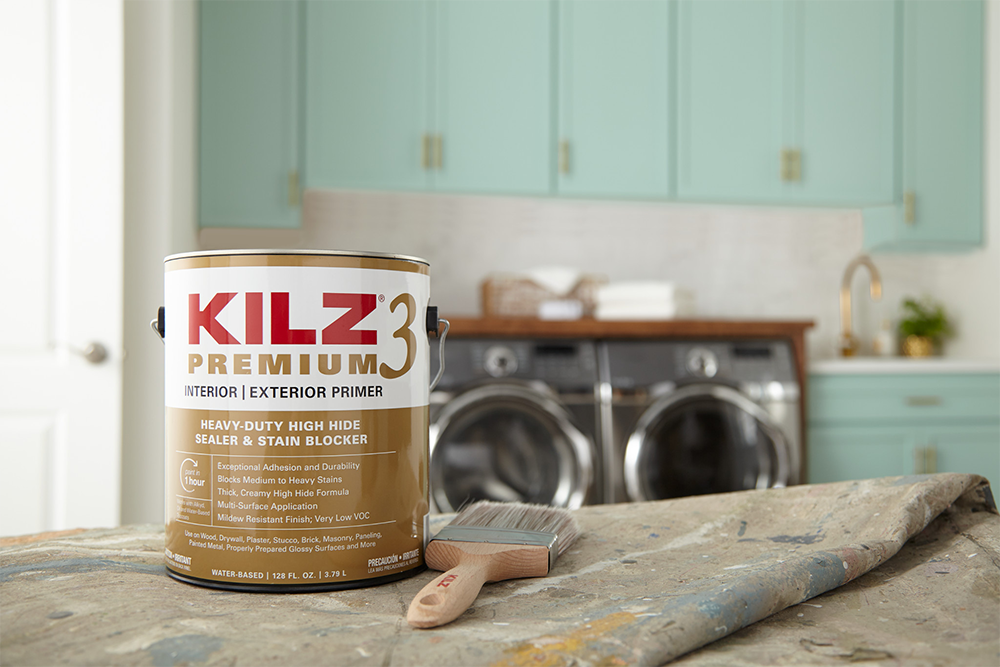
Fresh as Spring Laundry Room Makeover
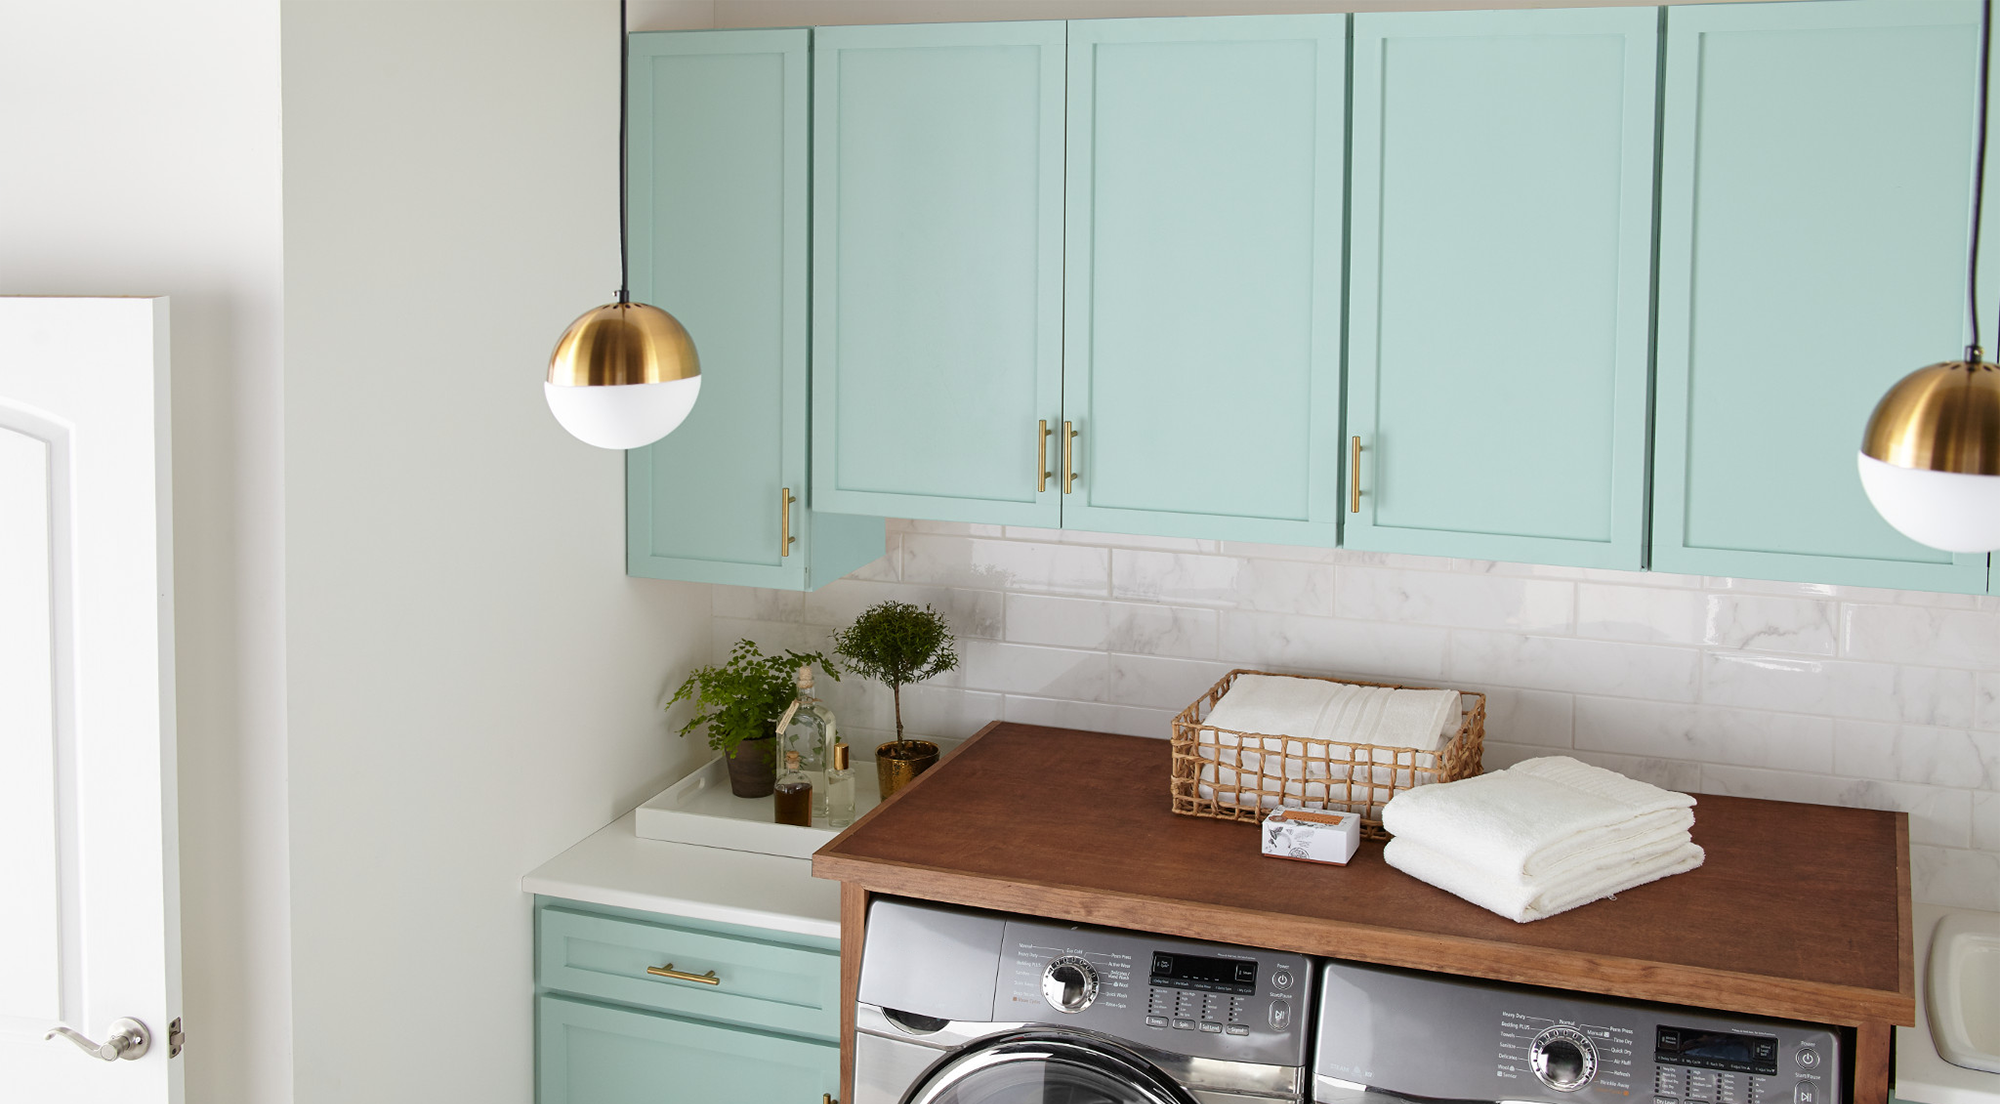
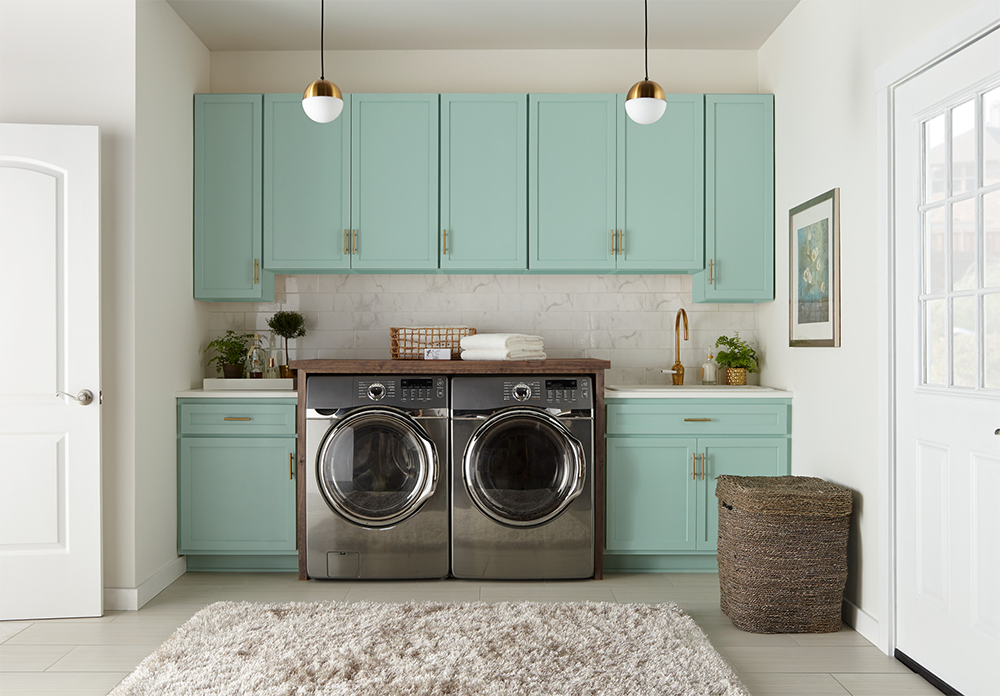
March 6, 2020A fresh coat of primer and paint brings a welcome sense of calm to a room often reserved only for chores in this fresh as spring laundry room makeover. Laundry is virtually unavoidable, so you might as well enjoy the space you’re in when you’re checking it off the to-do list!
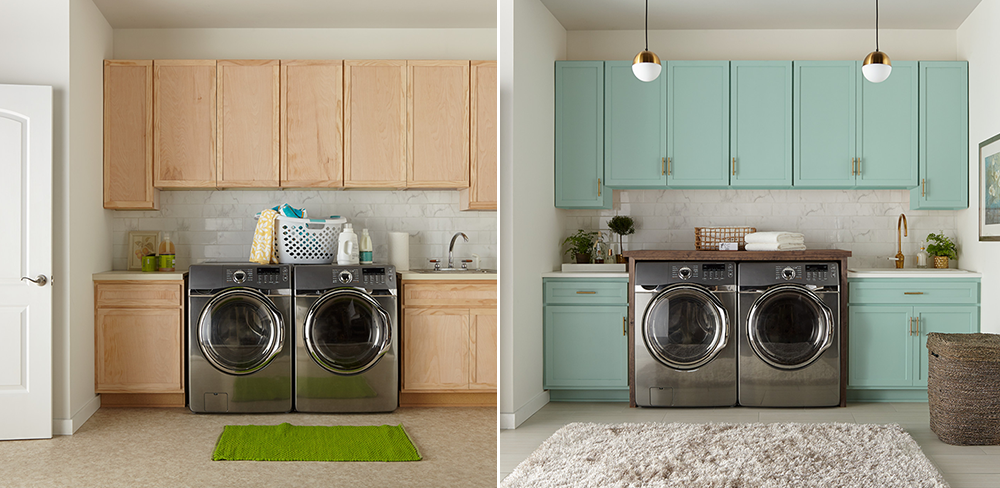
The laundry room’s original wood cabinets felt like an endless line up of bland and boring, lacking both color and any interesting detail. A fresh coat of paint was definitely in order, but first things first… we couldn’t forget to prime! Similar to bathrooms and kitchens, laundry rooms are an area of the house often prone to excess moisture, humidity and changing temperatures – making primer an essential first step to ensure a paint finish that will last.
For this laundry room transformation, we chose KILZ 3® Premium primer as it offers exceptional adhesion and durability, and a mildew resistant primer finish. After KILZ 3 Premium primer was properly applied and allowed to dry, we had a clean slate ready for color.
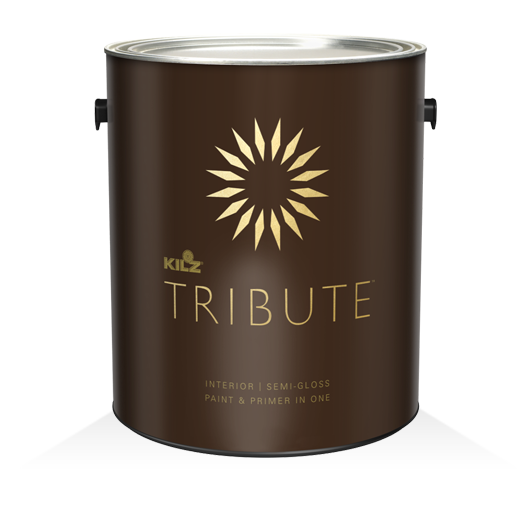
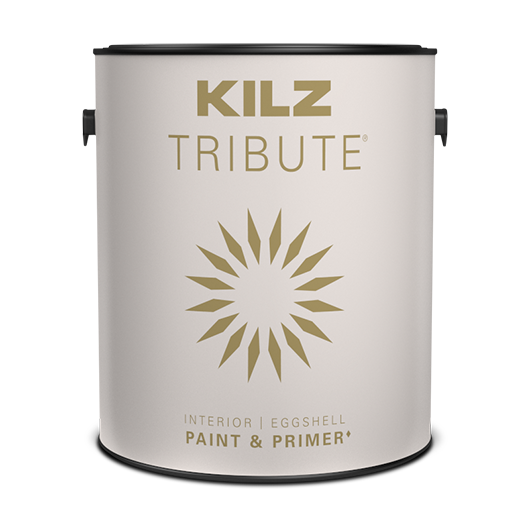
For a relaxed yet modern vibe we chose KILZ Tribute® in Panoramic Trail TB-65, a minty green with an ever so slight gray undertone. Gold hardware added a subtle shine and much needed detail to the otherwise flat cabinet fronts, inspiring the addition of a new gold faucet and metallic pendant lights to tie the space together.
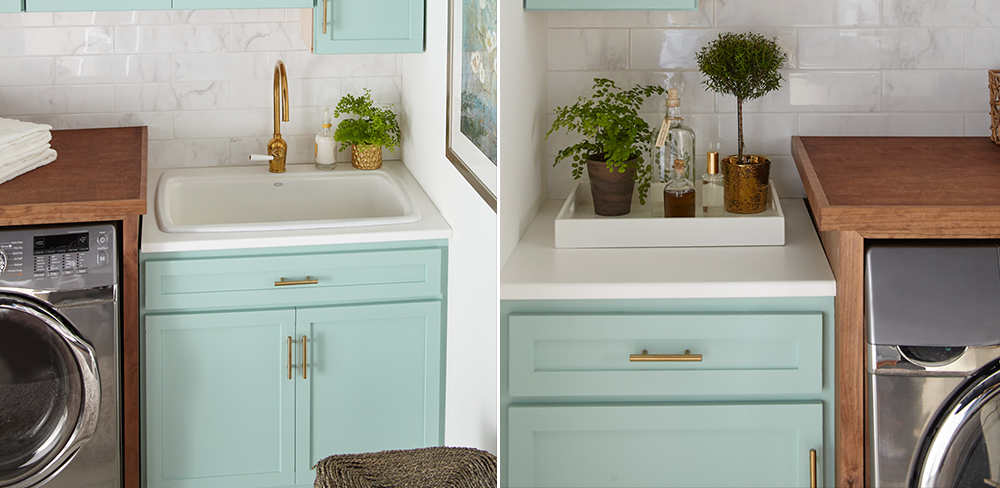
The original laundry room was also lacking surface area to fold after the fluffing is done, with the sink taking up an entire side of the already limited counter space. The fix was both functional and uniquely attractive! Adding a dark wooden panel around the top and sides of the washing machine and dryer not only brought warmth to the space, it also nearly tripled the usable countertop area.
A new faux-wood floor in a subtle grey shade was added to perfectly complement the new cabinet color. The final space is so pretty, it almost makes us want to do laundry!
Always remember to refer to our website kilz.com or product back labels for additional information on which primer is right for your project and detailed instructions on how to apply our products.
RELATED ARTICLES
get inspired:
FOLLOw us:
@kilzbrand
SHOP
PRODUCTS
Find a Color That Speaks to You
March 6, 2020Choosing a paint color can sometimes feel like a daunting task. Whether you’re DIY’ing or hiring a professional painter, the investment of time and money in a painting project is enough to make you want to get it right the first time. Now finding a color you love just got easier with KILZ® Color Perfect Tool™, an easy-to-use new online tool that allows you preview paint colors in different rooms and even in your own space!
If you have a hue in mind, you can start by picking a few colors and then previewing them in one of our sample room images. You can even upload an image to see the color in your own space! You can also start by choosing a room type and then selecting colors as the next step. Either way, you’ll have the option to try on colors from the KILZ® Tribute® paint line, a 100% acrylic and low VOC paint that offers both excellent stain-blocking performance and exceptional durability.
Our team loves color just as much as we love proper preparation (don’t forget to prime!) and know that finding a color that speaks to you can truly transform your space. Ready to try on colors in your own space or in one of our sample rooms? Try the KILZ Color Perfect Tool today!
RELATED ARTICLES
get inspired:
FOLLOw us:
@kilzbrand
SHOP
PRODUCTS
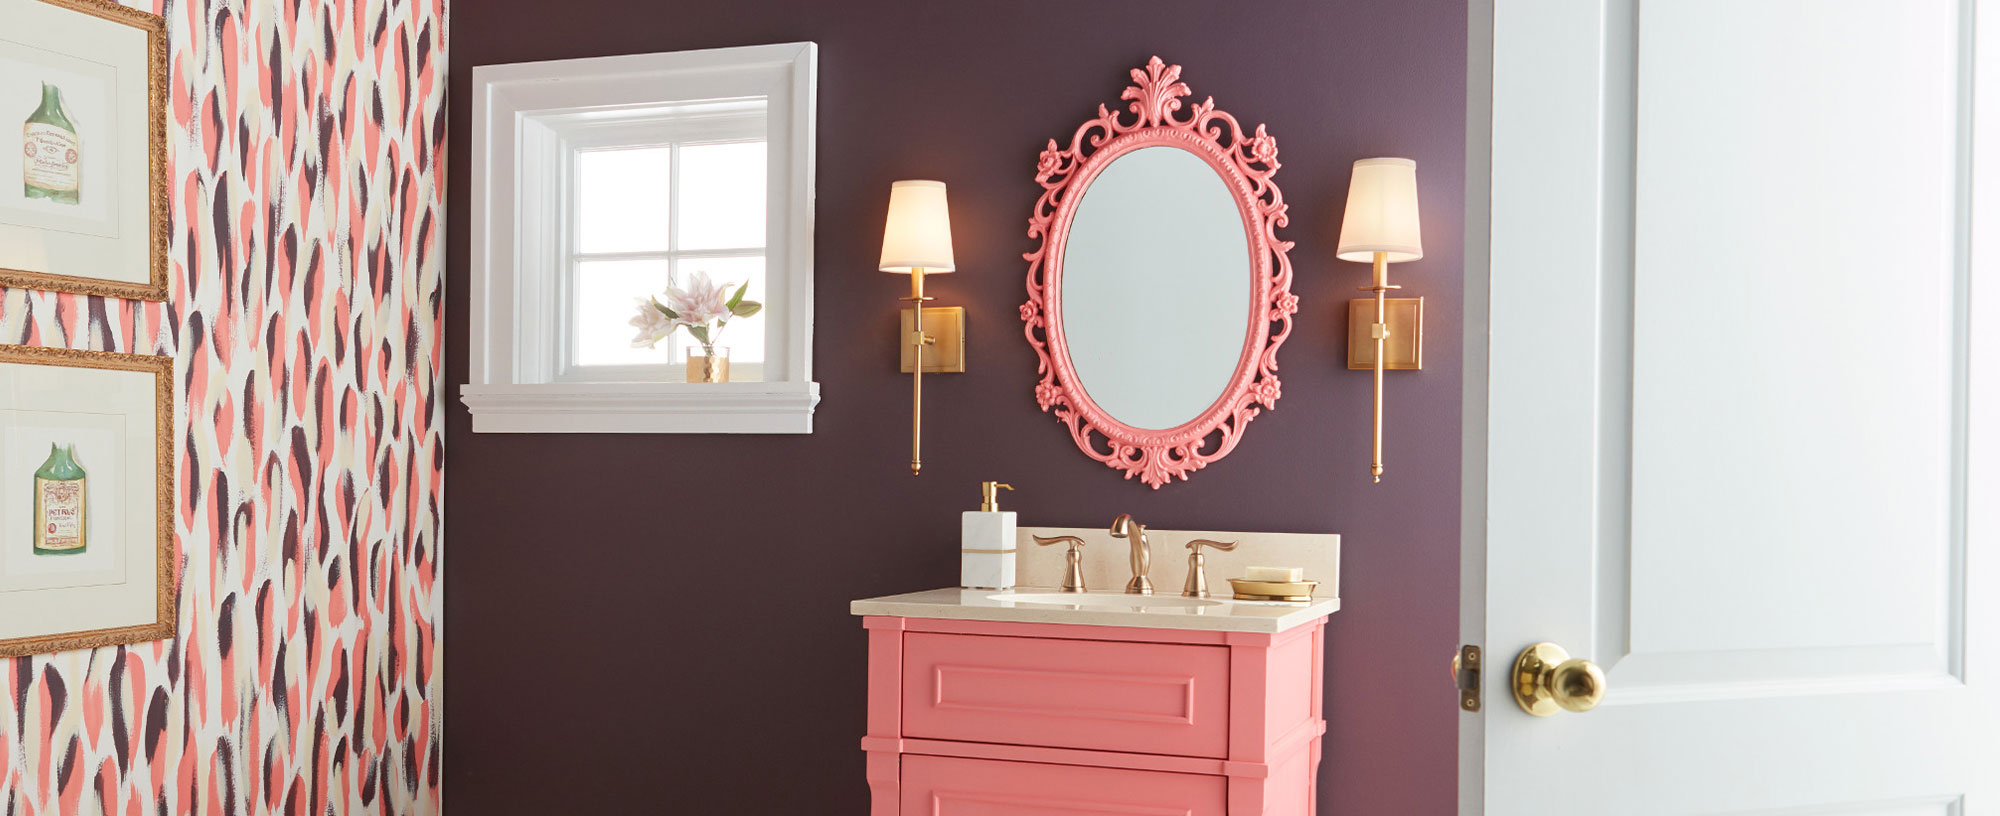
Pretty in Pink Bathroom Makeover
February 12, 2020It’s February, which means Valentine’s Day and all things pink are top of mind. This month we’re talking about colors and spaces you can fall in love with, including this pretty in pink bathroom. A once boring bathroom was given new life with painted faux wall paper, a bright pink vanity (with matching mirror!) and a dark accent wall. And just as important as picking the right vibrant colors for this small space renovation, was the prep work that went in before we painted to ensure that this makeover would last for years to come.
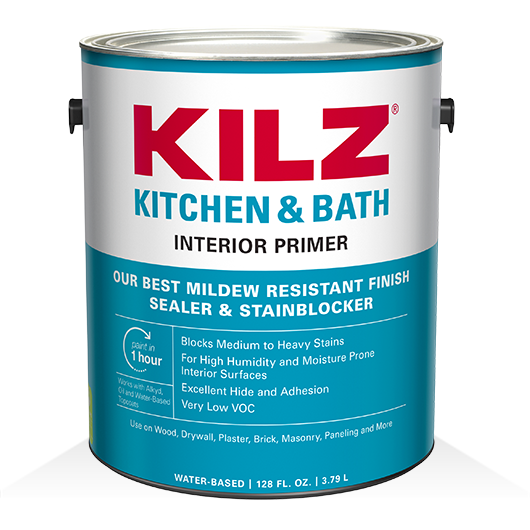
Before the paint went on, we wanted to ensure that our hard work would withstand a bathroom’s typical humidity, moisture and changing temperatures so we primed the walls with KILZ® Kitchen & Bath Primer. This water-based primer is specially designed for residential surfaces exposed to humidity, moisture and fluctuating temperatures such as kitchens, bathrooms, powder rooms and laundry rooms.
Proper priming also provides a solid anchor for paints – in this case a deep purple wall and coral-hued bath vanity. A painted “wall paper” accent wall and pink mirror complete the space. For this bathroom makeover, BEHR Premium Plus® in Watermelon Punch, KILZ Tribute® in Spanish Fortress and Beetroot Purple were used as accent colors over a white wall to create the fun faux wallpaper. Beetroot Purple was also used for the dramatic dark wall behind the vanity, with Watermelon Punch coating the vanity and matching mirror.
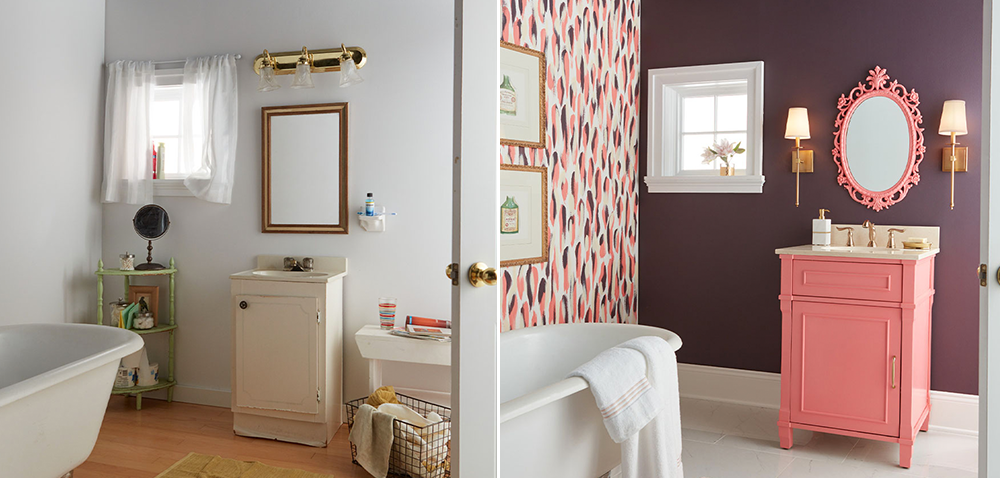
An everyday space gets a coat of unexpected flair in this stylish bathroom makeover. Read on for step by step directions to complete this paint project at home including the dark accent wall, painted “wall paper”, bathroom vanity and matching mirror.
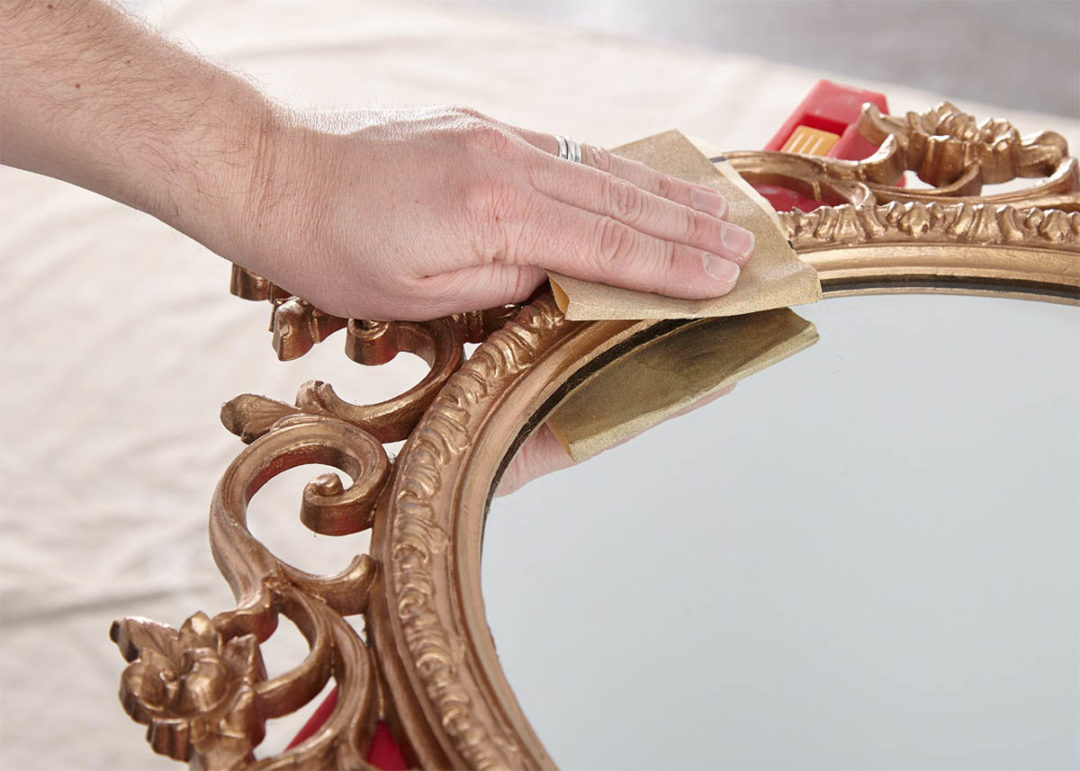
The Dark Accent Wall
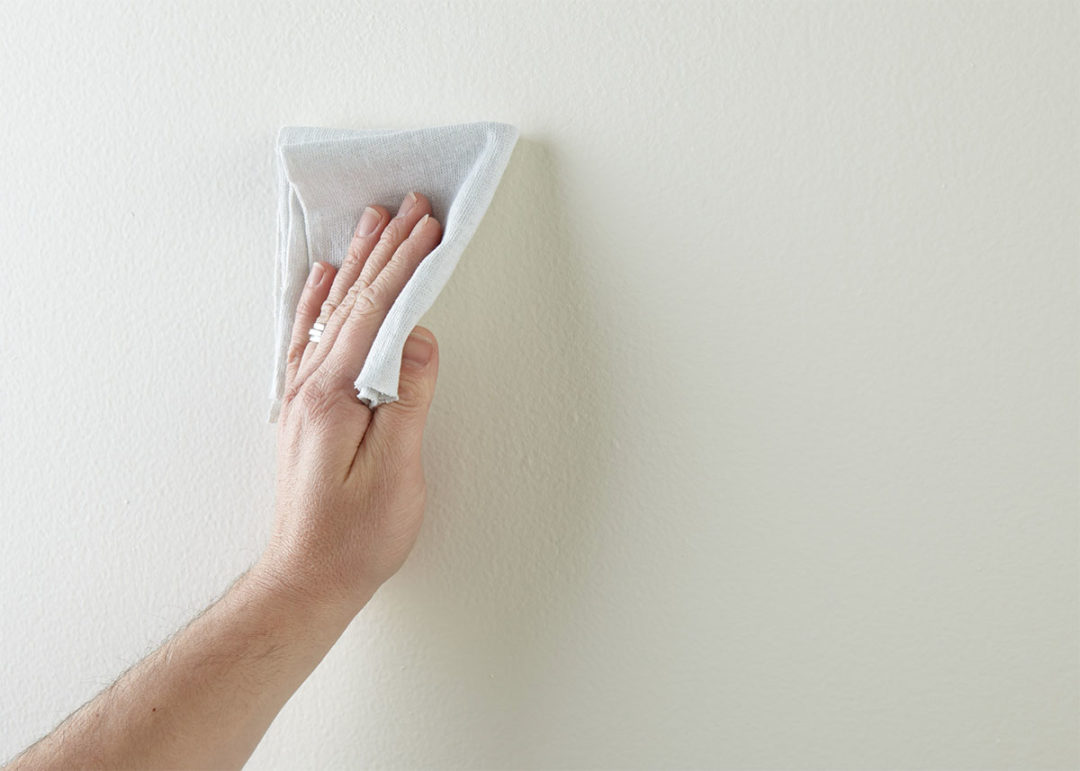
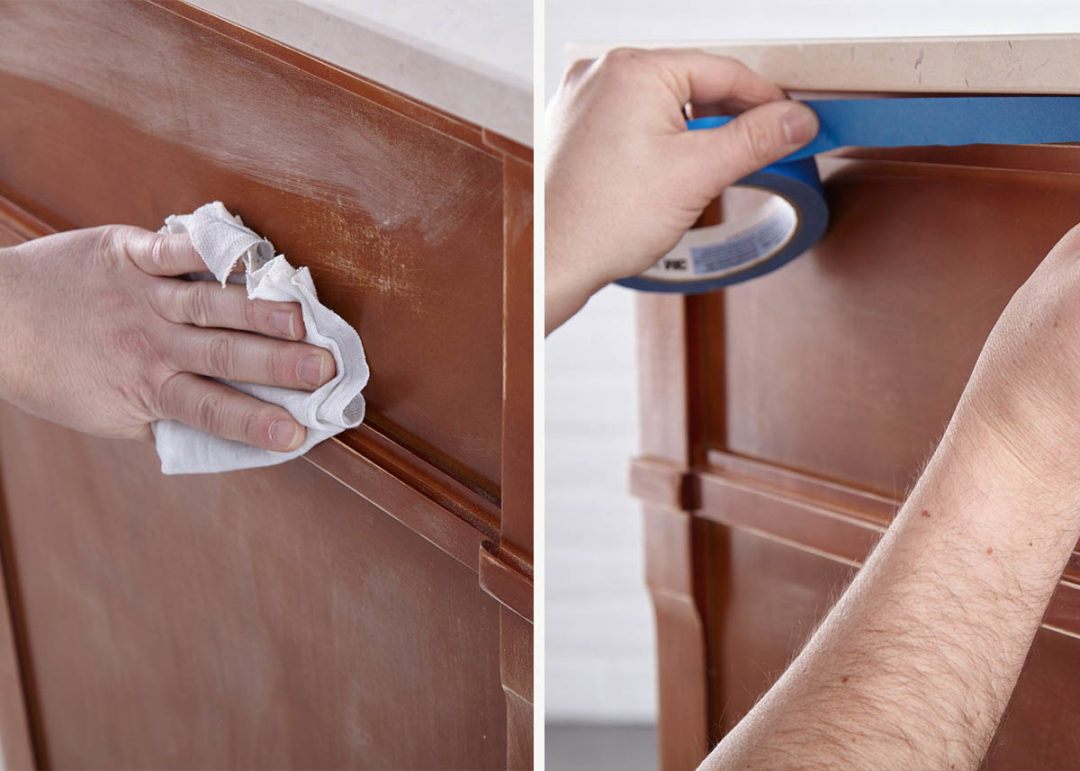
Step 1: Wipe down the chosen accent wall with a damp cloth to ensure it is clean and free of dust and allow the surface to dry.
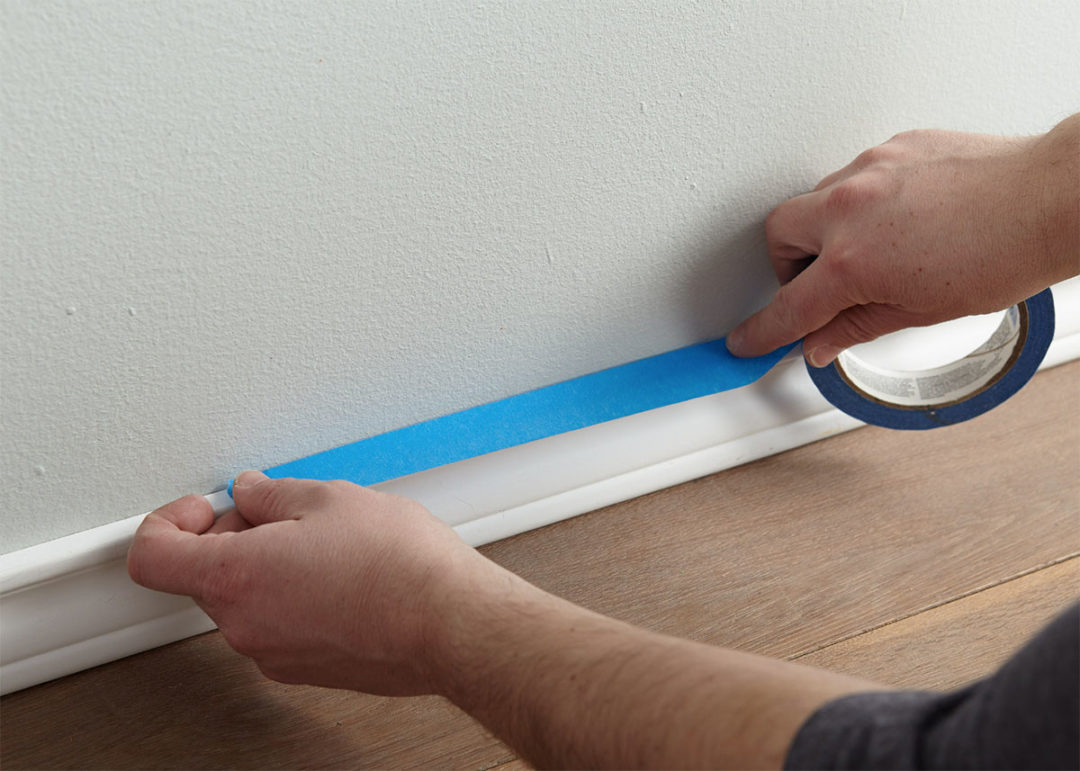
Step 2: Once dry, tape around the baseboards, trim and moldings.
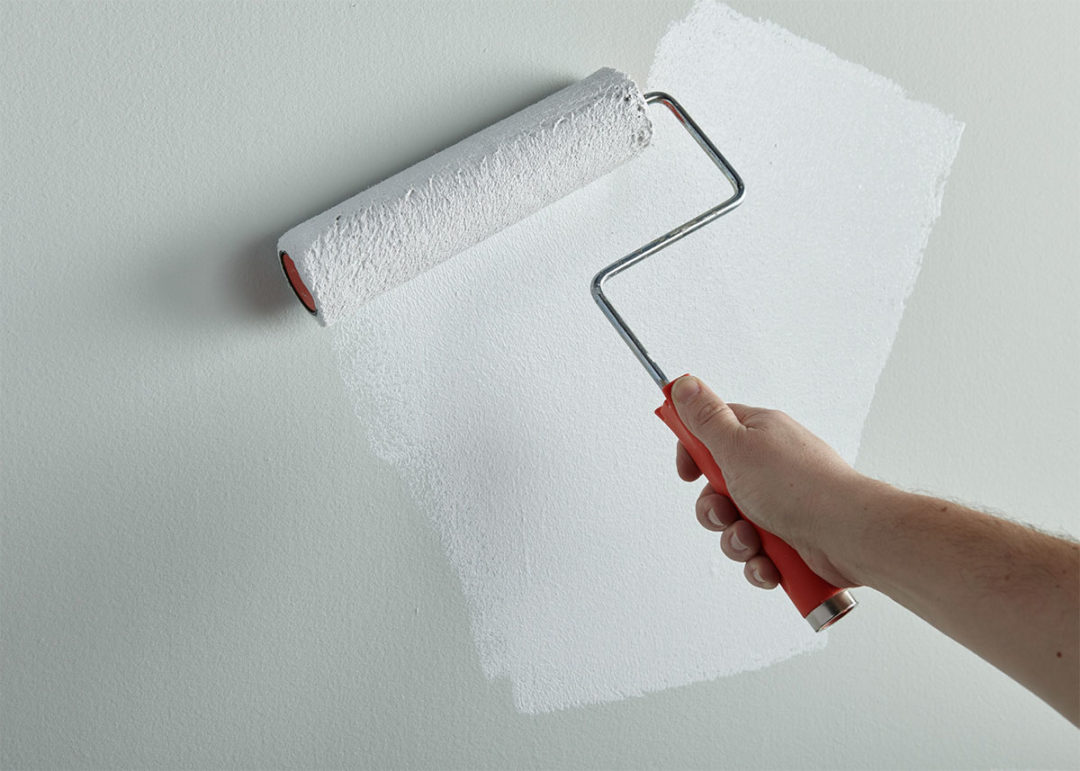
Step 3: Apply 1 coat of KILZ Kitchen & Bath (stirring thoroughly before and occasionally during use) and allow to dry. Apply primer using a brush first to “cut in” around the edges, then use a roller to fill in.
Step 4: Once primer is dry, apply KILZ Tribute in Beetroot Purple using the same application method as the primer (using a brush first to cut in around the edges 4 to 6 feet at a time, then use a roller to fill in those sections before moving along).
Step 5: Remove tape before paint is fully dry.
The Painted “Wallpaper”
Step 1: Once the wall is primed (use same method as above), apply base color.
Step 2: Starting with BEHR Premium Plus in Watermelon Punch, use a brush and apply vertical strokes across entire wall. Once dry, use KILZ Tribute in Beetroot Purple and repeat, slightly overlaying the vertical strokes across the first pink strokes. Allow to dry and repeat with KILZ Tribute in Spanish Fortress.
The Vanity
Step 1: Remove drawers and hardware. Put the screws back into the hardware, then seal the hardware and screws in painter’s tape and label it. It’s always best to put every screw back exactly where it came from. That will put the least amount of stress on the wood.
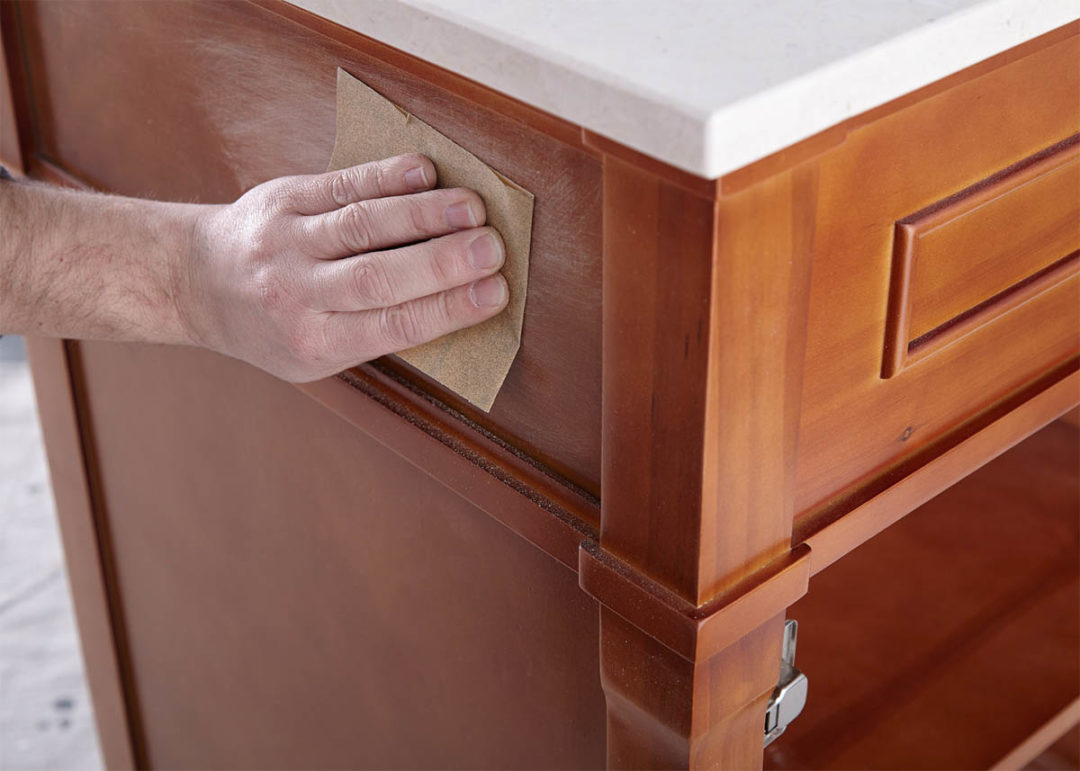
Step 2: Sand the surface; do a first pass with 100-150 grit sandpaper then finish with a second pass of 180-220 grit sandpaper.
Step 3: After sanding, wipe down the surface with a damp cloth to remove any dust or residue and allow the surface to dry. Once dry, apply painter’s tape around the countertop edges.
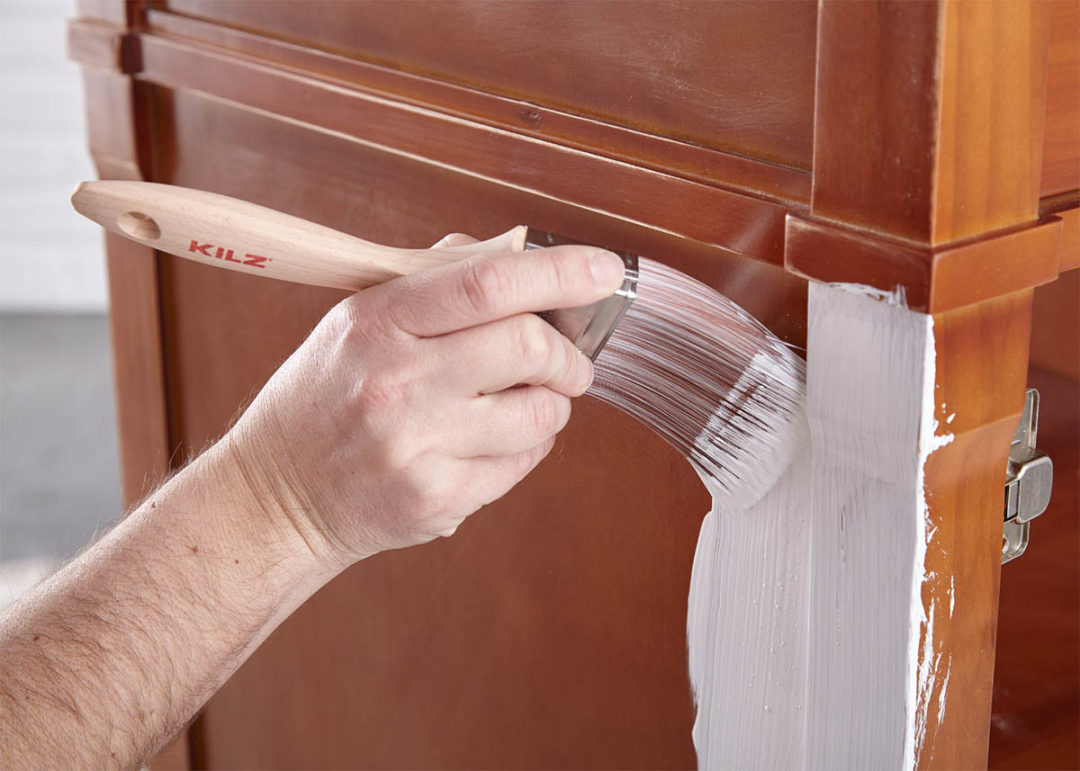
Step 4: Apply KILZ Kitchen & Bath (stirring thoroughly before and occasionally during use), moving in the same direction as the wood grain for best results. Allow primer to dry for 1 hour.
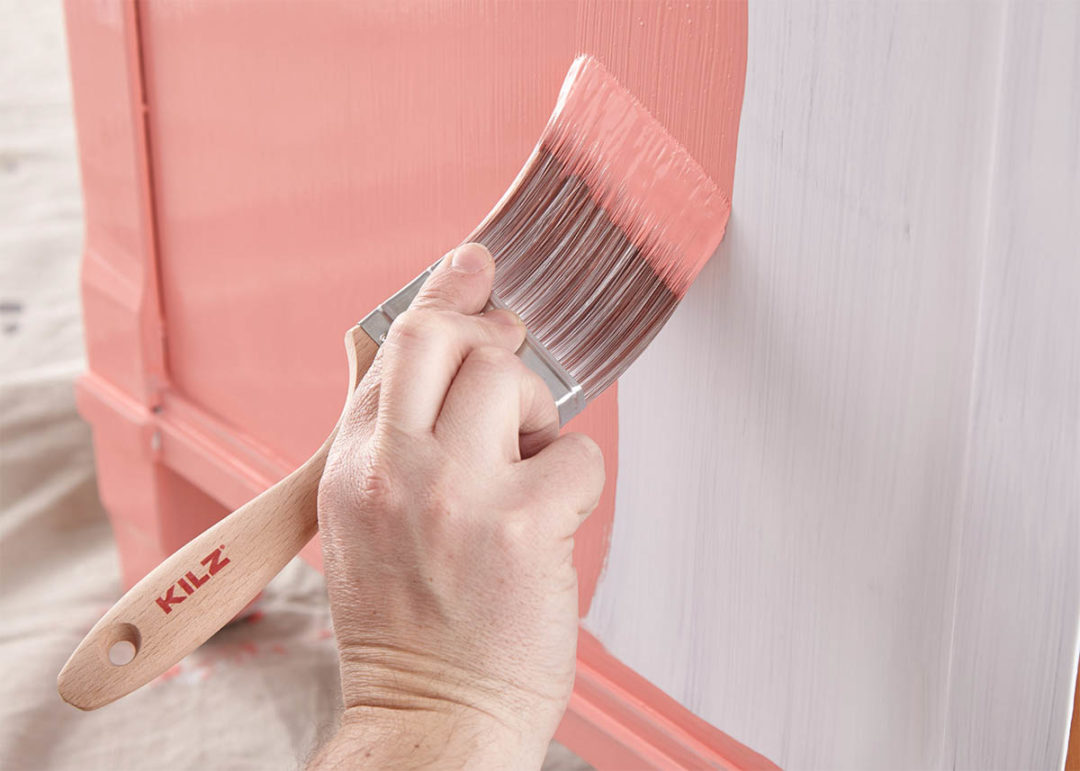
Step 5: Next it’s time for a pop of pink! Apply BEHR in Watermelon Punch (a satin or semi-gloss finish is recommended for superior mildew resistance). Remove the painter’s tape before the paint is fully dry.
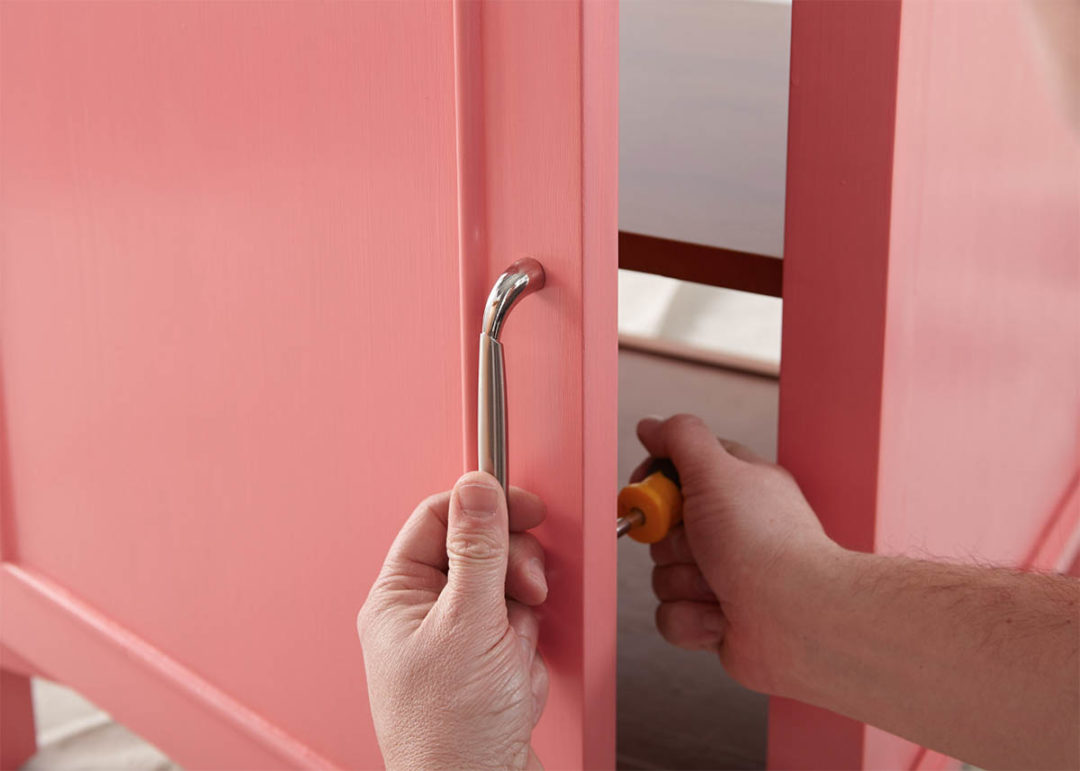
Step 6: Once the vanity is dry, reattach your hardware and you’re done!
The Mirror
Step 1: Sand the mirror frame, first with 100-150 grit sandpaper and then finish with a second pass of 180-220 grit sandpaper.
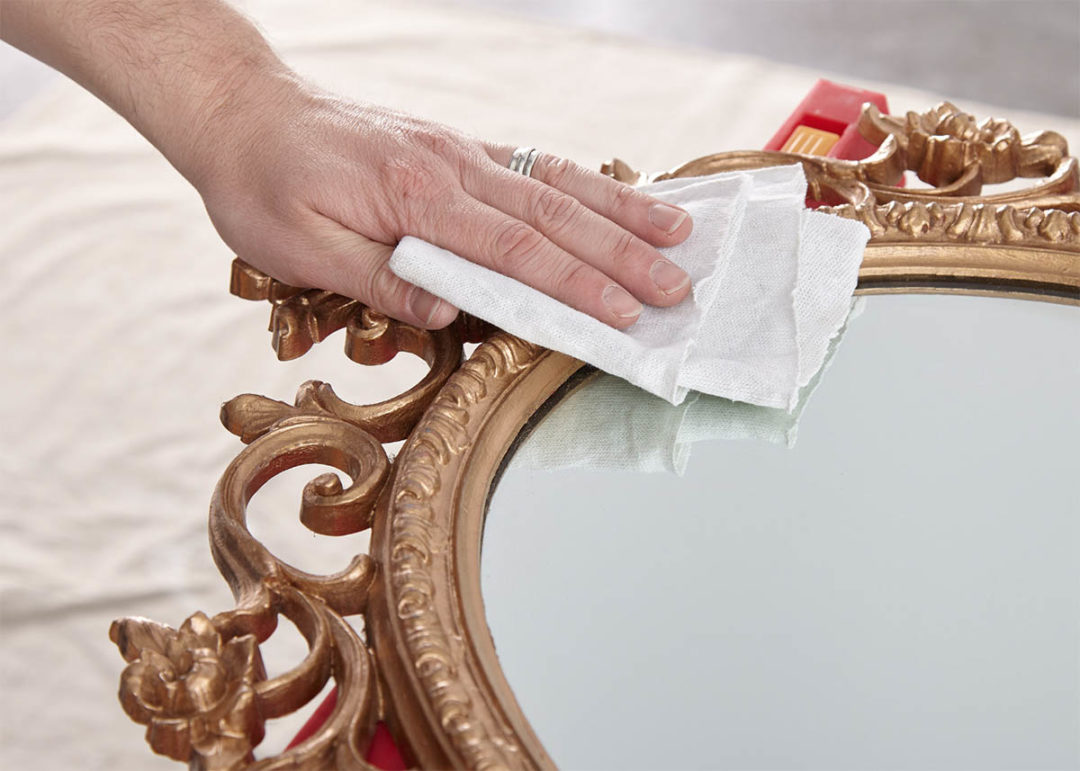
Step 2: After sanding, wipe down the surface with a damp cloth to remove any dust or residue and allow the surface to dry.
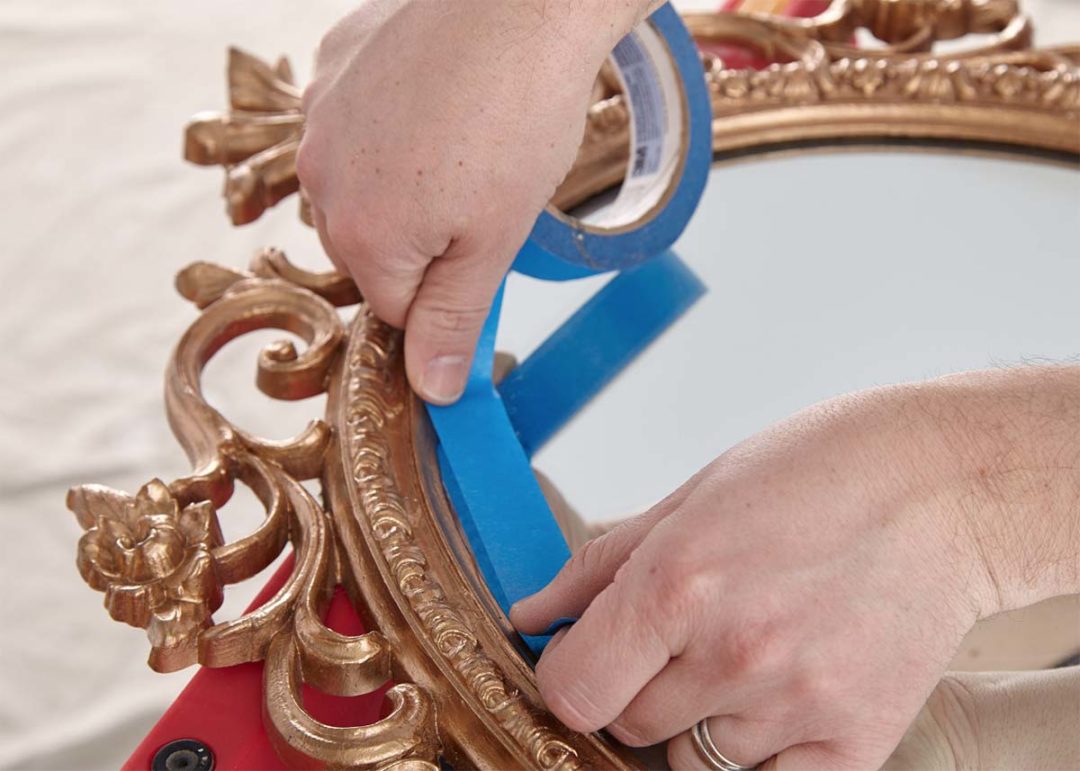
Step 3: Apply painter’s tape to the interior edges of the frame to protect the glass.
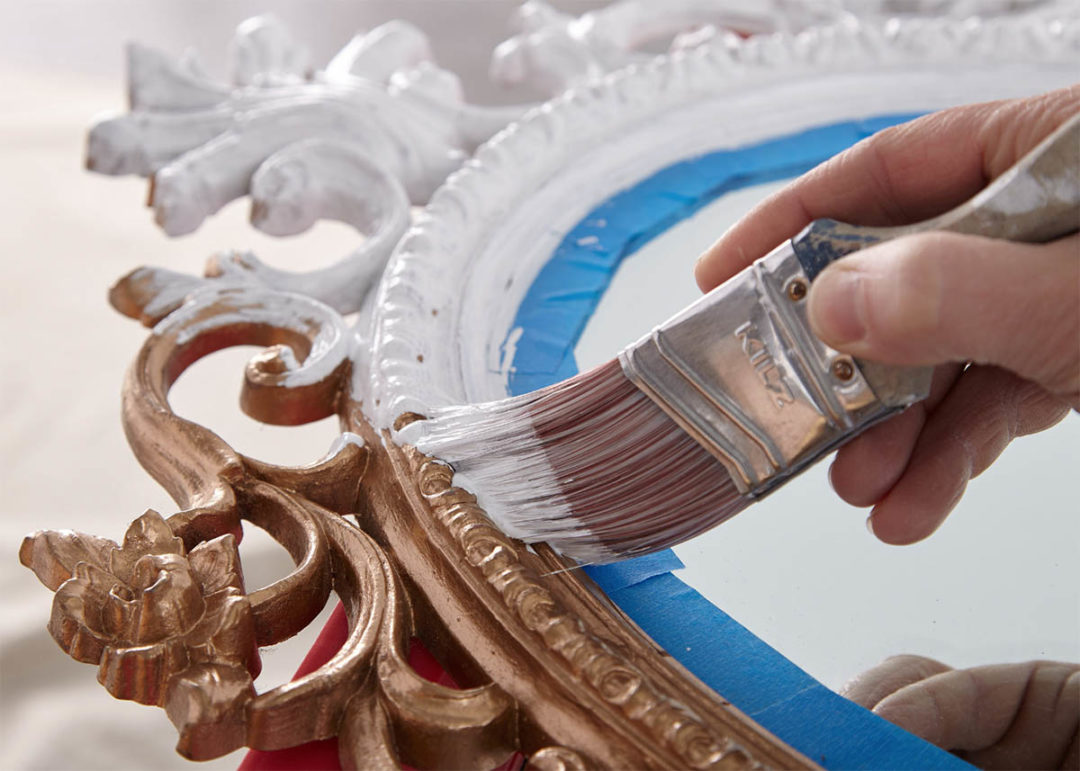
Step 4: Apply KILZ Kitchen & Bath primer with a small paint brush. Allow primer to dry for 1 hour.
Step 5: Next, apply BEHR Premium Plus in Watermelon Punch (a satin or semi-gloss finish is recommended to ensure superior mildew resistance) using a nylon or polyester brush. Remove the painter’s tape before paint is fully dry.
Always remember to refer to our website Kilz.com or product back labels for additional information and instructions on how to apply our products.
RELATED ARTICLES
get inspired:
FOLLOw us:
@kilzbrand
SHOP
PRODUCTS
How to Choose the Right Primer for Your Paint Project
January 31, 2020Do your New Year’s resolutions include taking on that painting project you’ve been putting off? Or maybe you have a list of several different DIY home improvement projects on your list to complete in 2020. No matter the size or scope of your project, taking the time to do proper prep work will ensure results that you can be proud of for years to come. Prep can seem like a time-consuming extra step, but trust the pros, it’s worth the time spent.
If your next DIY venture includes painting, the first step is choosing the right primer for your project. The KILZ® brand offers a family of primers to help you complete a wide range of painting projects and tackle a wide variety of common painting problems. With so many primers to choose from, how do you know which is right for your project? To start, assess the type of surface you will be painting.
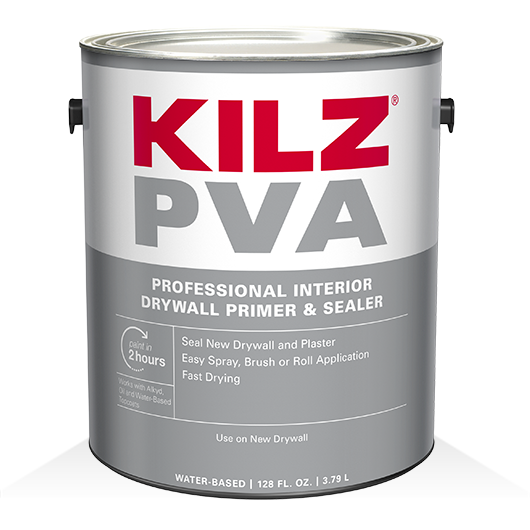
If you just moved into a new house or completed an addition and you’re painting new drywall, KILZ® PVA Drywall Primer or KILZ® 1 Standard Interior Primer are both made for the job.

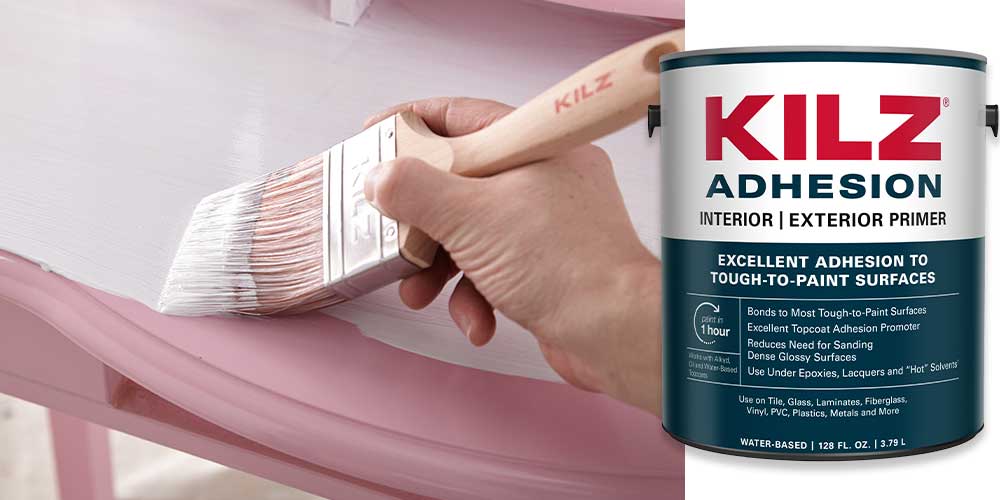
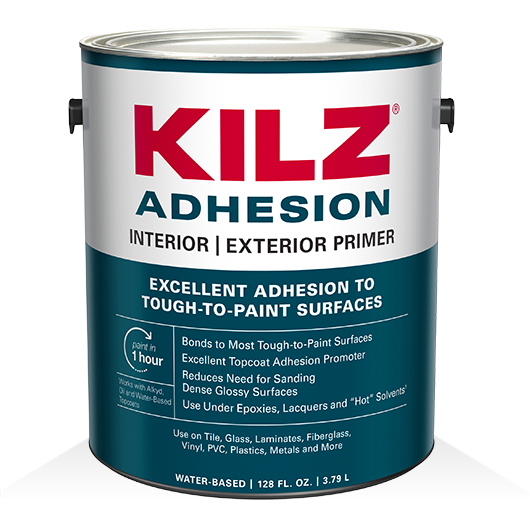
Perhaps you’re painting a surface that ordinary paint might not stick to, such as a slick glossy surface, aluminum, vinyl, ceramic tile or glass. In that case, KILZ® Adhesion Interior/Exterior Primer is an excellent choice.
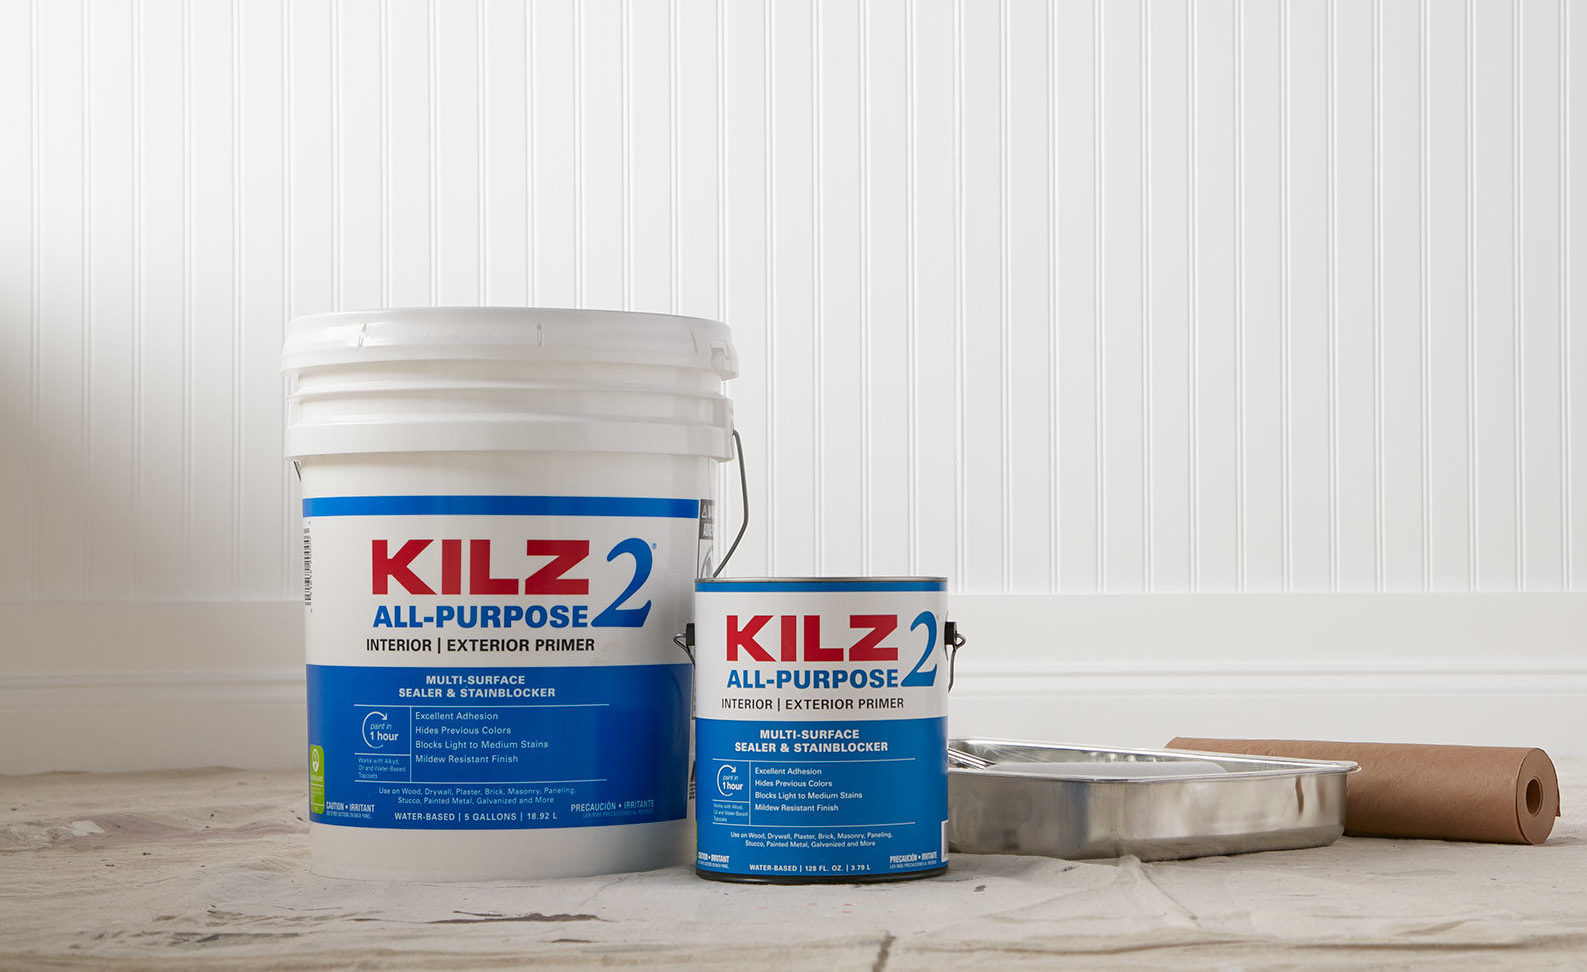
Pro painters and DIYers alike are often in need of a primer that offers multiple surface solutions – which is why KILZ 2® All-Purpose Primer is the choice of many! A fast drying, water-based multi-surface primer-sealer-stain blocker, it offers excellent adhesion, a mildew resistance primer film and can block light to medium stains like felt marker or minor water stains. It’s also a good choice for a simple color change, to ensure the truest color from your new topcoat.
And for projects that require even heavier lifting, KILZ Restoration™ offers the performance of a traditional oil-based primer in a water-based formula and can tackled the toughest odors, stains and even fire damage.
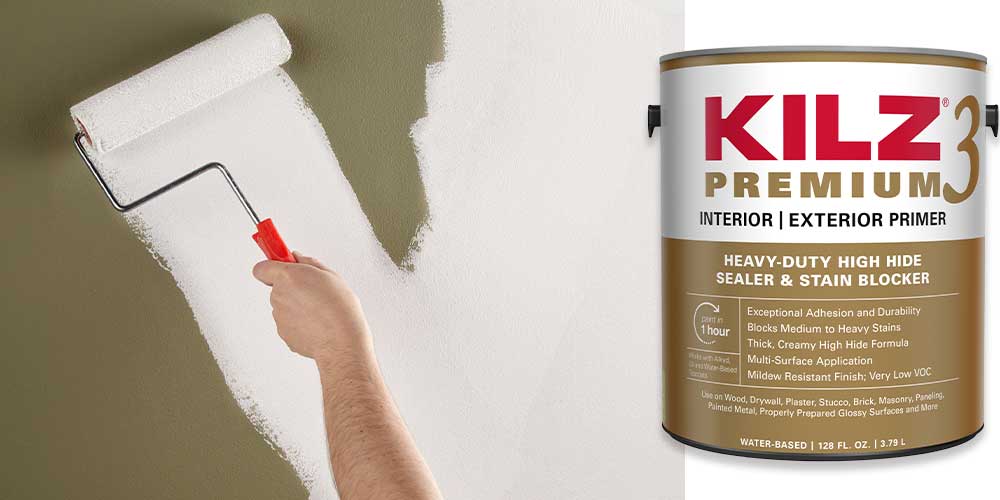
For those taking on more complex projects, including blocking smoke or pet odors, covering dark paint colors or heavy stains, there is a KILZ® Primer for you too! KILZ 3™ Premium is one of our more heavy-duty and high hiding formulas, making it ideally suited for blocking old dark colors or covering substantial stains.
If you’re still unsure what primer to use for your next project, answer these simple questions below and don’t be afraid to ask a friendly pro at your local hardware or home improvement store for help.
Choosing the Right Primer:
- Identify the surface type you will be painting.
- Assess any problems you need to tackle, such as stain or odor blocking, and determine the severity of the issue.
- Take into account any unique scenarios like needing a mildew resistance finish coat (good to keep in mind when painting moisture prone areas like bathrooms and laundry rooms), or if you’re covering a dark paint color with a new lighter hue.
Always remember to refer to our website kilz.com or product back labels for additional information on which primer is right for your project and detailed instructions on how to apply our products.
RELATED ARTICLES
get inspired:
FOLLOw us:
@kilzbrand
Our Favorite 2020 Design Trends
January 7, 2020While the KILZ® brand is known first and foremost for our hardworking primers, color and design are also important to our team! Primer might technically be colorless, but it is a crucial step in adding color to your walls, cabinets and furniture pieces. Primer should often be the first step in achieving a new look for your space, so in a sense you can consider primer a part of the design process just as much as paint.
As we enter a new year, we’re excited to share a few color and design trends to help you along the way to completing your painting and renovation projects. Color and design trends are everywhere, and there is no one size fits all in terms of the hottest hue or best design style – but we’ve rounded up a few of our 2020 favorites to help inspire your project planning process in this new year.
Kitchens Are King:
In 2020, you’re going to see kitchen renovations and remodels popping like corn at the movies! (Translation: they’re everywhere and on everyone’s minds). In 2020, we’ll be exploring more kitchen color trends and design hacks on the blog to help you renovate your kitchen on budgets both big and small. 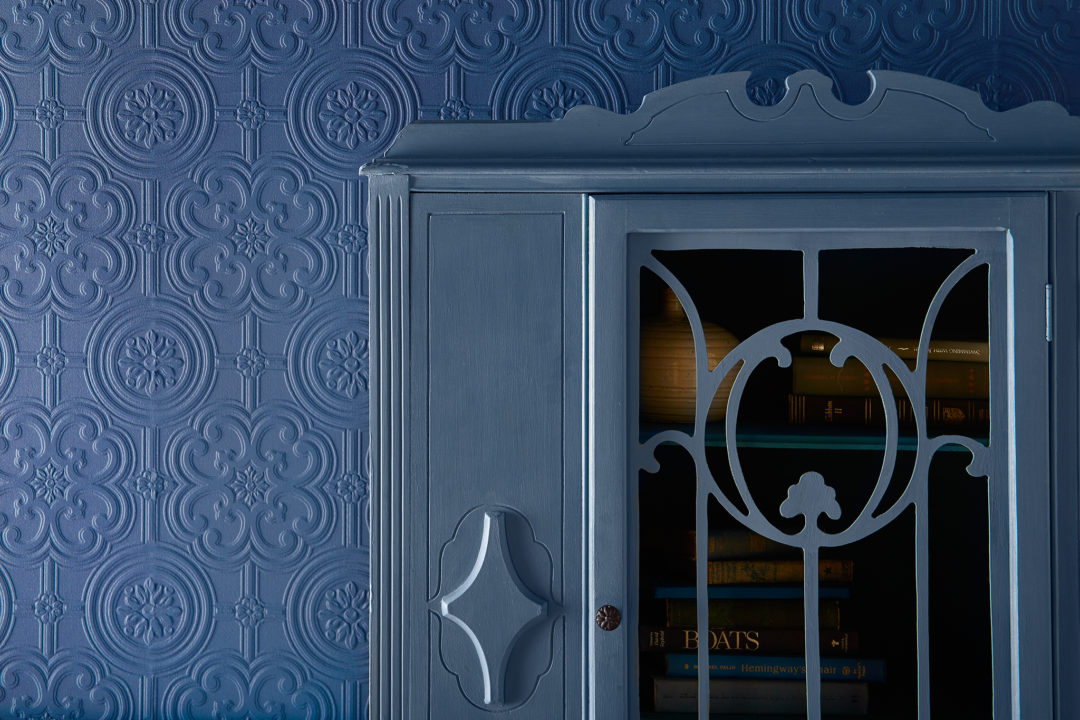
Not Over Navy:
Blues and grays have been popular paint colors in recent years and we’re nowhere near done with them. From kitchens to bedrooms and cabinets to walls, navy can often act as a “dark neutral” to give a pop of color to a space while also keeping it classic. And we’re not alone in our love for navy, Pantone named Classic Blue the Color of 2020. Look out for some of our favorite shades of Navy in upcoming How-To posts later this year (spoiler alert – we’re painting everything from living room walls to dining room chairs in this easy to love shade!). 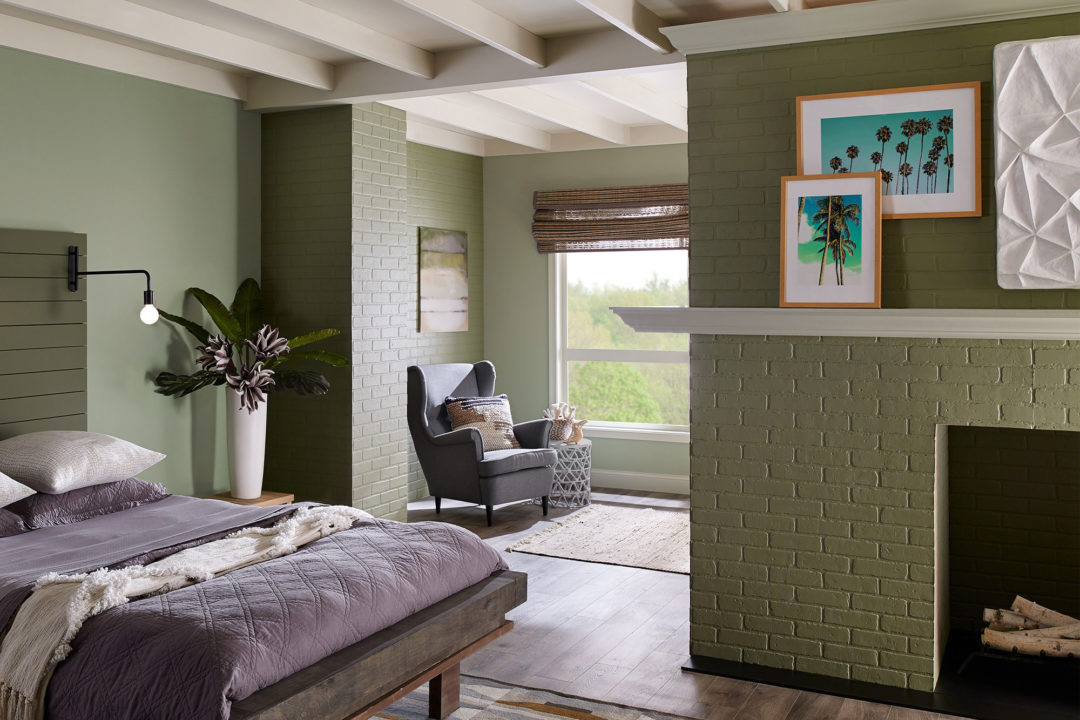
Fireplaces that Pop:
Who doesn’t love the crackling of a warm fire on a cold winter’s day? And for a fireplace design that pops both inside and out, we’re loving bright white bricks against colored walls and monochrome fireplaces in unexpected shades. 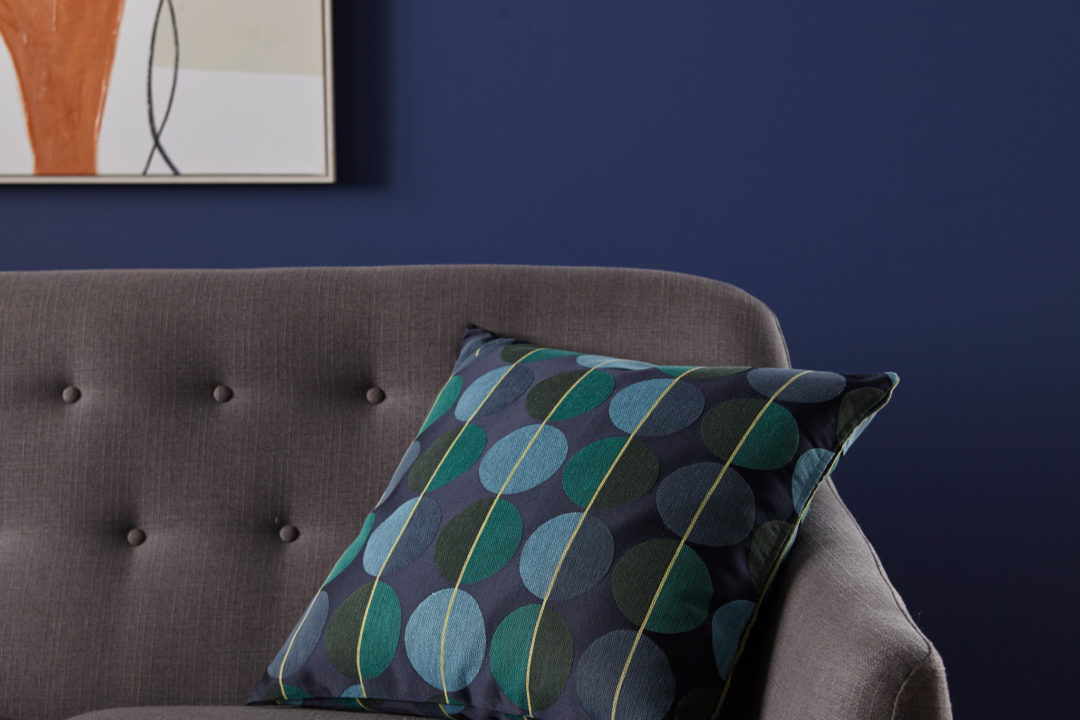
Full Circle Design:
Patterns and shapes are easy ways to add fun and unexpected touches to any room, and for 2020 we’re loving circles! From painting round pops of color on an accent wall to circular inspired décor items like mirrors, fabric and lighting, curved shapes and lines bring a nice softness to any design style. 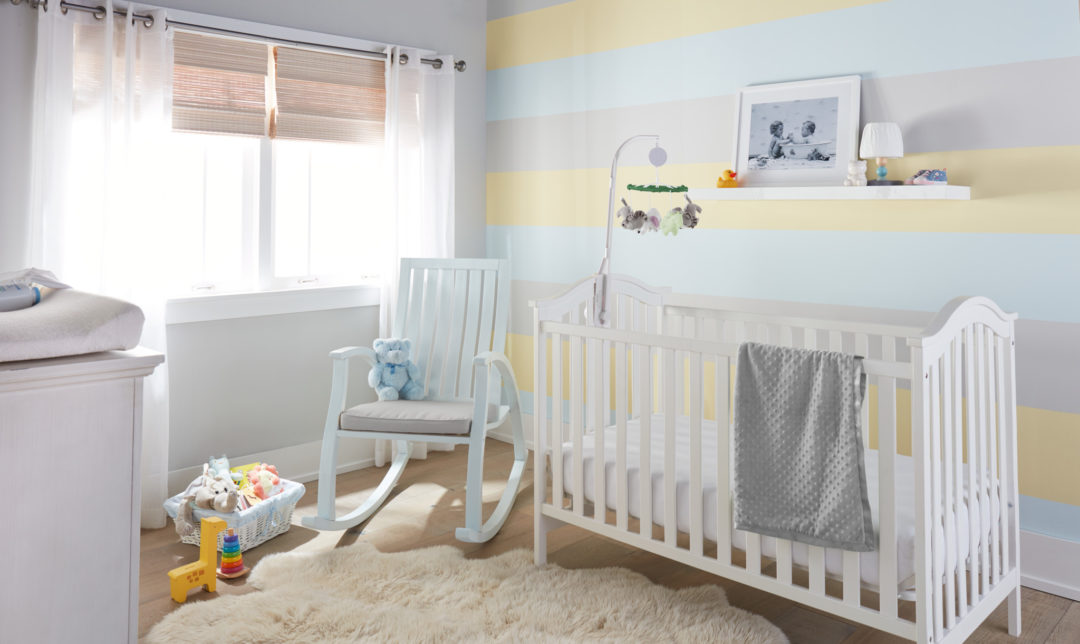
Color Blocking Children’s Spaces:
A little one’s room is the perfect place to play with pops of colors and interesting patterns or color placement. In 2019 we showcased a nursery makeover with a sweet striped wall, and we’re excited to explore more color blocking in 2020 for kid’s rooms.
RELATED ARTICLES
get inspired:
FOLLOw us:
@kilzbrand
join the conversation:
SHARE this post: