Tag: Makeover
Pretty in Pink Bathroom Makeover
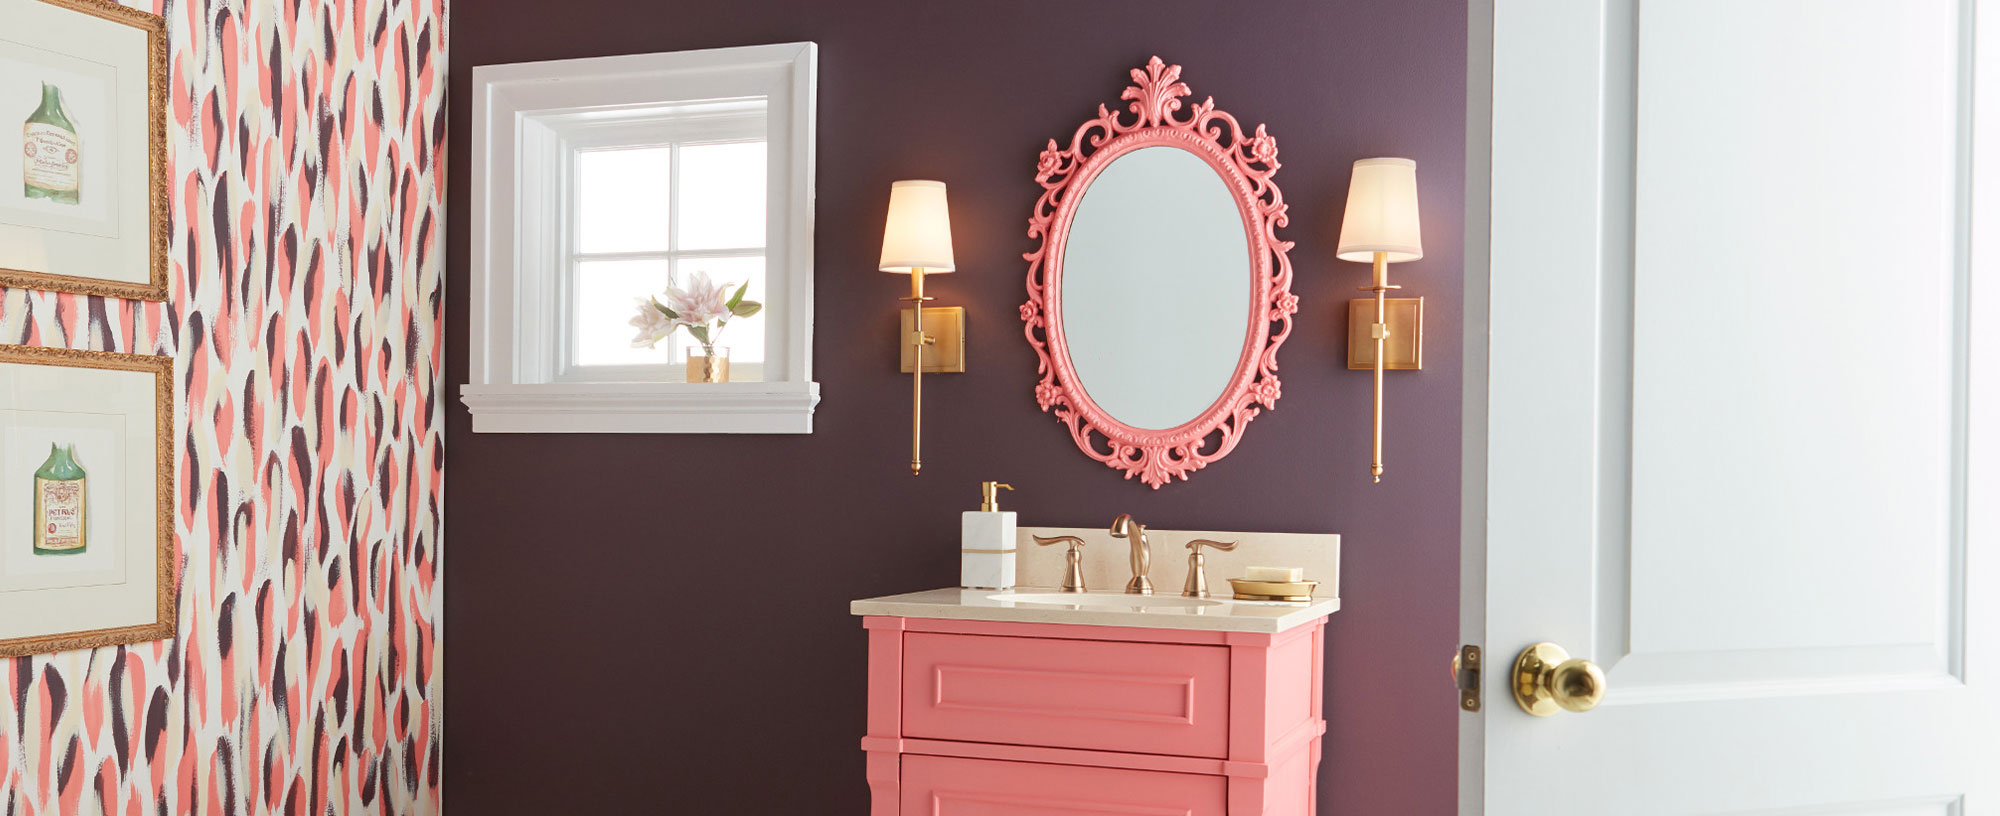
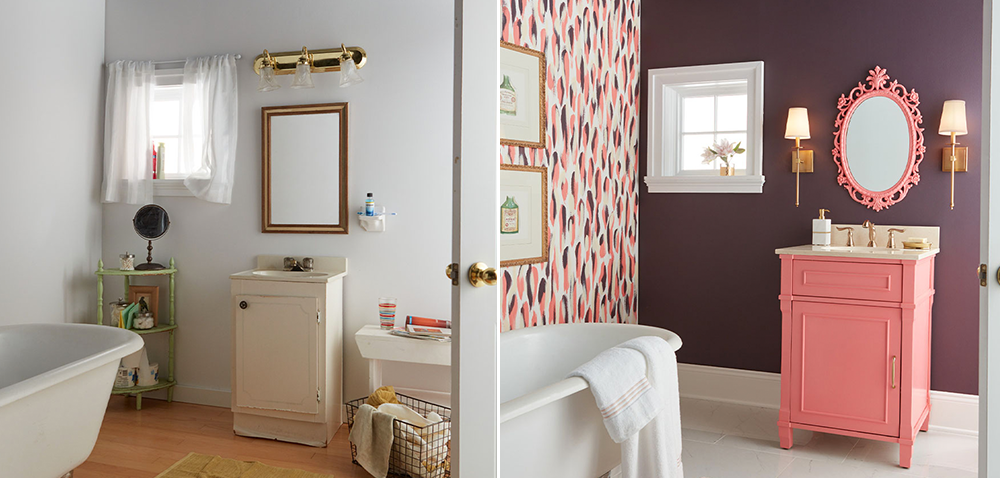
February 12, 2020It’s February, which means Valentine’s Day and all things pink are top of mind. This month we’re talking about colors and spaces you can fall in love with, including this pretty in pink bathroom. A once boring bathroom was given new life with painted faux wall paper, a bright pink vanity (with matching mirror!) and a dark accent wall. And just as important as picking the right vibrant colors for this small space renovation, was the prep work that went in before we painted to ensure that this makeover would last for years to come.
Before the paint went on, we wanted to ensure that our hard work would withstand a bathroom’s typical humidity, moisture and changing temperatures so we primed the walls with KILZ® Kitchen & Bath Primer. This water-based primer is specially designed for residential surfaces exposed to humidity, moisture and fluctuating temperatures such as kitchens, bathrooms, powder rooms and laundry rooms.
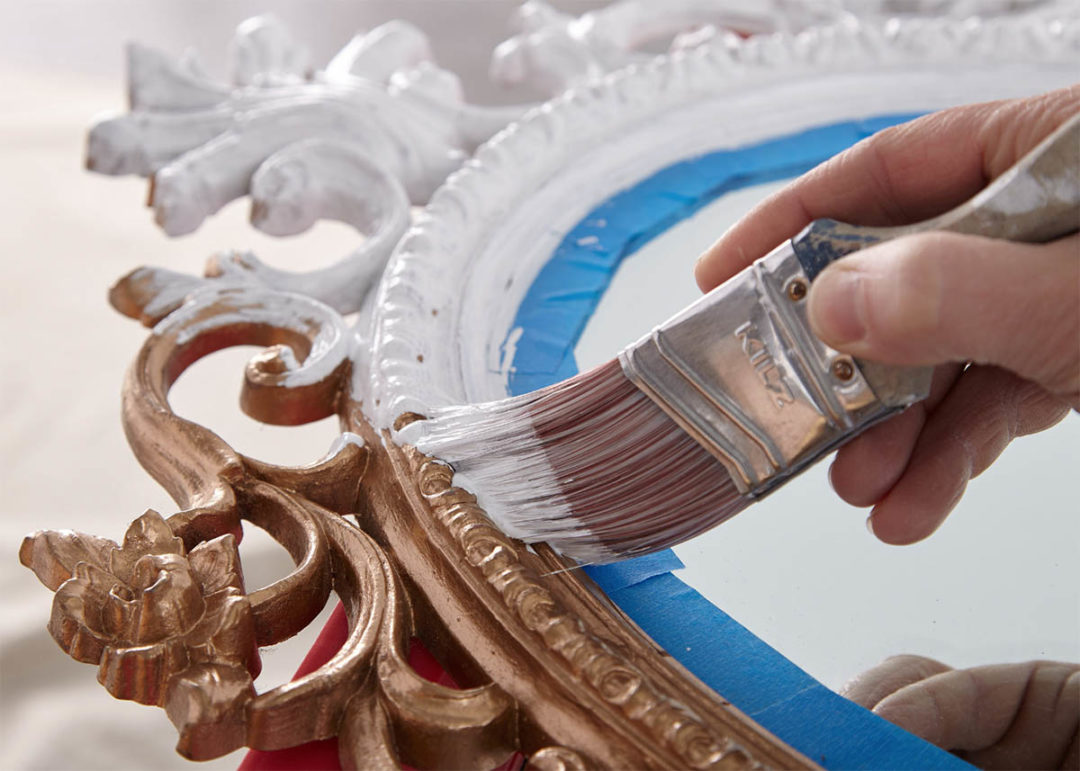
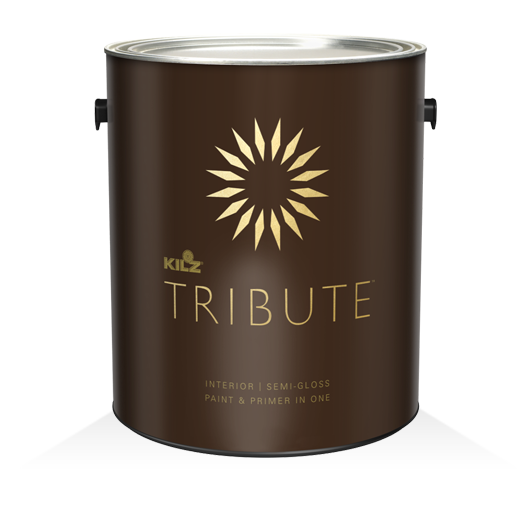
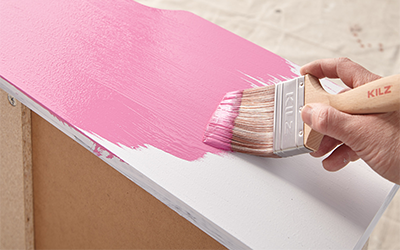
Proper priming also provides a solid anchor for paints – in this case a deep purple wall and coral-hued bath vanity. A painted “wall paper” accent wall and pink mirror complete the space. For this bathroom makeover, BEHR Premium Plus® in Watermelon Punch, KILZ Tribute® in Spanish Fortress and Beetroot Purple were used as accent colors over a white wall to create the fun faux wallpaper. Beetroot Purple was also used for the dramatic dark wall behind the vanity, with Watermelon Punch coating the vanity and matching mirror.
An everyday space gets a coat of unexpected flair in this stylish bathroom makeover. Read on for step by step directions to complete this paint project at home including the dark accent wall, painted “wall paper”, bathroom vanity and matching mirror.
The Dark Accent Wall
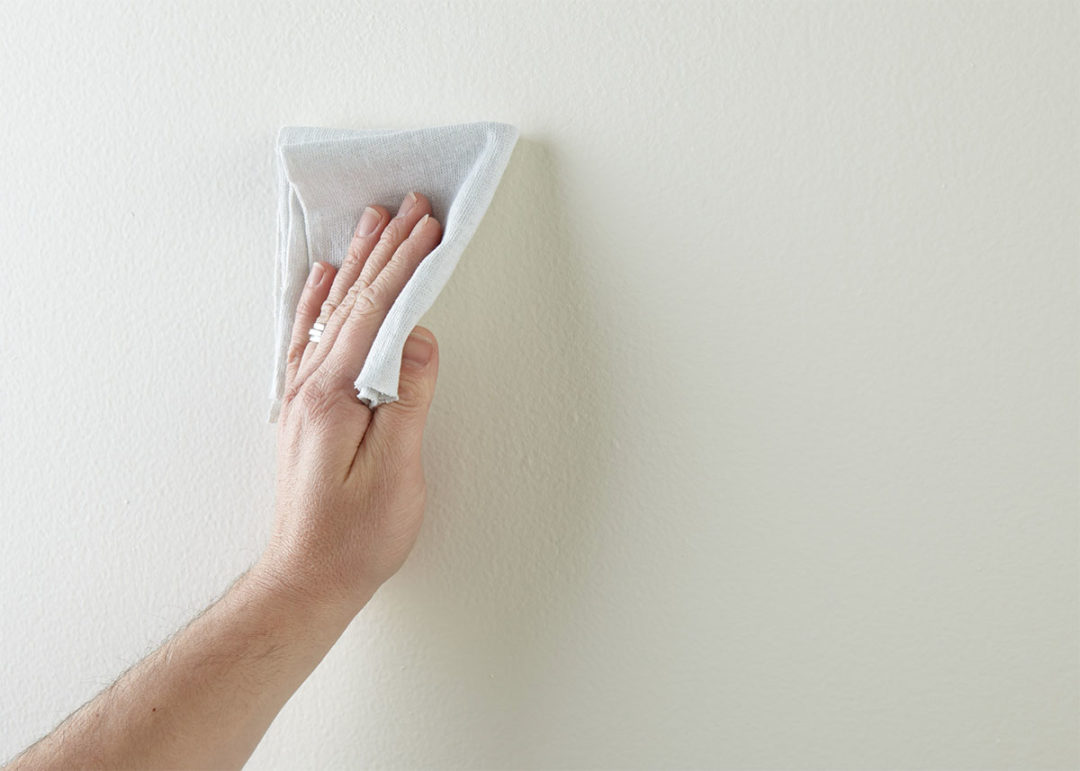
Step 1: Wipe down the chosen accent wall with a damp cloth to ensure it is clean and free of dust and allow the surface to dry.
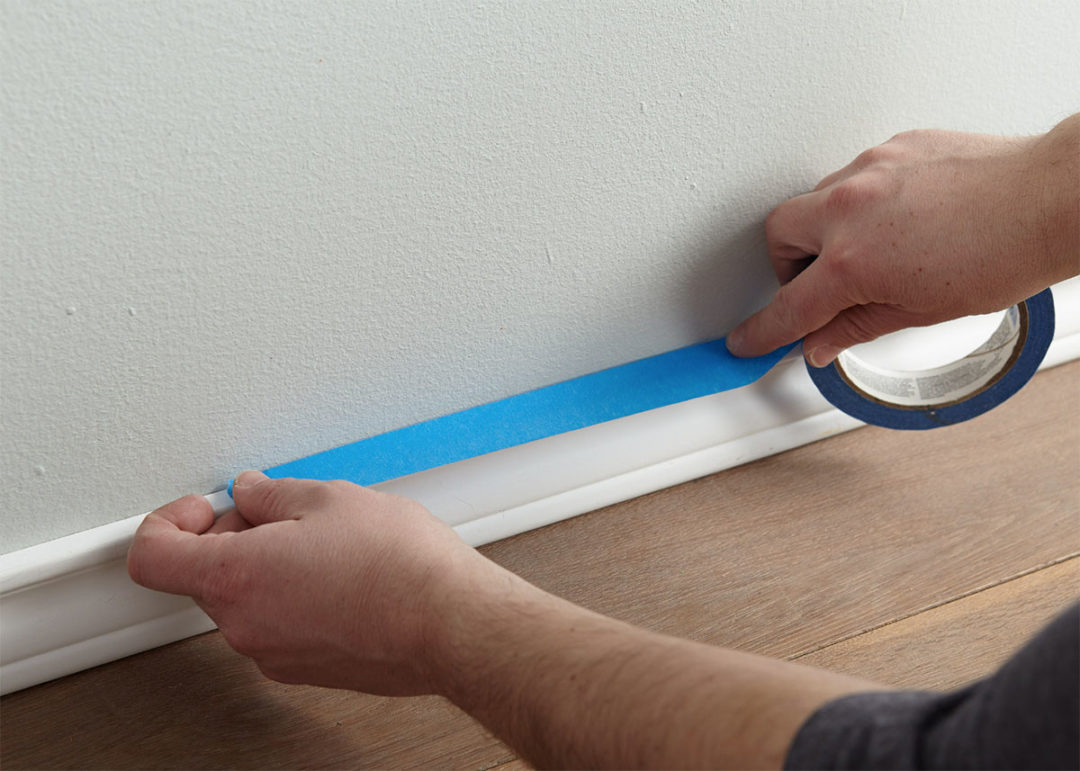
Step 2: Once dry, tape around the baseboards, trim and moldings.
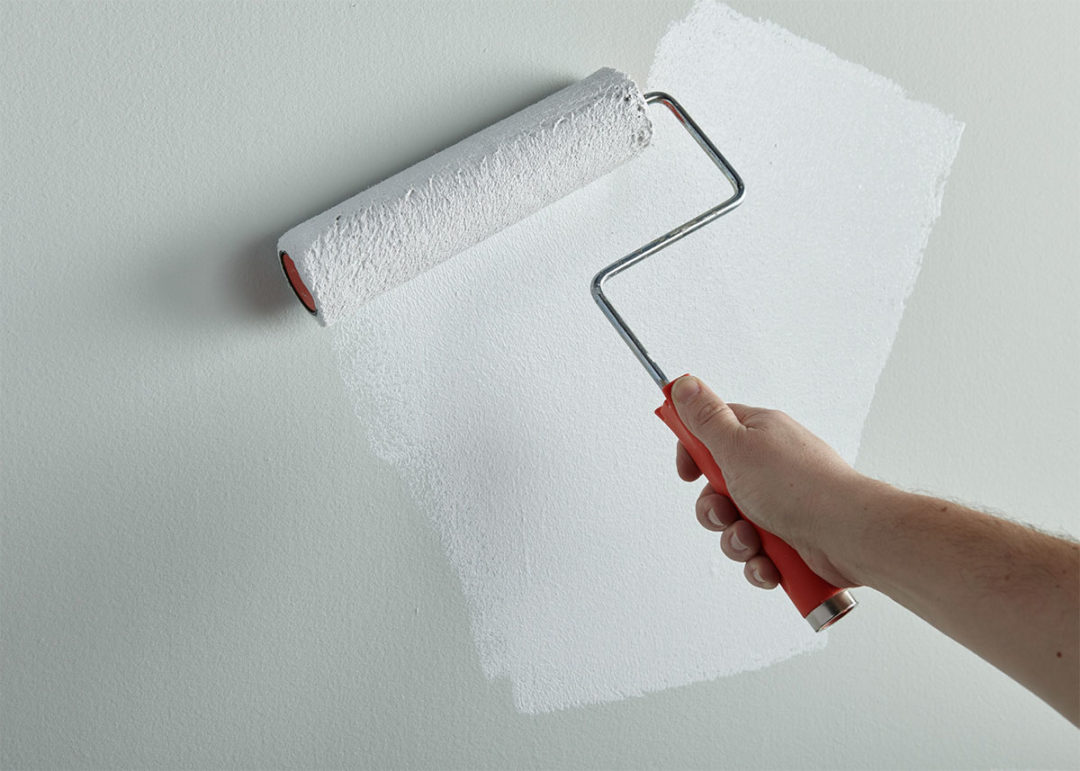
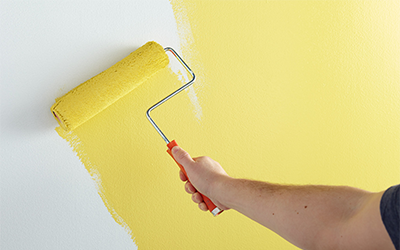
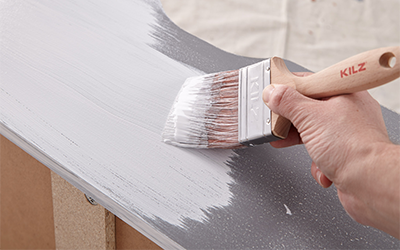
Step 3: Apply 1 coat of KILZ Kitchen & Bath (stirring thoroughly before and occasionally during use) and allow to dry. Apply primer using a brush first to “cut in” around the edges, then use a roller to fill in.
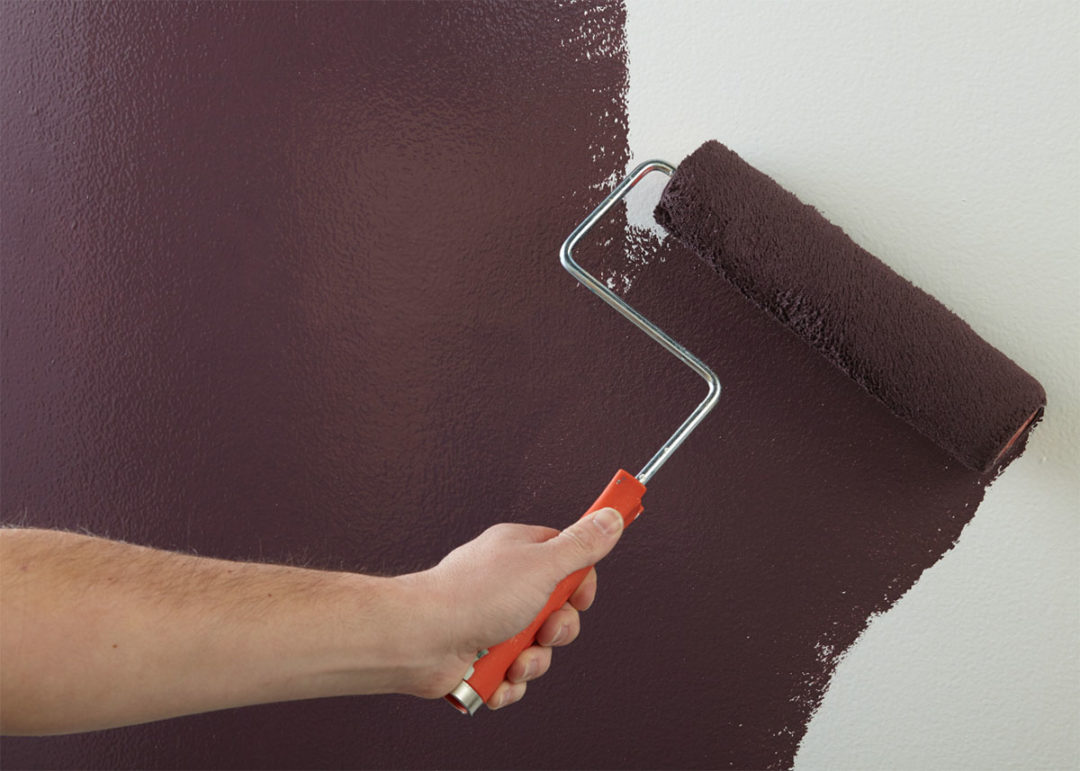
Step 4: Once primer is dry, apply KILZ Tribute in Beetroot Purple using the same application method as the primer (using a brush first to cut in around the edges 4 to 6 feet at a time, then use a roller to fill in those sections before moving along).
Step 5: Remove tape before paint is fully dry.
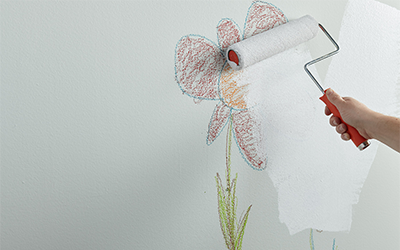
The Painted “Wallpaper”
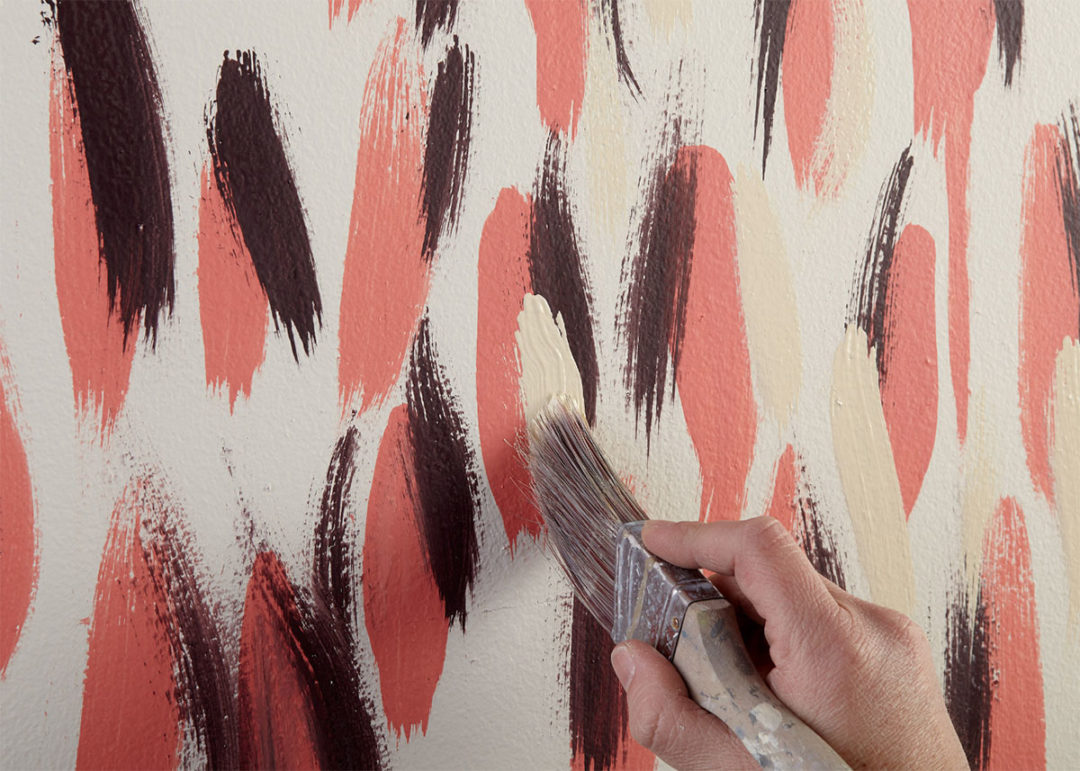
Step 1: Once the wall is primed (use same method as above), apply base color.
Step 2: Starting with BEHR Premium Plus in Watermelon Punch, use a brush and apply vertical strokes across entire wall. Once dry, use KILZ Tribute in Beetroot Purple and repeat, slightly overlaying the vertical strokes across the first pink strokes. Allow to dry and repeat with KILZ Tribute in Spanish Fortress.
The Vanity
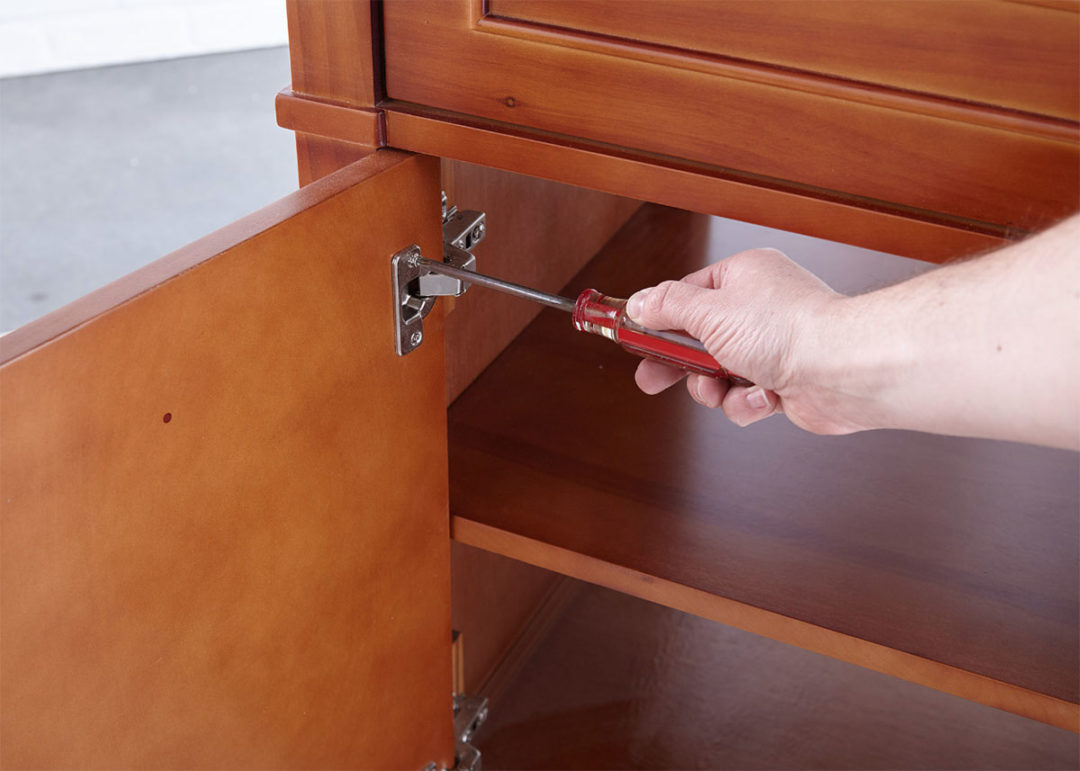
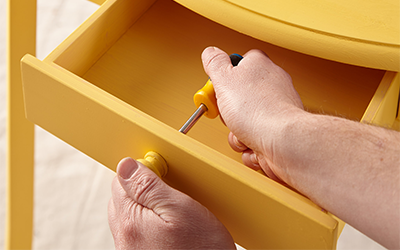
Step 1: Remove drawers and hardware. Put the screws back into the hardware, then seal the hardware and screws in painter’s tape and label it. It’s always best to put every screw back exactly where it came from. That will put the least amount of stress on the wood.
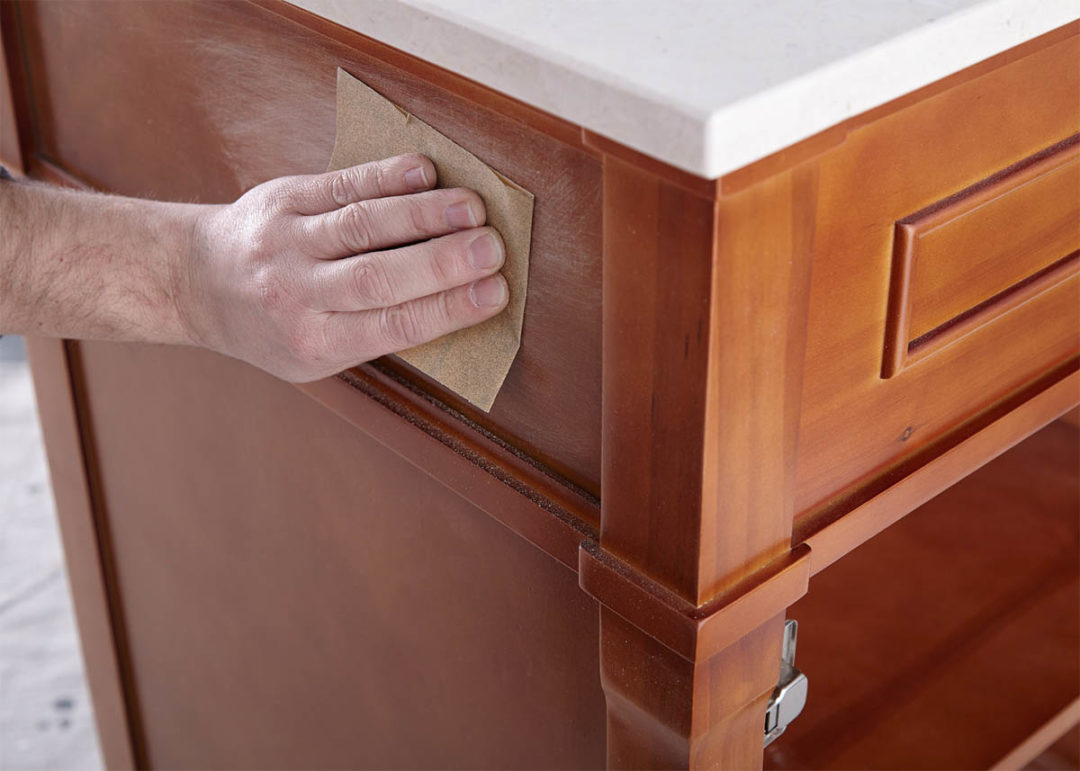
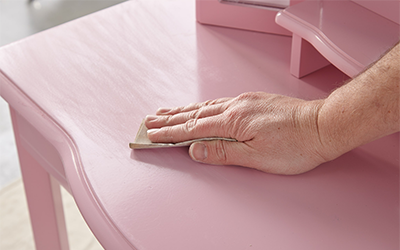
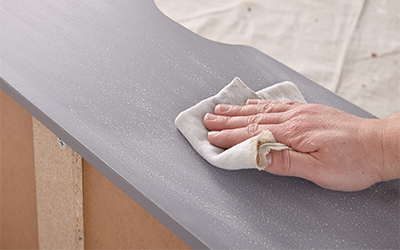
Step 2: Sand the surface; do a first pass with 100-150 grit sandpaper then finish with a second pass of 180-220 grit sandpaper.
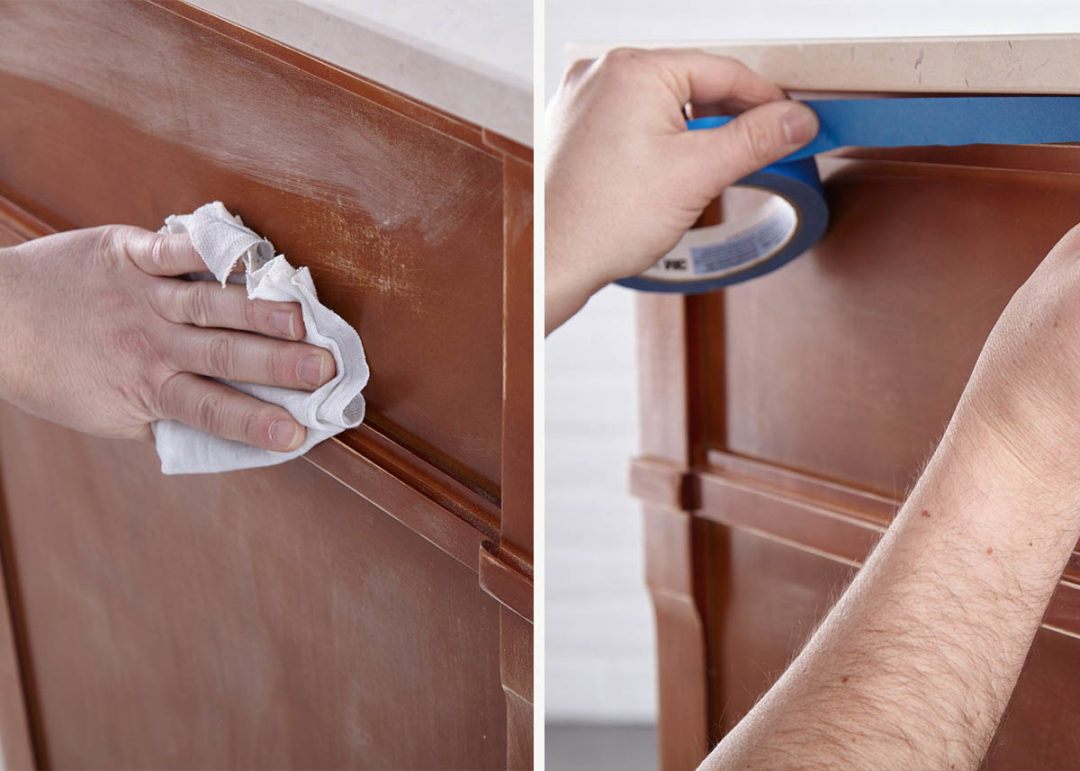
Step 3: After sanding, wipe down the surface with a damp cloth to remove any dust or residue and allow the surface to dry. Once dry, apply painter’s tape around the countertop edges.
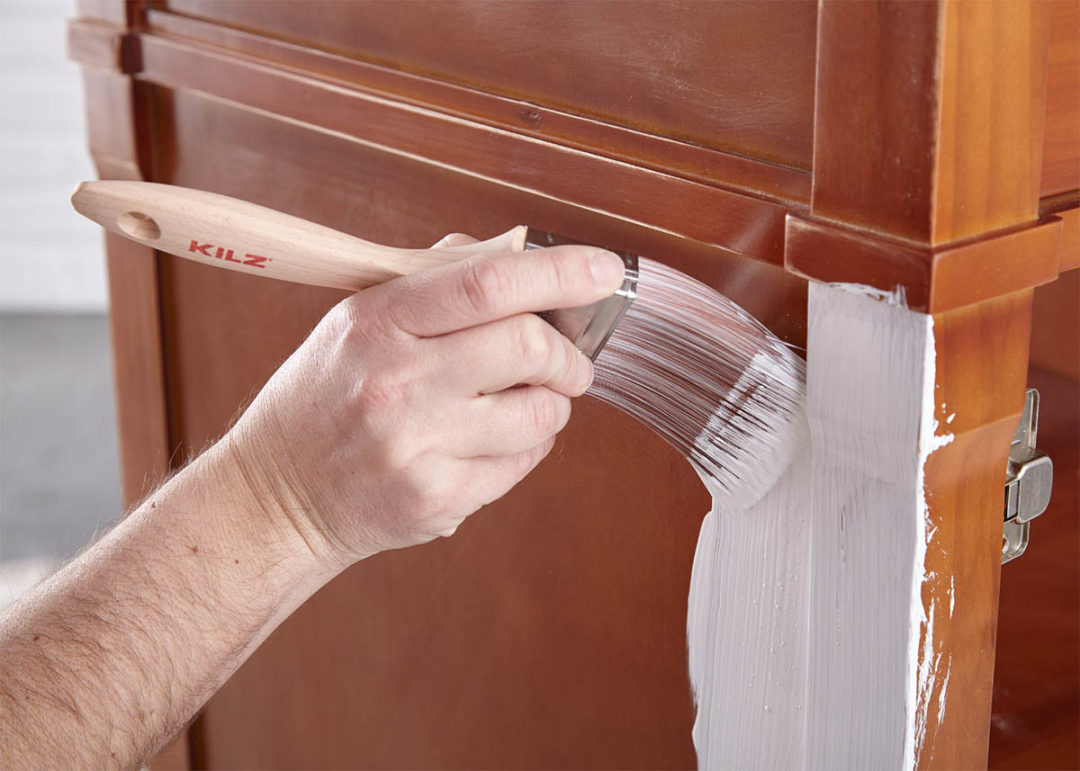
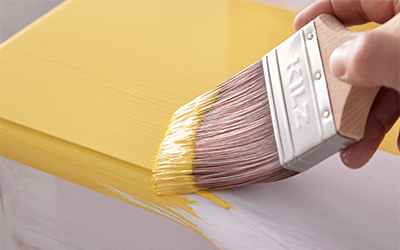
Step 4: Apply KILZ Kitchen & Bath (stirring thoroughly before and occasionally during use), moving in the same direction as the wood grain for best results. Allow primer to dry for 1 hour.
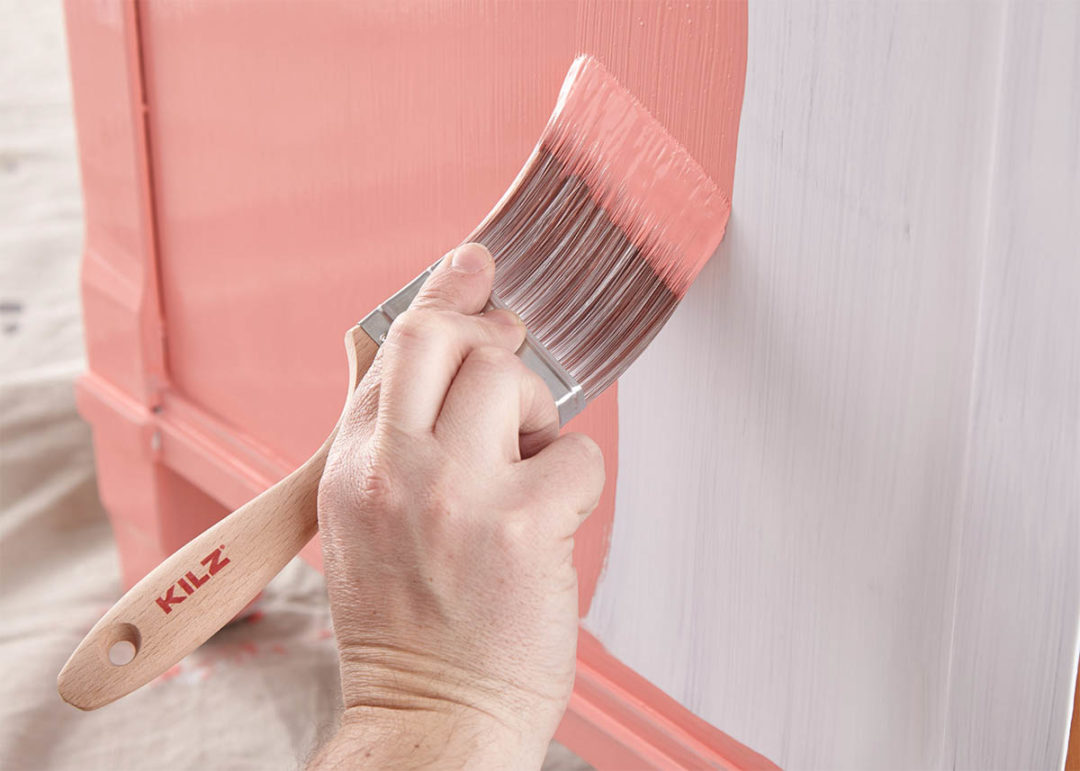
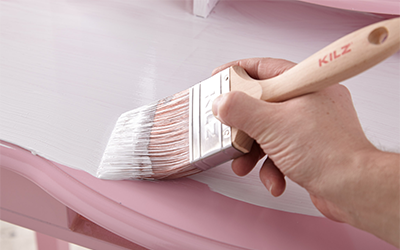
Step 5: Next it’s time for a pop of pink! Apply BEHR in Watermelon Punch (a satin or semi-gloss finish is recommended for superior mildew resistance). Remove the painter’s tape before the paint is fully dry.
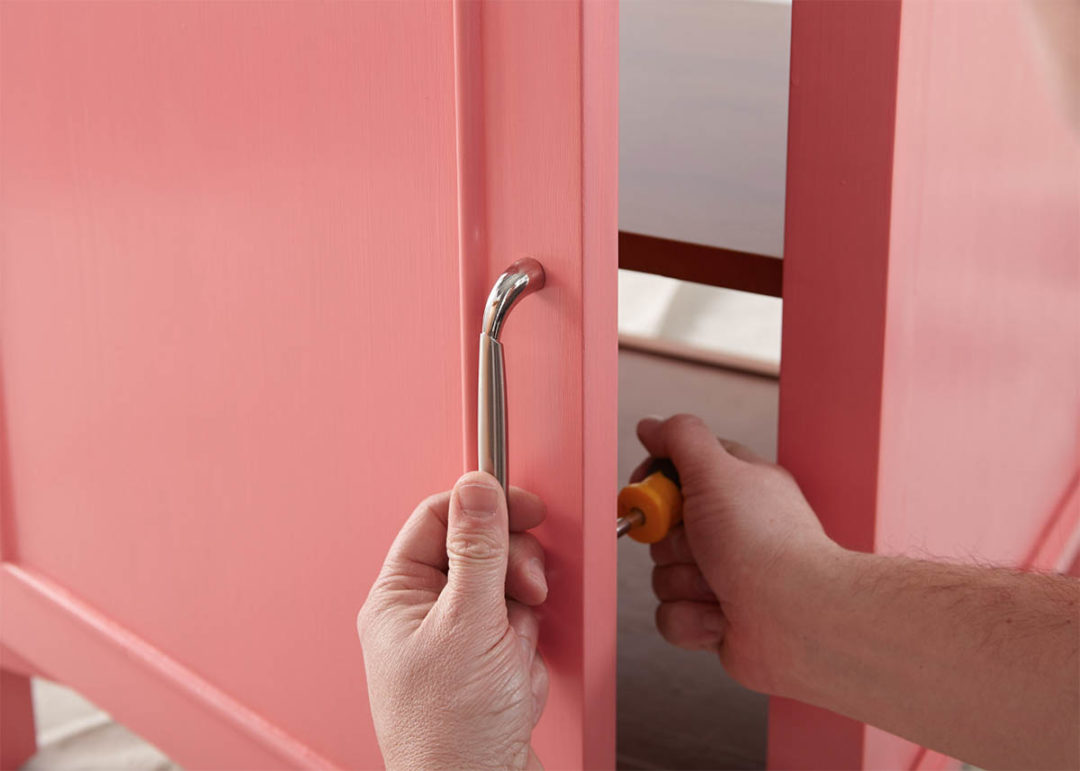
Step 6: Once the vanity is dry, reattach your hardware and you’re done!
The Mirror
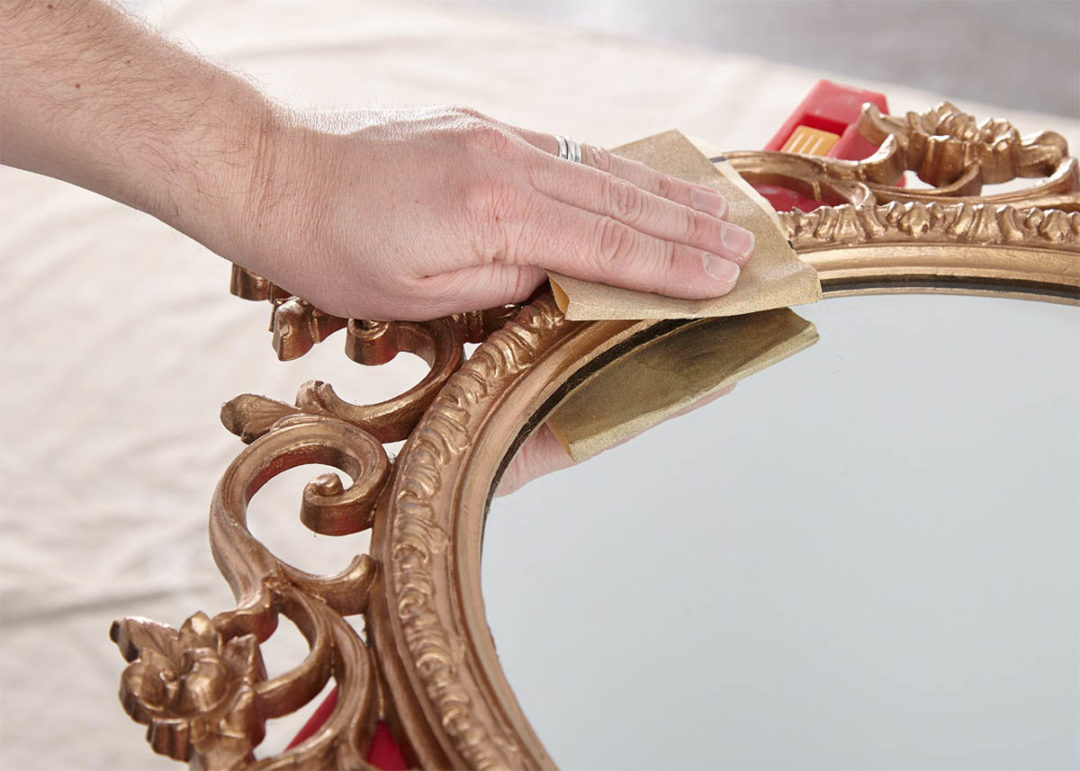
Step 1: Sand the mirror frame, first with 100-150 grit sandpaper and then finish with a second pass of 180-220 grit sandpaper.
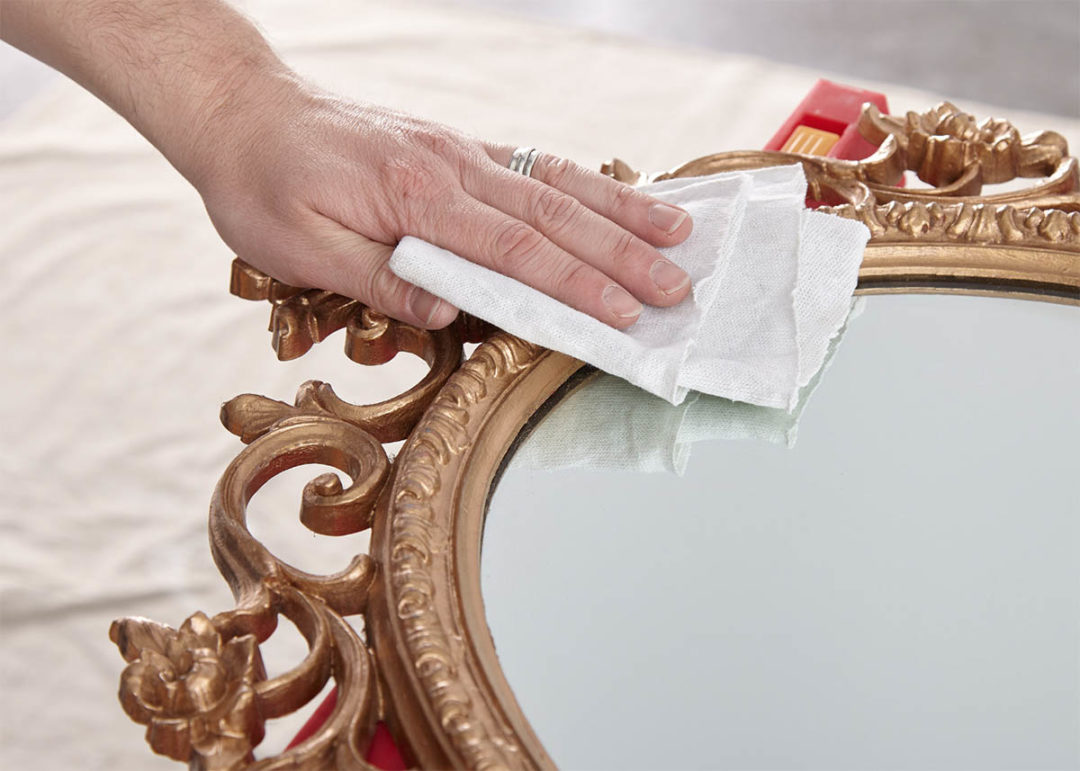
Step 2: After sanding, wipe down the surface with a damp cloth to remove any dust or residue and allow the surface to dry.
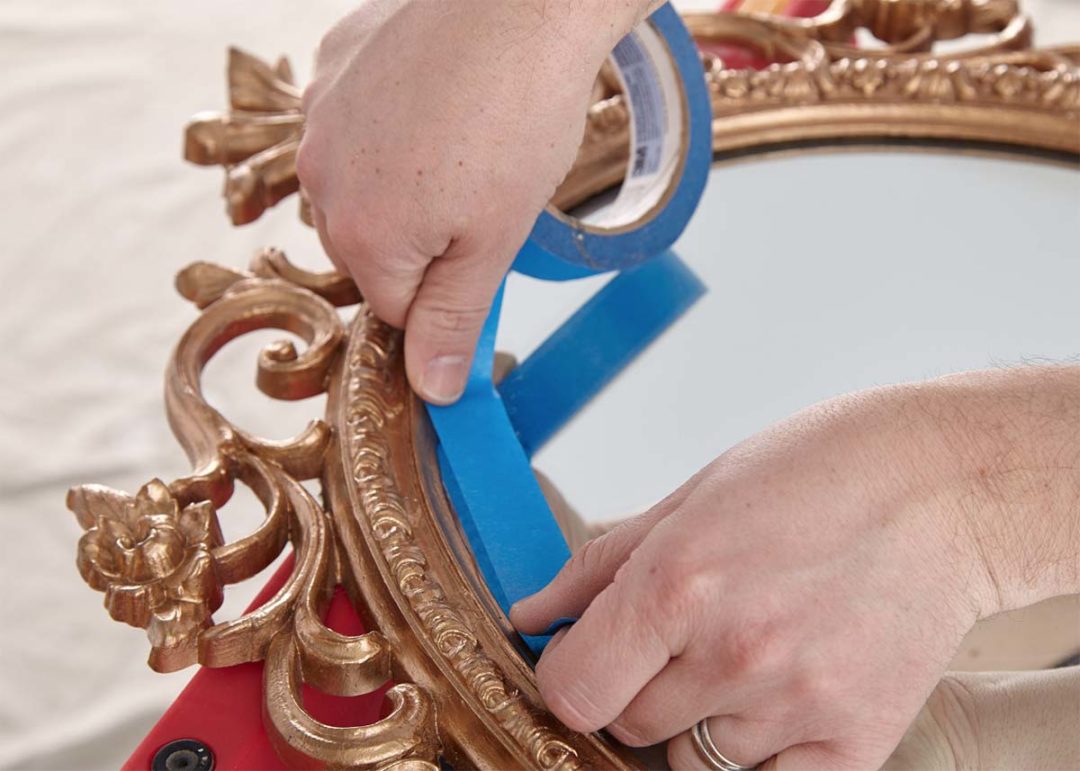
Step 3: Apply painter’s tape to the interior edges of the frame to protect the glass.
Step 4: Apply KILZ Kitchen & Bath primer with a small paint brush. Allow primer to dry for 1 hour.
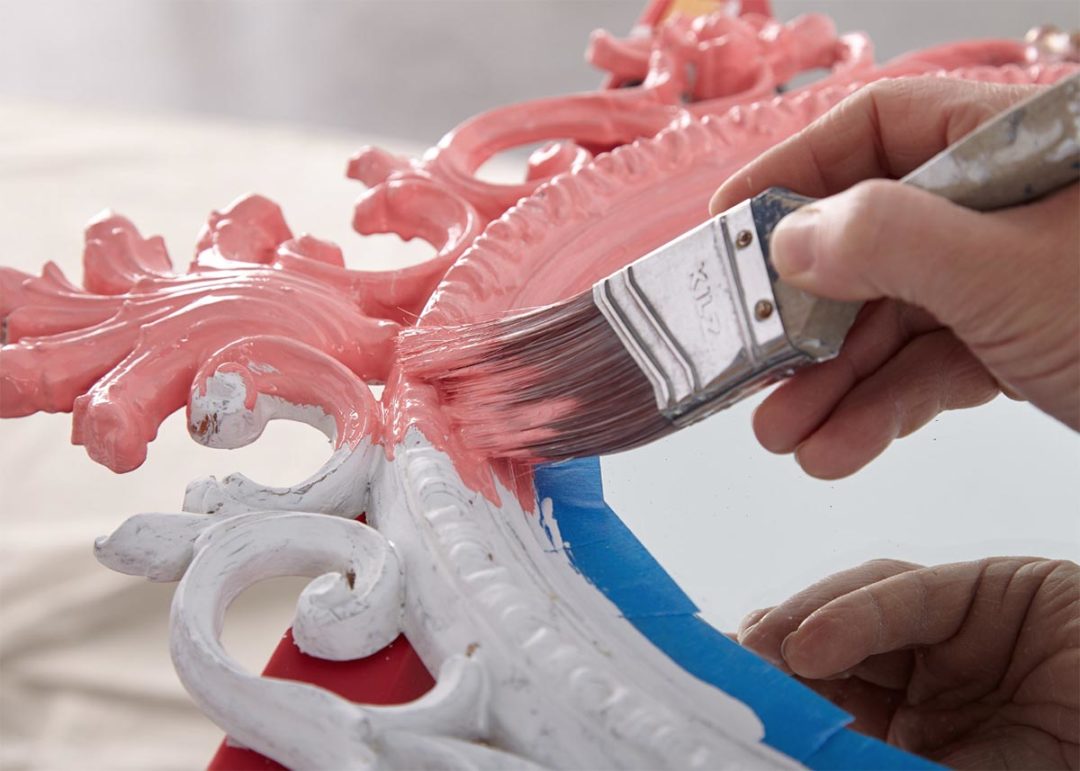
Step 5: Next, apply BEHR Premium Plus in Watermelon Punch (a satin or semi-gloss finish is recommended to ensure superior mildew resistance) using a nylon or polyester brush. Remove the painter’s tape before paint is fully dry.
Always remember to refer to our website Kilz.com or product back labels for additional information and instructions on how to apply our products.
RELATED ARTICLES

get inspired:
FOLLOw us:
@kilzbrand
SHOP
PRODUCTS
Craving a Kitchen Makeover? Start with the Cabinets!
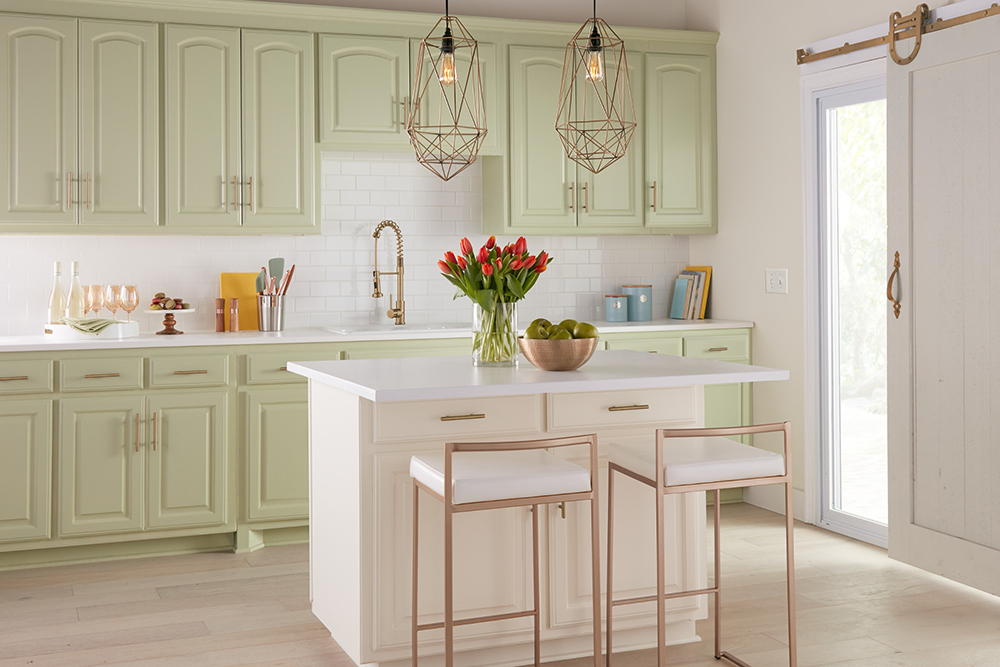
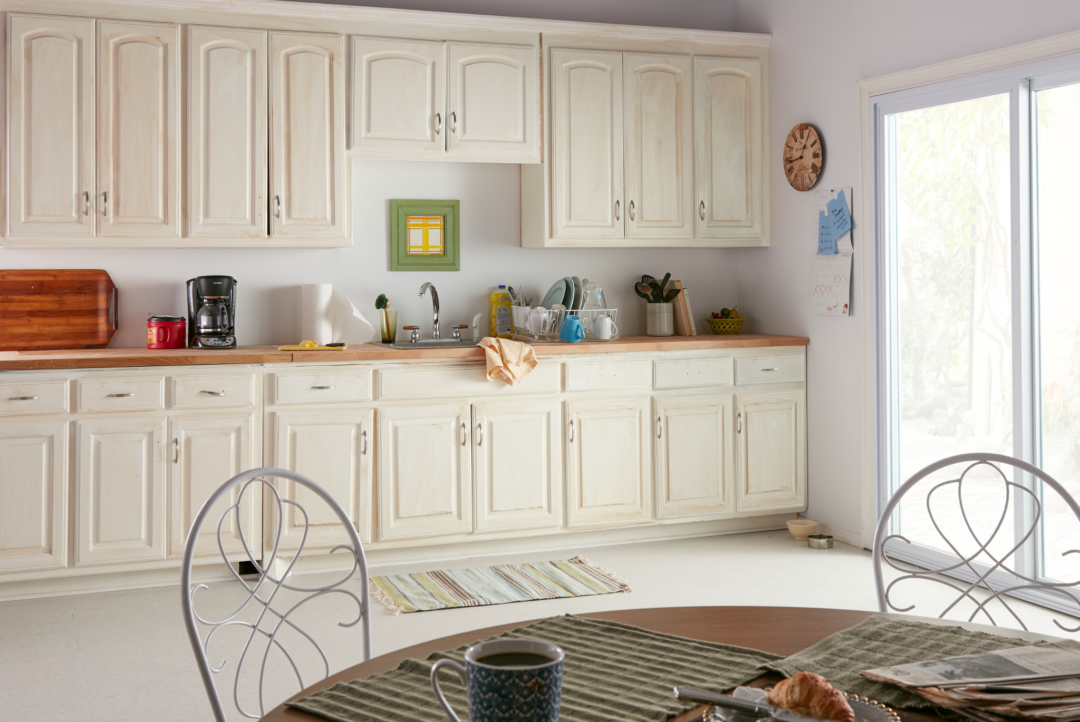
January 9, 2020Does the new year starting have you dreaming of a new kitchen? A complete kitchen overhaul can seem like a daunting task, especially if heavy demolition work is involved. But in many cases, you don’t need to break out the sledge hammer and start from scratch to achieve a fresh new look in your kitchen. Simply repainting your cabinets can have a big impact on the overall look and feel of your kitchen.
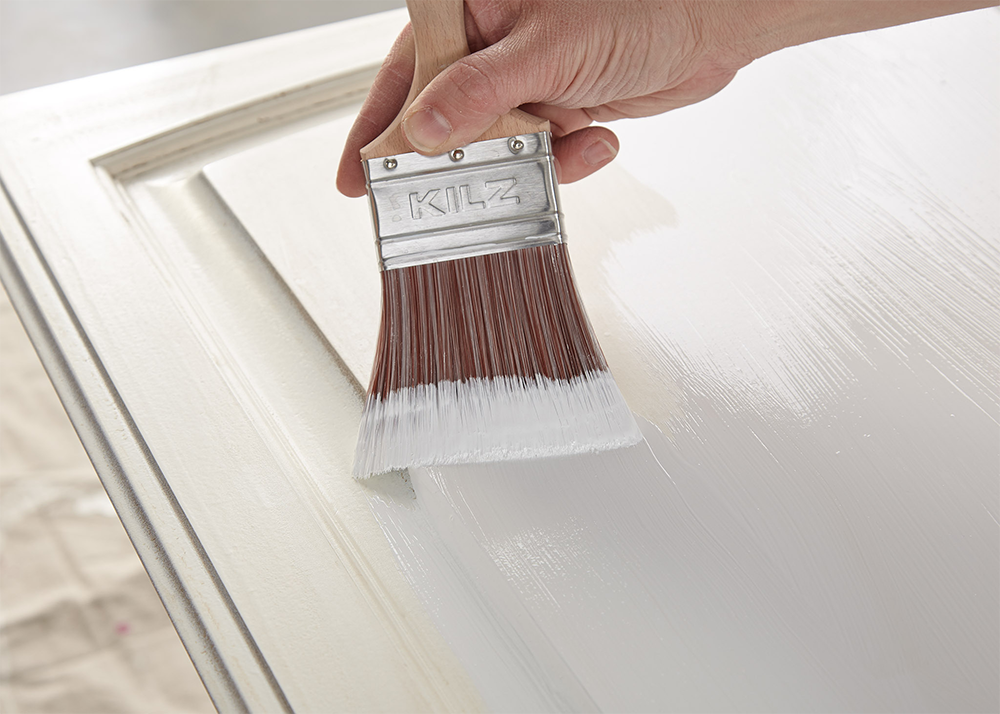
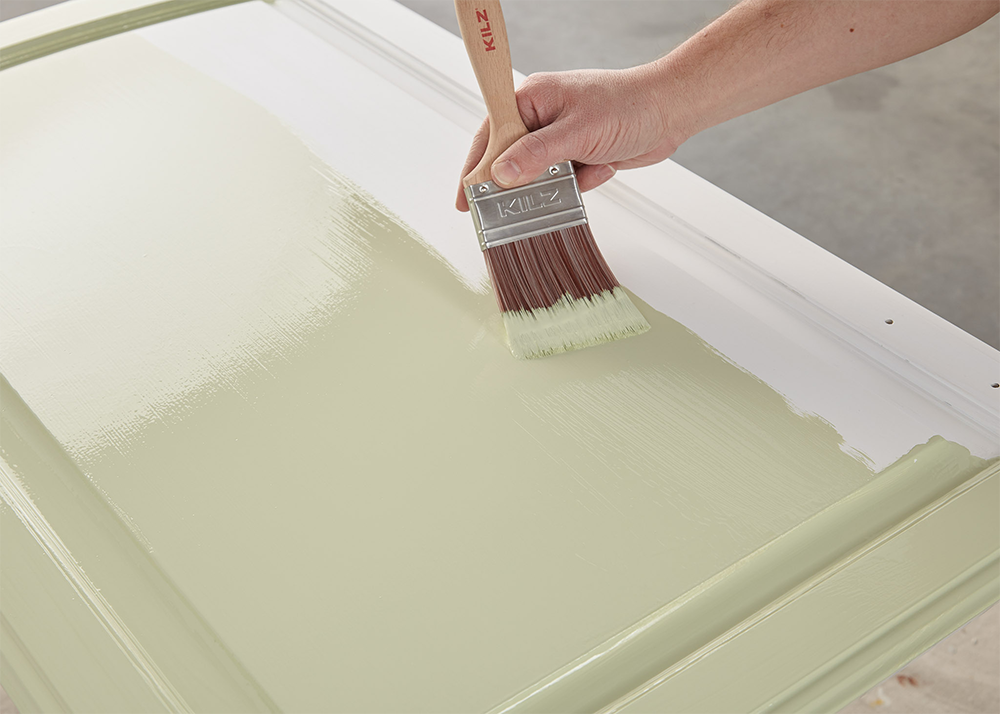
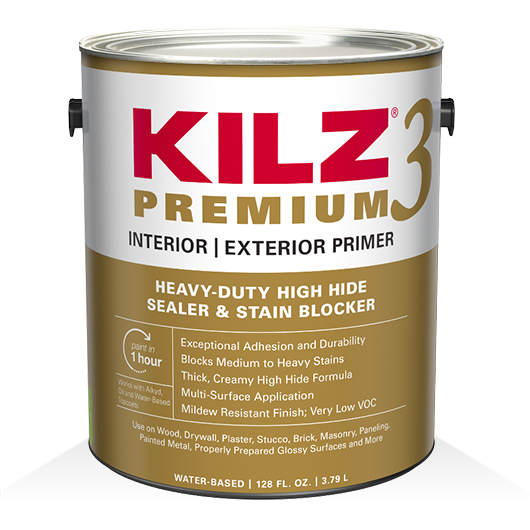
For a kitchen cabinet makeover that is both beautiful and durable, start with KILZ 3™ Premium Primer. This superior sealer-stain blocker provides excellent adhesion and a kitchen-essential mildew resistant primer coating. In this kitchen makeover, a celery-green paint color for the cabinets created a space that is cheerful, airy and inviting. The makeover went step further and also added new counter tops, a kitchen island (an addition that luckily didn’t involve tearing down any existing cabinetry!) and new modern gold light fixtures and hardware.

Is a kitchen renovation on your upcoming DIY project menu? The first step to a brand-new kitchen might be as easy as a new hue for your cabinets!
Read on for a step by step recipe for painting your kitchen cabinets:
Step 1: Remove the Hardware
Use a screwdriver to remove all door handles and hardware. It’s always best to put each screw back exactly where it came from to ensure the least amount of stress on the wood. Next, remove the cabinet doors and drawers from the cabinet frame.

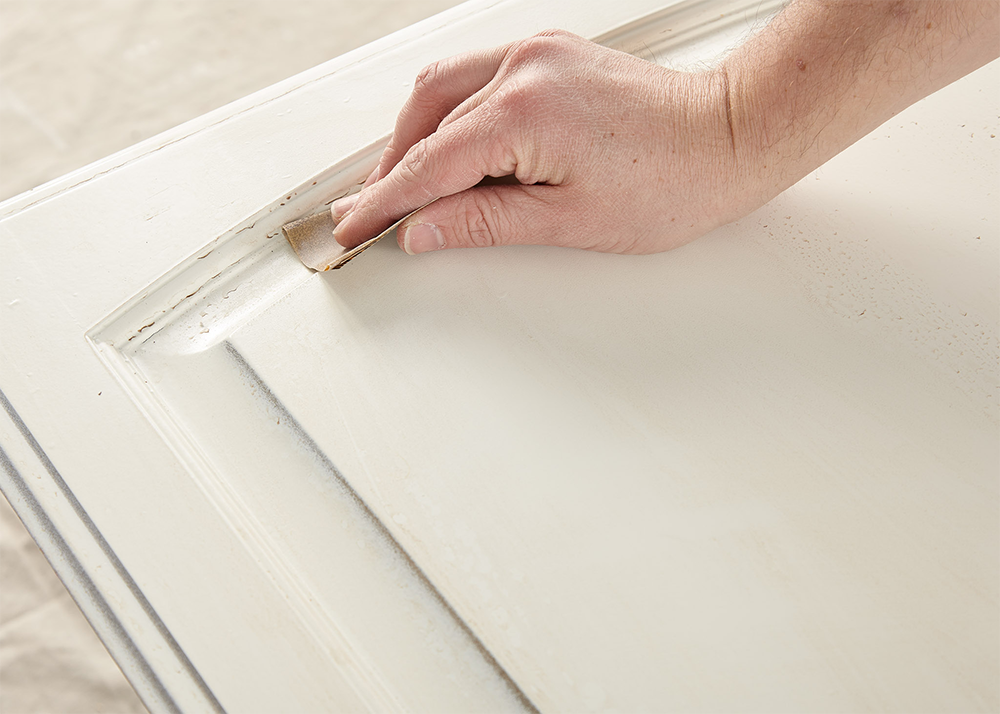
Step 2: Prepare the Cabinet Frame and Doors for Priming
Sand the doors, drawer faces and cabinet frame. Do a first pass with 100-150 grit sandpaper then finish with a second pass of 180-220 grit sandpaper, always moving in the direction of the wood grain. After sanding, wipe down the surface with a damp cloth to remove any dust or residue and allow the surface to dry. Next, tape around the cabinet frame to protect the walls and any areas you don’t want to get primer or paint on.
Step 3: Prime the Cabinet Frame and Doors
Apply KILZ 3™ Premium Primer on the doors, drawer faces and cabinet frame using a brush to ensure a mildew resistant finish. Stir thoroughly before and occasionally during use. Allow 1-hour of dry time.
Step 4: Paint the Cabinet Frame and Doors
Apply KILZ® Tribute® paint in Subtle Celery TB-74 with a brush to the cabinet frame and doors, moving in smooth strokes in the same direction as the wood grain. Remove your tape around the cabinet frame before the paint is fully dry. Once dry, reattach hardware to doors and then reattach doors to cabinets. Now it’s time to decide what delicious dish to whip up first in your refreshed kitchen!
Always remember to refer to our website (kilz.com) or product back labels for additional information on how to apply our products.
RELATED ARTICLES
get inspired:
FOLLOw us:
@kilzbrand
SHOP
PRODUCTS
Our Favorite 2020 Design Trends
January 7, 2020While the KILZ® brand is known first and foremost for our hardworking primers, color and design are also important to our team! Primer might technically be colorless, but it is a crucial step in adding color to your walls, cabinets and furniture pieces. Primer should often be the first step in achieving a new look for your space, so in a sense you can consider primer a part of the design process just as much as paint.
As we enter a new year, we’re excited to share a few color and design trends to help you along the way to completing your painting and renovation projects. Color and design trends are everywhere, and there is no one size fits all in terms of the hottest hue or best design style – but we’ve rounded up a few of our 2020 favorites to help inspire your project planning process in this new year.
Kitchens Are King:
In 2020, you’re going to see kitchen renovations and remodels popping like corn at the movies! (Translation: they’re everywhere and on everyone’s minds). In 2020, we’ll be exploring more kitchen color trends and design hacks on the blog to help you renovate your kitchen on budgets both big and small. 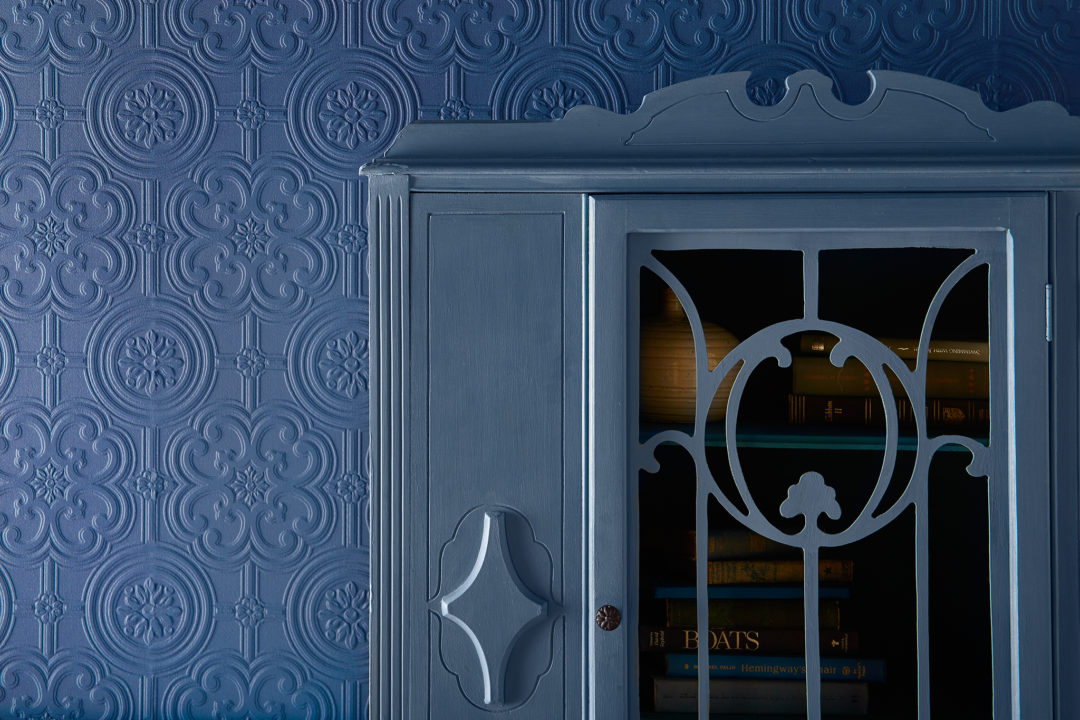
Not Over Navy:
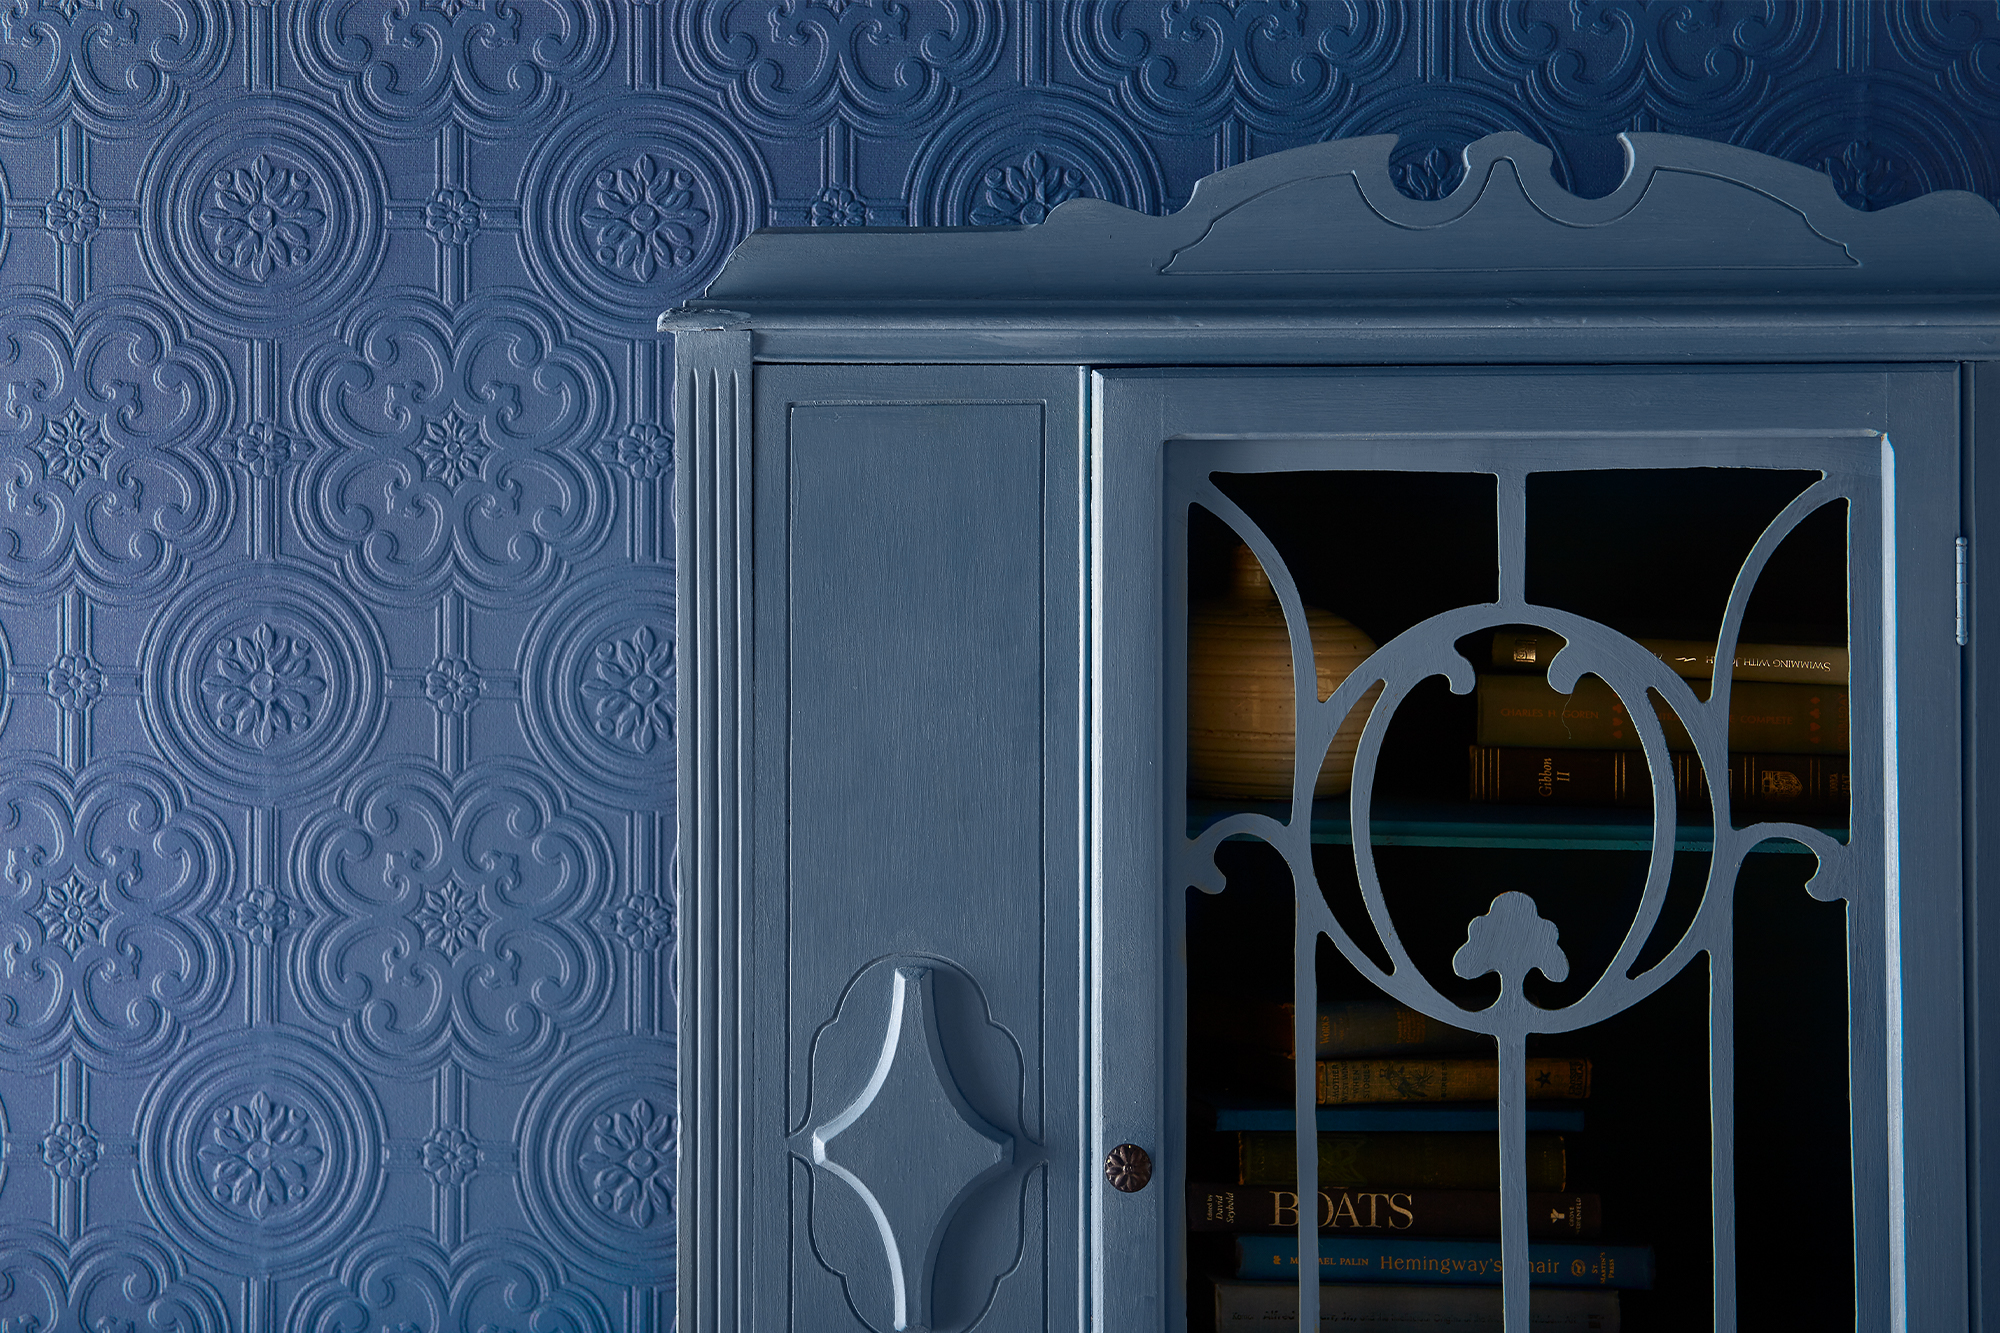
Blues and grays have been popular paint colors in recent years and we’re nowhere near done with them. From kitchens to bedrooms and cabinets to walls, navy can often act as a “dark neutral” to give a pop of color to a space while also keeping it classic. And we’re not alone in our love for navy, Pantone named Classic Blue the Color of 2020. Look out for some of our favorite shades of Navy in upcoming How-To posts later this year (spoiler alert – we’re painting everything from living room walls to dining room chairs in this easy to love shade!). 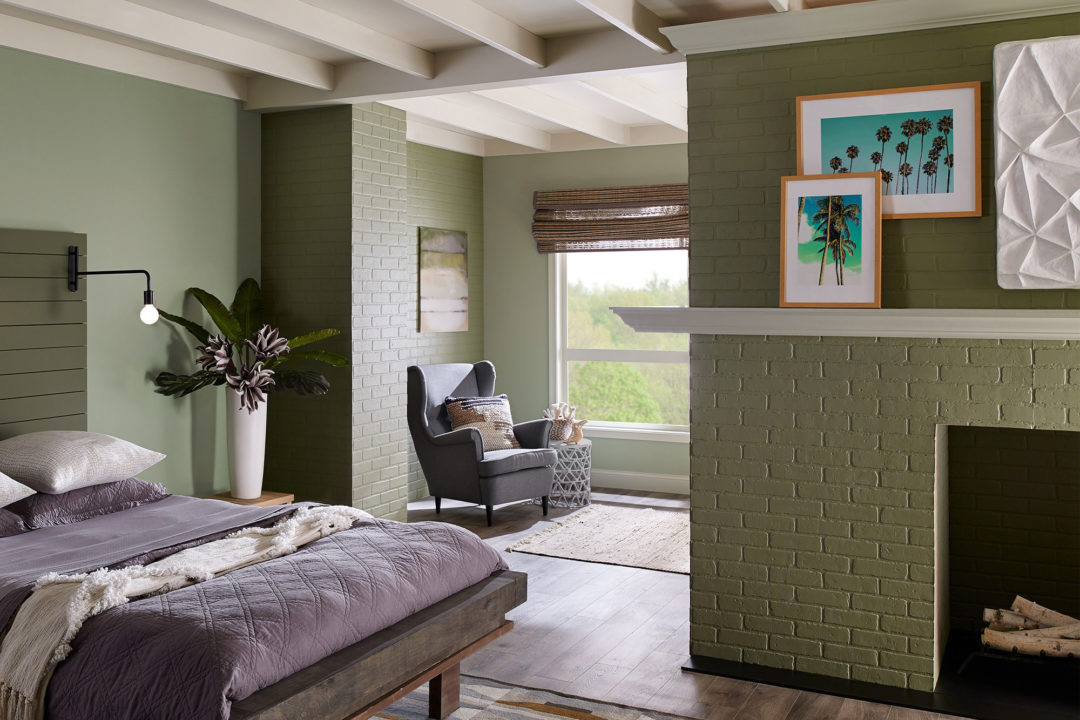
Fireplaces that Pop:
Who doesn’t love the crackling of a warm fire on a cold winter’s day? And for a fireplace design that pops both inside and out, we’re loving bright white bricks against colored walls and monochrome fireplaces in unexpected shades. 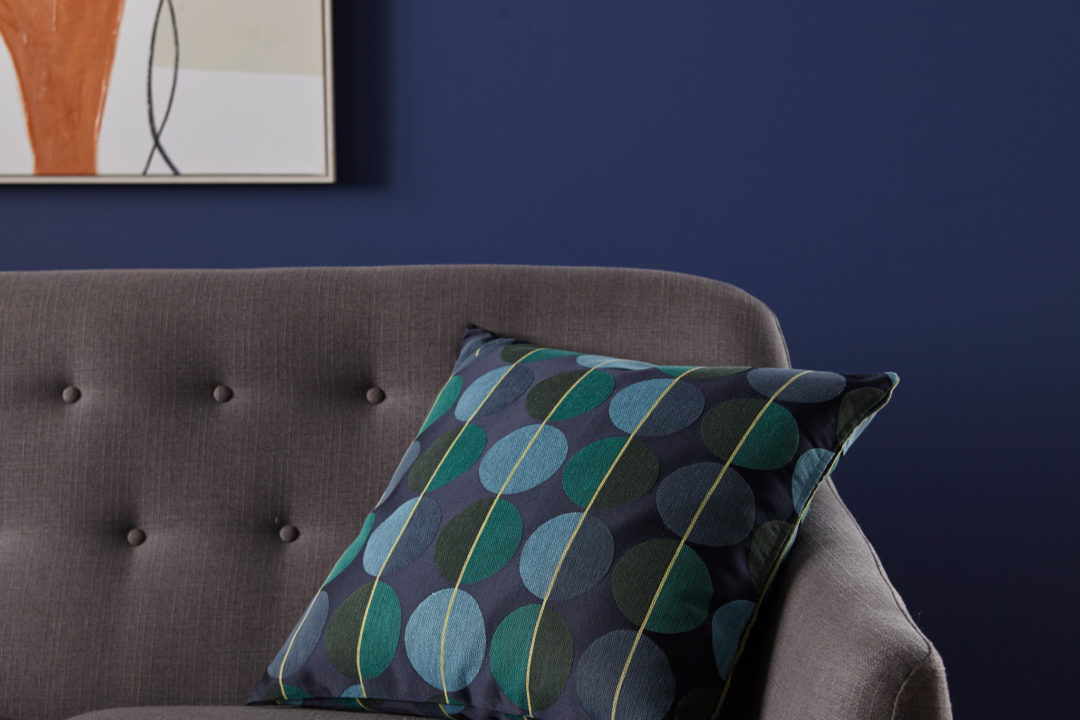
Full Circle Design:
Patterns and shapes are easy ways to add fun and unexpected touches to any room, and for 2020 we’re loving circles! From painting round pops of color on an accent wall to circular inspired décor items like mirrors, fabric and lighting, curved shapes and lines bring a nice softness to any design style. 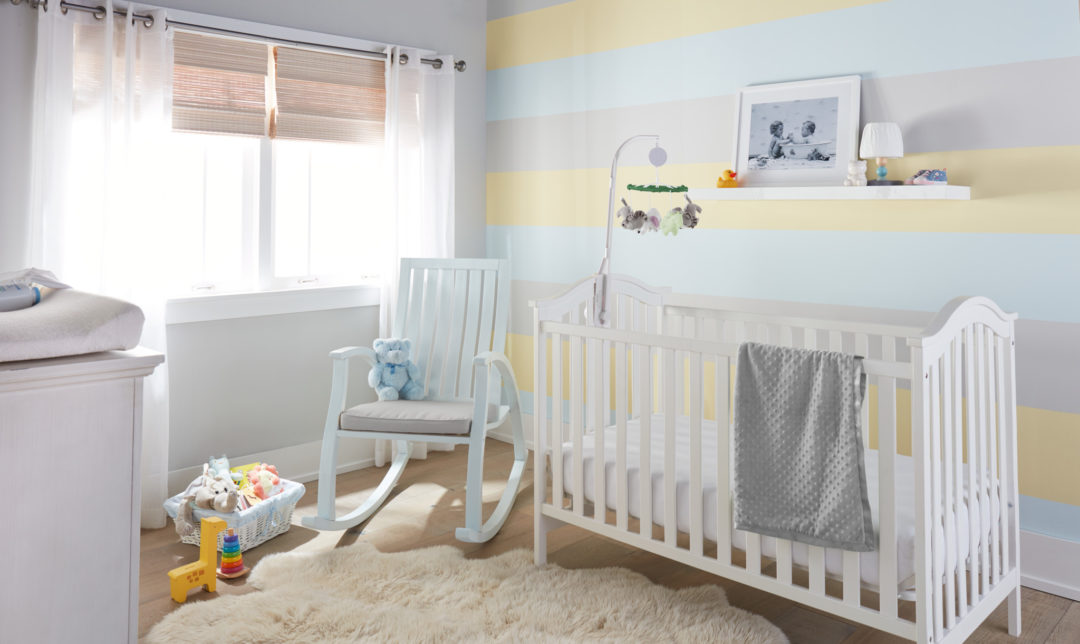
Color Blocking Children’s Spaces:
A little one’s room is the perfect place to play with pops of colors and interesting patterns or color placement. In 2019 we showcased a nursery makeover with a sweet striped wall, and we’re excited to explore more color blocking in 2020 for kid’s rooms.
RELATED ARTICLES
get inspired:
FOLLOw us:
@kilzbrand
SHOP
PRODUCTS

Cover Crayon Stains & Paint a Colorful Accent Wall
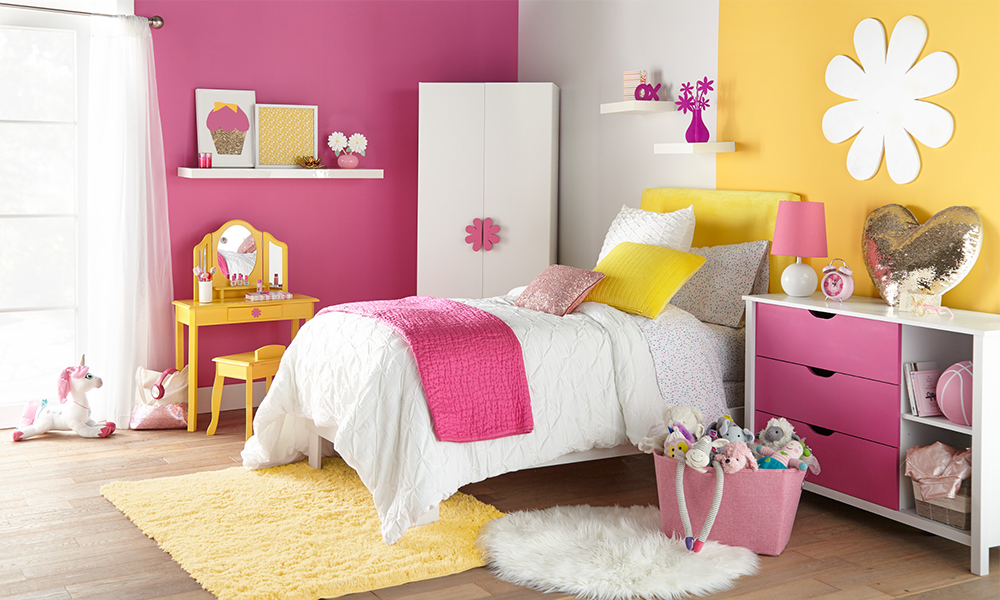
December 9, 2019Children love bringing their artwork home from school. But when the actual home becomes the artwork, what can you do to restore crayoned stained walls? In this sweet bedroom makeover, the walls are primed and painted as the first step to a total room refresh that includes a striking honey-hued accent wall and vivid pink and yellow furniture.

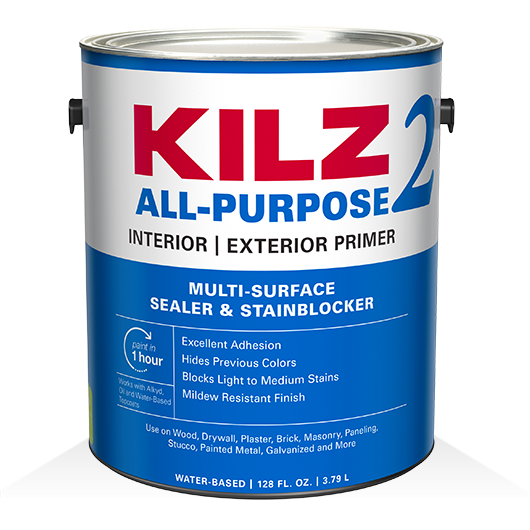
Crayon stained walls don’t stand a chance against KILZ 2® All-Purpose primer, used at the first step to create a sunny yellow accent wall in a little one’s dream bedroom. To begin, wipe down the chosen accent wall with a damp cloth to ensure it is clean and free of dust then allow the surface to dry. Next, tape around the baseboards, trim and moldings.
To block the light crayon stains and ensure a perfect finish, apply 1 coat of KILZ 2® All-Purpose primer using a brush first to “cut in” around the edges, then use a roller to fill in. Allow 1 hour of dry time. Finally, apply KILZ Tribute® in Jazz Age Yellow using the same method as the primer. Remove tape prior to paint drying, and the accent wall is complete!
To match the yellow accent wall, paint the vanity in the same sunny yellow shade! Similar to the accent wall, start with KILZ 2® All-Purpose primer before painting. The fast drying, water-based primer offers enhanced hiding, making it ideal for changing colors on both walls and furniture. To begin, remove the vanity’s drawer and hardware. Next, sand the surfaces of the vanity. Do a first pass with 100-150 grit sandpaper then finish with a second pass of 180-220 grit sandpaper, always moving in the direction of the wood grain. After sanding, wipe down the surface with a damp cloth to remove any dust or residue and allow the surface to dry before moving on to primer.
Now it’s time to prime. Apply KILZ 2® All-Purpose primer, moving in the same direction as the wood grain and allow to dry for 1-hour. Next, apply KILZ Tribute® in Jazz Age Yellow using a nylon or polyester blend brush, moving in smooth strokes that go the same direction as the wood grain. Once the paint is dry, reattached your hardware and the transformation is complete!
The final step in this child’s bedroom makeover is a pretty-in-pink dresser. Add a fun pop of color to a child’s dresser by painting the drawers a bright accent shade! Follow the same directions as outlined for the vanity, priming with KILZ 2® All-Purpose and then using BEHR Premium Plus® in Heart Breaker for the drawers and a favorite neutral for the dresser’s body.
Step 1:
Remove drawers and hardware.
Step 2:
Wipe down the entire surface with a damp cloth to ensure it is clean and free of dust. Allow the surface to dry.
Pro-tip:
Put the screws back into the hardware, then seal the hardware and screws in painter’s tape and label it. It’s always best to put every screw back exactly where it came from. That will put the least amount of stress on the wood.
Step 3:
Apply KILZ 2® All-Purpose primer, moving in the same direction as the wood grain for best results. Allow primer to dry for 1-hour.
Step 4:
Topcoat with BEHR Premium Plus® Semi-Gloss Paint in Heart Breaker.
RELATED ARTICLES
get inspired:
FOLLOw us:
@kilzbrand
SHOP
PRODUCTS

Pro Tips for Painting Over a Dark or Light Wall
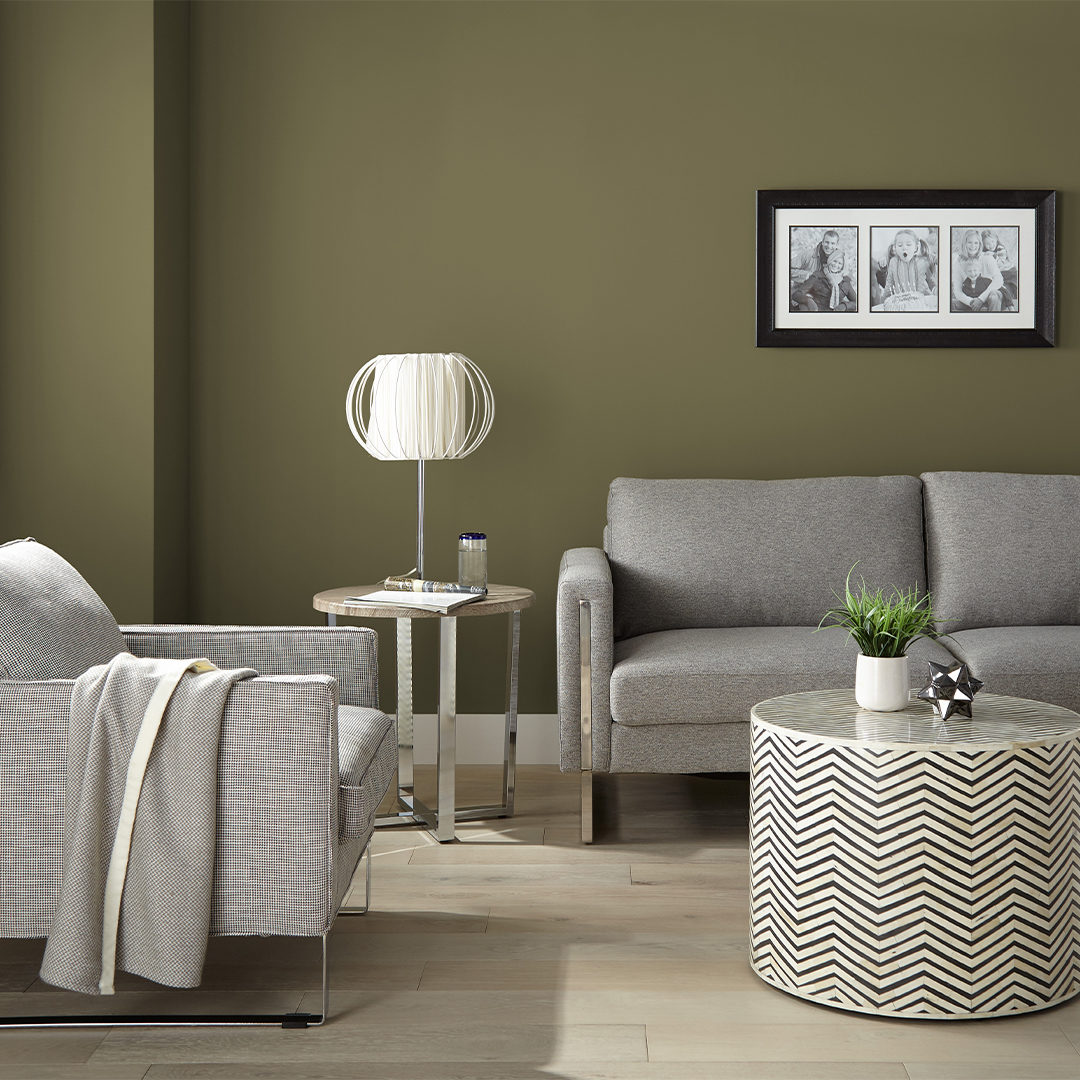
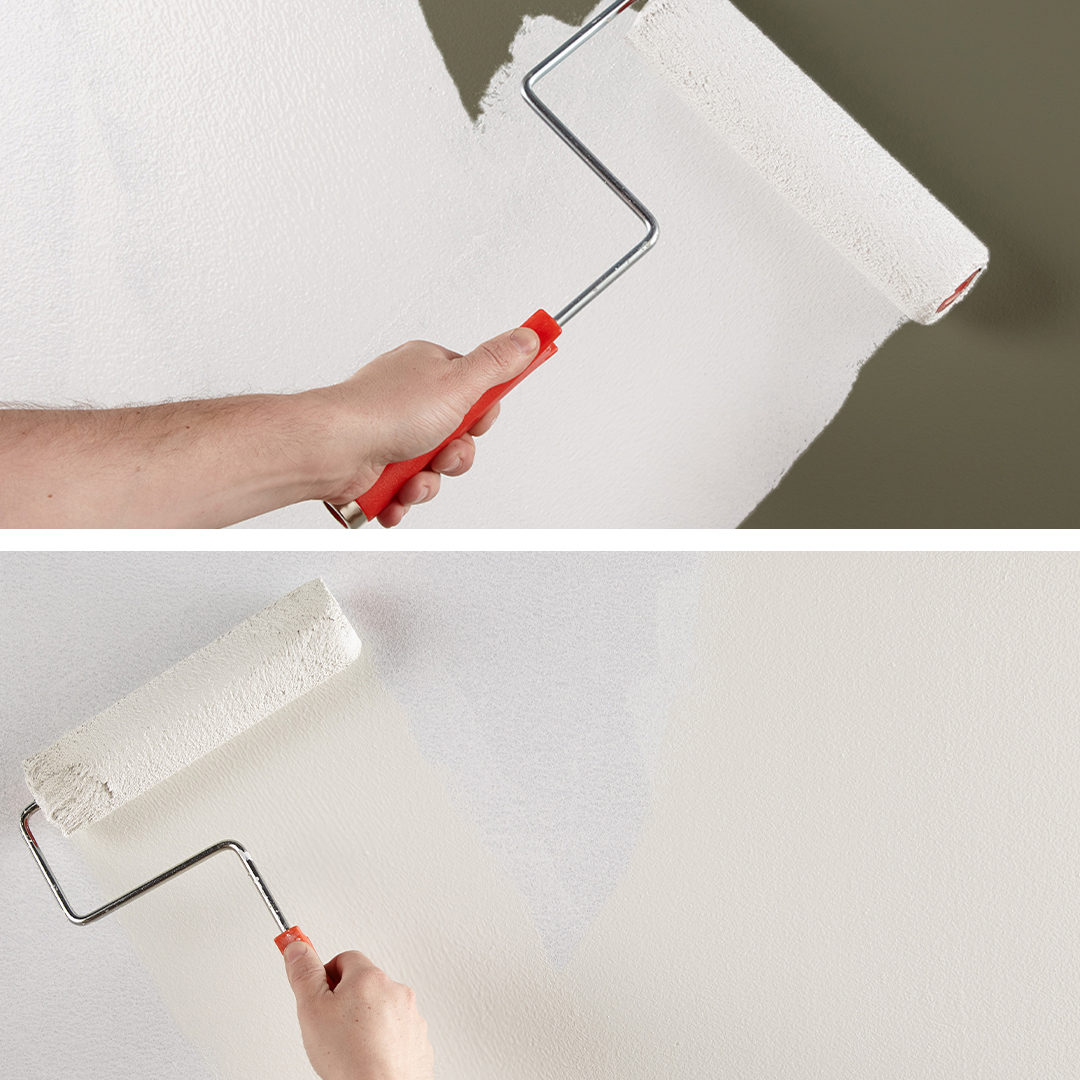
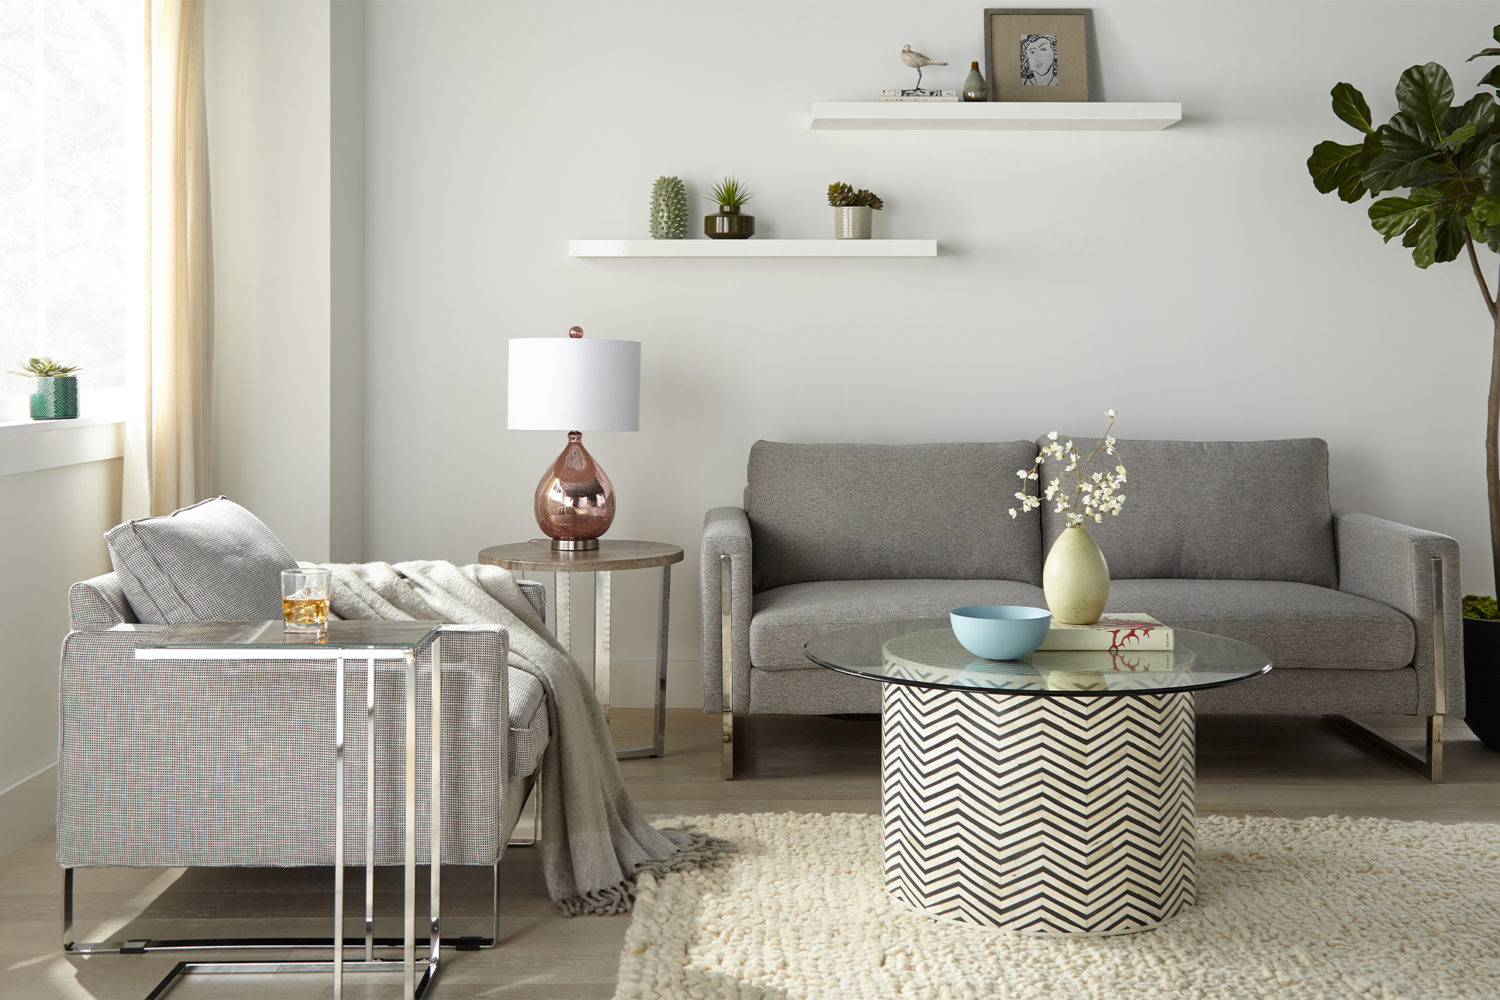
December 6, 2019A fresh coat of paint can go a long way in changing the look and feel of your space, and the last thing you want after meticulously selecting your perfect shade of white is for the old, unattractive color to seep through! One of our favorite neutrals is KILZ® Tribute® paint in Alaskan Mist and it was the perfect color to lighten up this living room.
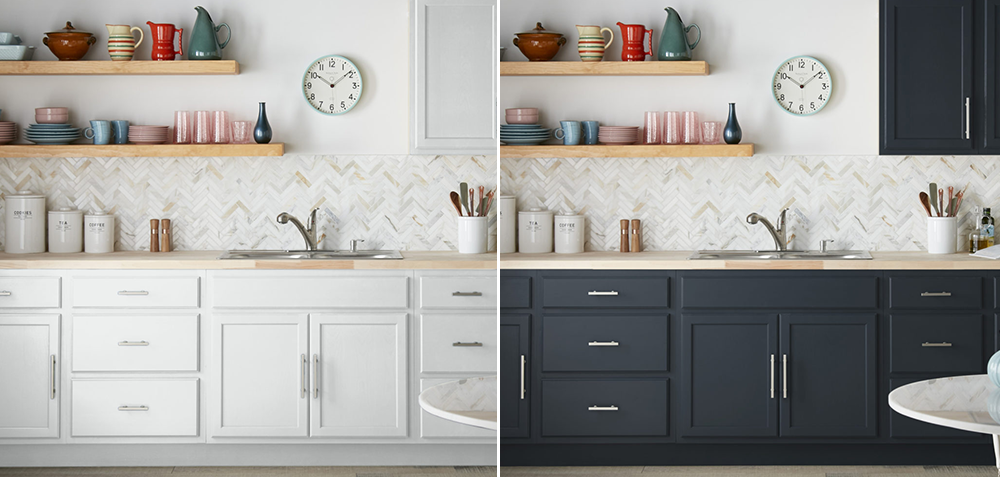
Taking the heavy olive-green walls to a bright white could have posed a challenge, including a need for excess coats of paint which we definitely wanted to avoid. It was time to prime! We chose KILZ 3™ Premium primer for its thicker, high hiding formula. This water-based primer hides surface imperfections and reduces the need for multiple coats of paint to allow a truer, richer color from the topcoat. A coat of KILZ 3™ Premium primer on the unpleasant green walls followed by paint in Alaskan Mist, and the color change was complete!
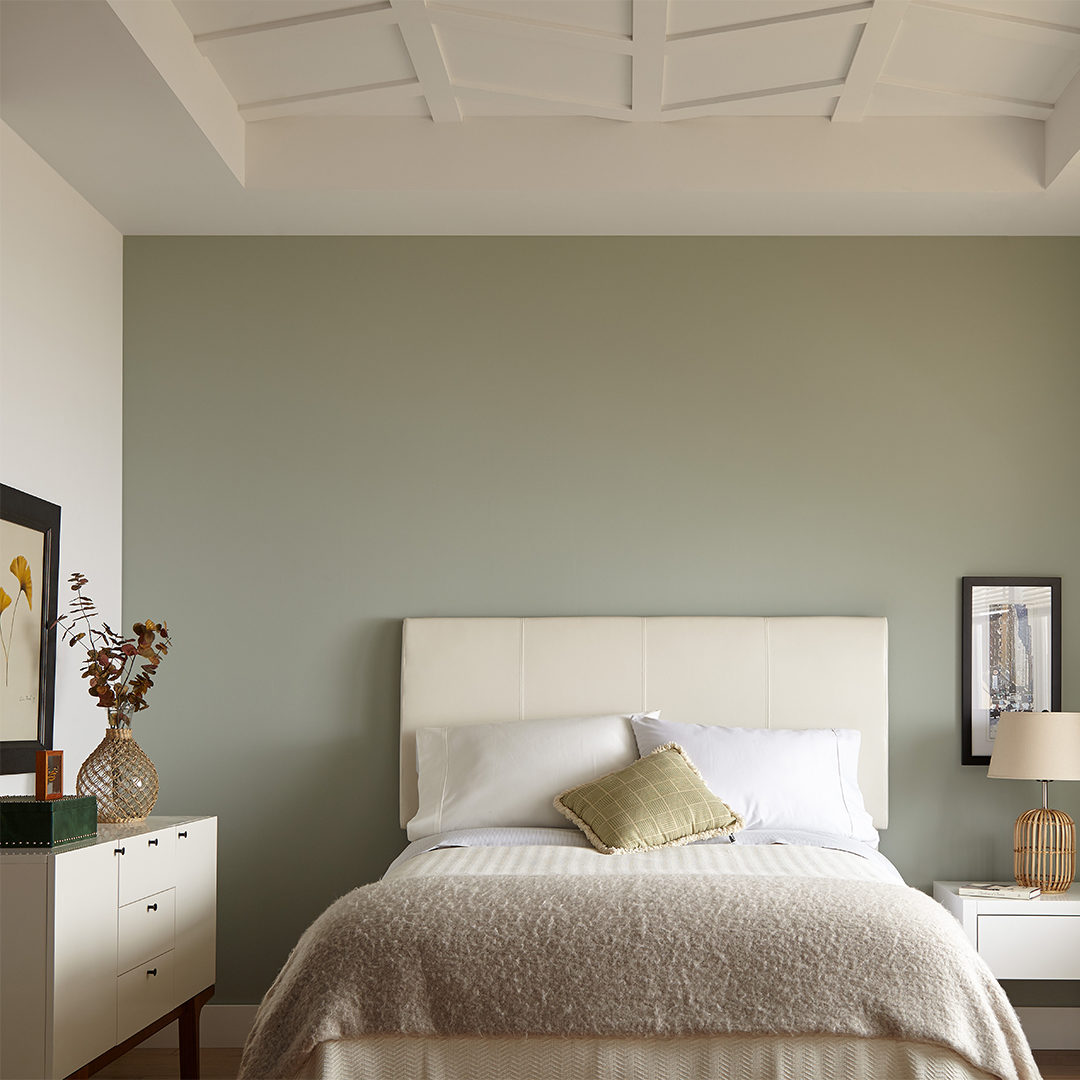
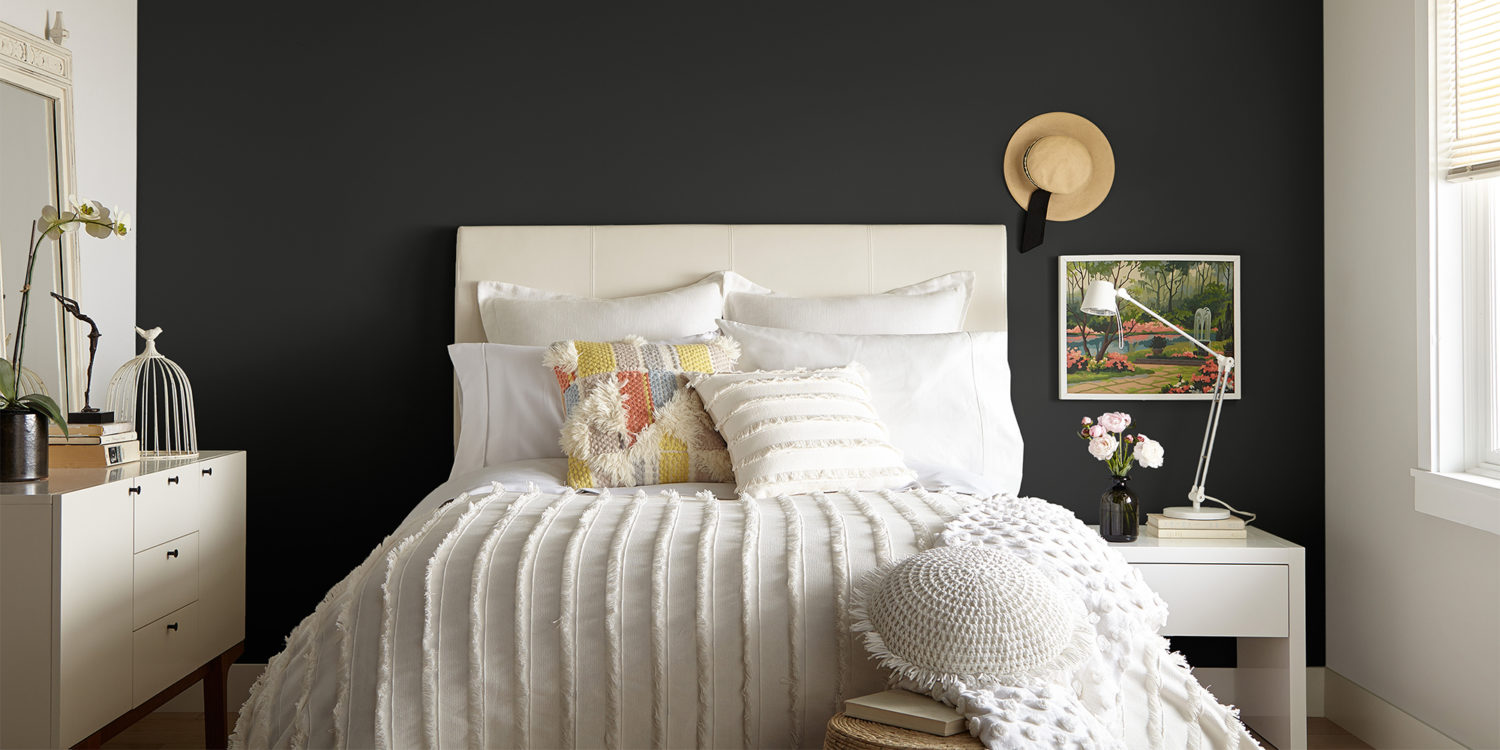
If dark paint colors are what you’re after, we have professional primer tips for a light to dark color change as well. It might seem like a dark color like BEHR® paint in Nocturne Blue can easily cover a lighter one in this bedroom refresh, so why prime? However, if you want that deep gray with dark blue undertones to look just right, we would suggest priming first with KILZ 2® All-Purpose primer. This water-based primer offers enhanced hiding, making it ideal for changing colors and helping to lessen the number of coats of paint required.

When painting to hide a previous color, KILZ® Primer reduces the need for multiple coats of paint to allow truer, richer color from your topcoat.
RELATED ARTICLES
get inspired:
FOLLOw us:
@kilzbrand
Styled by Color – One Kitchen, Three Ways
September 18, 2019One of the most searched for and sought-after room makeovers is the kitchen – and we’re not surprised! The heart of the home and a typical gathering, hosting and everyday living area, the kitchen is a space people typically spend a lot of time. If your kitchen is crying for a makeover, one simple and fairly low cost change you can make in a weekend is painting the cabinets. A fresh coat of primer and paint can completely transform your kitchen, whether you want an airy and light feel or an intimate and stylish look.
The first place to start when refreshing your kitchen cabinets is with proper prep work. Primer is key in a kitchen painting project, and the professionals often use a mildew resistant primer like KILZ® Kitchen & Bath or KILZ® 3 Premium. Once you’ve prepped and primed, it’s time for color! Kitchen cabinets are a great canvas for a wide range of colors, from light to dark neutrals to pops of color like blues and greens. With so many options it was a challenge to narrow down our top picks, but we landed on three different color combinations that are a winning recipe for a beautiful kitchen cabinet makeover.
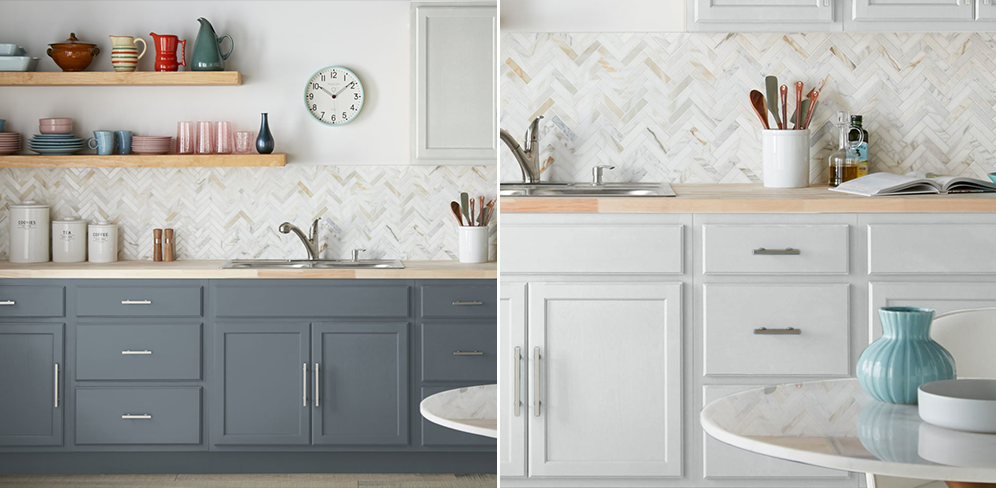
Our first pick is a timeless neutral, Contemporary White. A white with a hint of gray undertone, Contemporary White can appear as the color of fresh winter snow depending on the light and time of day. It is classic kitchen cabinet color, and makes the space feel bright and open.
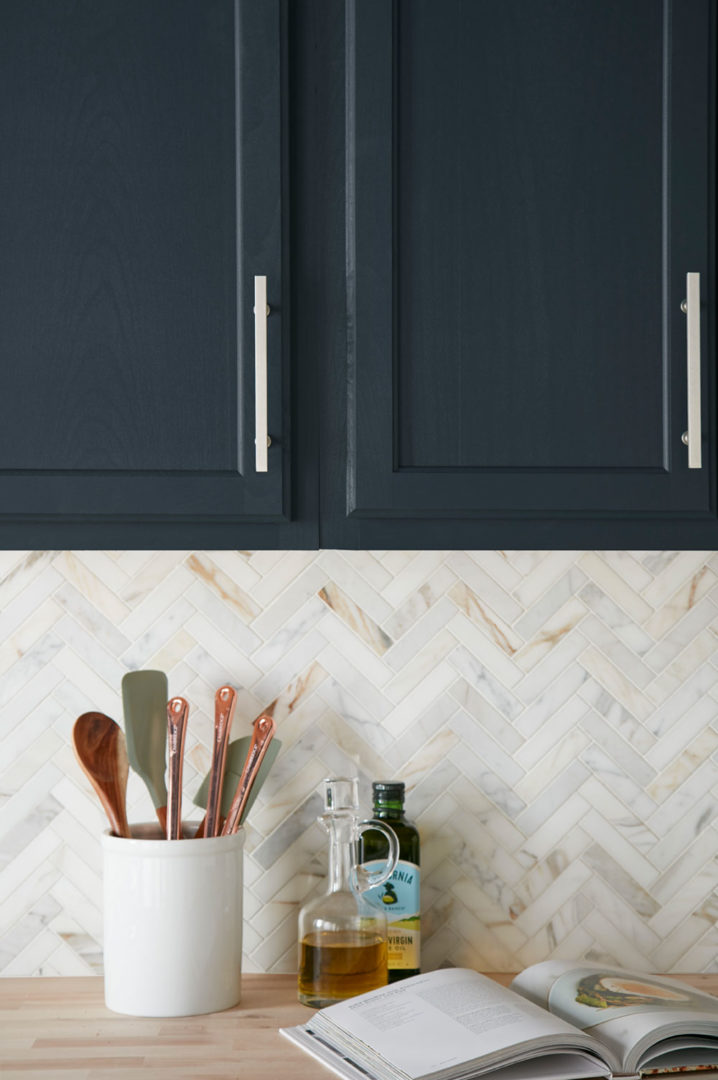
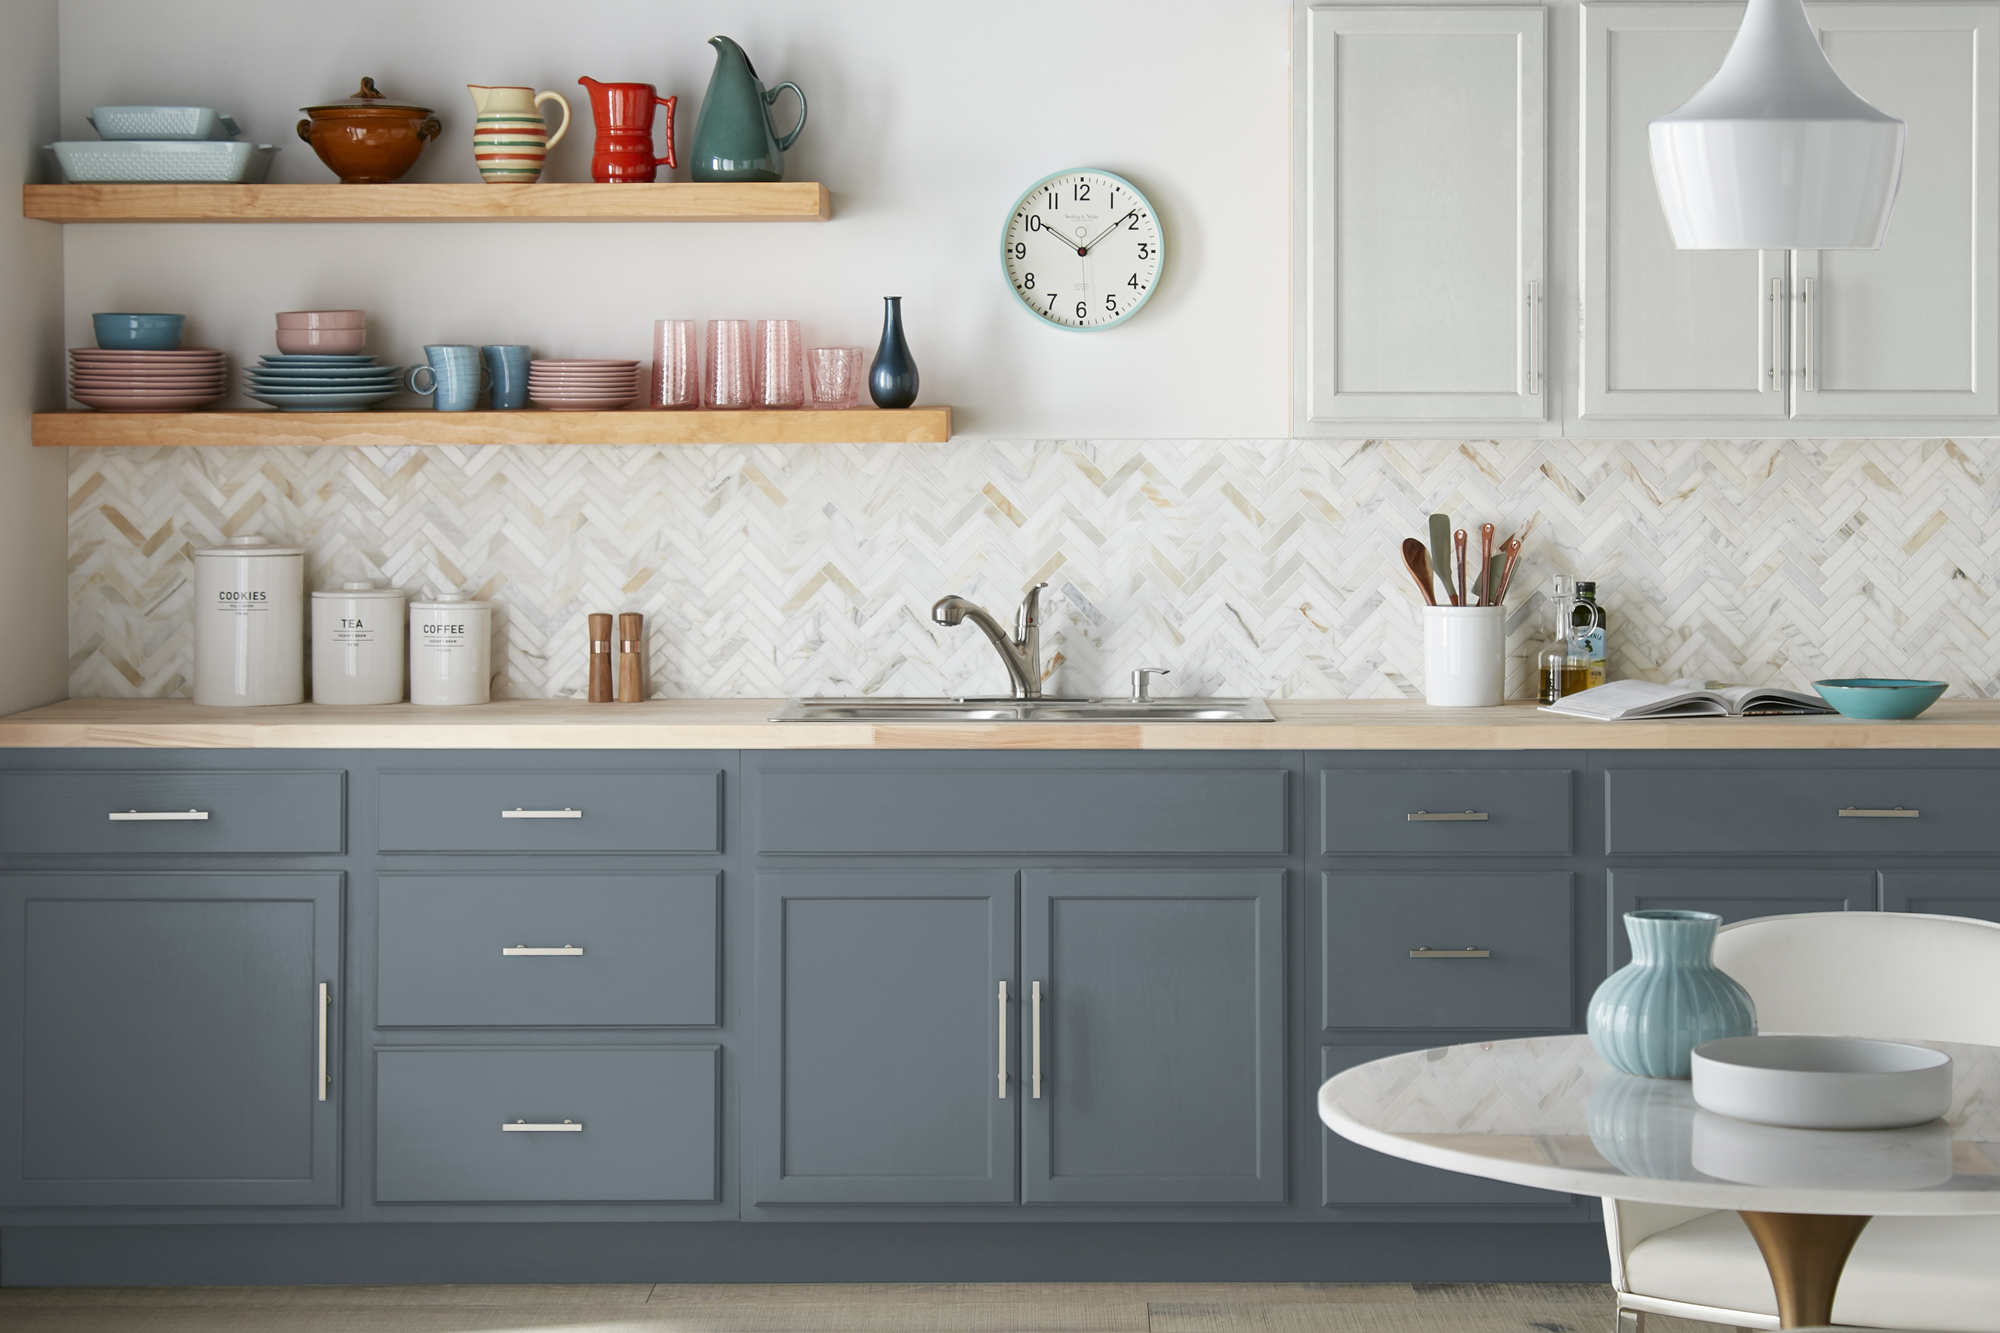
On the other end of the color spectrum, we picked an almost-black color that adds sophistication and subtle drama to a kitchen. Behr’s Nocturne Blue is a deep gray with a dark blue undertone and is consistently one of our favorite color picks. In some lighting it will appear as black, but with a softer feel.
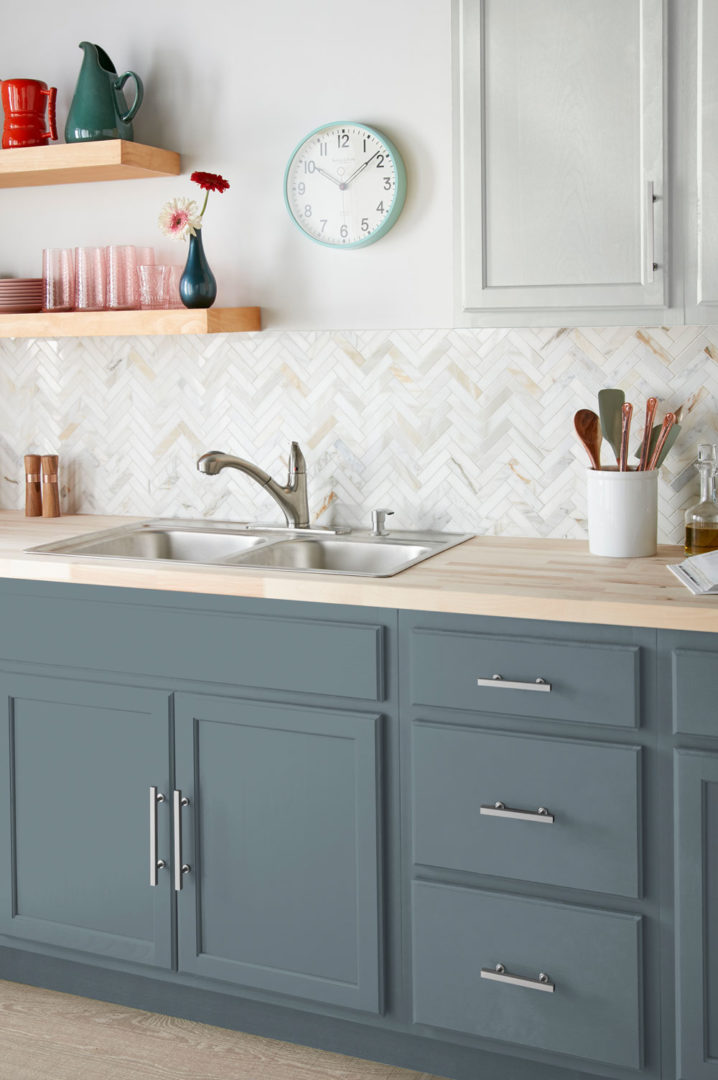
If you can’t choose between classic white or another color, why not use both! We chose two colors for our last pick to showcase stylish two-toned kitchen cabinets. For the uppers, Alaskan Mist, a bright white with soft green undertones, brought a perfect airiness to the space. We grounded the kitchen with December Nights, a stormy blue-gray, on the lower cabinets.

Contemporary White

Behr’s Nocturne Blue

Alaskan Mist

December Nights
Whether you prefer kitchen cabinets in crisp white, moody black or something in between, this home renovation project is one that makes a big impact in a short amount of time.
A fresh coat of primer and paint can completely transform your kitchen, whether you want an airy and light feel or an intimate and stylish look.
RELATED ARTICLES
get inspired:
FOLLOw us:
@kilzbrand
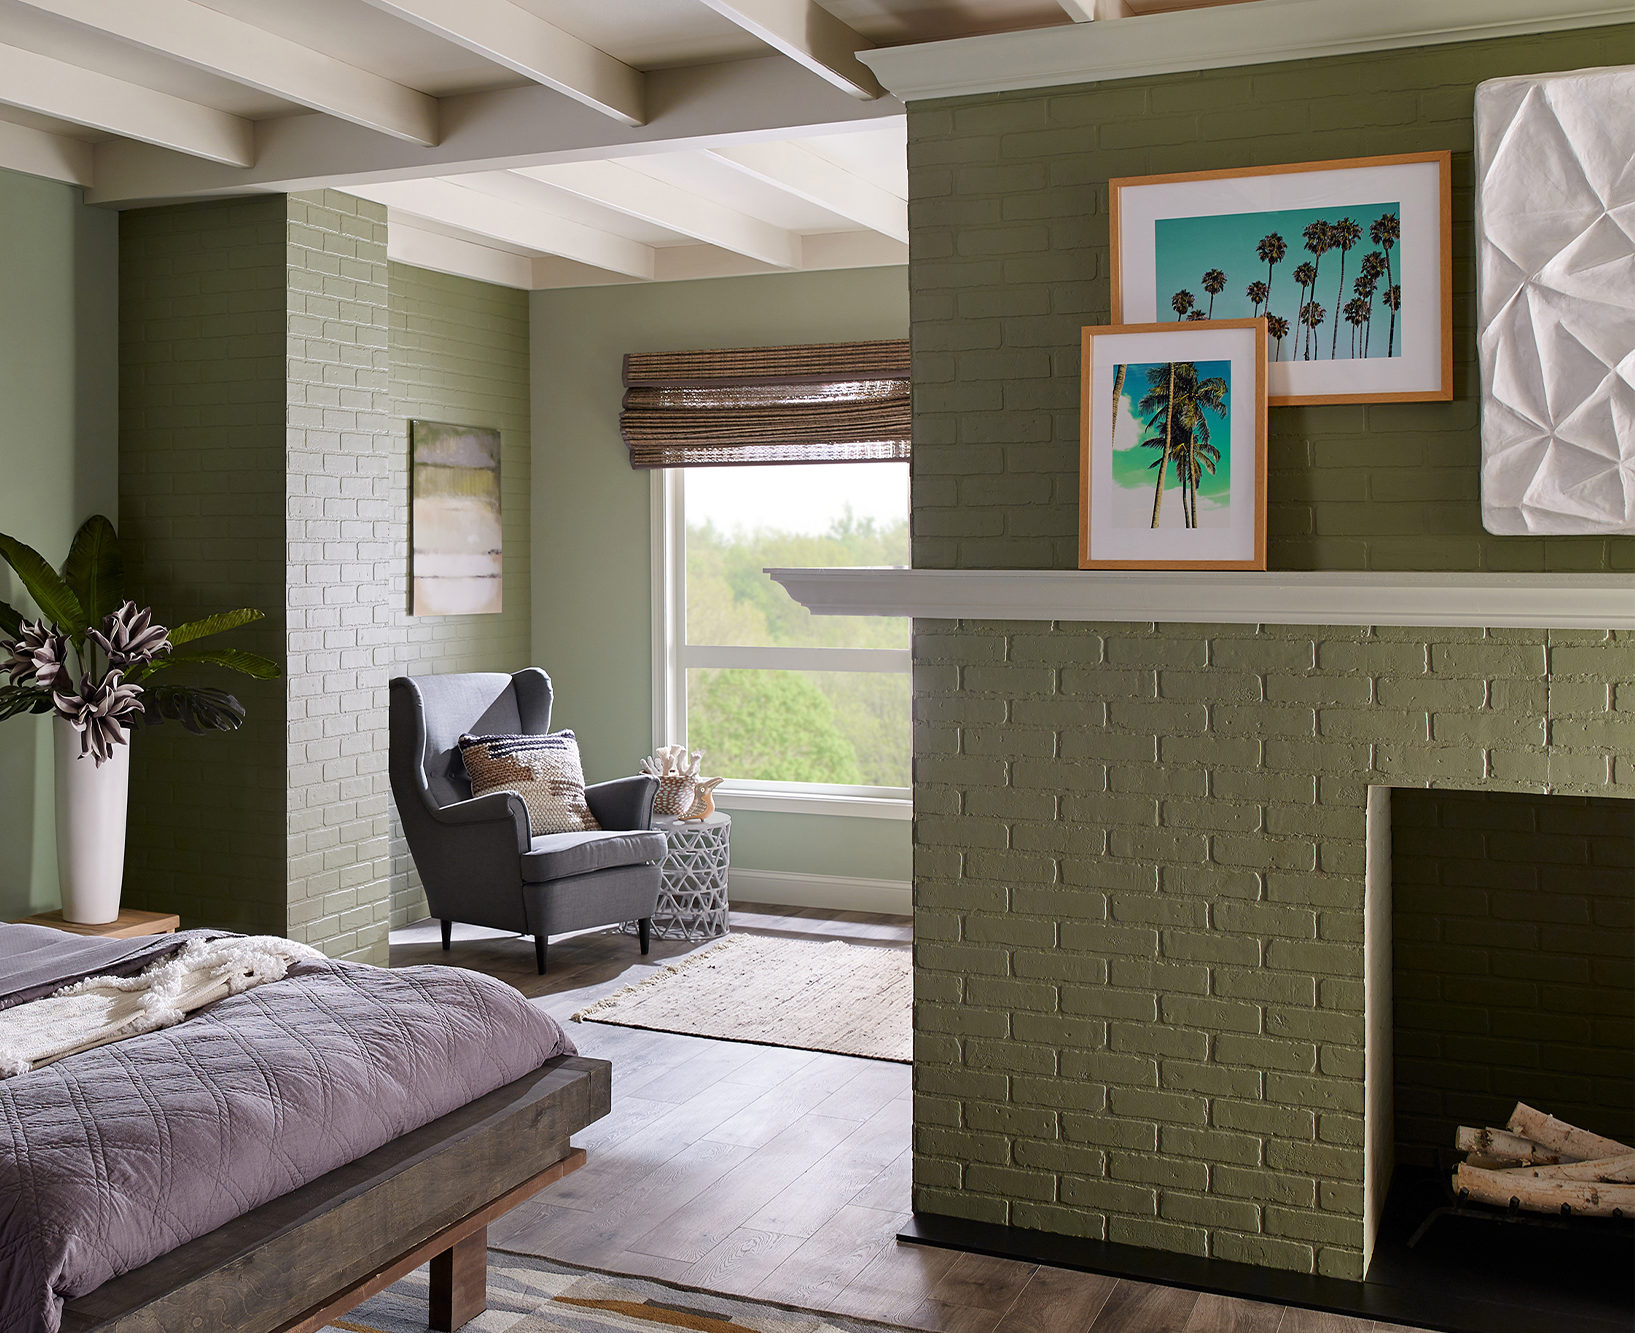
Prep & Paint a Porous Surface
August 20, 2019As with most any painting project, prepping and priming the surface is key before its time to paint. Choosing the right primer depends a lot on the surface type you’re painting, a choice that is second nature to professional painters but can be confusing to some! When selecting a primer, the first step is recognizing the surface you will be painting and taking into account its condition – and some surfaces are trickier than others.
In this gorgeous green bedroom, the red brick fireplace was drawing too much attention and taking away from the serene and calming feel that was desired. The fix was easy, paint the fireplace! This led us to the first step in selecting the right primer – knowing and assessing the surface that will be painted. In this case, brick, a porous surface that if not properly sealed can soak up a lot of paint. And that can cost time and money!
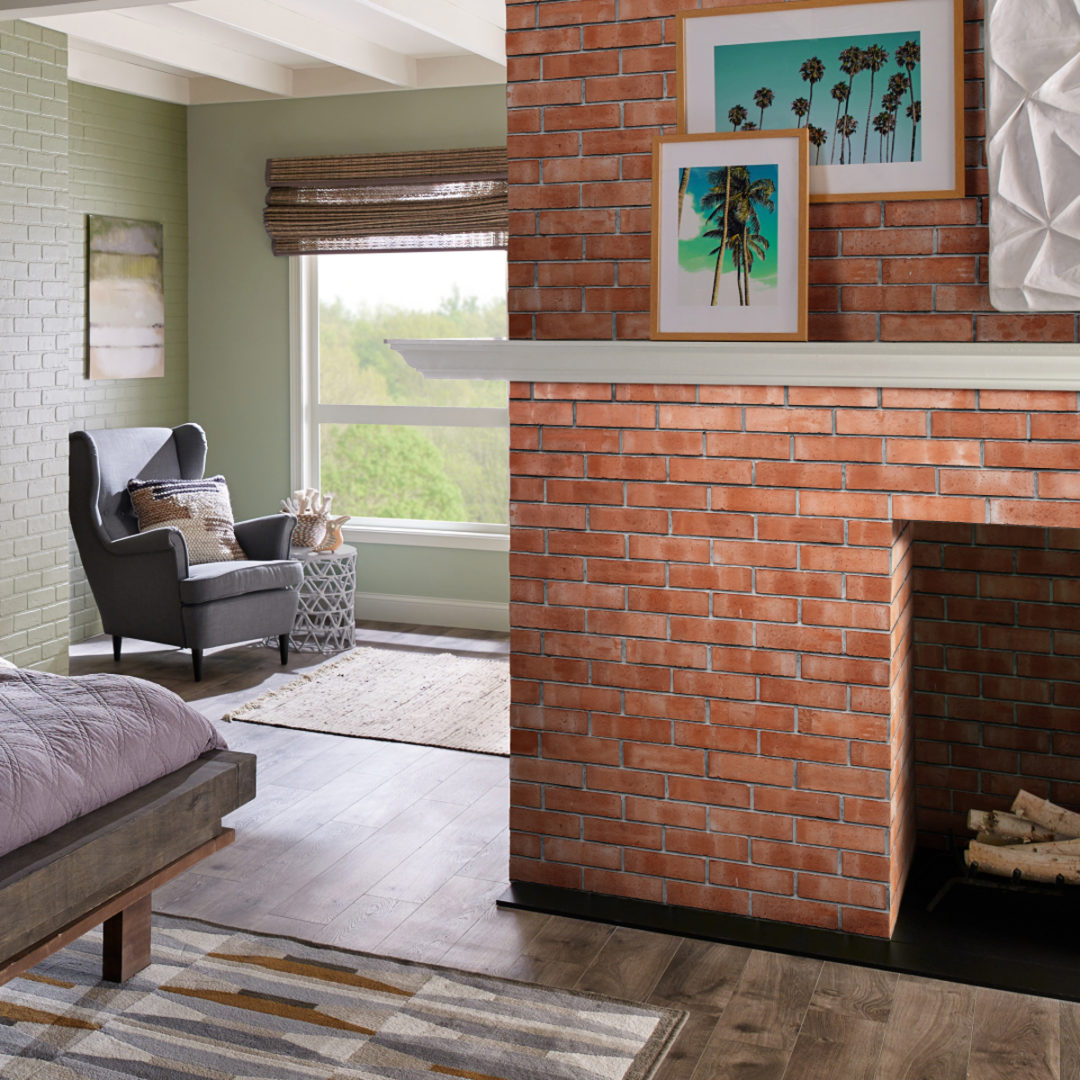
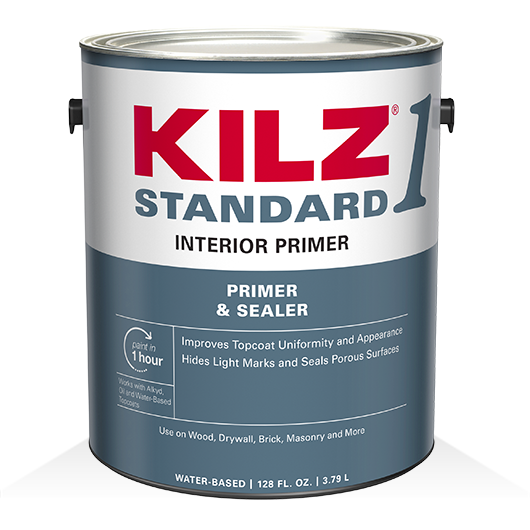
To prep this brick fireplace for painting we took a cue from the pros and chose KILZ® 1 Standard to seal the porous surface and ensure a professional looking finish. Other porous surfaces that are commonly painted include concrete, new wood and drywall. For any of these KILZ® 1 Standard or KILZ 2® All-Purpose are both great primers to choose.
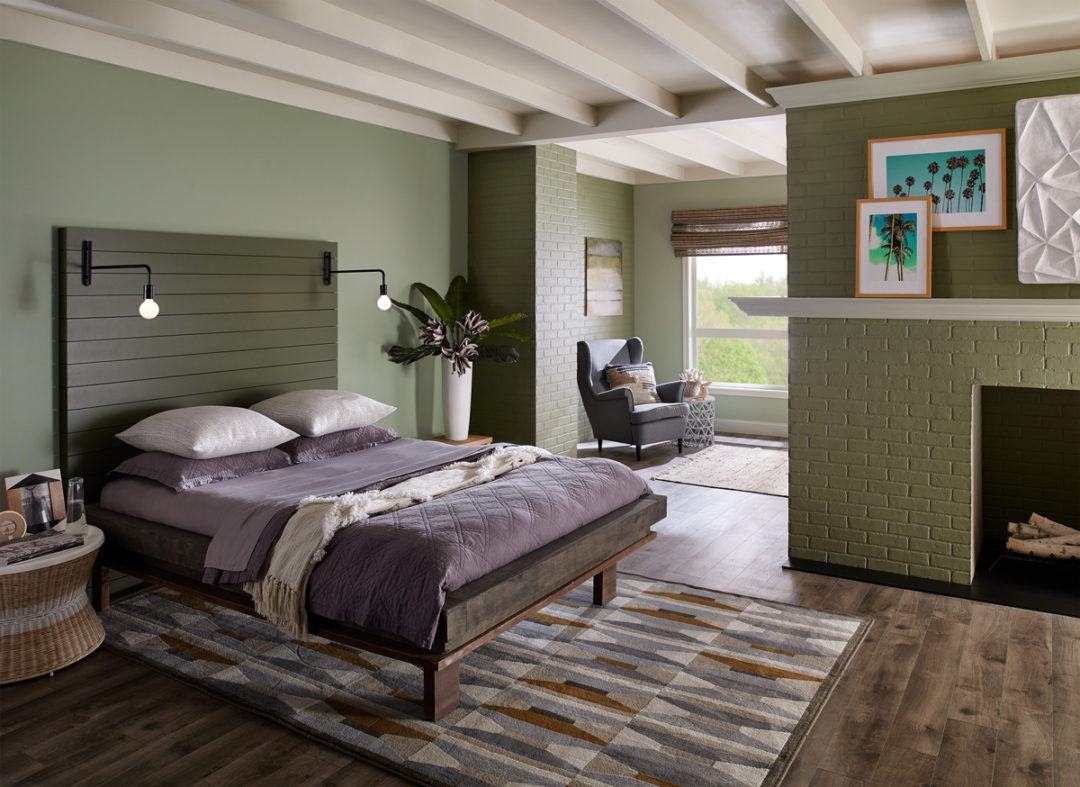
Priming a porous surface before painting ensures your topcoat will look its best.
RELATED ARTICLES
get inspired:
FOLLOw us:
@kilzbrand
Prep Mildew Prone Areas Like a Pro
August 6, 2019Professional painters know that priming can be a crucial step for any paint project. Whether you’re painting fresh drywall or looking to hide a previous wall color, a primer should always be properly applied before your topcoat. The necessity of this prep step is even more advantageous in mildew prone areas like kitchens, bathrooms and laundry rooms. These rooms often have excessive moisture making mildew a common problem, and simply painting over the issue is only a temporary solution.
For results that last, a primer created with specific mildew-resistant properties is what professionals often choose. The last thing you want is a mildew ridden kitchen or smelly bathroom and KILZ® primer is here to help with professional tips for ensuring a mildew-resistant finish on your next paint project.
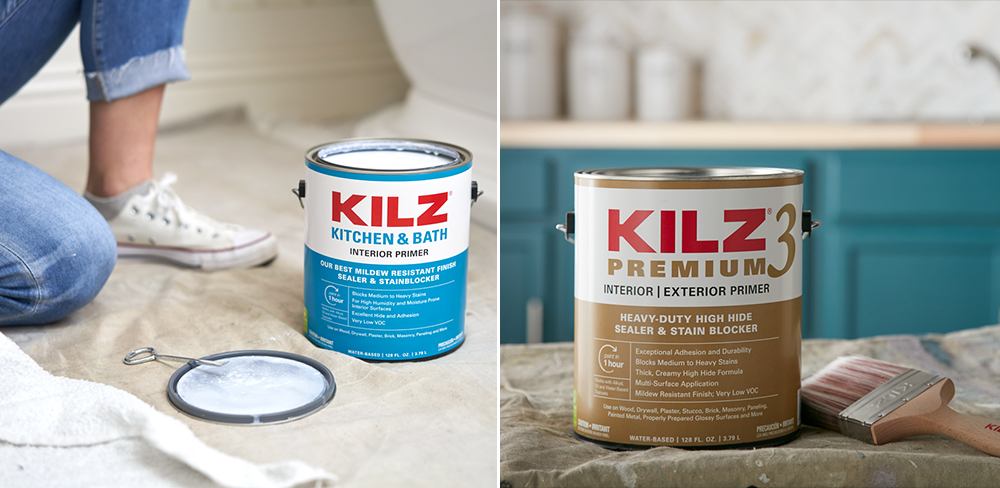 First things first, start by choosing the right primer. KILZ® Kitchen & Bath is specially designed for high-humidity and moisture-prone rooms like kitchens, laundry rooms and bathrooms. It has an enhanced mildew-resistant film that protects the primer from mildew growth. Another professional quality choice is KILZ 3™ Premium. Formulated for both interior and exterior use, this water-based primer works well for a variety of home improvement projects.
Now you’ve got the right primer, what’s next? Start by cleaning any existing mold or mildew off the surface you’re going to be priming and painting. Once the surface is fully dry, it’s time to prime!
For results that last, a primer created with specific mildew-resistant properties is what professionals often choose.
RELATED ARTICLES
get inspired:
FOLLOw us:
@kilzbrand
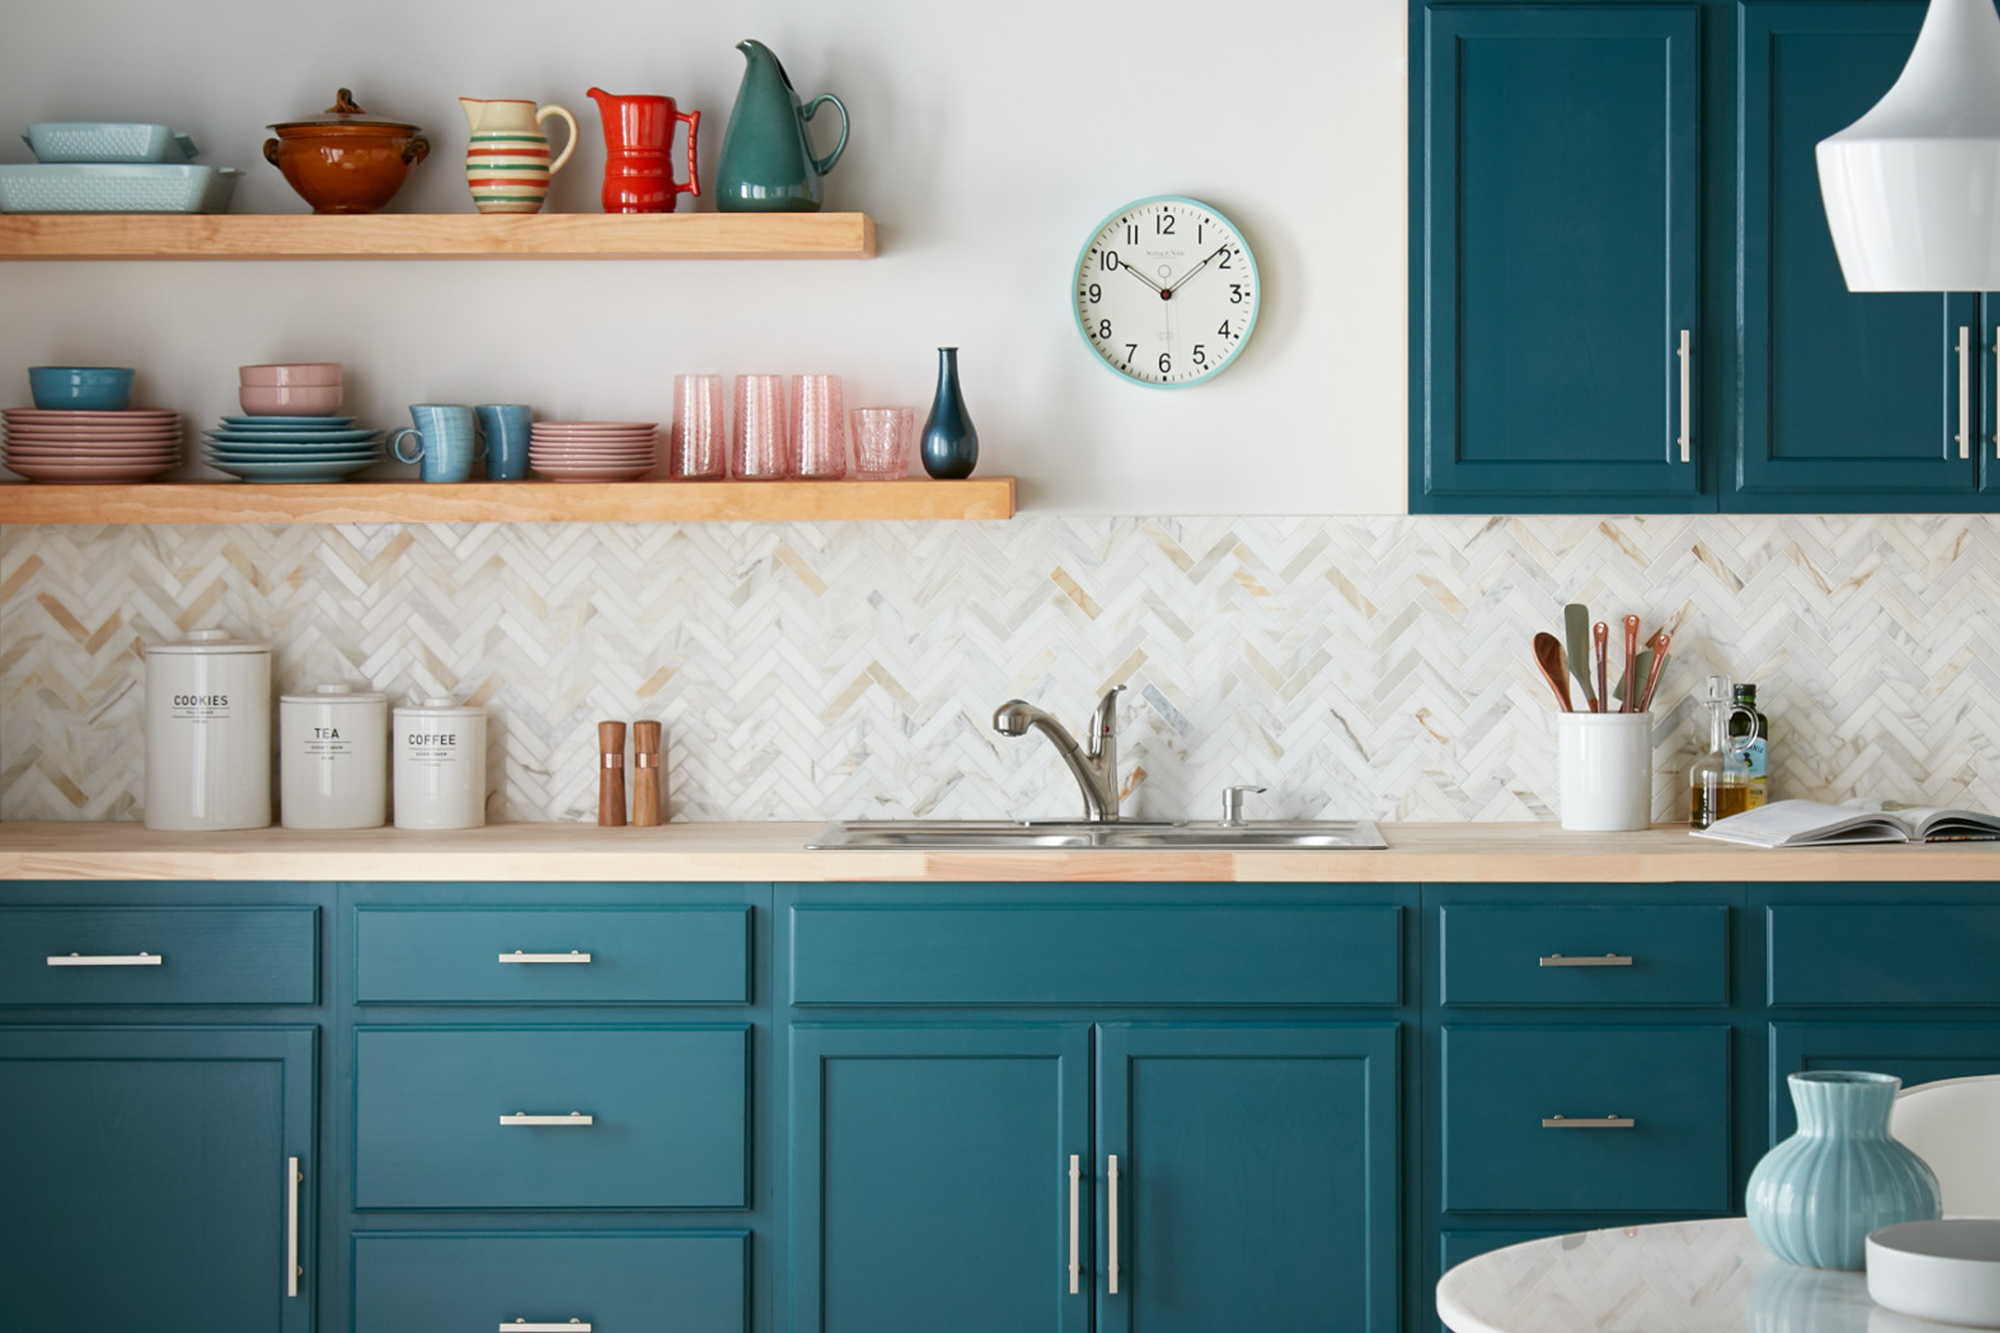
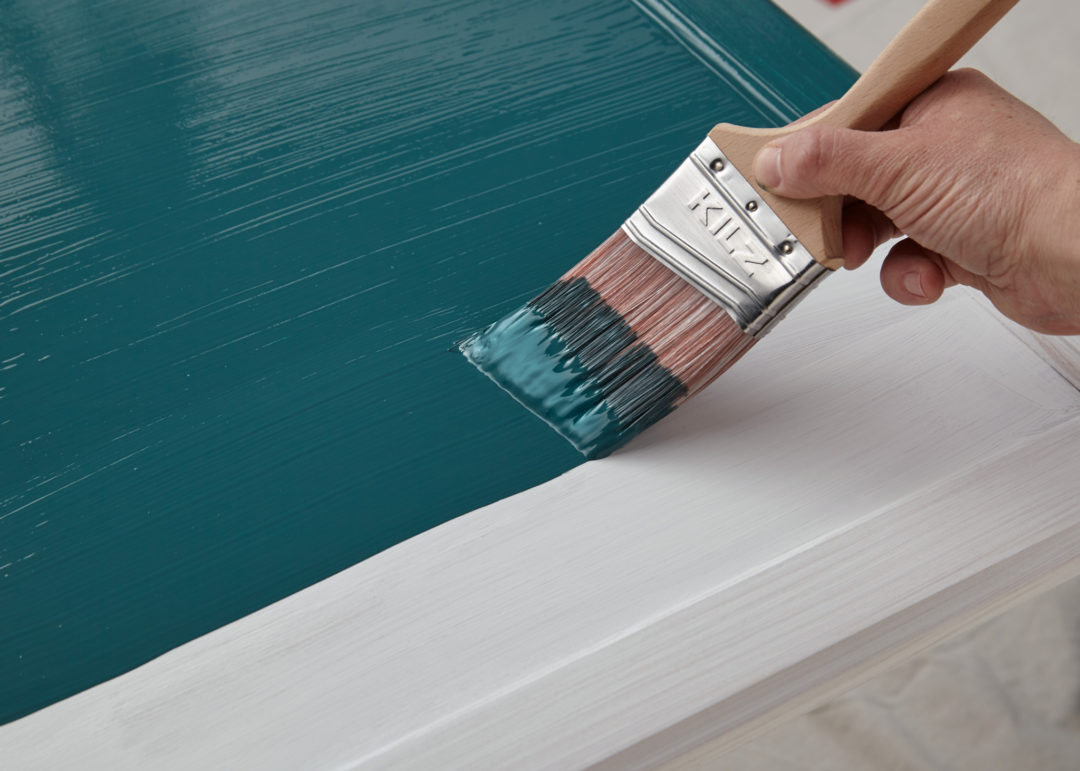
Colorful Kitchen Cabinet Transformation
August 1, 2019Have you been cooking up ideas for your dream kitchen but don’t know exactly where to start? While the cabinets might seem like a daunting place to begin, a fresh coat of paint and primer on this area of your kitchen can result in a dramatic transformation. The kitchen cabinets are also an area of the home where you can have fun with color – from bold blues to moody blacks, colorful cabinets can be as on-trend as they are timeless.
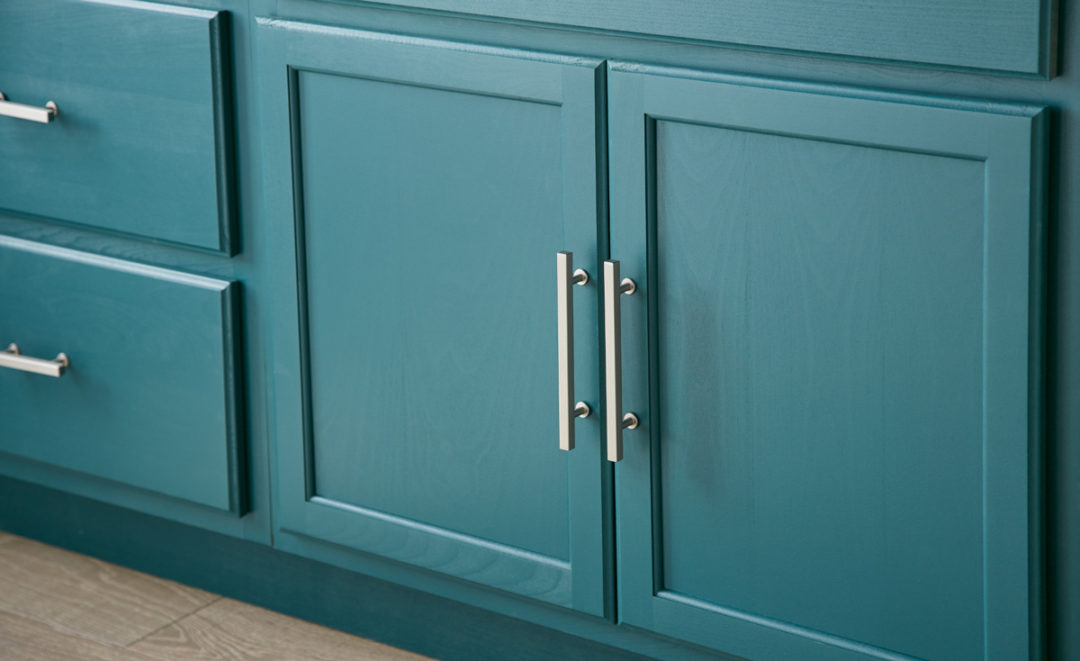
This month we’re bringing you a dash of inspiration and a pinch of proper prep work, served up in a stunning kitchen cabinet transformation. To take this sunny space from boring to brilliant, we chose Oceans Deep for the kitchen cabinets. The dark bluish green with gray tones is subdued enough to cover a large area but still results in a space with a ton of personality. Oceans Deep is available in the KILZ® Tribute® paint line, a low VOC paint that offers excellent stain-blocking performance and durability – both necessary qualities for an area where sticky fingers and spills are inevitable!

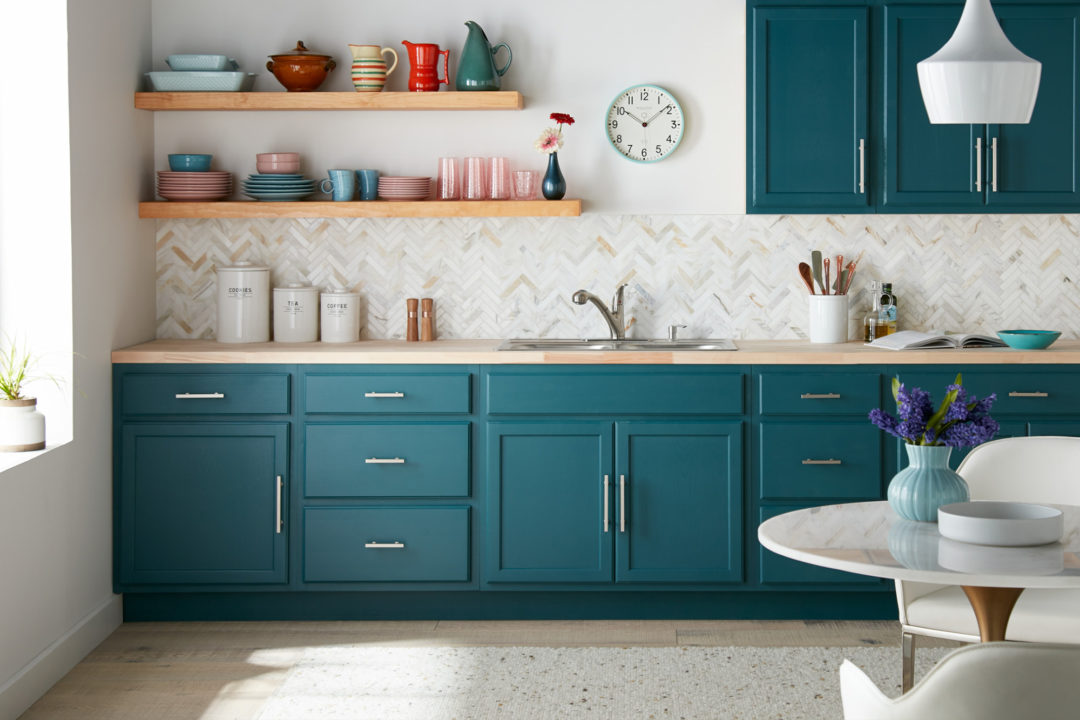
Equally important as color choice in this kitchen cabinet makeover was the primer selection. Since kitchens are prone to excess moisture and humidity, that also means that mildew can quickly become an issue. To ensure our cabinets would stay fresh for years to come we chose KILZ 3™ Premium primer, a fast drying, low odor and very low VOC primer that provides a mildew resistant coating.
Any professional painter will tell you that proper prep is key to the success of your project, and cabinets are no exception. If you’re ready to get started on your own kitchen transformation, below are instructions detailing how-to prime and paint your kitchen cabinets.
Step 1:
Use a screwdriver to remove the cabinet doors and drawers from the cabinet frame.
Step 2:
Remove all door handles and hardware. It’s always best to put each screw back exactly where it came from to ensure the least amount of stress on the wood.

Pro-tip: Put the screws back into the hardware, then seal the hardware and screws in painter’s tape and label it.
Sand the surfaces of the doors, drawer faces and cabinet frame. Do a first pass with 100-150 grit sandpaper then finish with a second pass of 180-220 grit sandpaper, always moving the sandpaper in the direction of the wood grain. After sanding, wipe down the surface with a damp cloth to remove any dust or residue and allow the surface to dry before moving on to primer.
Step 4:
Apply KILZ 3™ Premium using a brush or roller to ensure a mildew resistant finish. Stir thoroughly before and occasionally during use. Allow 1-hour dry time.
Step 5:
Apply KILZ® Tribute® in Oceans Deep (a satin or semi-gloss finish is recommended) with a brush or roller, moving in smooth strokes in the same direction as the wood grain.
Step 6:
Once paint is dry, reattach hardware to doors and then reattach doors to cabinets.

Oceans Deep
RELATED ARTICLES
get inspired:
FOLLOw us:
@kilzbrand
join the conversation:
SHARE this post: