Tag: Inspiration
One Living Room Two Ways
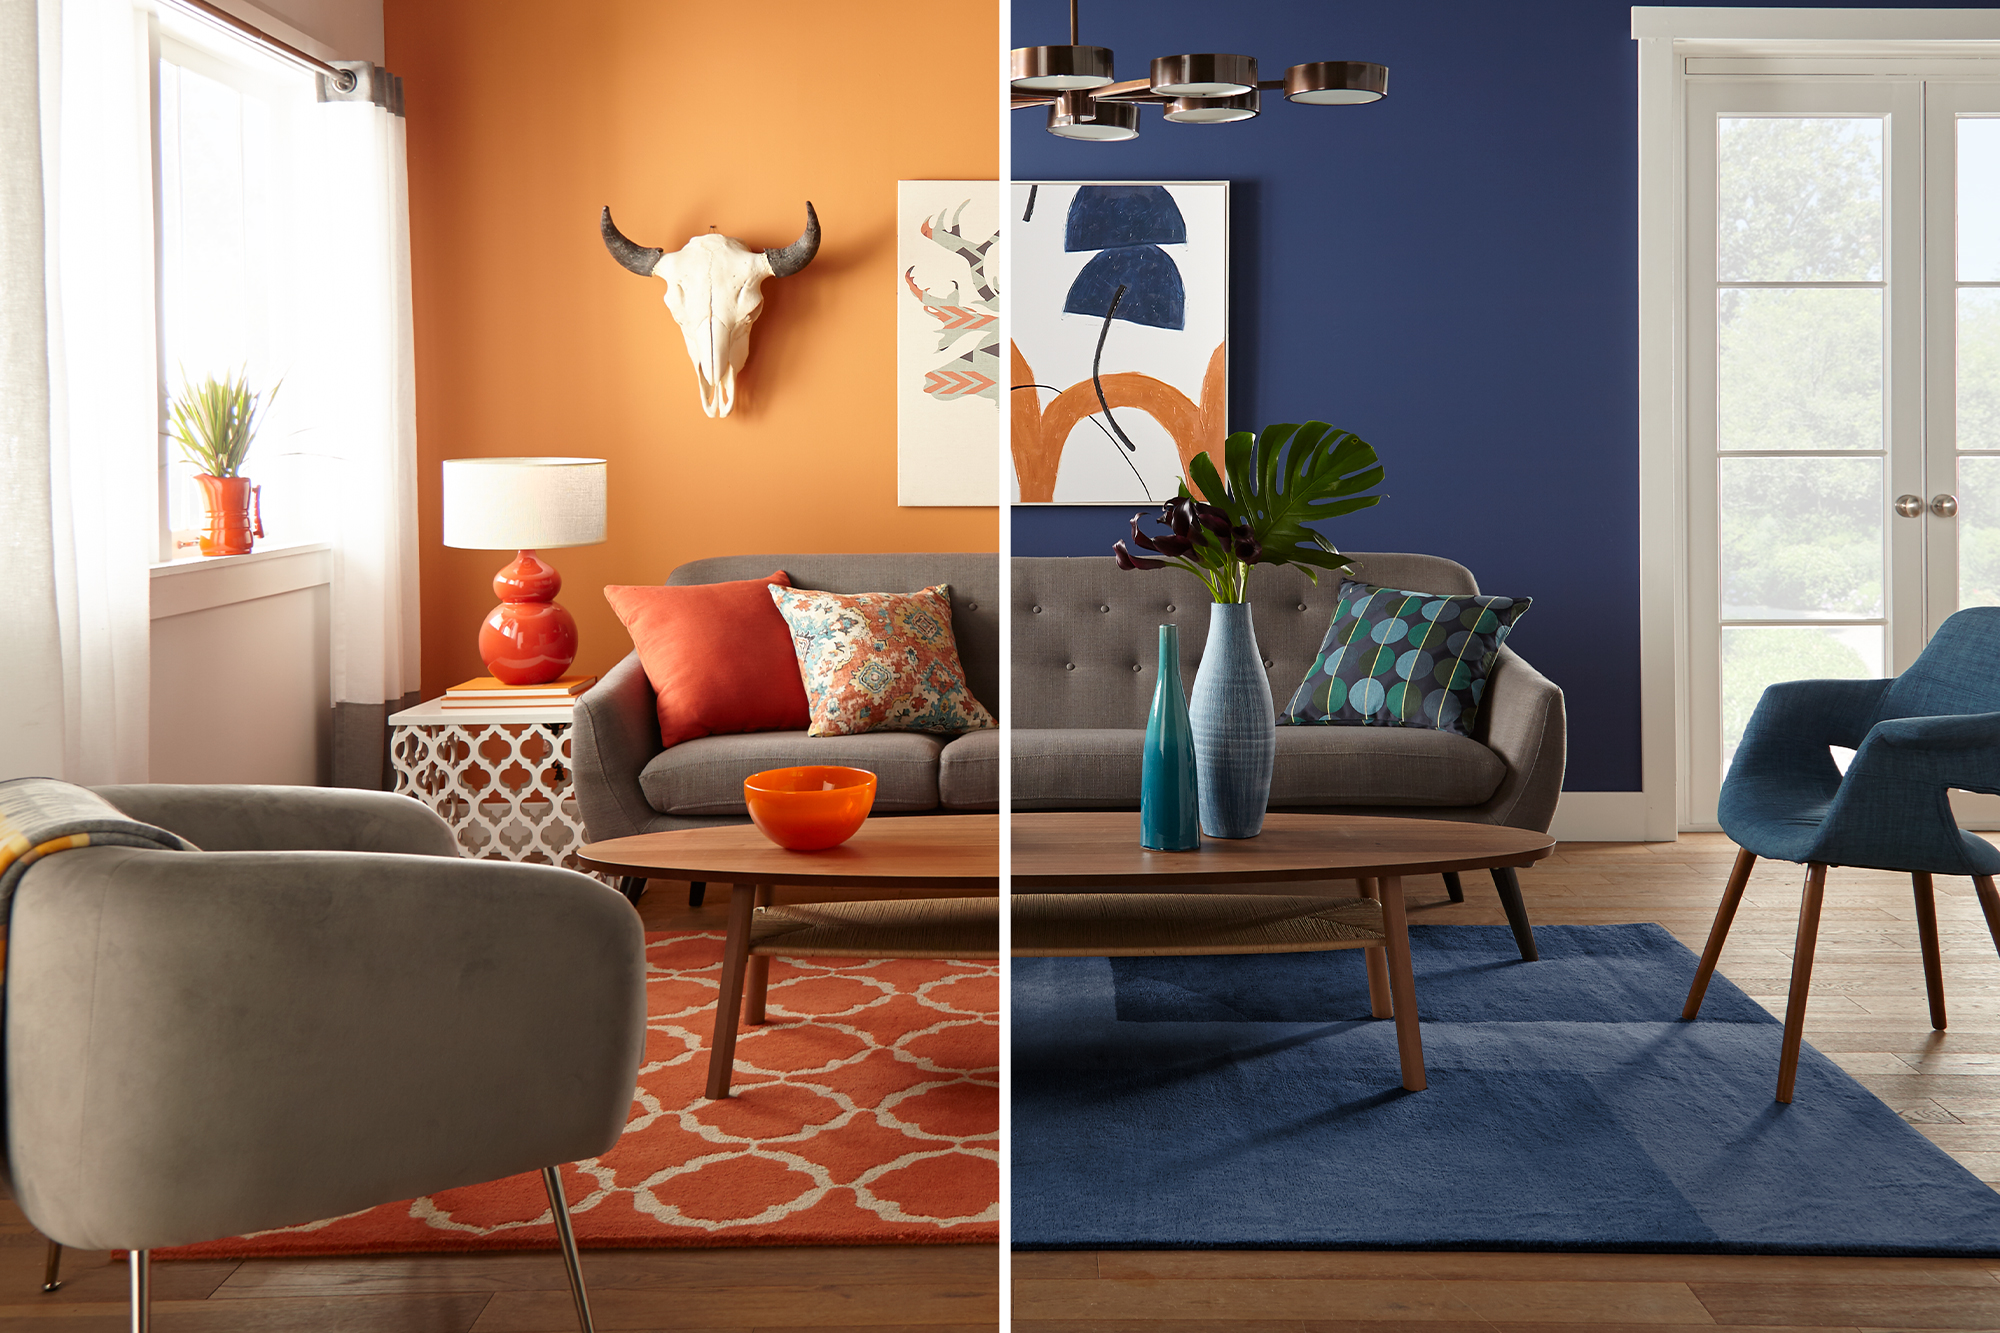
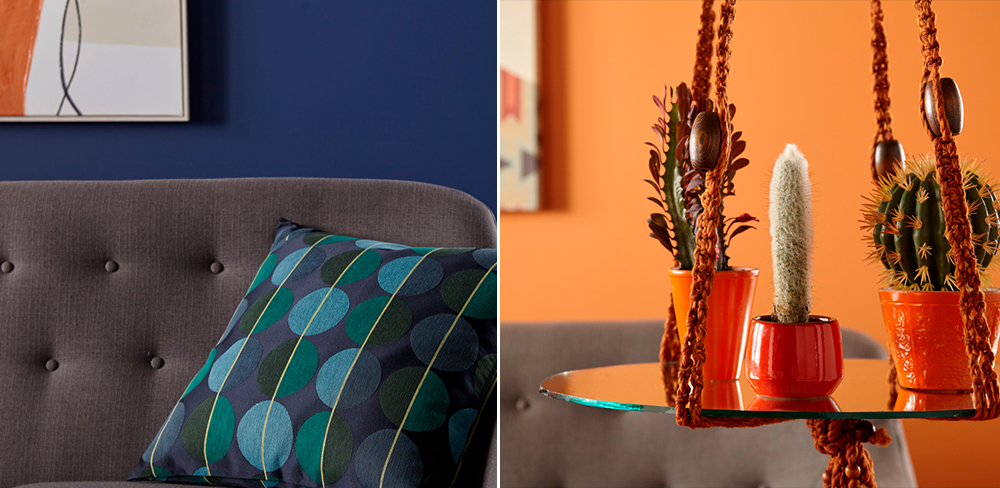
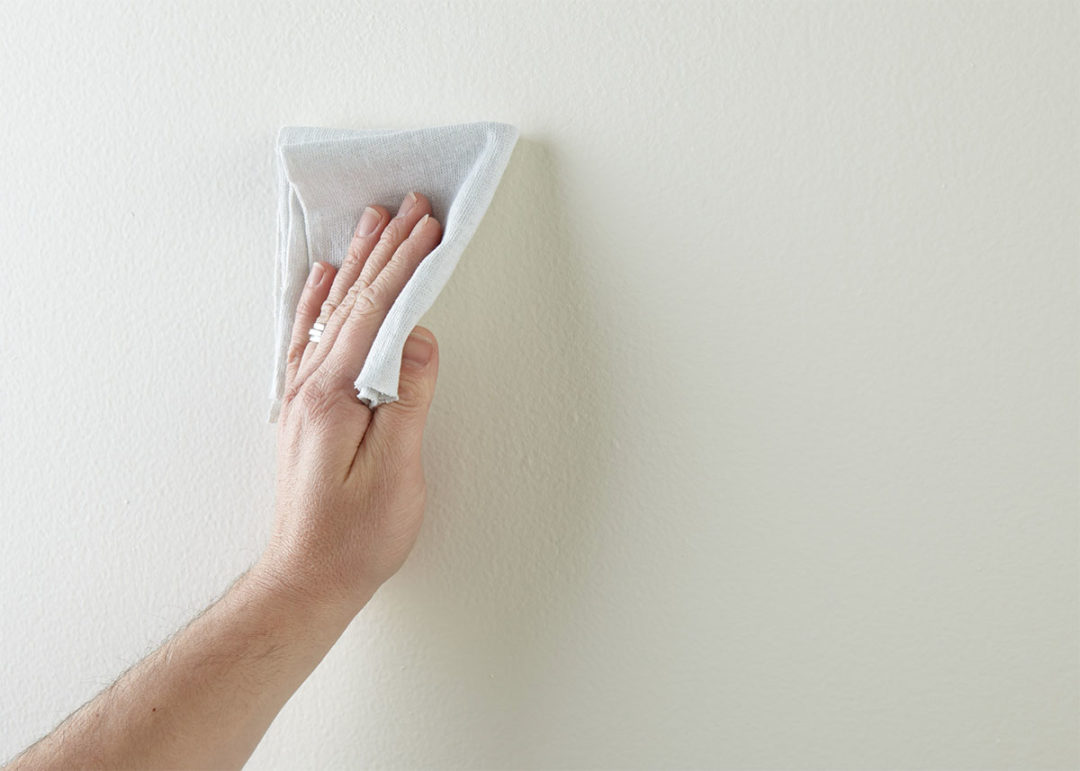
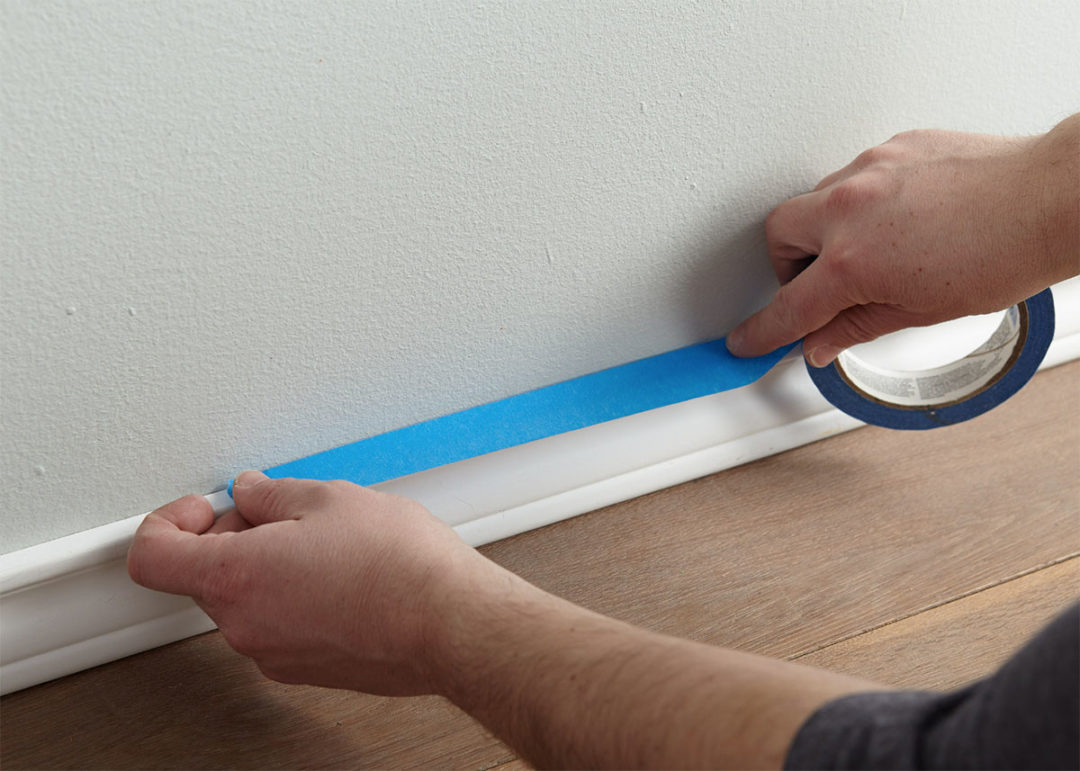
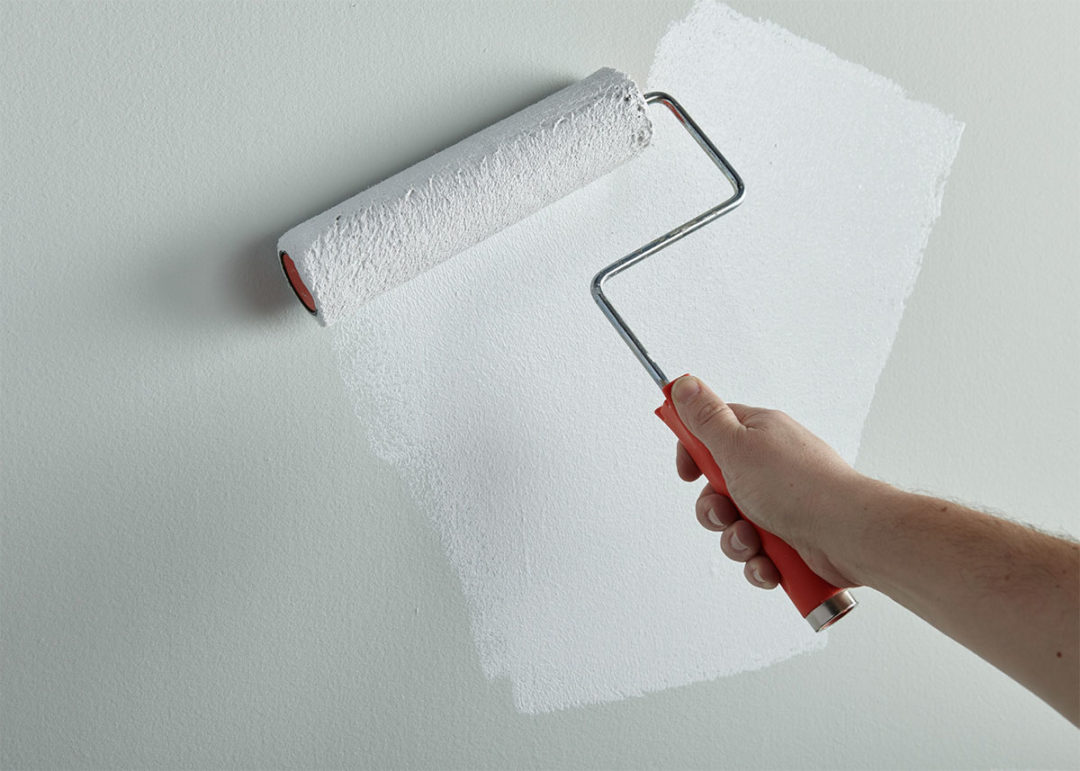
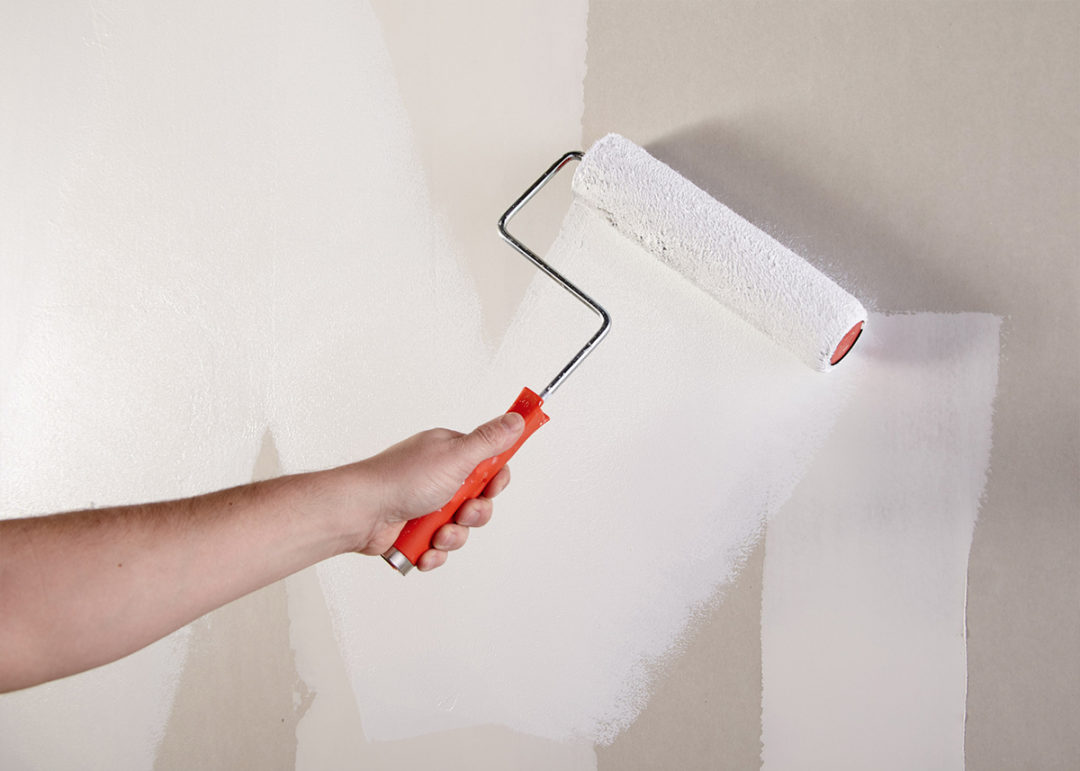
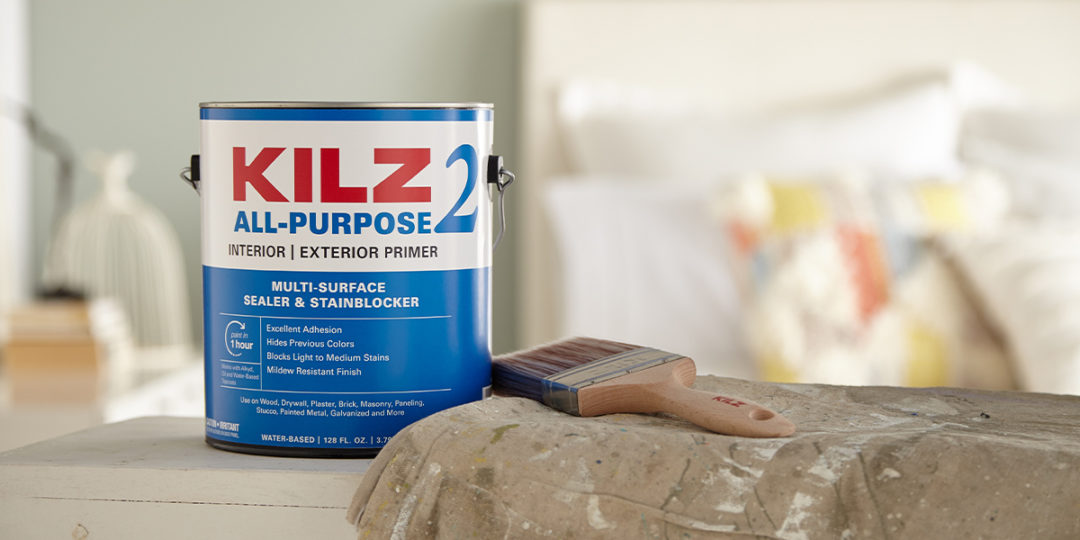
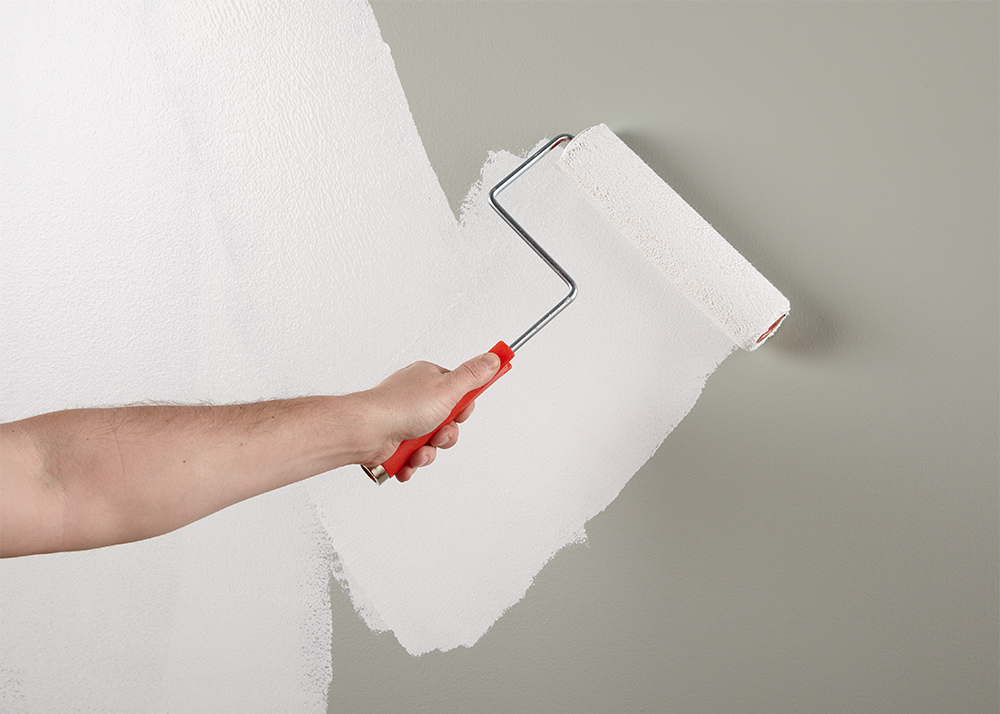
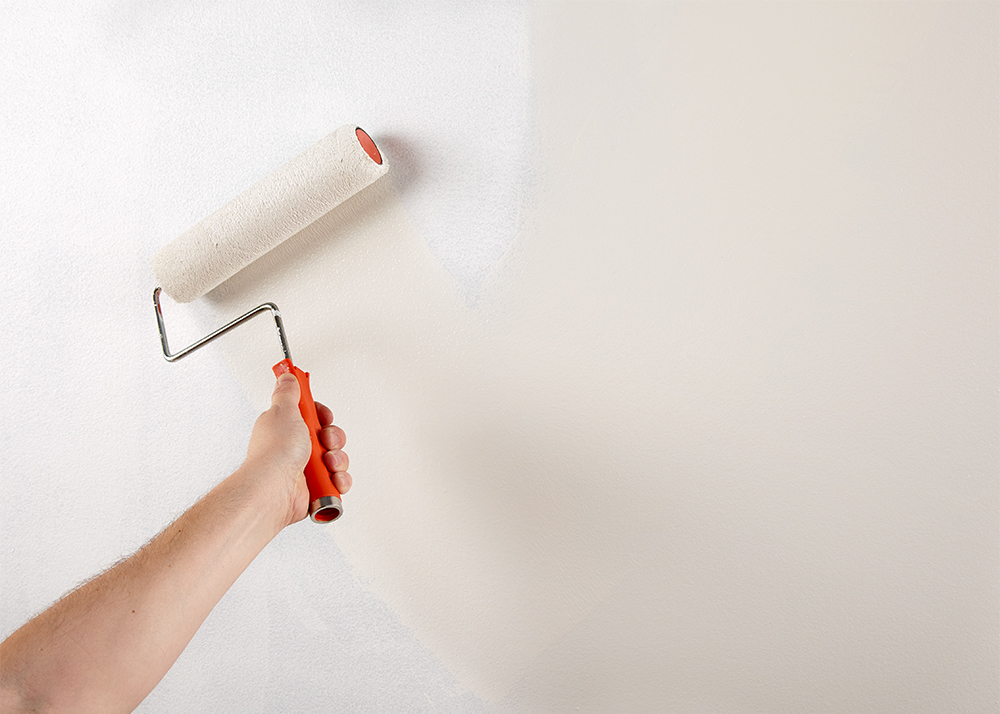
April 1, 2020To demonstrate that a fresh coat of paint can dramatically change the vibe of a space, we took one living room and styled it in two different monochromatic looks. Both designs started with choosing the right paint color! To ensure that the colors popped, the walls were primed with KILZ 2® All-Purpose primer prior to painting. This water-based, multi-surface primer is ideal for use when changing paint colors.
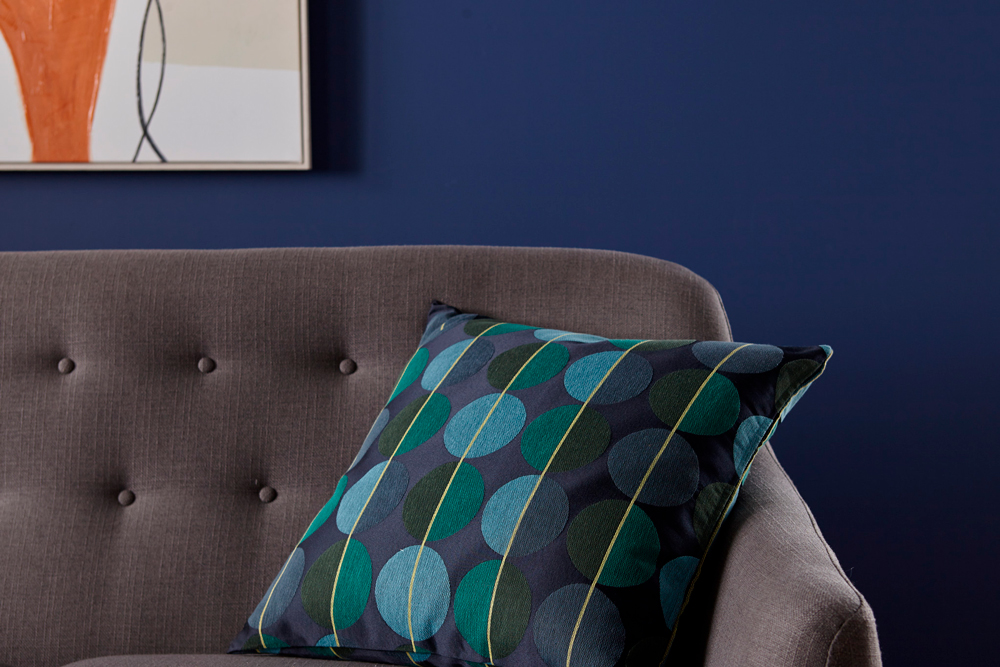
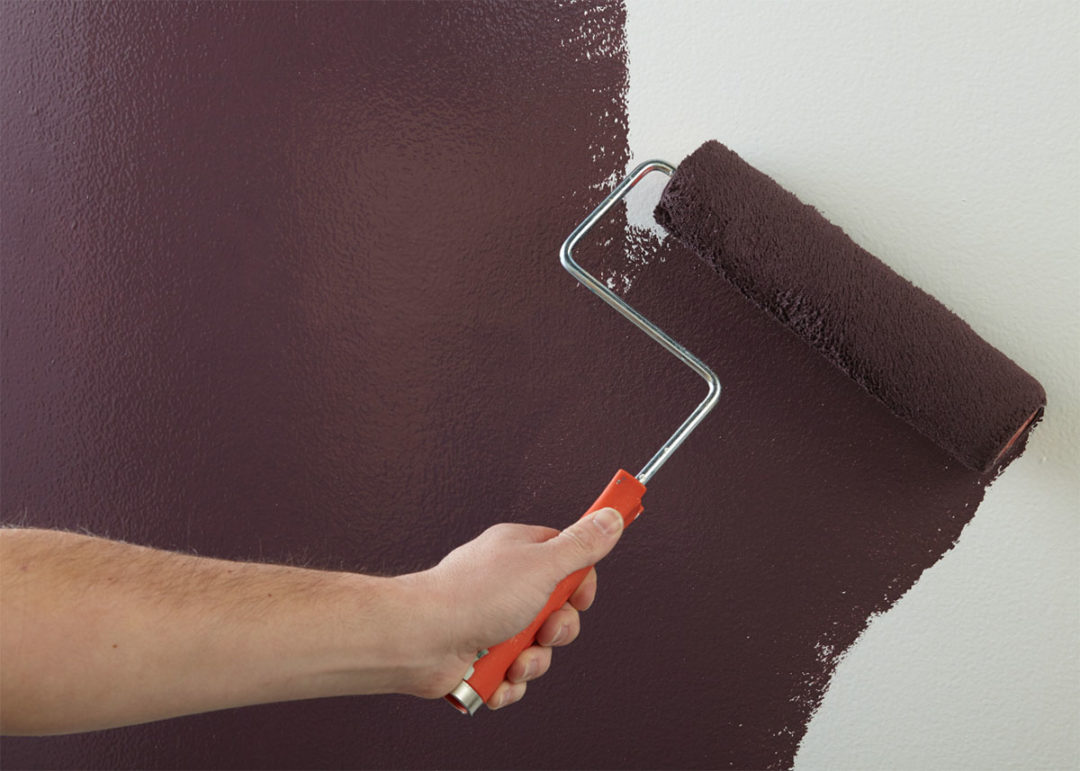
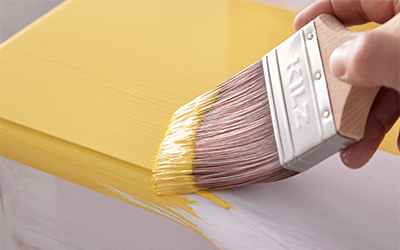
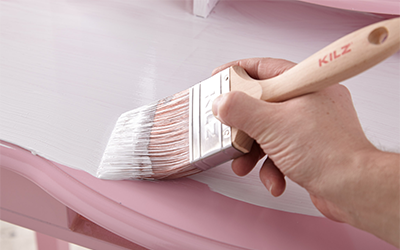
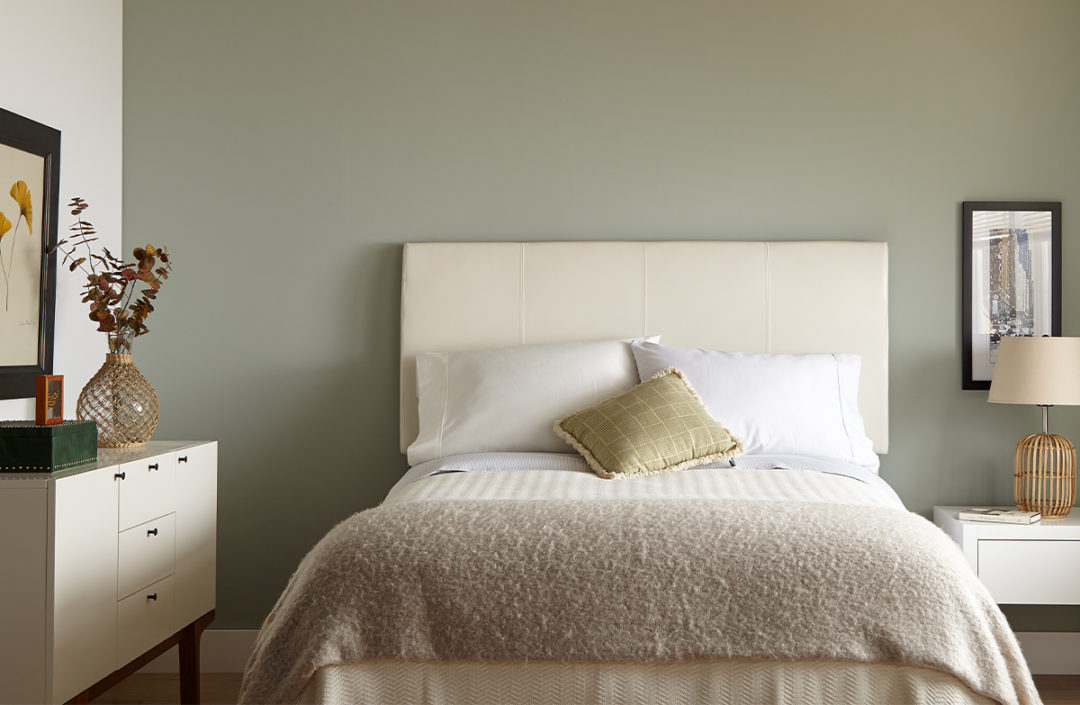
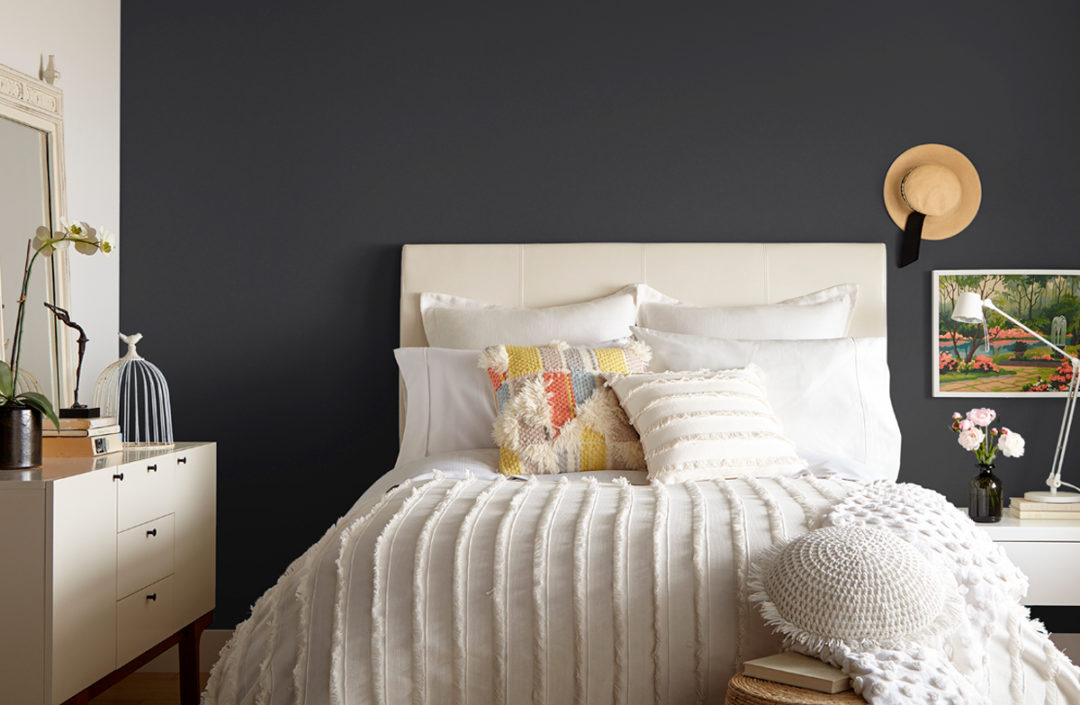
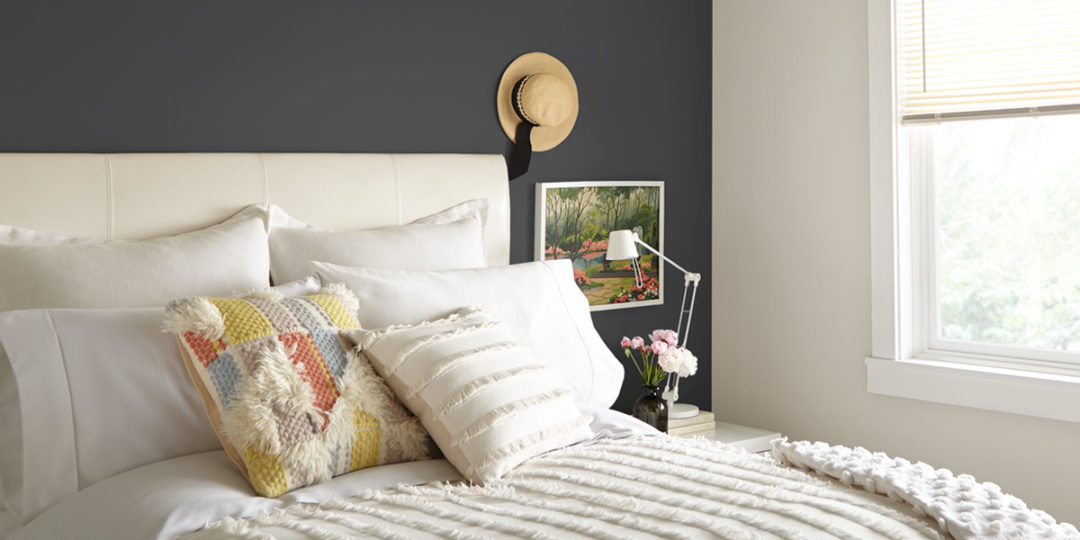
If you read our recent post on 2020 Design Trends, you know that we’re loving all shades of navy blue. The moody color works great in many different room types, and it was the perfect hue to bring some cool drama into this large living room. We chose KILZ Tribute® in Ruling Royalty – a dark blue with a subtle purple undertone that appears as a true navy in most light. KILZ Tribute is a high-quality, water-based paint that provides a durable and scrubbale finish that is ideal for high traffic areas like living rooms.
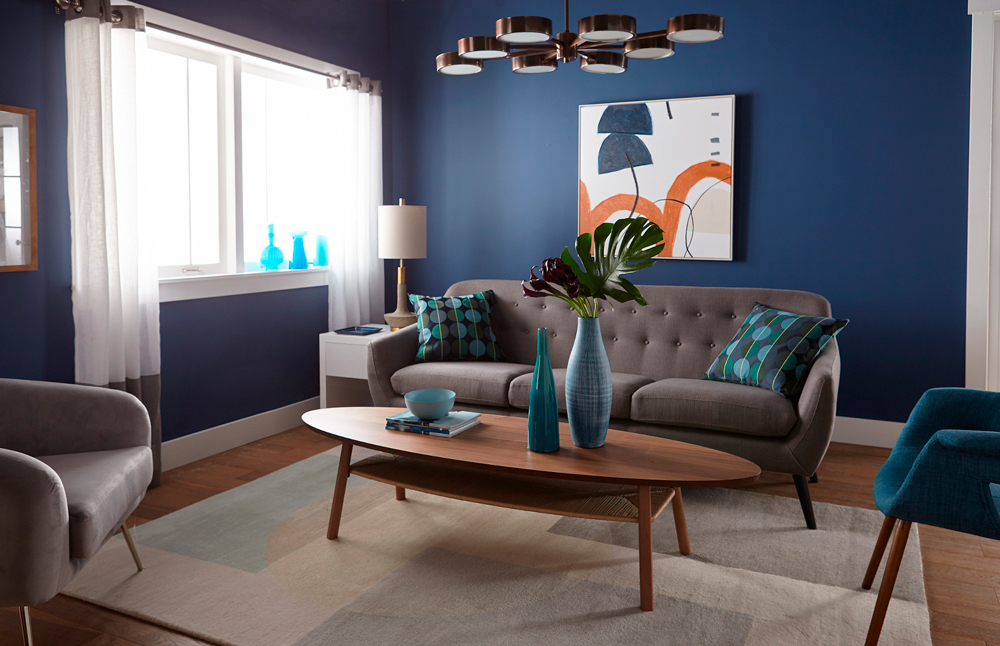
Keeping the same major pieces of furniture for both looks (including the sofa, coffee table and arm chair), the paint color alone made a big difference in the feel of the space. Pillows, plants and other small décor items in a range of blue shades brought in a modern yet minimalist look, while a hint of bright orange in the artwork alluded to the next color that would transform the room.
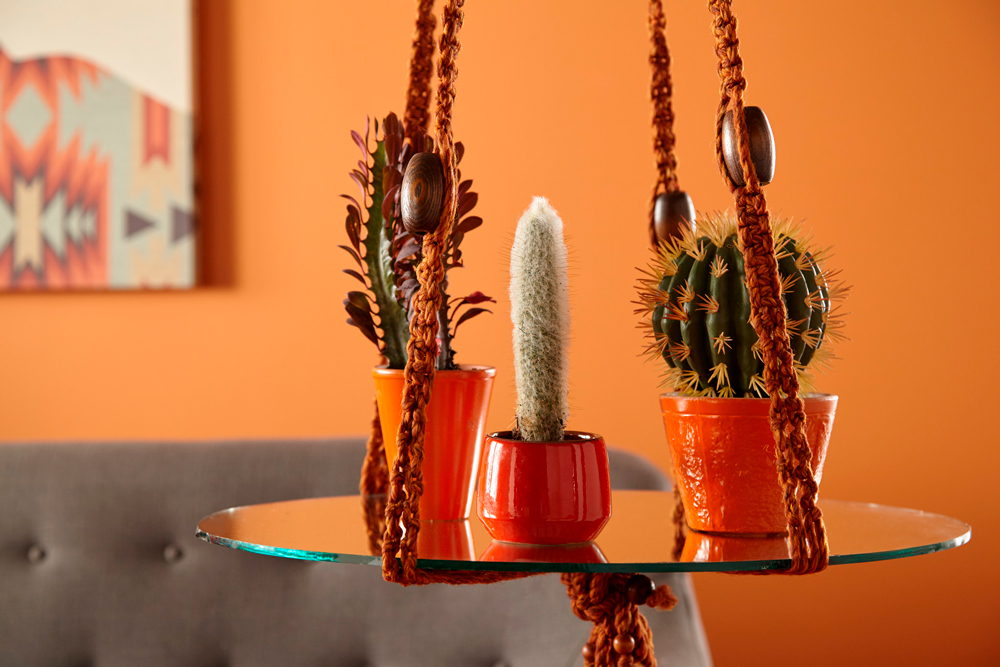
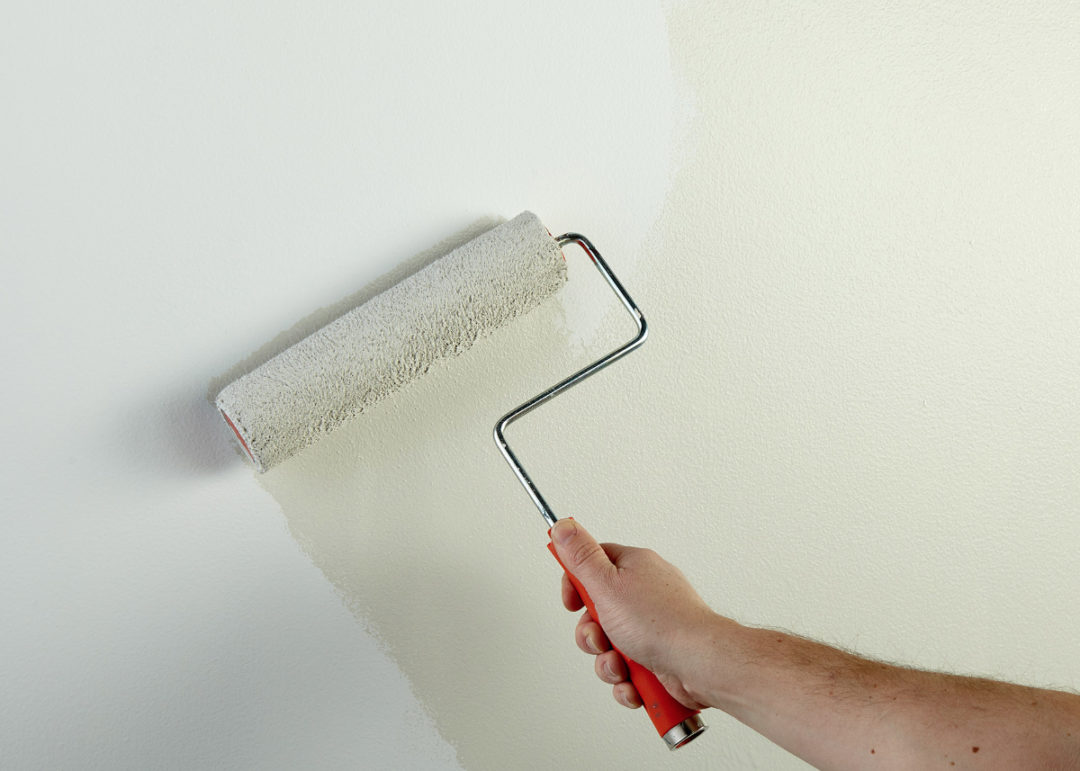
After priming the walls with KILZ 2 All-Purpose to give us a clean slate, the walls were painted in KILZ Tribute in Bright Marigold, a cheerful marigold hue with a carrot undertone. The new bright orange wall inspired a bohemian, desert vibe for the space – calling for an abundance of accessories including vases, potted desert plants, patterned textiles and three-dimensional artwork.
By simply changing the paint color and accessories, this living room was transformed into two very different design styles – and it all started with the proper primer to make those paint colors pop!

Ruling Royalty

Bright Marigold
Always remember to refer to our website kilz.com or product back labels for additional information on which primer is right for your project and detailed instructions on how to apply our products.
RELATED ARTICLES

get inspired:
FOLLOw us:
@kilzbrand
SHOP
PRODUCTS
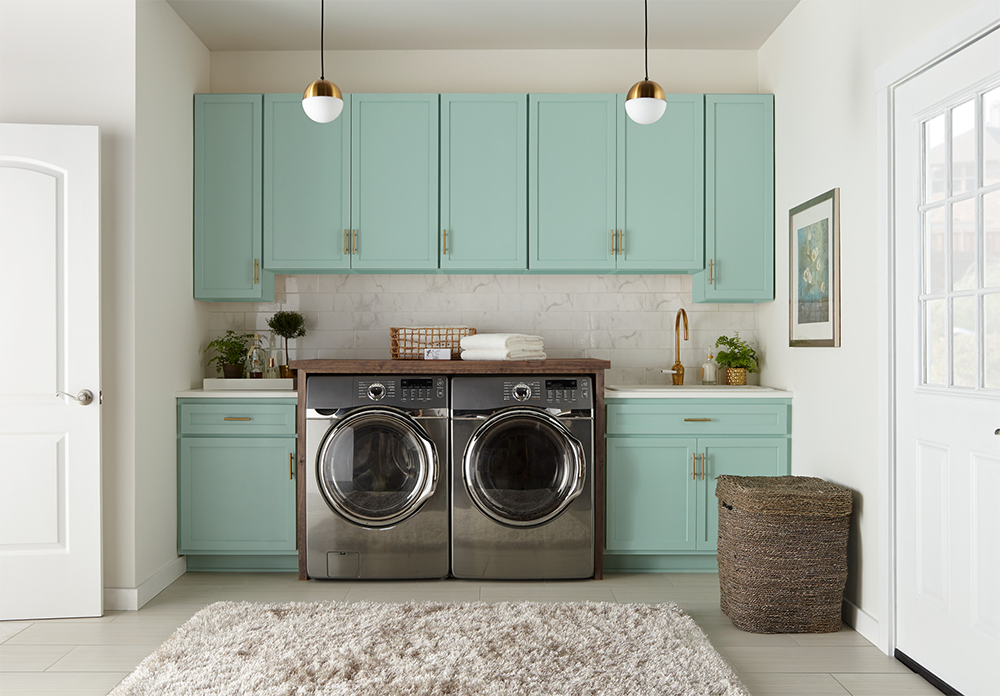
Fresh as Spring Laundry Room Makeover
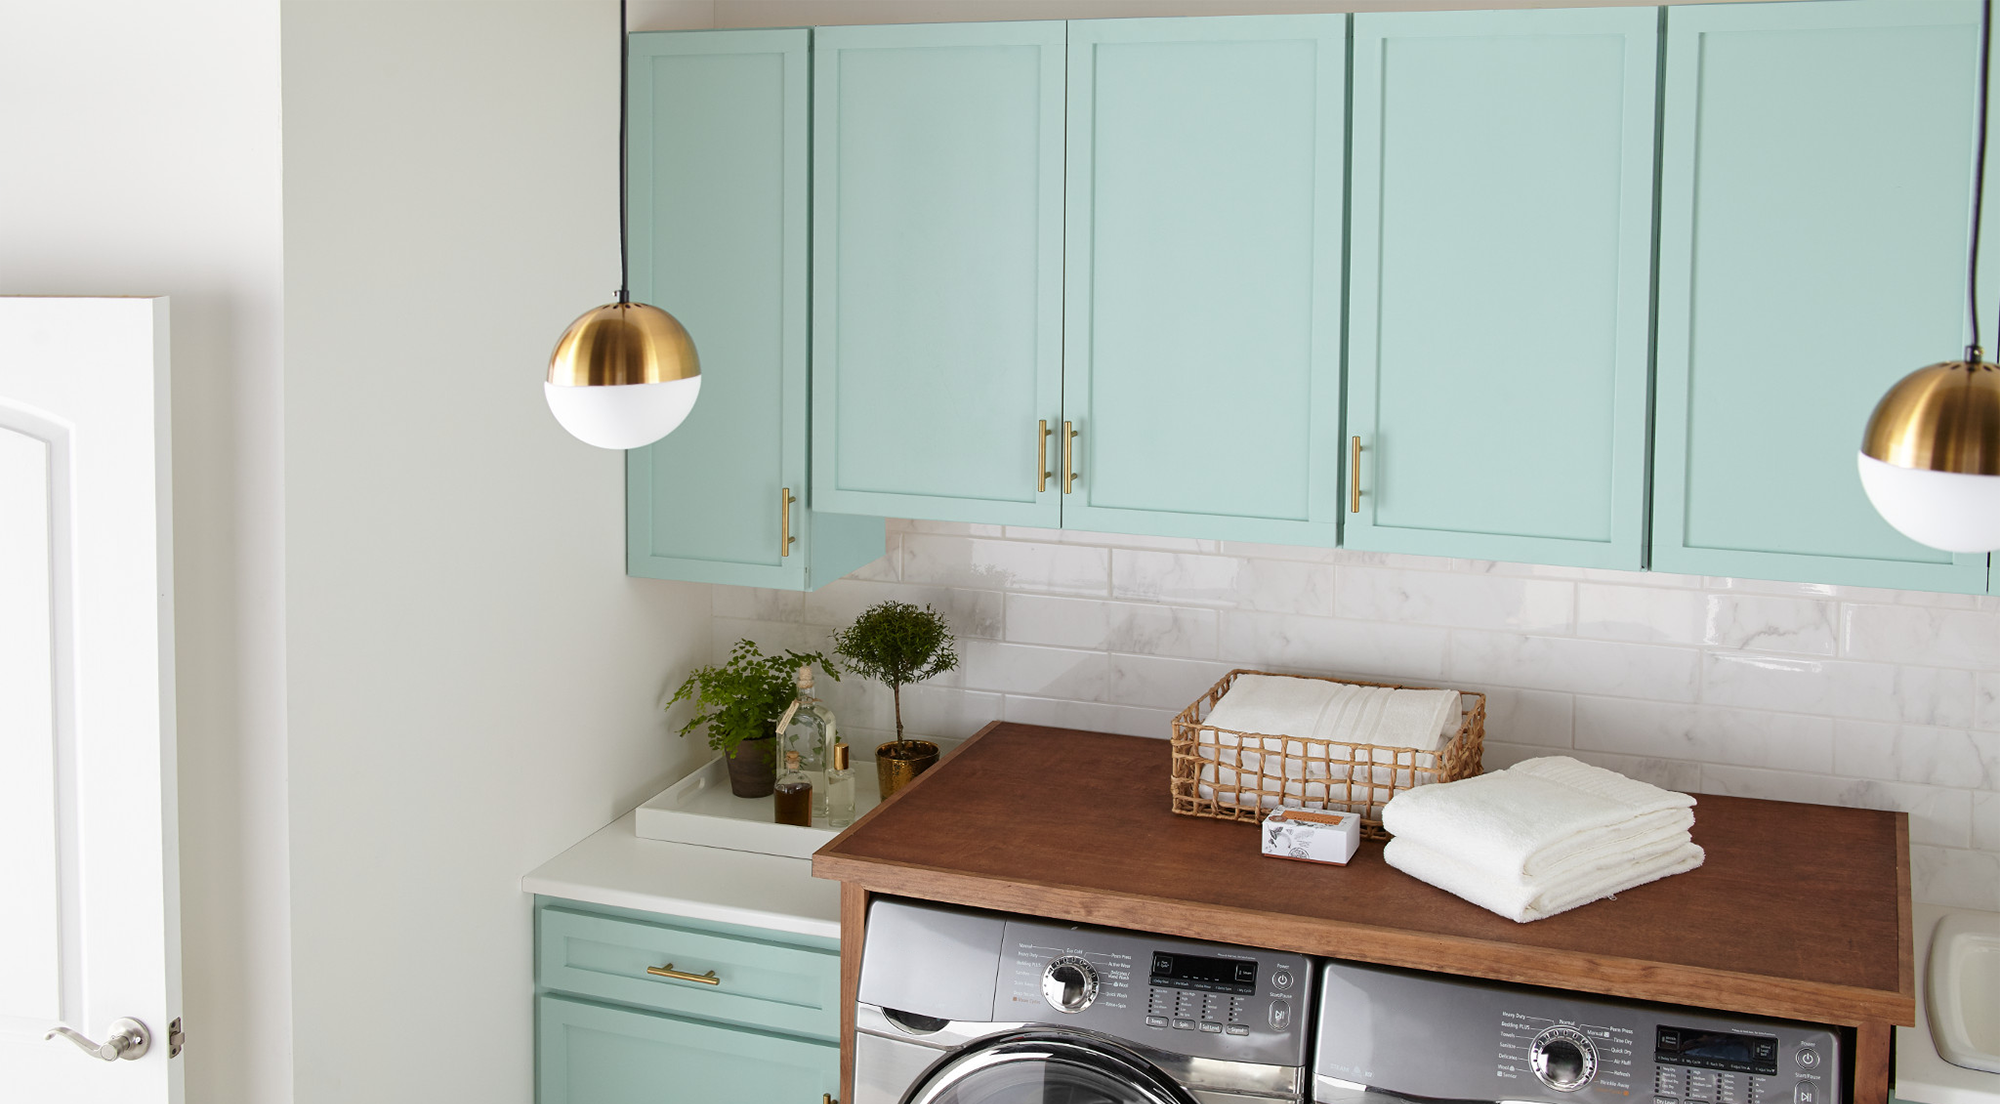
March 6, 2020A fresh coat of primer and paint brings a welcome sense of calm to a room often reserved only for chores in this fresh as spring laundry room makeover. Laundry is virtually unavoidable, so you might as well enjoy the space you’re in when you’re checking it off the to-do list!
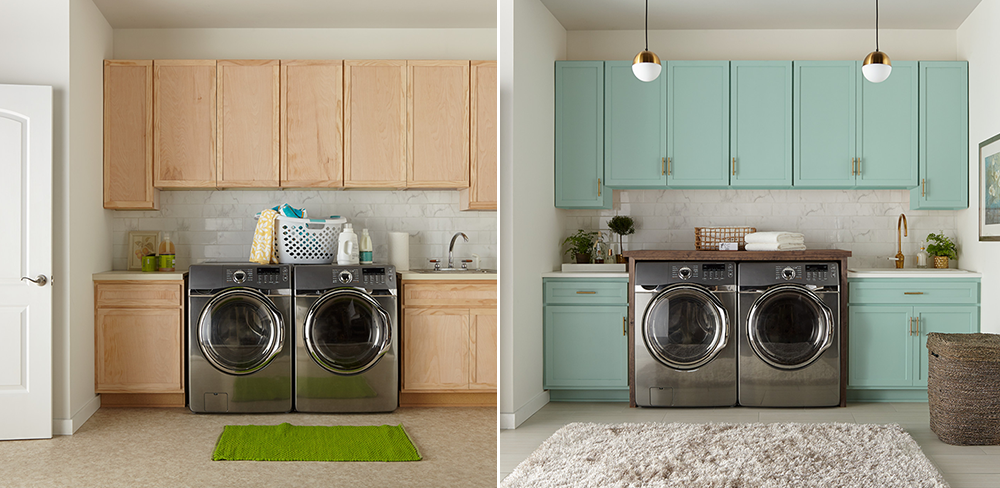
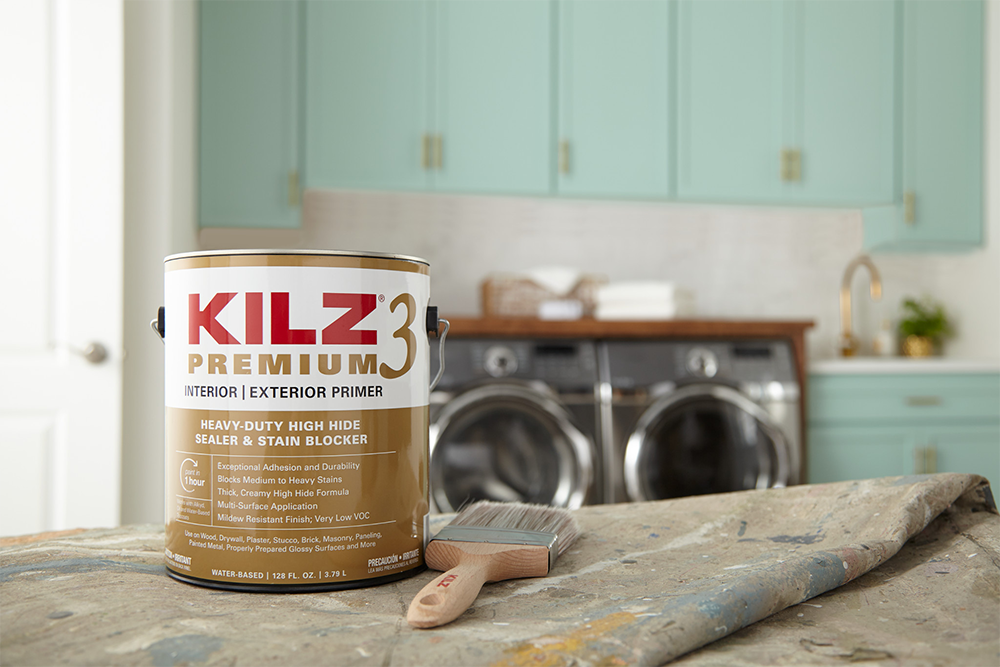
The laundry room’s original wood cabinets felt like an endless line up of bland and boring, lacking both color and any interesting detail. A fresh coat of paint was definitely in order, but first things first… we couldn’t forget to prime! Similar to bathrooms and kitchens, laundry rooms are an area of the house often prone to excess moisture, humidity and changing temperatures – making primer an essential first step to ensure a paint finish that will last.
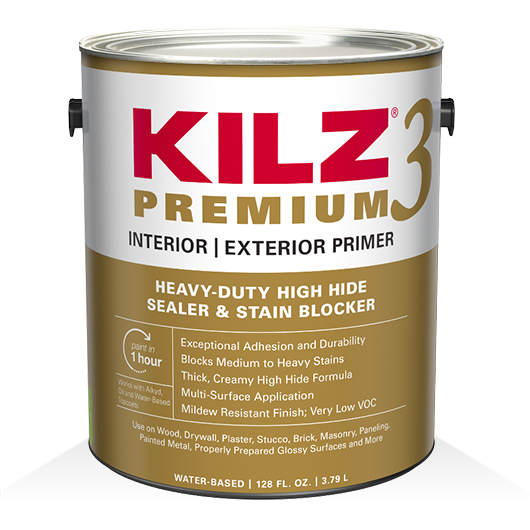
For this laundry room transformation, we chose KILZ 3® Premium primer as it offers exceptional adhesion and durability, and a mildew resistant primer finish. After KILZ 3 Premium primer was properly applied and allowed to dry, we had a clean slate ready for color.
For a relaxed yet modern vibe we chose KILZ Tribute® in Panoramic Trail TB-65, a minty green with an ever so slight gray undertone. Gold hardware added a subtle shine and much needed detail to the otherwise flat cabinet fronts, inspiring the addition of a new gold faucet and metallic pendant lights to tie the space together.
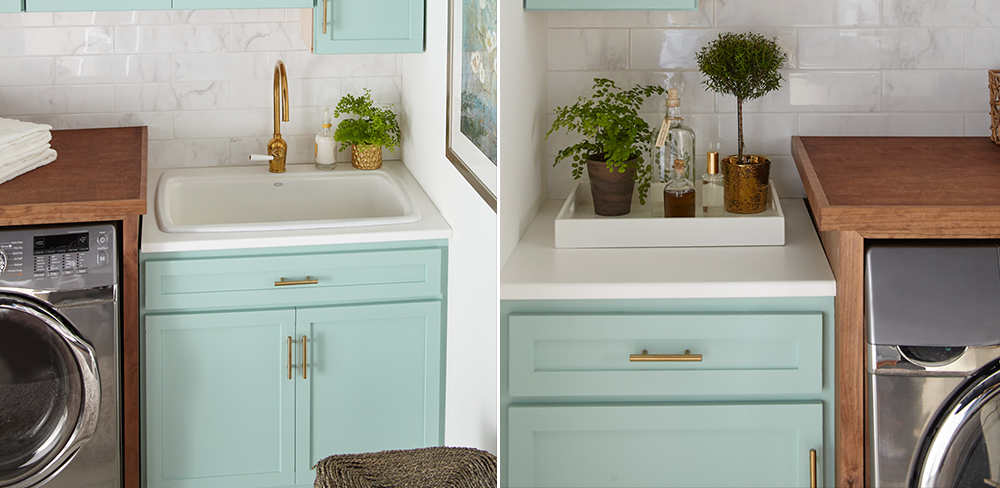
The original laundry room was also lacking surface area to fold after the fluffing is done, with the sink taking up an entire side of the already limited counter space. The fix was both functional and uniquely attractive! Adding a dark wooden panel around the top and sides of the washing machine and dryer not only brought warmth to the space, it also nearly tripled the usable countertop area.
A new faux-wood floor in a subtle grey shade was added to perfectly complement the new cabinet color. The final space is so pretty, it almost makes us want to do laundry!
Always remember to refer to our website kilz.com or product back labels for additional information on which primer is right for your project and detailed instructions on how to apply our products.
RELATED ARTICLES
get inspired:
FOLLOw us:
@kilzbrand
SHOP
PRODUCTS
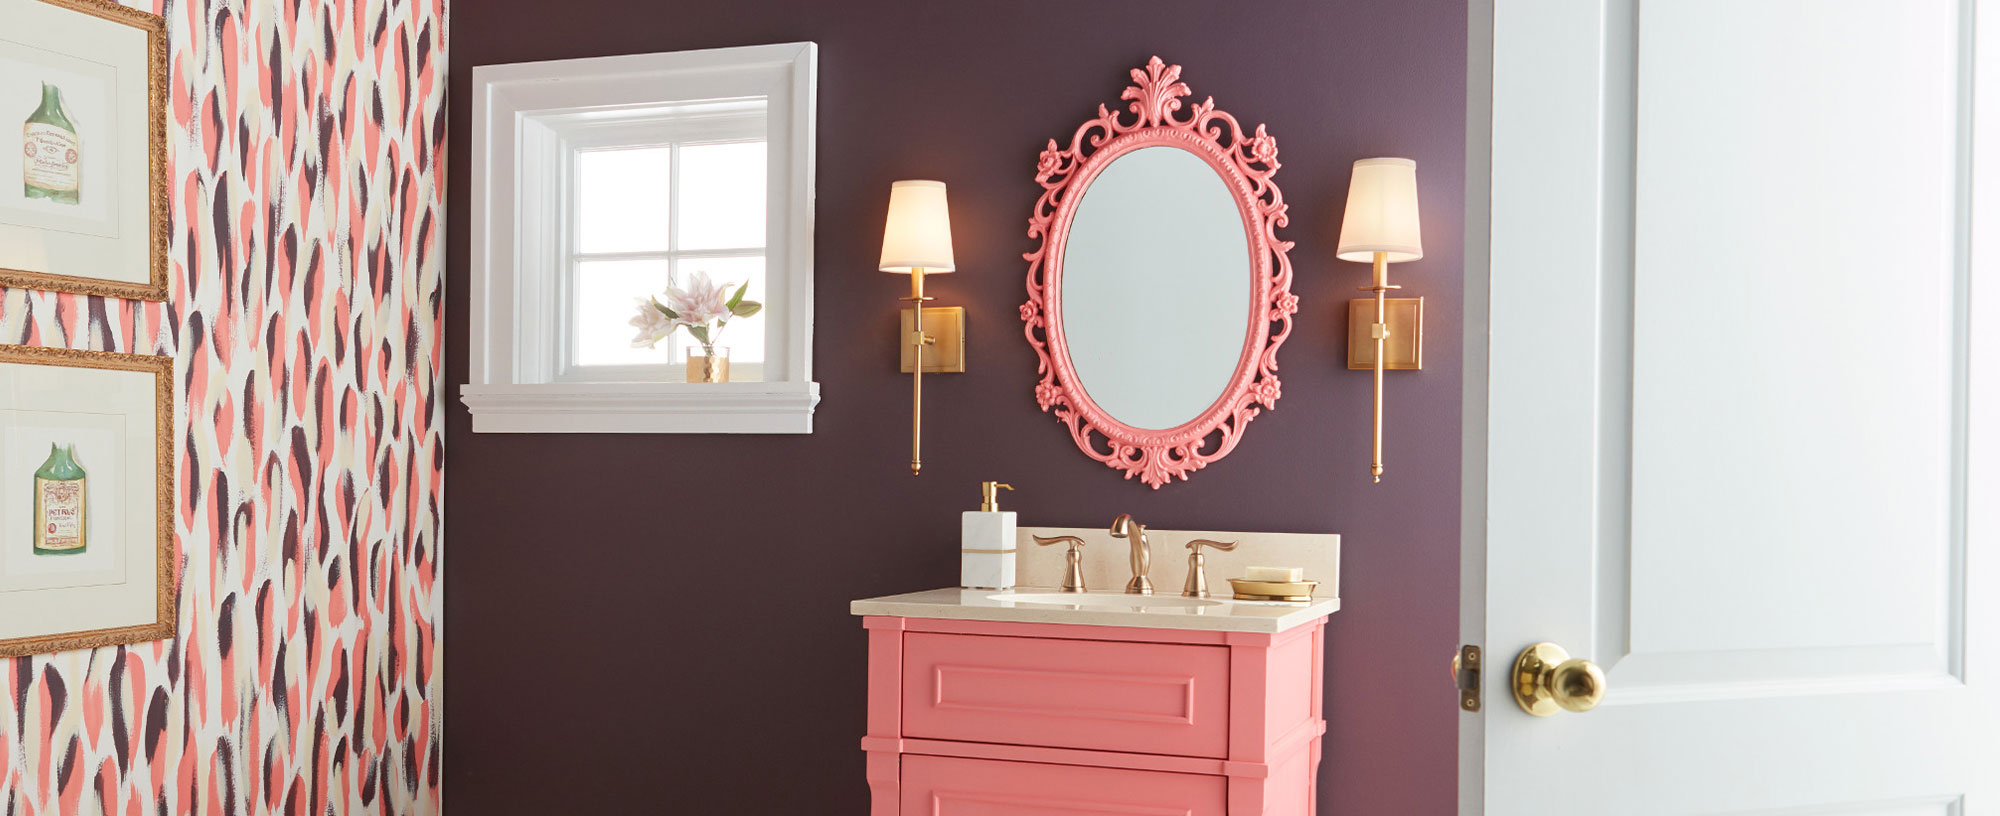
Pretty in Pink Bathroom Makeover
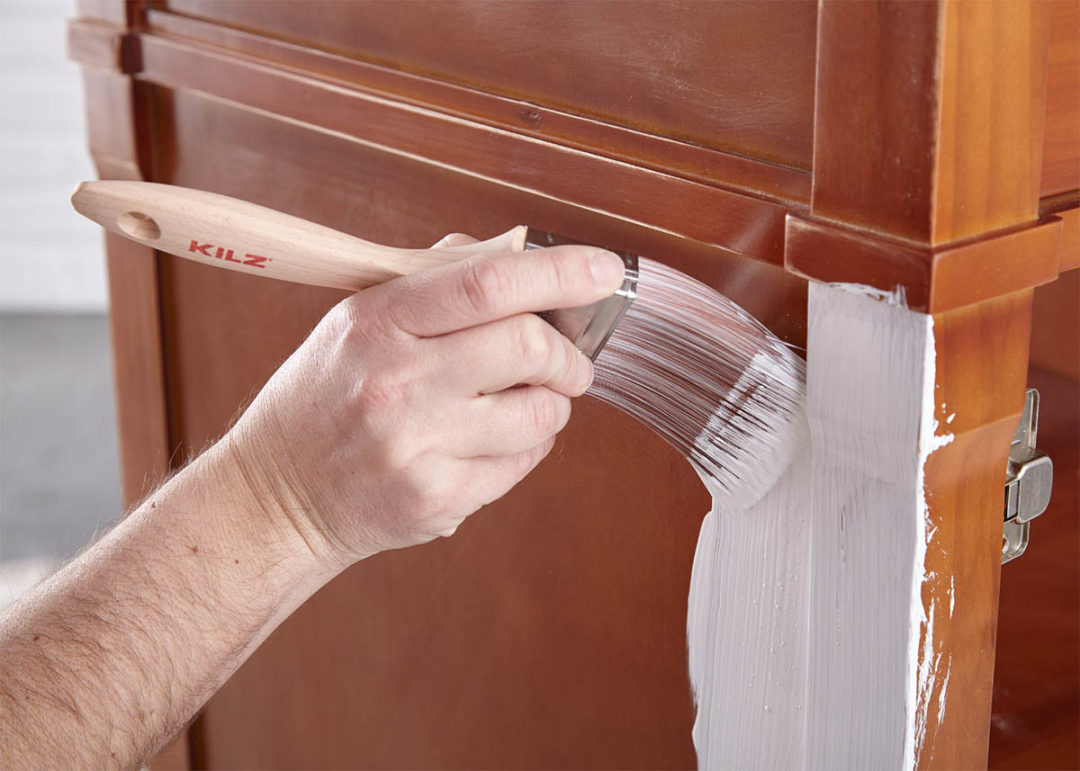
February 12, 2020It’s February, which means Valentine’s Day and all things pink are top of mind. This month we’re talking about colors and spaces you can fall in love with, including this pretty in pink bathroom. A once boring bathroom was given new life with painted faux wall paper, a bright pink vanity (with matching mirror!) and a dark accent wall. And just as important as picking the right vibrant colors for this small space renovation, was the prep work that went in before we painted to ensure that this makeover would last for years to come.
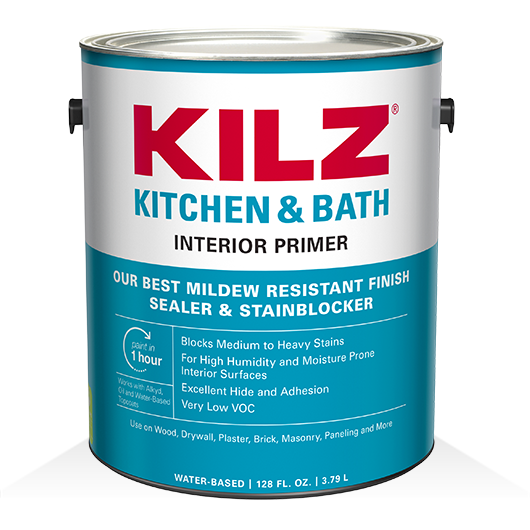
Before the paint went on, we wanted to ensure that our hard work would withstand a bathroom’s typical humidity, moisture and changing temperatures so we primed the walls with KILZ® Kitchen & Bath Primer. This water-based primer is specially designed for residential surfaces exposed to humidity, moisture and fluctuating temperatures such as kitchens, bathrooms, powder rooms and laundry rooms.
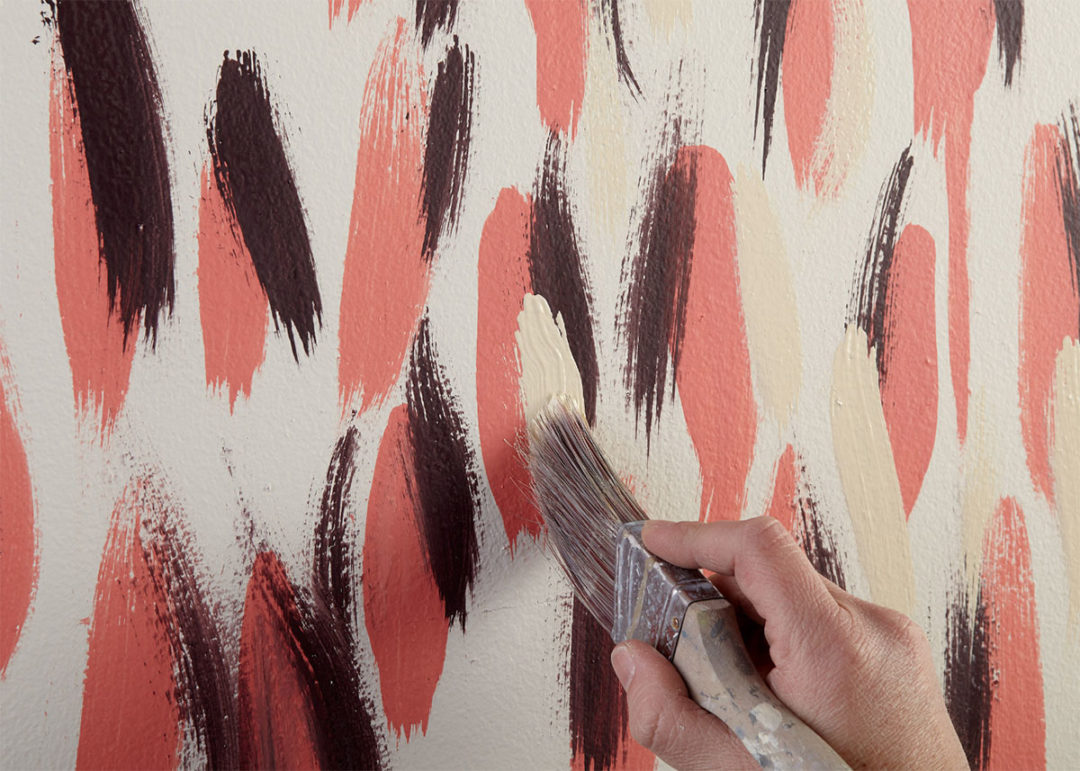
Proper priming also provides a solid anchor for paints – in this case a deep purple wall and coral-hued bath vanity. A painted “wall paper” accent wall and pink mirror complete the space. For this bathroom makeover, BEHR Premium Plus® in Watermelon Punch, KILZ Tribute® in Spanish Fortress and Beetroot Purple were used as accent colors over a white wall to create the fun faux wallpaper. Beetroot Purple was also used for the dramatic dark wall behind the vanity, with Watermelon Punch coating the vanity and matching mirror.
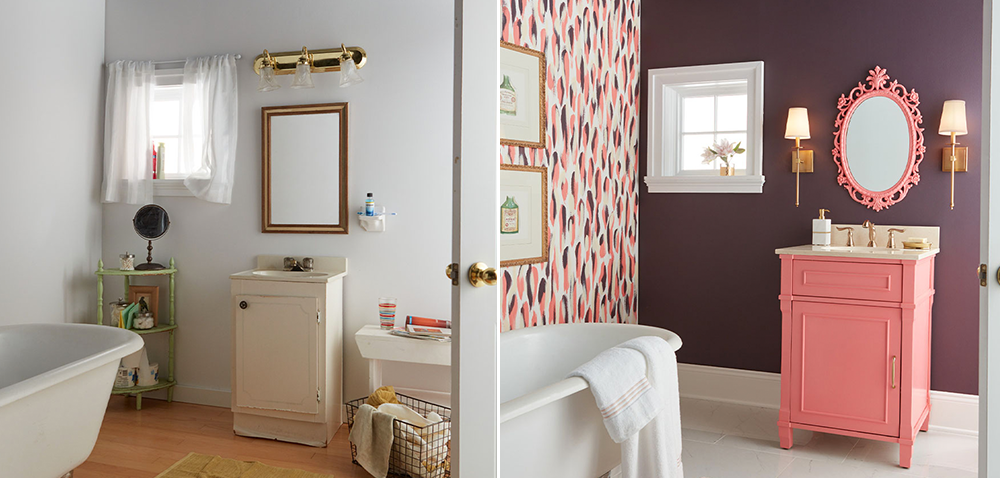
An everyday space gets a coat of unexpected flair in this stylish bathroom makeover. Read on for step by step directions to complete this paint project at home including the dark accent wall, painted “wall paper”, bathroom vanity and matching mirror.
The Dark Accent Wall
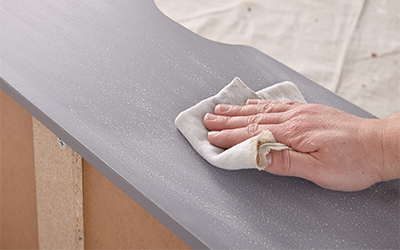
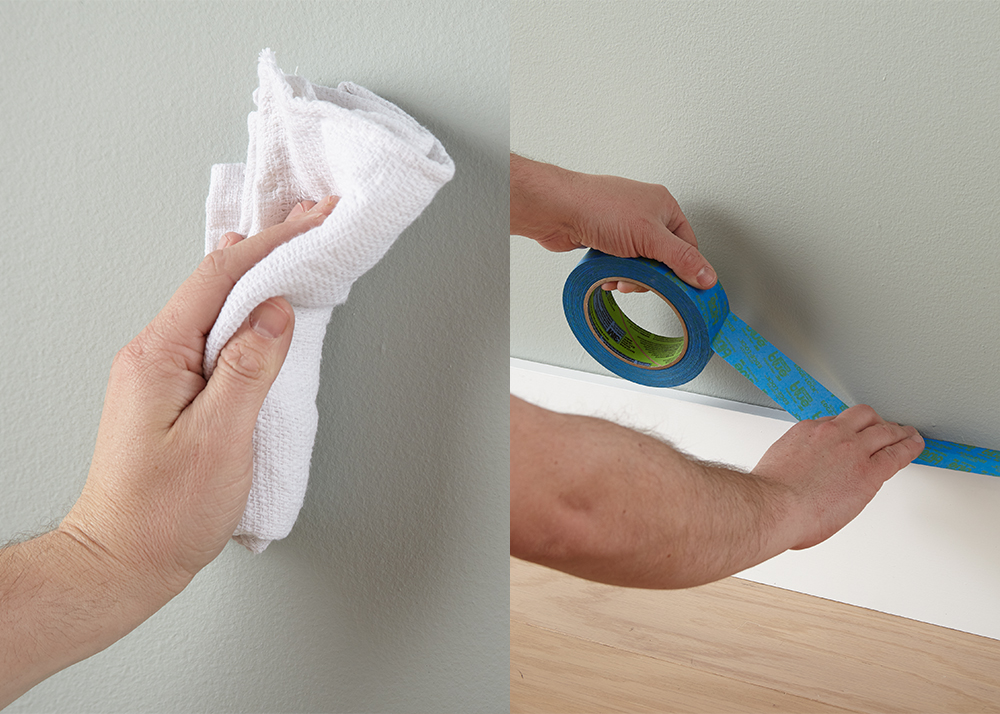
Step 1: Wipe down the chosen accent wall with a damp cloth to ensure it is clean and free of dust and allow the surface to dry.
Step 2: Once dry, tape around the baseboards, trim and moldings.
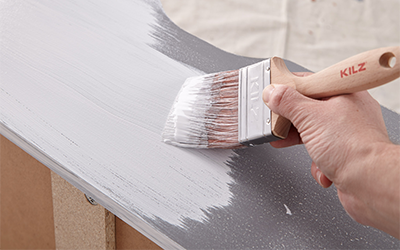
Step 3: Apply 1 coat of KILZ Kitchen & Bath (stirring thoroughly before and occasionally during use) and allow to dry. Apply primer using a brush first to “cut in” around the edges, then use a roller to fill in.
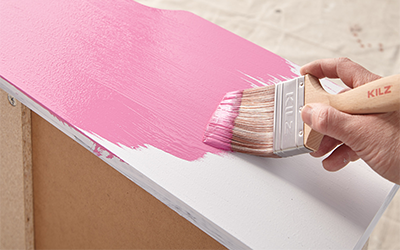
Step 4: Once primer is dry, apply KILZ Tribute in Beetroot Purple using the same application method as the primer (using a brush first to cut in around the edges 4 to 6 feet at a time, then use a roller to fill in those sections before moving along).
Step 5: Remove tape before paint is fully dry.
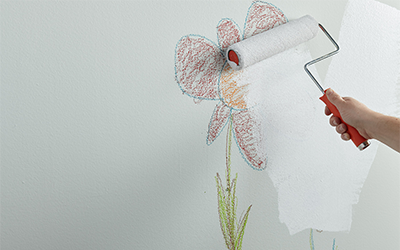
The Painted “Wallpaper”
Step 1: Once the wall is primed (use same method as above), apply base color.
Step 2: Starting with BEHR Premium Plus in Watermelon Punch, use a brush and apply vertical strokes across entire wall. Once dry, use KILZ Tribute in Beetroot Purple and repeat, slightly overlaying the vertical strokes across the first pink strokes. Allow to dry and repeat with KILZ Tribute in Spanish Fortress.
The Vanity
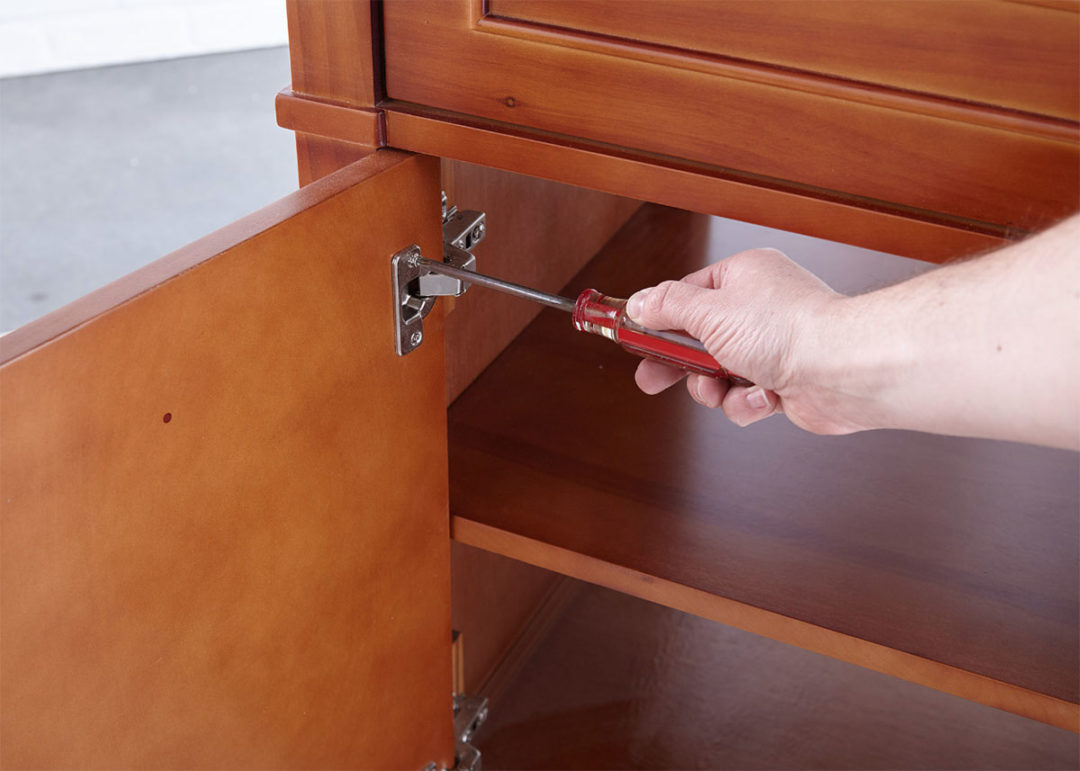
Step 1: Remove drawers and hardware. Put the screws back into the hardware, then seal the hardware and screws in painter’s tape and label it. It’s always best to put every screw back exactly where it came from. That will put the least amount of stress on the wood.
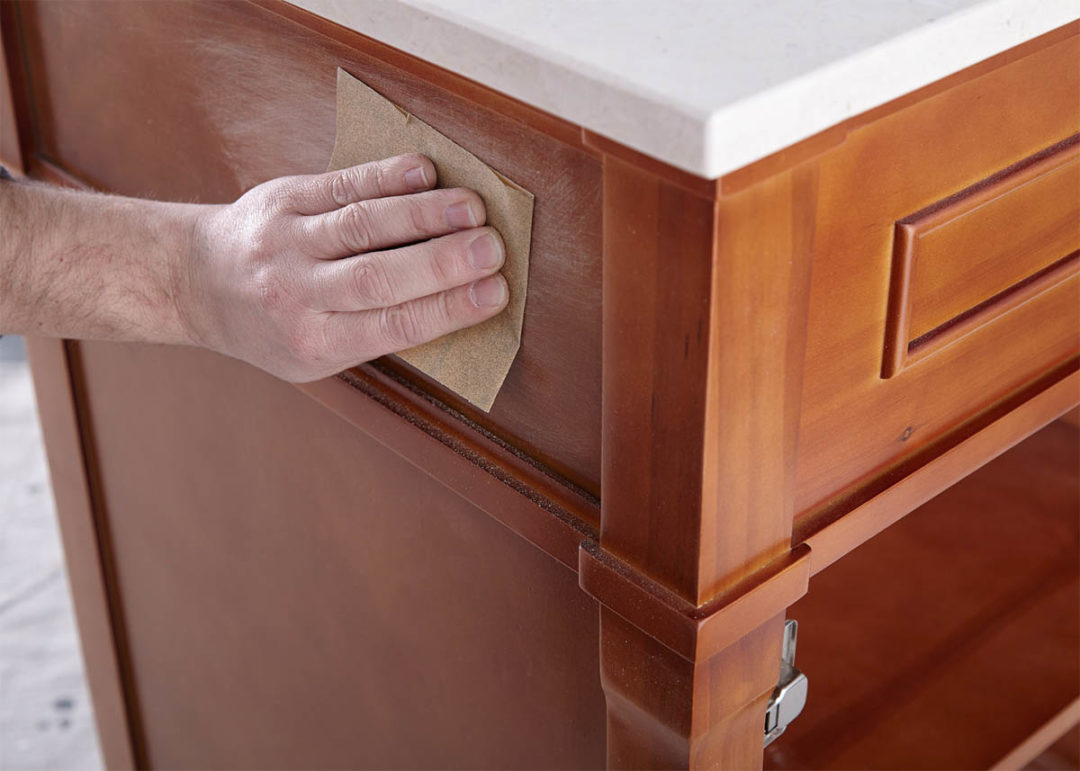
Step 2: Sand the surface; do a first pass with 100-150 grit sandpaper then finish with a second pass of 180-220 grit sandpaper.
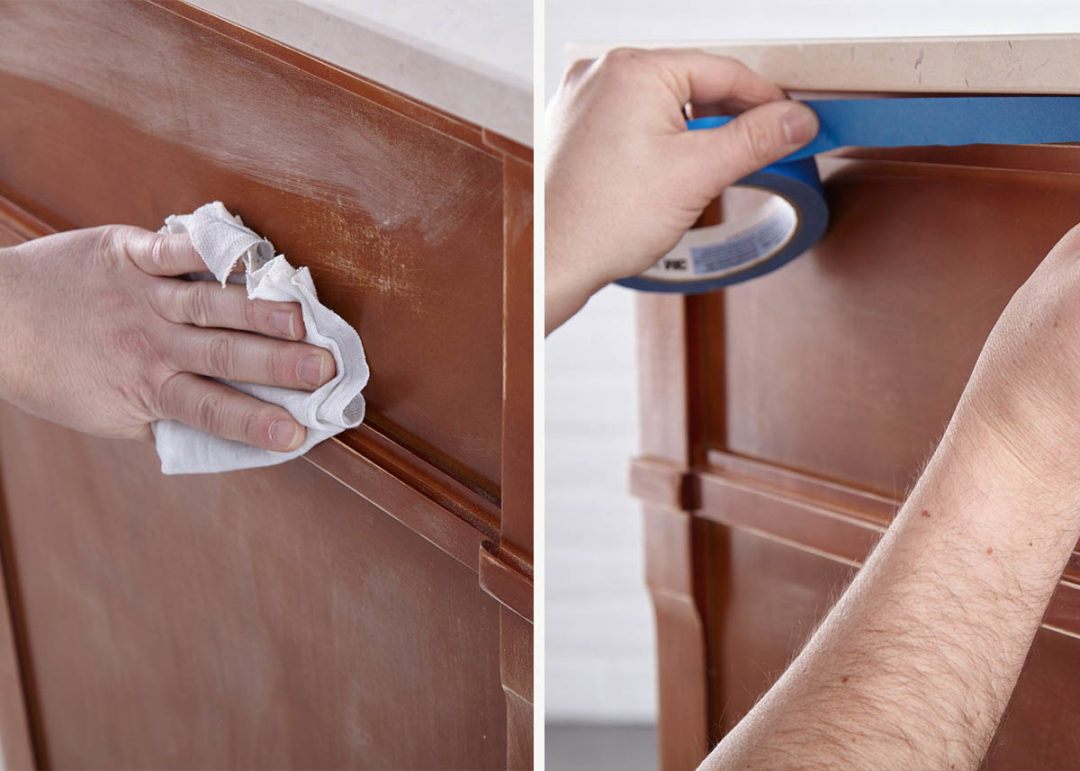
Step 3: After sanding, wipe down the surface with a damp cloth to remove any dust or residue and allow the surface to dry. Once dry, apply painter’s tape around the countertop edges.
Step 4: Apply KILZ Kitchen & Bath (stirring thoroughly before and occasionally during use), moving in the same direction as the wood grain for best results. Allow primer to dry for 1 hour.
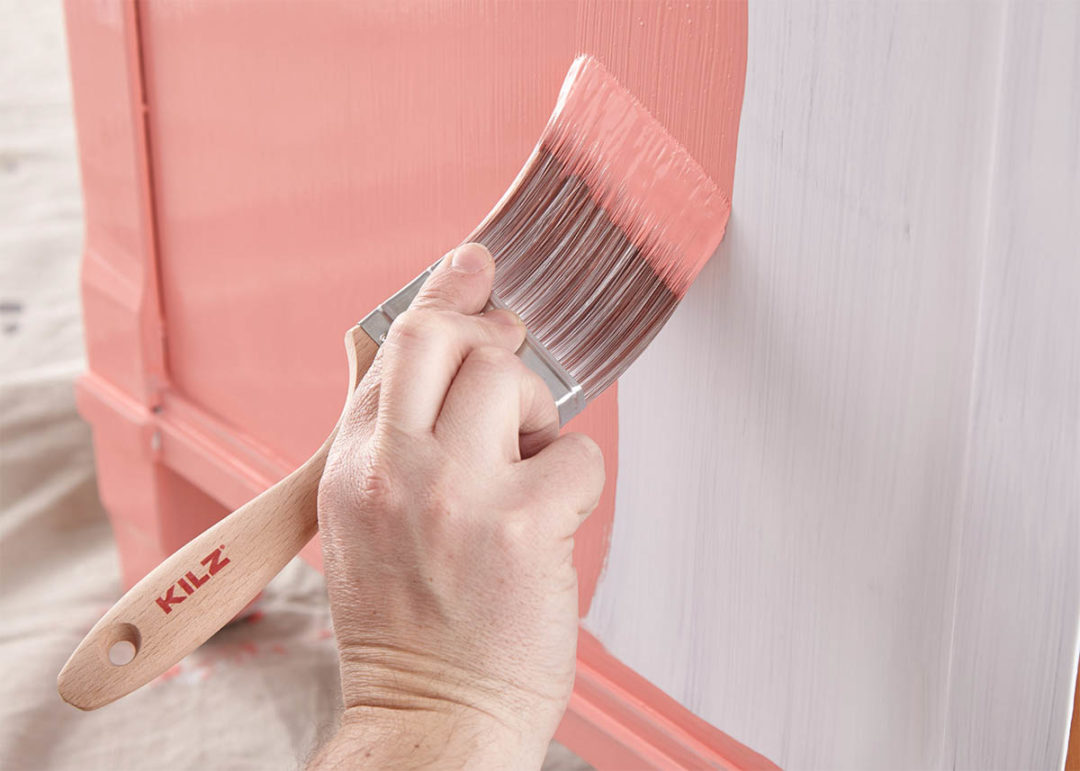
Step 5: Next it’s time for a pop of pink! Apply BEHR in Watermelon Punch (a satin or semi-gloss finish is recommended for superior mildew resistance). Remove the painter’s tape before the paint is fully dry.
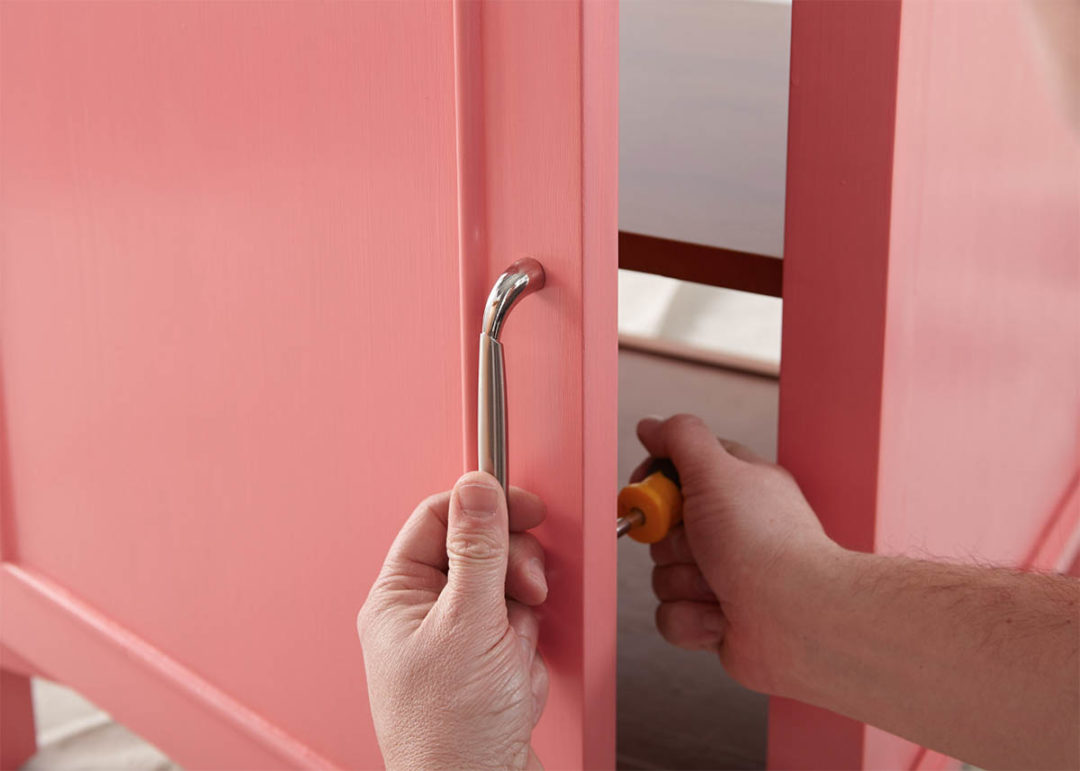
Step 6: Once the vanity is dry, reattach your hardware and you’re done!
The Mirror
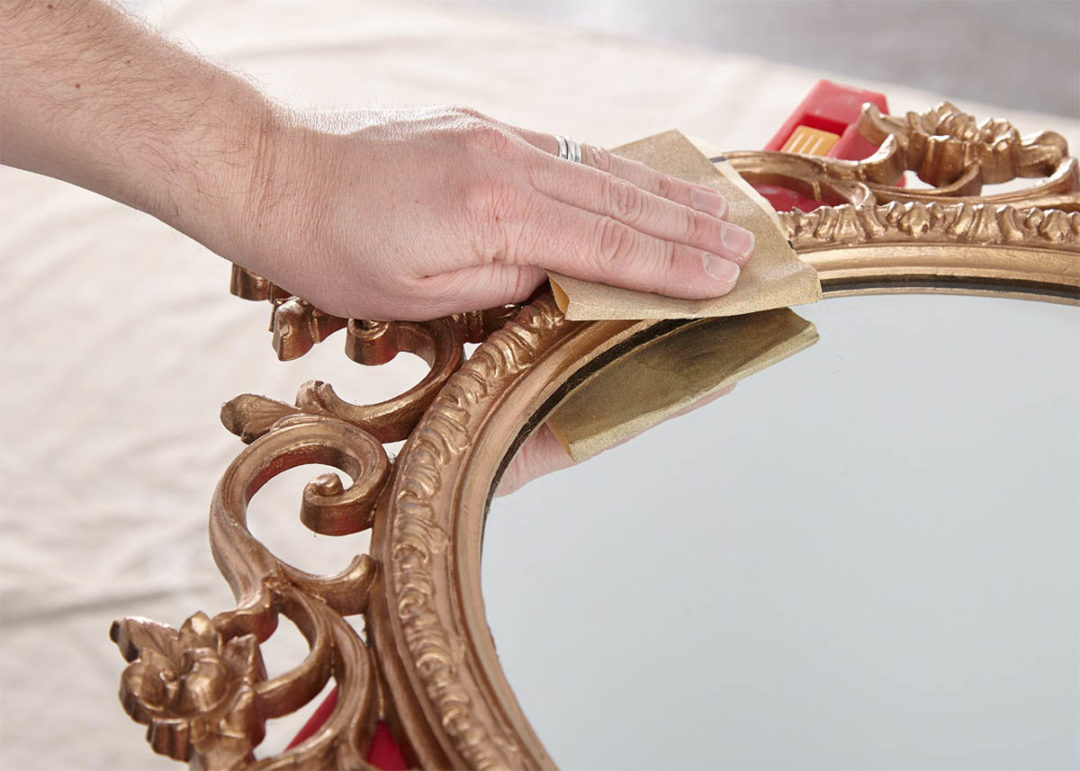
Step 1: Sand the mirror frame, first with 100-150 grit sandpaper and then finish with a second pass of 180-220 grit sandpaper.
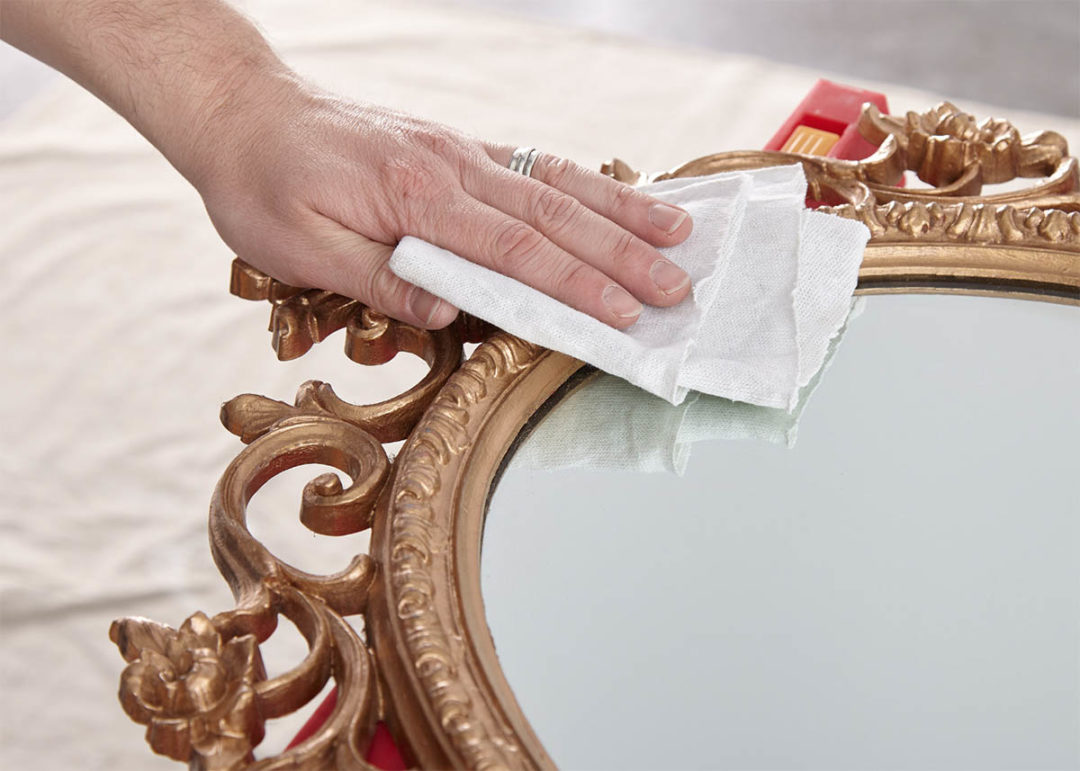
Step 2: After sanding, wipe down the surface with a damp cloth to remove any dust or residue and allow the surface to dry.
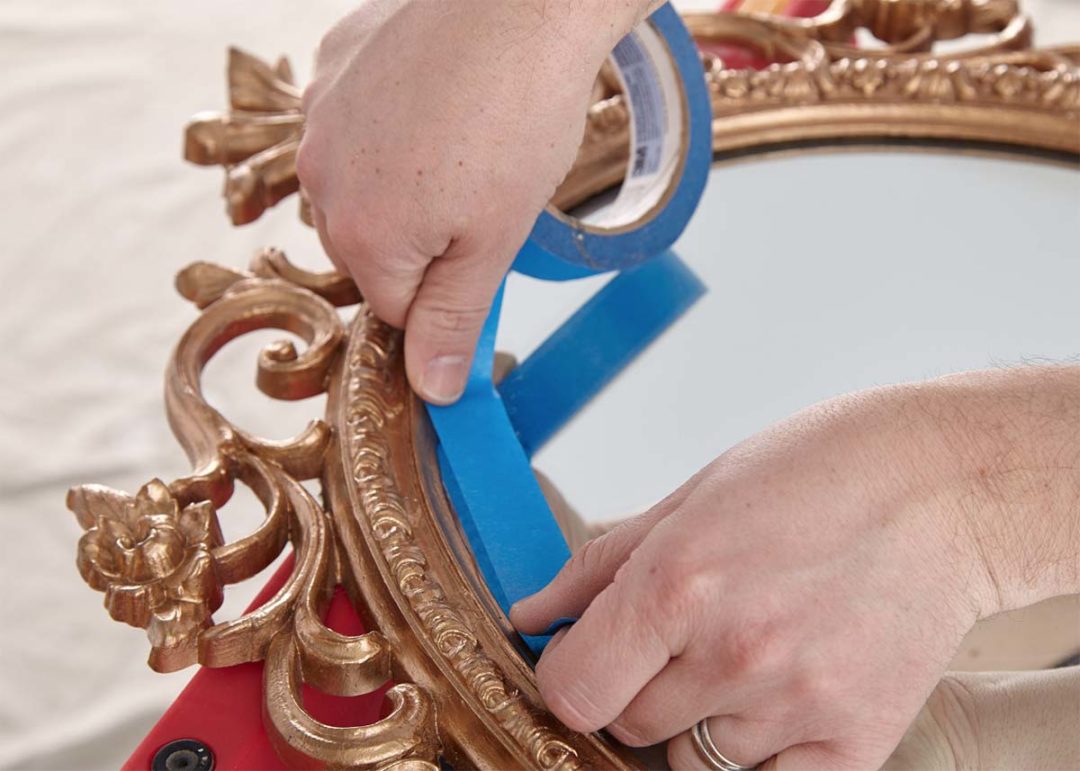
Step 3: Apply painter’s tape to the interior edges of the frame to protect the glass.
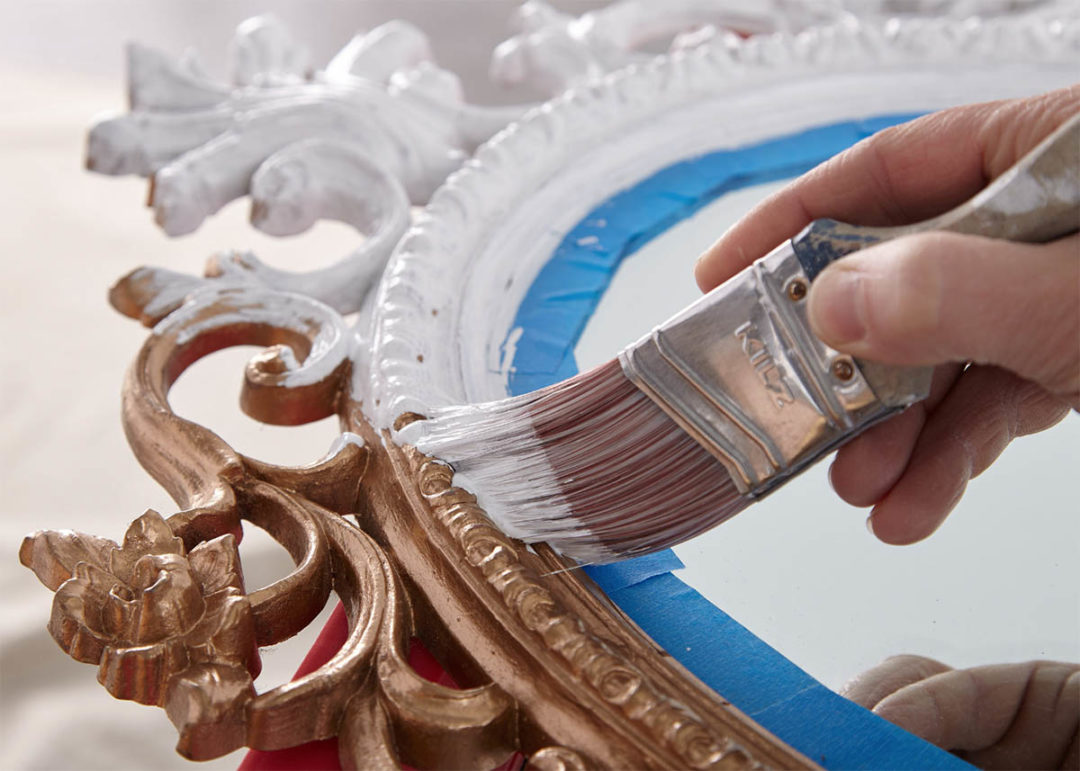
Step 4: Apply KILZ Kitchen & Bath primer with a small paint brush. Allow primer to dry for 1 hour.
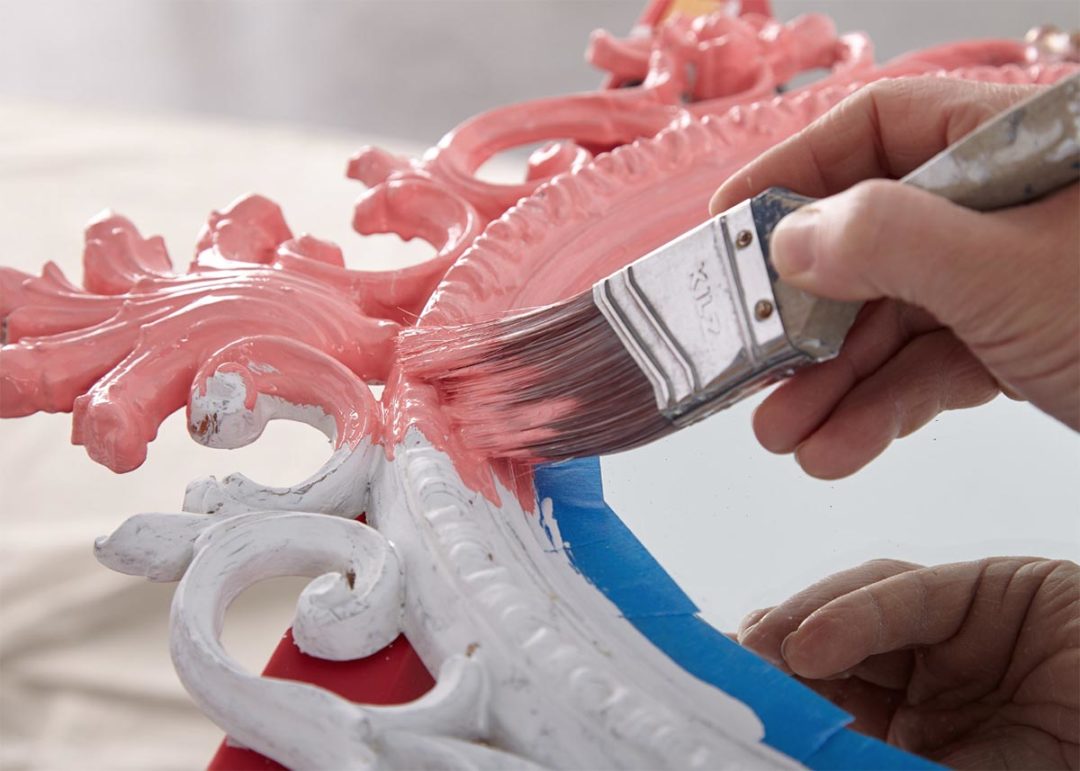
Step 5: Next, apply BEHR Premium Plus in Watermelon Punch (a satin or semi-gloss finish is recommended to ensure superior mildew resistance) using a nylon or polyester brush. Remove the painter’s tape before paint is fully dry.
Always remember to refer to our website Kilz.com or product back labels for additional information and instructions on how to apply our products.
RELATED ARTICLES
get inspired:
FOLLOw us:
@kilzbrand
SHOP
PRODUCTS

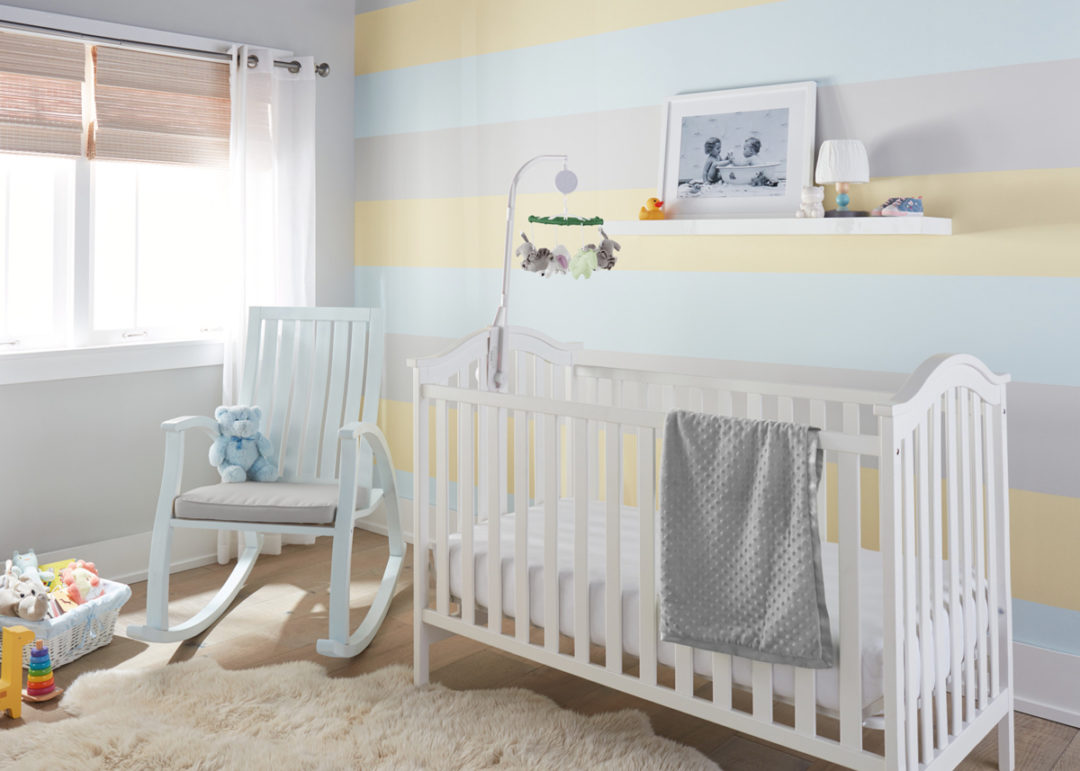
Nursery Makeover with a Sweet Striped Accent Wall
December 20, 2019Are you or someone you love expecting? Creating a cute-as-can-be nursery doesn’t have to be a challenge, and with tips from KILZ® you can color the space any way you choose! In this new nursery, soft colors are painted in a sweet striped pattern to create a playful accent wall. The colors pop because the wall was primed before it was painted! Want to recreate the look for yourself? This painting project is simple to do at home.
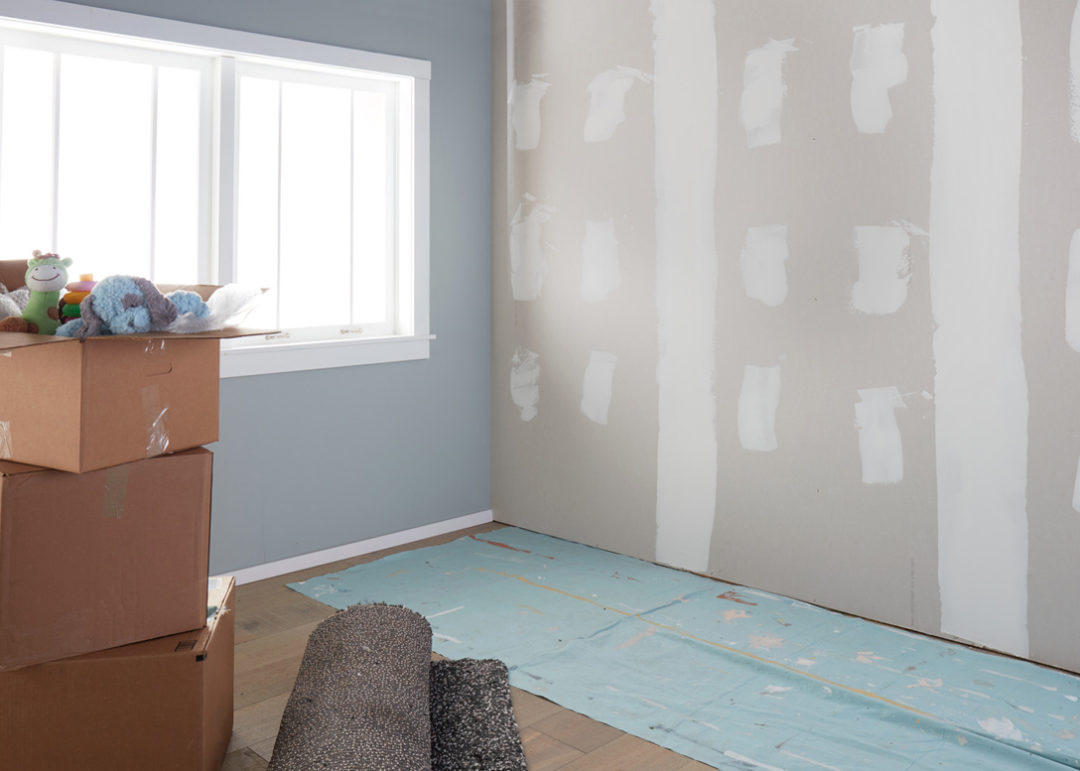
When painting a porous surface like new drywall, KILZ® 1 Standard Primer is recommended. Designed for use on multiple interior surfaces, KILZ® 1 Standard Primer seals porous surfaces and promotes a more uniform appearance of the topcoat. To begin, wipe down the accent wall with a damp cloth to ensure it is clean and free of dust and allow the surface to dry. Next, apply KILZ® 1 Standard Primer to seal the porous surface of the new drywall. Apply primer using a brush first to “cut in” around edges, then use a roller to fill in. Allow 1-hour dry time.
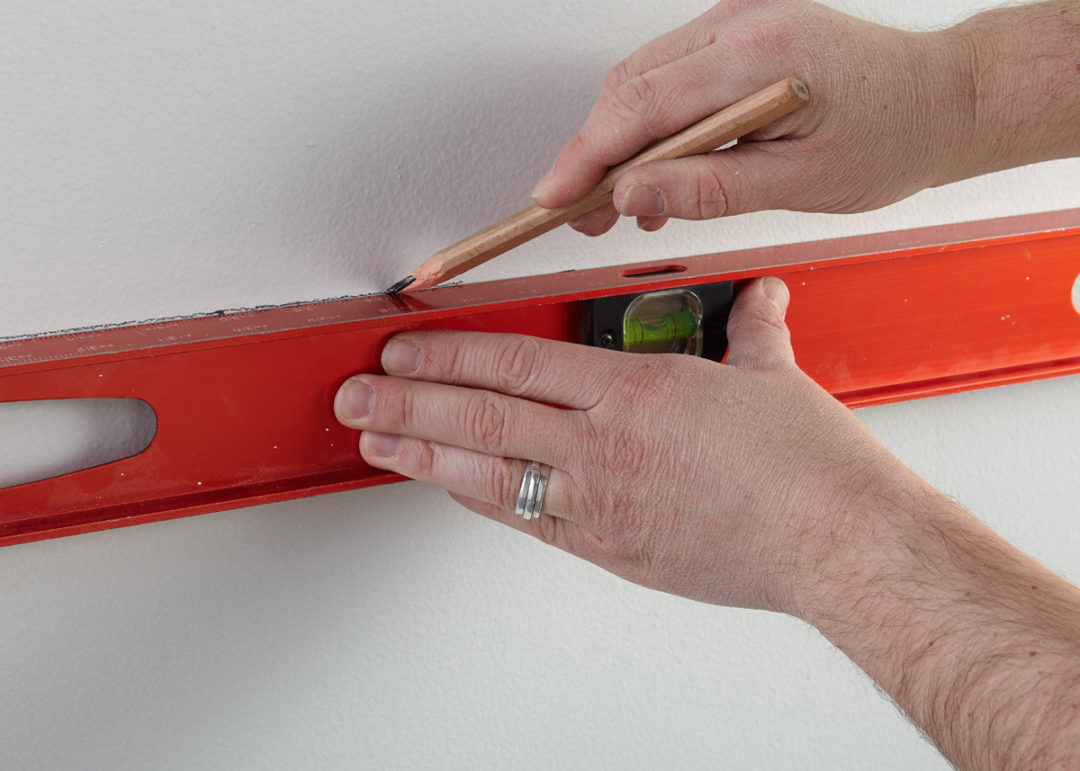
Now it’s time for paint! Selecting the lightest of the three paint colors as the base, apply KILZ Tribute® in Flying Dove to the entire accent wall. Use a brush first to cut in around edges 4 to 6 feet at a time, then use a roller to fill in those sections before moving along. Allow 1-hour dry time. Next up, painting the striped pattern! Measure the height of the wall and divide by the desired number of stripes to determine the width of each stripe. Use a measuring tape, pencil and level, mark the placement of each stripe, then apply painter’s tape to each line (ensuring the tape is on the correct side of the line so the stripes are even). Using a roller, paint every third stripe in BEHR Premium Plus® in Calla. Repeat the above steps to paint every other remaining stripe in Misty Morning. Remove the painter’s tape (pulling off at an angle) before the paint has fully dried to ensure clean lines.
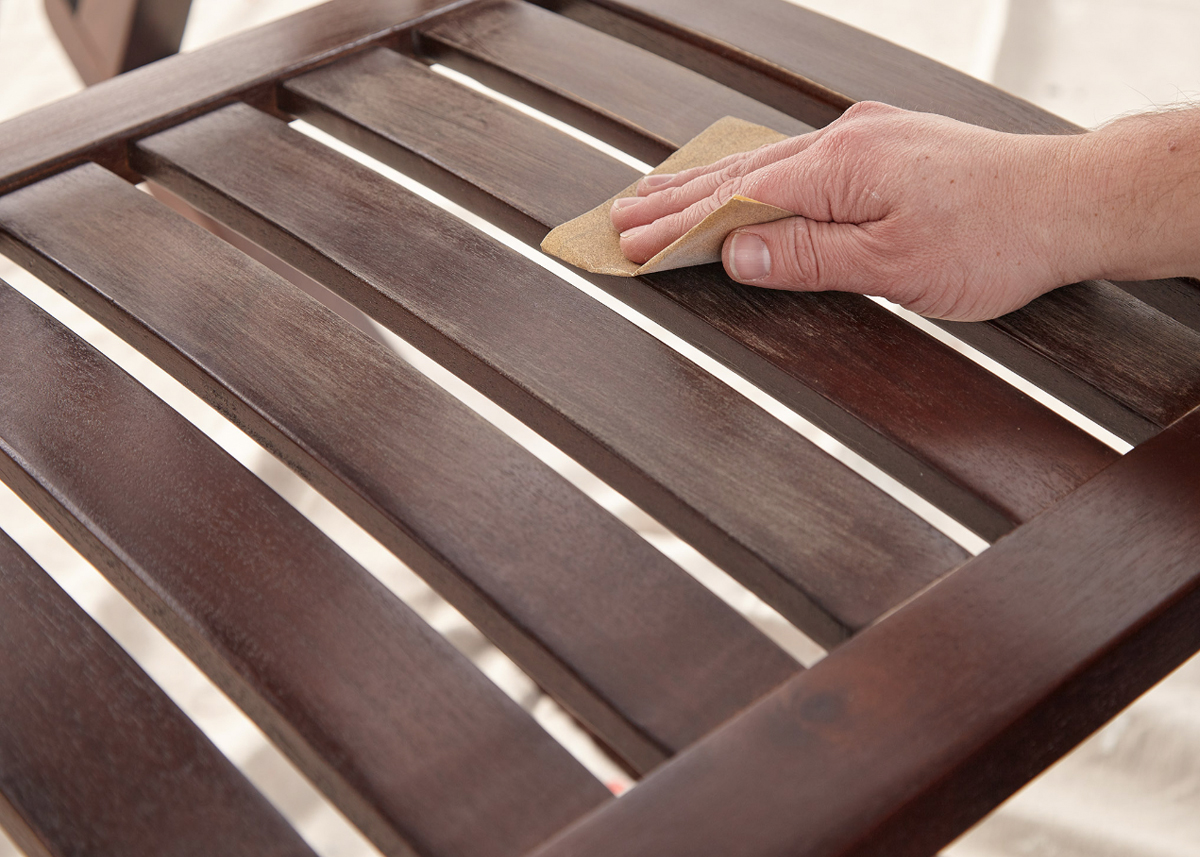
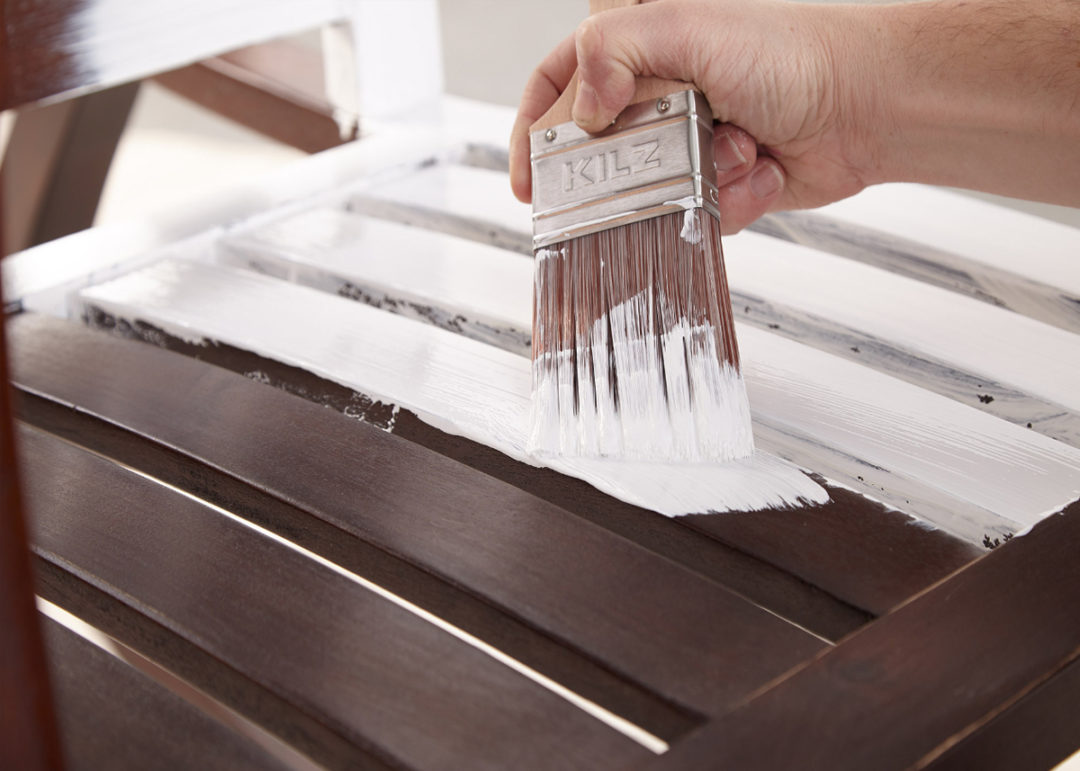
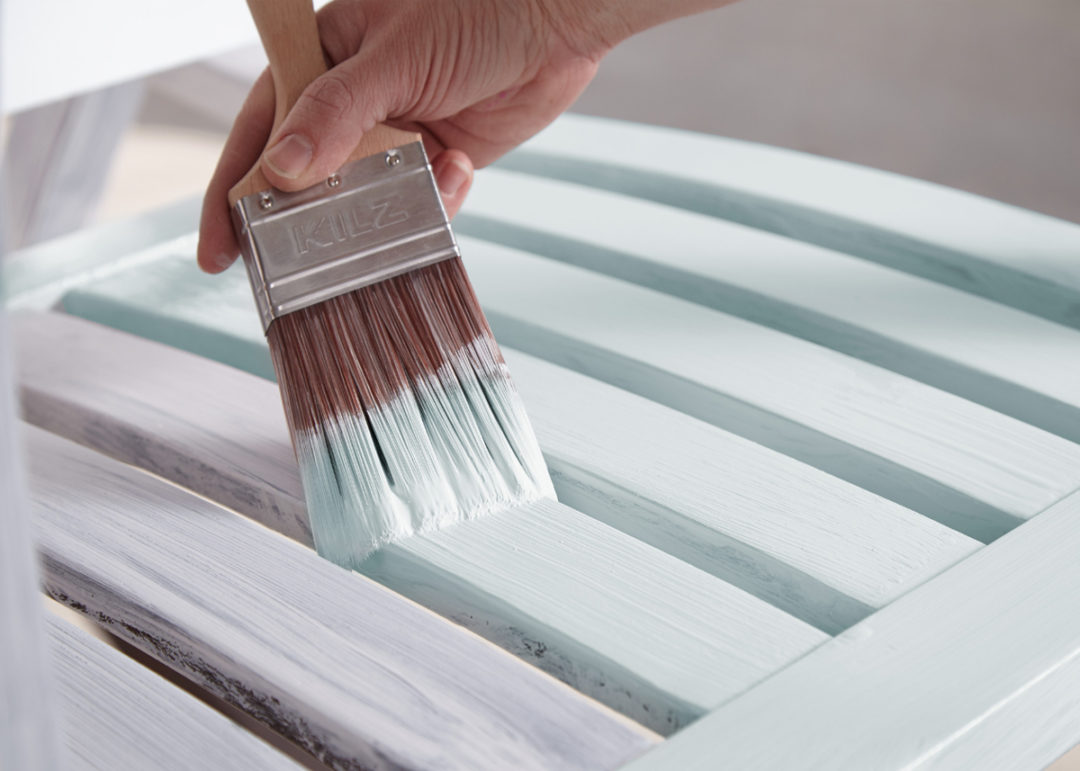
To finish up the sweet space, we primed and painted a plain wood rocking chair in the same light blue shade used for the striped accent wall – KILZ Tribute® in Misty Morning. It really ties the nursery together! When painting wood furniture, it is advised to always use primer first. Primer will help protect the wood and will ensure better adhesion and truer color from your paint. For this chair refresh we used KILZ 2® All-Purpose Primer, a great choice for furniture upcycling projects. To learn how to paint a chair of your own, keep reading below!
Step 1:
Remove chair cushion and set aside.
Step 2:
Sand the entire surface of the chair; do a first pass with 100-150 grit sandpaper then finish with a second pass of 180-220 grit sandpaper.
Step 3:
After sanding, wipe down the surface with a damp cloth to remove any dust or residue and allow the surface to dry before moving on to primer.
Step 4:
Apply KILZ 2® All-Purpose Primer, moving in the same direction as the wood grain for best results. Allow primer to dry for 1 hour.
Step 5:
Next it’s time for paint! Apply KILZ Tribute® in Misty Morning using a nylon or polyester blend brush, moving in smooth strokes that go the same direction as the wood grain.
RELATED ARTICLES
get inspired:
FOLLOw us:
@kilzbrand
SHOP
PRODUCTS

Cover Crayon Stains & Paint a Colorful Accent Wall
December 9, 2019Children love bringing their artwork home from school. But when the actual home becomes the artwork, what can you do to restore crayoned stained walls? In this sweet bedroom makeover, the walls are primed and painted as the first step to a total room refresh that includes a striking honey-hued accent wall and vivid pink and yellow furniture.

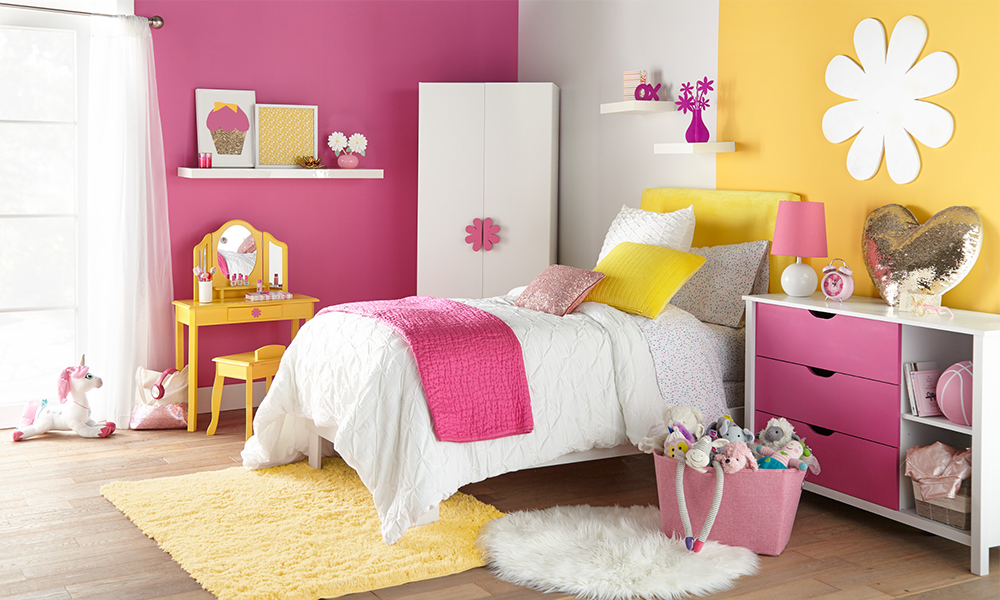
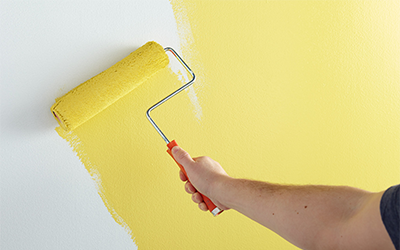
Crayon stained walls don’t stand a chance against KILZ 2® All-Purpose primer, used at the first step to create a sunny yellow accent wall in a little one’s dream bedroom. To begin, wipe down the chosen accent wall with a damp cloth to ensure it is clean and free of dust then allow the surface to dry. Next, tape around the baseboards, trim and moldings.
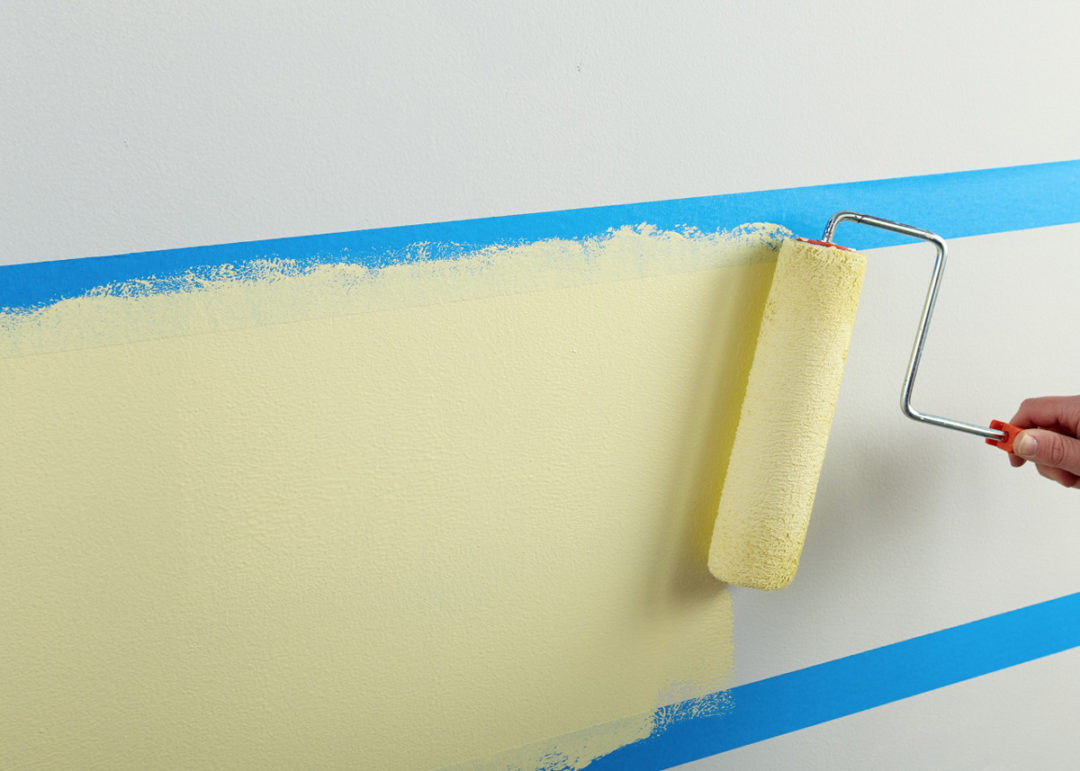
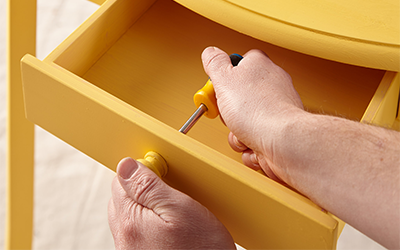
To block the light crayon stains and ensure a perfect finish, apply 1 coat of KILZ 2® All-Purpose primer using a brush first to “cut in” around the edges, then use a roller to fill in. Allow 1 hour of dry time. Finally, apply KILZ Tribute® in Jazz Age Yellow using the same method as the primer. Remove tape prior to paint drying, and the accent wall is complete!
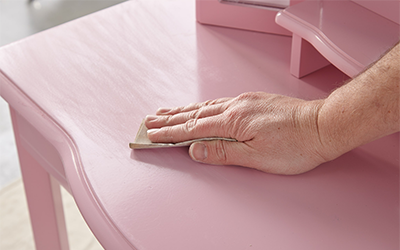
To match the yellow accent wall, paint the vanity in the same sunny yellow shade! Similar to the accent wall, start with KILZ 2® All-Purpose primer before painting. The fast drying, water-based primer offers enhanced hiding, making it ideal for changing colors on both walls and furniture. To begin, remove the vanity’s drawer and hardware. Next, sand the surfaces of the vanity. Do a first pass with 100-150 grit sandpaper then finish with a second pass of 180-220 grit sandpaper, always moving in the direction of the wood grain. After sanding, wipe down the surface with a damp cloth to remove any dust or residue and allow the surface to dry before moving on to primer.
Now it’s time to prime. Apply KILZ 2® All-Purpose primer, moving in the same direction as the wood grain and allow to dry for 1-hour. Next, apply KILZ Tribute® in Jazz Age Yellow using a nylon or polyester blend brush, moving in smooth strokes that go the same direction as the wood grain. Once the paint is dry, reattached your hardware and the transformation is complete!
The final step in this child’s bedroom makeover is a pretty-in-pink dresser. Add a fun pop of color to a child’s dresser by painting the drawers a bright accent shade! Follow the same directions as outlined for the vanity, priming with KILZ 2® All-Purpose and then using BEHR Premium Plus® in Heart Breaker for the drawers and a favorite neutral for the dresser’s body.
Step 1:
Remove drawers and hardware.
Step 2:
Wipe down the entire surface with a damp cloth to ensure it is clean and free of dust. Allow the surface to dry.
Pro-tip:
Put the screws back into the hardware, then seal the hardware and screws in painter’s tape and label it. It’s always best to put every screw back exactly where it came from. That will put the least amount of stress on the wood.
Step 3:
Apply KILZ 2® All-Purpose primer, moving in the same direction as the wood grain for best results. Allow primer to dry for 1-hour.
Step 4:
Topcoat with BEHR Premium Plus® Semi-Gloss Paint in Heart Breaker.
RELATED ARTICLES
get inspired:
FOLLOw us:
@kilzbrand
SHOP
PRODUCTS

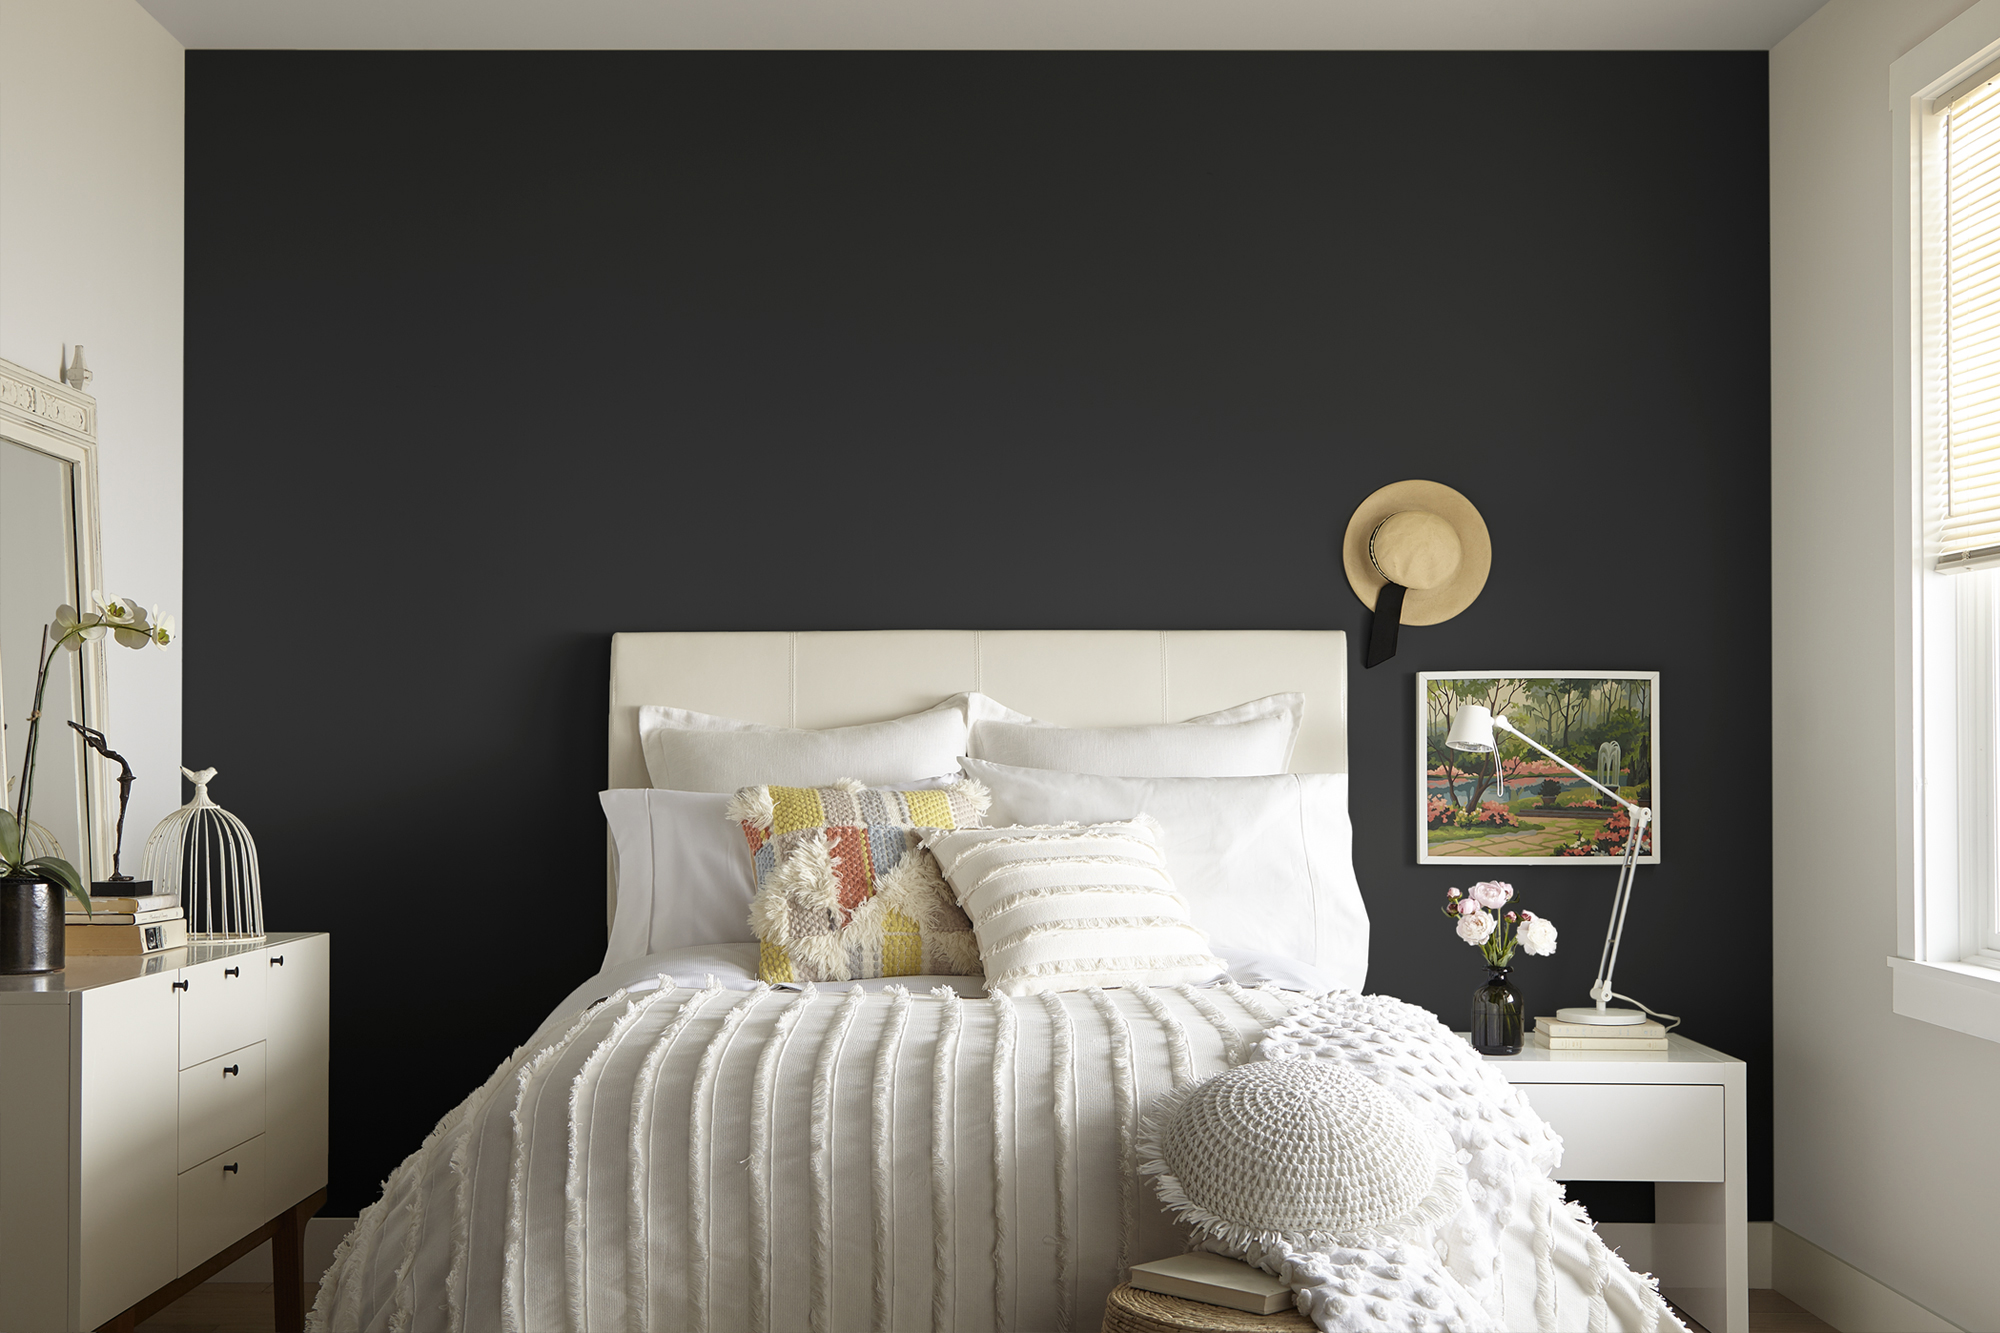
How-To Paint a Dark Accent Wall
August 30, 2019An outdated wall color is replaced with a bold hue in this easy to replicate bedroom transformation, giving a once bland space a fresh look and feel. It’s typical of many painting projects to be applying new paint over a previous color, and when you’re going from a lighter shade to a darker paint color do you need to prime? The Pro’s answer is yes! Priming before painting allows a truer and richer color from your top coat, so even if you think your new color is dark enough to cover the old paint, you might not get the exact result you were expecting if you don’t prime first.
For this bedroom makeover we chose KILZ 2® All-Purpose primer, a multi-surface sealer and stain blocker that is great at hiding a previous light or mid-toned color. KILZ 2® was perfect for the job as we were taking the wall behind the bed from light to dark, but also changing the wall with the window from the old grey-green to a crisp white – this really made our final accent wall pop!
At first glance the before-to-after transformation of this space might look like it took a lot of work, but the biggest change was the new paint color. The beauty of a dark accent wall is that it can dramatically elevate your space, without the need for many other changes. We chose BEHR PREMIUM PLUS® in Nocturne Blue HDC-CL-28 for the accent wall and White Modern TB-09 for the remaining walls. A deep gray with a dark blue undertone, Nocturne Blue appears as almost black on the wall which resulted in the bold look we desired while still having a level of softness ideal for a bedroom.
After the priming and painting were done, we added new bedding and a few fresh accessories and the stunning bedroom makeover was complete. If you’re feeling inspired to paint your own dark accent wall, step-by-step instructions are below.
Step 1:
Wipe down the walls with a damp cloth to ensure they are clean and free of dust. Allow the surface to dry.
Step 2:
Tape around the baseboards, trim and moldings.
Step 3:
To ensure a perfect paint finish, start by applying 1 coat of KILZ 2® All-Purpose – stirring thoroughly before and occasionally during use. Allow 1-hour of dry time.
 Pro-tip: Apply primer using a brush first to “cut in” around the edges, then use a roller to fill in.
Step 4:
Next, apply KILZ Tribute® in White Modern on all walls except the chosen accent wall. Use a brush first to cut in around the edges 4 to 6 feet at a time, then use a roller to fill in those sections before moving along.
Step 5:
Next on the chosen accent wall, apply BEHR PREMIUM PLUS Nocturne Blue. Use a brush first to cut in around the edges 4 to 6 feet at a time, then use a roller to fill in those sections before moving along.

Step 6:
Remove tape prior to paint drying.
RELATED ARTICLES
get inspired:
FOLLOw us:
@kilzbrand
SHOP
PRODUCTS
Master Bedroom Refresh
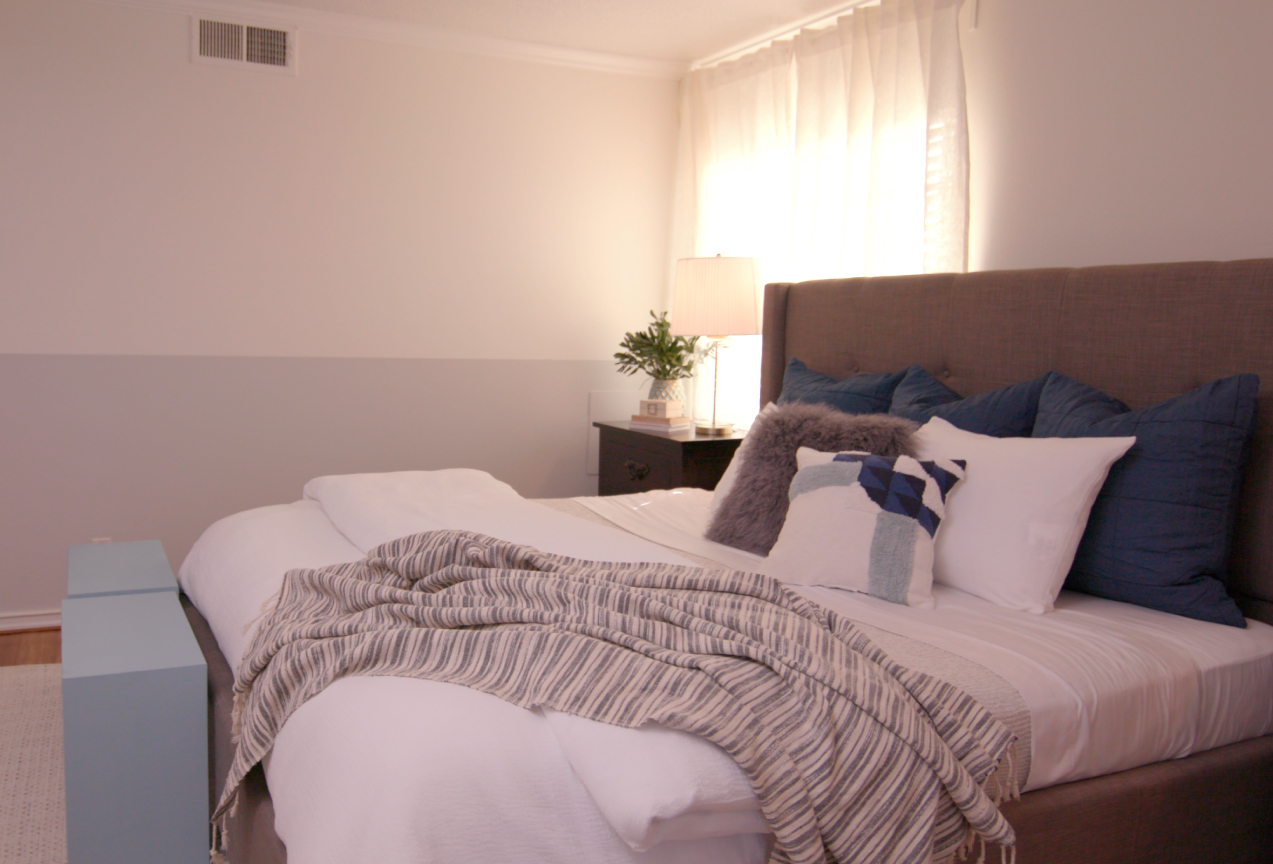
August 14, 2018A ready-to-use neutral creates the ideal base for your transformation. In this case, a coat of KILZ TRIBUTE® Paint and Primer properties in One—we’ve used a color called Architectural White here—leaves little guesswork and effort because it covers all four walls with one coat. After that, the magic happens.
To add a pop of contrast and sophistication, we’ve elected to paint the bottom half of the walls in a slightly contrasting neutral—another KILZ TRIBUTE® hue called Flying Dove. This combined neutral palette creates the effect that the ceilings are higher than they are, opening up the bedroom and making it feel more spacious.
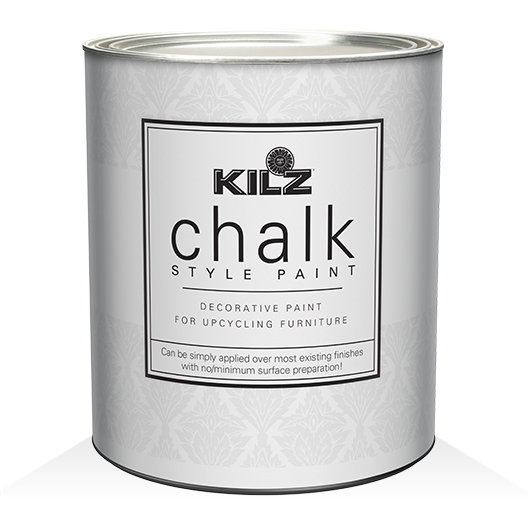
But our weekend bedroom transformation isn’t apparent only on the walls; a furniture refresh is in order, too. KILZ® CHALK STYLE PAINT upcycles fixtures with a soft finish, creating the perfect accent piece for our tranquil, welcoming bedroom refresh.

Architectural White

Flying Dove

Pale Emerald
This combined neutral palette creates the effect that the ceilings are higher than they are, opening up the bedroom and making it feel more spacious.
RELATED ARTICLES
get inspired:
FOLLOw us:
@kilzbrand
SHOP
PRODUCTS
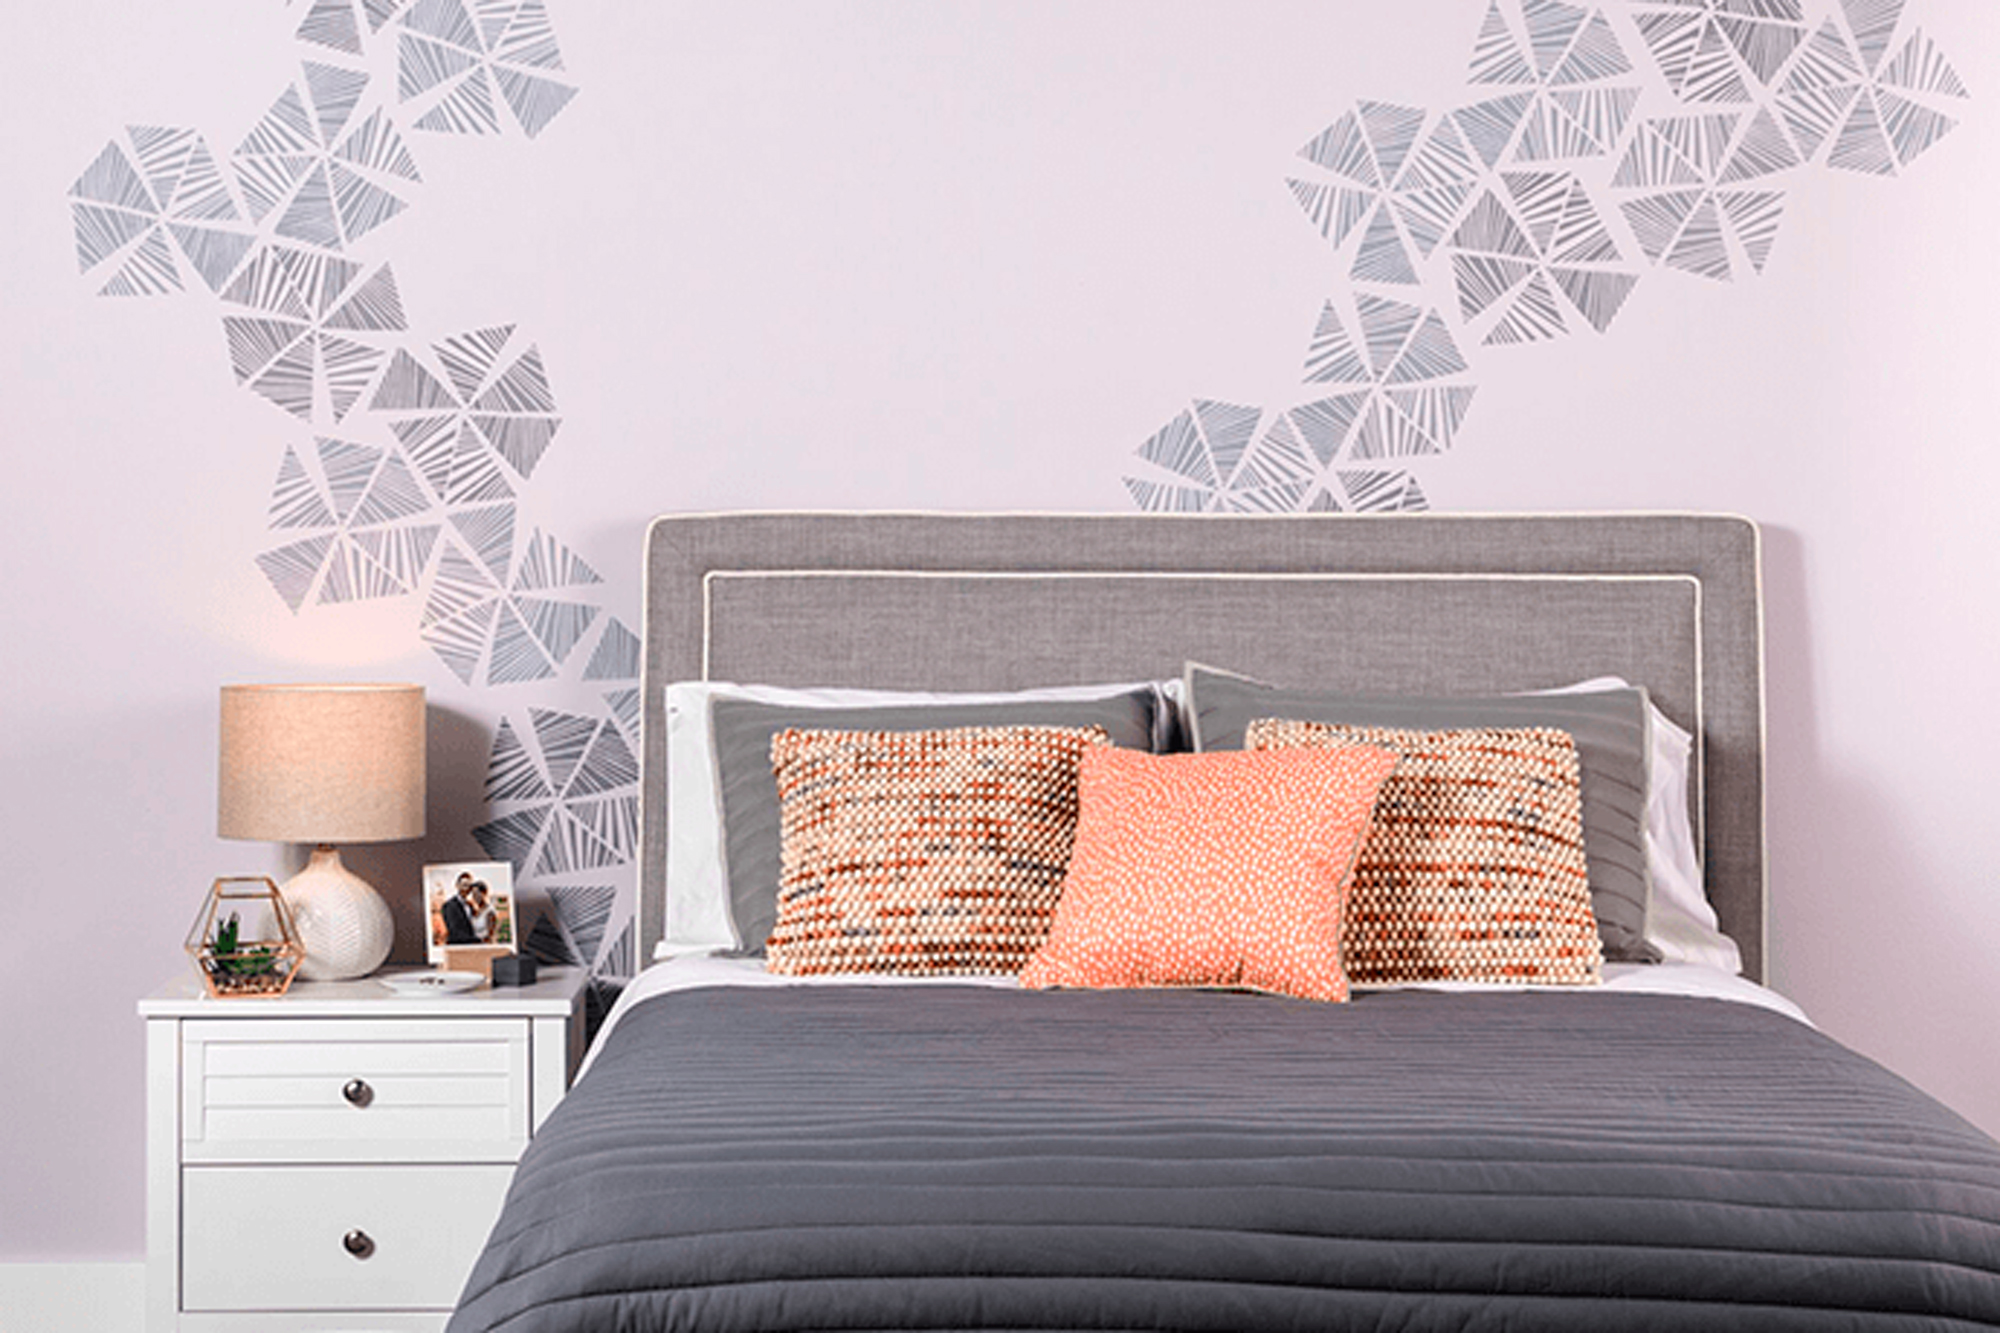
Stencil Wall Accents
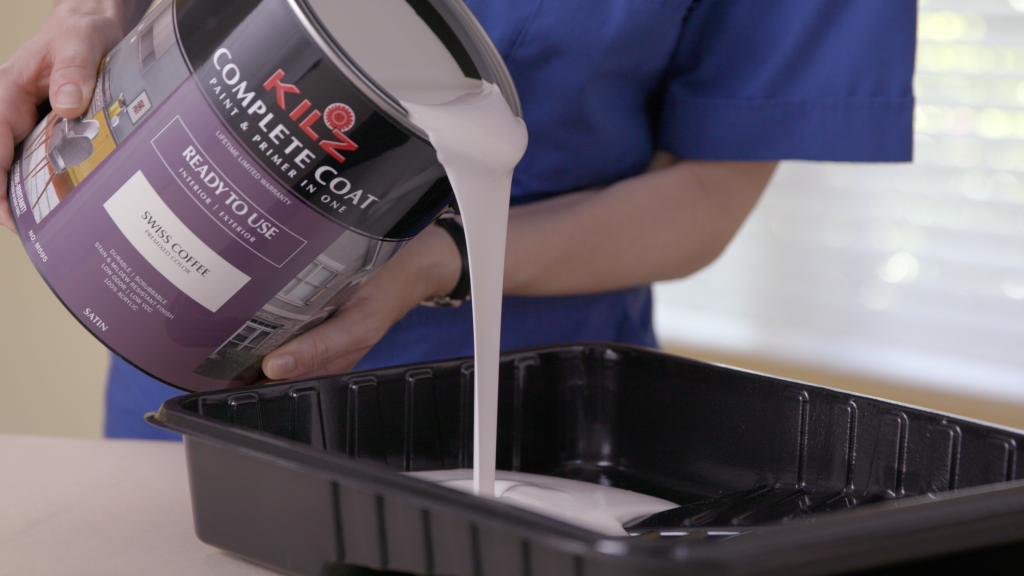
December 8, 2017For this project we used our KILZ COMPLETE COAT® Paint and Primer in One in neutral based colors to transform this plain master bedroom wall into the perfect statement. Although we chose more muted colors for this specific space, you could always go bolder, repeating more (or less) of the stencil patterns to accomplish a louder more extroverted look. The great news is that the stencils come in all types of styles leaving the opportunities virtually endless when it comes to which type of look you want to create.
Mix and match! Using the stencil patterns behind or above furniture pieces is a nice way to really make them feel custom to the room. You could also pull stencils in order to frame artwork or simply add extra dimensions to your décor. The color of the stencil here subtly pulls from other colors in the room. In this case, the tone of the stencil ties in with the bedding and comforter set. We could have also opted for an orange tone to really make the accent pillows pop. This could be a nice effect in a living room space, or even in a dining room above a serving unit.
This project is simple! See below for a full tutorial about how you can achieve this look in your space. Loving it? Explore our full KILZ COMPLETE COAT® palette here.
Project Checklist:
- KILZ COMPLETE COAT® Paint and Primer in One
- Stencil
- Stencil Brush
- Painter’s Tape or Spray Adhesive
- Paper Towels
- Can Key
- Drop Cloth
- Stir Stick
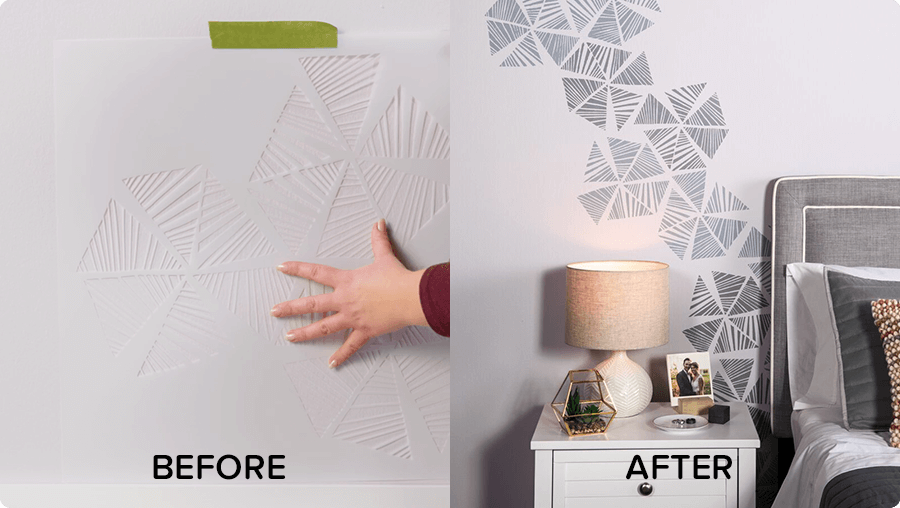
Step 1:
Determine location of pattern to be stenciled on wall.
Step 2:
Stir paint to make sure it is mixed.
Step 3:
Spray stencil with adhesive or secure stencil with painters tape.
Step 4:
Level and then secure your stencil on the top middle of the wall with painter’s tape.
Step 5:
Stencil the pattern by lightly dabbing the paint until the areas are fully covered.
Step 6:
Move on to the second repeat of the pattern by following the registrations that are included in the stencil. These registration marks help you move and place the stencil along the wall perfectly every time!
Step 7:
Allow 2 hours dry time. Then call your best friend and invite them over for coffee because you’re all done.
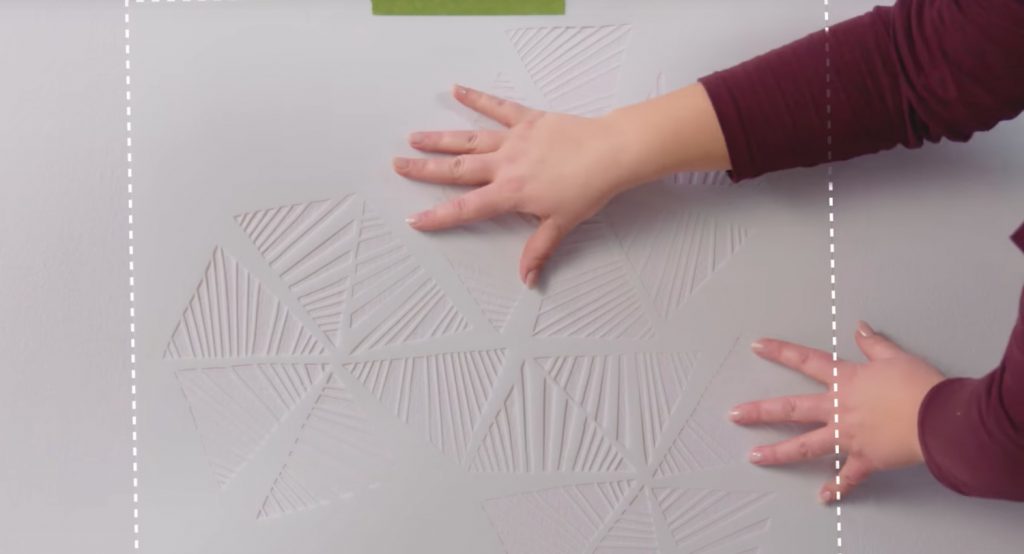 Pro-tip: Make sure the stencil is secure before you add paint.
 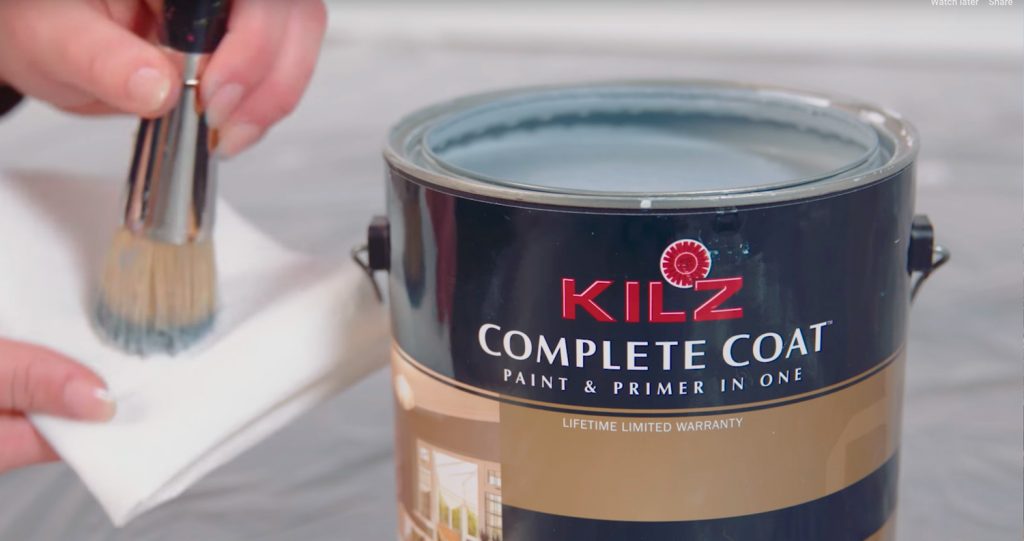 Pro-tip: Load your brush with paint and off-load most of the paint onto a paper towel. Using too much paint when stenciling is the number one reason for bleeding, so make sure to off-load excess paint before starting on the wall.
Mix and match! Using the stencil patterns behind or above furniture pieces is a nice way to really make them feel custom to the room.
RELATED ARTICLES
get inspired:
FOLLOw us:
@kilzbrand
SHOP
PRODUCTS
Table & Chairs Makeover
January 12, 2017Project Checklist:
- KILZ COMPLETE COAT® Paint and Primer in One
- 100-150 Grit Sandpaper
- Painter’s Tape
- Paint Brush
- Measuring Tape
- Chairs
- Table
- 3/8”-1/2” Synthetic Roller
Step 1:
For best results start with a properly prepared and previously painted or primed surfaces. Remove any loose or peeling paint and wash off dirt or grease with a non-soapy detergent or a TSP substitute. Rinse well and allow surface to dry.
Pro-tip: For glossy surfaces, scuff sand with the appropriate sandpaper prior to coating.
Step 2:
Tape off areas to be painted. To achieve a geometric pattern we recommend using measuring tape to evenly space tape.
Step 3:
Stir paint before and during application to make sure it is mixed.
Step 4:
Remove the painters tape when the paint is wet, or have a razor to cut the film if you’ve let the paint dry.
Step 5:
Allow to dry. The product dries to touch in 2 hours (at 77° F and 50% relative humidity) or longer in cooler temperatures and/or higher humidity.
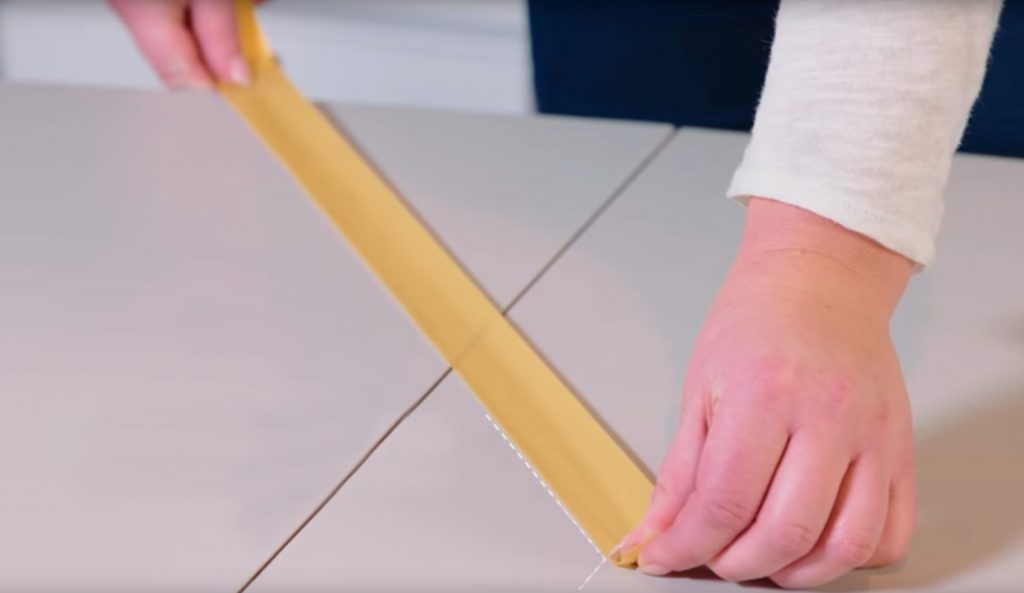
Pro-tip: Measure peak to peak, as well as the distance between the points along the side of the table.
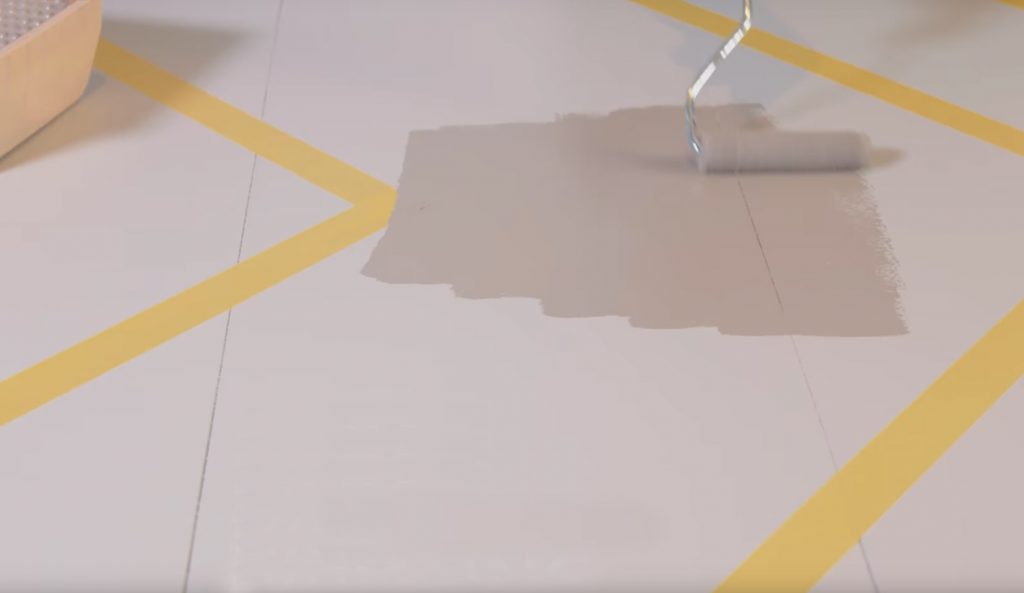
Pro-tip: Use a high quality synthetic brush or 3/8”-1/2” synthetic roller for the application. When painting a horizontal surface, like a tabletop, apply thin coats.
RELATED ARTICLES
get inspired:
FOLLOw us:
@kilzbrand
join the conversation:
SHARE this post: