Category: Inspiration
Styled by Color – White Modern
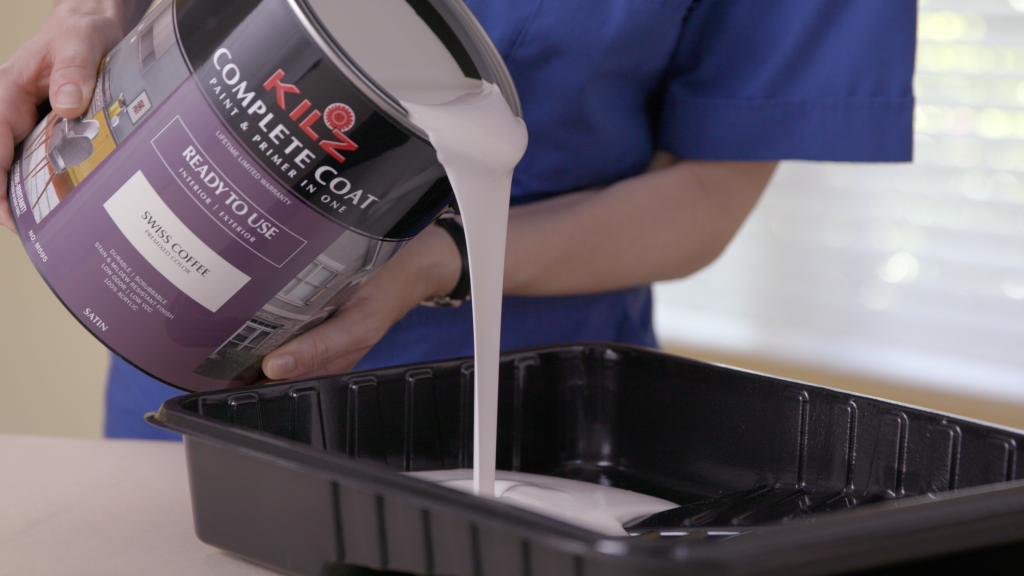
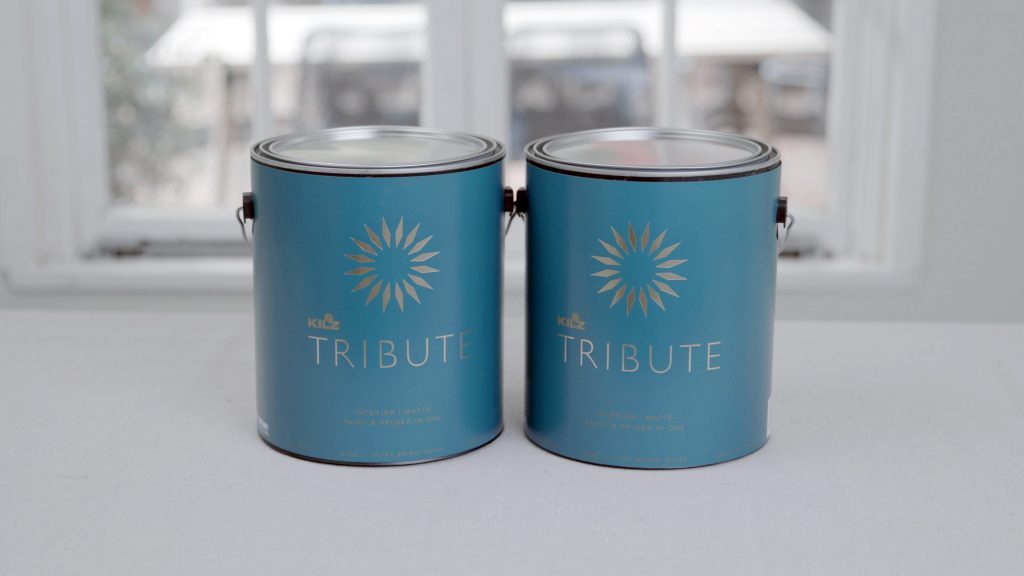
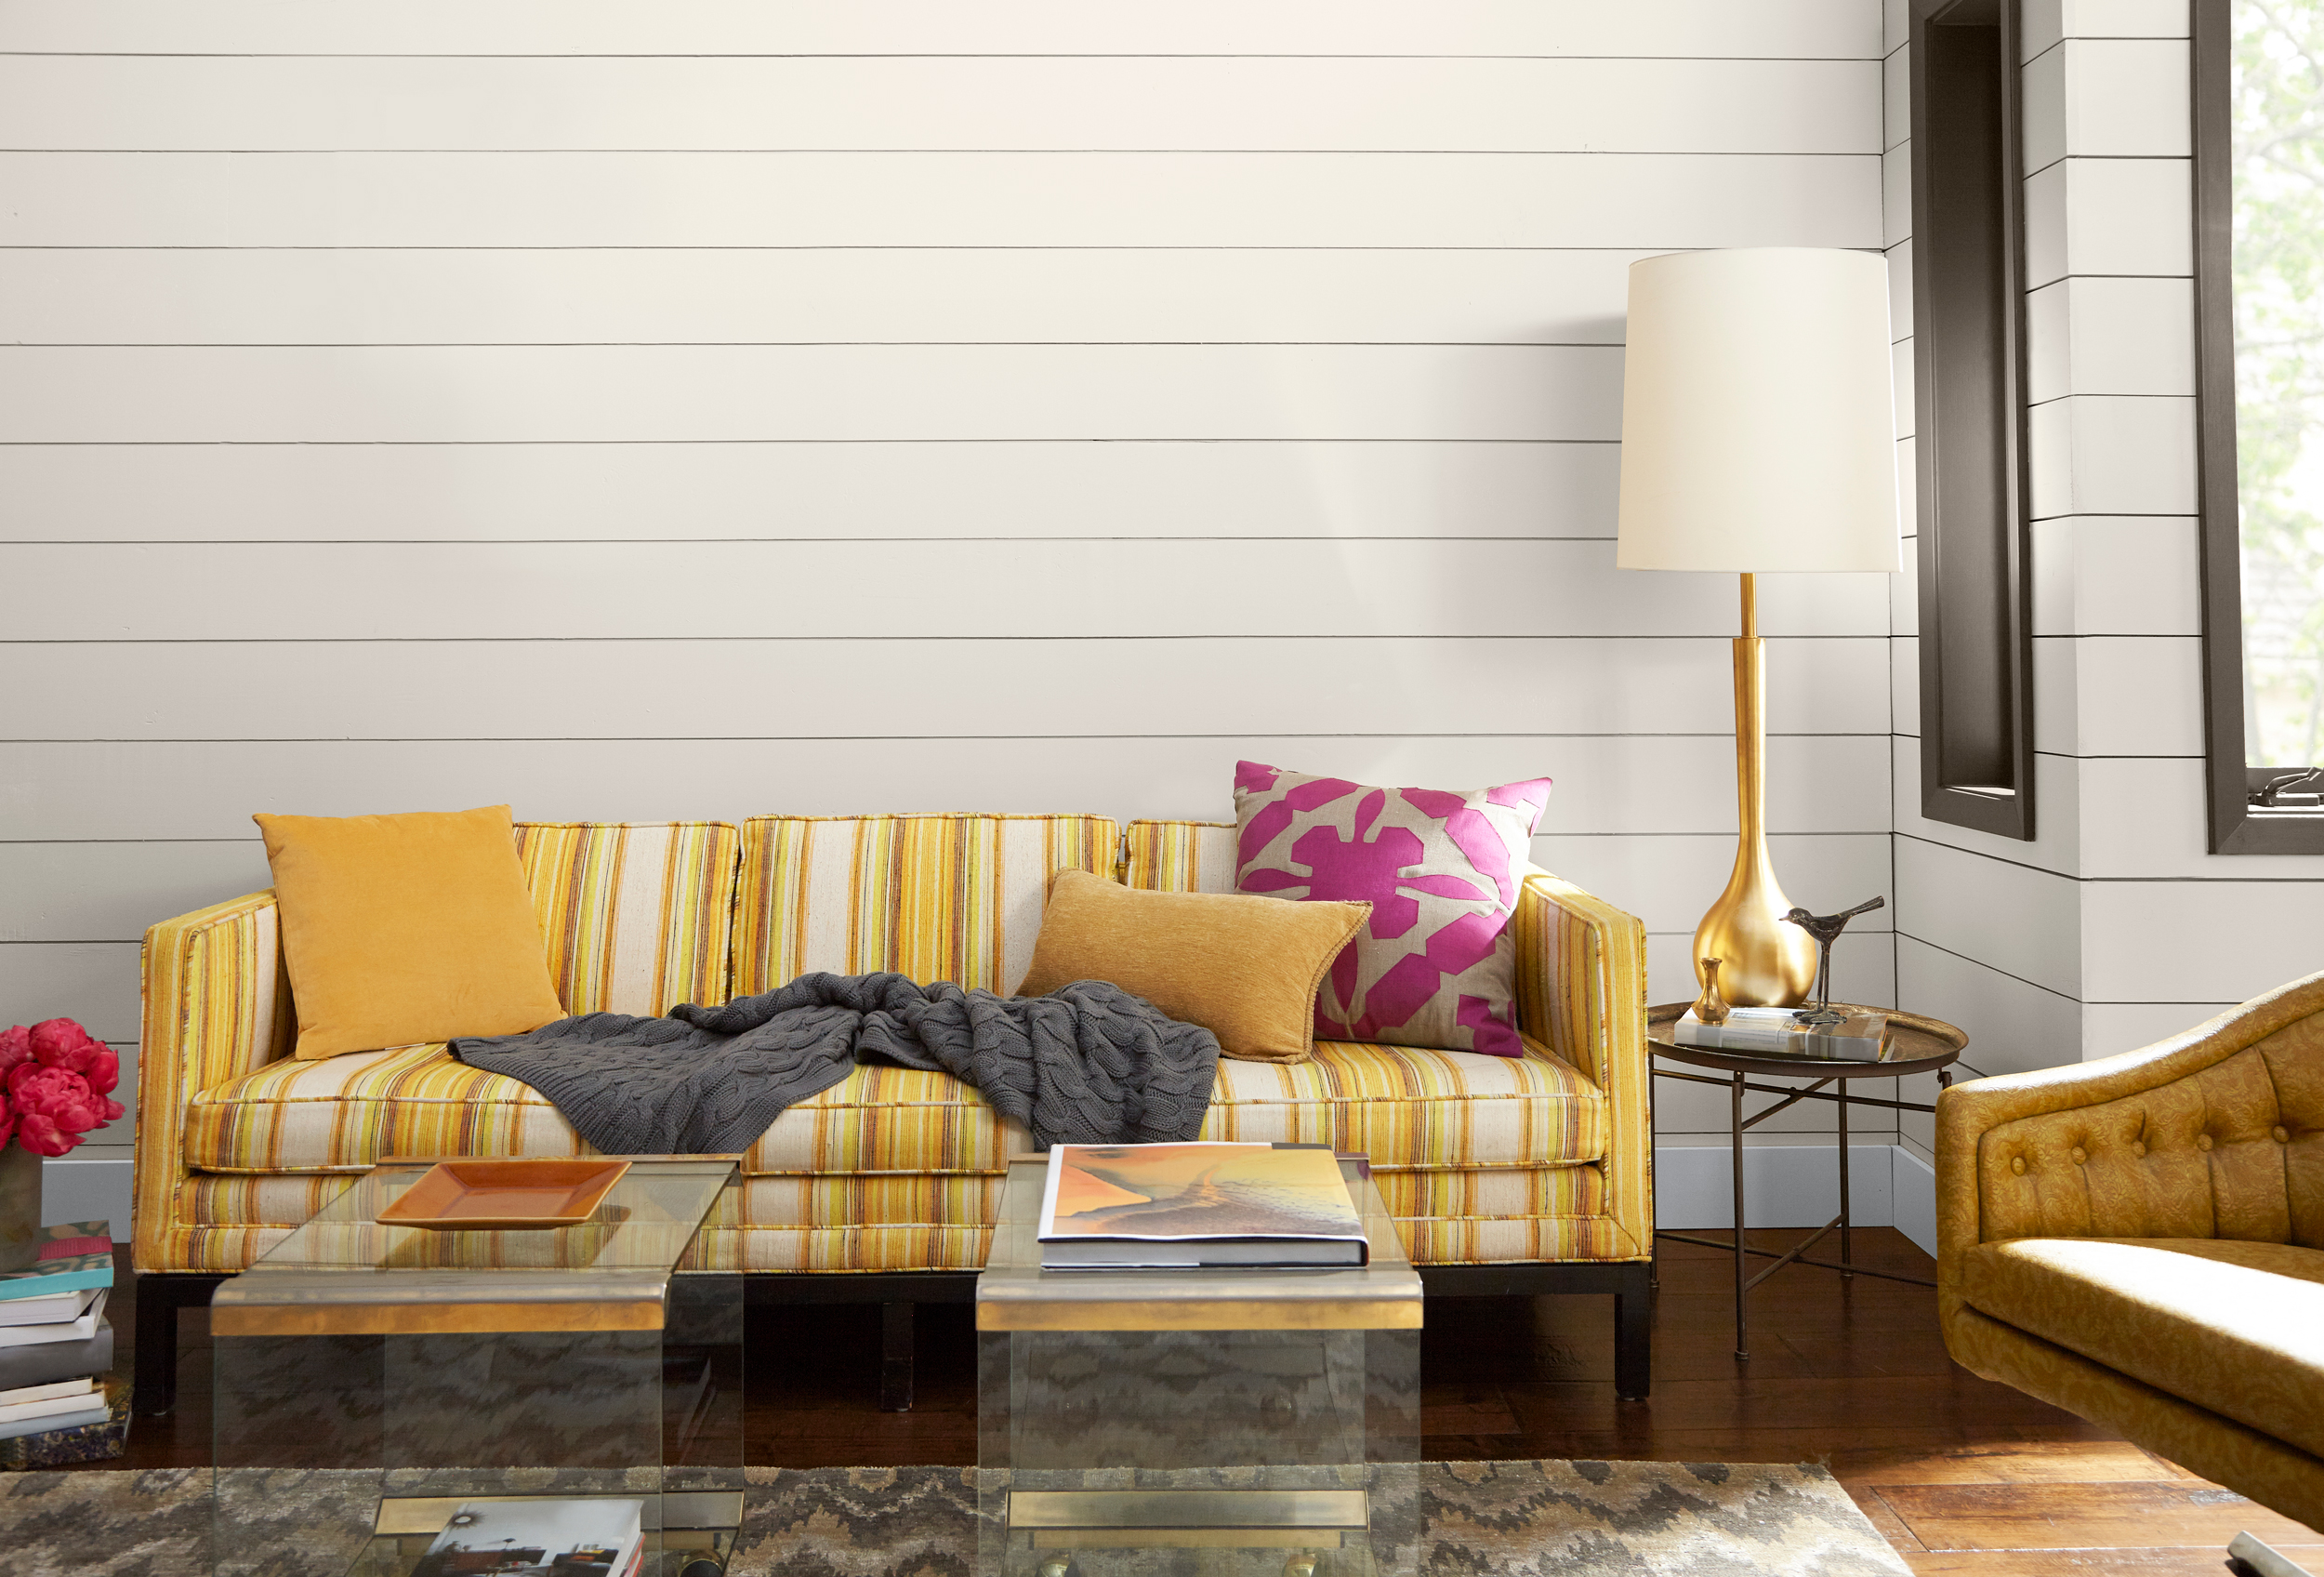
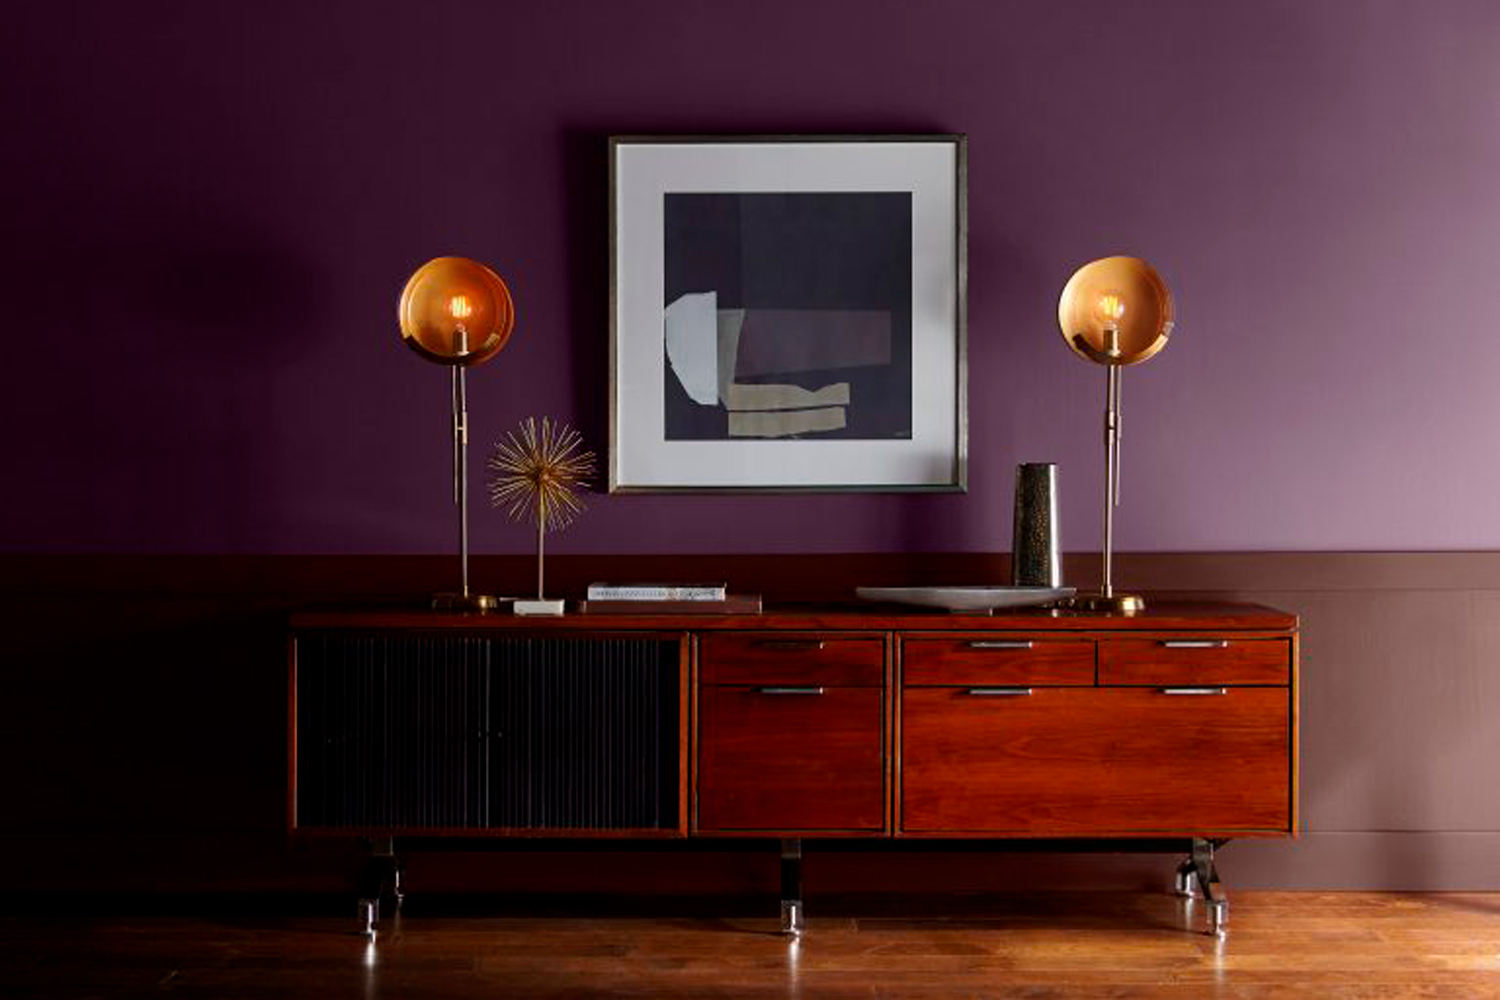
May 30, 2019Memorial Day has come and gone, marking the start of summer and the season to dress in your freshest whites. Whether you subscribe to the “no wearing white before Memorial Day” rule or not, in the world of interior design white is a timeless shade that instantly breathes new life into any space. For June’s color of the month we chose White Modern, a warm off-white that captures the sunshine filled days of summer and pairs well with a broad spectrum of coordinating colors. A timeless white, it balances warm and cool tones and is versatile enough to be used throughout the home as a wall or trim color.
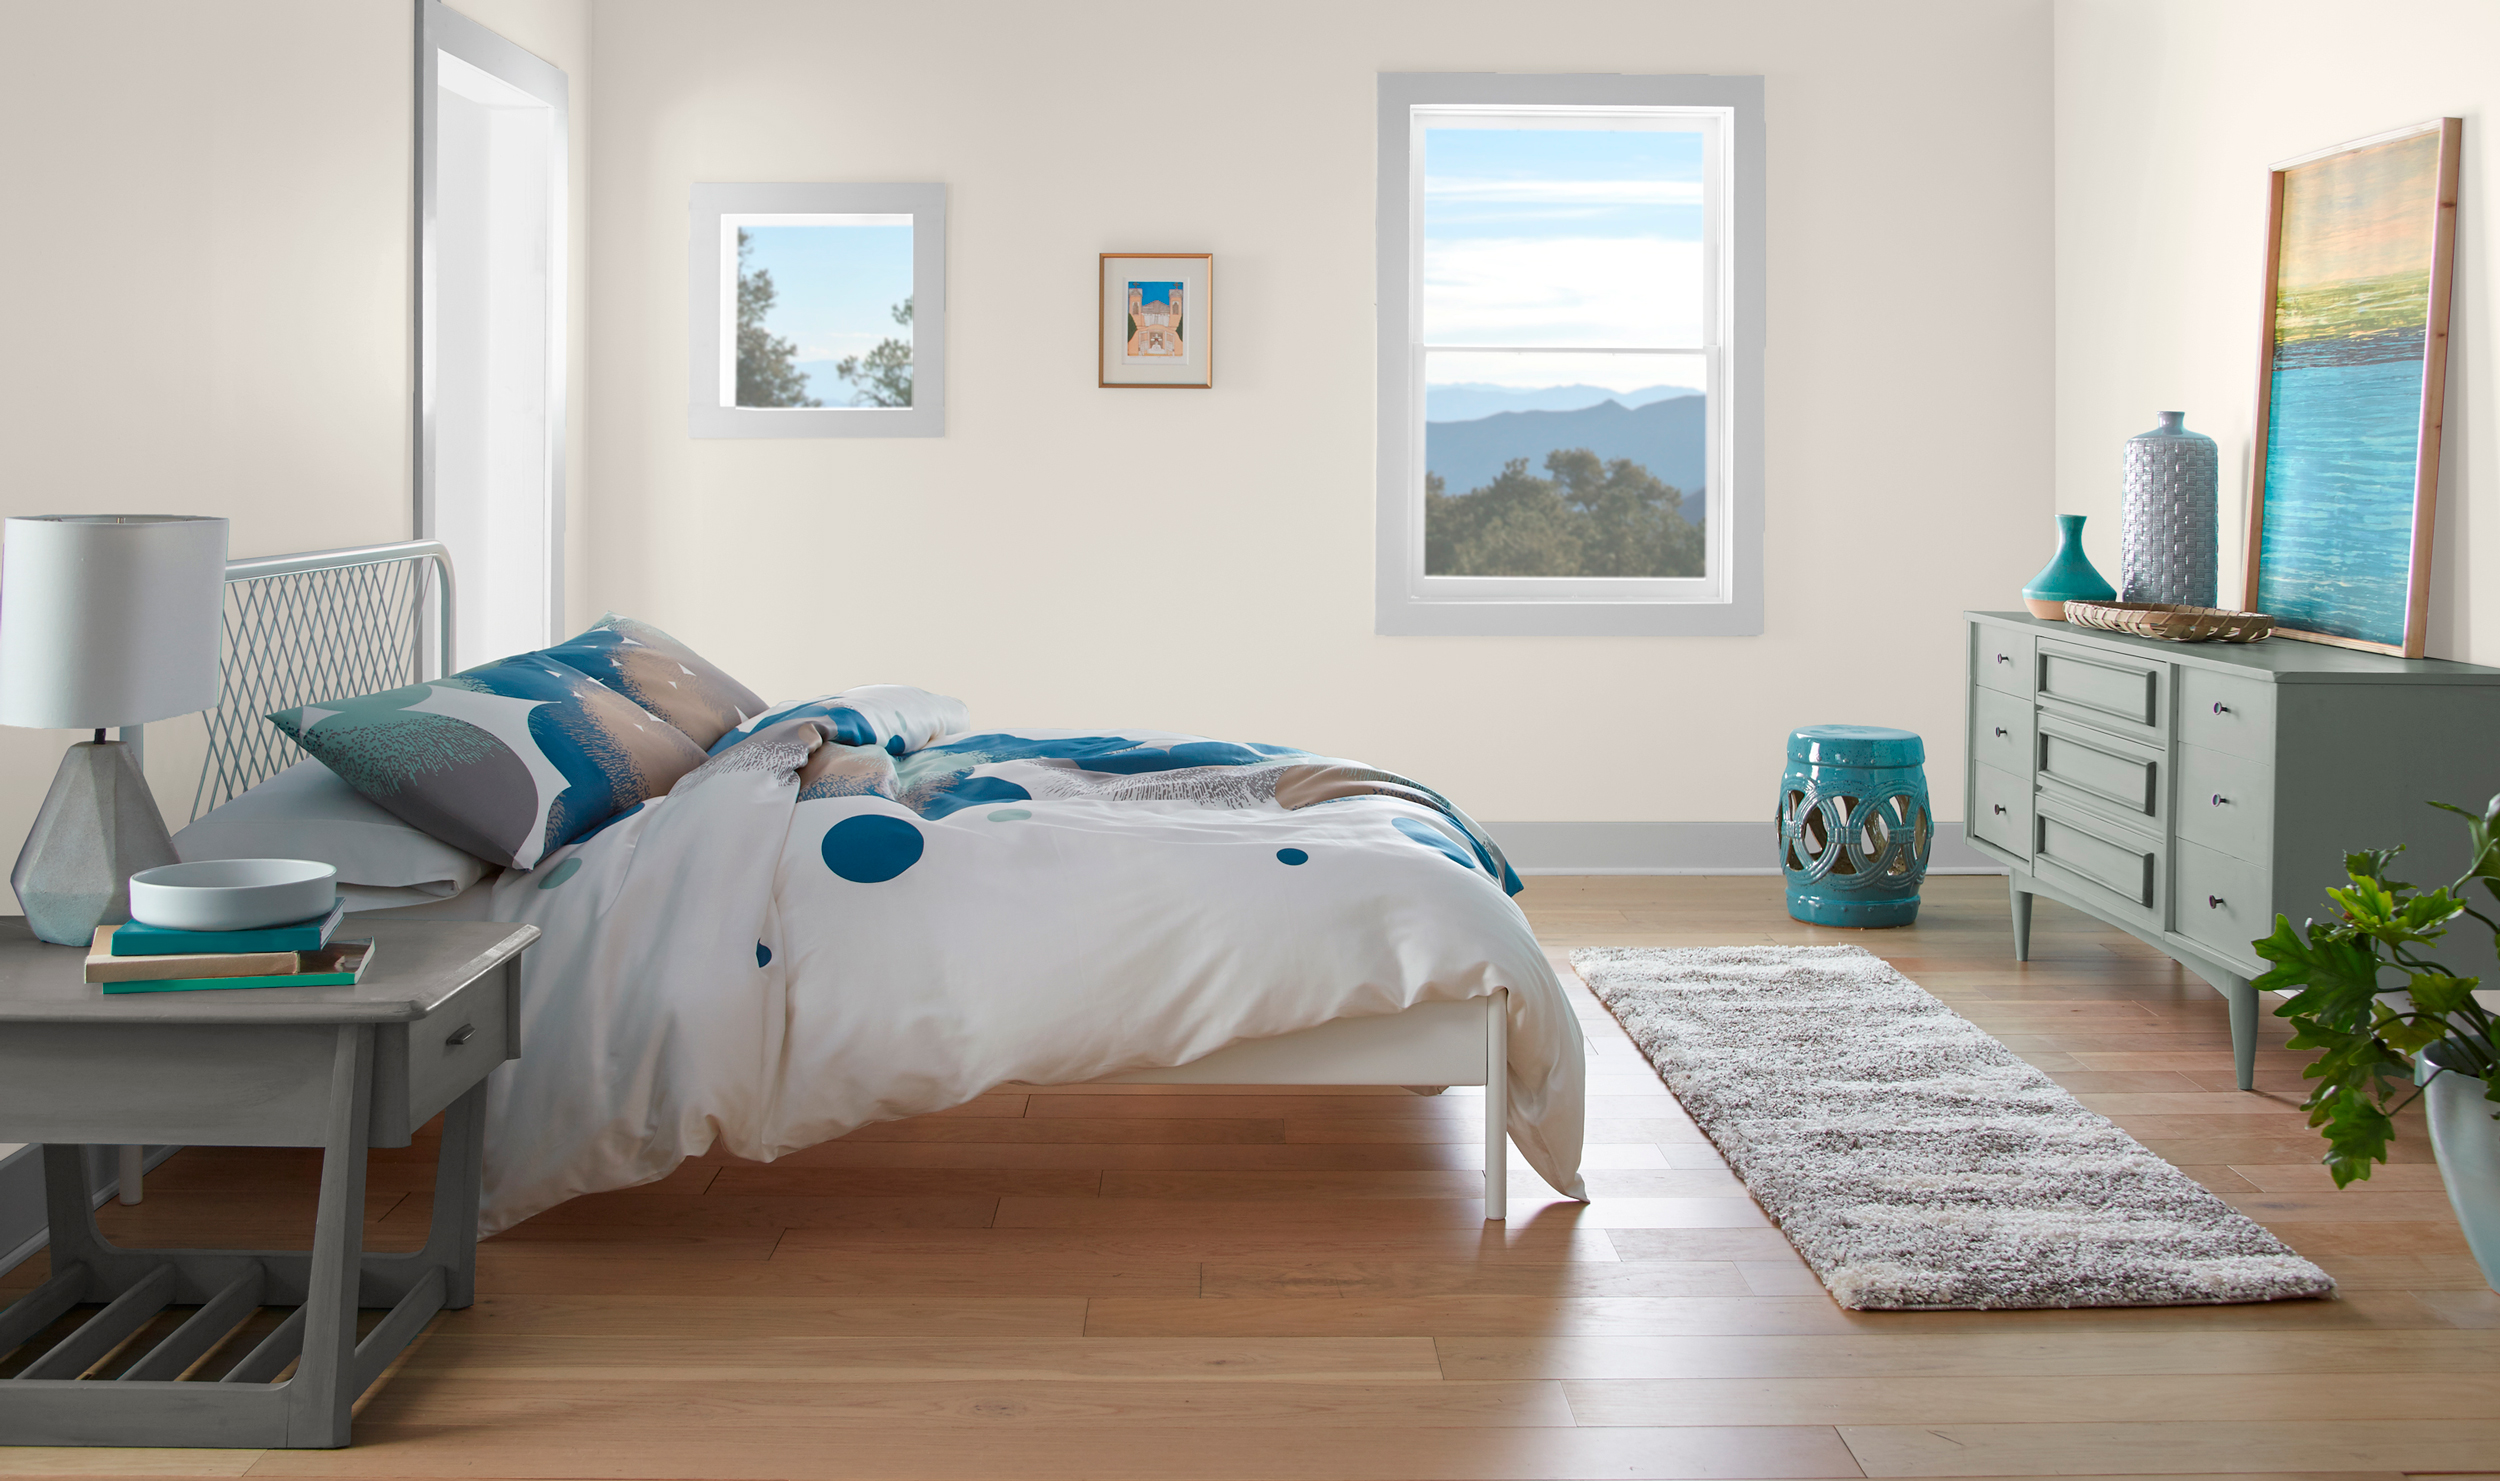
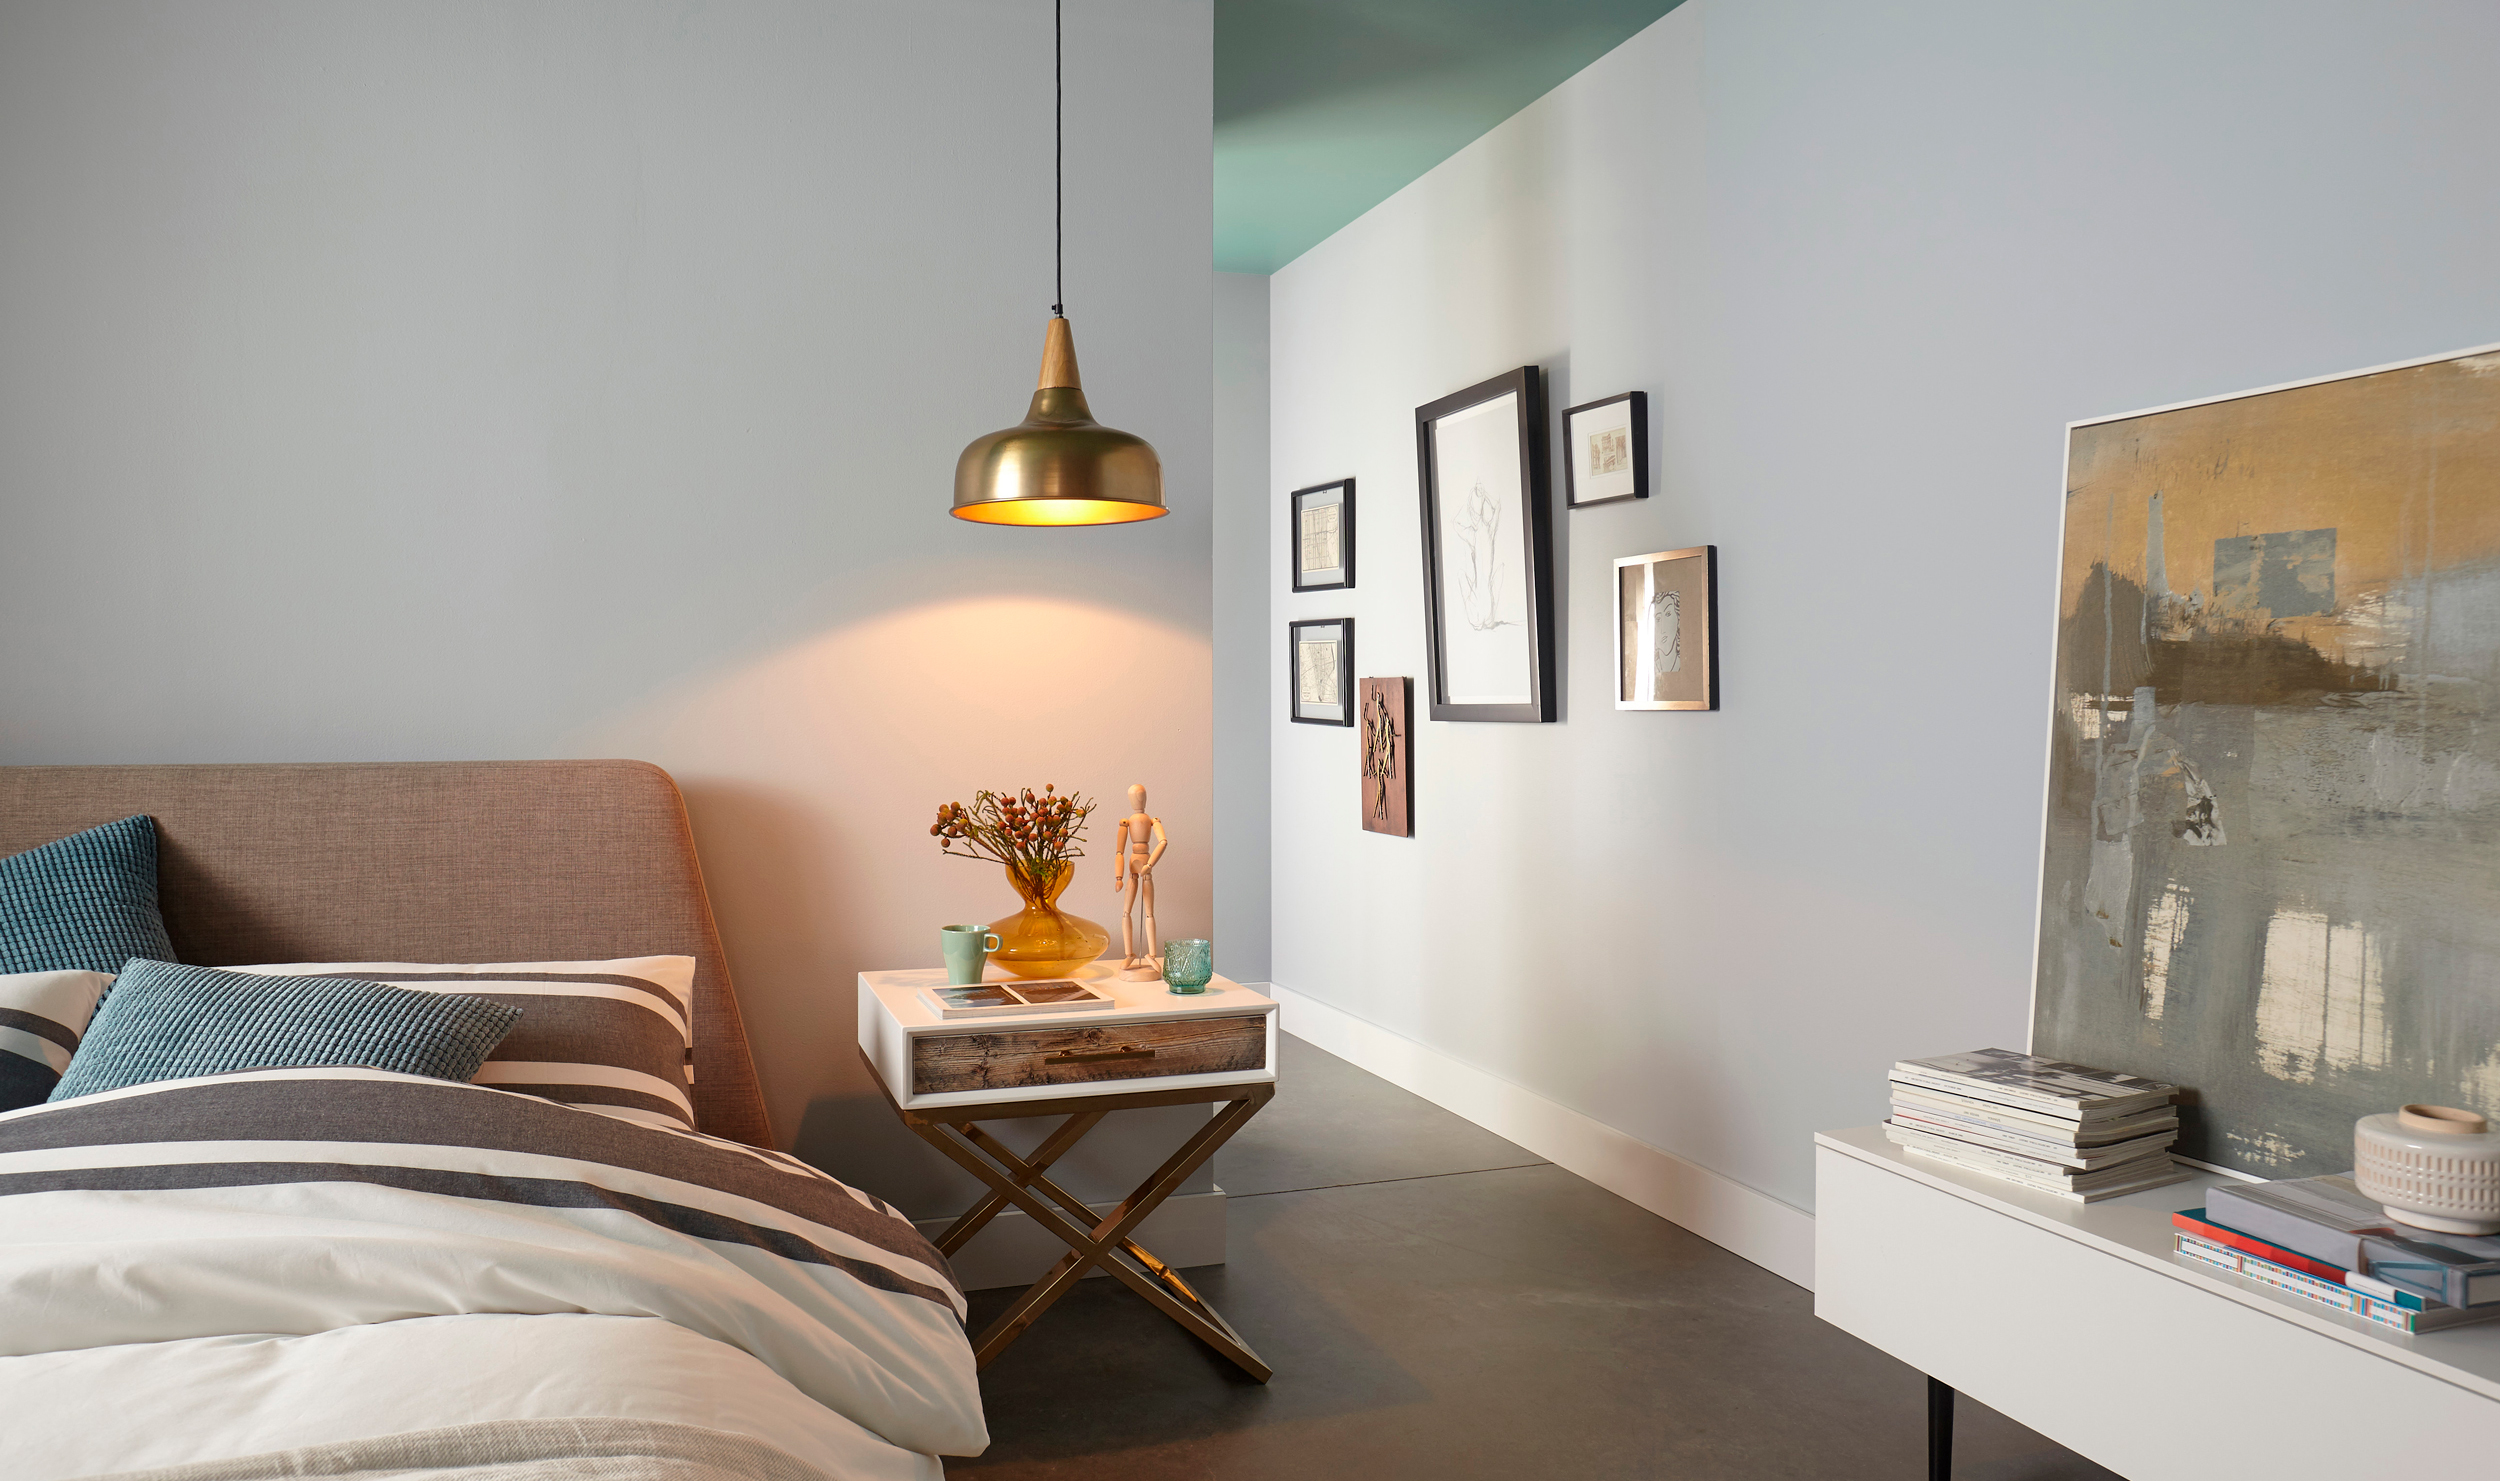
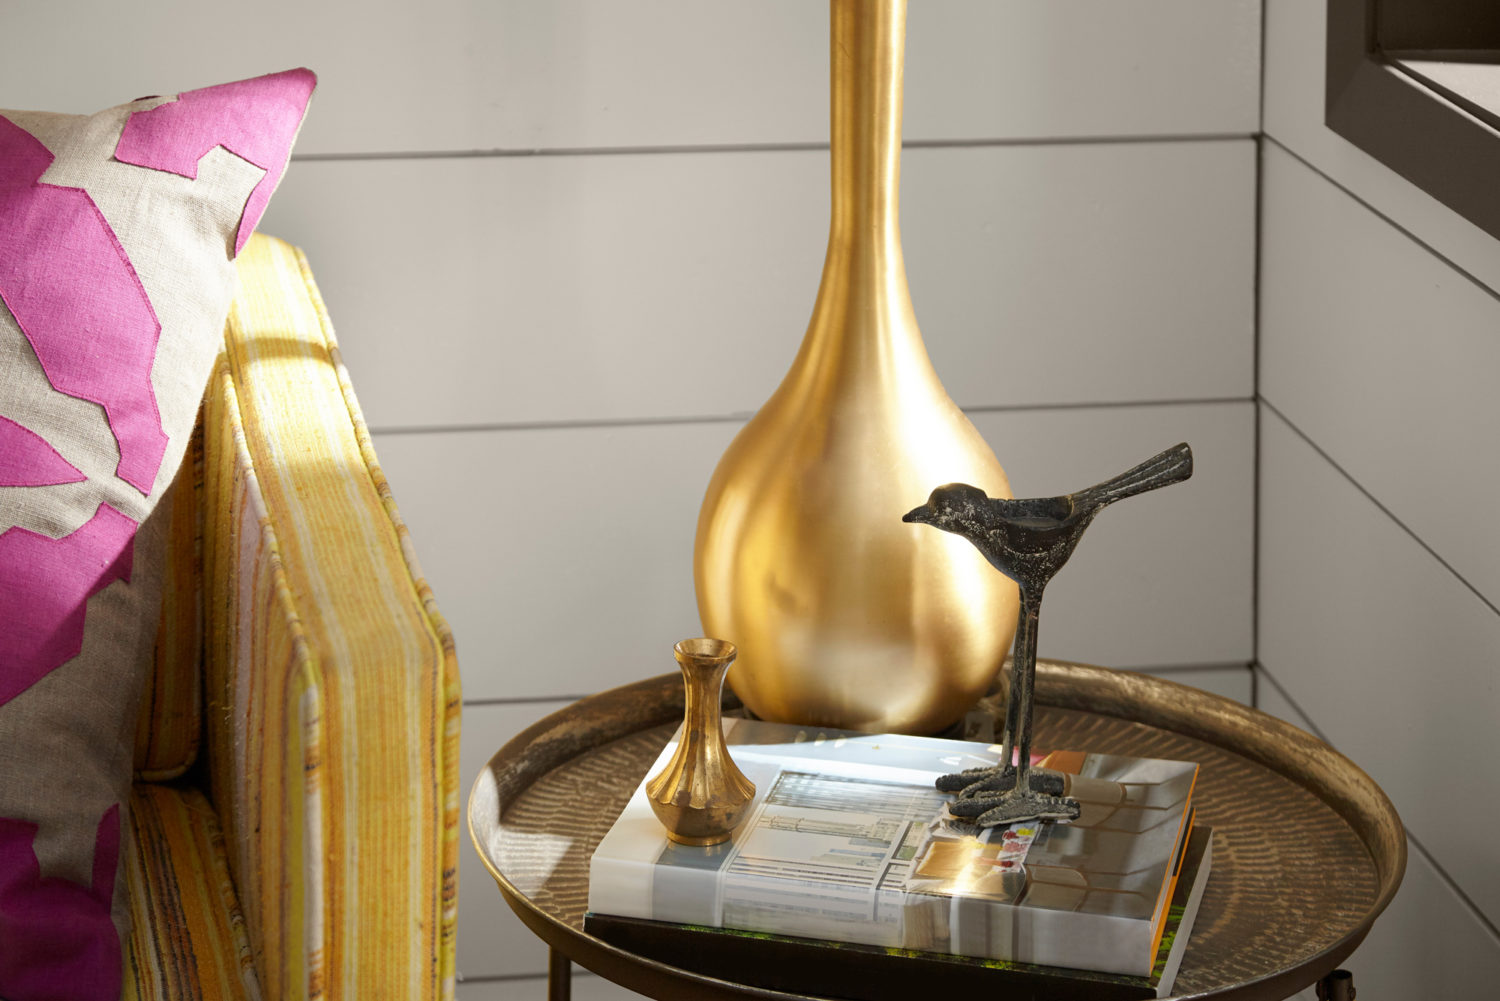
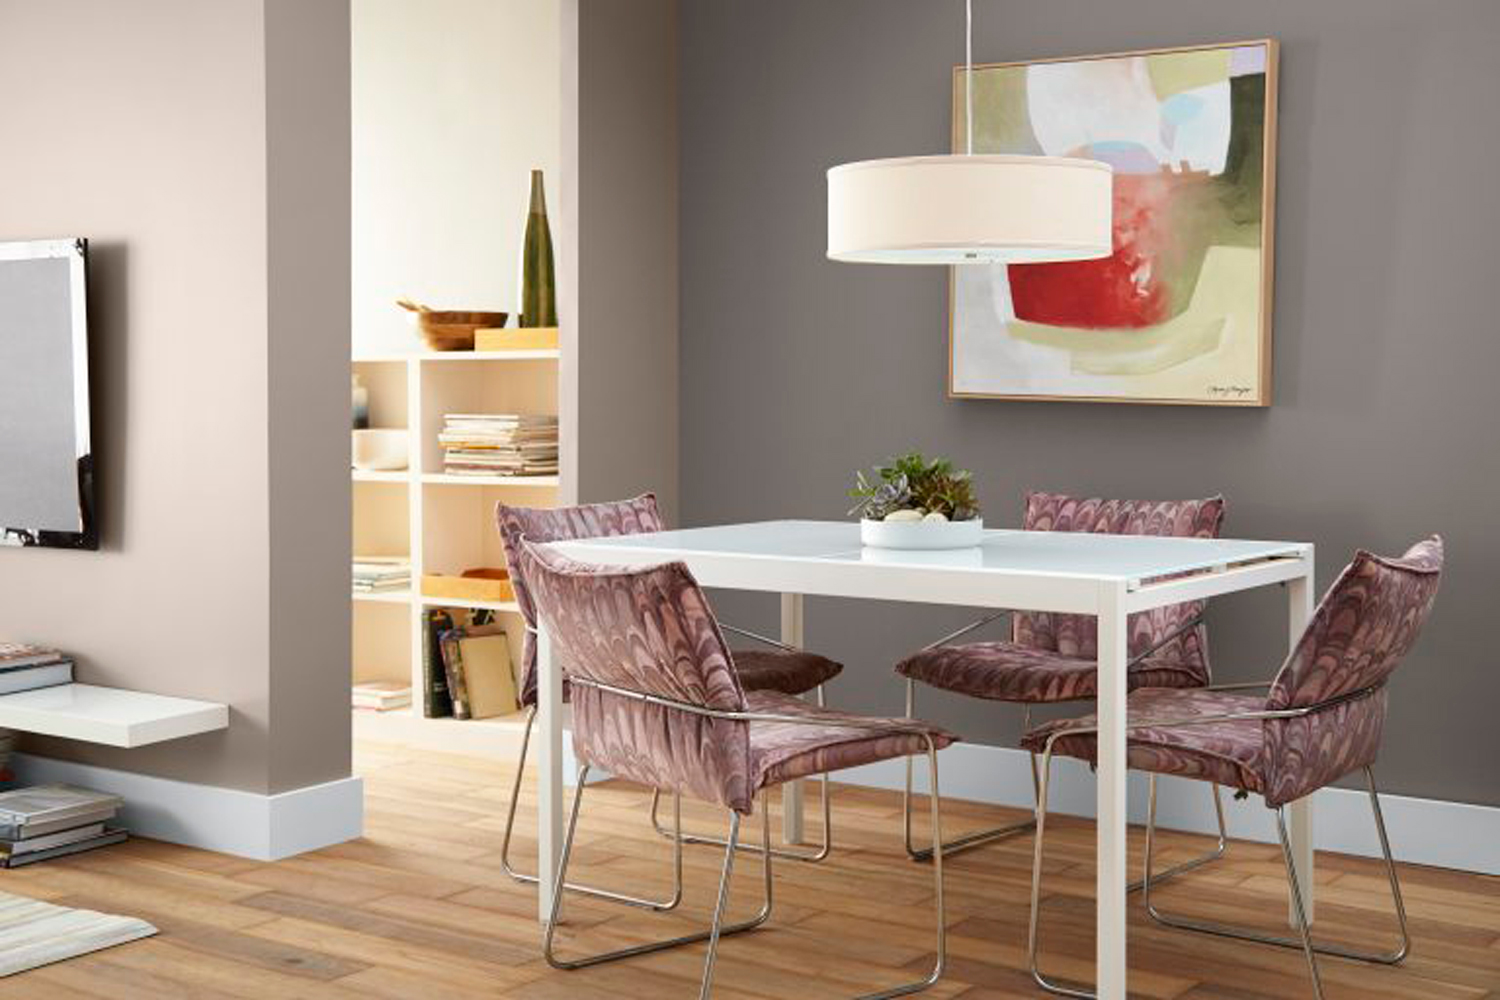
In a bedroom, White Modern creates a sense of comfort and openness with a contemporary edge. It pairs easily with grey and light-moss colored furniture and is complemented by soft ceramic accessories. A true white trim on doors and windows pops against White Modern walls and draws the eye to the world outside, subtly bringing the outdoors in.
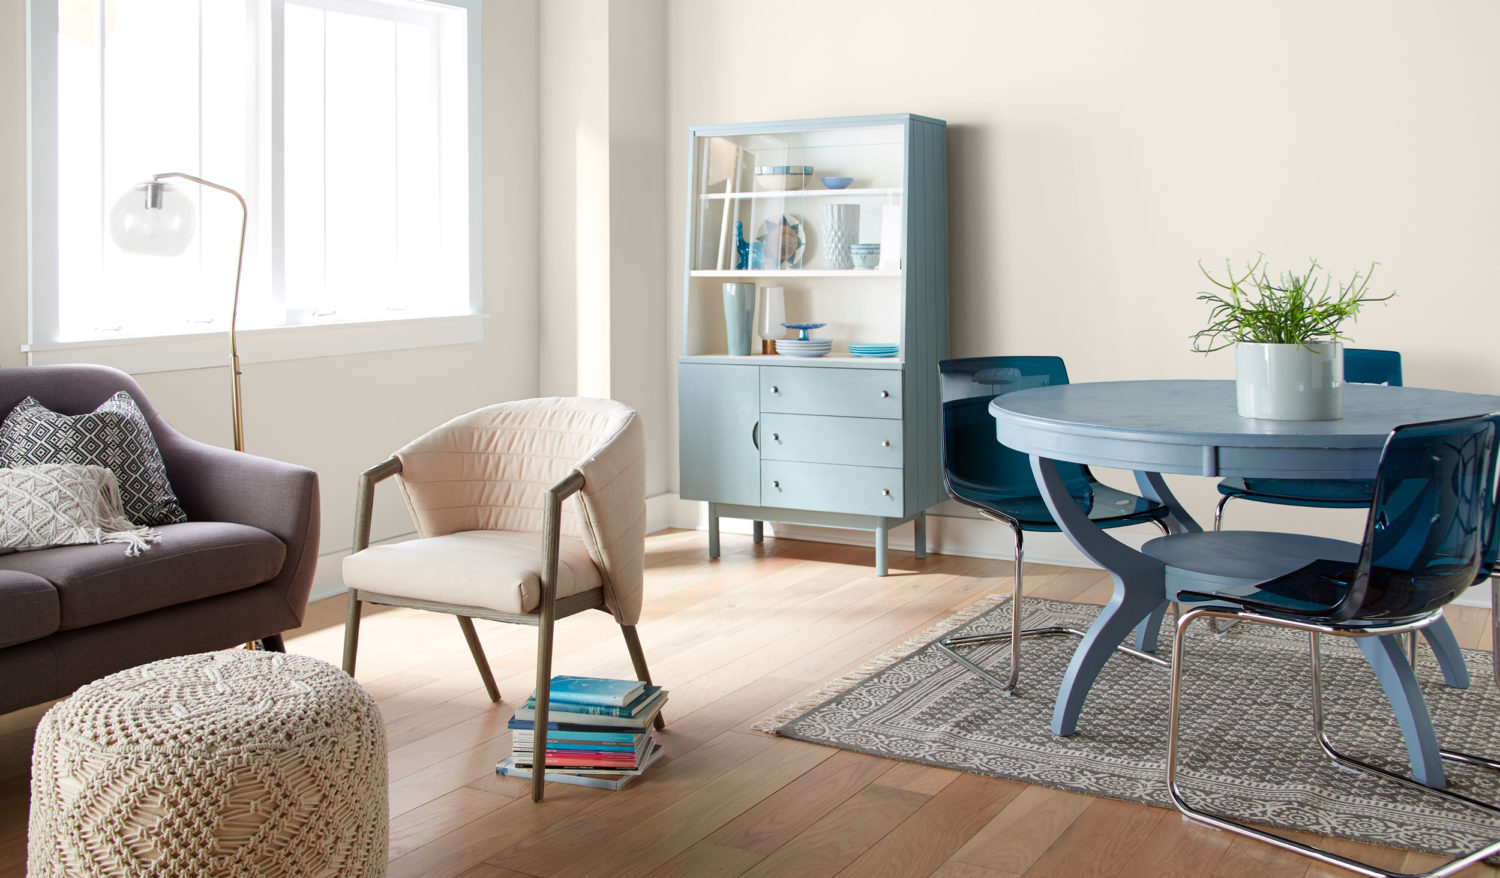
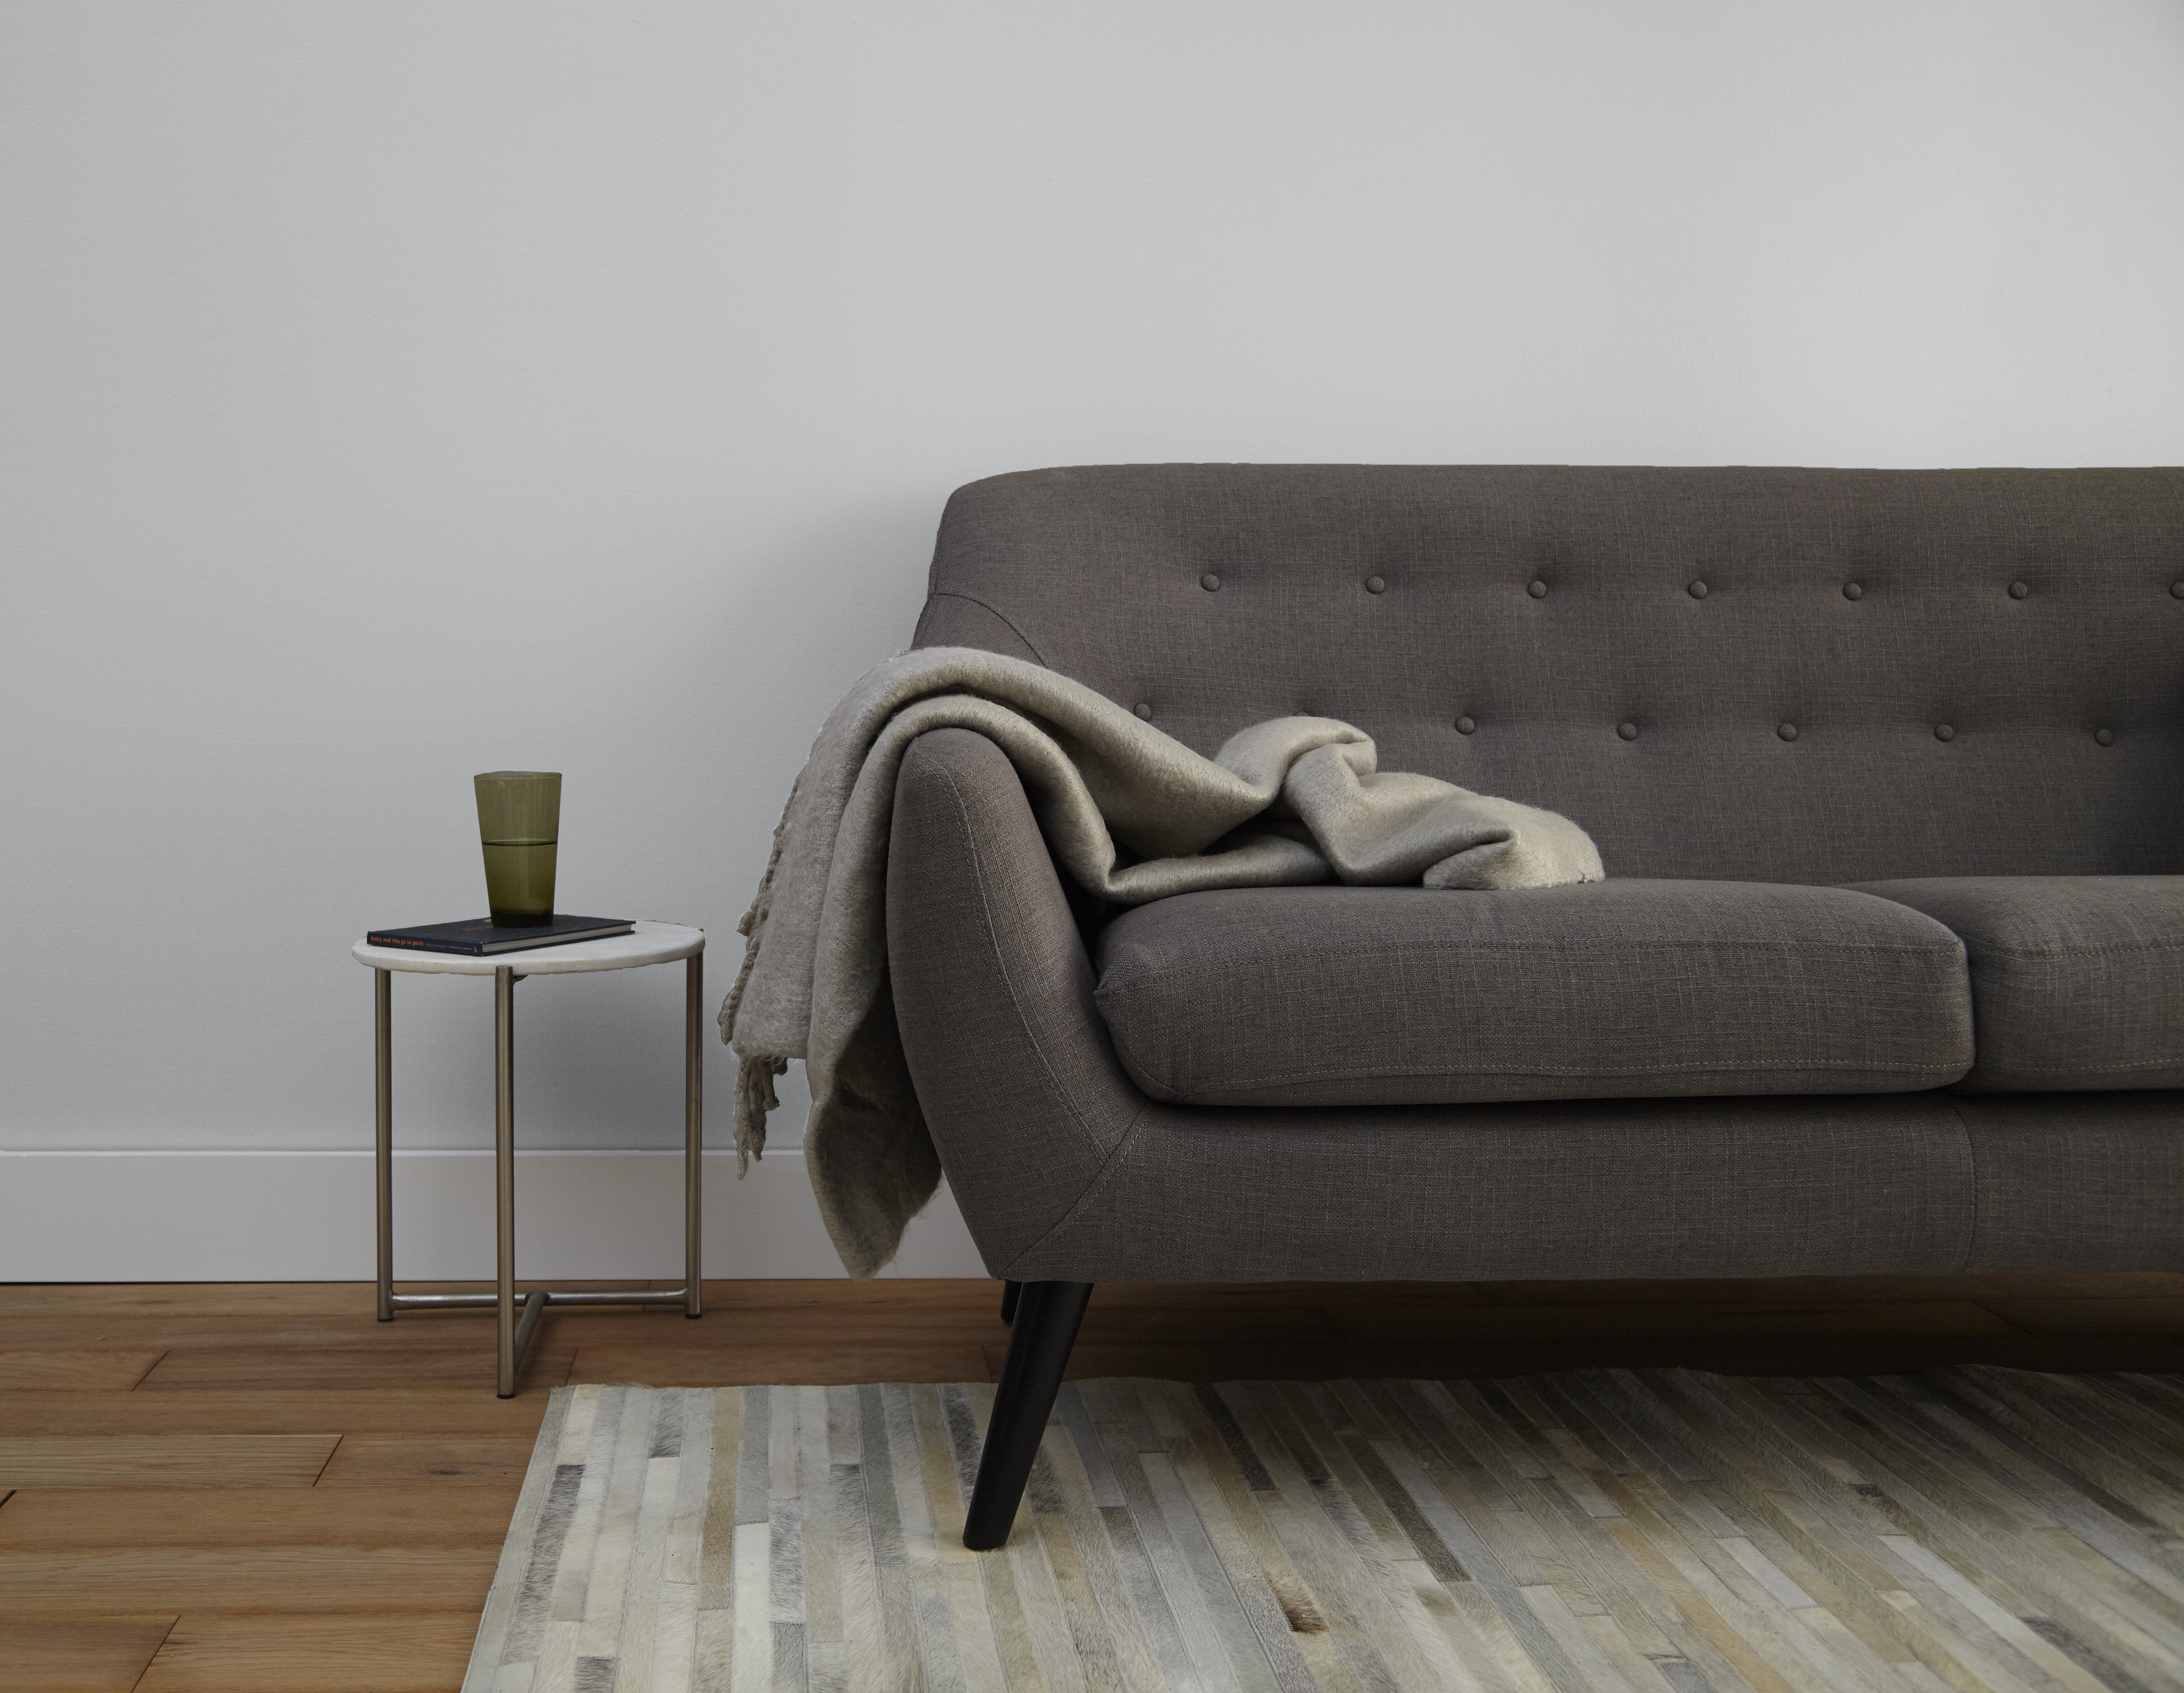
White Modern creates the perfect backdrop in any space and coordinates well with a range of furniture and décor pieces. A mid-tone blue dining table and light blue hutch are a natural complement to White Modern walls and work together to create a distinct dining space next to a warm living area with a grey-brown sofa and neutral accessories.
Looking for a few other whites to try? Ultra Bright White is our whitest white and provides a crisp and clean look. For a silky neutral, Champagne White is a light cream with the perfect hint of peach.

White Modern

Ultra Bright White

Champagne White
RELATED ARTICLES

get inspired:
FOLLOw us:
@kilzbrand
SHOP
PRODUCTS
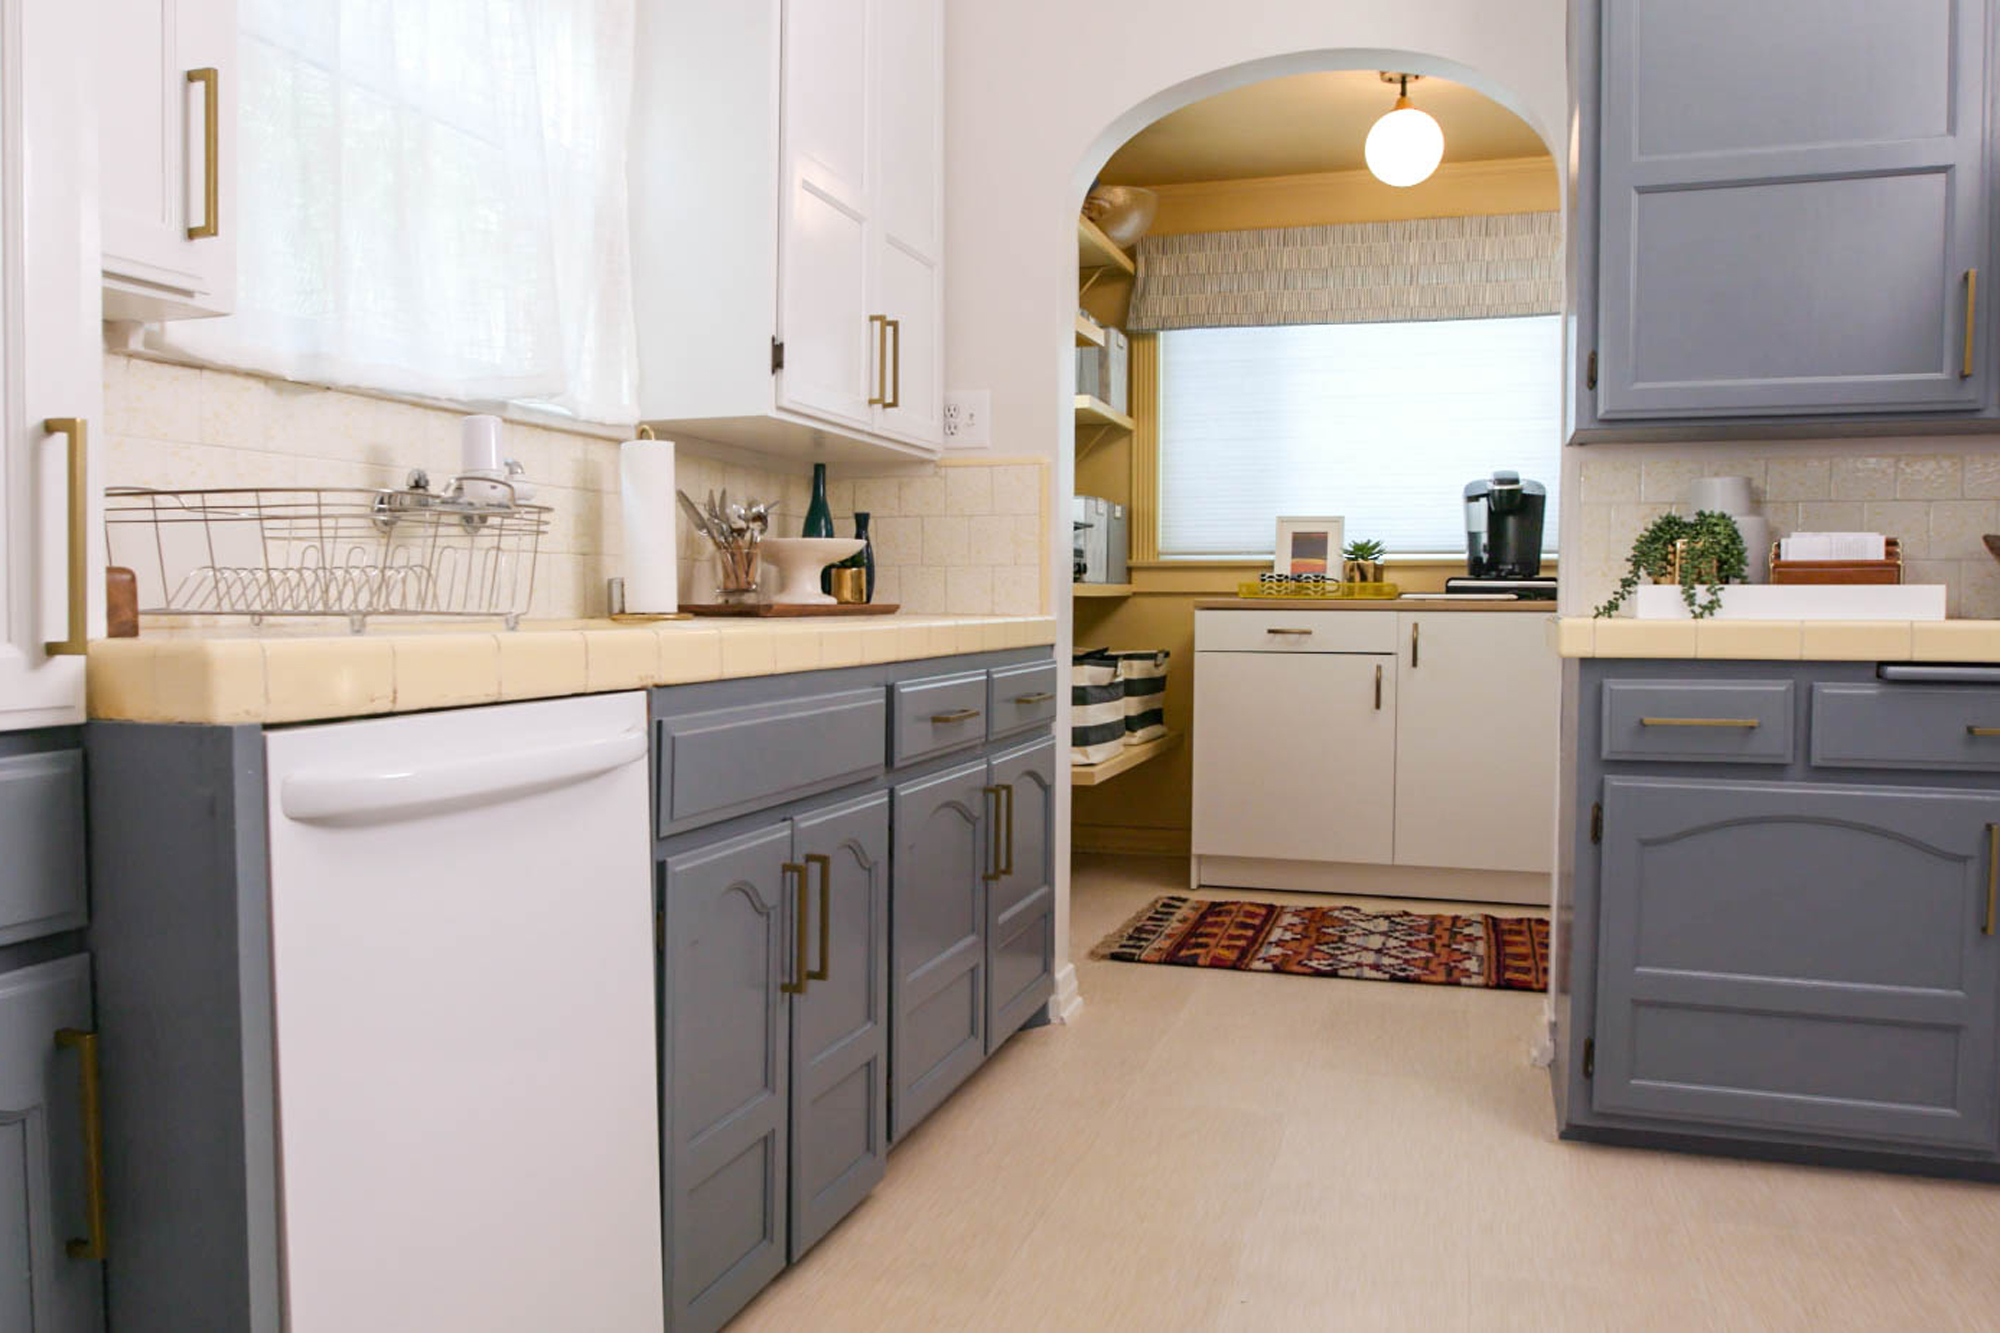
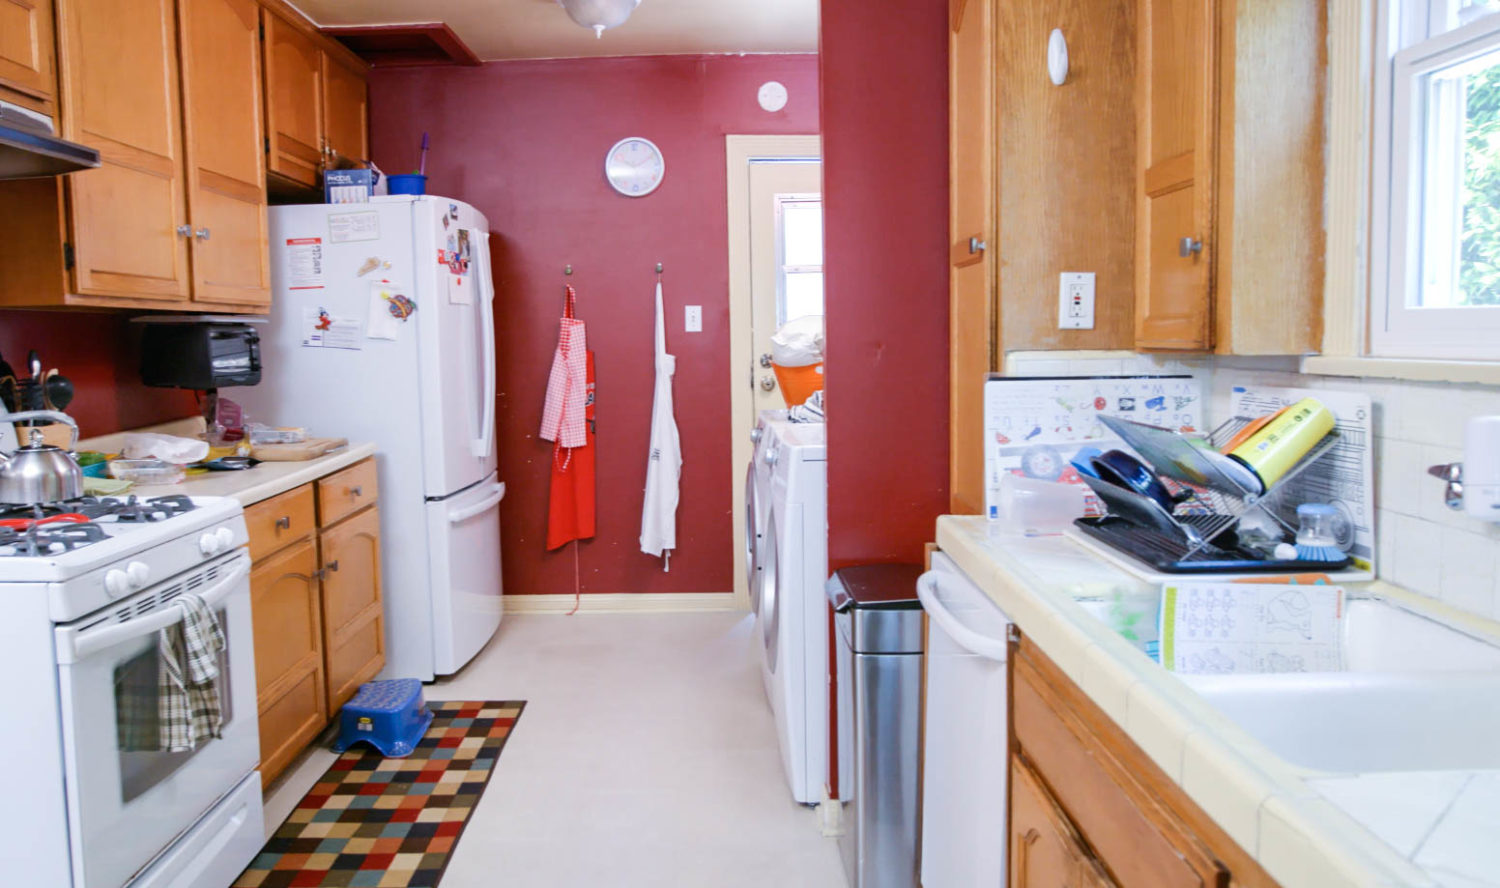
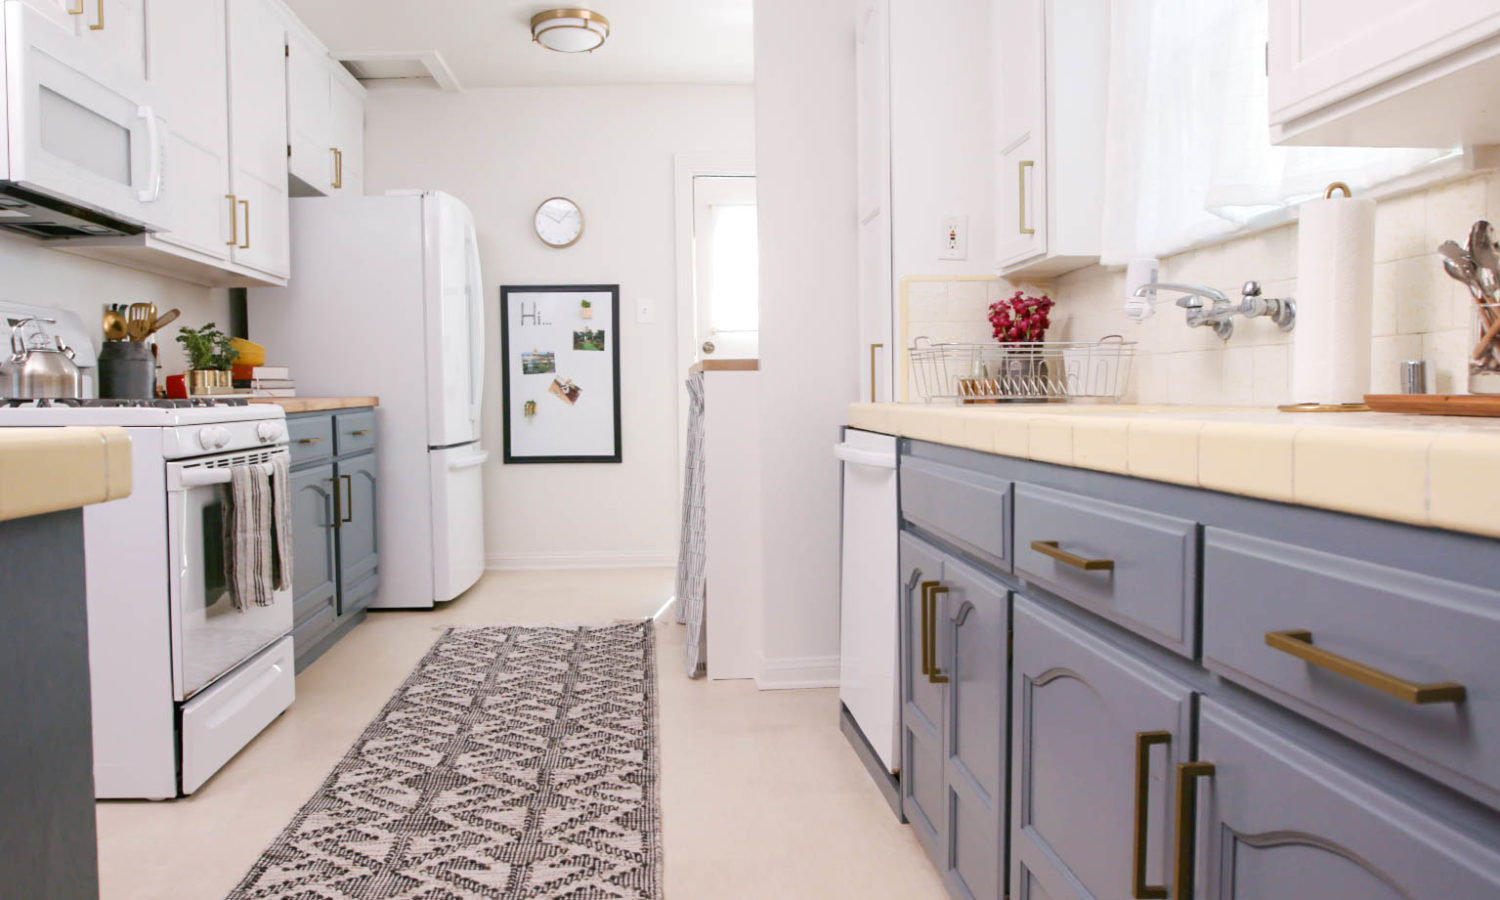
Trendy Two-Toned Kitchen Cabinet Refresh
September 4, 2018Once the space is cleared, remove the cabinet drawers and doors for sanding. Applying a coat of KILZ® 2 Latex primer achieves two important goals: it blocks out stains and provides the ideal surface for new paint colors to adhere to the wooden drawers. Perform the same prep steps on kitchen walls.
When painting cabinetry, choose a strong, semi-gloss latex paint that holds up to the rigors of daily use in a high traffic area. Since we’re going for a lively, two-toned look, we’ve chosen KILZ® TRIBUTE® in a periwinkle blue called Old Lamppost and contrasted it with KILZ® TRIBUTE® in Contemporary White.
Add some additional color punch with wild, graphic patterns on curtains or linens and suddenly your kitchen is a fun, inviting space perfect for entertaining. New knobs and pulls breathe new life into the cabinets once they’re replaced, and a simple pair of curtains cleverly camouflages the laundry appliances. An inexpensive set of new accessories tops off our slick new kitchen look, and the finished product is now cozy, clean and welcoming.

Old Lamppost

Contemporary White
RELATED ARTICLES
get inspired:
FOLLOw us:
@kilzbrand
SHOP
PRODUCTS
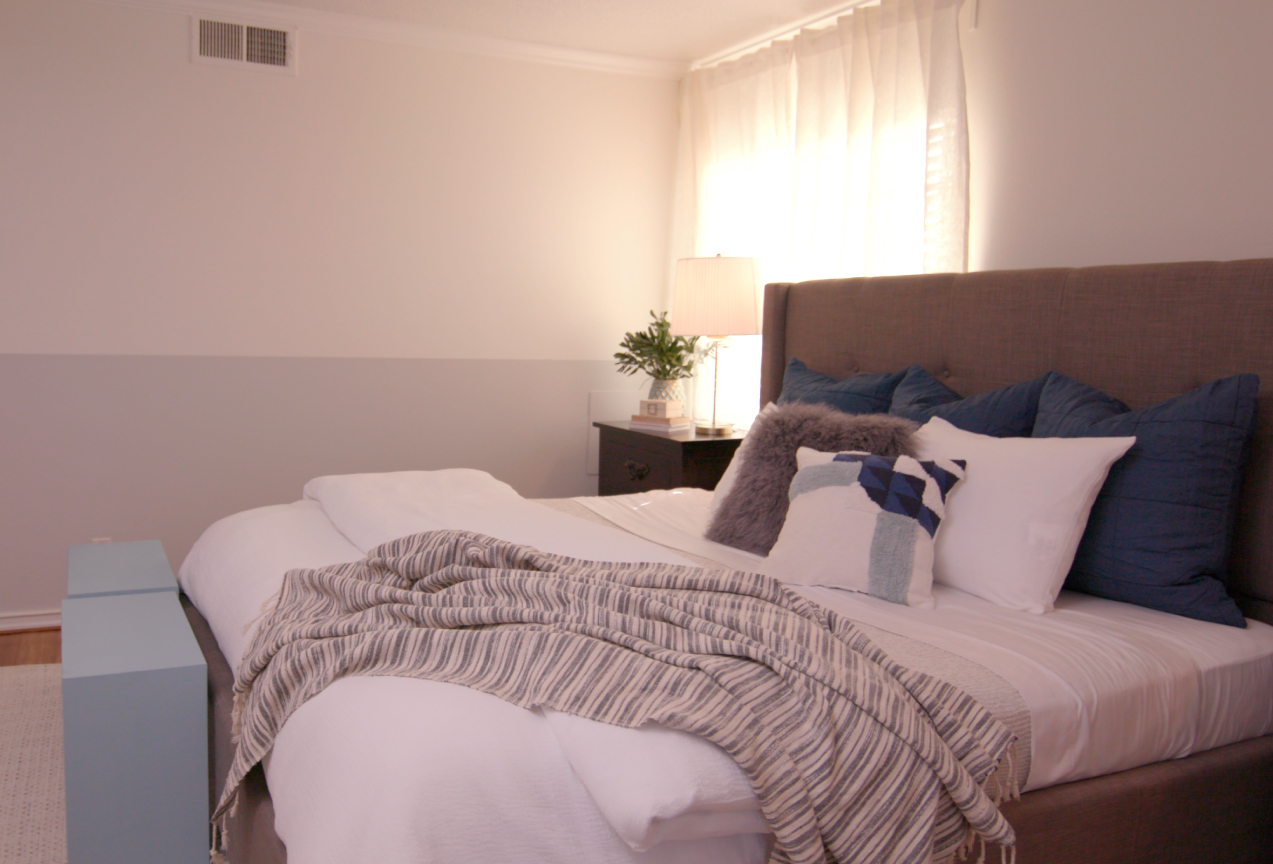
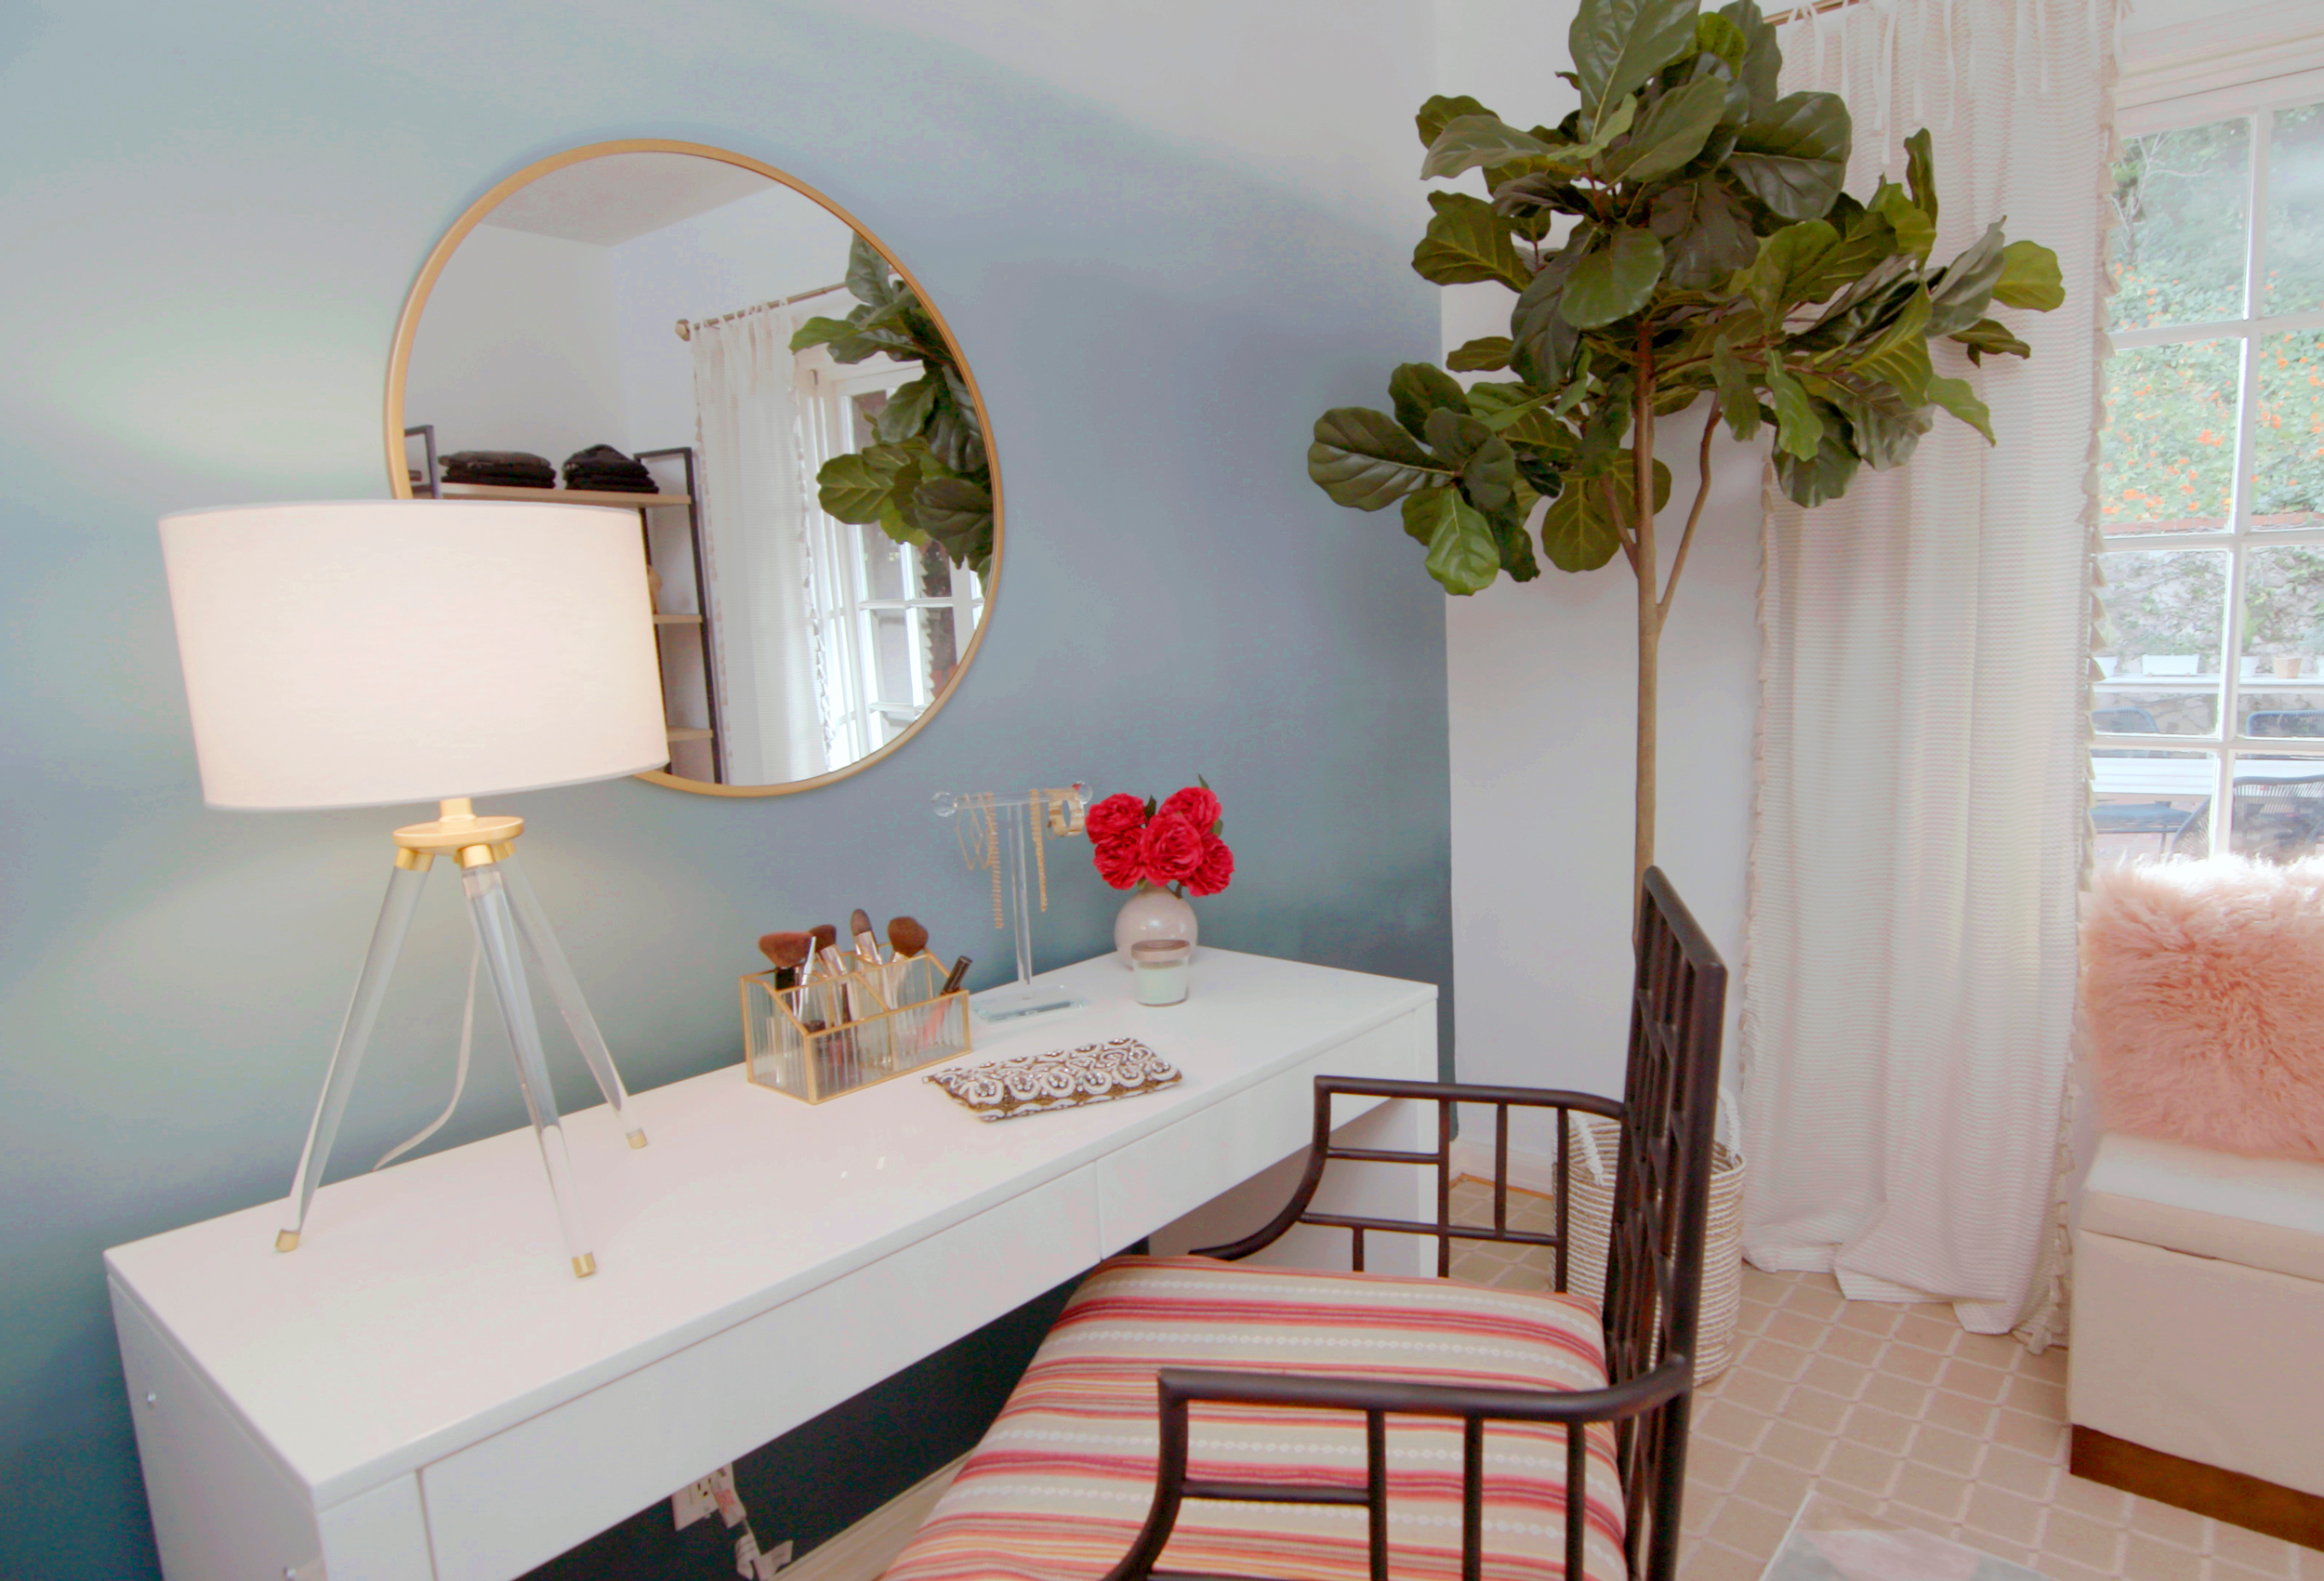
Master Bedroom Refresh
August 14, 2018A ready-to-use neutral creates the ideal base for your transformation. In this case, a coat of KILZ TRIBUTE® Paint and Primer properties in One—we’ve used a color called Architectural White here—leaves little guesswork and effort because it covers all four walls with one coat. After that, the magic happens.
To add a pop of contrast and sophistication, we’ve elected to paint the bottom half of the walls in a slightly contrasting neutral—another KILZ TRIBUTE® hue called Flying Dove. This combined neutral palette creates the effect that the ceilings are higher than they are, opening up the bedroom and making it feel more spacious.
But our weekend bedroom transformation isn’t apparent only on the walls; a furniture refresh is in order, too. KILZ® CHALK STYLE PAINT upcycles fixtures with a soft finish, creating the perfect accent piece for our tranquil, welcoming bedroom refresh.

Architectural White

Flying Dove

Pale Emerald
This combined neutral palette creates the effect that the ceilings are higher than they are, opening up the bedroom and making it feel more spacious.
RELATED ARTICLES
get inspired:
FOLLOw us:
@kilzbrand
SHOP
PRODUCTS
Ombré Wall Dressing Room Transformation
July 19, 2018Let’s be real: a small closet is hardly enough space for a modern professional woman to store her wardrobe and shoes (OMG, the shoes!). So what better way to make good use of a spare bedroom—maybe one that currently serves as a messy resting place for dirty laundry—than to turn it into a hip, functional dressing room. And the best part? This dramatic transformation can be completed in just one weekend.
After emptying the room, the first order of business is picking a new wall color. While this process was once a tedious one, now you can start to search for your perfect colors online. In this case, our designer has chosen three ocean-inspired KILZ® TRIBUTE® paint colors: ULTRA BRIGHT WHITE (TB-01), TRUE TEAL (TB-59) and OCEANS DEEP (TB-60) to achieve this ombré accent wall look. Check out the video below to learn some techniques for this application!

Ultra Bright White

True Teal

Oceans Deep
Project Checklist: (All products available on Amazon)
- KILZ® TRIBUTE®
- Water Spray Bottle
- Mixing Stick
- Paint Roller Tray
- KILZ MASTER COLLECTION Foam Mini Paint Roller Cover
- KILZ Master Collection Wire Paint Roller Frame
- KILZ MASTER COLLECTION Handcrafted Nylon-Polyester Blend Angle Sash Paint Brush
- Drop Cloth
- Painter’s Tape
- Measuring Tape (to section off Ombré quadrants)
- Pencil
Feather together with a dry brush. Spray water to keep things moist. Keep going until you reach ombré perfection.
RELATED ARTICLES
get inspired:
FOLLOw us:
@kilzbrand
SHOP
PRODUCTS
Winchester Green
July 2, 2018Weeping Willow TB-77 is a saturated lake green with a shaded undertone. Weeping Willow cabinets add healthy energy while Bay Fog adds a simple and clean look. This combination will enhance your sense of peace and comfort that will allow a true escape after a long day. Transform your home to achieve a serene ceiling, calming coolness and tranquil escape. Click here to try a sample of this color today!
Another beautiful tone that compliments this month’s color is, Bay Fog, a calming cool gray with a slight dusty blue undertone. This color adds tranquility and simplicity to a room making it the perfect backdrop. Use Cool Fog with Weeping Willow to add a serene touch of color.
Weeping Willow
RELATED ARTICLES
get inspired:
FOLLOw us:
@kilzbrand
SHOP
PRODUCTS
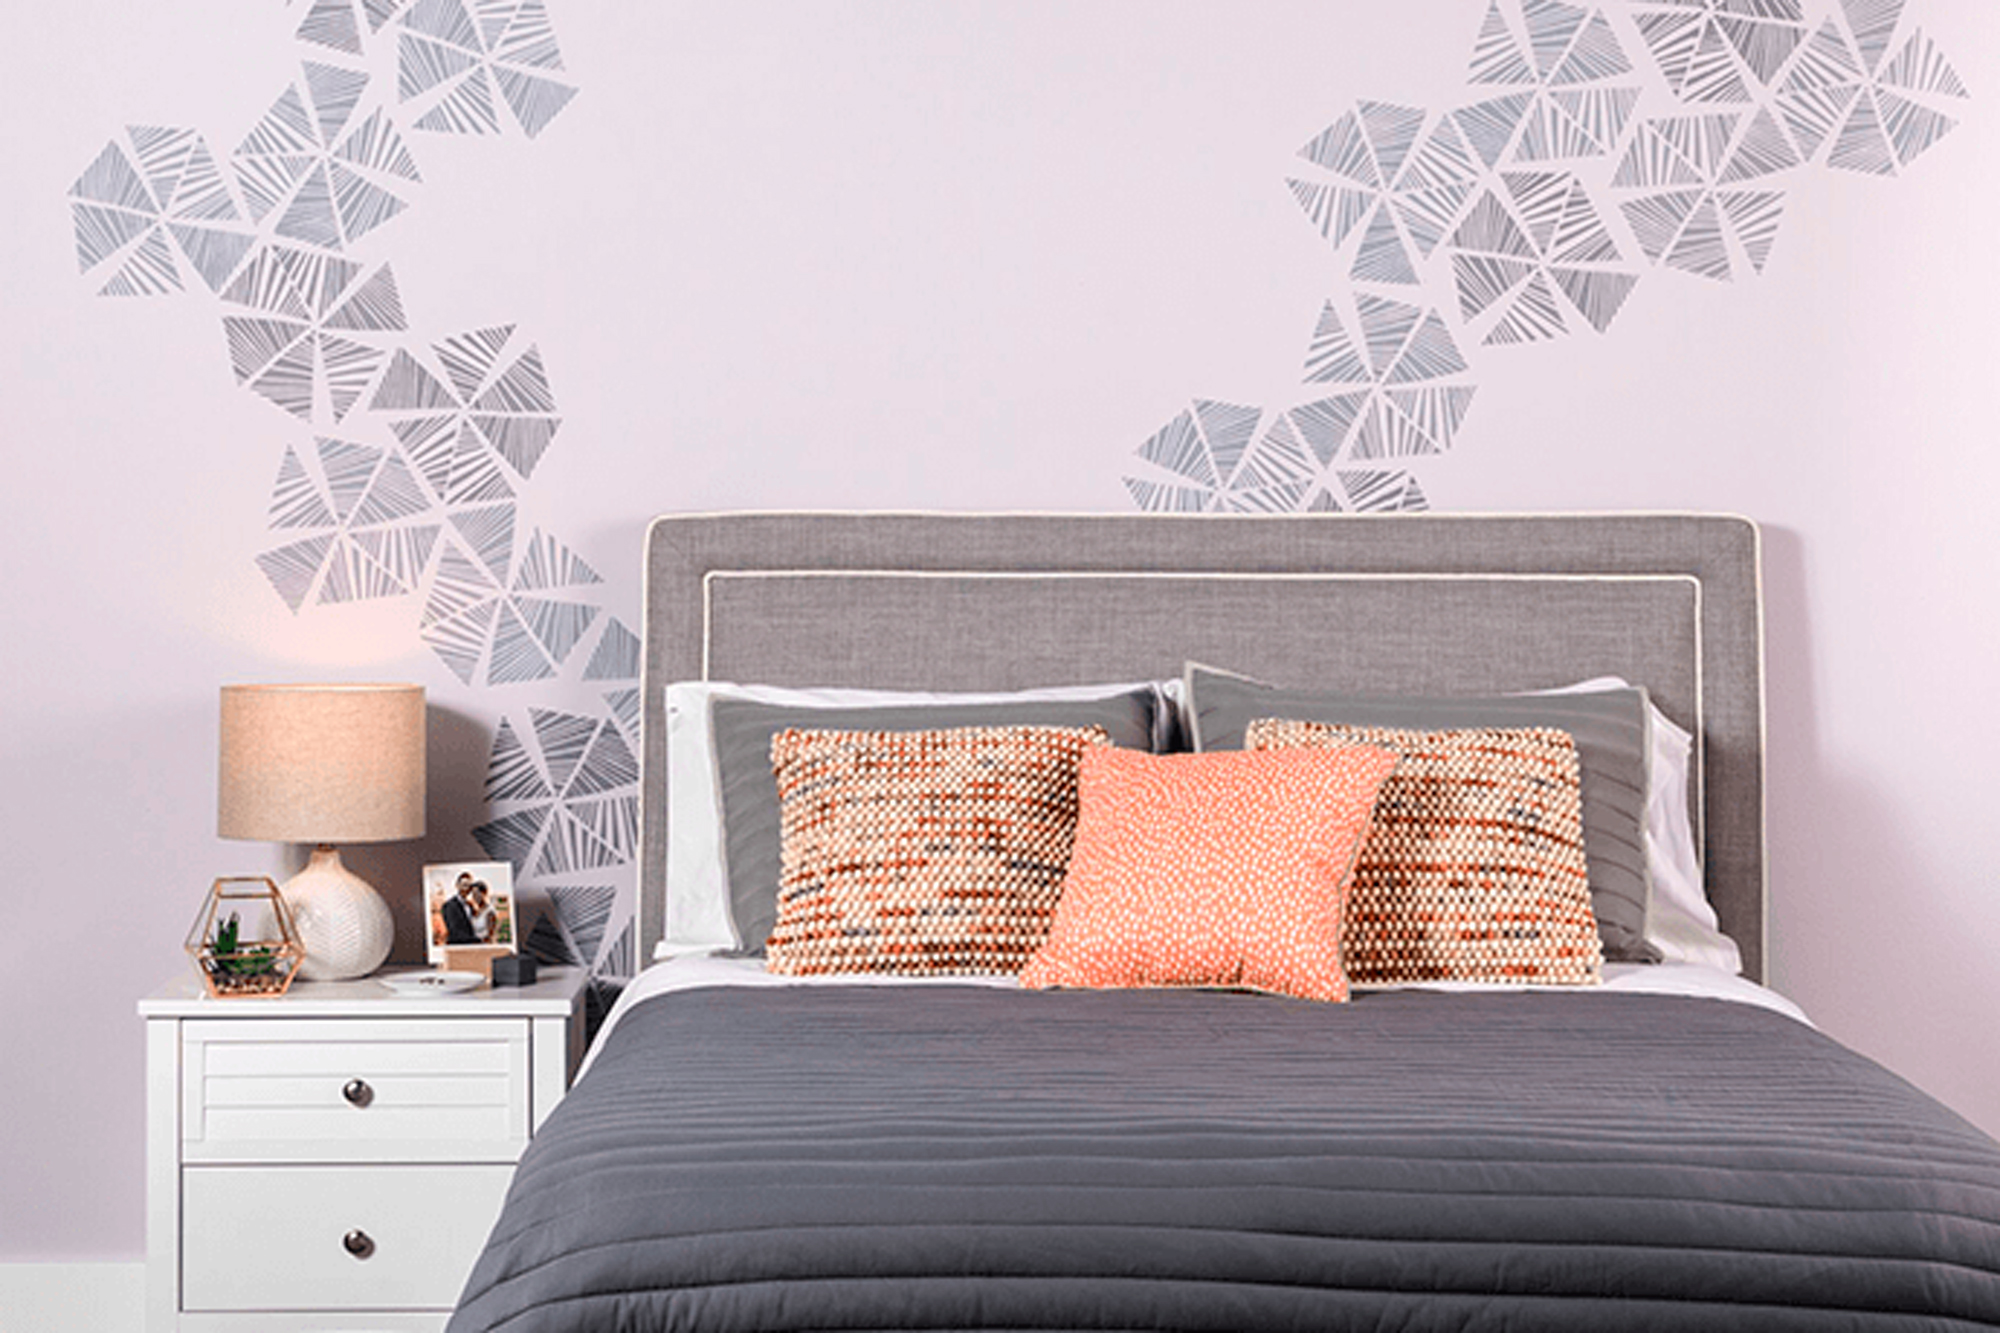
Stencil Wall Accents
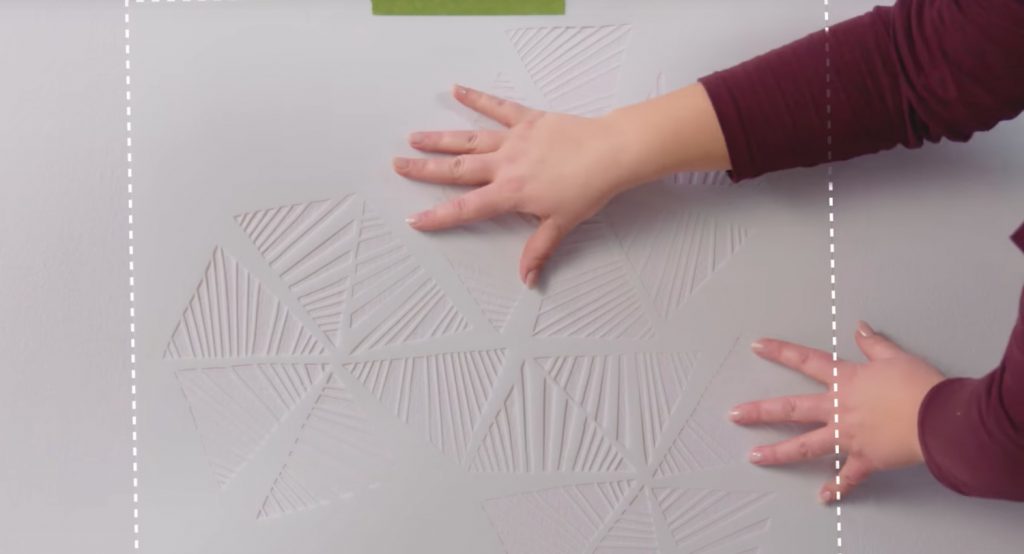
December 8, 2017For this project we used our KILZ COMPLETE COAT® Paint and Primer in One in neutral based colors to transform this plain master bedroom wall into the perfect statement. Although we chose more muted colors for this specific space, you could always go bolder, repeating more (or less) of the stencil patterns to accomplish a louder more extroverted look. The great news is that the stencils come in all types of styles leaving the opportunities virtually endless when it comes to which type of look you want to create.
Mix and match! Using the stencil patterns behind or above furniture pieces is a nice way to really make them feel custom to the room. You could also pull stencils in order to frame artwork or simply add extra dimensions to your décor. The color of the stencil here subtly pulls from other colors in the room. In this case, the tone of the stencil ties in with the bedding and comforter set. We could have also opted for an orange tone to really make the accent pillows pop. This could be a nice effect in a living room space, or even in a dining room above a serving unit.
This project is simple! See below for a full tutorial about how you can achieve this look in your space. Loving it? Explore our full KILZ COMPLETE COAT® palette here.
Project Checklist:
- KILZ COMPLETE COAT® Paint and Primer in One
- Stencil
- Stencil Brush
- Painter’s Tape or Spray Adhesive
- Paper Towels
- Can Key
- Drop Cloth
- Stir Stick
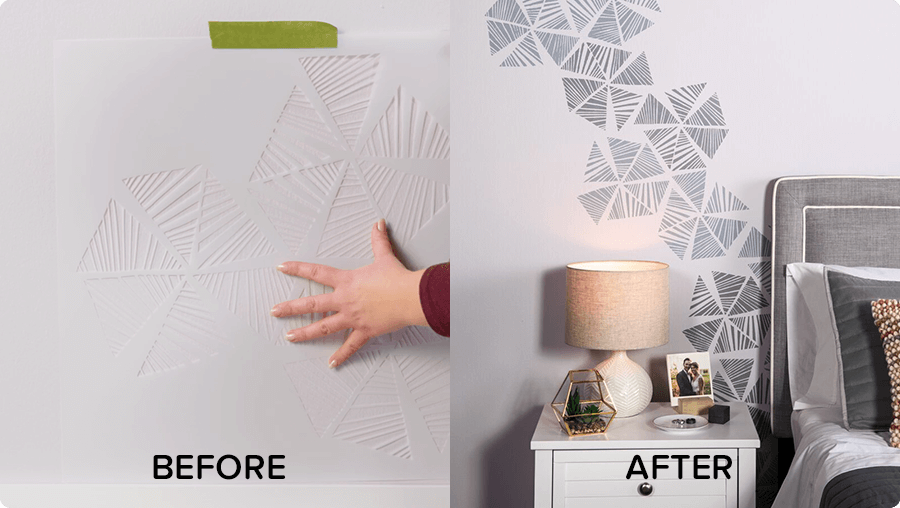
Step 1:
Determine location of pattern to be stenciled on wall.
Step 2:
Stir paint to make sure it is mixed.
Step 3:
Spray stencil with adhesive or secure stencil with painters tape.
Step 4:
Level and then secure your stencil on the top middle of the wall with painter’s tape.
Step 5:
Stencil the pattern by lightly dabbing the paint until the areas are fully covered.
Step 6:
Move on to the second repeat of the pattern by following the registrations that are included in the stencil. These registration marks help you move and place the stencil along the wall perfectly every time!
Step 7:
Allow 2 hours dry time. Then call your best friend and invite them over for coffee because you’re all done.
 Pro-tip: Make sure the stencil is secure before you add paint.
 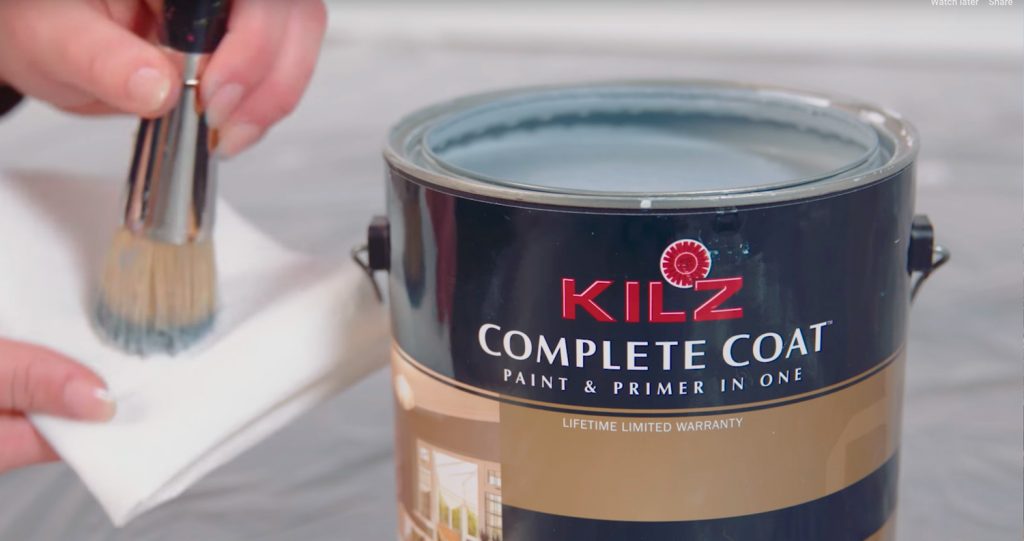 Pro-tip: Load your brush with paint and off-load most of the paint onto a paper towel. Using too much paint when stenciling is the number one reason for bleeding, so make sure to off-load excess paint before starting on the wall.
Mix and match! Using the stencil patterns behind or above furniture pieces is a nice way to really make them feel custom to the room.
RELATED ARTICLES
get inspired:
FOLLOw us:
@kilzbrand
SHOP
PRODUCTS
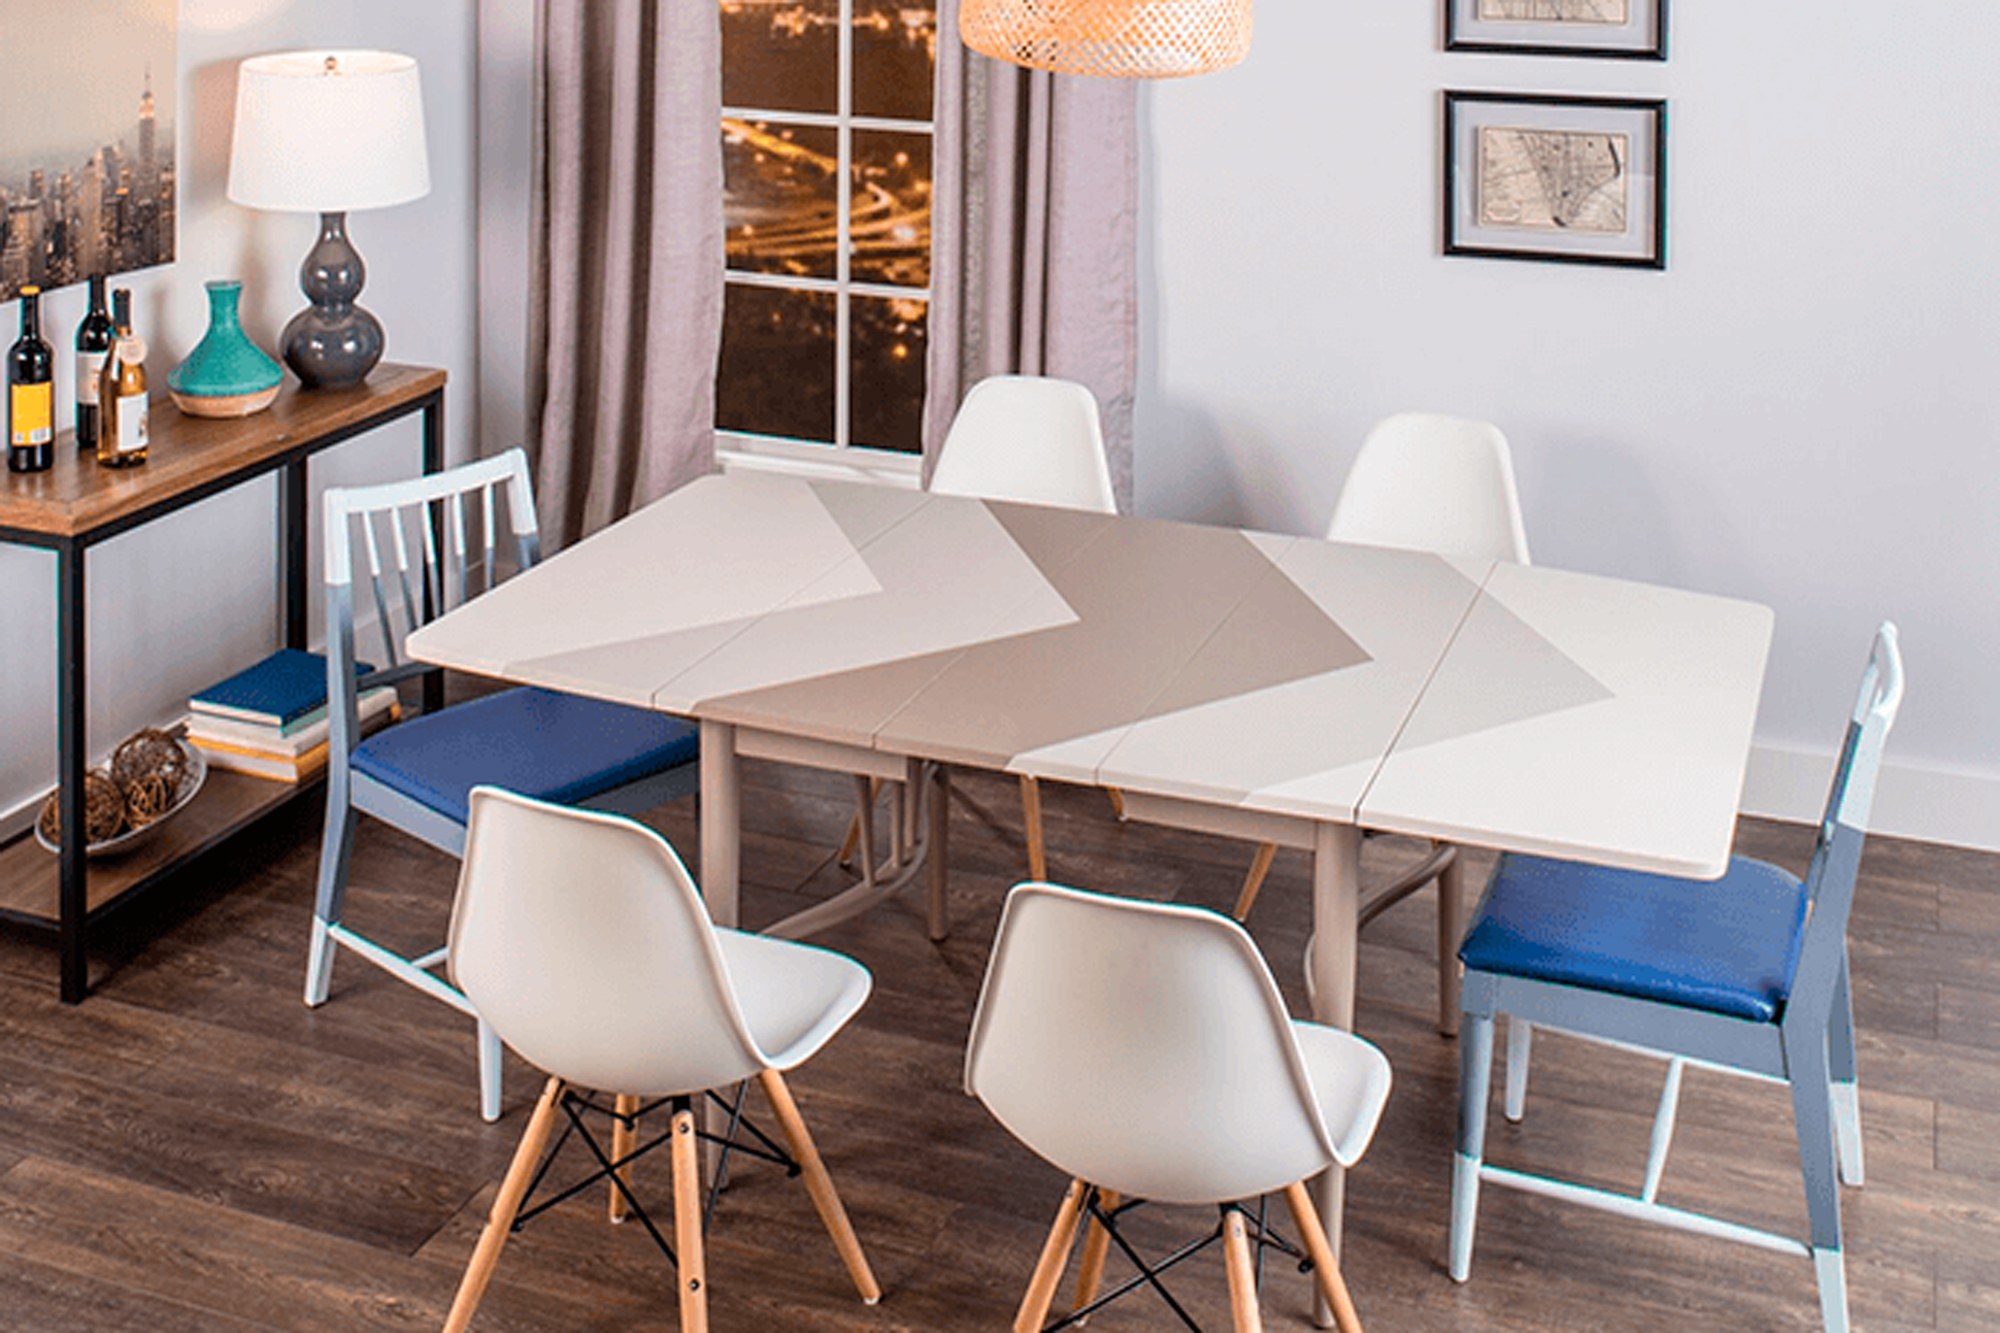
Table & Chairs Makeover
January 12, 2017Project Checklist:
- KILZ COMPLETE COAT® Paint and Primer in One
- 100-150 Grit Sandpaper
- Painter’s Tape
- Paint Brush
- Measuring Tape
- Chairs
- Table
- 3/8”-1/2” Synthetic Roller
Step 1:
For best results start with a properly prepared and previously painted or primed surfaces. Remove any loose or peeling paint and wash off dirt or grease with a non-soapy detergent or a TSP substitute. Rinse well and allow surface to dry.
Pro-tip: For glossy surfaces, scuff sand with the appropriate sandpaper prior to coating.
Step 2:
Tape off areas to be painted. To achieve a geometric pattern we recommend using measuring tape to evenly space tape.
Step 3:
Stir paint before and during application to make sure it is mixed.
Step 4:
Remove the painters tape when the paint is wet, or have a razor to cut the film if you’ve let the paint dry.
Step 5:
Allow to dry. The product dries to touch in 2 hours (at 77° F and 50% relative humidity) or longer in cooler temperatures and/or higher humidity.
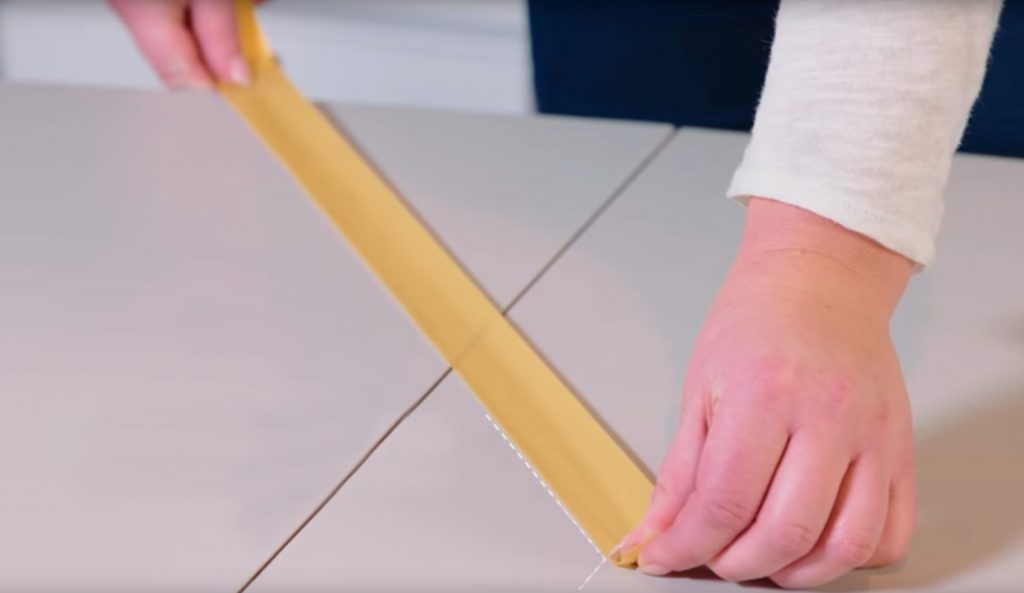
Pro-tip: Measure peak to peak, as well as the distance between the points along the side of the table.
Pro-tip: Use a high quality synthetic brush or 3/8”-1/2” synthetic roller for the application. When painting a horizontal surface, like a tabletop, apply thin coats.
RELATED ARTICLES
get inspired:
FOLLOw us:
@kilzbrand
SHOP
PRODUCTS
Role of Color In A Mid-Century Modern Look
January 11, 2017With the right colors and décor, it’s relatively easy to bring this timeless vibe into the home. Our color experts have recommended these colors from the KILZ® TRIBUTE® paint collection as inspiration for a Mid-Century Modern look: Art Museum, Brushed Metal, Fawn Doe, Northern Sky, Oceanic, Beetroot Purple.
All of these colors complement the vintage look of yesterday without feeling dated. If you’re going for a bolder look, don’t be afraid to explore contrasting materials and colors, such as wood and metal, or a pastel paired with a saturated hue on your ceiling.

BRUSHED METAL

NORTHERN SKY

OCEANIC

BEETROOT PURPLE
FAWN DOE

ART MUSEUM
RELATED ARTICLES
get inspired:
FOLLOw us:
@kilzbrand
SHOP
PRODUCTS
Small Kitchen Hack & A Pop of Color
January 10, 2017This project is one of our favorites because of the unexpected twist that adds not only color but functionality to this space. If there’s not enough square footage for that 12 person dining table you’ve always dreamed of, we think you will love this solution. For this project we will show you how to create an optional tabletop space that retracts up and down allowing you to utilize at your convenience. This Murphy table will double your working counter space, and can even be used as a desk for the little ones to color! This concept can be used in a hallway, bedroom, office or garage for a working station!
Project Checklist:
- Plywood
- KILZ COMPLETE COAT® Paint and Primer in One
- 100-150 Grit Sandpaper
- Dust Mask
- Damp Cloth
- Paint Brush
- 3/8”-1/2” Synthetic Roller
- Framed Artwork
- Drill or Screwdriver
- Screws
- Piano Hinge
- Hook and Eye Latch
- Stir Stick
- Can Key
- Framed Artwork
- Measuring Tape
- Level
Step 1:
Start by cutting 2 pieces of 1/2″ plywood to size 28-1/4″ X 36″. Then cut 2 additional pieces of plywood to 1″ X 28-1/4″ for the wall cleats.
Step 2:
Sand all pieces of plywood with 100-150 grit sandpaper.
Step 3:
After sanding, use a damp cloth to remove any dust from the pieces of plywood.
Step 4:
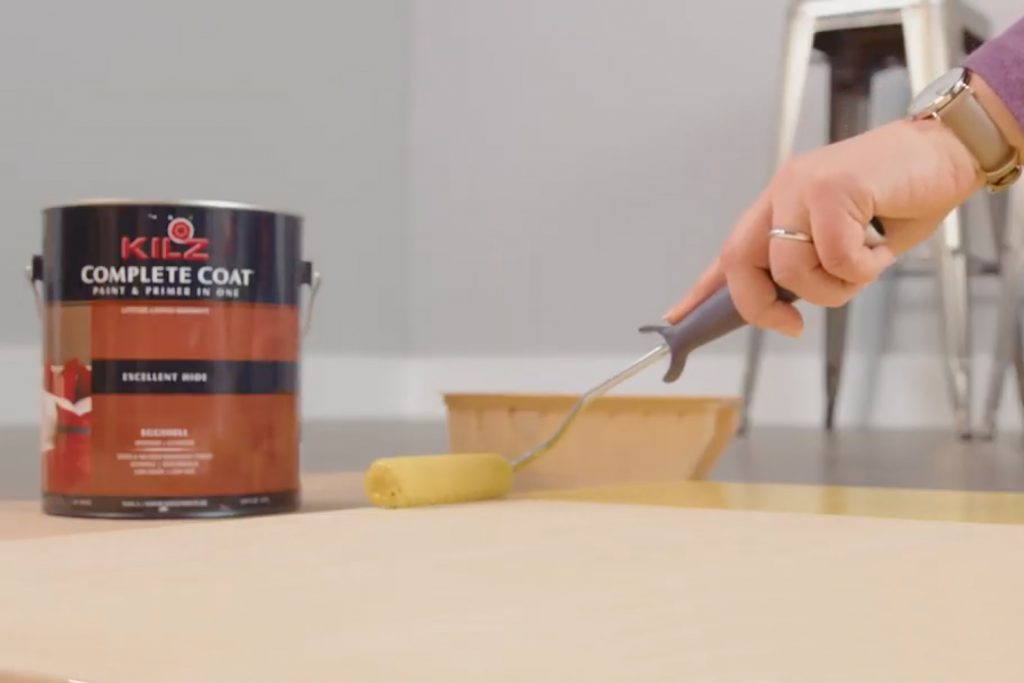
Open a can of KILZ COMPLETE COAT® Paint and Primer in One and thoroughly stir the paint.
Step 5:
Paint all of the pieces of wood with your selected colors and allow to dry.
Step 6:
Allow 2 hours dry time*, apply second coat if needed.
*Dark colors and high humidity areas may have extended dry times.
Step 7:
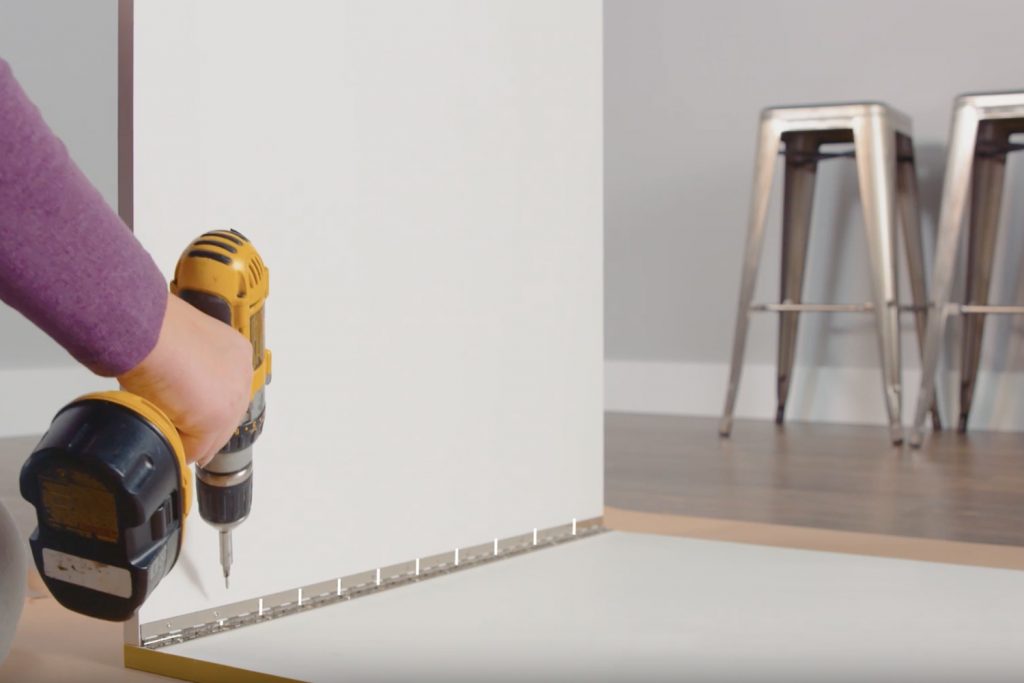
Next measure and cut the 2 piano hinges to size 28-1/4″.
Step 8:
Using screws, attach the first piano hinge to connect the two larger pieces of plywood (table top and leg). Then attach the second piano hinge to connect the table top to the first cleat.
Step 9:
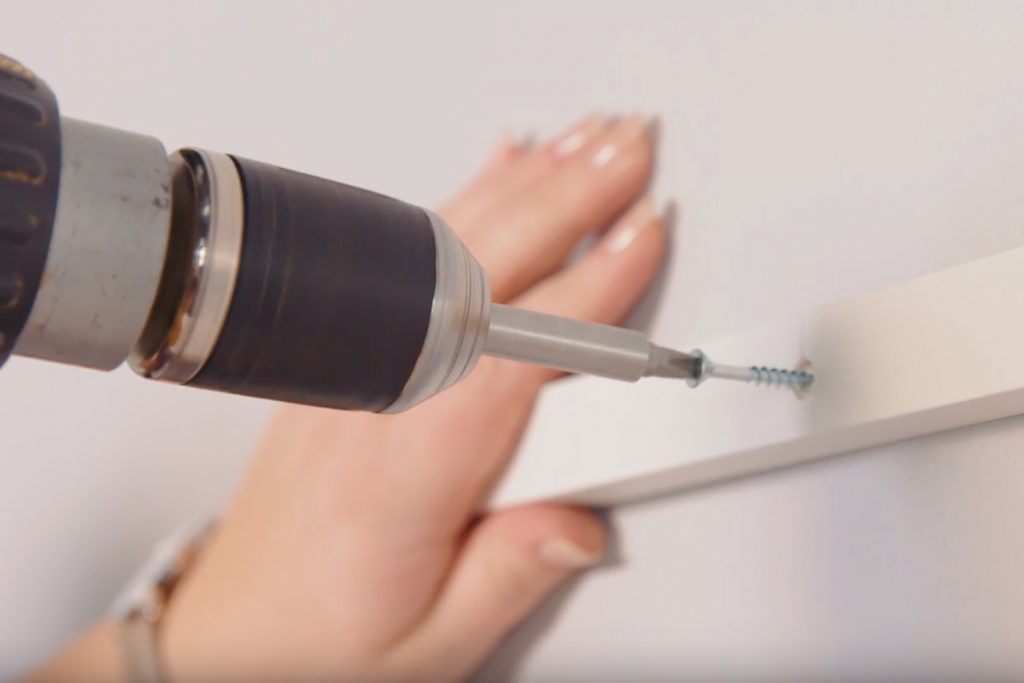
Measure and center the picture frame onto the front of the table leg. Once centered attach the frame with screws.
Step 10:
Attach the table top and lower cleat to the wall.
Step 11:
With the table folded against the wall, measure and attach the top cleat to the wall.
Step 12:
Finish by measuring and attaching the hook and eye latch to the top wall cleat and the table leg.
Pro-tip: For best results, apply with smooth strokes that go in the same direction as the wood grain.
Pro-tip: Use a power drill to attach the piano hinge.
Pro-tip: Use a stud finder to ensure the table is properly secured to the wall.
If there’s not enough square footage for that 12 person dining table you’ve always dreamed of, we think you will love this solution.
RELATED ARTICLES
get inspired:
FOLLOw us:
@kilzbrand
join the conversation:
SHARE this post: