Tag: KILZ 3 Premium

Why I Used KILZ 3® Premium Primer for a Basement Refresh Project
June 3, 2026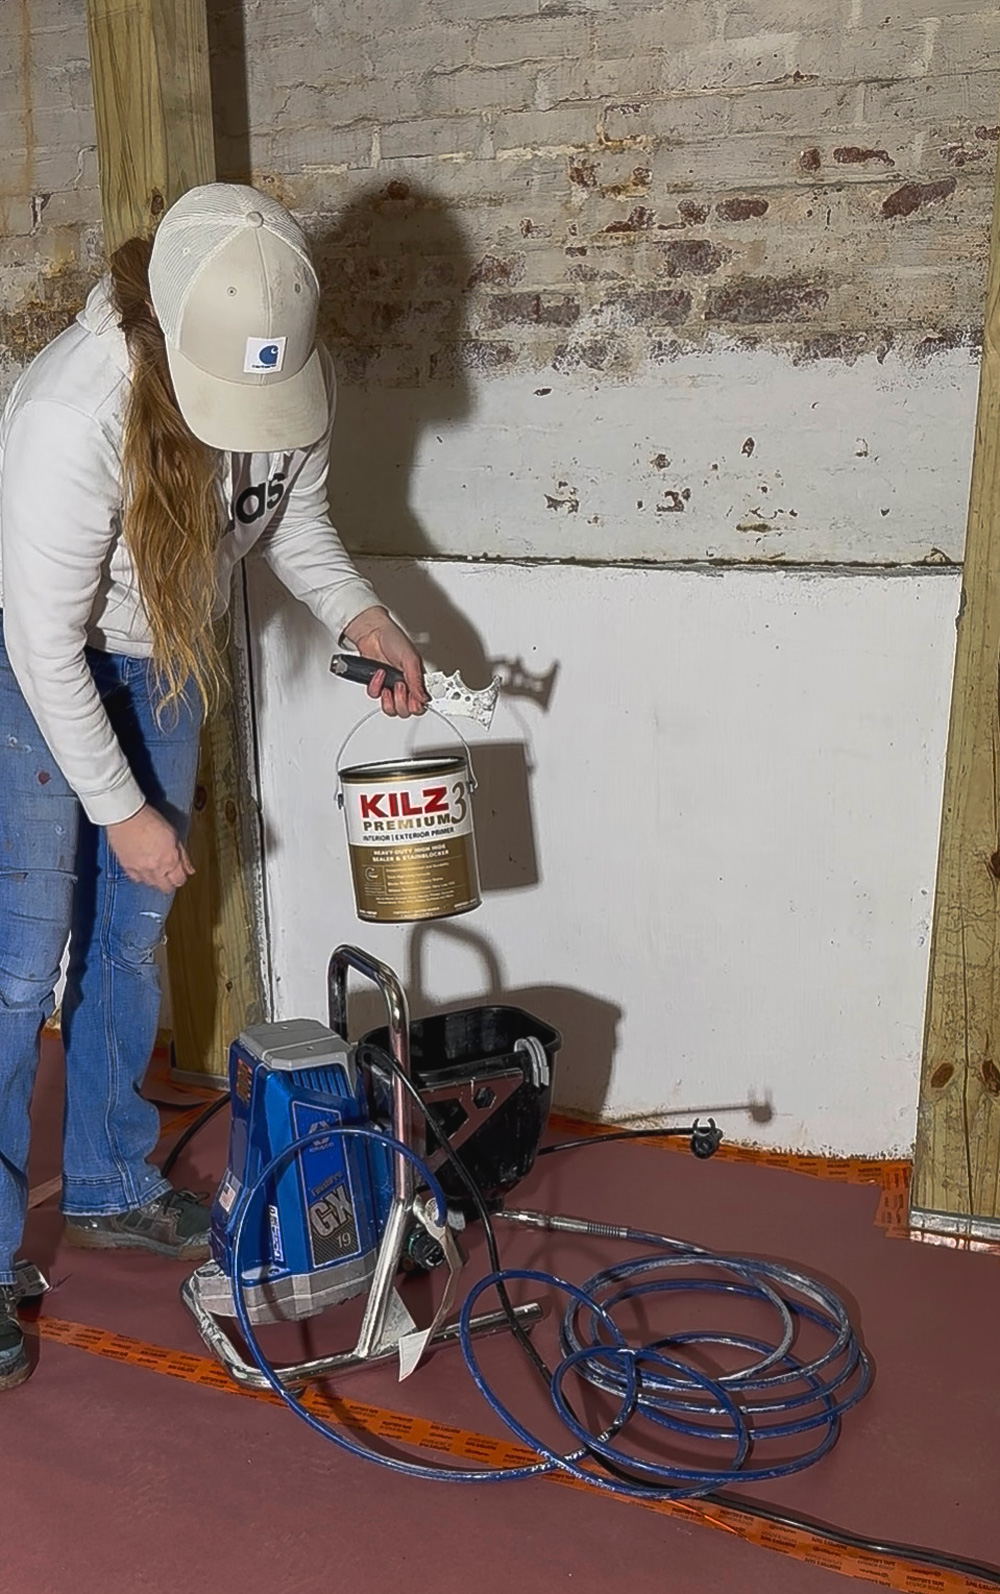
Not every basement needs a full renovation to feel dramatically better. Sometimes, the right prep, materials, and attention to detail are enough to completely change how the space feels. On a recent basement project, the goal wasn’t to turn it into finished living space—it was to refresh it, brighten it, and eliminate that musty, dungeon-like feeling the client had been dealing with for years.
The project included previously painted concrete brick walls and previously painted ceiling joists, both showing signs of age, discoloration, and wear. Combined with outdated insulation issues, this basement needed a thoughtful approach.
Existing Conditions: Old Paint, Discoloration, and a “Dungeon” Feel
The concrete brick walls had been painted in the past, but the coating was failing in multiple areas. There was visible flaking and peeling, especially where the masonry had absorbed moisture over time. This is common in basements and always needs to be addressed before any new coatings go on.
The ceiling joists had also been painted previously, but the paint had become heavily discolored. Between age, dust, and old staining, the ceiling felt dark and neglected. The client didn’t want perfection—they just wanted the space to feel cleaner, brighter, and more usable.
During the walkthrough, I also noticed an issue that had nothing to do with paint but contributed heavily to how the basement felt: the insulation was old, improperly installed, and facing the wrong direction. It wasn’t the correct R-value for the space and wasn’t helping with moisture or odor control.
The client planned to replace the insulation as part of sealing the space up properly, which made primer selection even more important. This refresh was part of a larger effort to make the basement feel dry, clean, and intentional.
Prep Work: Removing Loose Paint Is Non-Negotiable
Before any priming began, the failing paint on the concrete brick had to be dealt with. Painting over loose material is one of the fastest ways to guarantee premature failure.
All loose and flaking paint was removed from the concrete brick walls. Once only sound material remained, the surface was thoroughly cleaned to remove dust and debris. This step ensured that the primer would bond to a stable substrate rather than locking down failure underneath.
The ceiling joists didn’t have peeling paint, but they did require a primer capable of blocking discoloration and evening out the appearance, so the ceiling wouldn’t continue to feel dark after repainting.
Why Primer Matters in a Basement Refresh
Basements are harsh environments for coatings. Masonry is porous, framing lumber ages unevenly, and discoloration tends to bleed through if it’s not properly sealed. Even when the goal is “just a refresh,” the primer does most of the heavy lifting.
This was especially important here, since the client was also upgrading insulation and working toward sealing the space more effectively. The paint system needed to support that effort, not work against it.
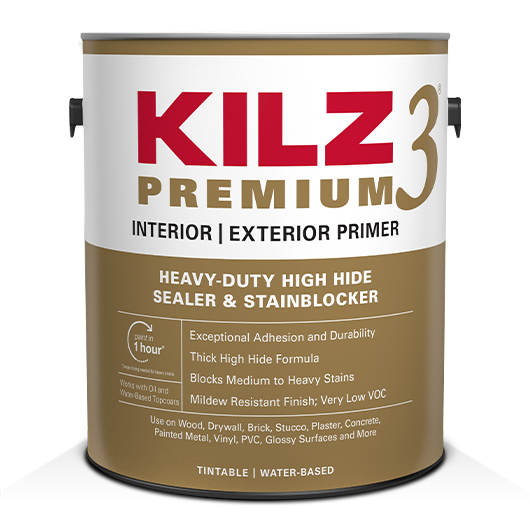
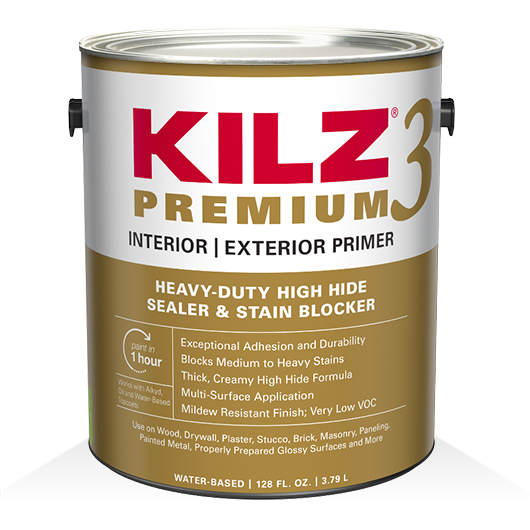
Why I Chose KILZ 3® Premium Primer
For this project, I chose KILZ 3® Premium Primer because it struck the right balance between performance and practicality.
KILZ 3® Premium Primer offers:
• Strong adhesion to masonry and previously painted surfaces
• Effective stain and discoloration blocking
• Excellent sealing on porous substrates
• A water-based, low-VOC formula suitable for enclosed basement spaces
• Fast dry times that keep projects moving efficiently
Since this was an interior basement and not a wide-open job site, low odor and air quality were important considerations. KILZ 3® Premium Primer delivered professional-level performance without the heavy fumes of oil-based primers.
Application on Previously Painted Concrete Brick
Once prep was complete, KILZ 3® Premium Primer was applied to the concrete brick walls using a combination of brush and roller. The goal was to work the primer into the texture of the brick and mortar joints to properly seal the surface.
One of the standout benefits was how well it handled mixed conditions—areas where old paint remained sound blended seamlessly with exposed masonry. Instead of flashing or absorbing unevenly, the primer created a consistent, uniform appearance across the wall.
After drying, the surface was fully sealed and ready for paint without concern about uneven absorption or future failure.
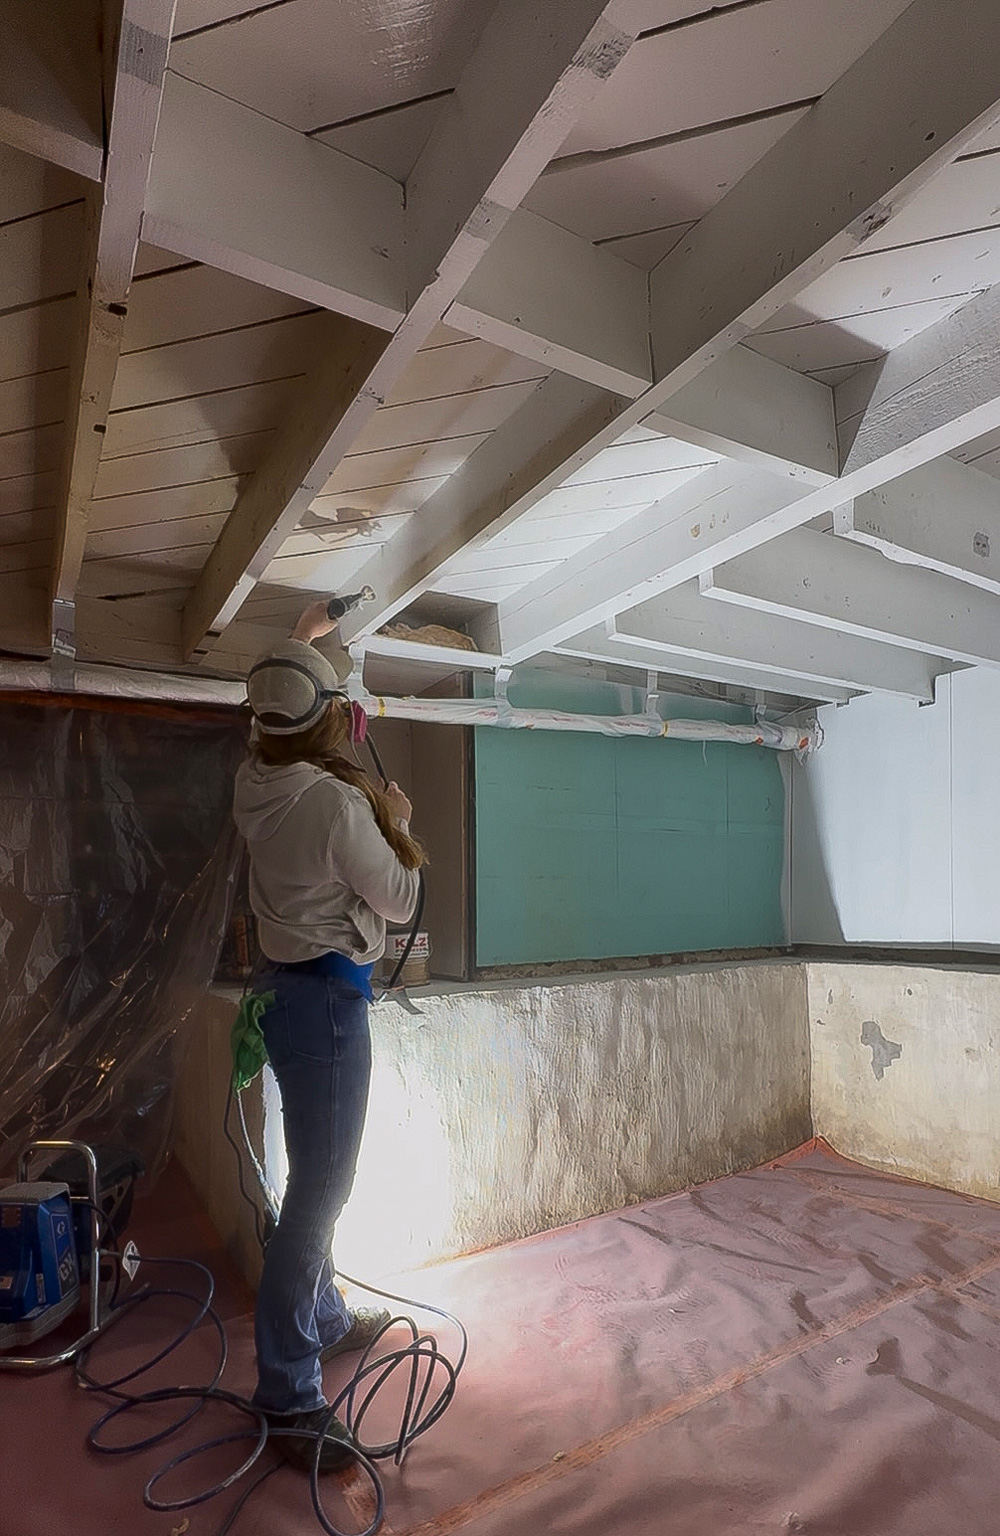
Application on Discolored Ceiling Joists
The ceiling joists were all about improving the overall feel of the space. Dark, discolored ceilings make basements feel lower and more closed in.
KILZ 3® Premium Primer adhered well to the previously painted wood and did an excellent job blocking stains and evening out color. It locked down residual dust and helped brighten the ceiling, immediately making the basement feel cleaner and more open.
Being water-based, it was also far more comfortable to apply overhead than oil-based alternatives—an important factor in an enclosed basement environment.
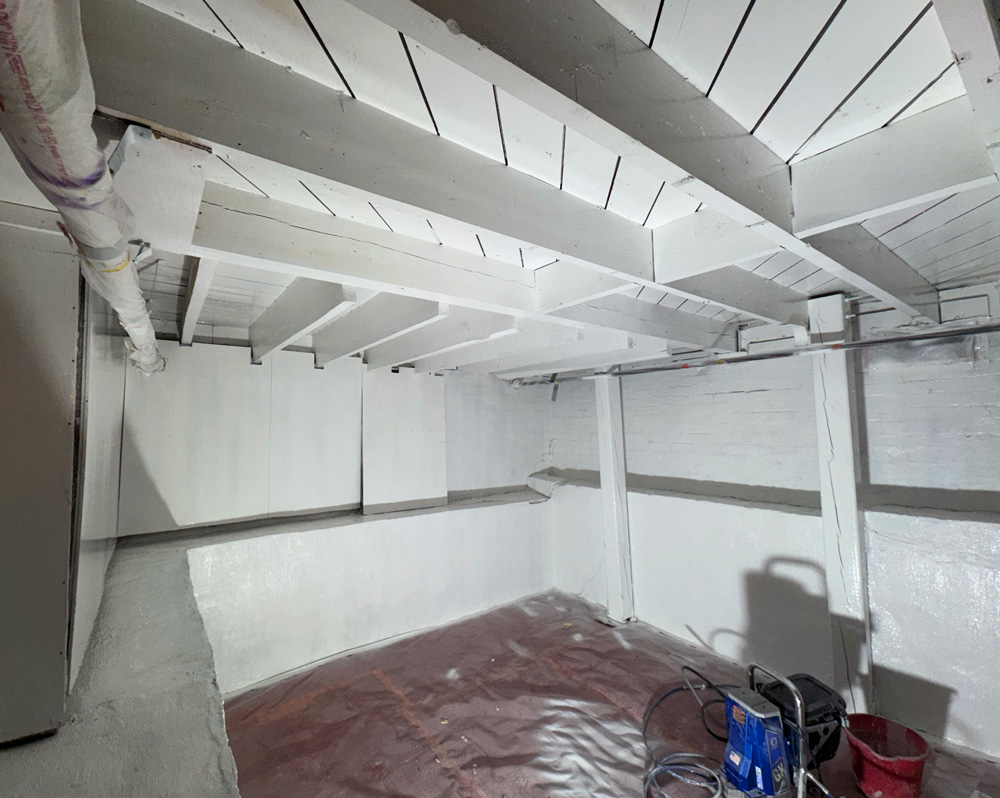
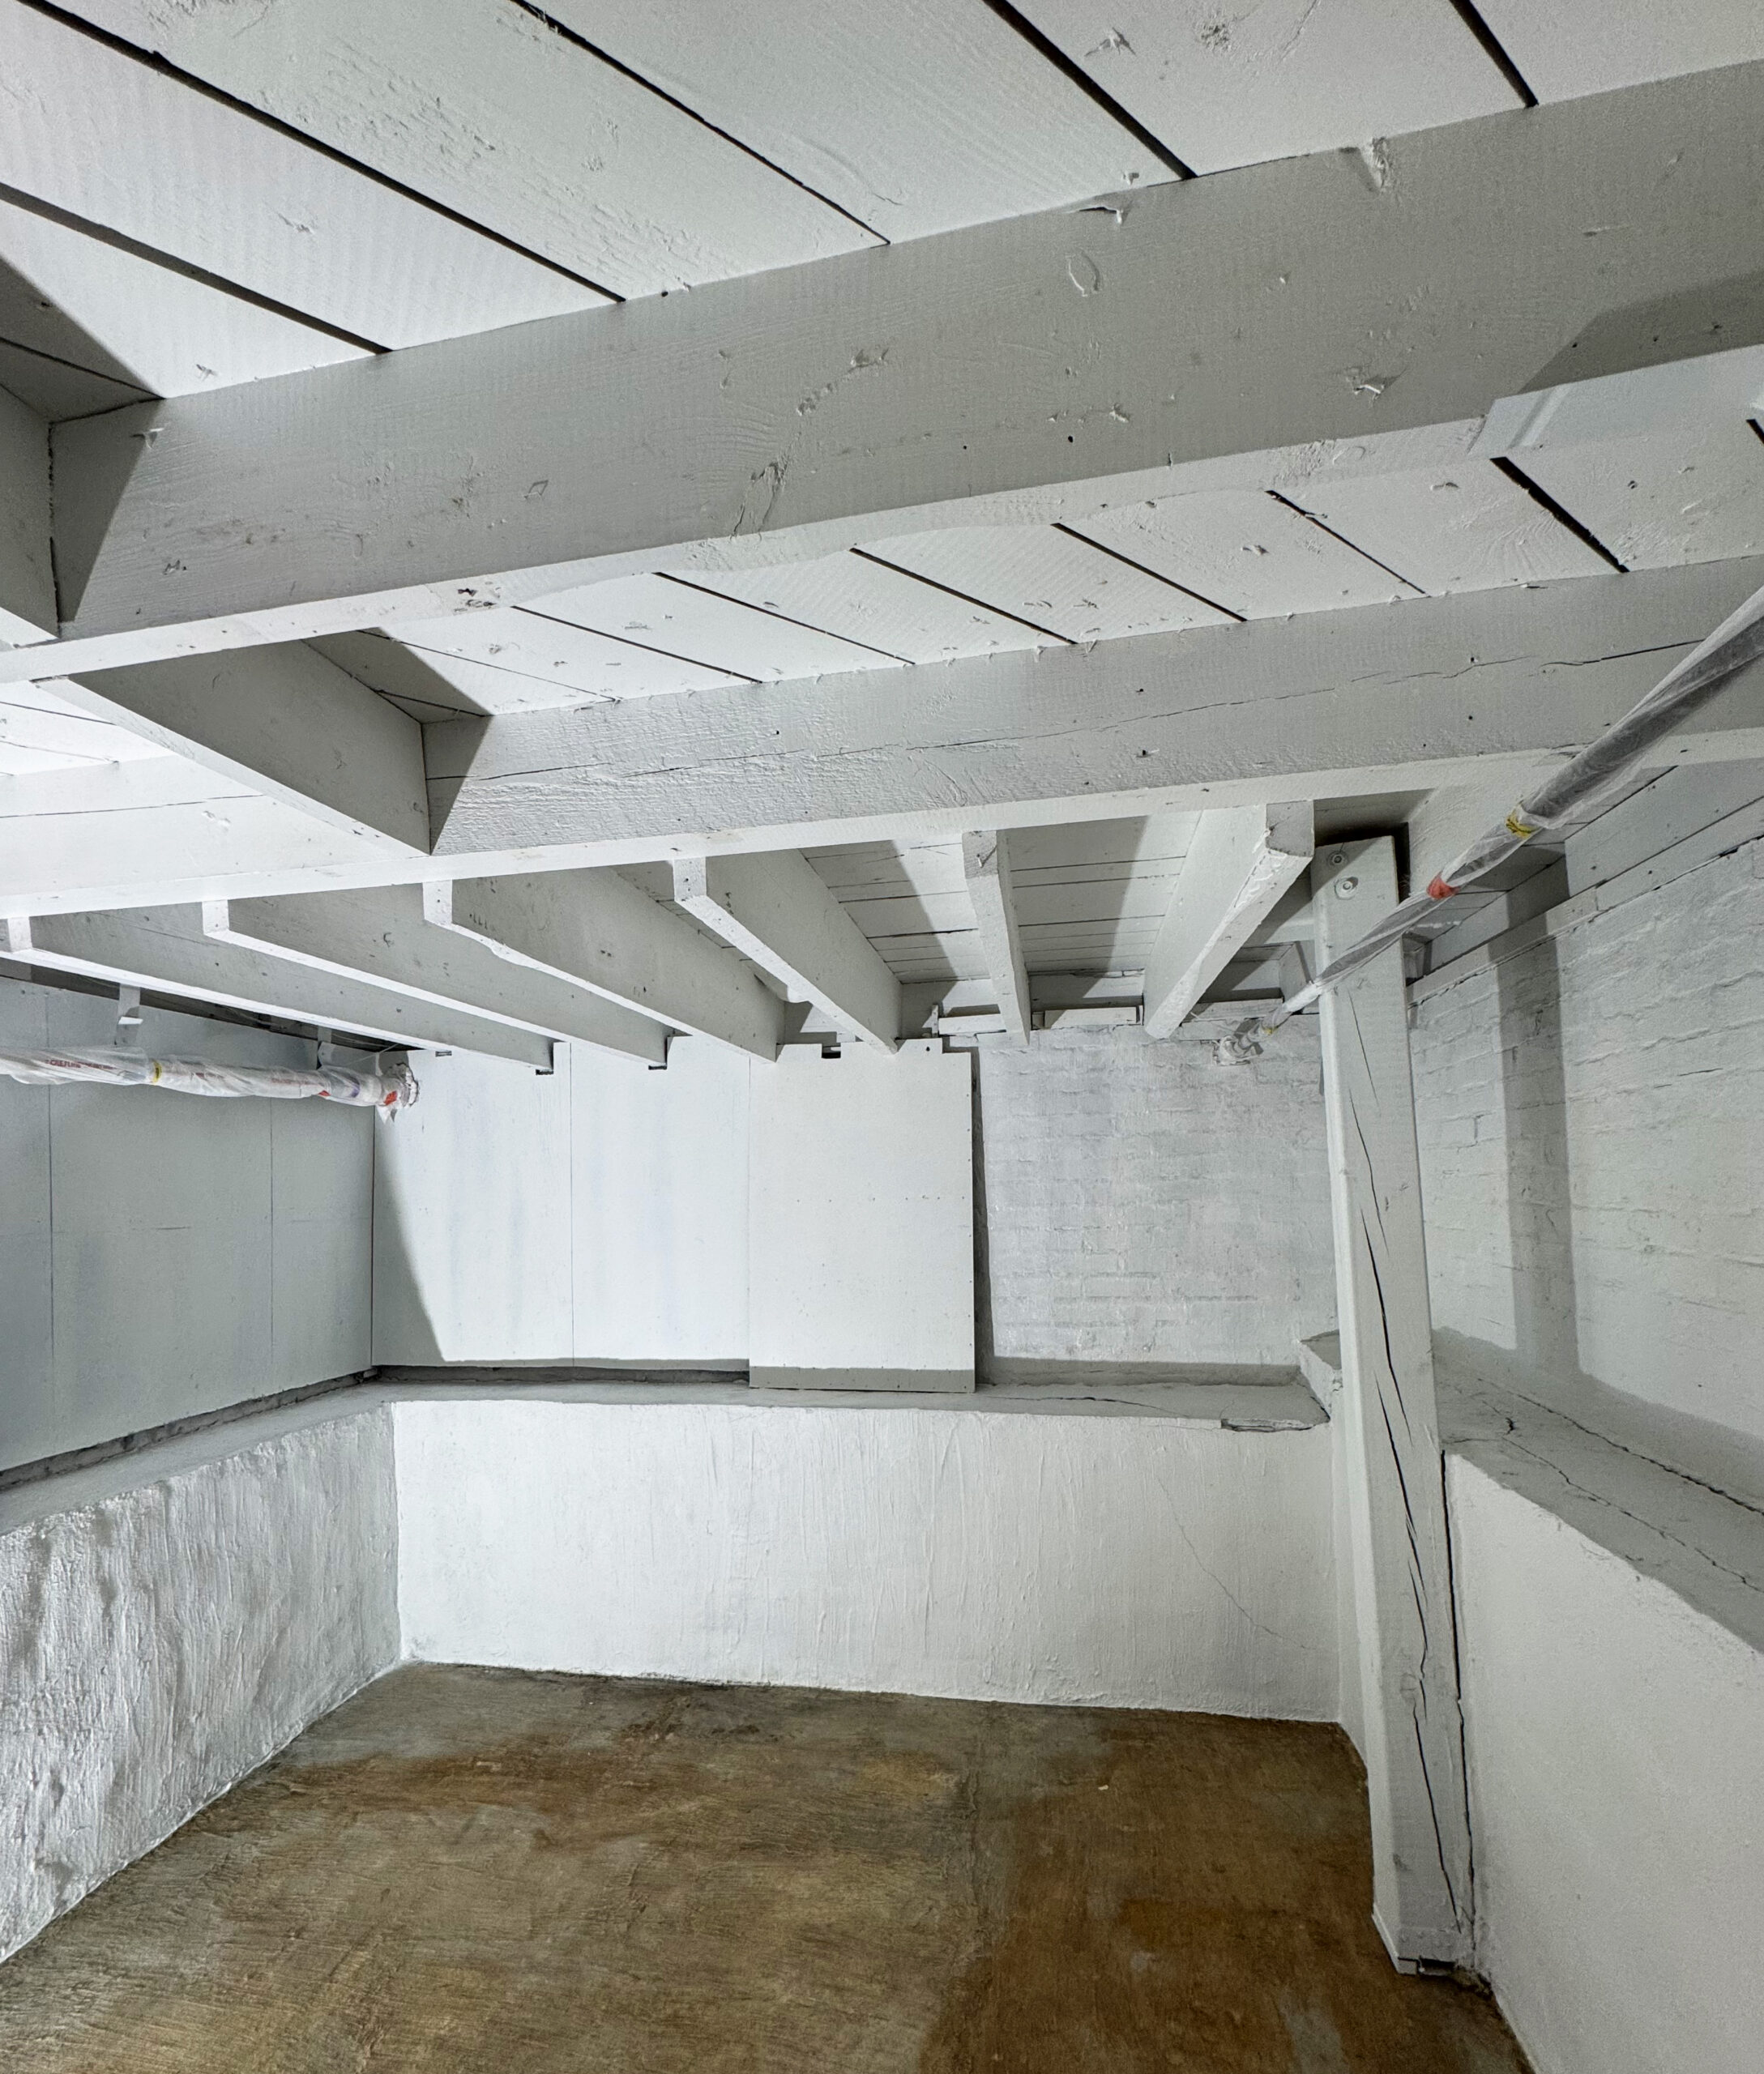
Results: Supporting a Cleaner, Sealed Space
Once primed, the basement felt noticeably different. The walls looked clean and uniform, the ceiling felt brighter, and the space no longer had that neglected, dungeon-like appearance.
Combined with the client’s plan to replace the improperly installed insulation with the correct R-value, the primer played a key role in sealing and refreshing the space—not just visually, but functionally.
There was no bleed-through, no flashing, and no lingering odors—just a solid foundation for the finish coat and a basement that finally felt cared for.
RELATED ARTICLES
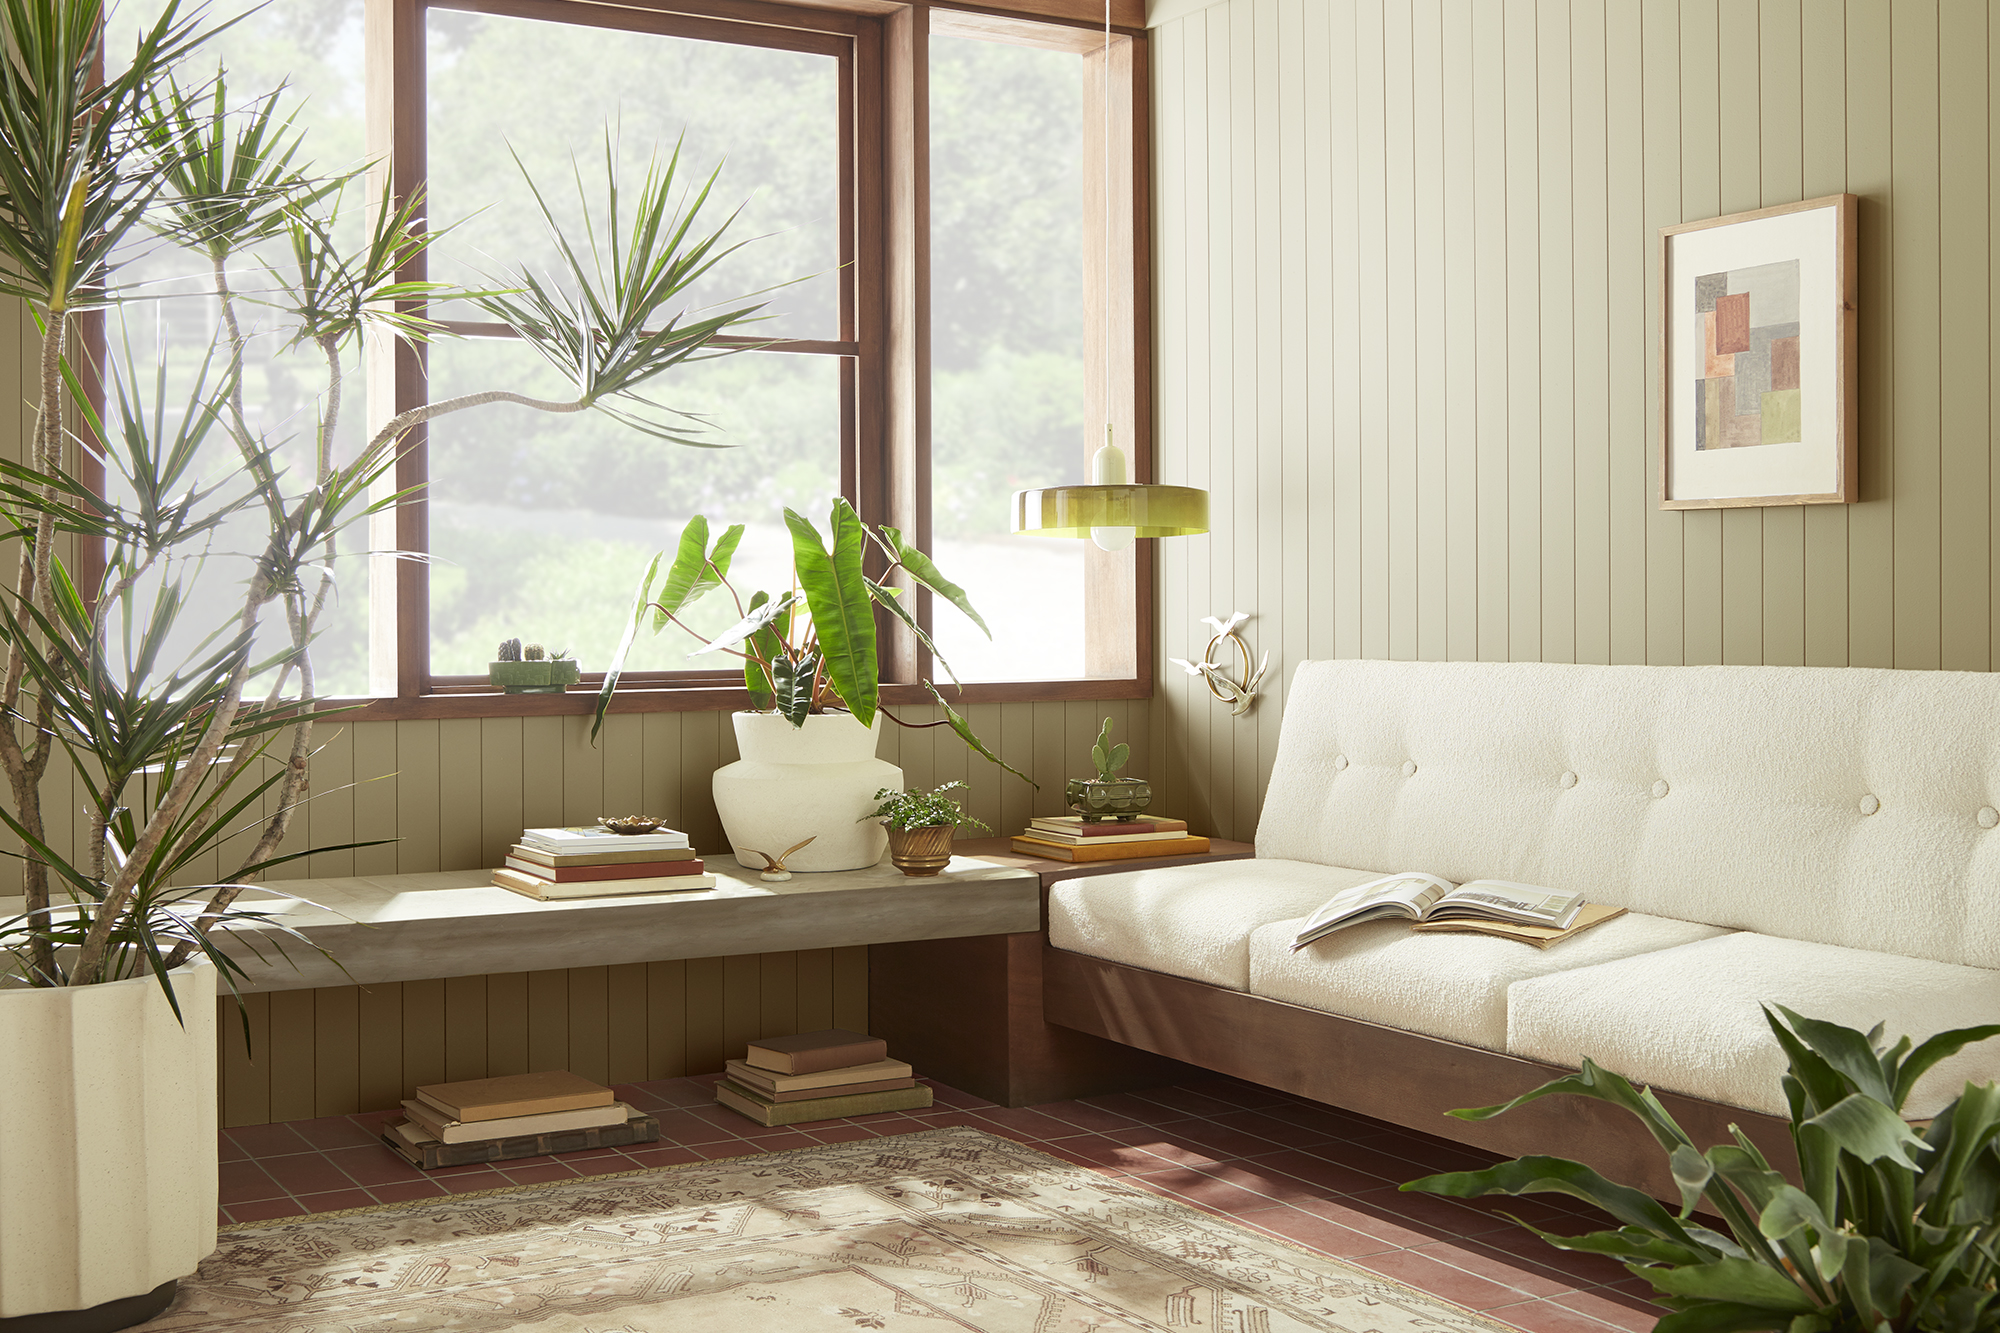
get inspired:
FOLLOw us:
@kilzbrand
SHOP
PRODUCTS
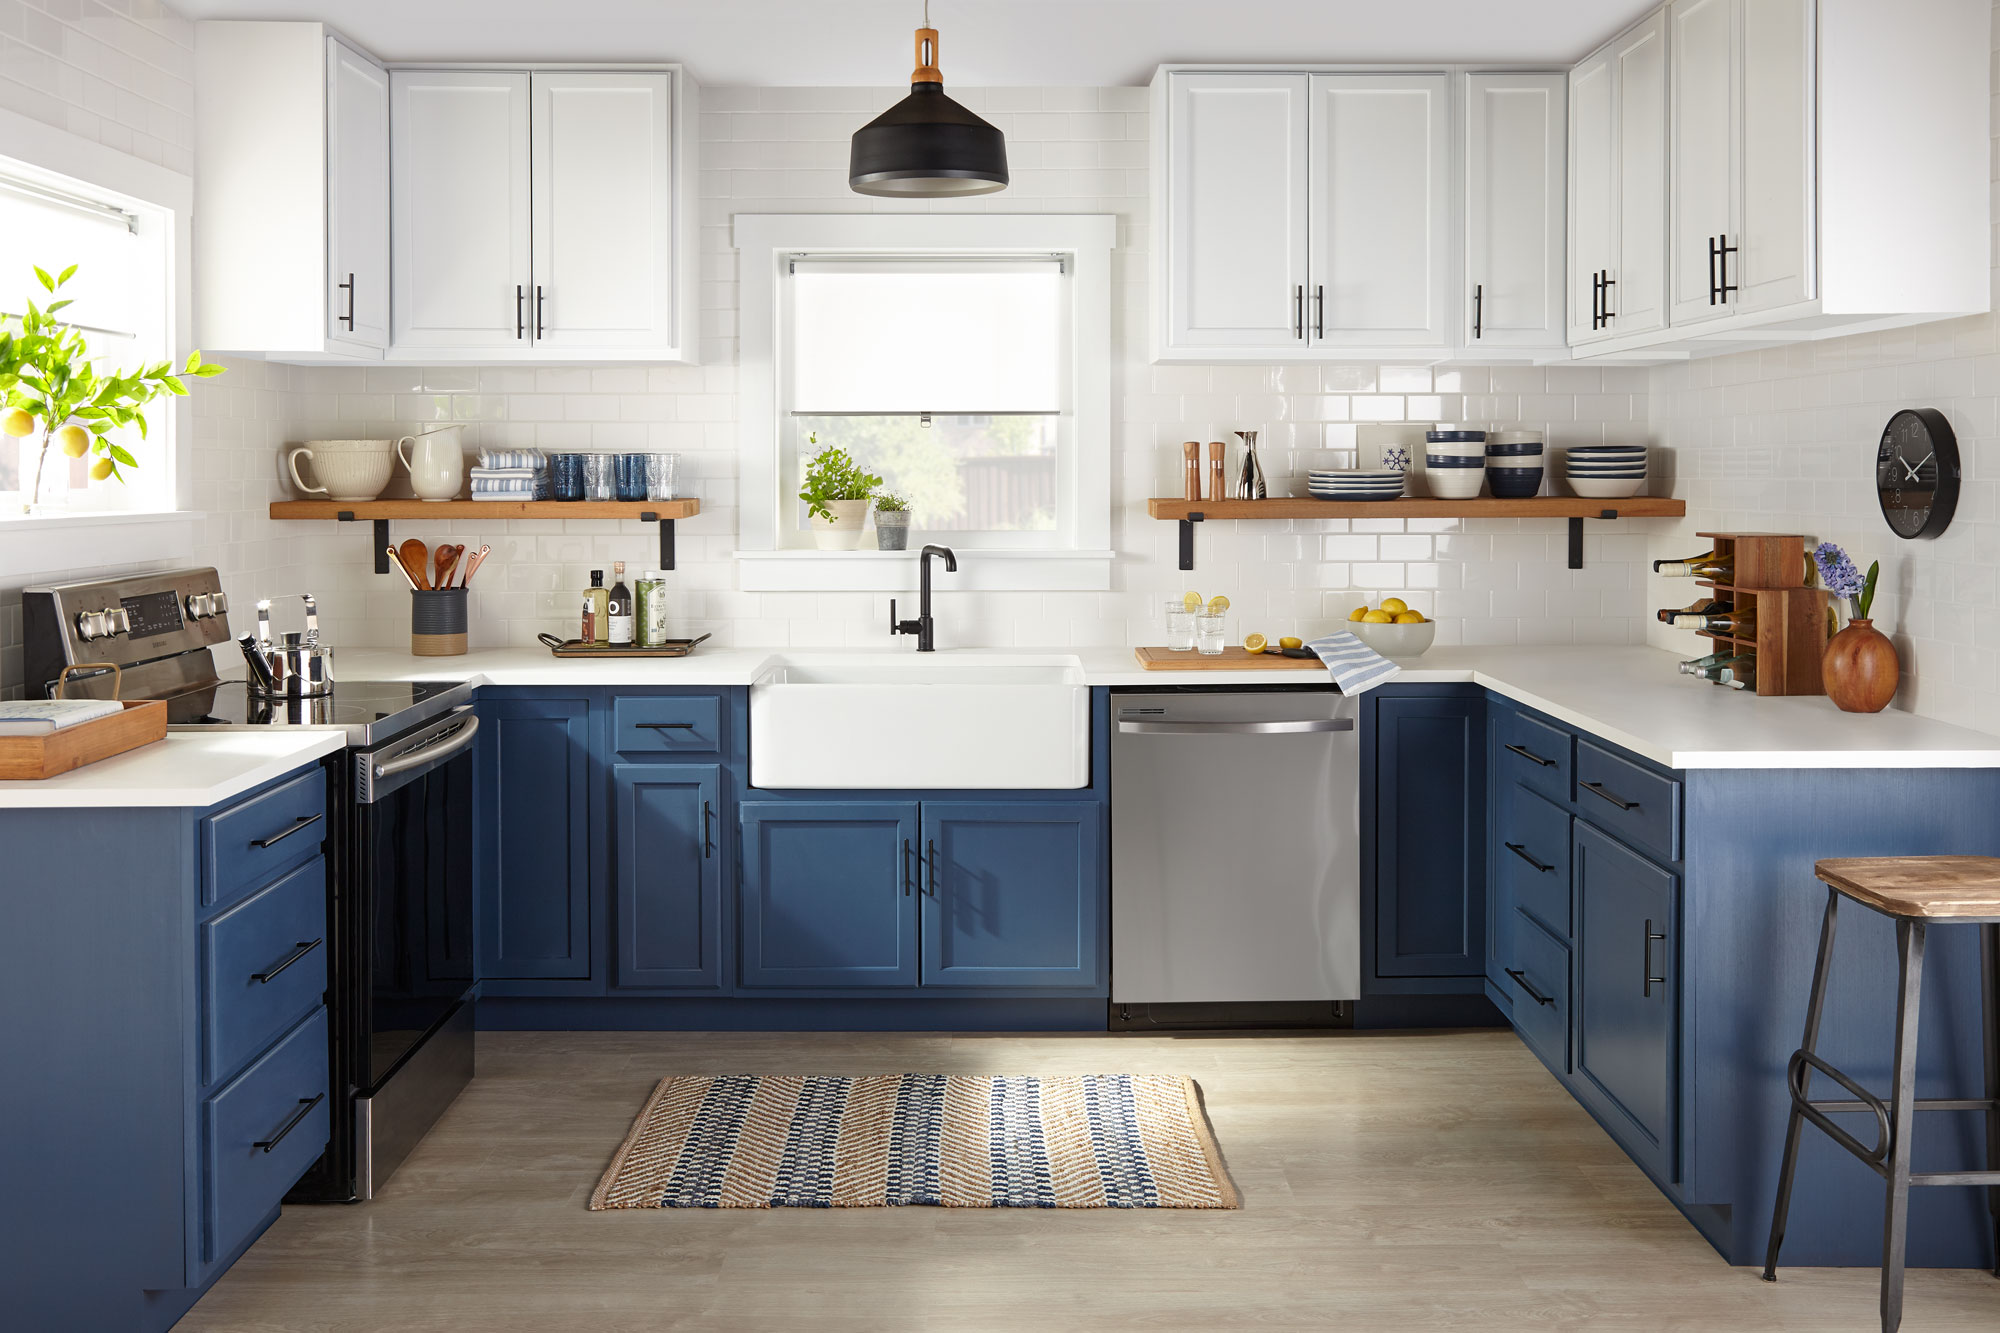
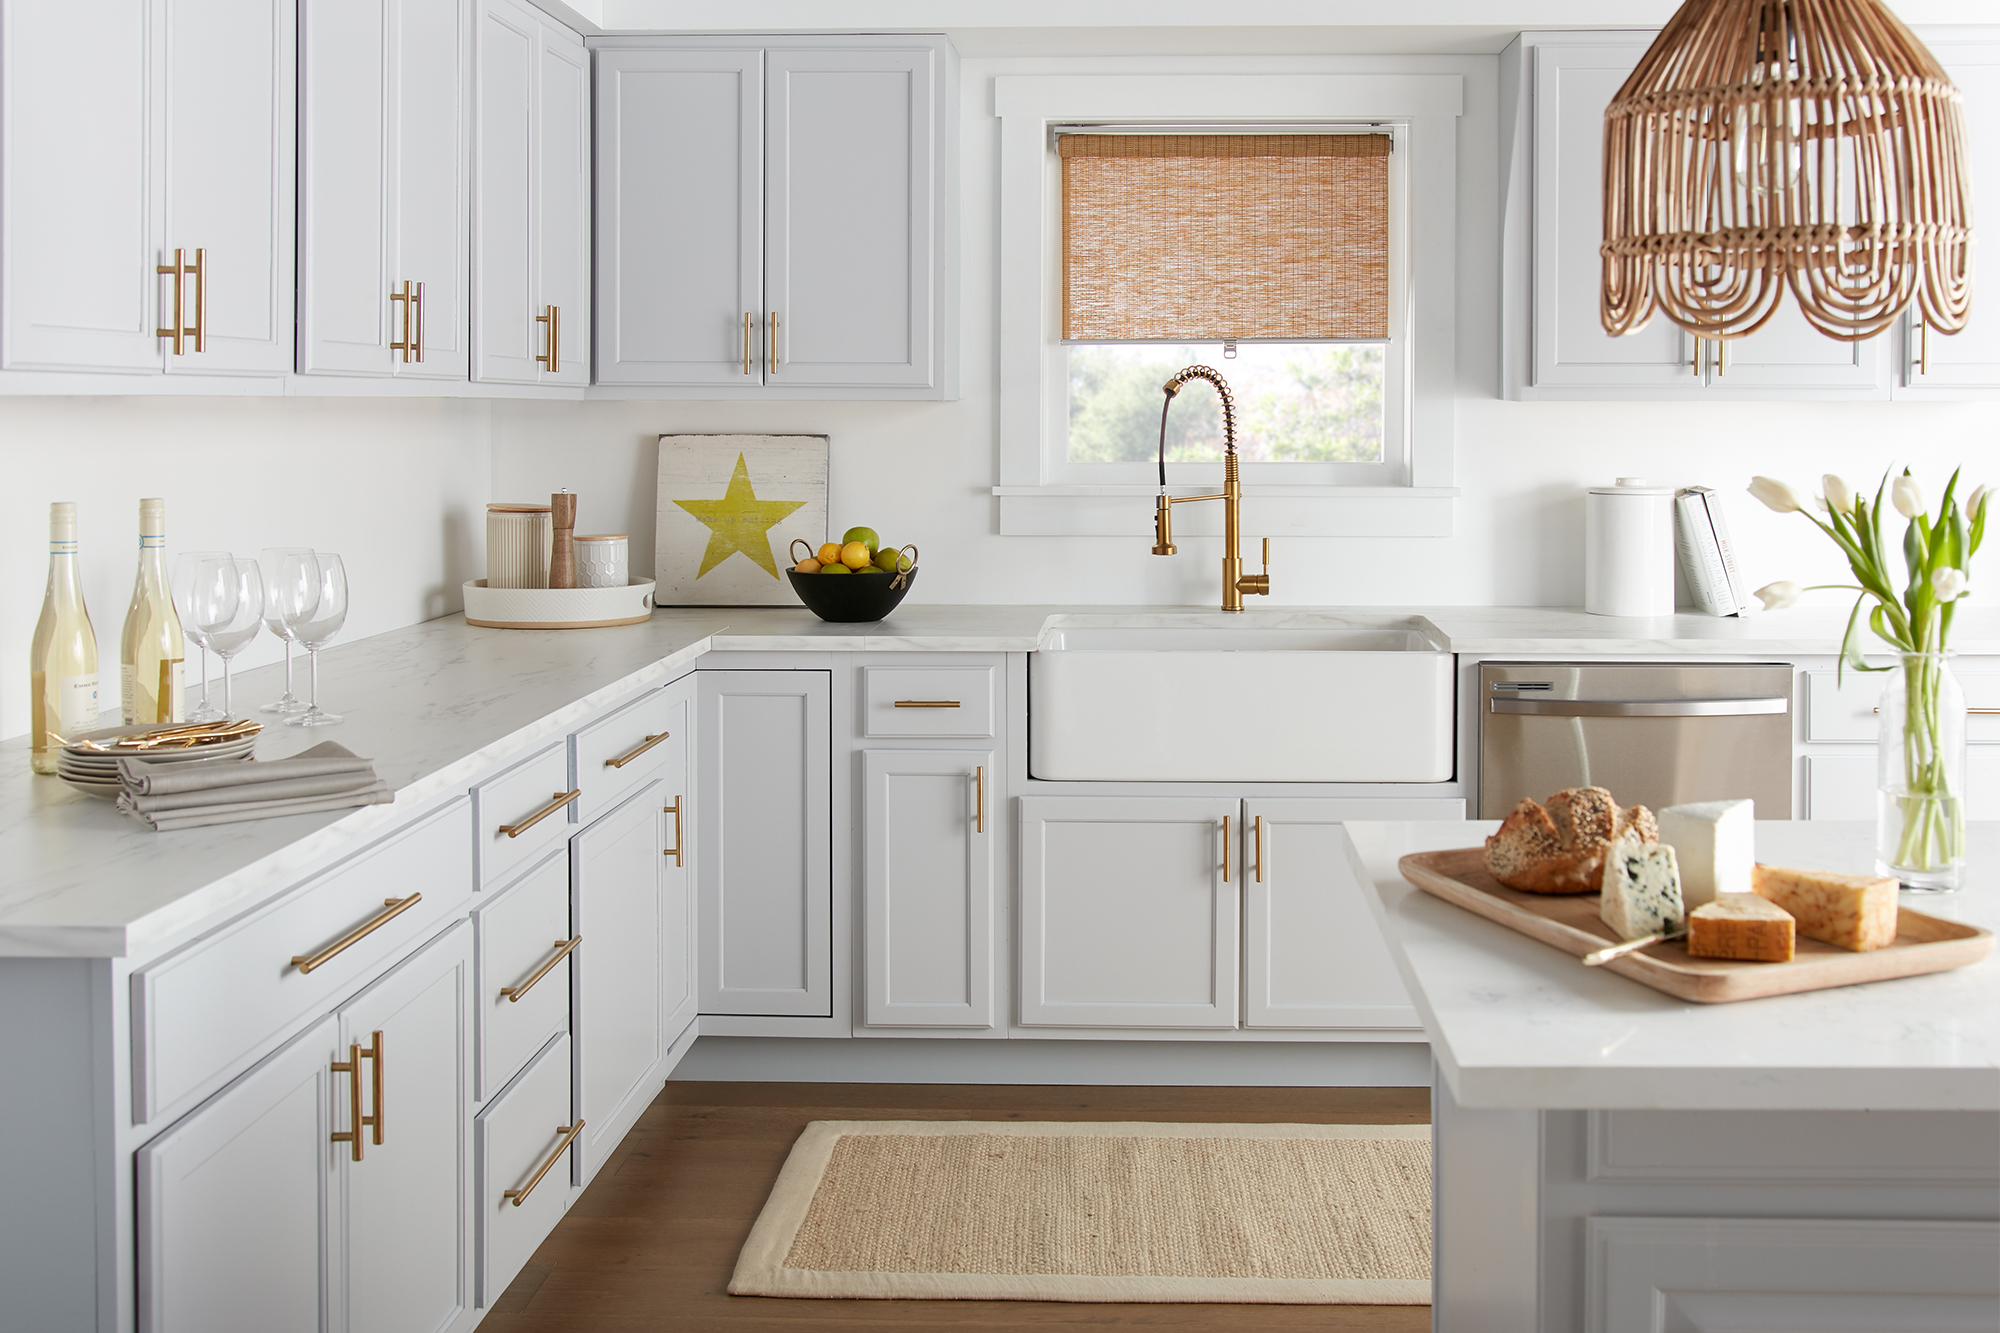
Modern Blue Farmhouse Kitchen
January 13, 2021A bland kitchen gets a dash of color and a sprinkle of modern farmhouse flair in this stunning transformation. Primer and paint are the key ingredients in this kitchen renovation, proving that you don’t always need to demo your dated wood cabinets to bring an entirely new look and feel into your space. Like a gourmet chef who understands the importance of properly preparing their ingredients before whipping up a main dish, professional painters know that proper prep work is key to ensuring a star-worthy renovation.
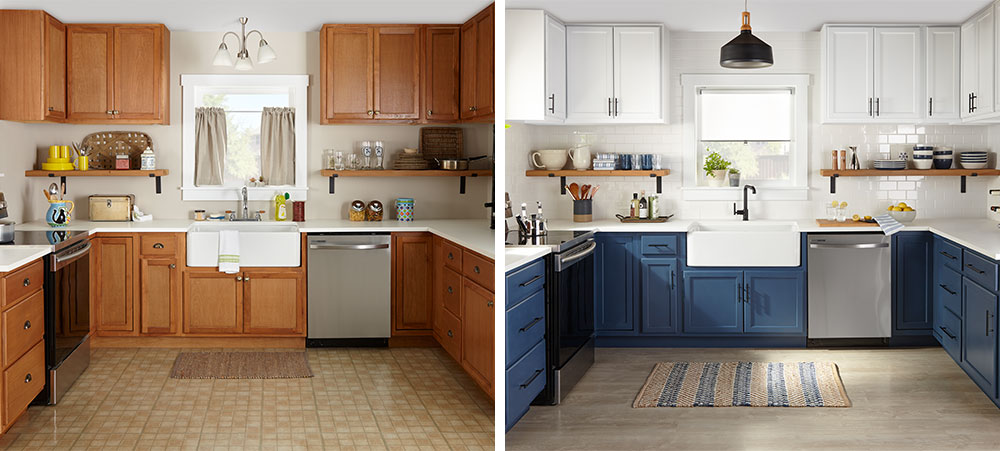
For this kitchen makeover, KILZ 3® Premium primer is the not-so-secret sauce that took these cabinets from flat to fabulous! A fast drying, low odor and very low VOC primer, KILZ 3 Premium provides exceptional adhesion and durability – ideal for high traffic and high touch surfaces including kitchen cabinets and drawers. KILZ 3 Premium also ensures a mildew resistant primer coat, great for use in moisture prone areas like kitchens, bathrooms and laundry rooms.
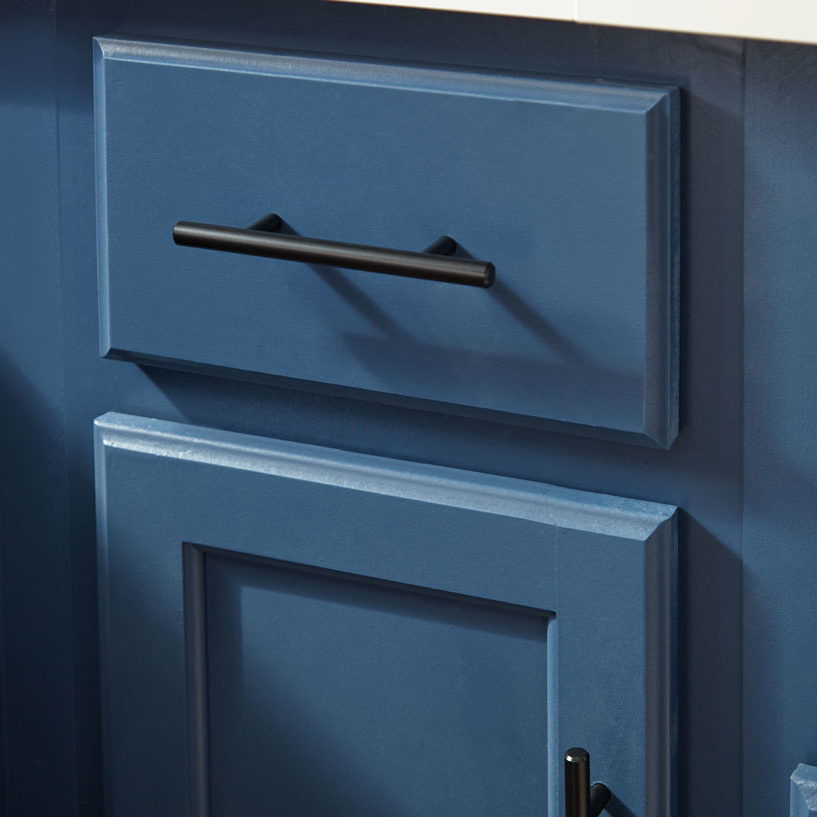
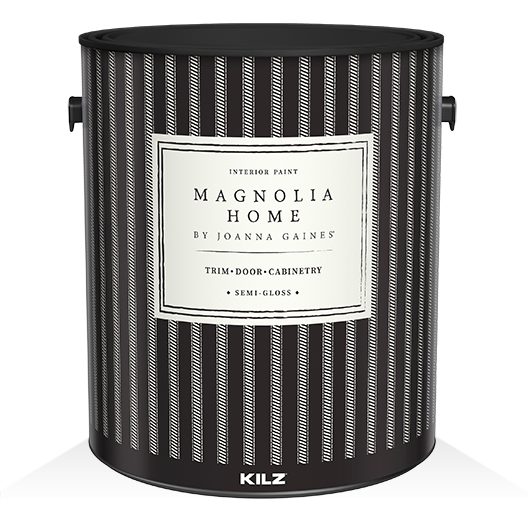
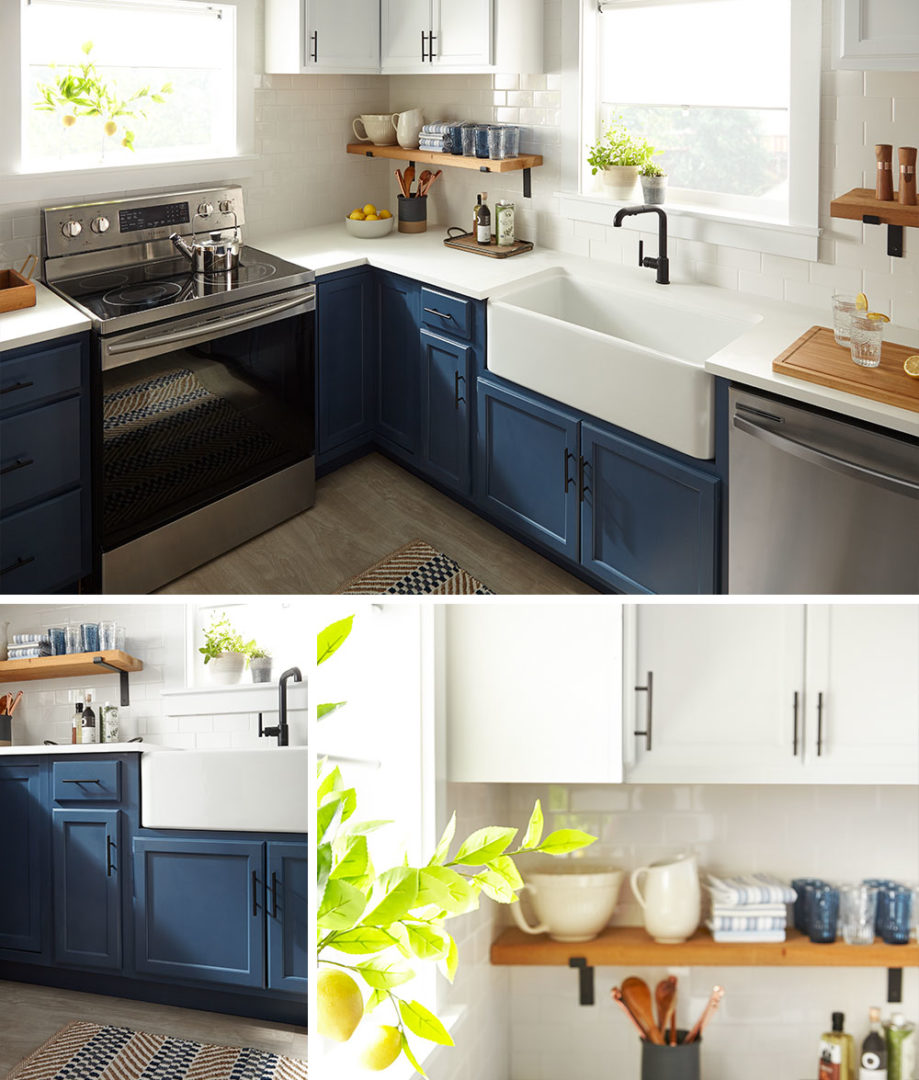 Once the primer is properly applied and dried, it is time for paint! The upper cabinets are painted in a pure white, Magnolia Home by Joanna Gaines® Trim & Cabinetry Paint in True White MAG008. Available in 150 timeless colors personally crafted by Joanna Gaines, Magnolia Home by Joanna Gaines premium interior paint offers the hardness of a traditional oil-based paint in a water-based acrylic formula that is remarkably durable and easy to clean. The white upper cabinets serve to make the kitchen feel lighter, larger and more open. They also perfectly contrast with the inky blue lower cabinets – coated in the same paint line’s Silos District MAG120.
Wood shelves that once faded into the background now pop between the white and blue cabinets, creating the perfect place for color-coordinated glassware and table settings to be on display. Sleek black hardware completes the cabinet transformation and was the inspiration for the addition of a matte black pendant light and matching faucet to modernize the existing farmhouse sink.
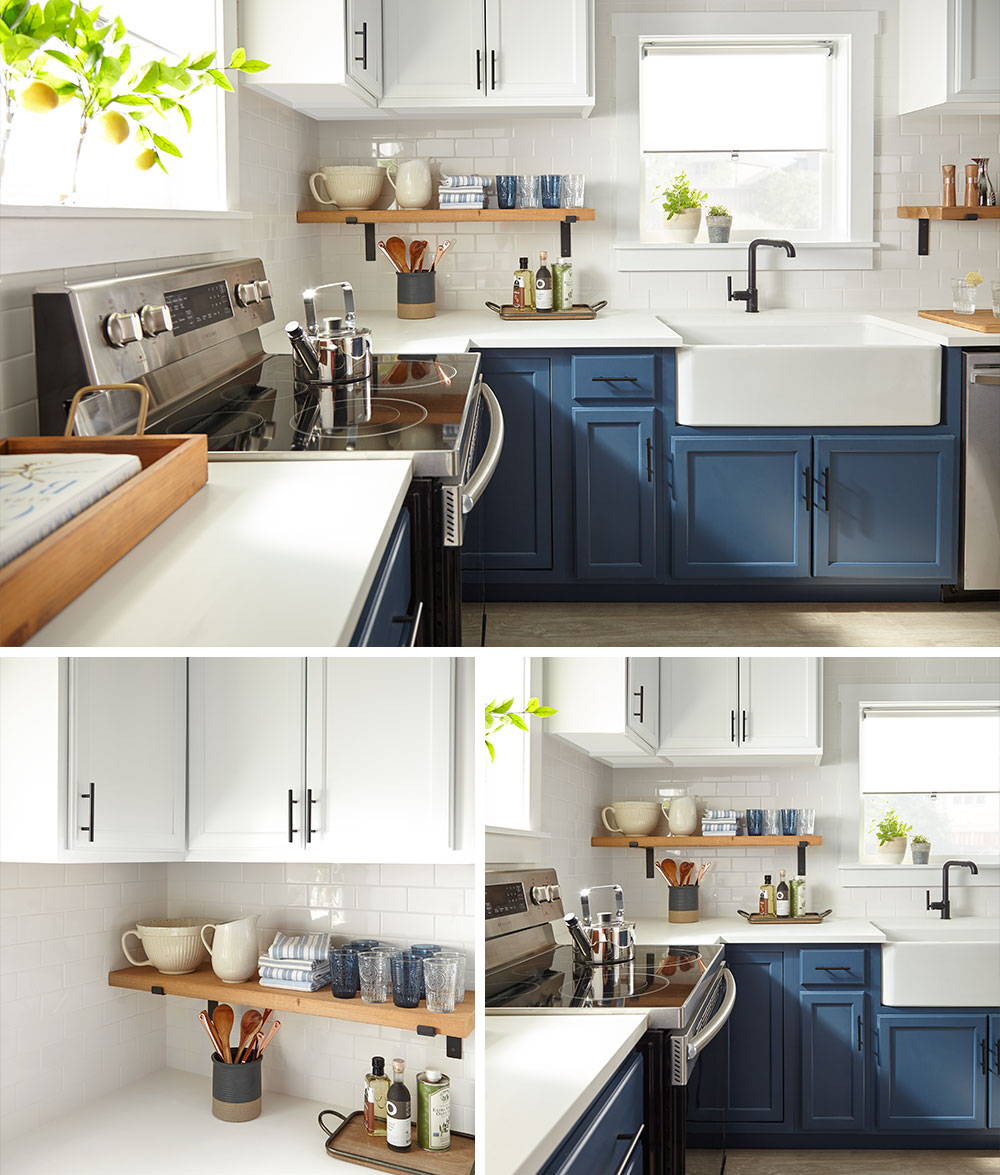
Light wood floors and a sleek white subway tile backsplash complete the space, but it’s easy to see that primer and paint were key ingredients that transformed a tired kitchen into a modern masterpiece. If you’re hungry to complete a kitchen cabinet painting project of your own, read on below for step-by-step instructions!
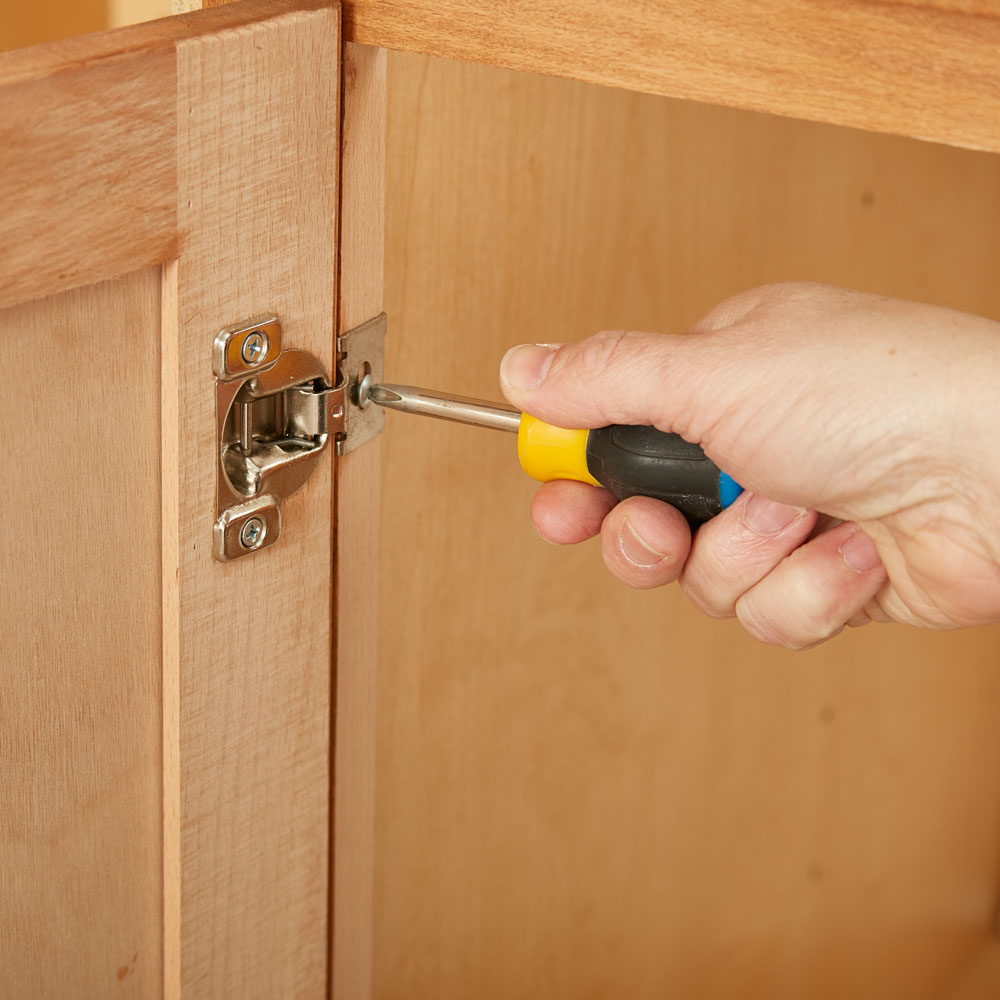
Step 1:
Using a screwdriver, remove all cabinet handles and then remove the cabinet doors and drawers from the cabinet frame. As you move along, we recommend putting each screw back into its respective hardware piece, sealing it together with painter’s tape and labelling it. You’ll ensure the least amount of stress on the wood by putting each screw back exactly where it came from when the priming and painting is done!
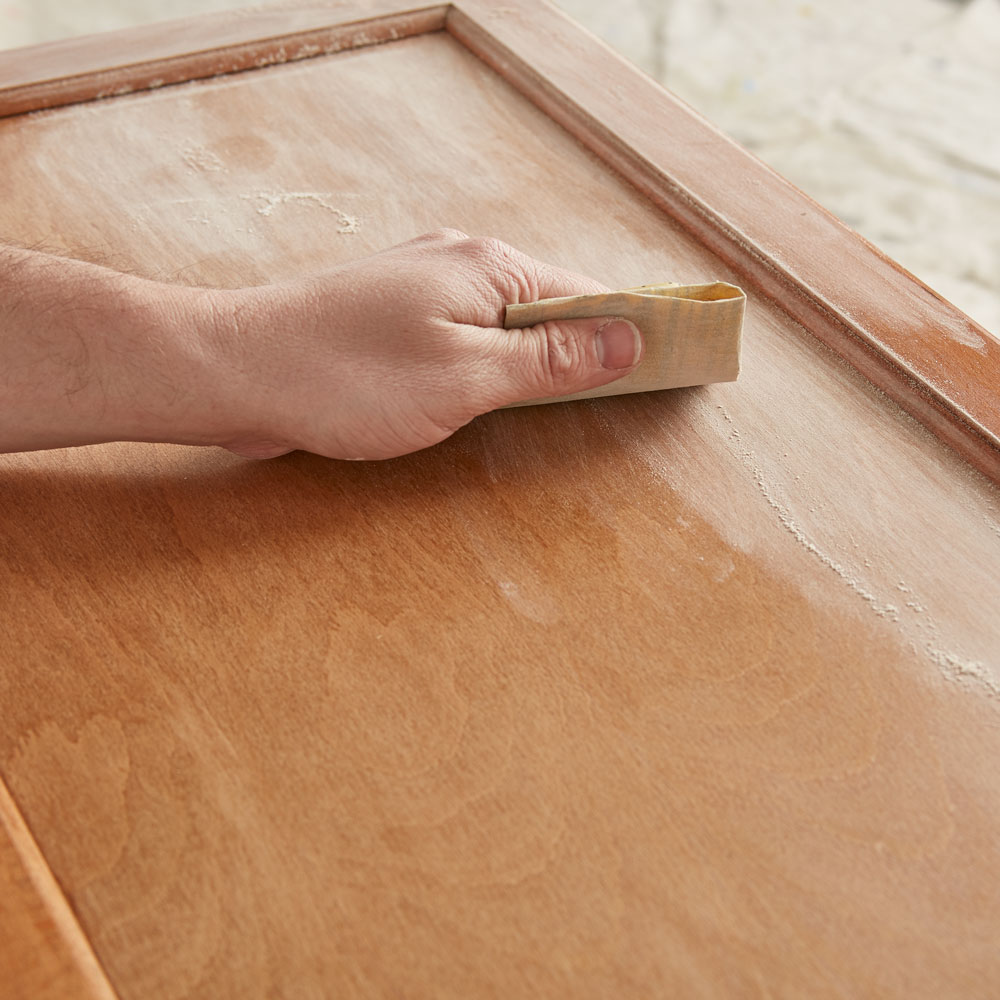
Step 2:
Sand the surfaces of the doors, drawer faces and cabinet frame. Do a first pass with 100-150 grit sandpaper then finish with a second pass of 180-220 grit sandpaper, always moving the sandpaper in the direction of the wood grain.
Step 3:
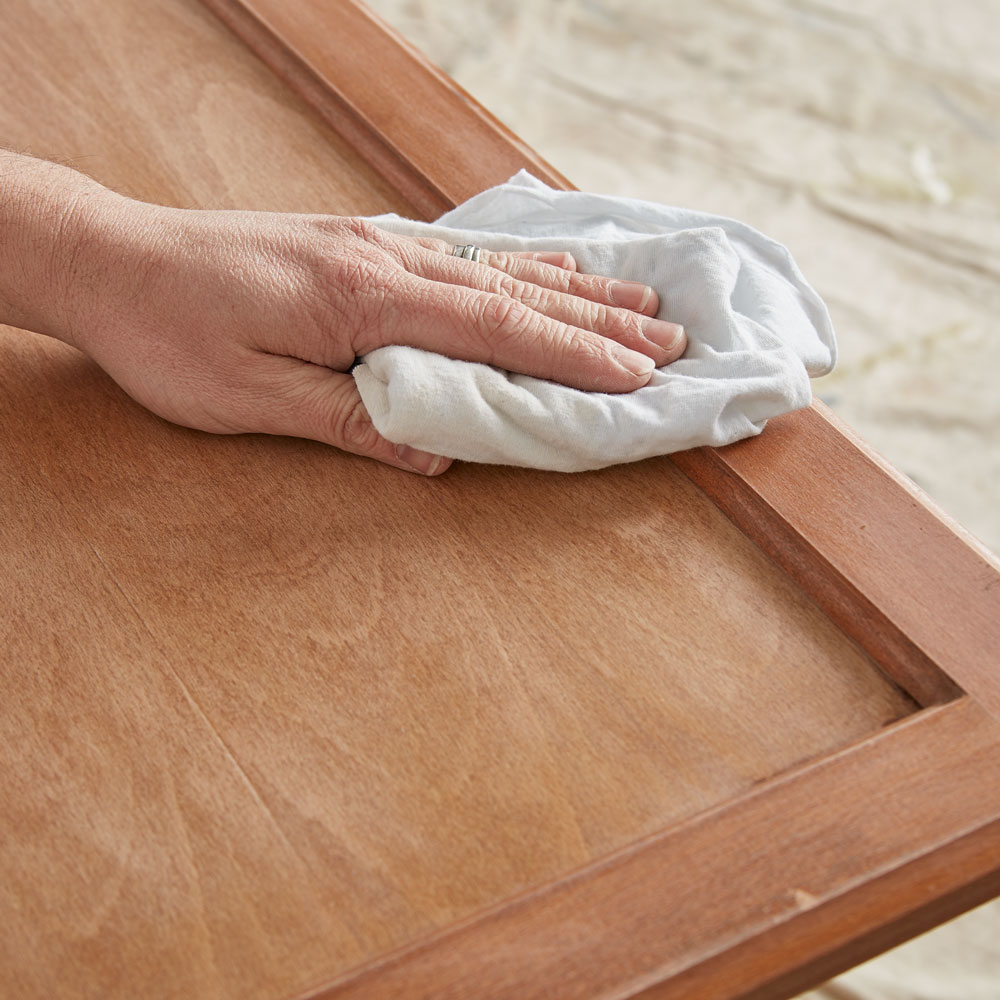
After sanding, wipe down all sanded surfaces with a damp cloth to remove any dust or residue and allow to dry. Next, tape around the cabinet body to protect any areas you don’t want to get primer or paint on.
Step 4:
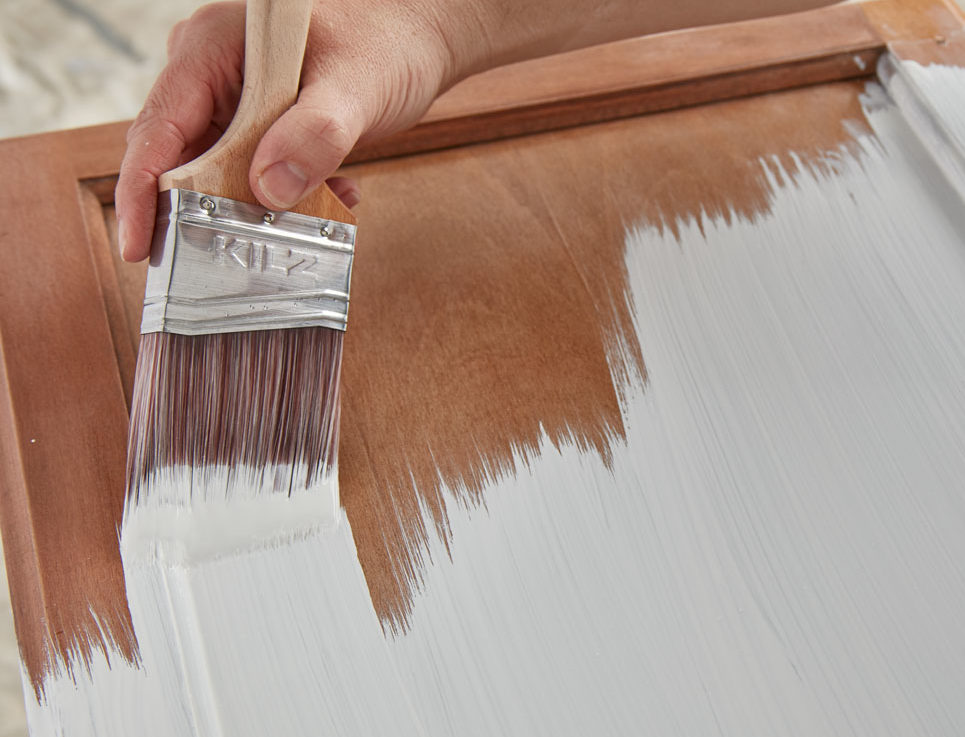
Apply KILZ 3® Premium primer to the cabinet doors and frame using a brush, stirring the primer thoroughly before and occasionally during use. Allow 1-hour dry time.
Pro Tip: KILZ 3® Premium is a great primer choice for kitchen cabinets as it offers exceptional adhesion and durability. KILZ 3® Premium also ensures a mildew resistant primer coat, great for moisture prone areas like kitchens, bathrooms and laundry rooms
Step 5:
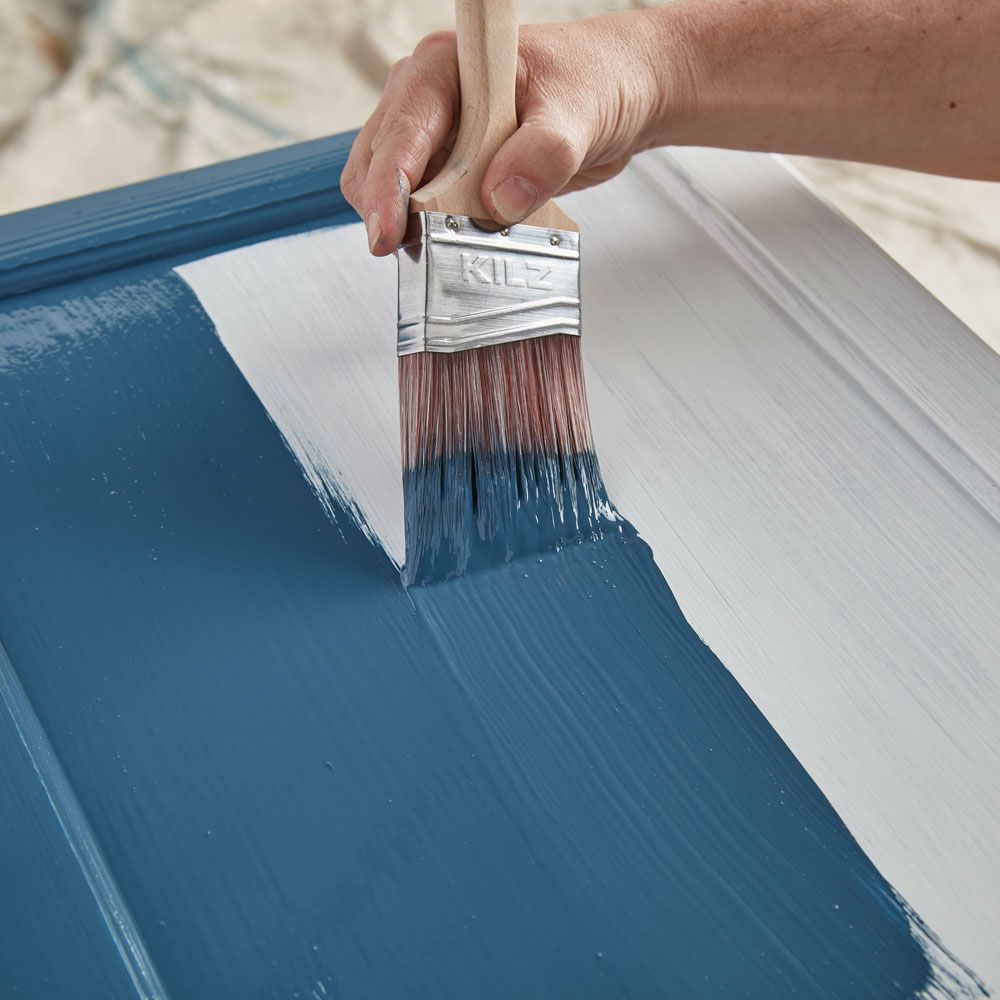
Once your primer is dry, apply Magnolia Home by Joanna Gaines Trim & Cabinetry Interior Semi-Gloss Paint in Silos District to the lower cabinets and True White to the upper cabinets. Apply the paint with a brush, moving in smooth strokes in the same direction as the wood grain. Remove the painter’s tape before the paint is fully dry.
Step 6:
Once paint is dry, reattach hardware to doors and then reattach doors to cabinets.
Always remember to refer to our website kilz.com or product back labels for additional information on which primer is right for your project and detailed instructions on how to apply our products.
RELATED ARTICLES
get inspired:
FOLLOw us:
@kilzbrand
Cool & Calming Kitchen Makeover
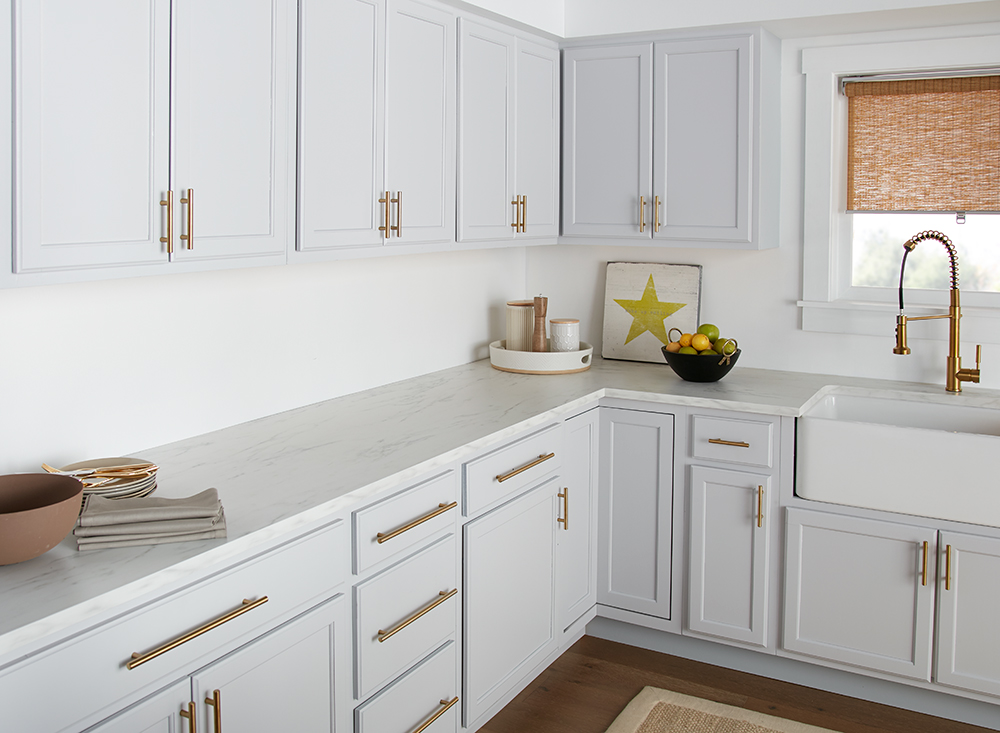
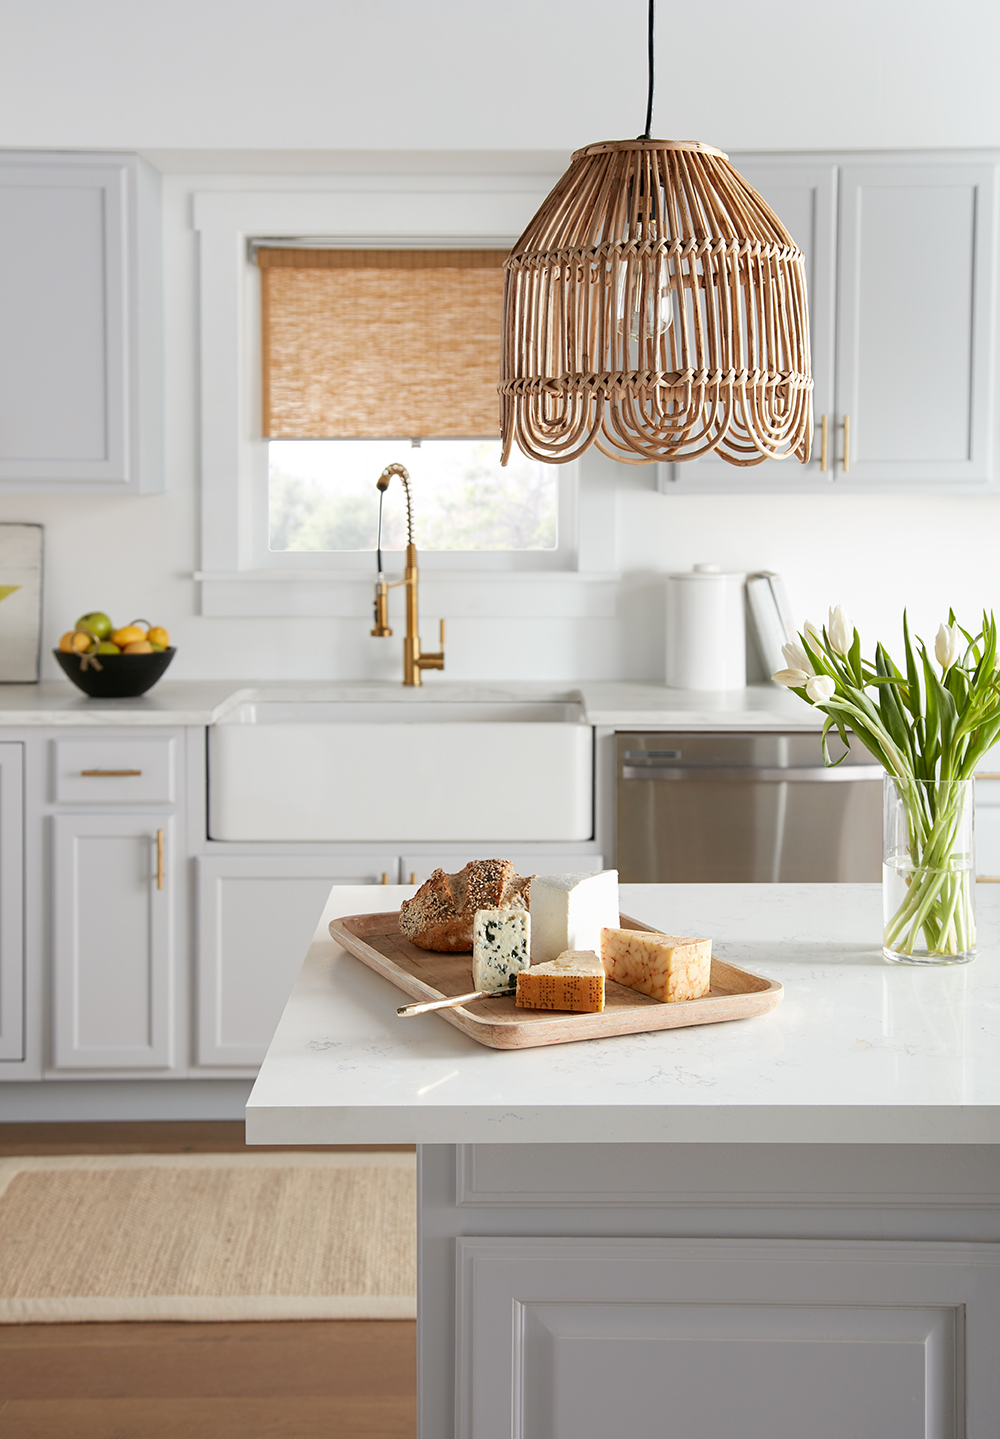
July 1, 2020A dark and dated kitchen gets a much-needed makeover in this coastal inspired kitchen transformation. In this large and open kitchen, the endless brown cabinets and busy backsplash were an unattractive focal point. To lighten up the space it was clear that the kitchen cabinets needed a refresh.
Repainting your kitchen cabinets is one of the easiest and most cost-effective ways to transform your space, and with a little patience and proper preparation you can DIY your way to a professional looking kitchen makeover. Read on to learn how we took this boring before to a beautiful after in this cool and calming kitchen makeover. 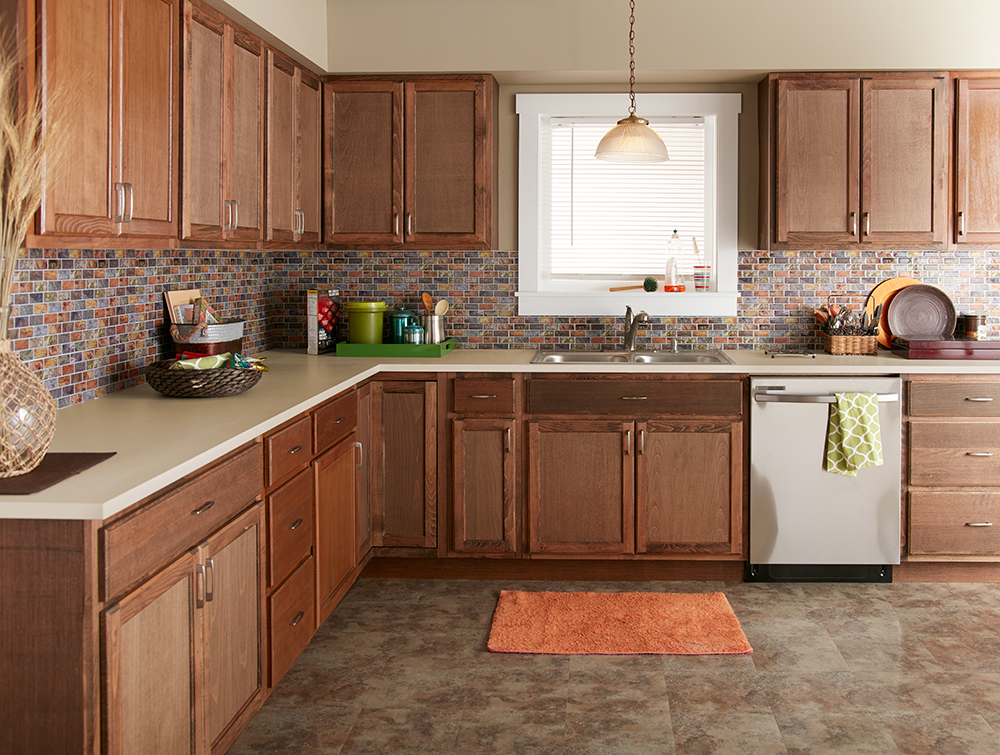
 One thing the professionals know is that priming your cabinets prior to painting can make all the difference in how the final paint job appears – and how long it will last. When choosing the right primer for your kitchen, it’s important to look for a product that offers exceptional durability and mildew resistance. KILZ 3® Premium is a heavy-duty water-based primer that offers excellent adhesion, superior durability and provides a mildew resistant coating – ideal for moisture-prone areas like kitchens. After properly preparing the cabinets, including sanding and priming with KILZ 3 Premium, it was time to paint! To breath some lightness into these dark and heavy cabinets, we chose KILZ® Tribute in Brushed Metal – a cool silver with hints of blue and violet. The new airy and soothing paint color was complemented with brushed gold hardware, new white countertops and an all-white backsplash. For step-by-step kitchen cabinet priming and painting instructions, check out our post on a Colorful Kitchen Cabinet Transformation.
 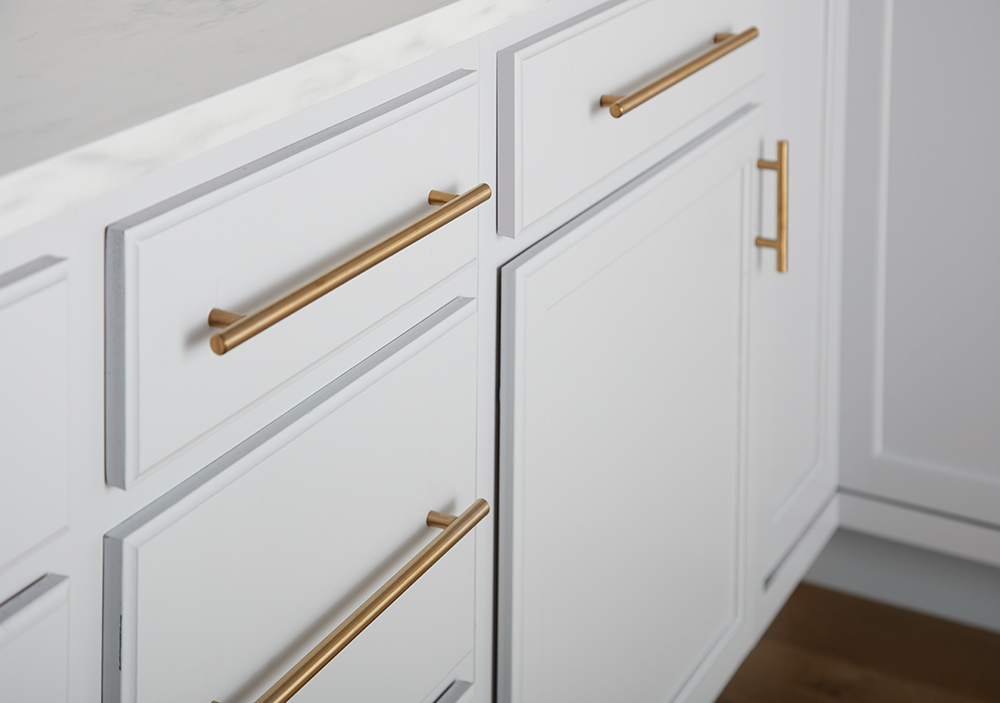 The large size of this kitchen offered the chance to have a bit more fun with the layout and design elements. We started by grounding the wide-open space with a new island, painted in the same color as the cabinets, and adding new light wood floors. Natural textures and tones in the light fixture, rug and window shade brought a subtle coastal vibe to the space that fit perfectly with the new light bluish-gray cabinets.

Always remember to refer to our website kilz.com or product back labels for additional information on which primer is right for your project and detailed instructions on how to apply our products.
RELATED ARTICLES
get inspired:
FOLLOw us:
@kilzbrand
join the conversation:
SHARE this post: