
Pro Spotlight: Tom Kraeutler Talks Kitchen Cabinets
August 24, 2021 For this month’s Pro Spotlight, we are excited to share a post authored by Tom Kraeutler – Founder, Host and Chief Home Improvement Evangelist of The Money Pit. He is a hands-on home improvement broadcast journalist and the kind of guy homeowners want to call at midnight when their basement floods. He first earned his home improvement stripes as a professional home inspector, amassing over 20 years’ experience learning how houses are put together, and how they fall apart! Read on to learn Tom’s tips and tricks for one of our favorite projects, refinishing kitchen cabinets.
Refinishing Kitchen Cabinets: Simple Steps to a Colorful Makeover
Author: Tom Kraeutler
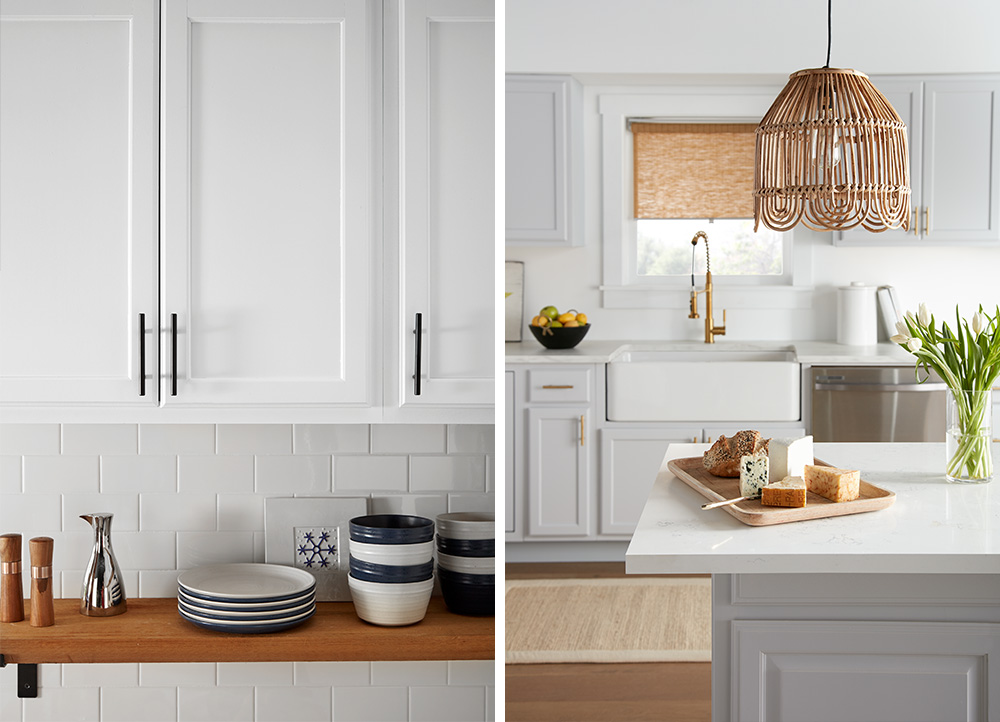
Kitchens are perhaps the busiest rooms in any home. Whether it’s meal preparation, homework space, or social gatherings, they serve as the hub of family life. And that means kitchen cabinets must stand up to years of heavy use. A constant cycle of opening and closing wears out their finish, pots and pans scratch them, and hinges and handles wear out. But while replacing kitchen cabinets can be a time-consuming, expensive, and difficult task, refinishing kitchen cabinets is not and can deliver stunningly colorful results.
Here’s what you need to know to get this project done.
Getting Ready: Prep Makes Perfect!
My earliest DIY inspiration came from my father who always said the “gettin’ ready” was the most important part of the project! Years later and no longer an impetuous teenager just looking to get my chores done quickly, I realized how right he was. Before popping the lid of the paint can, set yourself up for success by getting the space and cabinets ready.
First, clear out furniture and clean out the cabinets from top to bottom. Then, remove all the cabinet doors, shelves, and drawers, and take off the hardware.
Tip: Label the doors and drawers in an inconspicuous area so you’ll know where they belong when the project is complete. For drawers, mark the bottoms. For cabinet doors, the area behind the hinge works well.
Next, cabinet finishes can be magnets for dirt, dust and grease so wash them thoroughly with a solution of TSP (trisodium phosphate). Be sure to clean the top of the cabinets as well, as dust that gathers here can float down and stick to the finish as it dries.
Evaluate the cabinet surfaces. Applying a new finish on top of an old finish that’s not adhered to the original surface is a recipe for disaster. Any loose, chalking or cracked paint surfaces should be scraped smooth. For most surfaces, and especially those that are glossy, a light sanding will help improve adhesion between the old surface and the primer.
Primer Selection Drives Durability
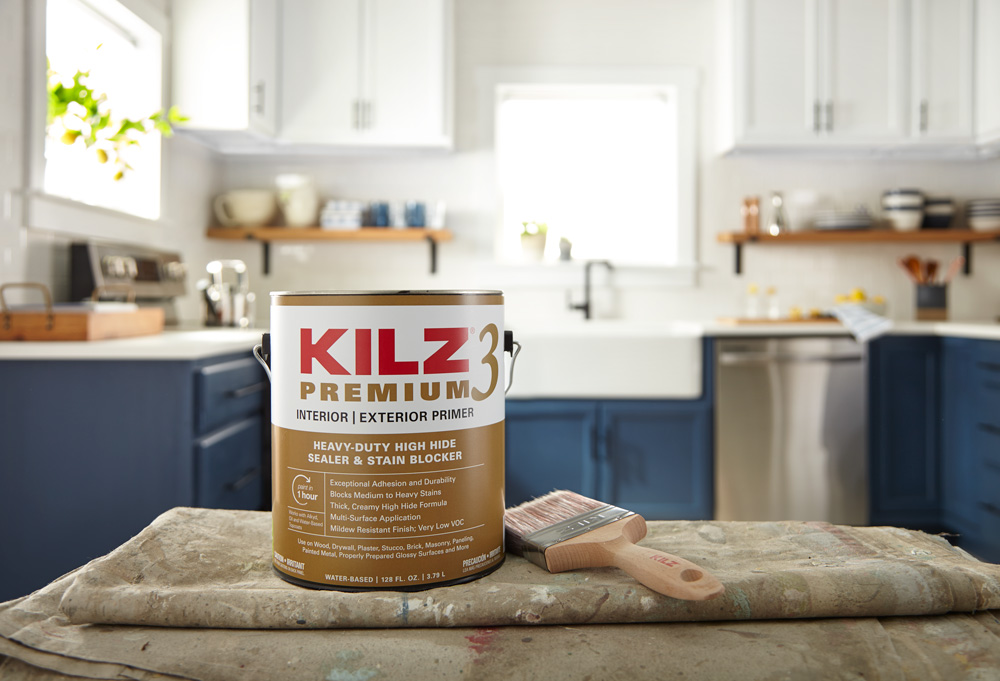
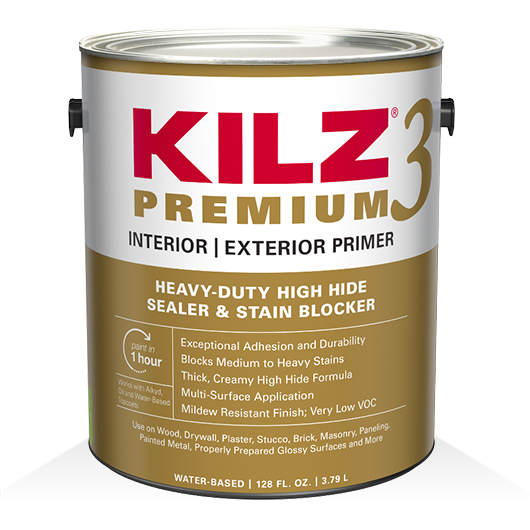
Selecting the right primer for kitchen cabinet refinishing is critical. The primer helps assure the top-coat of paint adheres to the cabinet, provides durability and helps assure the final finish flows evenly with minimal brush strokes or roller marks.
KILZ 3® PREMIUM Primer is an excellent choice for this part of the project. The primer provides exceptional adhesion with a mildew-resistant finish, making it ideal for projects in moisture prone areas such as kitchens and bathrooms. I also like that KILZ 3 is what’s known as a “high build” finish. This means that it can fill in minor imperfections in a cabinet surface or minimize deep wood grain patterns when painting oak cabinets, for example. KILZ 3 is also water-based for easy clean-up, dries quickly, and has a low-odor, low-VOC finish.
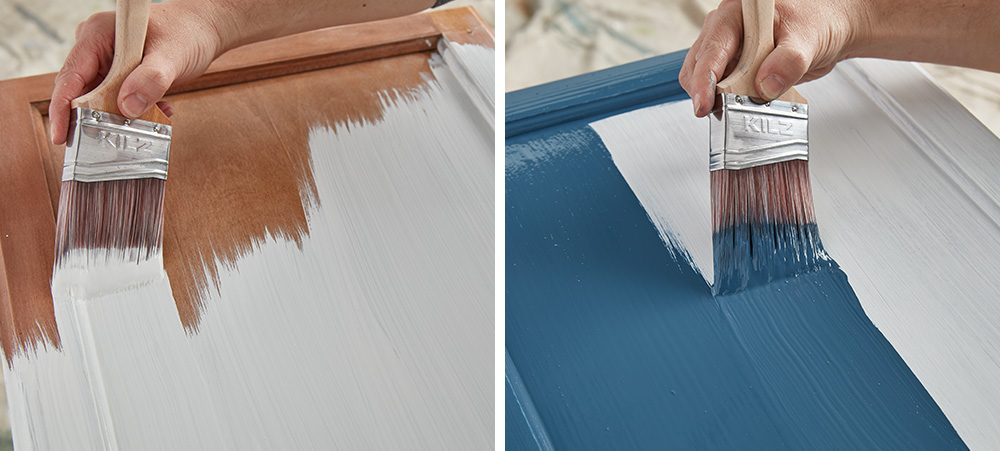
KILZ 3 should be applied evenly using a brush, roller, or airless sprayer, as specified by the manufacturer. Only a single coat is needed. Set up a space to layout the doors and drawers for priming, and then prime the cabinets working from the top-down.
Top-Coat Counts
Just like primer selection is based on the product’s adhesion, moisture resistance and high-build formulation, equal care should be given to the selection of paint for the top coat. Over the course of your newly painted cabinet’s life cycle, doors and drawers will be opened and closed thousands of times. Moisture in the air will be a constant presence, as will oils and grease given off by years of cooking. Therefore, you’ll want to select a paint that has excellent durability and is very easy to clean.
Look for paints made specifically for kitchen cabinets. Magnolia Home by Joanna Gaines® Trim, Door + Cabinetry Paint dries quickly, leaving a hard finish that’s remarkably durable and it is water-based for easy cleanup. For most projects, plan to apply two-coats and follow the manufacturer’s directions for application.
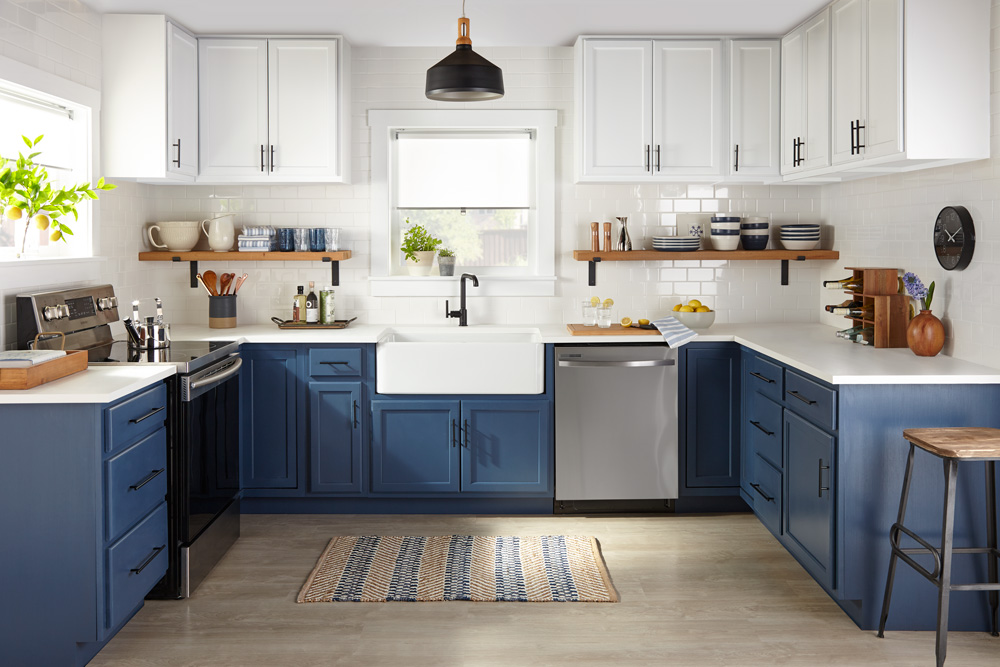
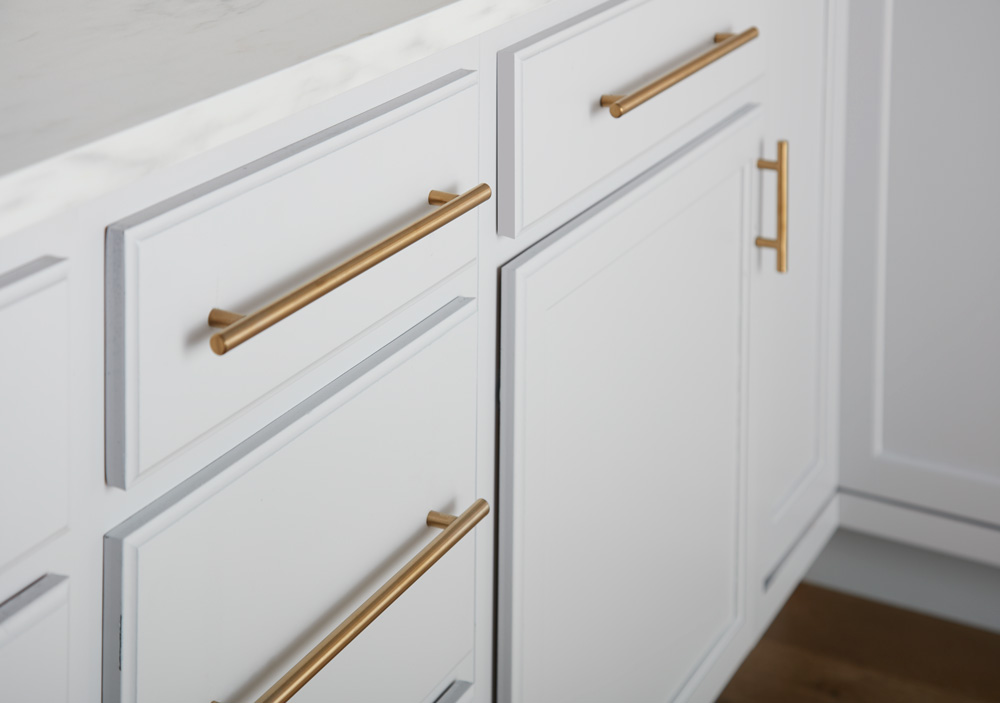
Add Some Bling
Once the painting is complete, you’ll have the option to replace the original hardware or add new. Given the work it’s taken to get to this point in your kitchen cabinet refinishing project, installing new door and drawer pulls adds some bling and provides a nice finishing touch.
This part of the project is easiest if the new hardware fits the holes left by the original hardware. However, if you plan to go in a completely new direction, it’s easy enough to fill and sand the old holes before you get to the priming step above. Personally, I also like to replace the hinges as well. New spring-loaded hinges look good and close nicely. Finally, install bumpers to the drawers and doors for added durability.
Today, solid-color kitchen cabinets are more popular than ever making this an ideal time to take on a kitchen cabinet refinishing project. But the success of refinishing kitchen cabinets depends entirely on the details. With the right prep work, a high-quality primer, and a colorful, durable top coat, you can transform this space with a fresh finish that can last for years to come.
Always remember to refer to our website kilz.com or product back labels for additional information on which primer is right for your project and detailed instructions on how to apply our products.
RELATED ARTICLES

get inspired:
FOLLOw us:
@kilzbrand
join the conversation:
SHARE this post:
COMMENTS: